

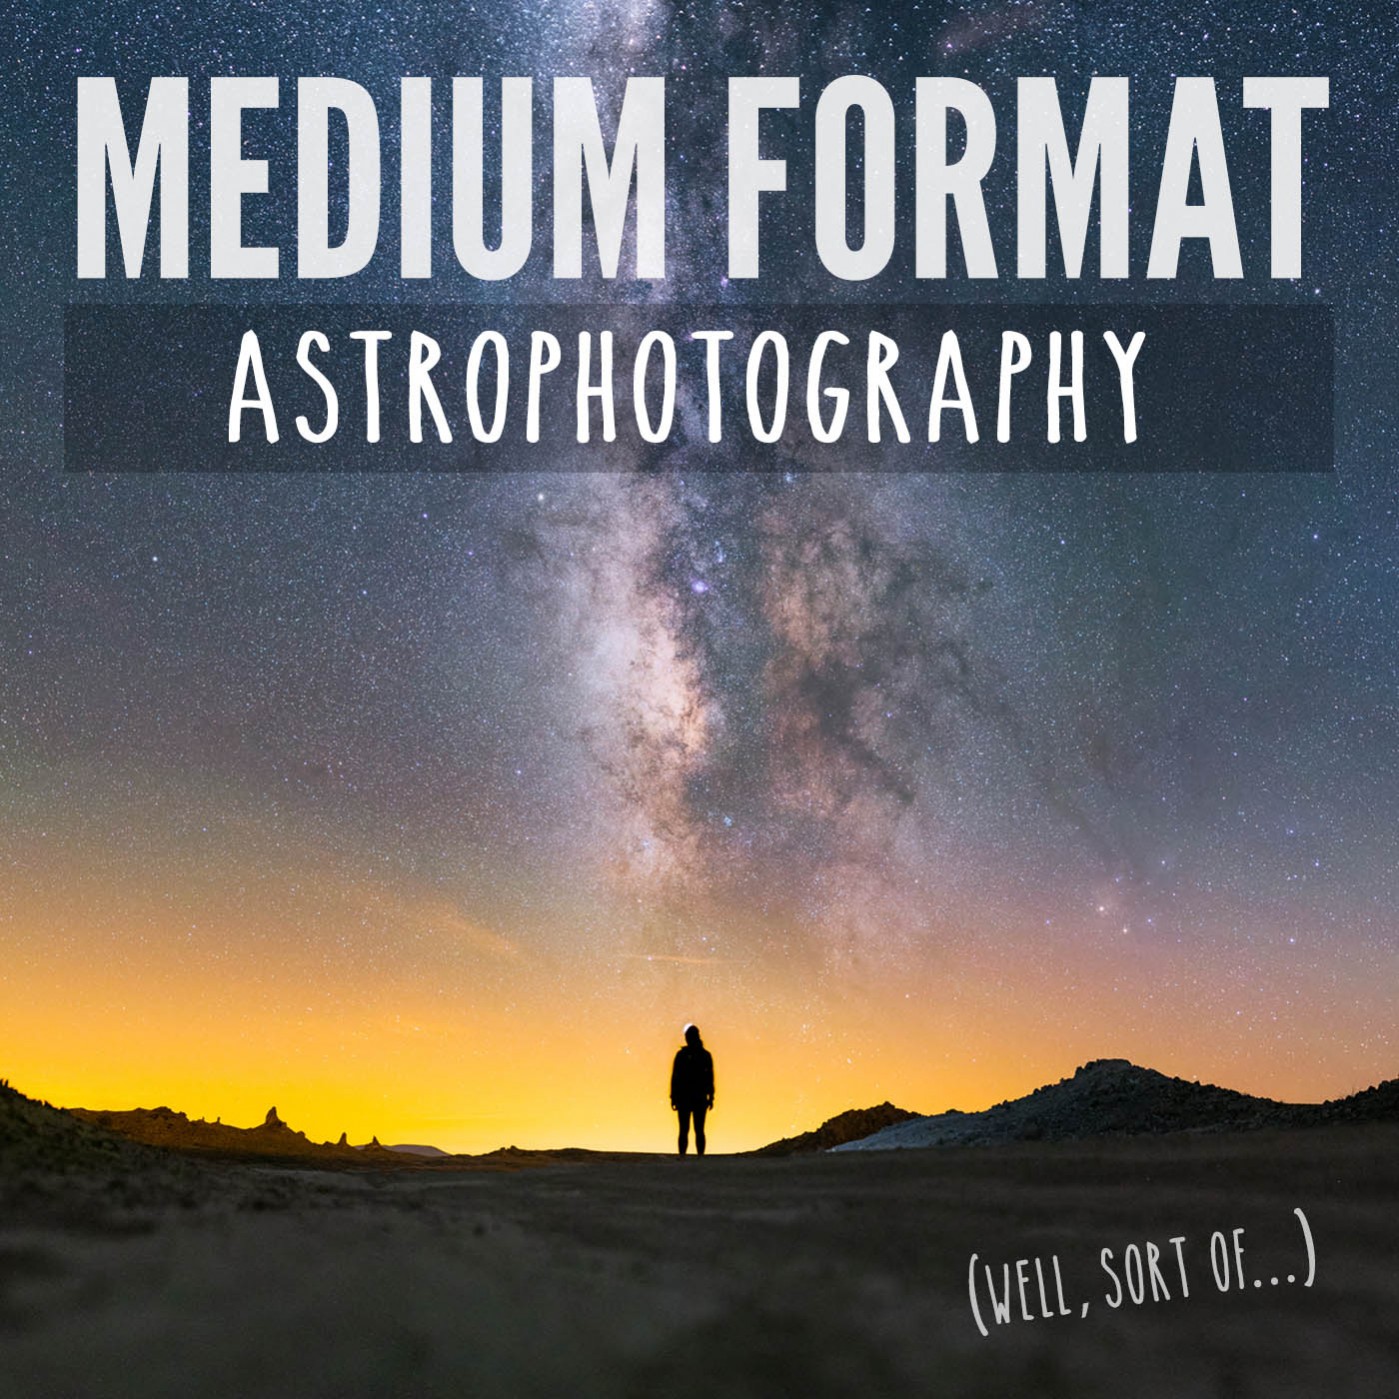
In this tutorial, I’ll show you how I use standard prime lenses like a 50mm to make medium format sized astrophotos with a regular small format camera.
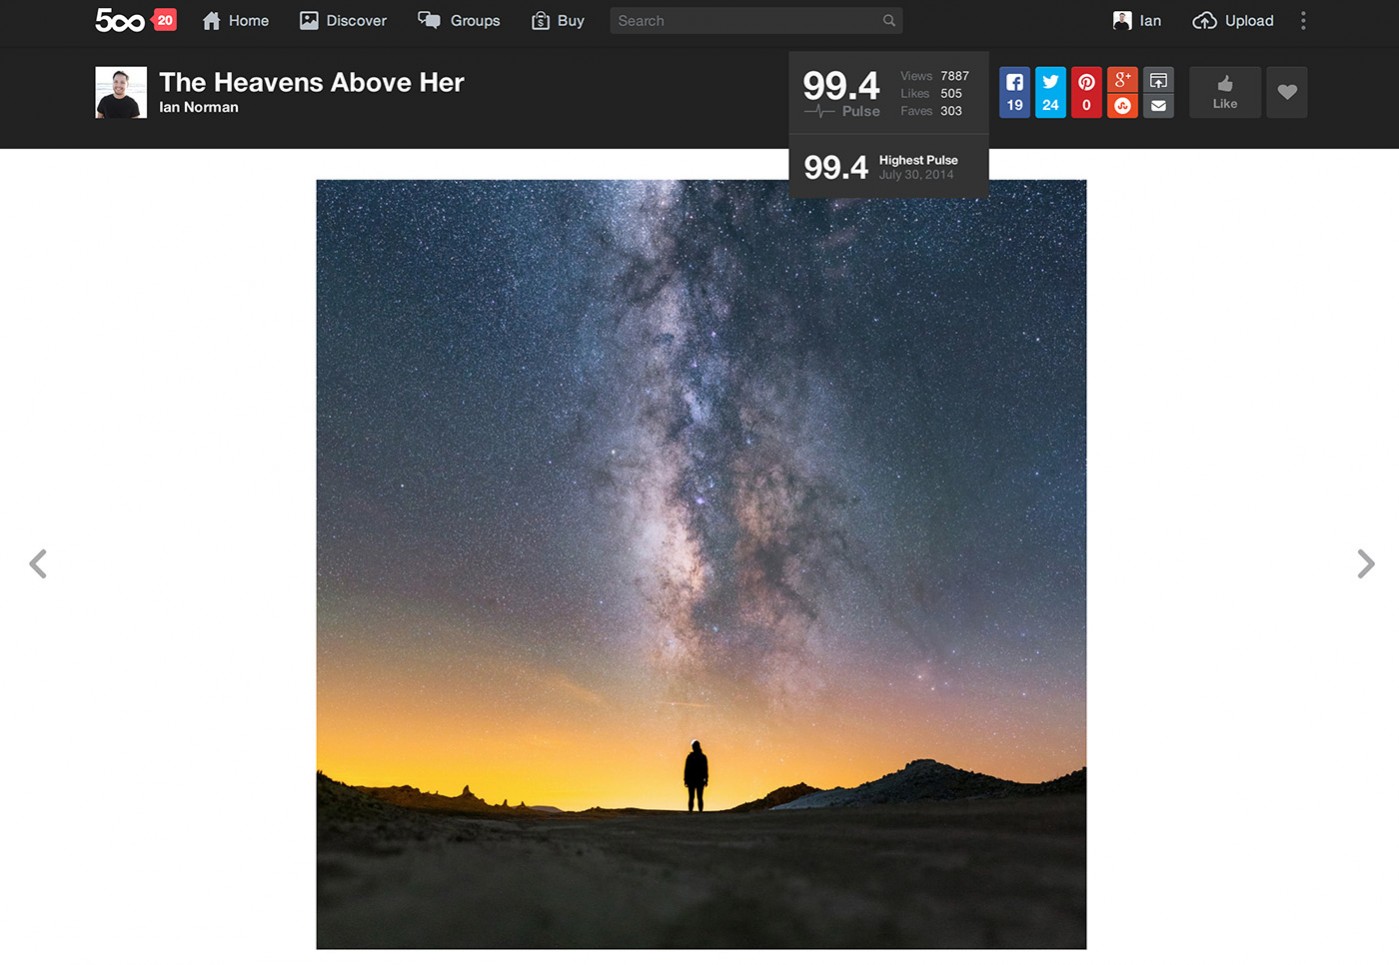
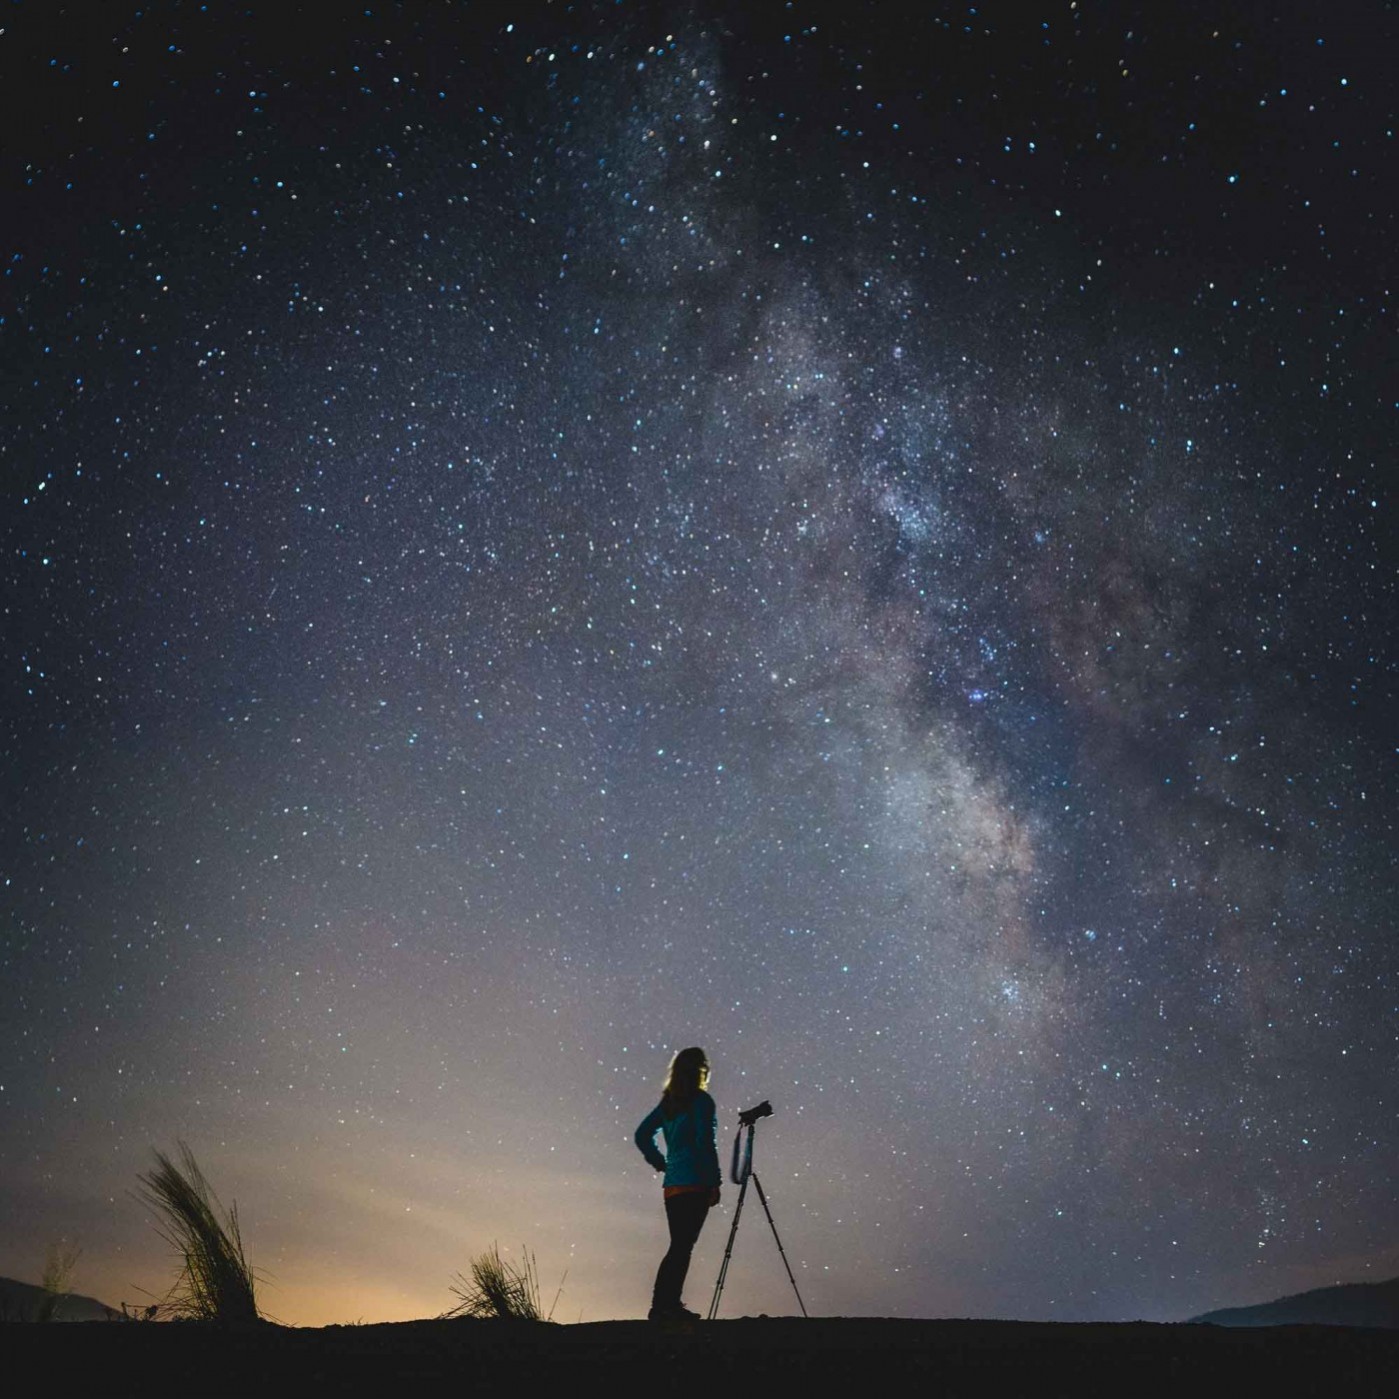
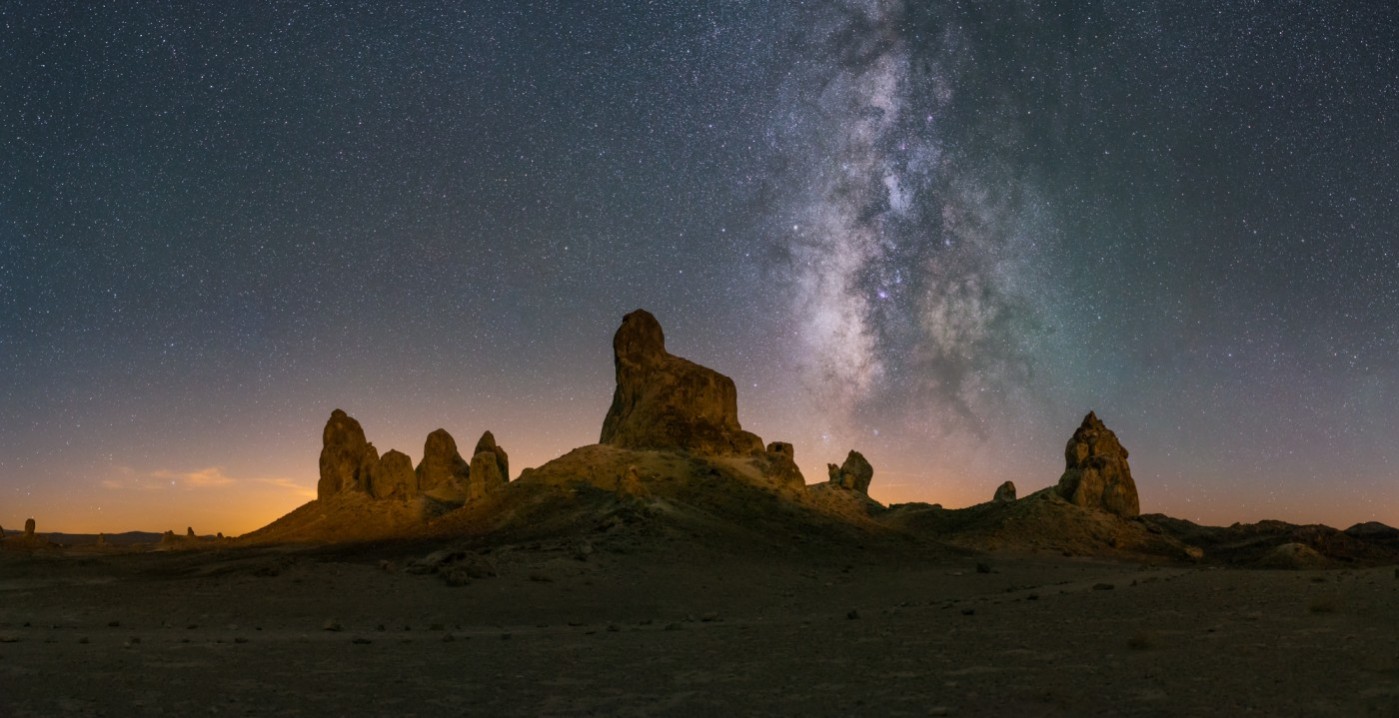
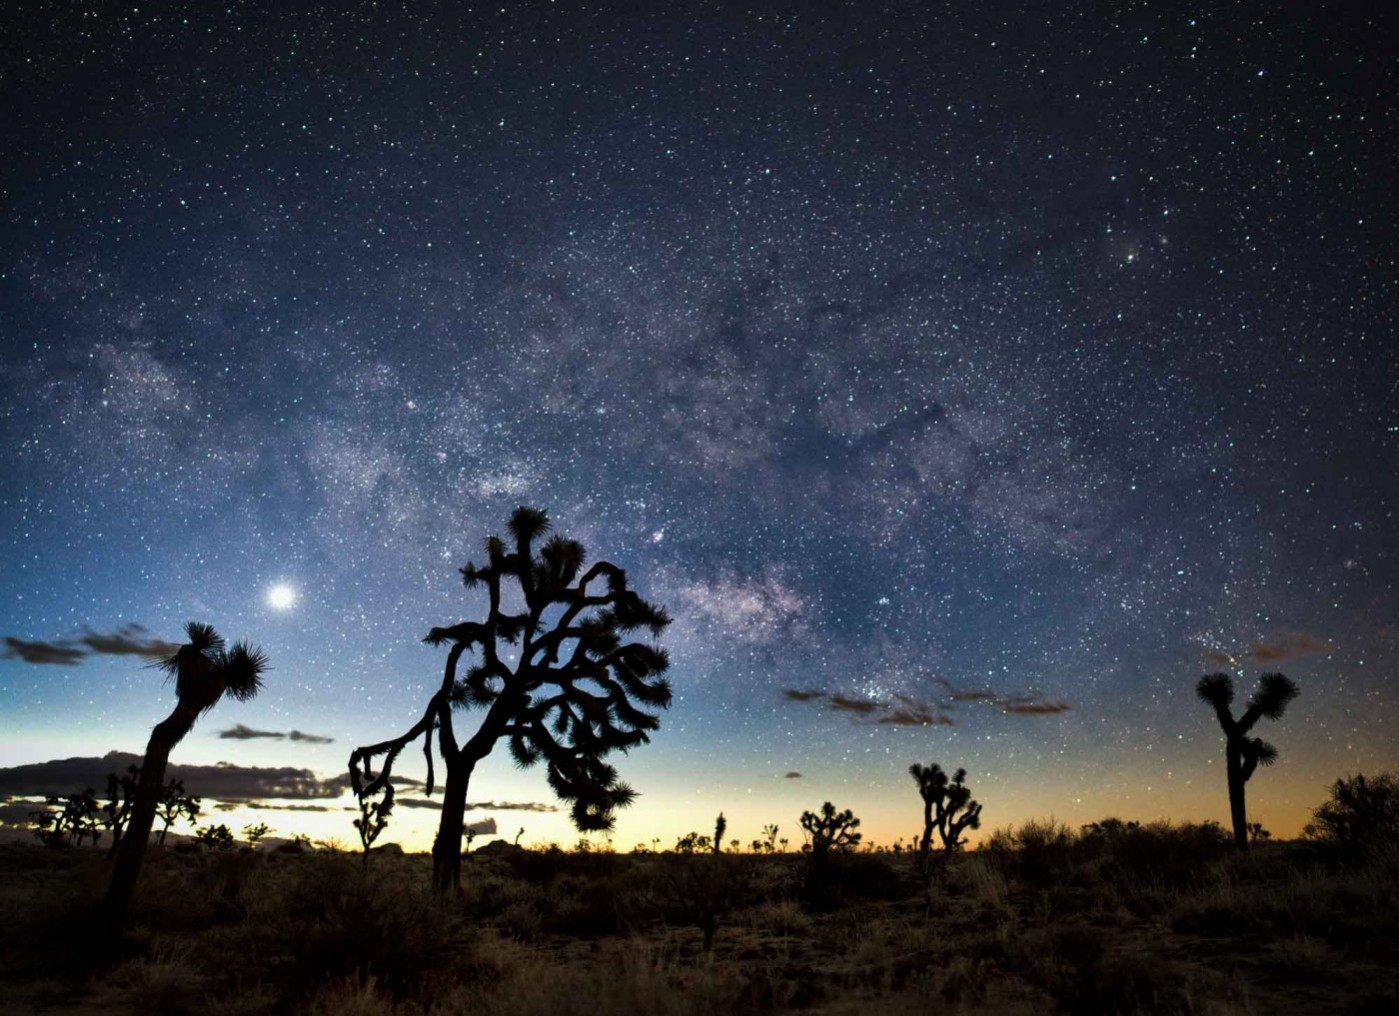
The example photograph for this tutorial is an image of my girlfriend Diana standing below the Milky Way at Trona Pinnacles, California. It’s one of my most popular images, was a top photo on 500px when it was released and it’s the title photo for my Astrophotography 101 tutorial series. What’s not immediately apparent from the image is that it’s actually a two row, 11 exposure panorama stitch made with a narrower 50mm lens to give a medium format look.
I usually don’t suggest using longer lenses like a 50mm because the field of view of a 50mm lens is narrower than we usually want for capturing the Milky Way: it can capture only a small portion of the night sky. Likewise, in my How to Pick a Lens for Milky Way Photography tutorial, I showed readers that the best lenses for astrophotography are typically fast wide angle lenses.
Panorama stitching can help us break from the typical convention of needing to use a fast wide angle lens for astrophotography. It’s more common to see astrophotographers stitching wide angle images together to create a large sweeping image of the Milky Way arching across the sky. This time we’ll use similar techniques using a narrow angle lens instead.
For the image in this tutorial, I wanted instead to create a medium format 6×6 look, reminiscent of the look of the square format photos from a Hasselblad 500 Series camera. Camera technology has not yet offered a digital 6×6 medium format camera so we’re limited to stitching together frames with a smaller format sensor in order to try and achieve the same look and level of resolution.
The Gear
Camera
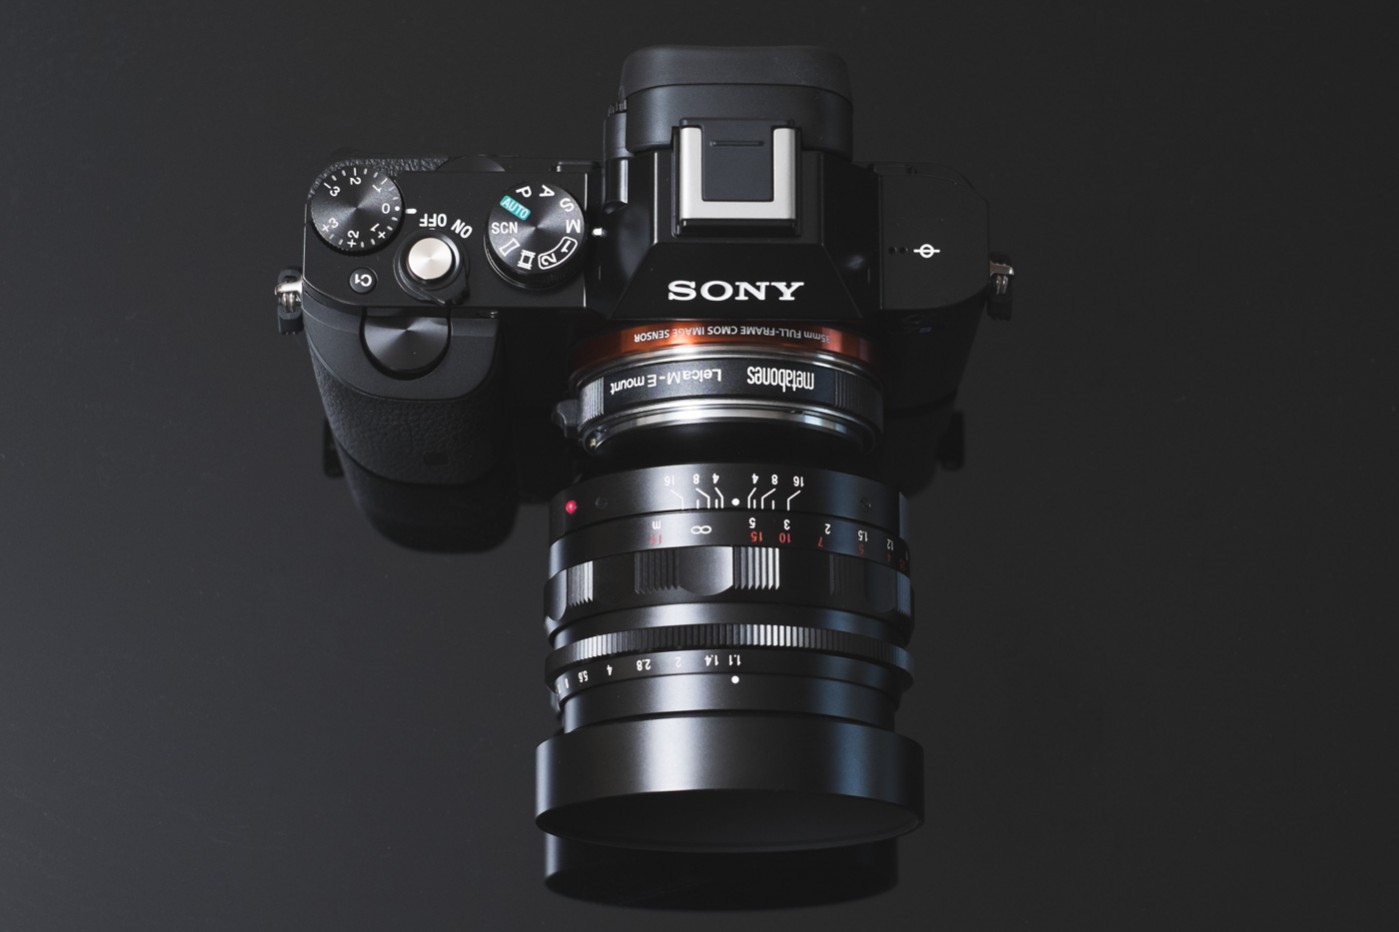
For this particular shot, I used the full-frame Sony a7S (Amazon) / (B&H). It’s probably the best camera body I’ve used for astrophotography yet because it has a very high gain sensor ( it goes to ISO 409600 ) and that makes it possible to easily frame the shot in pitch black conditions using fast lenses. It’s kind of like night vision. That said, you don’t need anything more than an entry level digital SLR or interchangeable lens camera with a Micro 4/3, APS-C or full-frame sensor. I’ve even been caught using point-and-shoots and smartphones from time to time.
Lens
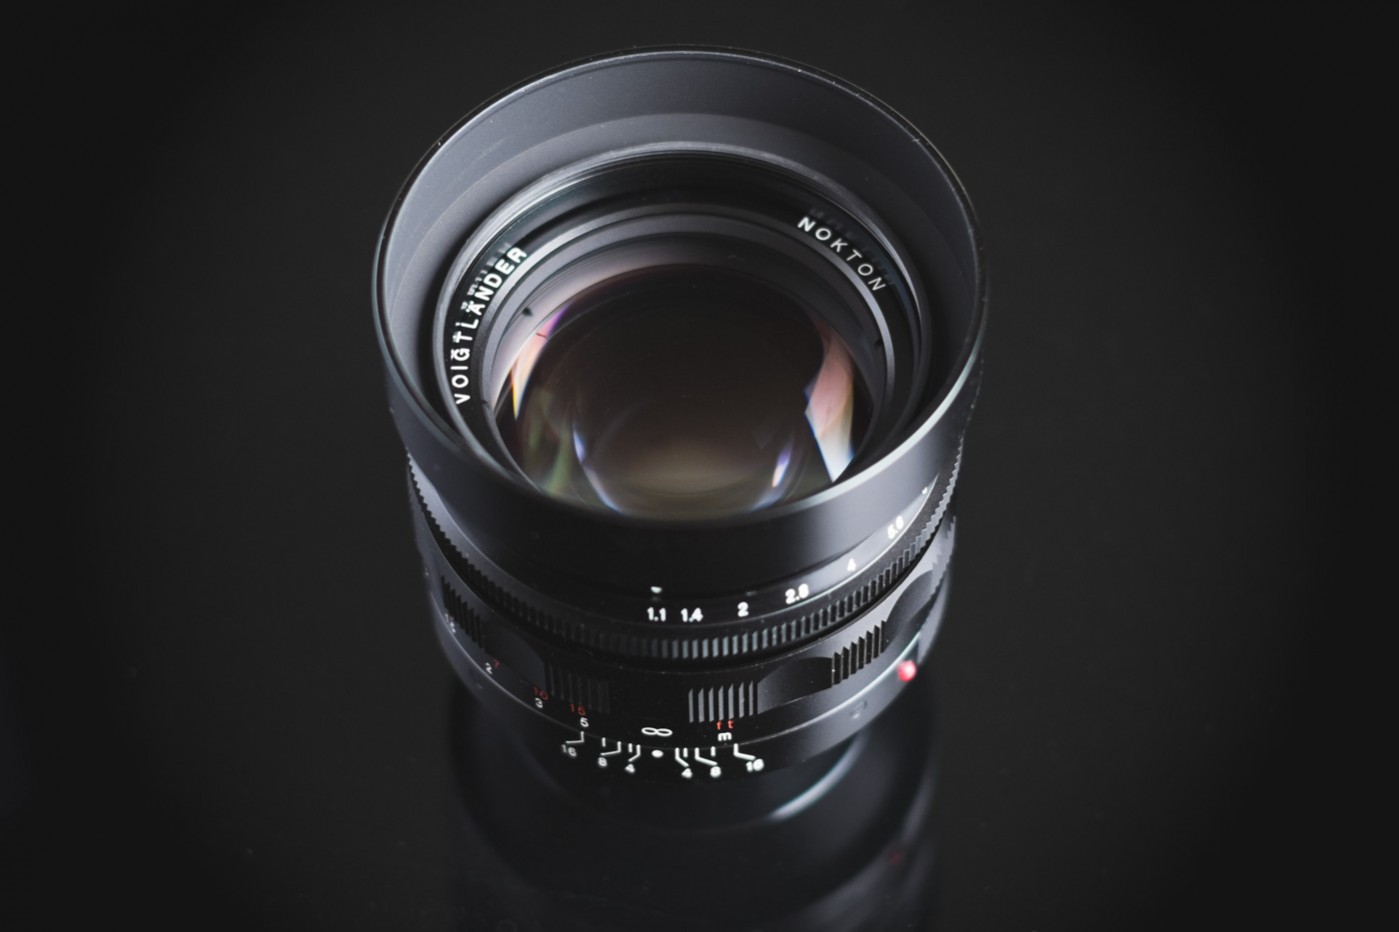
We’ll want to use a fast “standard” lens. For full-frame sensor cameras this is usually anything from about 40mm to 60mm. If you’re using a Micro 4/3 or a more common APS-C sensor camera you’ll want something in the 24mm to 40mm range. Results will be best with a “fast” lens that has an aperture f/number of f/2.8 or lower, the lower the f/number, the larger the opening in the lens and the more light the lens will be able to collect. Lower f/number lenses also allow us to “stop down” to a higher f/number to reduce vignetting (dark corners on the edge of the image). For this example shot I used a Sony a7S mounted with a Voigtlander 50mm f/1.1 Nokton Len (Amazon) / (B&H). A few recommended “standard” lenses for astrophotography are below:
Some Recommended Standard Prime Lenses
Micro 4/3 Sensor:
- Rokinon 21mm f/1.4
- Olympus 25mm f/1.8
- Panasonic 20mm f/1.7
- Panasonic 25mm f/1.7
- Voigtländer 25mm f/0.95
- Mitakon 25mm f/0.95
APS-C Sensor:
Full-Frame Sensor:
Tripod
The final piece of the equipment is a tripod. I use a compact Sirui T-025X carbon fiber tripod which is great for more compact mirrorless cameras like the a7S. Any tripod will work here for this exercise, just make sure it’s adequately stable for your camera and shooting conditions.
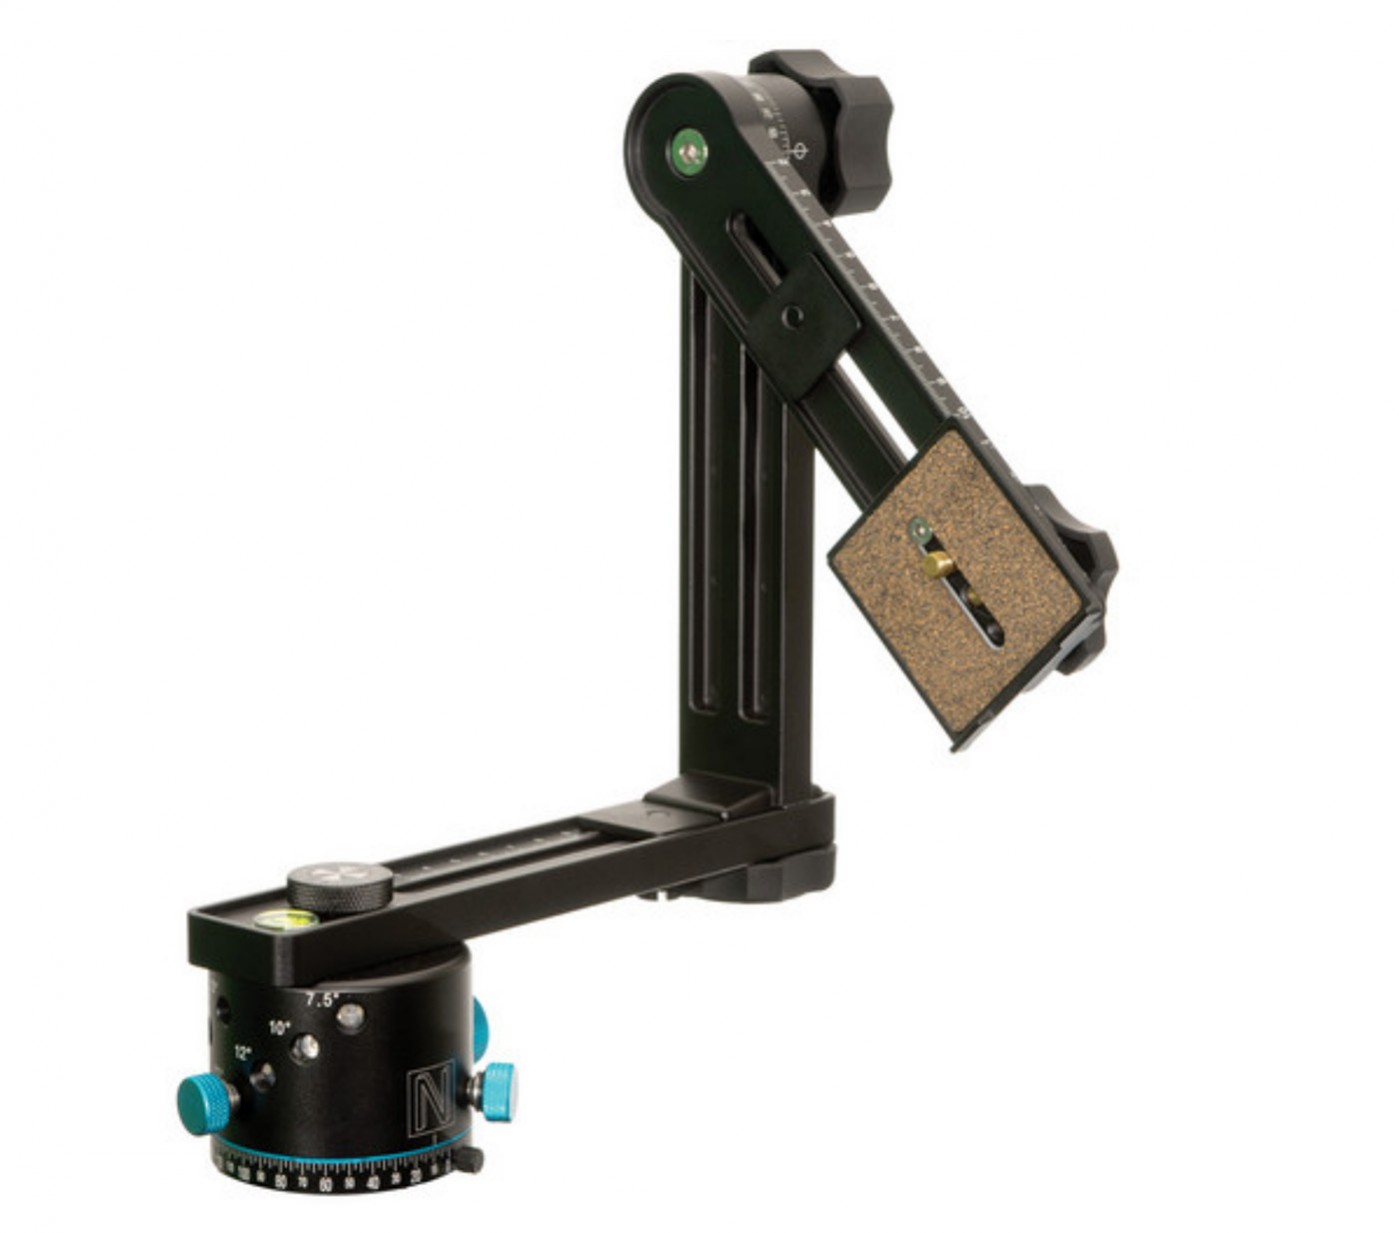
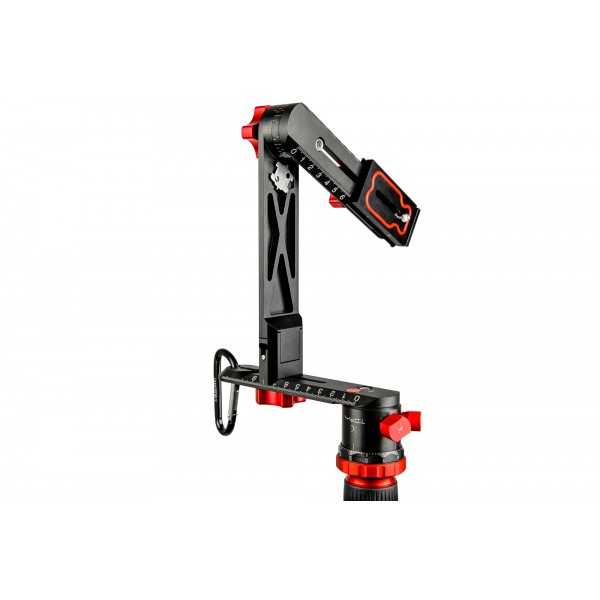
I recommend a tripod with a ballhead that lets you use your camera in a vertical orientation. For the best results, a panoramic tripod head like the Nodal Ninja above will allow you to create the panorama without any parallax problems. A panoramic head is certainly not necessary but it can definitely help.
For some more recommendations on equipment if you’re just starting out, check out my Beginner Astrophotography Kit post.
The Shoot
Shooting a panorama is relatively simple but there are a few things that will help in the setup and execution.
First, roughly level your tripod. My tripod does not include a level so I just eyeballed it and made sure that when panning the head, the horizon did not shift up and down too much. The better the leveling job, the easier it will be to stitch everything together.
Framing and Overlap
I recommend using the camera in vertical orientation and shooting the panorama in two rows, bottom row first.

Make sure that you provide adequate overlap between each exposure. For the easiest stitch job, provide a minimum of 50% overlap between each frame. Adobe Photoshop requires at least 40% overlap to properly stitch. For a 50mm lens on a full-frame sensor camera, that’s just about 10-15° between photos in each row. For my example I shot 6 photos on the bottom row and 5 on the top for a total of 11 frames. The number of frames doesn’t really matter but I highly recommend keeping it at 12 frames or less to start.
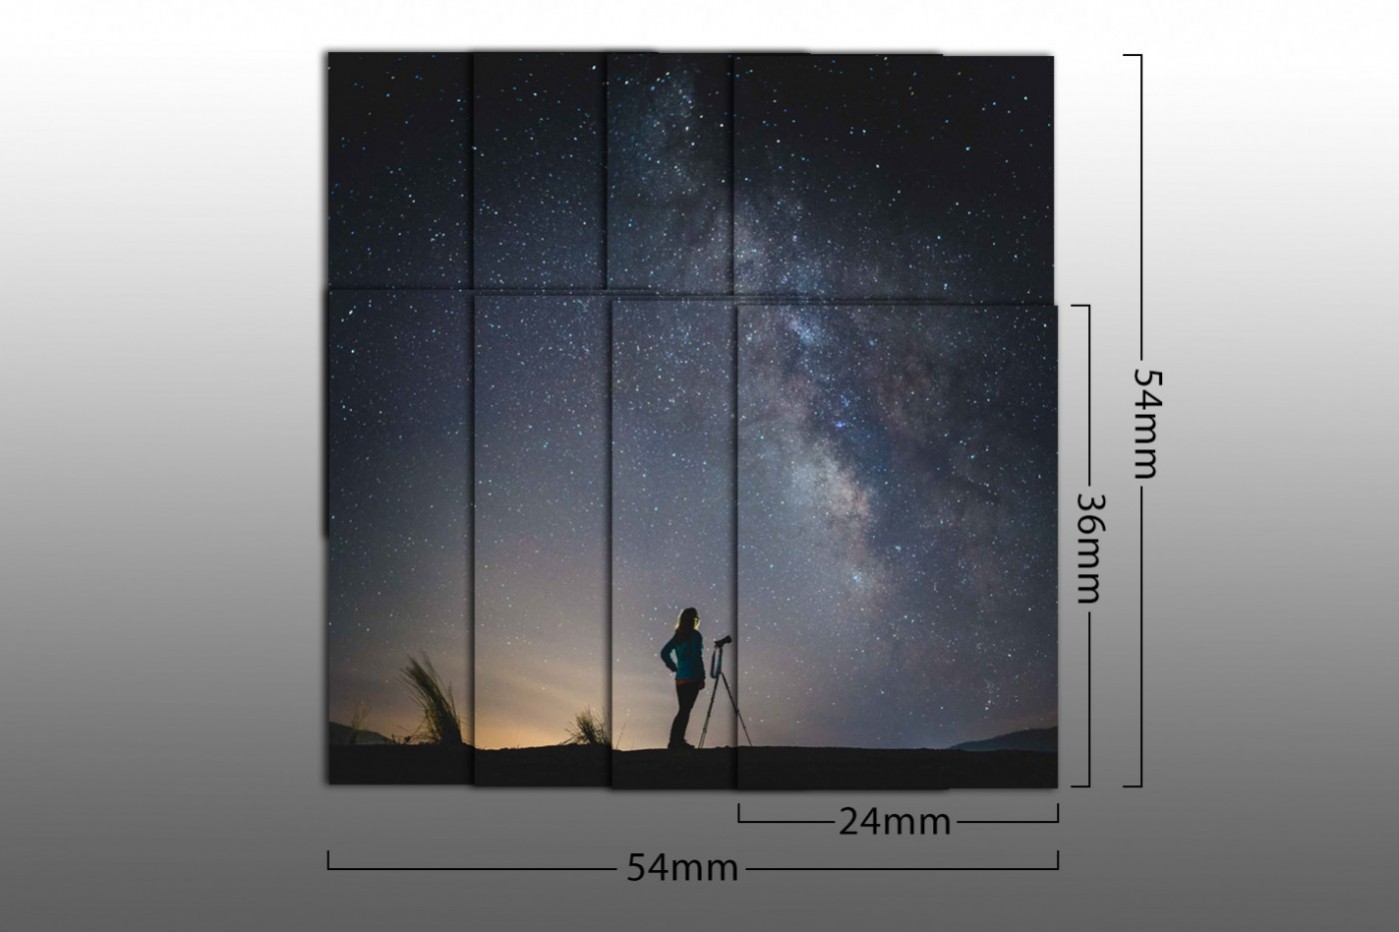
In order to try and roughly match the image area of a 6×6 film camera (approx. 55mm x 55mm depending on the camera) with the smaller full frame sensor (36mm x 24mm) we need a minimum of 8 images total with 50% overlap, (4 images in 2 rows) in in order to achieve an area of about 54mm x 54mm for our final “negative” size.
Exposure
With a normal 50mm lens on full frame (or 35mm on APS-C) I generally recommend an exposure of about 10 seconds at f/2.8 and ISO 6400. 10 seconds should be long enough to gather lots of light but short enough that we won’t see any star trails due to the rotation of the Earth.
It may be enticing to shoot these photos at a very low f/number in order to capture the most light but it’s actually more advantageous to stop the lens a little bit. Even if your lens can go all the way down to f/1.4 or lower, stopping down at least one to two full stops (e.g. to f/2.0 or f/2.8) will help eliminate any aberrations that my blur and stretch the stars on the edges of the frame. Stopping down to a higher f/number also carries the distinct benefit of reducing the effects of vignetting which will make it a lot easier to stitch without visible seams.
Shooting at ISO 3200-6400 will ensure that the camera is using a high enough amplification to produce the cleanest shadow detail. It varies a little by camera, but most modern cameras tend to show the best results in low light shooting above ISO 800. If your ISO is too low, dark portions of your image will often show extra noise. Don’t be afraid to bump it up past 800. Be sure to take a test shot and make any adjustments as needed. For more information about choosing an astrophotography exposure, check out my guide on How to Photograph the Milky Way and my Milky Way Exposure Calculator.
Post Processing
My typical panorama workflow uses Adobe Lightroom and Adobe Photoshop. There are lots and lots of tools that can merge photos into a panorama but I typically stick with Photoshop because of its easy integration with Lightroom. If I’m having difficulty merging in Photoshop, PTGui Pro does a great job of handling more complex merge jobs.
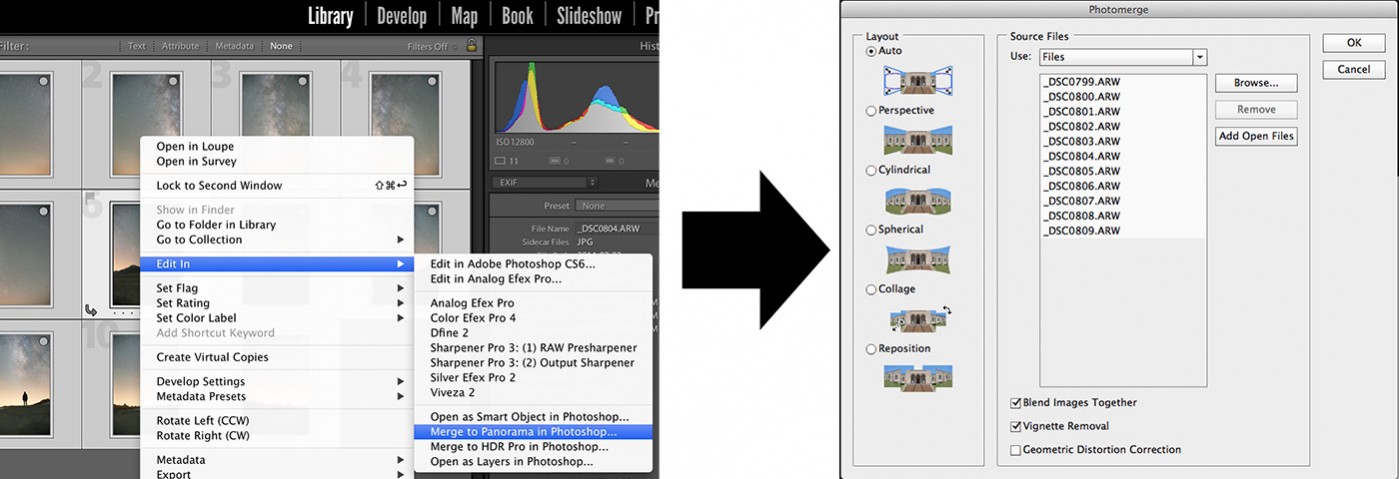
Once imported into Adobe Lightroom, I select all of the photos, right click and use “Merge to Panorama in Photoshop” or from Photoshop select “File>Automate>Photomerge…” to compile all the frames into the final panorama. Photoshop gives several options for combining all the frames but I usually use the defaults of “Auto”, “Blend Images Together” and I check the “Vignette Removal” checkbox.
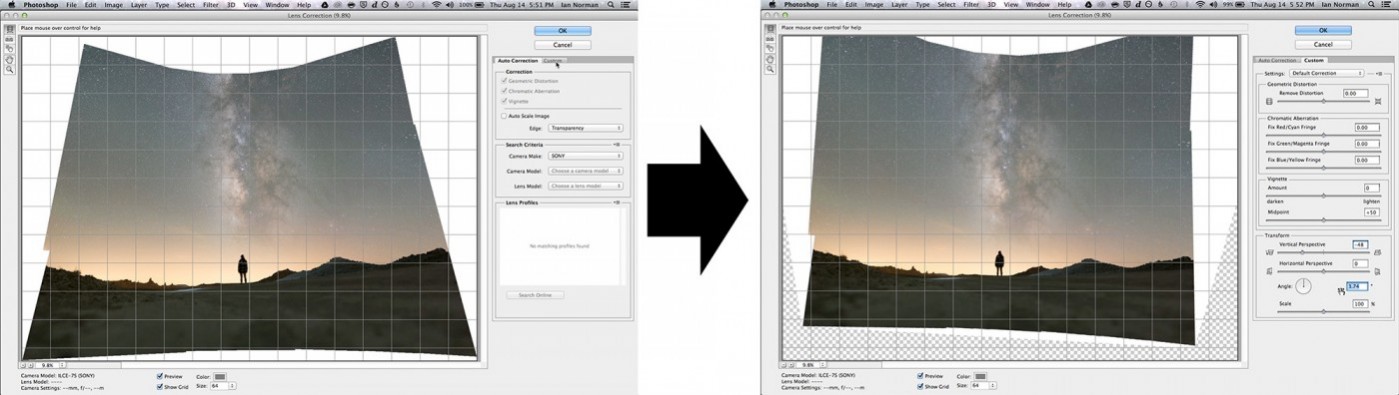
Once merged, I flatten all the layers and then use the Lens Corrections filter to level the horizon and transform the shape of the final stitch into something a little more square. This bit is optional but I like it so that I retain most of the image when making the final crop.
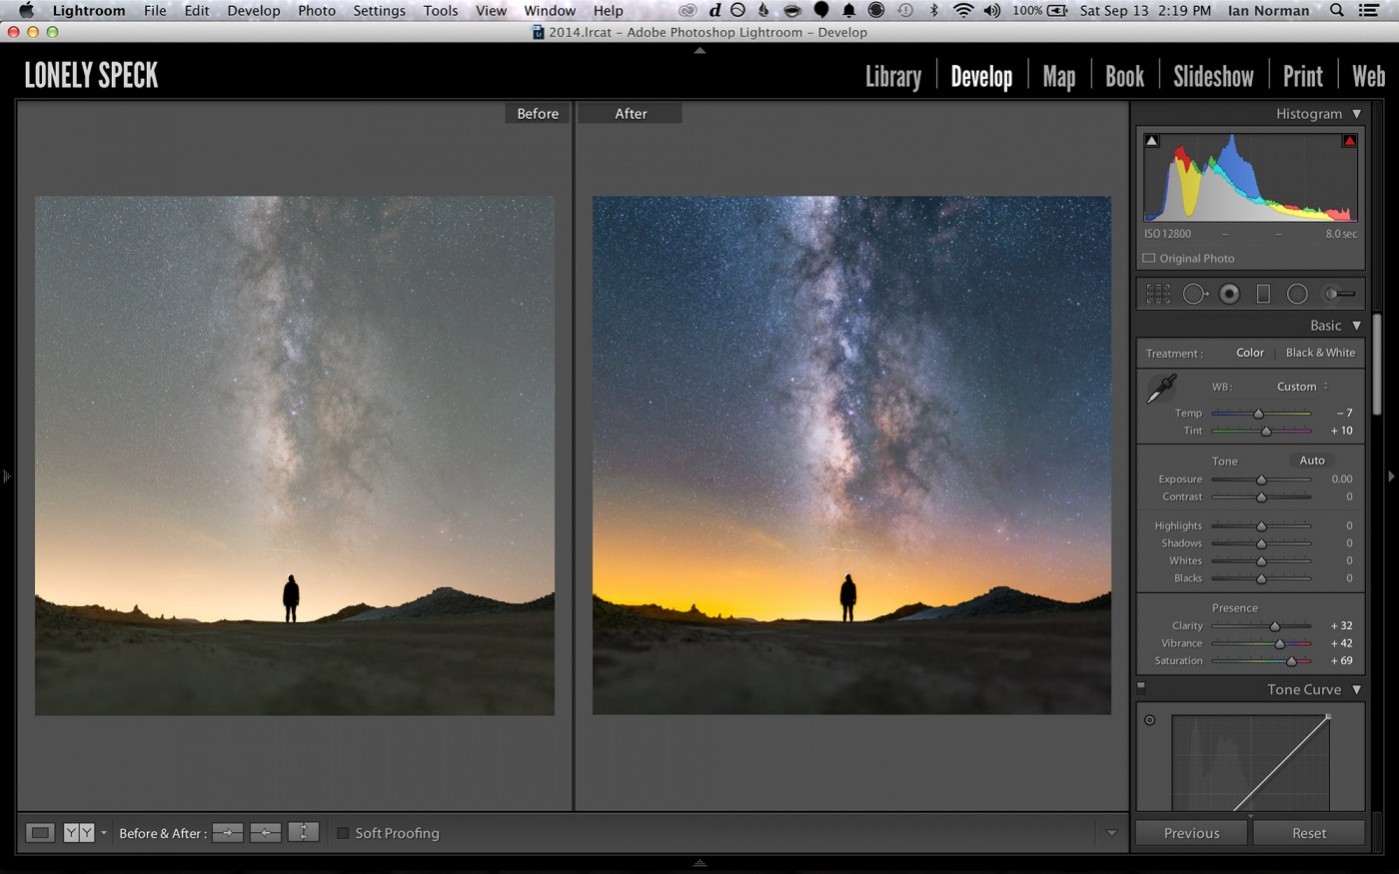
Finally, once I’m satisfied with the image, I’ll crop it, save it and return to Lightroom for the final edits. Check out the video walkthrough below for details on how I compiled, stitched and edited the photo in Adobe Lightroom.
Complete Video Walkthrough
Check out the complete video tutorial on astrophotography panorama stitching on my YouTube Channel:
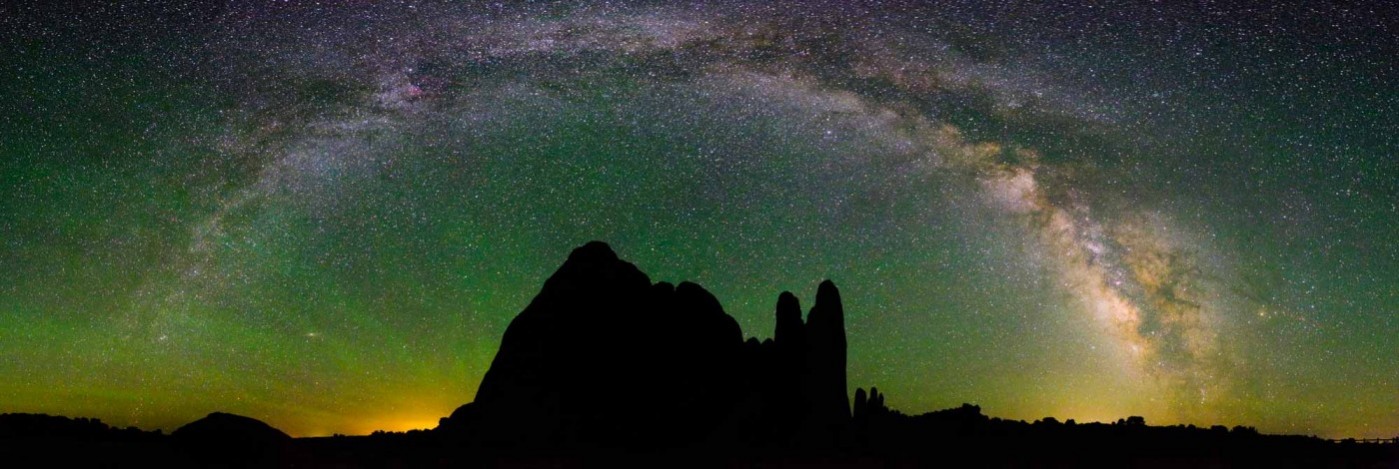
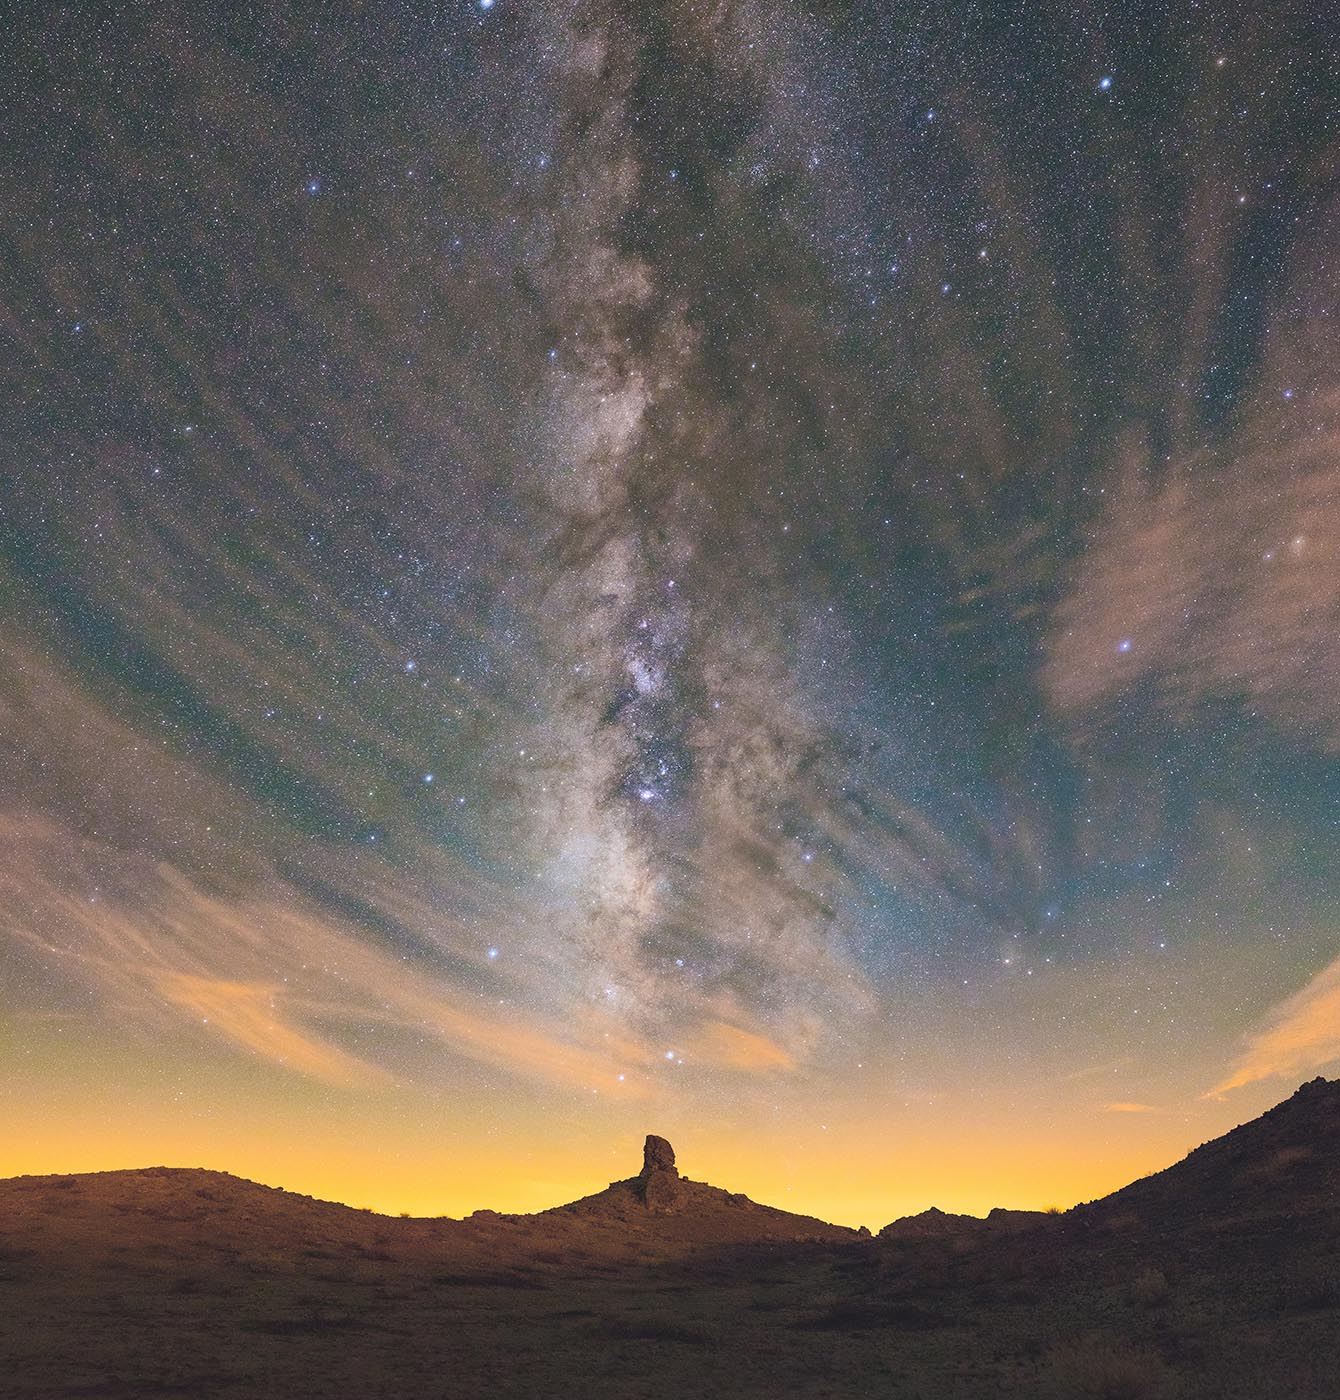
More Examples
All of the images below employed a similar stitching method as outlined in this tutorial. Try it out yourself and share your examples on our Lonely Speck Flickr Group.


Don’t the stars move? Won’t that affect alignment?
A common question that I get in regards to this technique is how to cope with the movement of stars across the sky while shooting. In the time that passes from the start of our first exposure, all the way until our last exposure, it’s likely that the stars will have shifted substantially due to the rotation of the Earth.
While this phenomenon seems like it could pose significant problems when trying to align 8-12 images, it actually doesn’t usually show any issues in practice. As long as all the frames are shot without substantial delay between frames, the automatic re-alignment and blending operations in Photoshop will usually be able to hide any effects caused by the Earth’s rotation. It’s possible that some or all of my example photos have visible signs imperfect alignment but if there are any, they’re very hard to spot.
Other Uses
Remember that this technique works well for photos other than astrophotography too. Here are a few examples that aren’t astrophotography:

There are a lot of other methods to create panoramas but this is the way that I make all of my “medium format” astro shots. At this point in time, stitching multiple exposures is the only way to fully match the negative size of a 6×6 or larger camera with an off-the-shelf digital camera. (The new Phase One FX IQ3 comes close.)
As of this writing, the largest digital camera sensor available to consumers is that of the Phase One IQ2 and Mamiya Leaf Credo series of digital backs for the Mamiya/Phase One 645DF+ cameras Phase One XF IQ3 At over $30,000 $48,000 for such a setup, medium format cameras are way out of reach of most photography enthusiasts. These medium format cameras also can’t compete with small format cameras in the low-light conditions that we encounter when shooting astrophotography.
The methods outlined here can produce results with more total image area and more resolution than any of these expensive medium format digital cameras can. It’s more tediuous and perhaps not akin to certain types of shooting (like moving subjects) but the results can be worth the patient process. It makes for a more methodical shoot and creates a new role for your standard prime or longer lenses.
I hope you enjoyed this tutorial. If you have any questions or comments feel free to chime in on the comments below.
Recommended Multi-Row Spherical Panorama Heads
Below are a list of panorama heads that I recommend for most medium sized setups. All the panorama heads below they feature detent stops on both their vertical and horizontal axes.
Sunwayfoto CR-3015A
The Sunwayfoto CR-3015A is the panorama head that I use. For the price, I personally think it’s one of the best deals for a panorama head available on the market today. It has adjustable detent stops on both the horizontal and vertical axes.
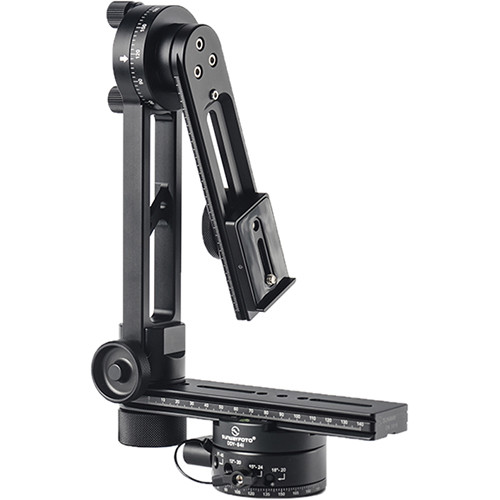
The horizontal rotator can be set for detent click stops at 8°, 12°, 15° and 18° and the vertical rotator for 5°, 15°, 30° and 45°, making this head suitable for most lenses up to 135mm in focal length when relying on the detent clicks. Most very long lenses can’t use the nodal slide for parallax correction as it does not slide forward enough, but that’s rarely necessary for long focal lengths. When used for counterbalance, it can balance my Sigma 105mm f/1.4 and my Sony FE 100-400mm f/4.5-5.6, both of which are about at the limit for weight that I would recommend with the CR-3015A. With both of these lenses, stiffness is adequate in calm conditions but I don’t recommend it in anything more than a slight breeze. The Sunwayfoto CR-3015A also has a built-in nadir-point rotation function for 360 degree panoramas with a wide angle lens without having the tripod in the shot. Where the CR-3015A compromises is in its size and weight. Complete, it’s 2.6 lb (1183g) which is on the heavier side when compared to many of the options below but it supports up to 17.6lb (8kg) of gear according to the manufacturer. Check out more details of my CR-3015A kit in the later section below.
Bushman Panoramic (Kalahari V2 and Gobi V2)
Bushman Panoramic is a panorama tool company from Czechia that makes a wide variety of panorama tools. Their Kalahari V2 and Gobi V2 are full-featured multi-row panorama heads. The Gobi is the smaller (0.9lb (430g) with Yetti rotator) of the two, built for compact mirrorless and DSLR camera kits up to 4.2lb (1.9kg) while the Kalahari is the larger, beefier model (1.5lb (630g) with Yetti rotator) for DSLRs and larger, heavier lenses up to 7.7lb (3.5 kg).
Bushman Panoramic Kalahari V2 
Bushman Panoramic Gobi V2
Configuration of the Gobi is a little bit more customizable as it can be configured with either their compact Quick Click rotator or their larger Yetti rotator. The Quick Click horizontal rotator is available in specific models, a 4 (90°), 10 (36°) or 20 (18°) click variant. Their larger Yetti rotator has adjustable detents allowing for 8 (45°), 12 (30°), 15 (24°), 18 (20°), or 24 (15°) clicks per 360 rotation.
Both the Kalahari and Gobi heads have a detent ring system for their vertical axis, allowing for 15° of rotation between clicks. The ring can also be flipped for free rotation with no clicks. They also sell two alternate rings separately that allow for rotations of either 10°/22° or 45°/90°.
Nodal Ninja NN6
The Nodal Ninja NN6 is a full-featured panorama head that offers detents for both horizontal (5°, 7.5°, 10°, 15°, 18°, 30°, 36°, 45°, 60°, 90°) and vertical (7.5°) axes.

It’s notable that the NN6’s vertical axis does not have an adjustable detent range, instead clicking every 7.5 degrees. This means that it’s only possible to do larger movements (e.g. 15°, 30°, 60°, 90°) with multiple clicks of the detent. It’s a little heavier at 2 lb (920g) and supports up to 7.7 lb (3.5kg) of gear.
Novoflex VR-System Slim
Novoflex has a compact and slim panorama system with their VR-System Slim. It comes ing a very slim package while still offering functionality and stability for focal lengths up to 160mm.
It has detents on both horizontal (22.5°, 12°, 10°, 7.5°) and vertical axes (10°). Similar to the Nodal Ninja NN6, it only has one detent setting for the vertical axis. It’s pretty light at only 1.6lb (760g) but can support a maximum of 10lb (4.5kg).
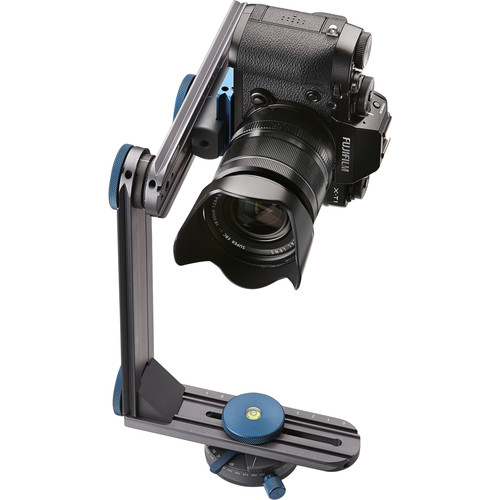
A Close Look at My Medium Format Panorama Head Setup
- Sony a7S
- Sony 55mm f/1.8 Lens
- Sunwayfoto CR-3015A Panorama Head
- Leofoto LS-284C Tripod

Improvements I’ve made to my Sunwayfoto CR-3015A:
- 38mm Arca Compatible Quick Release Clamp
- I added an Arca compatible quick release clamp to the camera plate included on the Sunwayfoto CR-3015 Panorama Head’s Nodal Slide. This plate allows me to quickly mount my camera and lens via an Arca L-bracket


- Arca Compatible Index Stop Bars
- In order to mark the position of the rails on the Sunwayfoto CR-3015A, and the position of my camera mounting in the panorama head, I added index stop bars to the horizontal rail of the CR-3015A and to the L-bracket of my camera. When assembling the panorama head, everything can slide together, right up to the index stop bars and I know the lenses is properly centered on the panning axis. The bars that I use no longer seem available, but B&H has some alternatives, as does Hejnar Photo, that are nearly identical in function.


Disclosure
We are a participant in the Amazon Services LLC Associates Program, an affiliate advertising program designed to provide a means for us to earn fees by linking to Amazon.com and affiliated sites. We are also a participant in the B&H Affiliate Program which also allows us to earn fees by linking to bhphotovideo.com.
Learn Astrophotography
Astrophotography 101 is completely free for everyone. All of the lessons are available on the Lonely Speck Astrophotography 101 page for you to access at any time. Enter your email and whenever we post a new lesson you’ll receive it in your inbox. We won’t spam you and your email will stay secure. Furthermore, updates will be sent out only periodically, usually less than once per week.
Help us help you!
Believe it or not, Lonely Speck is my full-time job. It’s been an amazing experience for us to see a community develop around learning astrophotography and we’re so happy to be a small part of it. I have learned that amazing things happen when you ask for help so remember that we are always here for you. If you have any questions about photography or just want to share a story, contact us! If you find the articles here helpful, consider helping us out with a donation.
[button font_size=”16″ color=”#136e9f” text_color=”#ffffff” url=”https://www.paypal.com/cgi-bin/webscr?cmd=_donations&business=lonelyspeckblog%40gmail.com&item_name=These+tips+help+keep+lonelyspeck.com+running.¤cy_code=USD&source=url” target=”_blank”]Donate[/button]
Thanks so much for being a part of our astrophotography adventure.
-Ian
[button font_size=”16″ color=”#136e9f” text_color=”#ffffff” icon=”arrow-left” url=”https://www.lonelyspeck.com/astrophotography-101/” target=”_self”]Back to Astrophotography 101[/button]
Thank you so much of your content! Super helpful and encompassing, especially for beginners like me.
One question I have is if I’m stitching photos for a panorama, would that happen in sacrifice of photostacking? Or do you still photostack when stitching?
Sorry if you already answered this!
Thanks!
Exposure stacking is possible. It’s just all dependent on how much time you want to work! Obviously, shooting a series of exposures for each frame of the panorama will increase shooting time, increase processing time, and increase the difficulty of the whole process.