
Installing the Lightroom Classic Presets – .zip (Windows/Mac)
- Locate your download and extract the .zip file. (Check your Downloads folder if you’re unsure where you saved it.)
- Open the Film Speck Pro folder. Copy the folders inside and paste them into the Develop Presets folder:
- On a Mac, open Finder and select Go from the menu at the top of your screen. Hold the alt/option key to reveal the hidden Library folder and select Library. From the Library folder, navigate to /Application Support/Adobe/Lightroom/Develop Presets/
- If you’ve enabled the “Store Presets With This Catalog” option in the Lightroom Classic preferences, the presets and templates files are saved at: ~/[catalog location]/[catalog folder name]/Lightroom Settings/Settings
- On a PC, Lightroom 6 and older, it’s located in C:\Users\user\AppData\Roaming\Adobe\Lightroom\Develop Presets\
- If you’ve enabled the “Store Presets With This Catalog” option in the Lightroom Classic preferences, the presets and templates files are saved at: “C:\Users\[user name]\[catalog location]\[catalog folder name]\Lightroom Settings\Settings”
- On a Mac, open Finder and select Go from the menu at the top of your screen. Hold the alt/option key to reveal the hidden Library folder and select Library. From the Library folder, navigate to /Application Support/Adobe/Lightroom/Develop Presets/
- Relaunch Lightroom. Enter the Develop Module and select any of the presets of your choice via the Preset bar on the left. You’ll find the core Film Speck Pro presets in the Film Speck Pro Filters folder. The preset adjustment tools are located in the first 6 Film Speck Pro folders.
Installing the Lightroom Classic Presets – .dmg (Recommended for Mac)
- Locate your download and open the .dmg file. (Check your Downloads folder if you’re unsure where you saved it.)
- Follow the instructions in the window that appears, selecting all 7 folders on the left and dragging them into the Develop Presets folder on the right.
- Relaunch Lightroom. Enter the Develop Module and select any of the presets of your choice via the Preset bar on the left. You’ll find the core Film Speck Pro presets in the Film Speck Pro Filters folder. The preset adjustment tools are located in the first 6 Film Speck Pro folders.
If you have trouble with the Mac installation method, you may also download the .zip file and follow the Windows method above instead.
Installing the Presets in Lightroom CC
The best way to import presets into Lightroom CC is a little different.
Locate your download and extract the .zip or .dmg to a folder on your computer. (Check your Downloads folder if you’re unsure where you saved it.) Then follow these steps in Lightroom CC:
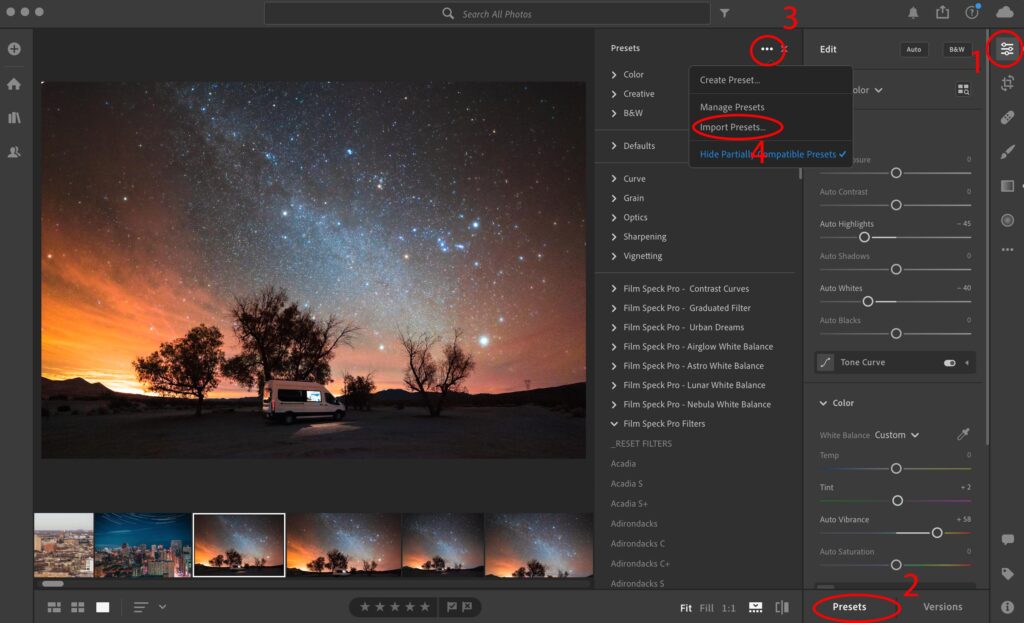
- Open Lightroom CC and open the Edit toolbar (E) with any photo.
- At the bottom of the edit tools, select the “Presets” button to open the preset tools.
- At the top right of the preset tools, click the three dot ellipsis (…) button
- Select “Import Presets…” and locate the folder containing the presets you previously extracted from the .zip and click “Import”.
If you’re still having any issues, please contact us directly at [email protected]