

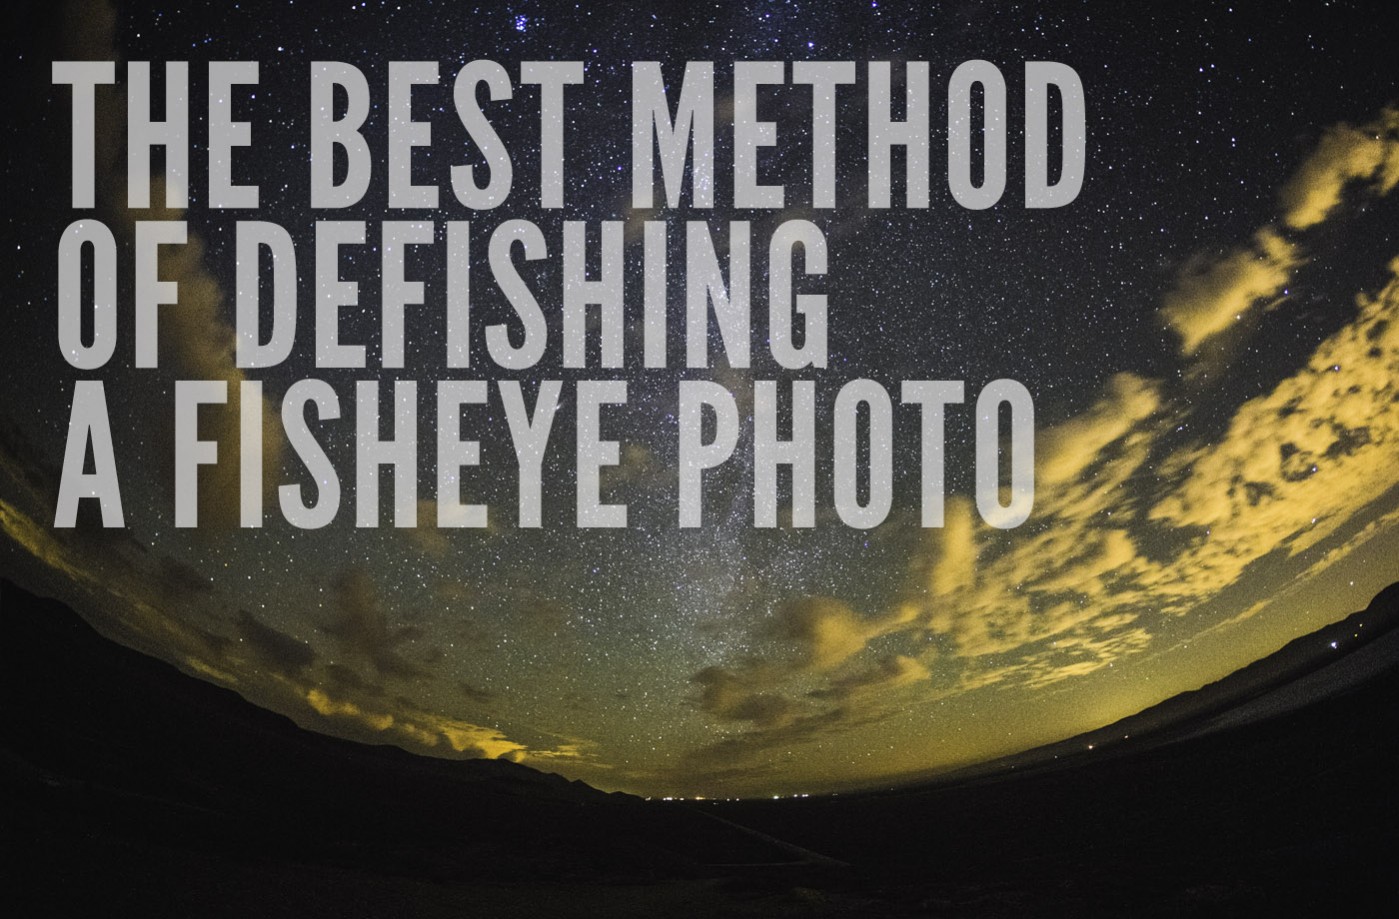
This article and video tutorial will show you my favorite way to defish a fisheye photo and how to use your fisheye lens as a serious landscape tool.
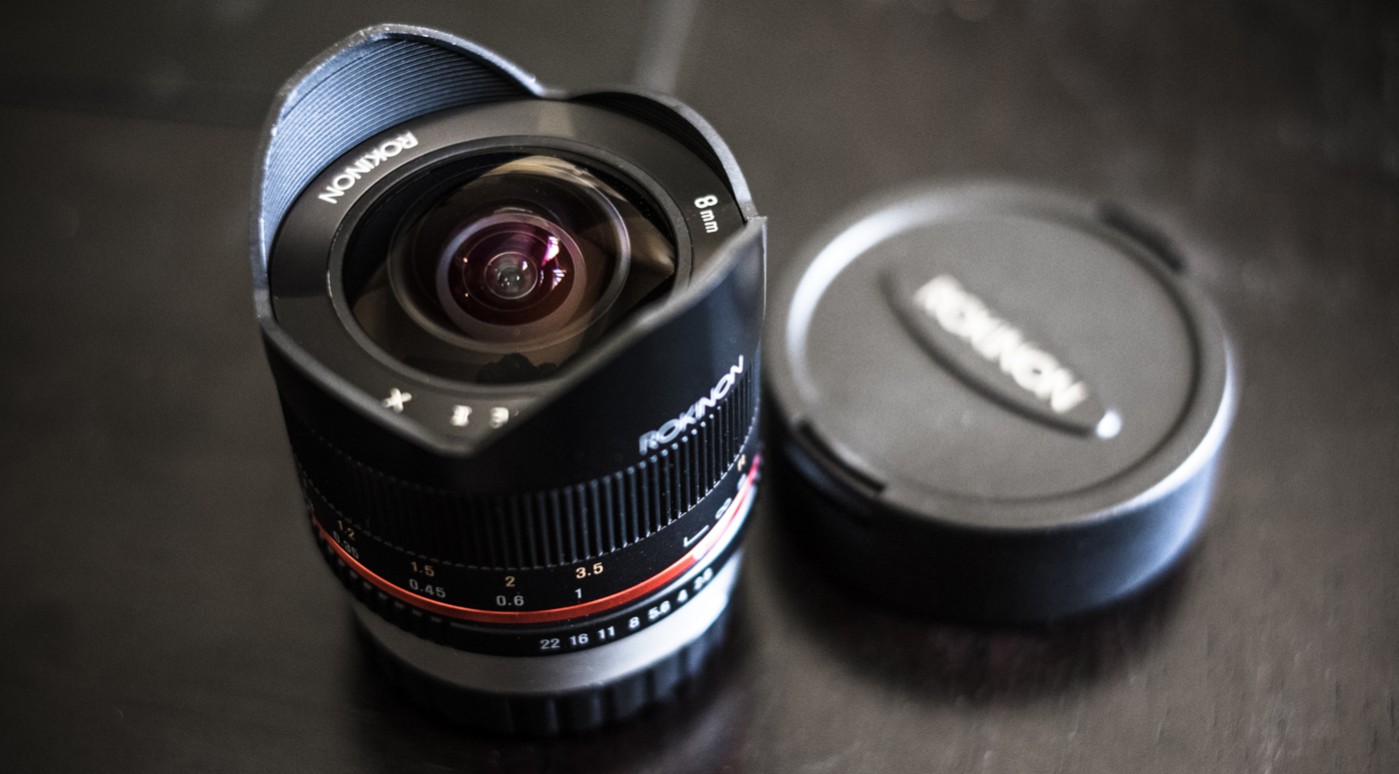
I recently purchased the new Rokinon 8mm f/2.8 Fisheye II lens that was just released for mirrorless cameras. I’ve owned the earlier version of this lens and I have used other fisheye lenses in the past but never thought seriously (until now) about the wide distorted photos that they made.
The fisheye lens is typically pigeonholed into a few specialty uses: things like action sports photography (made especially popular by the GoPro), underwater photography, and the occasional distorted portrait. Fisheye lenses often scream “Distortion!” and as a result, the fisheye is considered a specialty lens by most photographers. It is a lens that rarely sees itself mounted to your camera, either staying in your bag or sitting on the shelf and collecting dust. Fisheye lenses are rarely used for landscapes because of their tendency to curve the horizon if not perfectly centered, thus making the distortion the most attention grabbing part of the photograph. As a result, it’s a lot easier to just take silly portraits with one than try to make any “serious” photos.

I would like to convince you that a fisheye is not just a specialty lens for rare occasions or funky portraits, it’s a serious photographic tool that deserves a place alongside your other, certainly more often used, “more serious” rectilinear camera lenses.
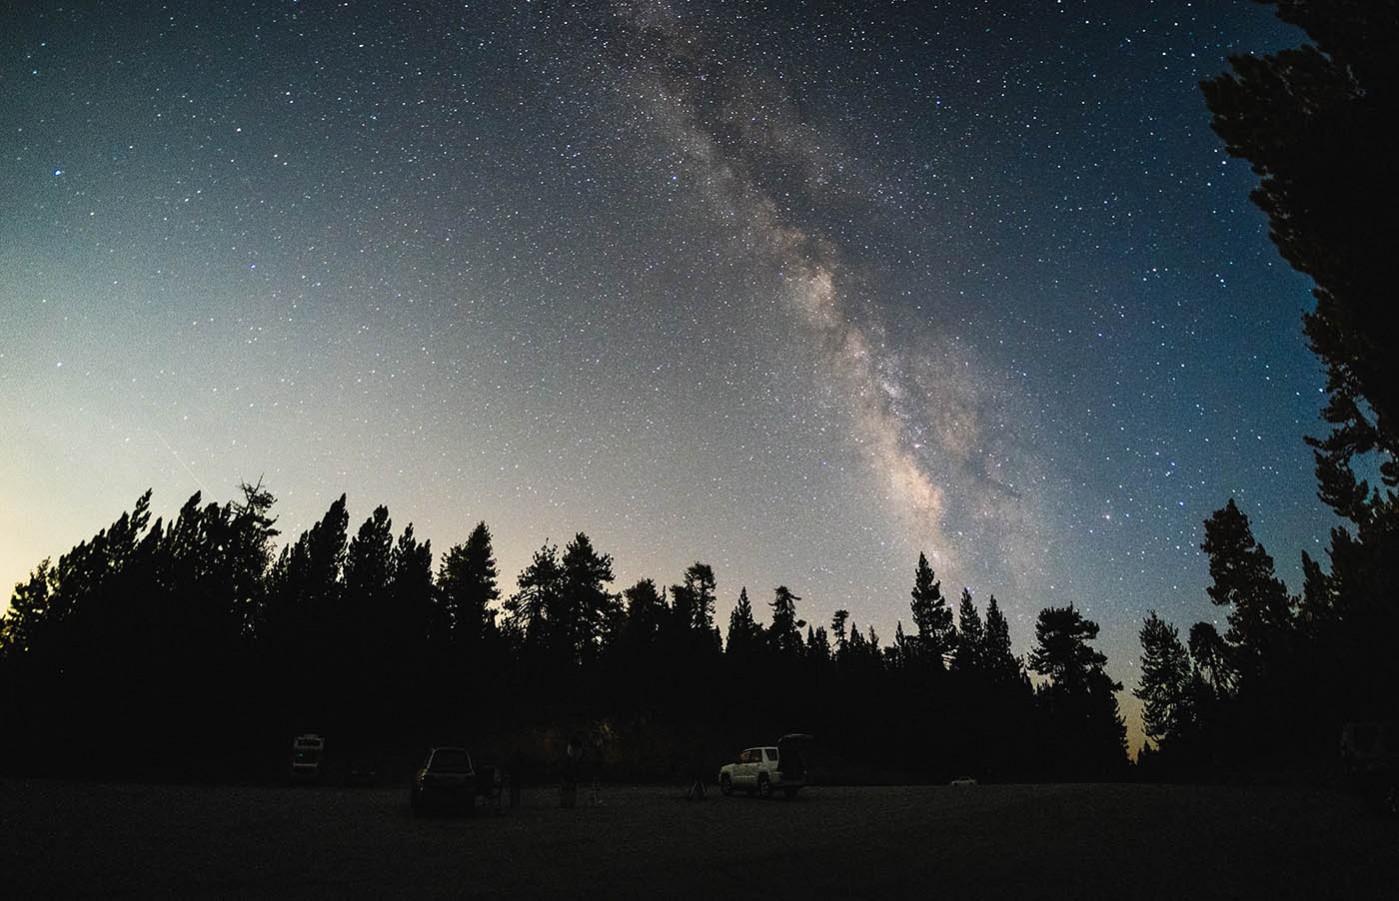
According to Wikipedia, the fisheye lens had its “first practical use was in the 1920s for use in meteorology to study cloud formation giving them the name ‘whole-sky lenses’.” As a result, they’re excellent for photographing the night sky and that’s why they interest us at Lonely Speck. The large field of view that they offer allow us to not only see a huge amount of the night sky but also let us use relatively long exposures, up to 60 seconds without significant star trailing. Now if only that darn horizon wasn’t so curved and fishy.
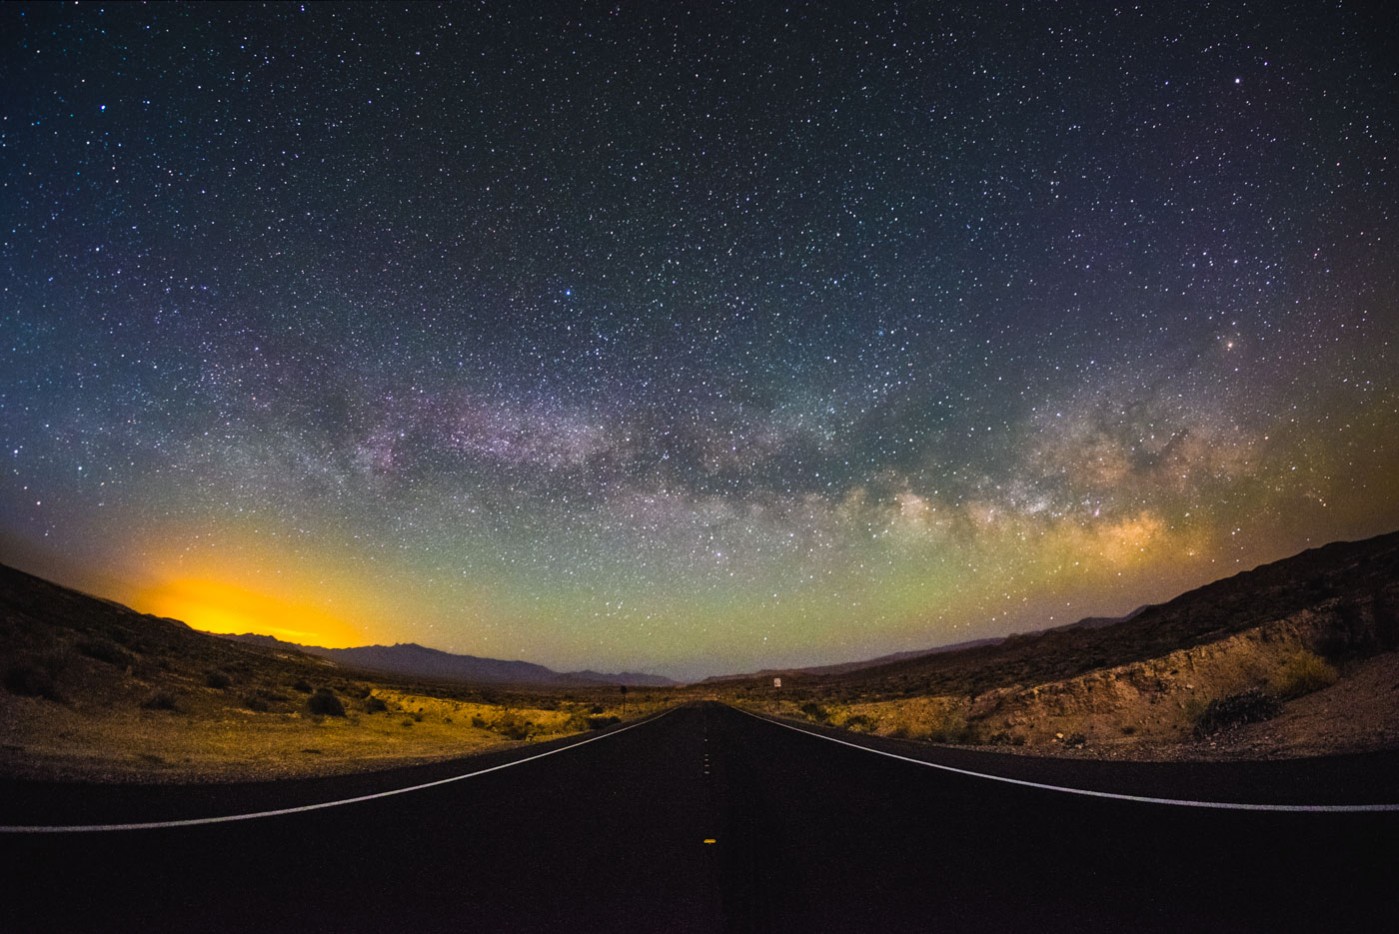
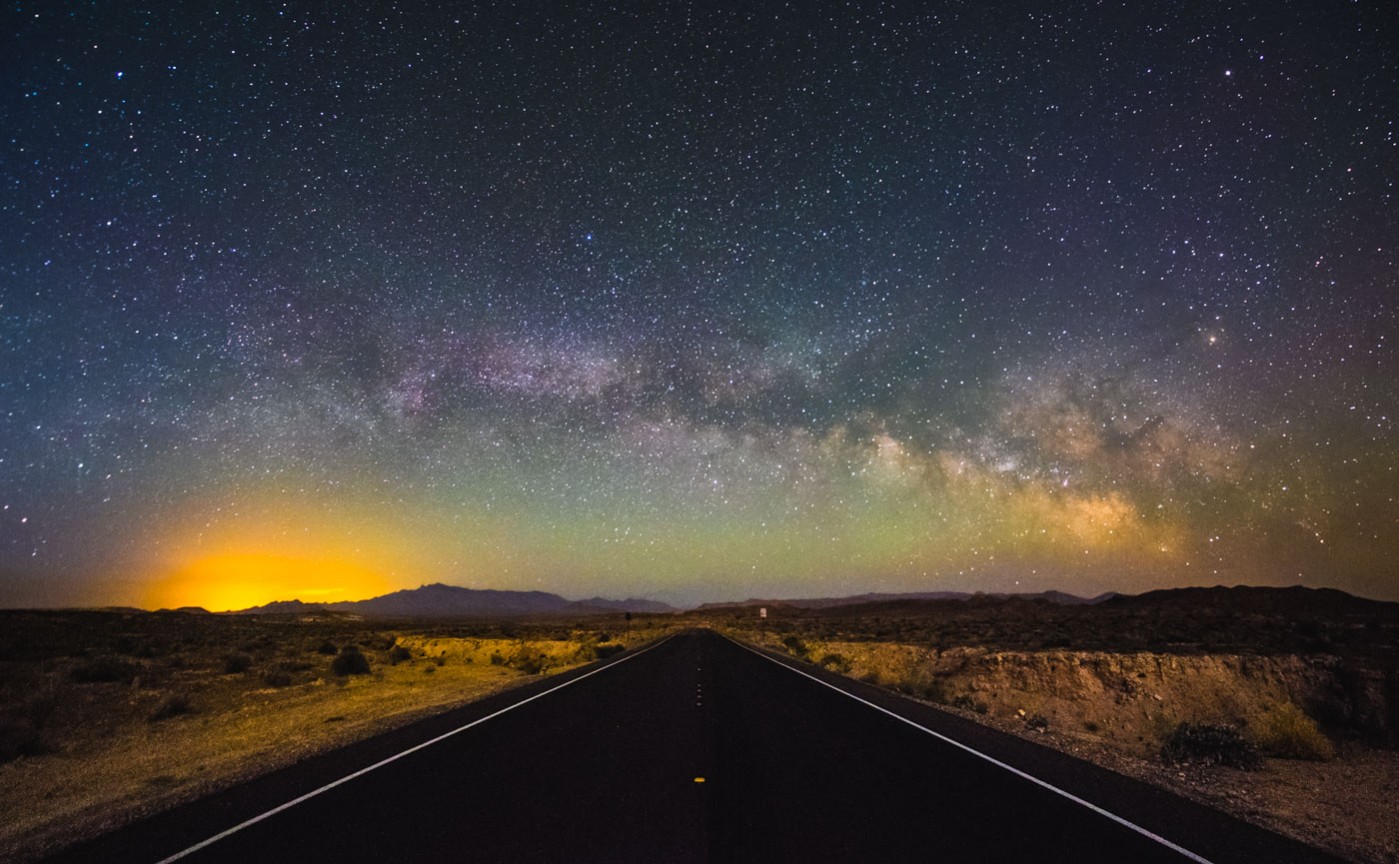
In the example above, I think that the fishiness detracts from the content of the photo. The curved horizon, and the curved roadway are distracting. The easiest way to make a fisheye lens more serious and more appropriate for applications like landscape photography (or landscape astrophotography) is to “defish” the image.
There are many methods to defish a fisheye photograph but some work better than others. I will show you what I regard as the best method of defishing. It’s a technique that I’ve seen used only a handful of times by other photographers but the results can be great. It’s especially suited for landscape photographs that have a curved horizon but it’s applicable to other types of photography too. I will, of course, be using it with landscape astrophotography. For the processing examples, I will be using Adobe Lightroom and Adobe Photoshop.
Why Defish?
Firstly, why would you want to spend the extra processing time to defish a fisheye photograph? Isn’t the whole distortion thing the point of a fisheye? Why not just use a super wide angle rectilinear lens?
One answer: field of view.
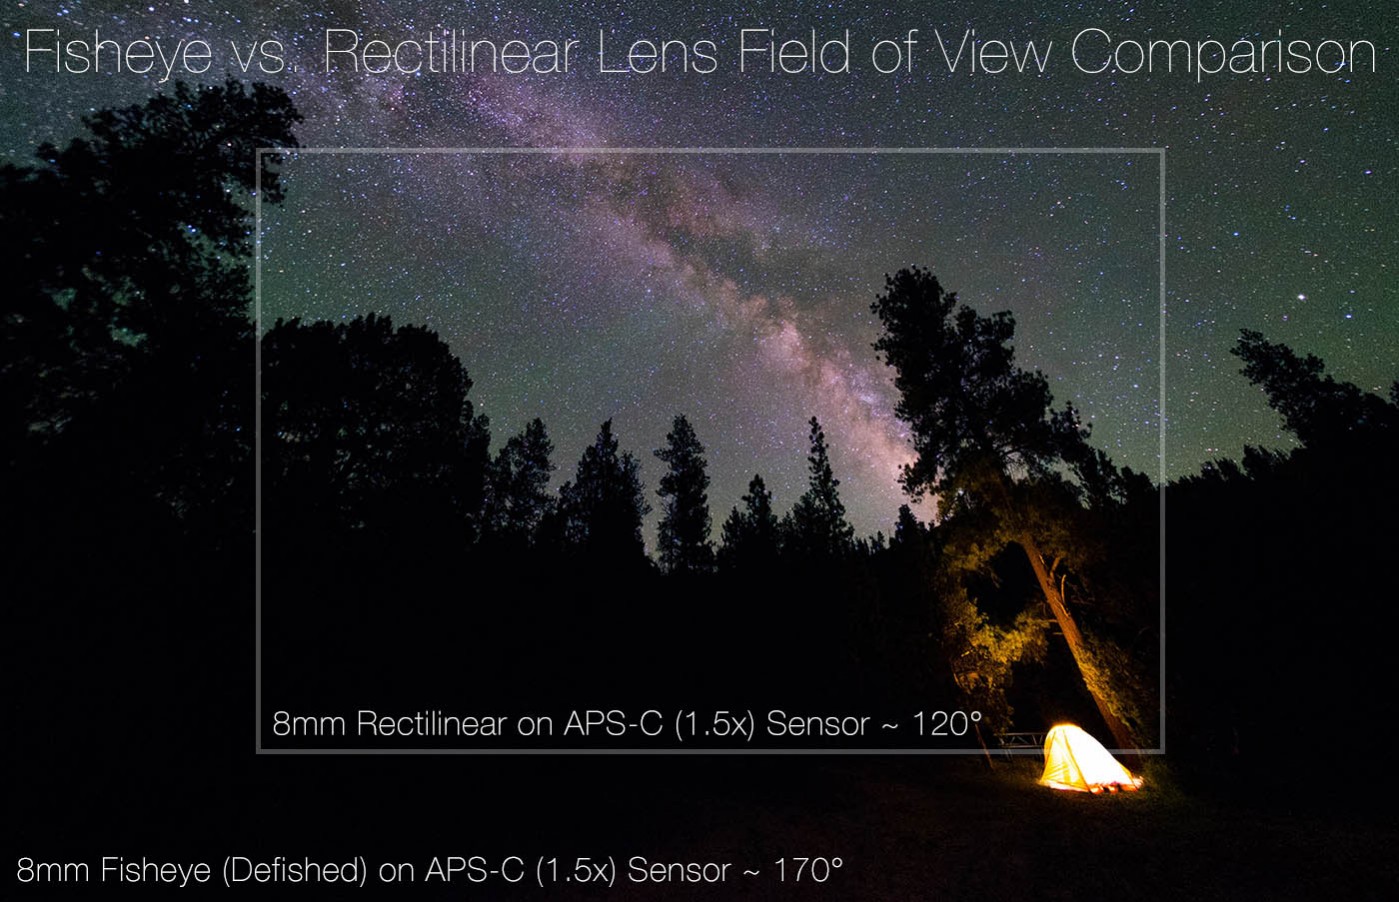
An 8mm fisheye lens has a corner-to-corner field of view of 180 degrees on an APS-C sensor. The widest rectilinear (non-fisheye) lens available for an APS-C sensor is the Sigma 8-16mm f/4.5-5.6 with a field of view of about 121 degrees. Despite being the same focal length, the 8mm fisheye has a field of view that’s about 60 degrees larger than its 8mm rectilinear counterpart. When properly defished with the method that I will show you here, the fisheye lens can retain most of that extremely wide field of view while fixing curved horizon lines for a rectilinear appearance.
Defishing a fisheye photo is also more convenient than panorama stitching. If used in conjunction with a batch script/actions in Photoshop, defishing can be performed on timelapse sequences which allows the creation of super wide timelapse videos, something that I’ll write about more soon.
Traditional Rectilinear Defishing:
The most common (and my least favorite) method of defishing a photograph is to use software to remap the photograph into a rectilinear projection. This is really easy to do in Adobe Photoshop or Adobe Lightroom, provided that you have first downloaded an appropriate lens profile from the Adobe Lens Profile Downloader. Defishing with this method is as easy as selecting the Lens Corrections profile in Lightroom Develop Module. If you’re using Photoshop, you can do the same with the Filter>Lens Corrections function.
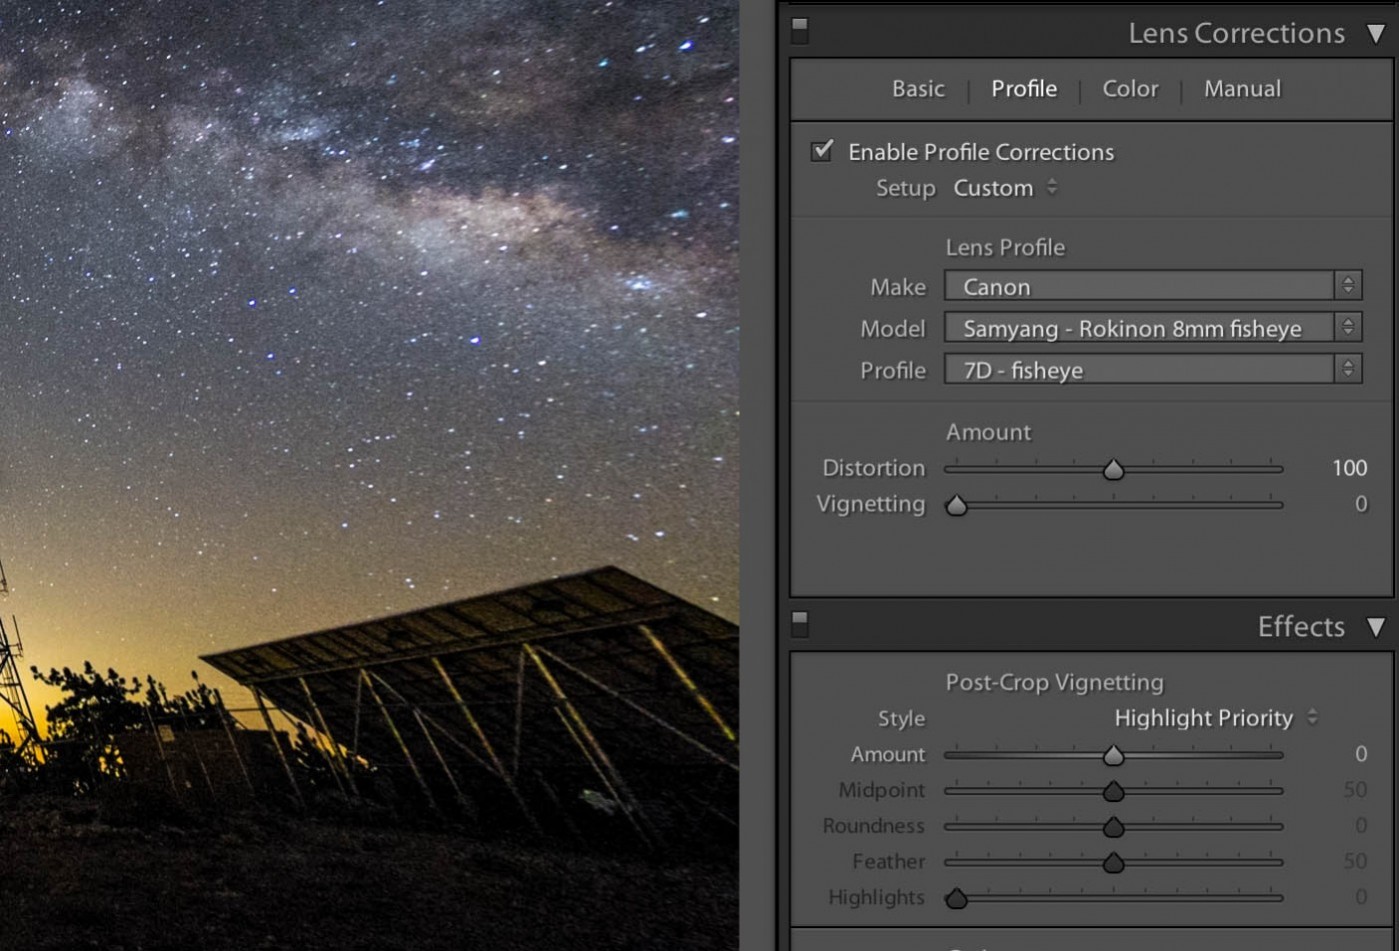
In this example below, the image below has been defished to a rectilinear projection. This method results in a rectilinear image but has some huge disadvantages: it appears to stretch the corners of the photo which reduces the resolution. If you look at the corrected photo below, you can see that the stars on the corners of the image are super stretched and blurred looking.
Performing a rectilinear defish also relies on heavy amounts of cropping that decrease the field of view. That 180 degree fisheye image ends up being around a 120-130 degree rectilinear image, not much different from just using a superwide rectilinear lens from the starting gate. These disadvantages are the main reason I avoid using a rectilinear defishing method for my fisheye photos.
[himage]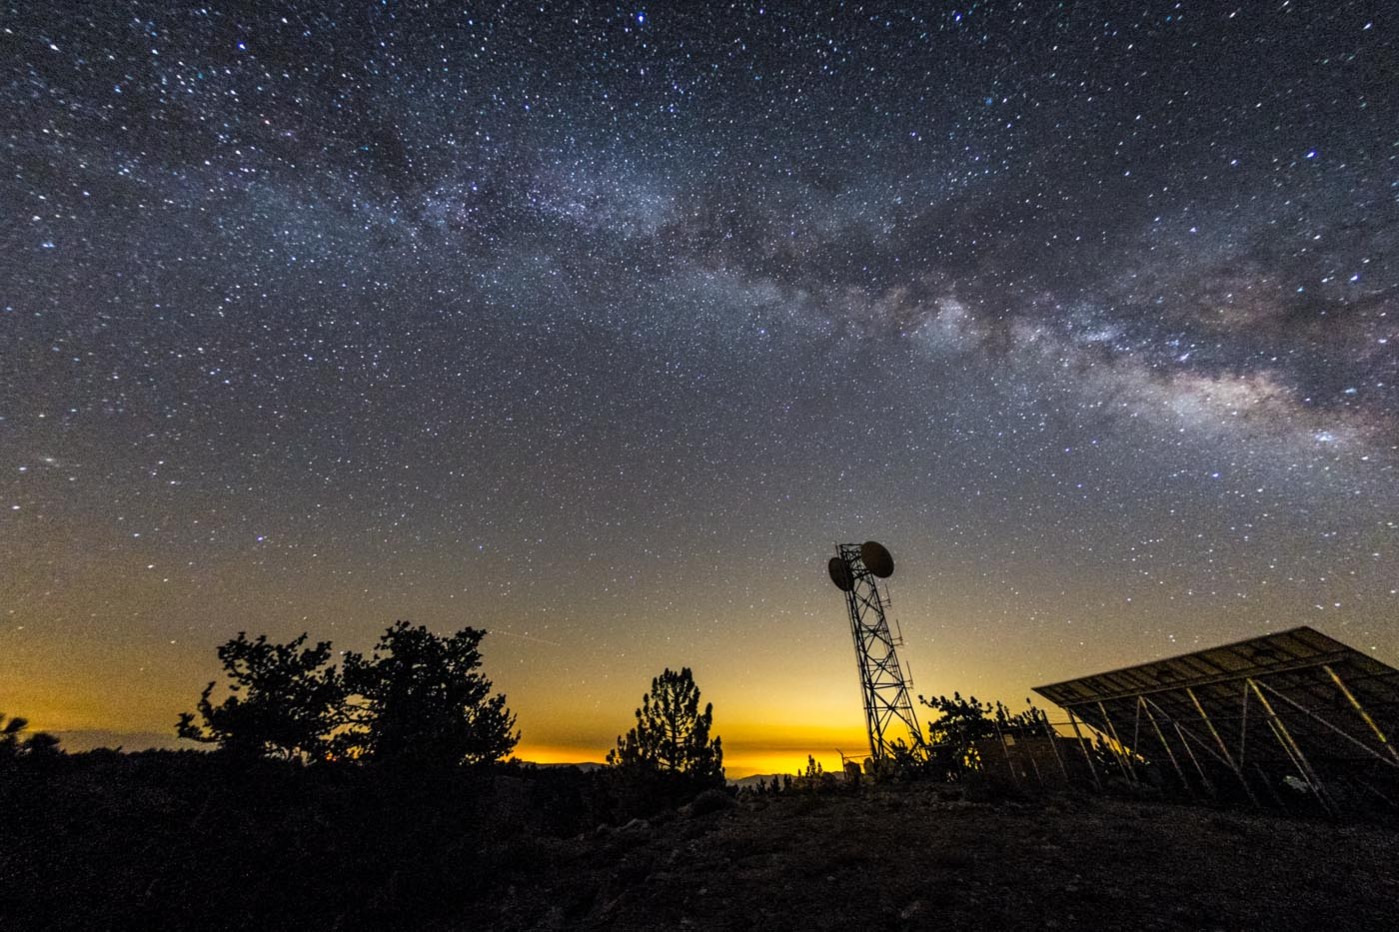
 [/himage]
Rectilinear defishing works but usually crops a lot of the original image and stretches the corners. Hover for original.
Fisheye-Hemi Defishing
A much better method of defishing is to use Imadio’s Fisheye-Hemi program. It’s available as a plugin for Adobe Photoshop and it’s my favorite one-click tool for defishing. Fisheye-Hemi utilizes a remapping algorithm that only corrects distortion along one axis. As a result, much more of the image is retained and lines running vertically in a landscape image will be corrected to appear straight. The result is a photograph that is much less “fishy” but still has a huge field of view and doesn’t have any of the problems of stretched looking corners.
Corrected with Fisheye-Hemi:[himage]
 [/himage]
Fisheye-Hemi does a great job a defishing photos when the horizon is in the center of the image. Hover for original.
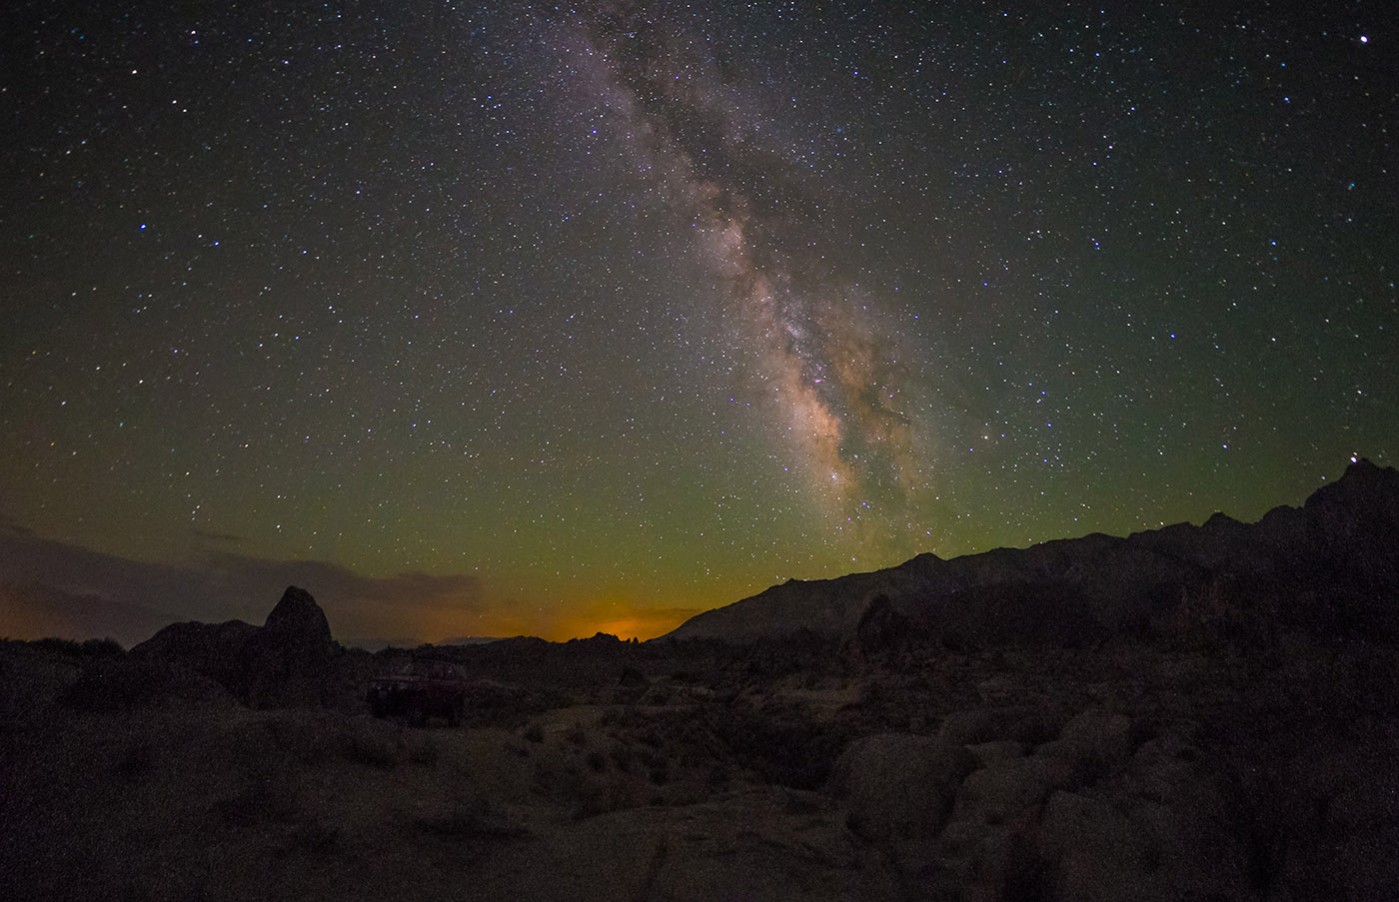
However, Fisheye-Hemi’s documented uses are a little bit limited. The problem with Fisheye-Hemi is that it’s normally limited to only correcting vertical lines on a landscape oriented photograph or horizontal lines on a portrait oriented photo. This makes it fail on photographs like our antenna tower and Milky Way nightscape example.
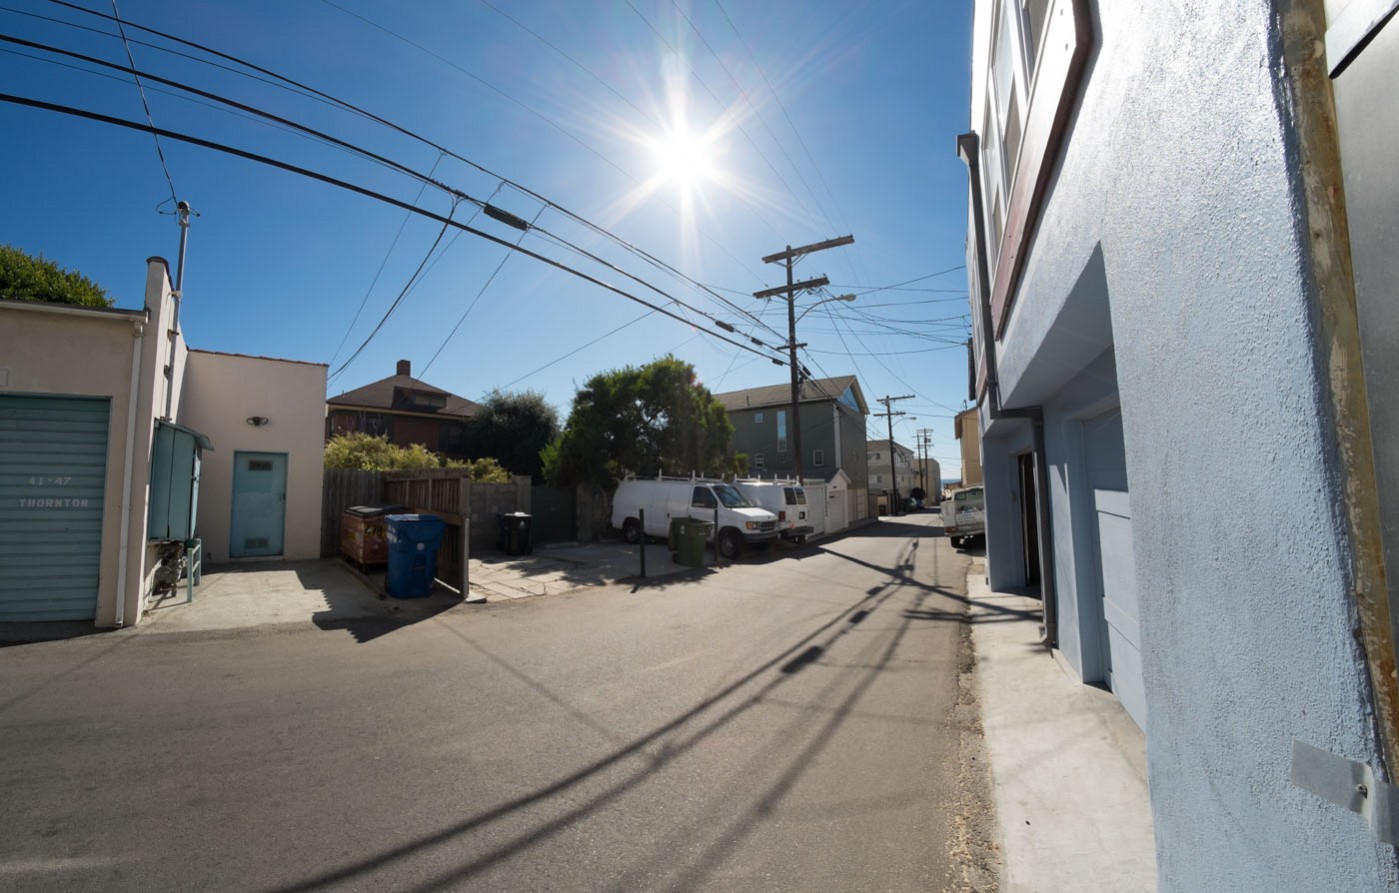
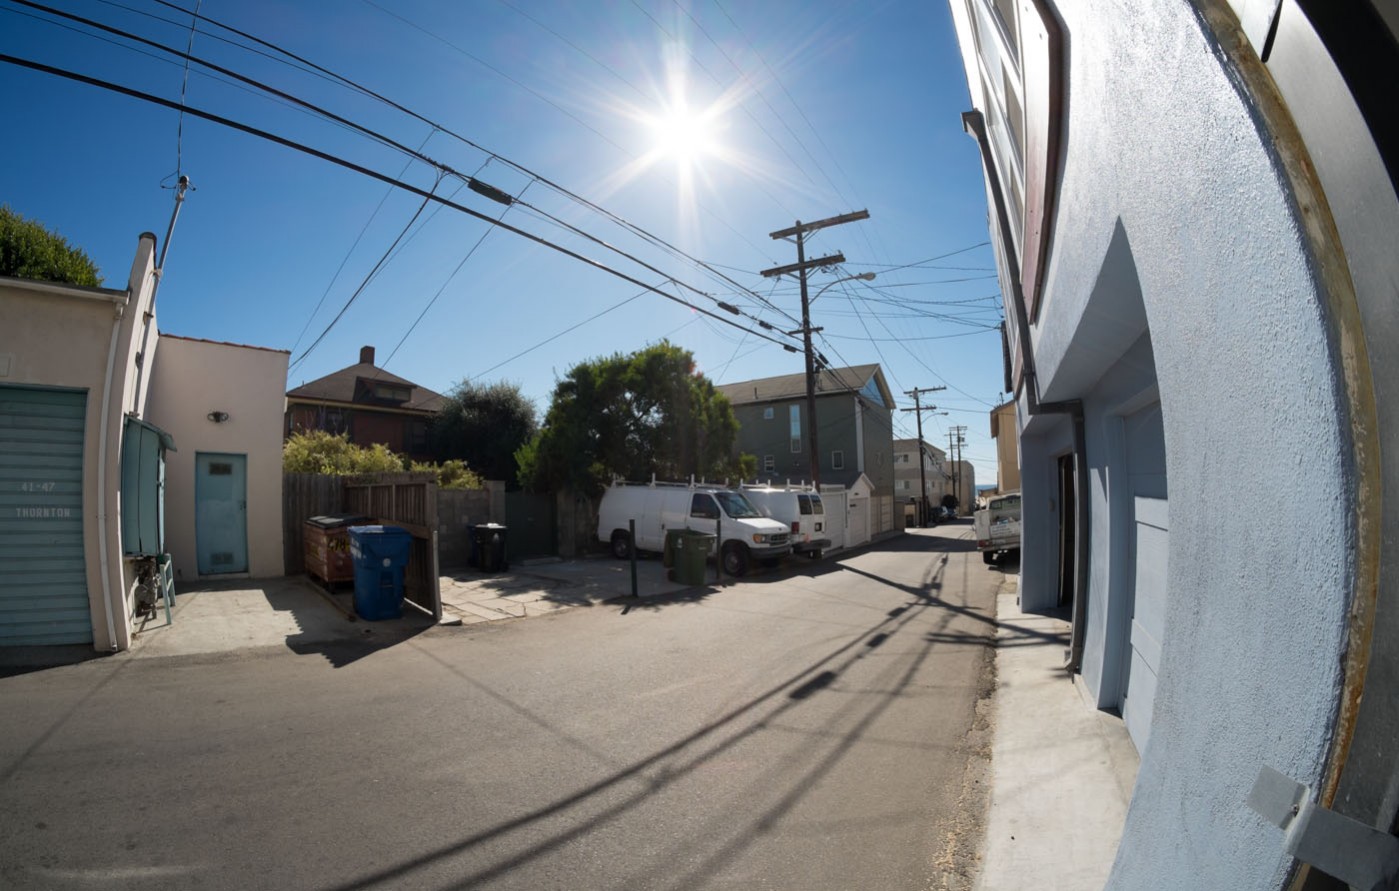
Using the Fisheye-Hemi filter directly on a landscape photo with a curved horizon won’t be properly defished. In the example below you can see that the antenna tower looks less curved but the horizon is still super curved!
Failed Correction with Fisheye-Hemi:[himage]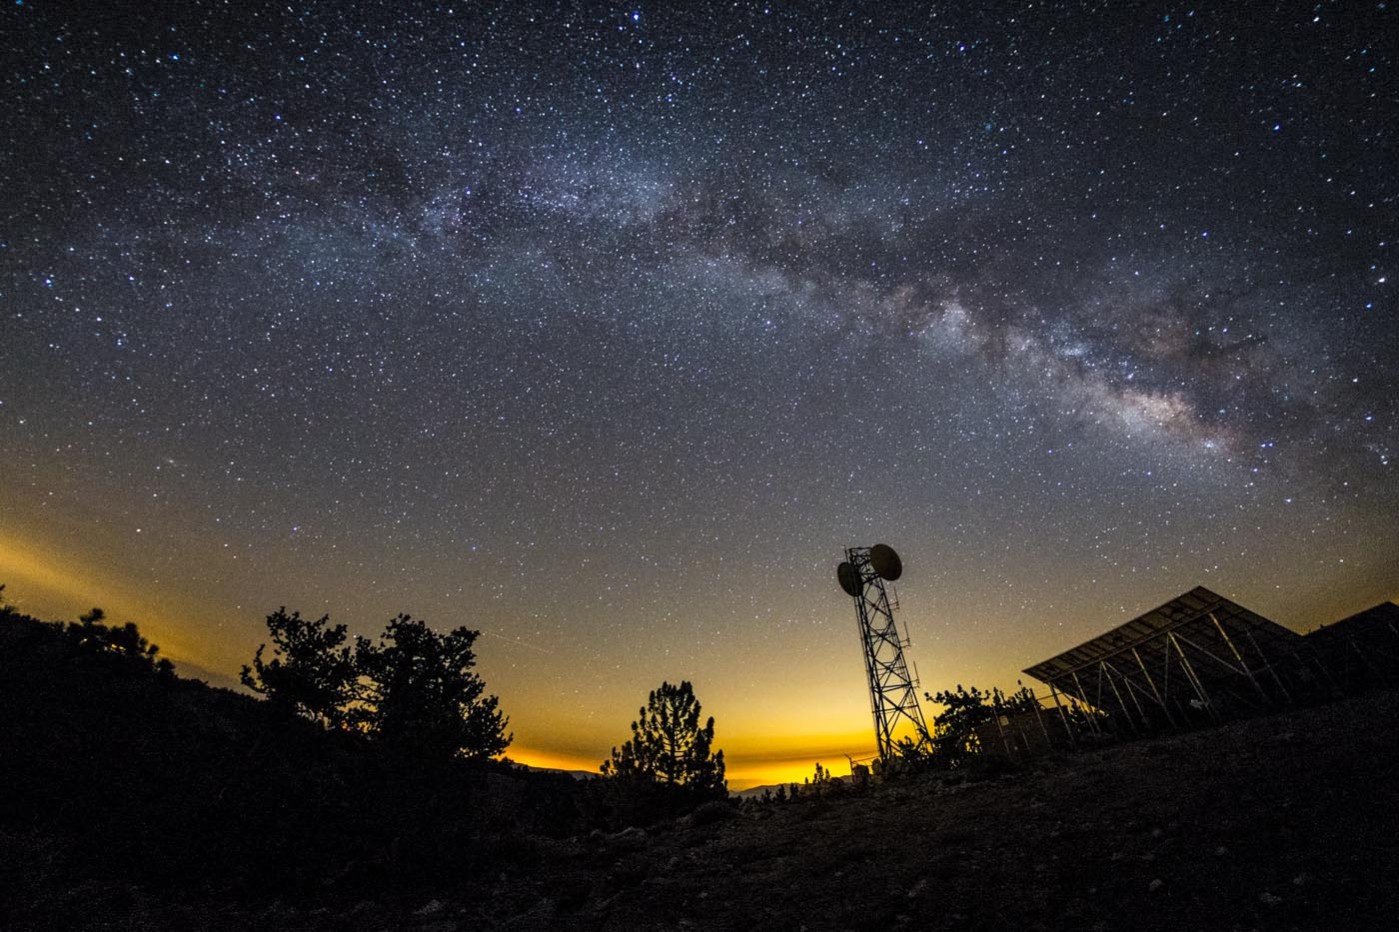
[/himage] The antenna tower now looks straight but the horizon is still curved. Hover for original.
Fisheye-Hemi only corrects lines that run parallel to the shortest edge of the photograph. This means that by default Fisheye-Hemi won’t be able to correct landscape oriented fisheye photographs with a curved horizon, limiting its standard use to just photos with a centered horizon. Unless we trick it, of course.
Tricking Fisheye-Hemi for Landscapes with a Curved Horizon Line
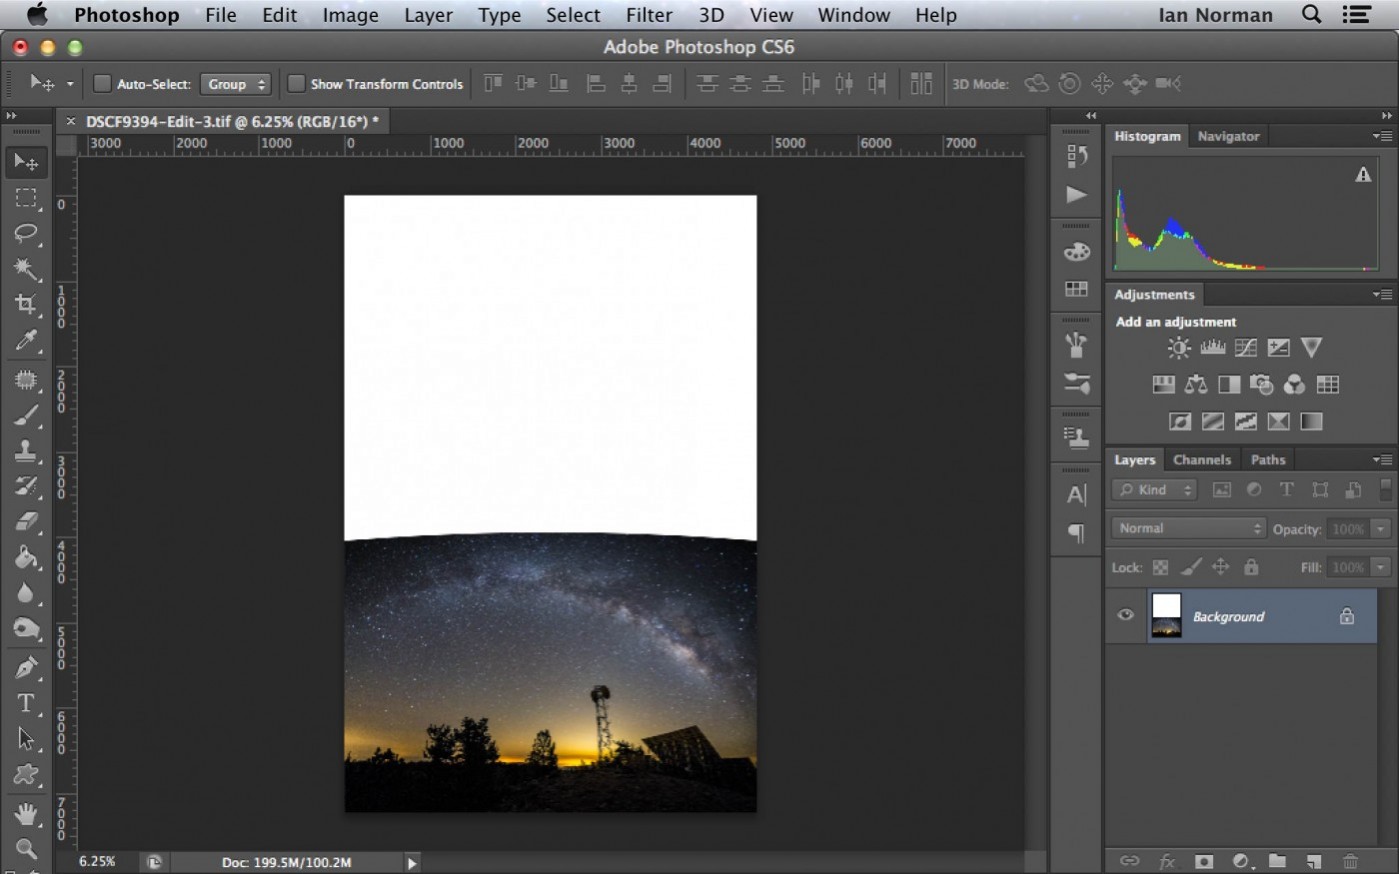
Fisheye-Hemi decides which axis to correct based on the aspect ratio of the photo. It only ever corrects straight lines along the shortest edge of the photograph. That means that in order to correct a curved horizon line in a landscape oriented photo, like in our example nightscape photograph, we need to trick Fisheye-Hemi into thinking we have a portrait oriented photograph instead. The easiest way to do this is to change the canvas size of our photo, not unlike the “advanced tips” documented on Imadio’s Fish-Eye Hemi site, but in the other direction.
This method is much more effective than a rectilinear defishing method because it retains corner detail and most of the original field of view. For the example below I will be using Adobe Photoshop CS6 and the Fisheye-Hemi plug-in from Imadio’s
1. Open the photo in Photoshop and adjust the canvas size
The first thing we need to do is adjust the canvas size so that the file has a vertical orientation.
In Photoshop choose: Image>Canvas Size…
In the Canvas Size dialogue, choose the Anchor location based on the position of the horizon.
If the horizon is on the bottom third of the photo, pick the bottom anchor, if it’s on the top third of the photo, pick the top anchor, if it’s in the middle third, leave it at the middle anchor.
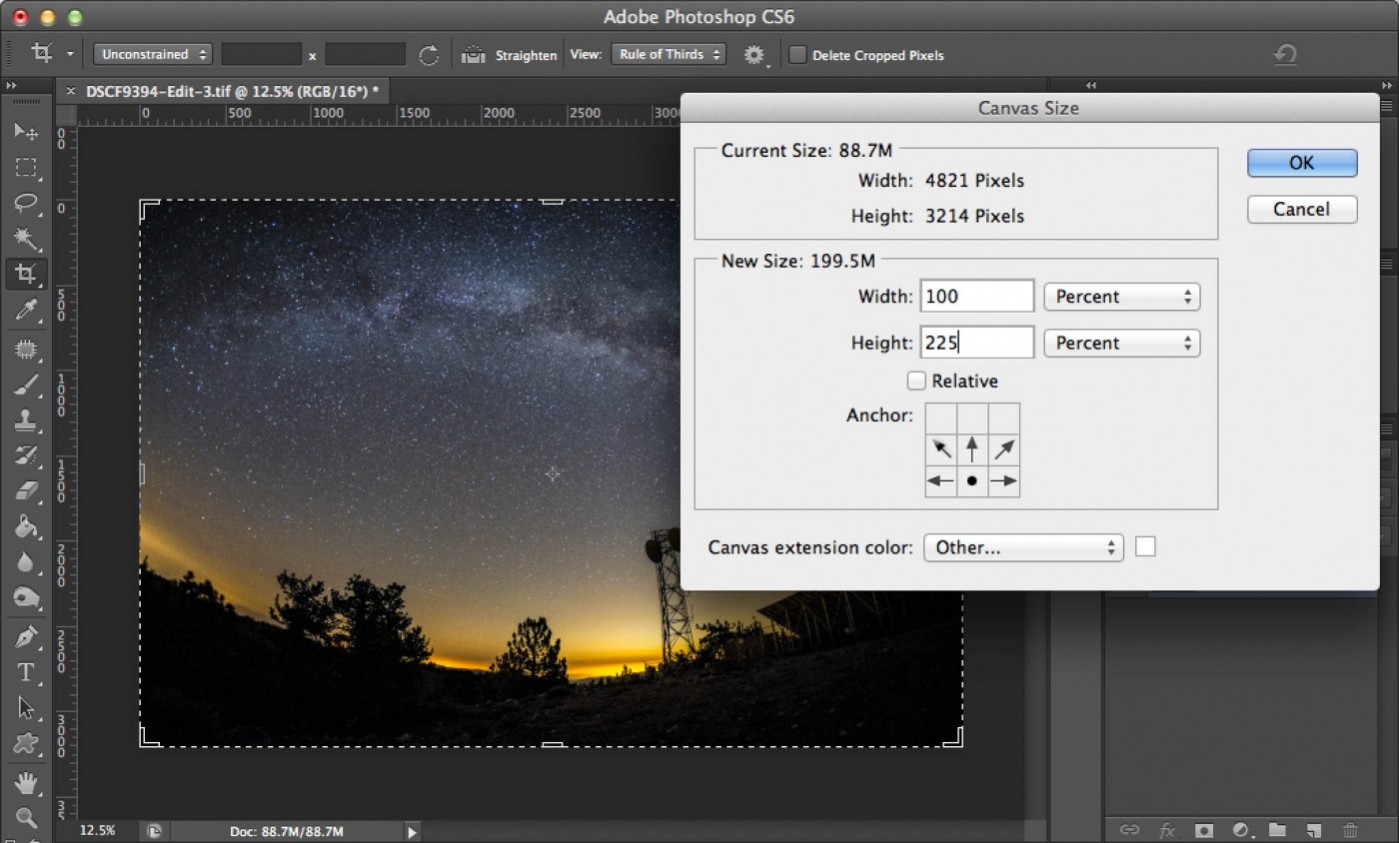
Now make the height of the photograph larger than the width. I like to use the percent scale and usually make the height 225 percent, leaving the width at 100 percent. Provided your photo has a 3:2 width:height aspect ratio like most digital SLR photos, the bump to 225 percent on the height will flip the canvas aspect ratio to 2:3. You can tweak this number to get different strength of results, just make sure that the height ends up being bigger than the width.
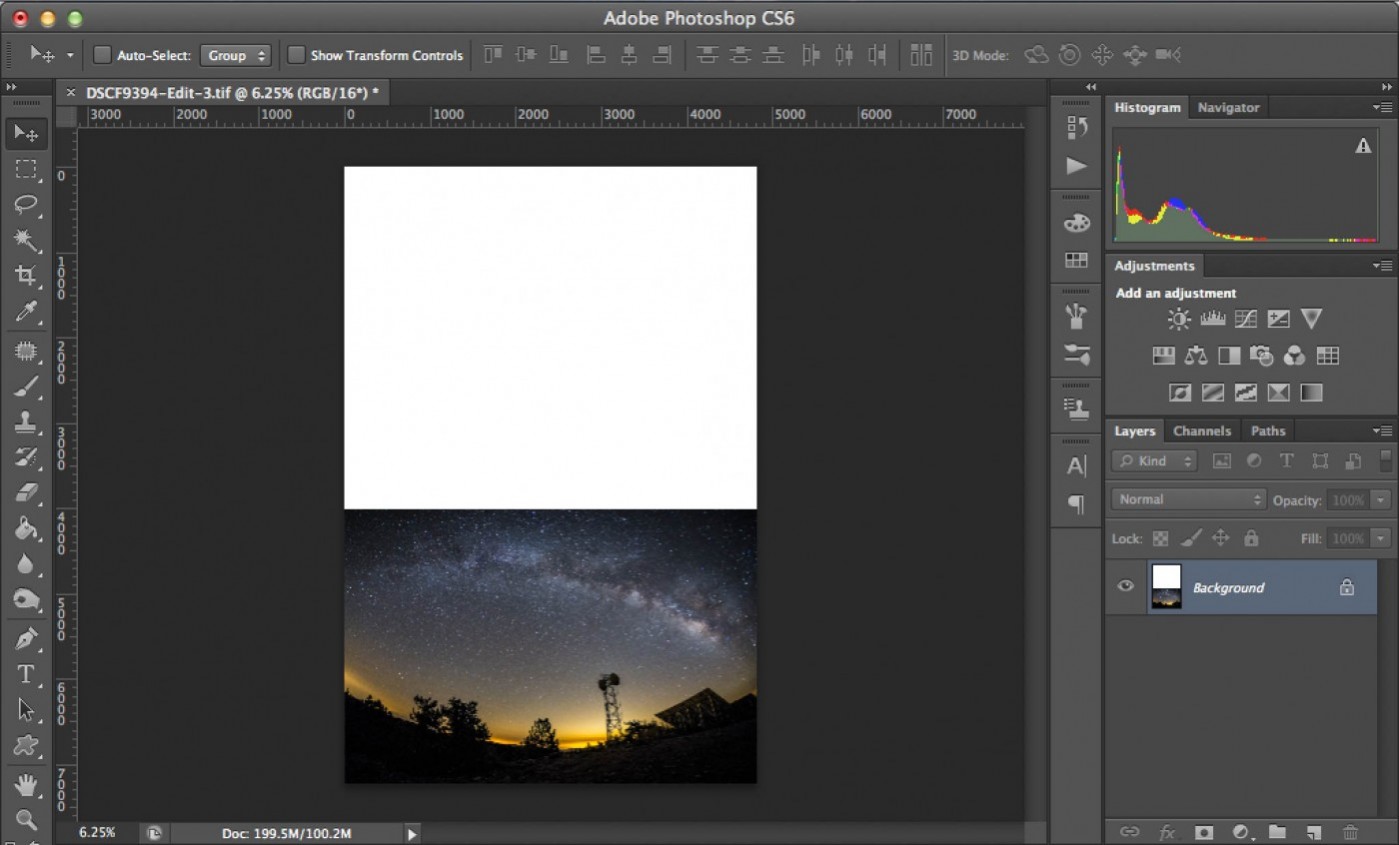
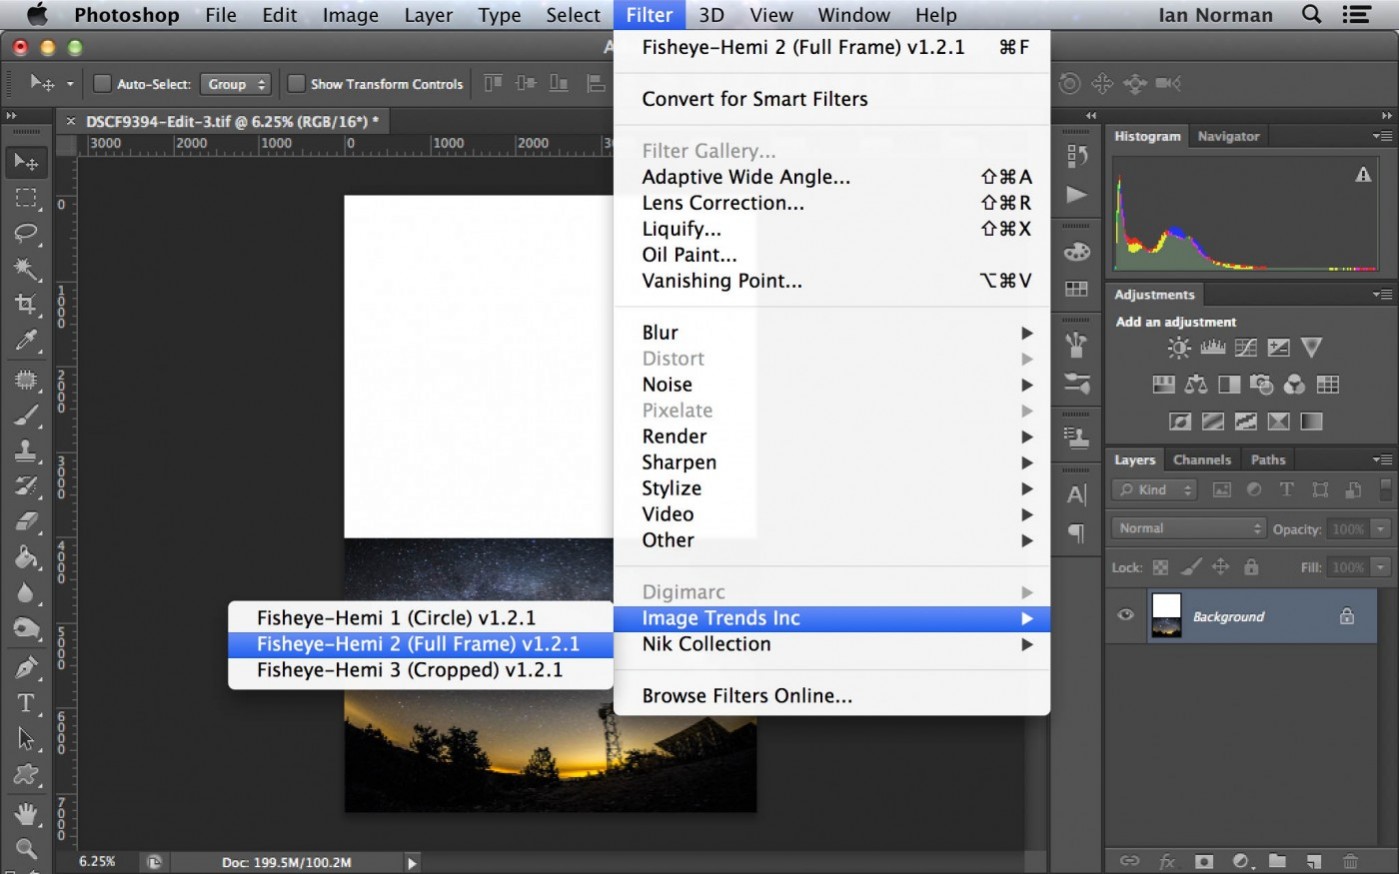
2. Apply Fisheye-Hemi
Now that the canvas has been stretched, Fisheye-Hemi will think that we have a portrait oriented photograph so we can apply the Fisheye-Hemi Filter as usual with Filter>Imadio>Fisheye-Hemi 2
And voila! A straight horizon!
3. Crop, Flatten and Save the Image
All that’s needed is to crop the extra white space out and save.
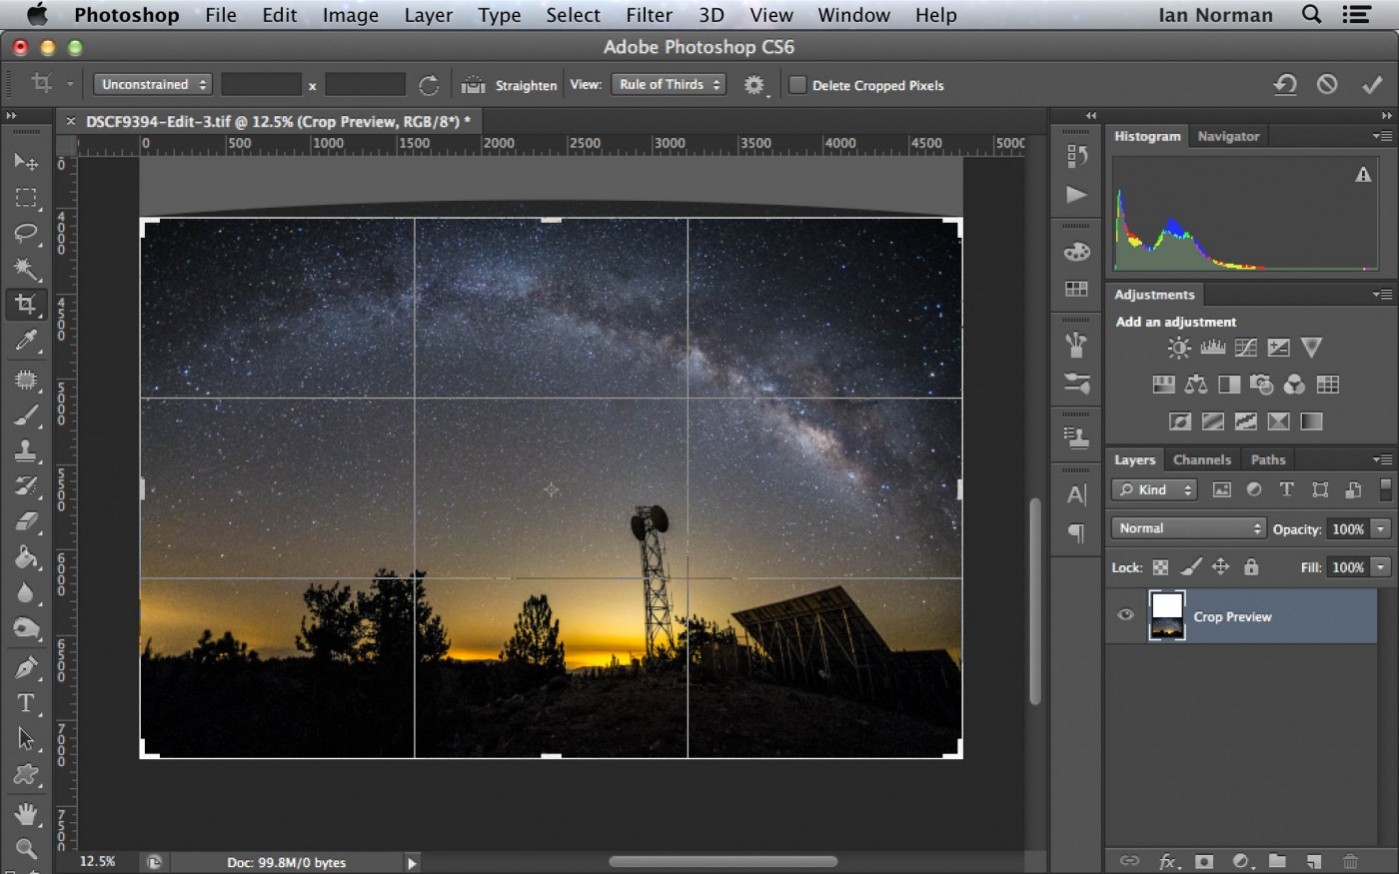
If the filter didn’t properly straighten the horizon, you can tweak the results by going back to step 1 and adjusting the amount of extra canvas to add by increasing or decreasing the percent size for the new canvas height.
You can also adjust the correction by moving the photo up and down on the canvas. The closer to the middle of the canvas, the weaker the correction. The farther from the middle, the stronger the correction. Play around with different combinations to get different results.
4. Run Fisheye-Hemi Again (Optional)
The cool thing about this method is that after we have cropped the image back to a landscape orientation, we can flatten the image and apply Fisheye-Hemi again in order to correct for any remaining distortion in the vertical lines in the photo (like the radio tower). The result is subtle but it gives a photograph that appears rectilinear while retaining a lot of the original image.
[himage]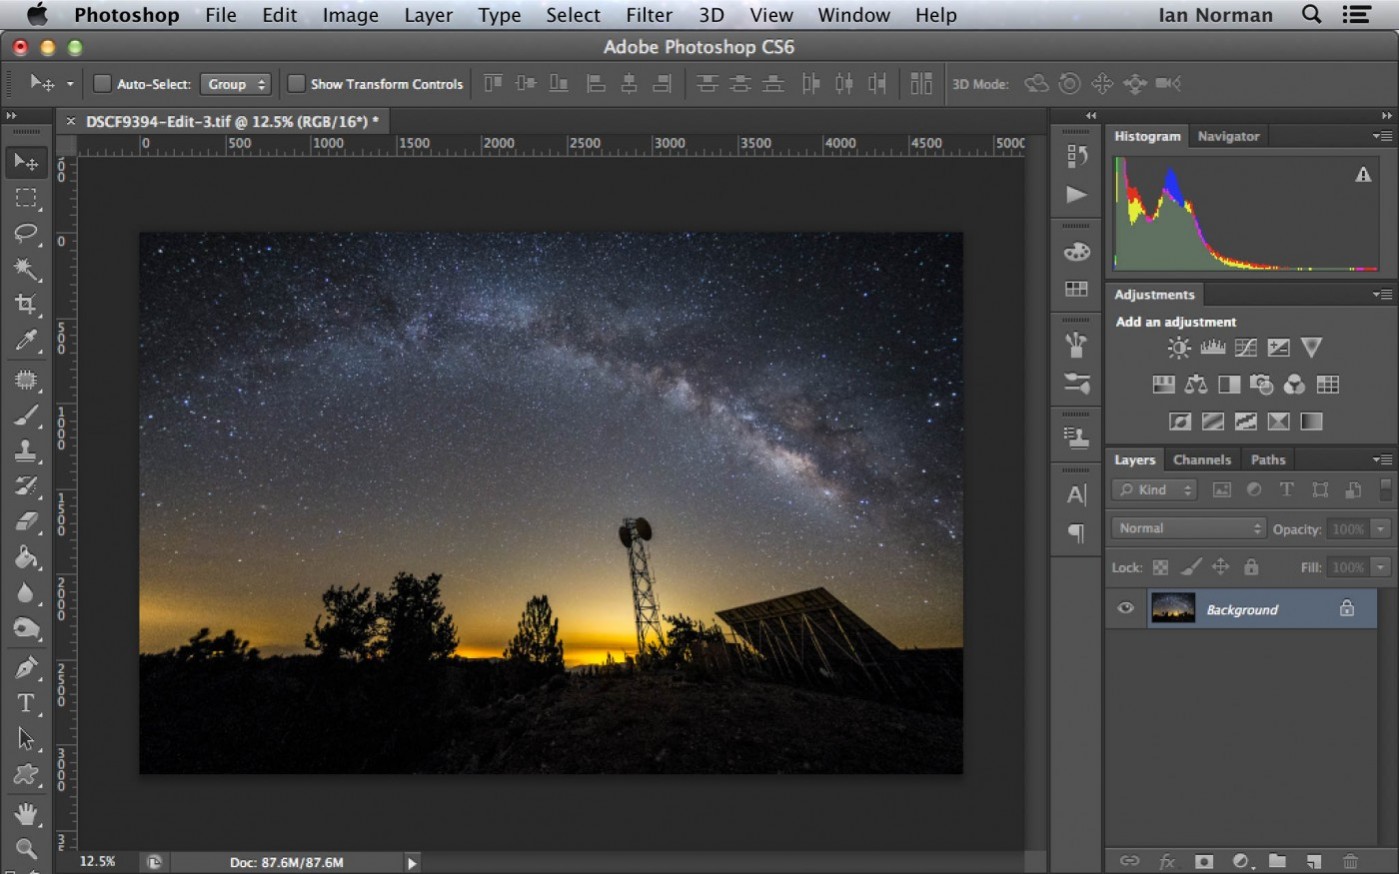
 [/himage]
Running Fisheye-Hemi again straightens out the radio tower. Hover to see the change.
If we compare this method to the traditional rectilinear correction methods, we can see that it has a much wider field of view and retains more of the original resolution on the corners of the photo. Hover over the image to see the difference between the corrected and uncorrected photo for each method.
Fisheye-Hemi Trick Method:[himage]
[/himage]
Using Fish-Hemi to straighten the horizon keeps a lot of the original image intact. Hover for original.
Rectilinear Defishing Method:[himage]
[/himage]
Compared to the Fisheye-Hemi trick, the rectilinear correction loses a lot of the corners of the image. Hover for original.
An Alternative to the Fisheye-Hemi Plugin for Landscapes with a Curved Horizon Line
I highly recommend the Fisheye-Hemi plugin for anyone who uses a fisheye lens. It’s the easiest solution available, it works well with actions and scripting (great for timelapse sequences) and I think it’s worth the price for the full version, especially if you’re serious about using your fisheye lens and particularly if you find my “trick” method useful. The trial version of Fisheye-Hemi will let you try out the software but leaves a watermark on your photos until you upgrade to the paid version. Definitely try it before you buy it.
For those of you who wish there was an alternative to Fisheye-Hemi, you can mimic some of the results that I showed you here with some of the standard tools in Photoshop. Here’s how:
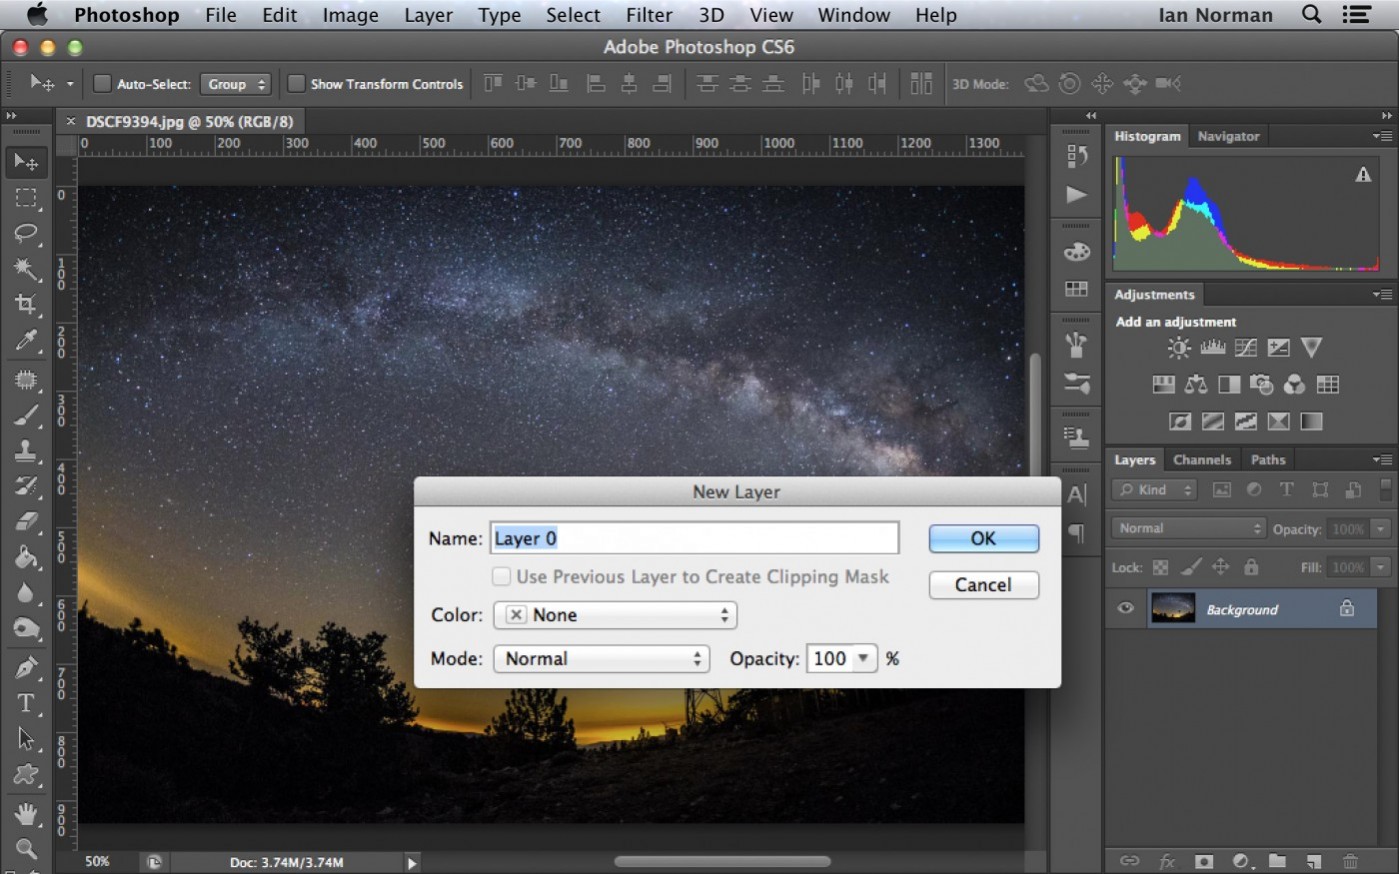
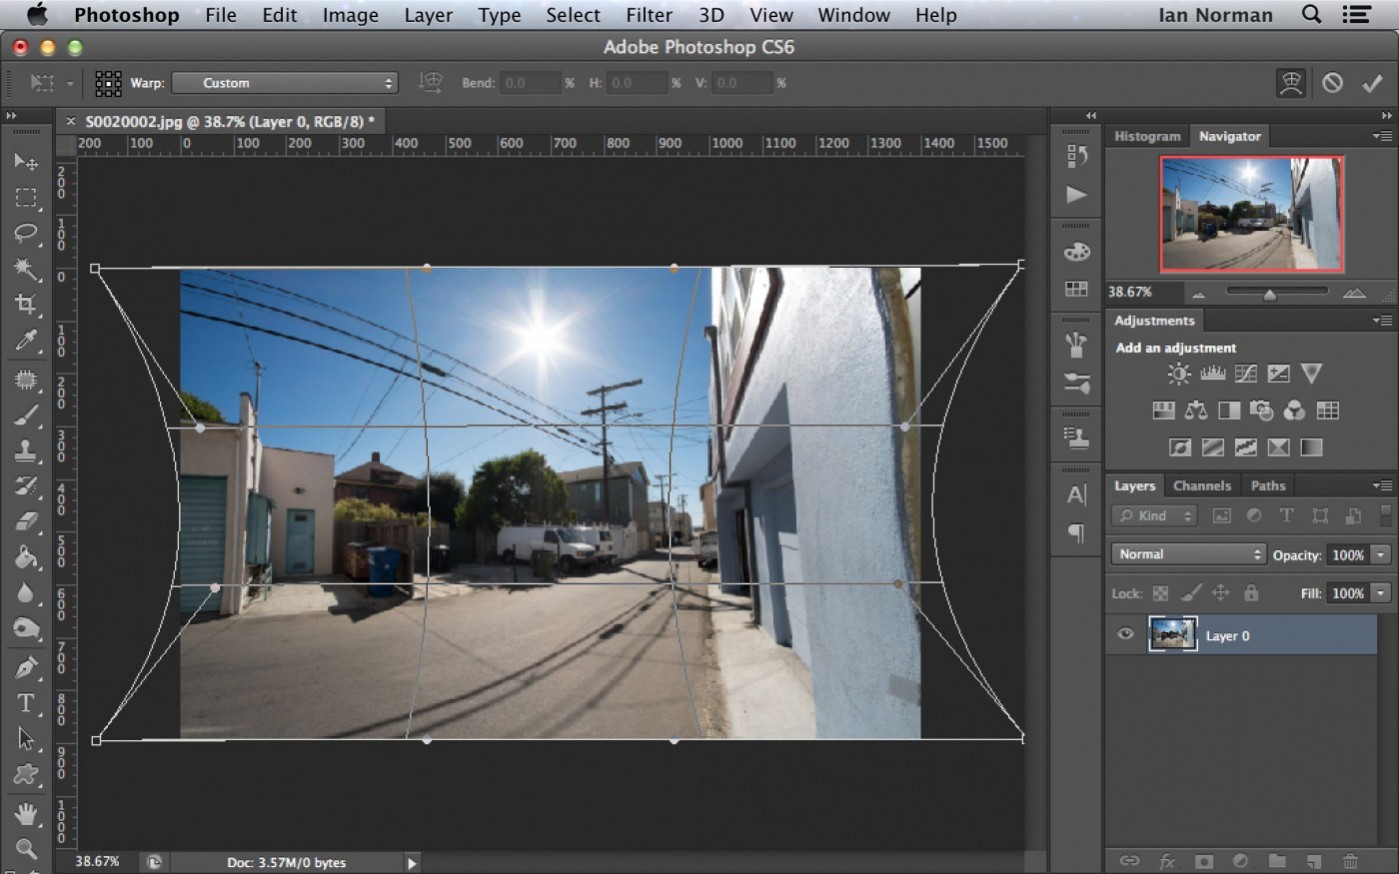
1. Open the photo in Photoshop and convert the Background Layer to a New Layer.
Once your photo is opened in Photoshop, double click the background layer in the layers palette to change it into a new layer. Just click OK when the dialogue pops up. This will unlock the layer and allow us to transform the photo.
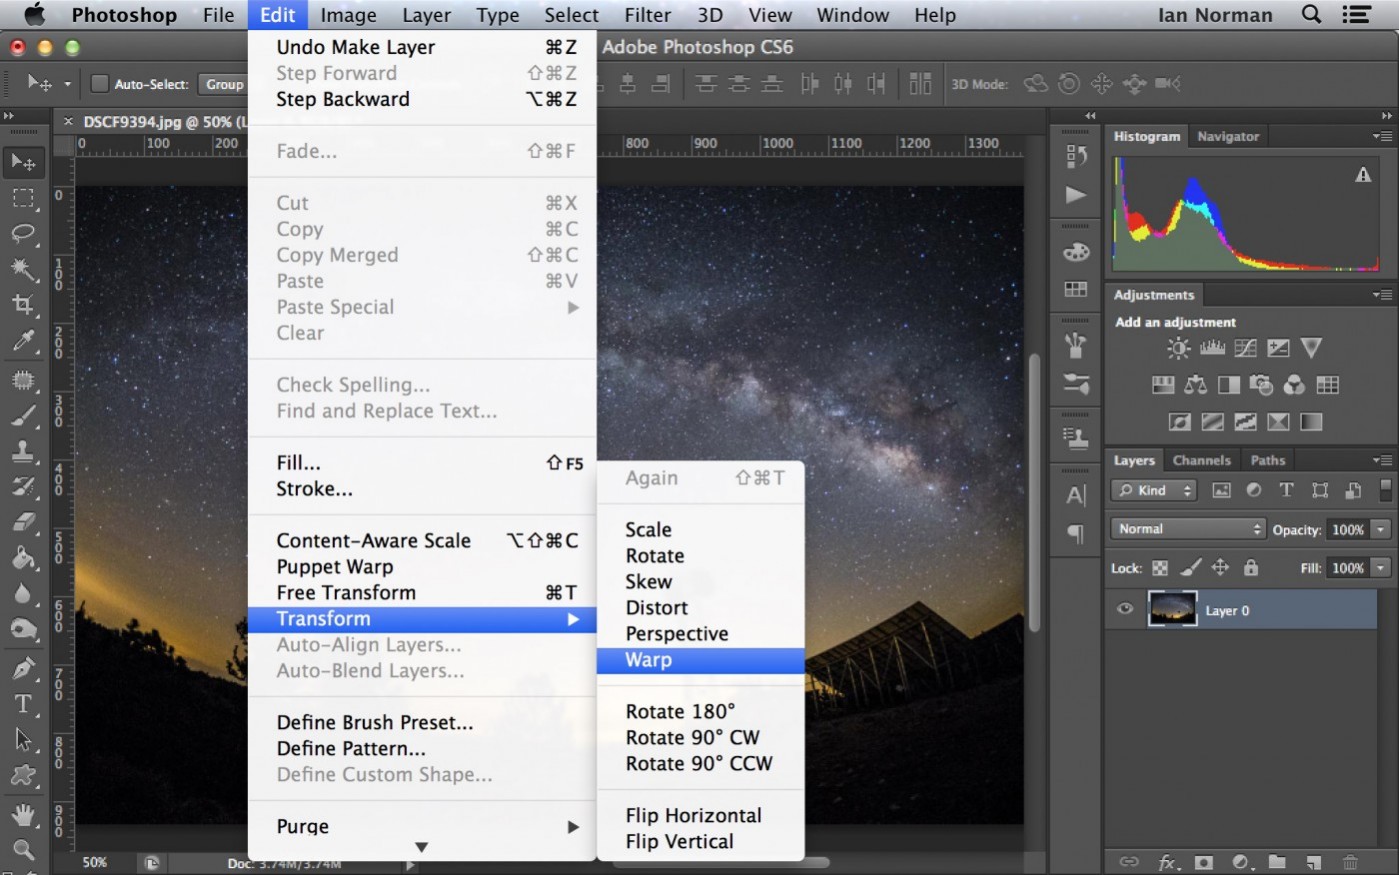
2. Use the Warp tool to correct the horizon line.
Next, enable the Warp transformation by selecting Edit>Transform>Warp.
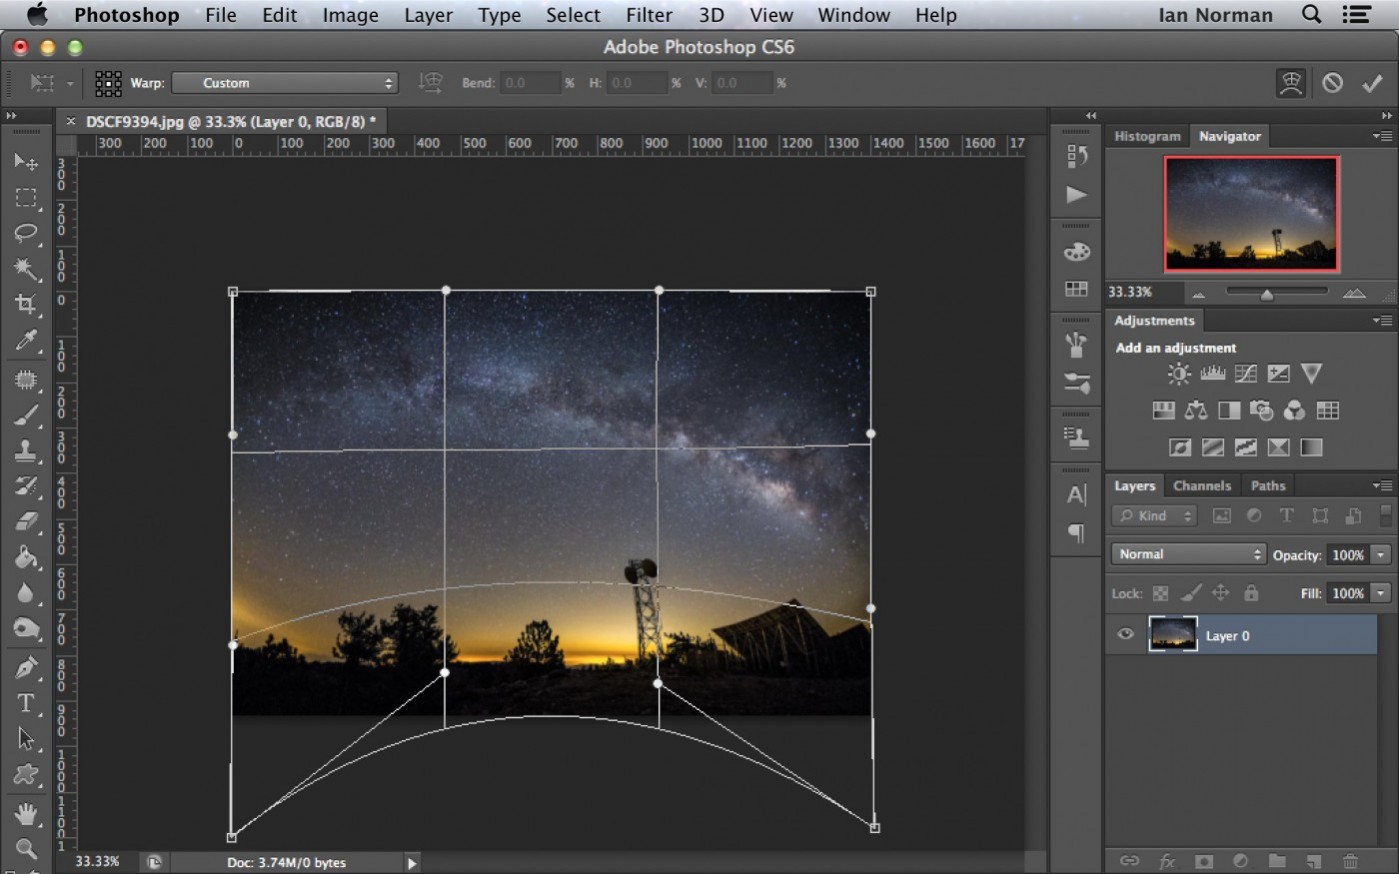
Now you can click-hold and drag the bottom corners and edges of the photo until it the horizon looks roughly straight. Try to keep the curve just tangent to the edge of the canvas. See my example below as a rough guide. Hit enter when you’re satisfied to apply the transformation.
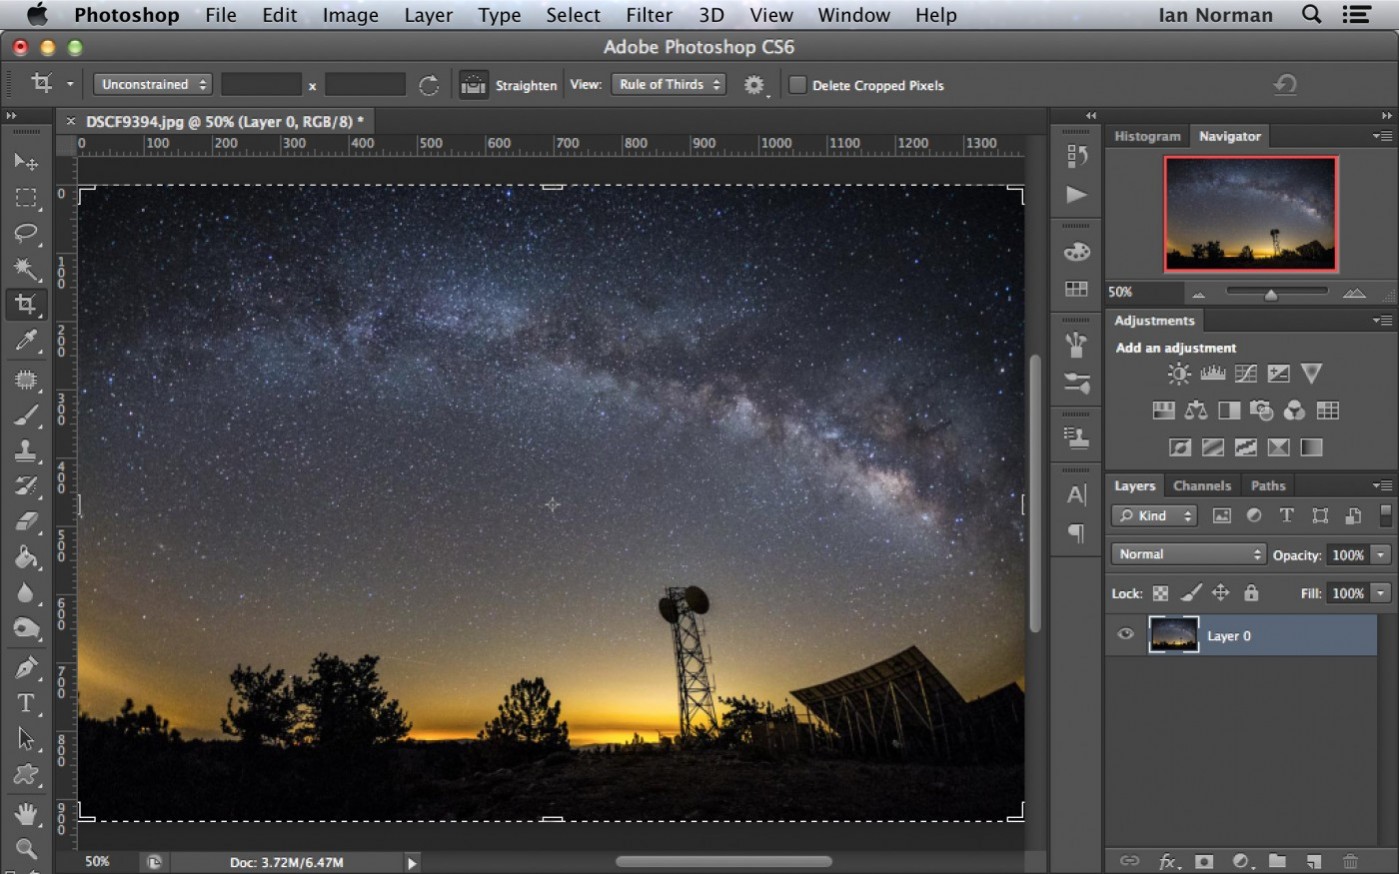
3. Crop, Flatten and Save the image.
Finally, crop the image with the crop tool.
This method might take a little bit of tweaking to get the photo to look normal. It’s a bit easier to get an accurately corrected horizon line with my trick Fisheye-Hemi method than with the warp tool but I think that the warp tool is a nice option for people who don’t already have the plugin.
This method can also be used for mimicking more traditional Fisheye-Hemi corrections for straightening vertical lines too. Rather than warping for the horizon, we just do the same for our vertical lines. With a little patience it’s possible to get the results pretty close to Fisheye-Hemi.
Tools
I get a lot of questions as to whether or not someone should consider a fisheye lens as a tool for astrophotography. If you’re willing to go through an extra step in post processing, I think a fisheye lens is an amazing tool for any camera kit. Along the trend of most of my posts on Lonely Speck, I’m always looking for the best price to performance ratio for my gear so tend to really like the manual focus Rokinon line of lenses and their fisheye lenses are very good and they are available in a wide variety of mounts. I opted for the newest iteration of the Rokinon 8mm f/2.8 Fisheye II for mirrorless cameras.
Here are some of the most widely available fisheye lenses for interchangeable lens cameras listed in my personal order of preference.
- My personal fisheye kit is: Fujifilm X-T1 and Rokinon 8mm f/2.8 II
- APS-C DSLRs: Sigma 10mm/2.8, Rokinon 8mm/3.5, Nikon 10.5mm/2.8, Canon 8-15mm f/4
- Full-Frame DSLRs: Sigma 15mm f/2.8, Nikon 16mm f/2.8, Canon 8-15mm f/4
- APS-C Mirrorless: Rokinon 8mm f/2.8 II or Rokinon 8mm f/2.8
- Micro 4/3 Mirrorless: Rokinon 7.5mm f/3.5
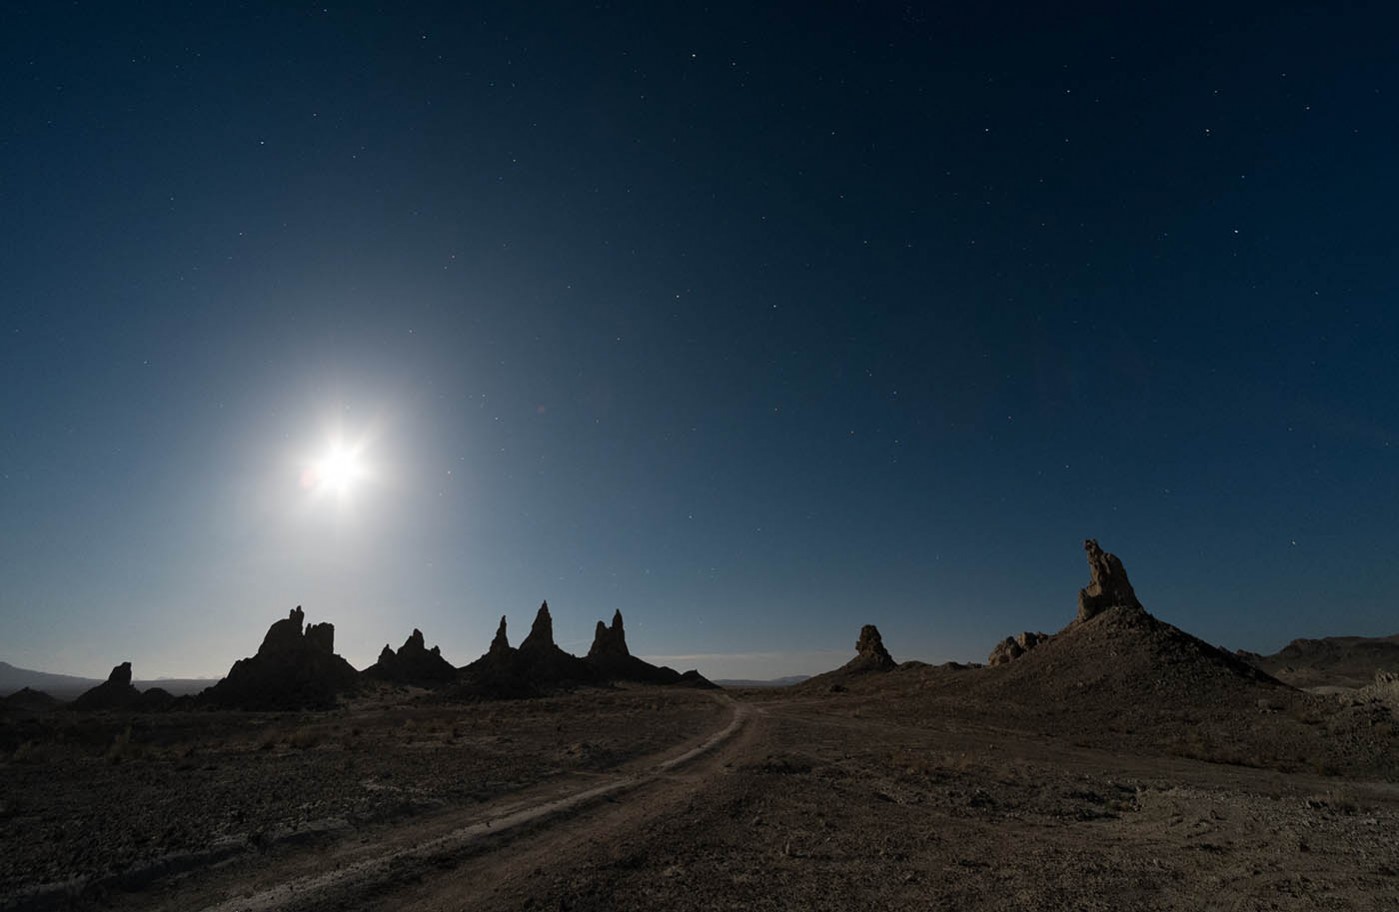
Example Photos
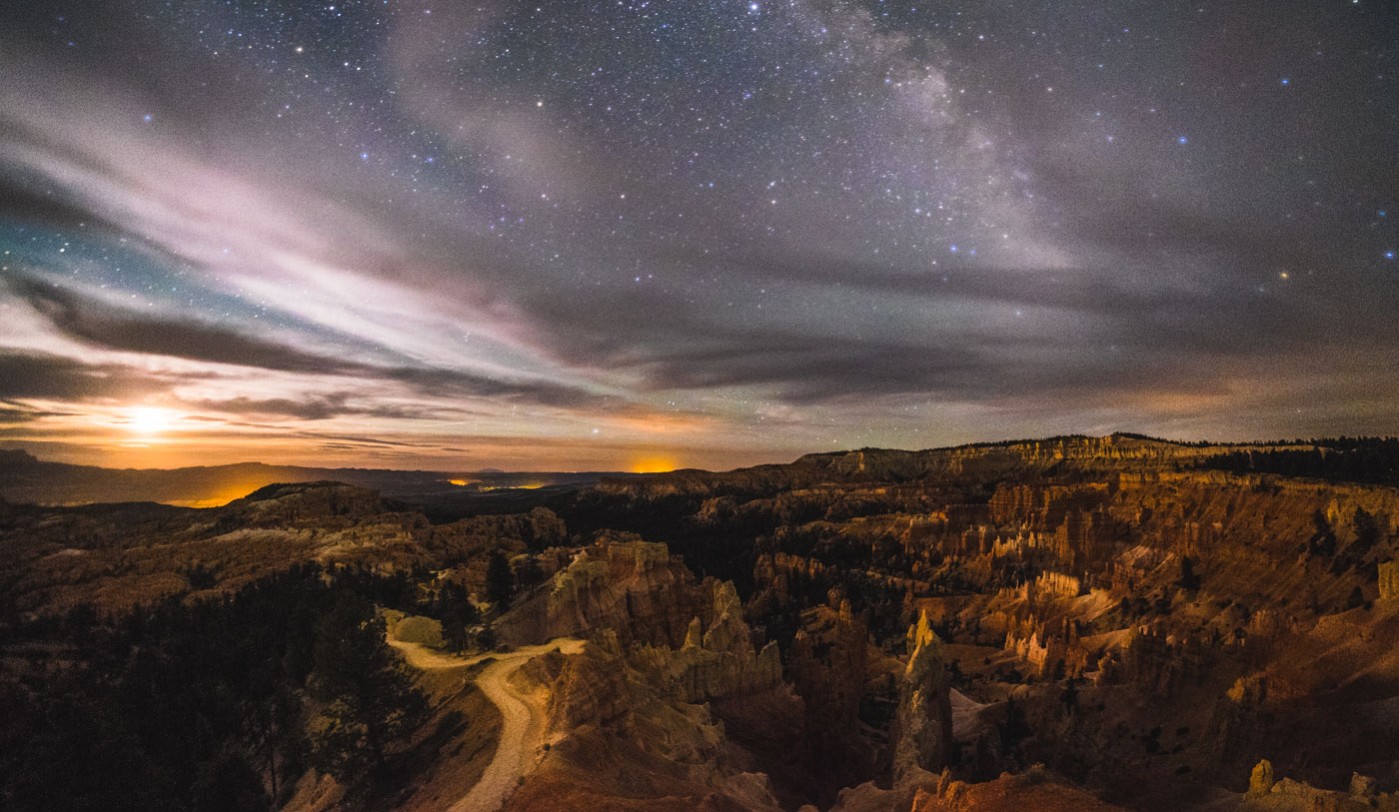
Finally, here are some more example landscapes that were shot with a Rokinon 8mm f/2.8 Fisheye lens on a Fuji X-E1 or with the new Rokinon 8mm f/2.8 Fisheye II on a Fuji X-T1 and then corrected with the methods described above. Discovering this method has made me go back and re-discover many of my past fisheye photographs which I otherwise would have forgotten about because I thought they were too fishy.


Conclusions
If you’re a wide angle junkie like me or just want to breath new life into your dust collecting fisheye lens, using this method for defishing can give excellent results. The really great thing about this method is that the resulting image retains most of the resolution of the original photo and won’t have the stretched corners of a rectilinear photo. It keeps the proportions of the image much more natural looking than a typical rectilinear lens but offers an even larger field of view. The result is a photograph that appears rectilinear but has a field of view that’s larger than any available rectilinear lens.
I hope this article may have helped you see fisheye lenses from a new perspective. I was once in the mindset that I would never use my fisheye lens for serious landscape photographs and I was never really fully satisfied with common ways of defishing. I think that employing some unorthodox methods like the ones in this article can create some amazing results that would otherwise be impossible for a single exposure image. As a result, my fisheye lens has transformed into one of my favorite tools for landscape astrophotography.
Disclosure
We are a participant in the Amazon Services LLC Associates Program, an affiliate advertising program designed to provide a means for us to earn fees by linking to Amazon.com and affiliated sites. We are also a participant in the B&H Affiliate Program which also allows us to earn fees by linking to bhphotovideo.com.
Learn Astrophotography
Astrophotography 101 is completely free for everyone. All of the lessons are available on the Lonely Speck Astrophotography 101 page for you to access at any time. Enter your email and whenever we post a new lesson you’ll receive it in your inbox. We won’t spam you and your email will stay secure. Furthermore, updates will be sent out only periodically, usually less than once per week.
[email-subscribers namefield=”NO” desc=”” group=”Lonely Speck Newsletter”]
Help us help you!
Believe it or not, Lonely Speck is my full-time job. It’s been an amazing experience for us to see a community develop around learning astrophotography and we’re so happy to be a small part of it. I have learned that amazing things happen when you ask for help so remember that we are always here for you. If you have any questions about photography or just want to share a story, contact us! If you find the articles here helpful, consider helping us out with a donation.
[button font_size=”16″ color=”#136e9f” text_color=”#ffffff” url=”https://www.paypal.com/cgi-bin/webscr?cmd=_donations&business=lonelyspeckblog%40gmail.com&item_name=These+tips+help+keep+lonelyspeck.com+running.¤cy_code=USD&source=url” target=”_blank”]Donate[/button]
Thanks so much for being a part of our astrophotography adventure.
-Ian
Hi,
Thanks for this very usefull tutorial about Fisheye Hemi.
aparently Fishey hemi has disappered from the scene. Any chance of sharing a licence key?
thanks in advance.
Kind regards,
Herman