

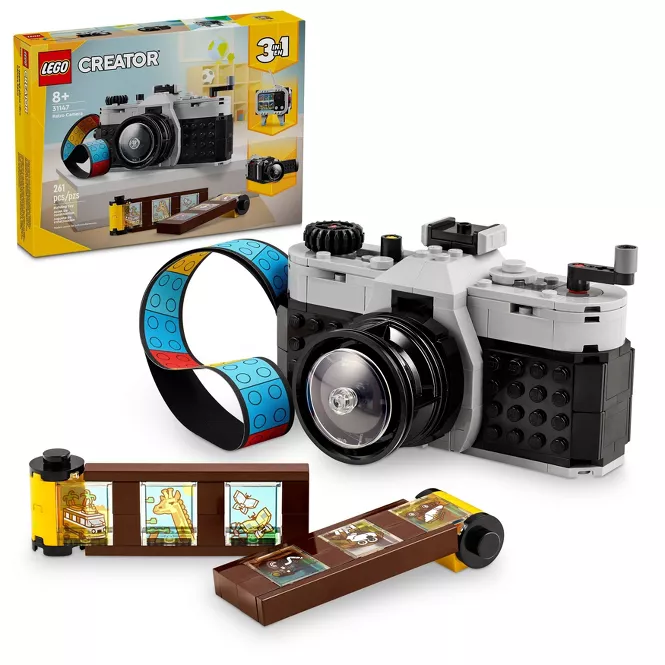
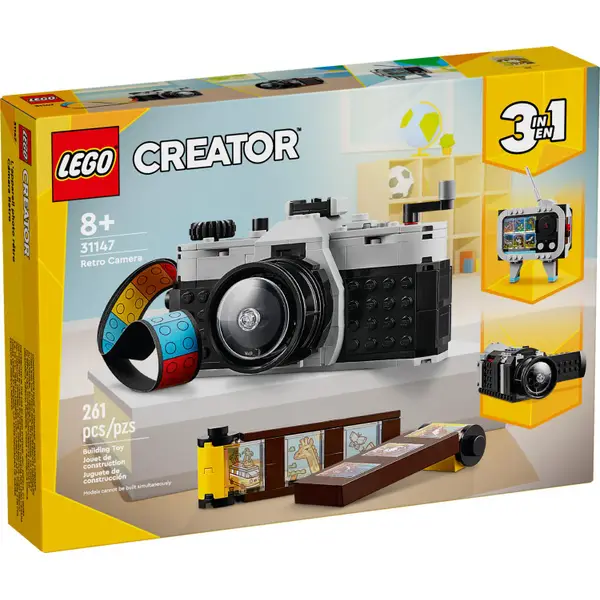
Here’s one that’s just for fun. I received the LEGO Creator 3-in-1 Retro Camera 31147 Kit for Christmas. The default build is a nice little retro SLR. It’s a stylish little toy that harkens back to the 1970s or 80s without really looking like any real SLR model in particular. I found it to be a surprisingly detailed and enjoyable set to build, but lacking a bit of character. Rather than sticking with the default build, I decided to see if I could make it look more like a classic Leica M6 rangefinder.
My First Try at Making a LEGO Rangefinder Camera
My first iteration of this build was just based off of the idea that I could first build the original SLR build of the LEGO Creator 3-in-1 Retro Camera, but then I could modify it by removing the pentaprism viewfinder to make it look like a rangefinder style top plate instead.
After some re-configuring, I figured out a way to move the viewfinder. I also had to adjust the internal spacing to reduce the size of the SLR mirrorbox area to reflect the more compact mirrorless rangefinder design of a typical Leica M camera. This change brings the lens closer to the camera body. There’s one caveat to this change as it reduces the internal spacing and prevents the stock build of the LEGO film roll with slide photos from fitting. The bare roll as shown below still fits into the back of the camera.
This first version adds a frameline selector “lever” to the front of the camera under the viewfinder and I even added a little 1×1 red LEGO plate reminiscent of the Leica Red Dot logo.
Overall, I was fairly happy with this build but I still felt like it was lacking a bit of authenticity when compared to the visual appeal of a real Leica film camera.
One of the things I didn’t love was how much the hotshoe and shutter dial stuck up. On a real Leica M6, the hotshoe is flush with the top plate. This version also lacks the typical Leica viewfinder illumination window to the left of the viewfinder, above the lens… it’s closer in appearance to digital Leica M type 240 in appearance. I was also still bothered by little details like the size of the rangefinder window and the fact that the windows were not fully “framed” in by the silver top plate.

The rear of the top plate is also basically like the default SLR version, but with the viewfinder window added. It’s not the best LEGO Leica M rangefinder, but people over at /r/Leica liked it enough to ask me how I build it and that got me to work on this post.
Since someone asked, and since I liked to tinker with this new toy, I decided to learn BrickLink Studio to build a 3D CAD model of the build to try to share how to build it with all of you.

At first, I thought that I wouldn’t really be able to improve this build much as I was fairly limited on parts, but as I built out the CAD version in BrickLink Studio, I realized how many parts I could move around to achieve the goal of making it look like a real Leica. My first build was originally shared here, but I found a number of errors in my model, so I’ve decided to just focus on sharing the newer, more accurate, M6 build below.
So, with a new found skill in LEGO CAD, and using photos of a Leica M6 as my design guide, I decided to take apart my new toy yet again, move a whole lot of pieces around and try to make a new and improved design. The result is much closer in layout and design representation to a real film Leica M6 rangefinder. See below!
The Much Improved Version (LEGO Leica M6 Rangefinder Camera)
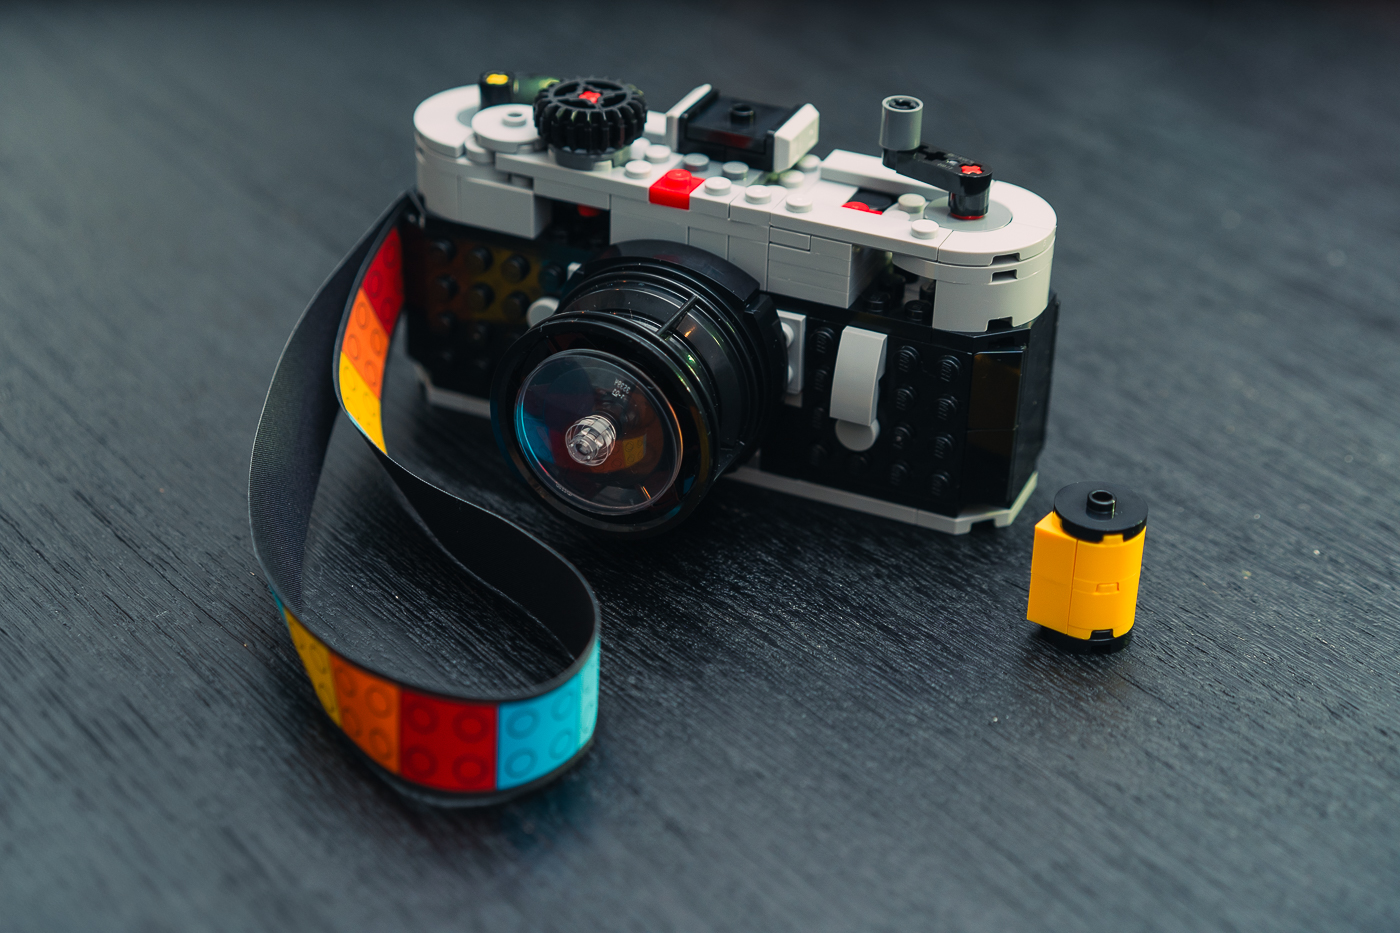
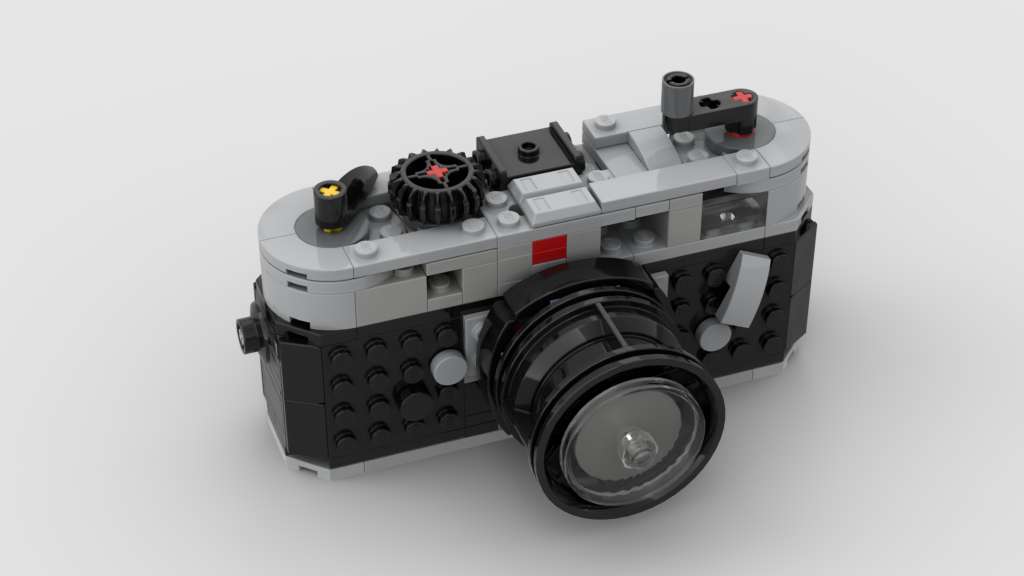
Here it is, the final (so far) version of my LEGO Leica M6 Rangefinder Camera:

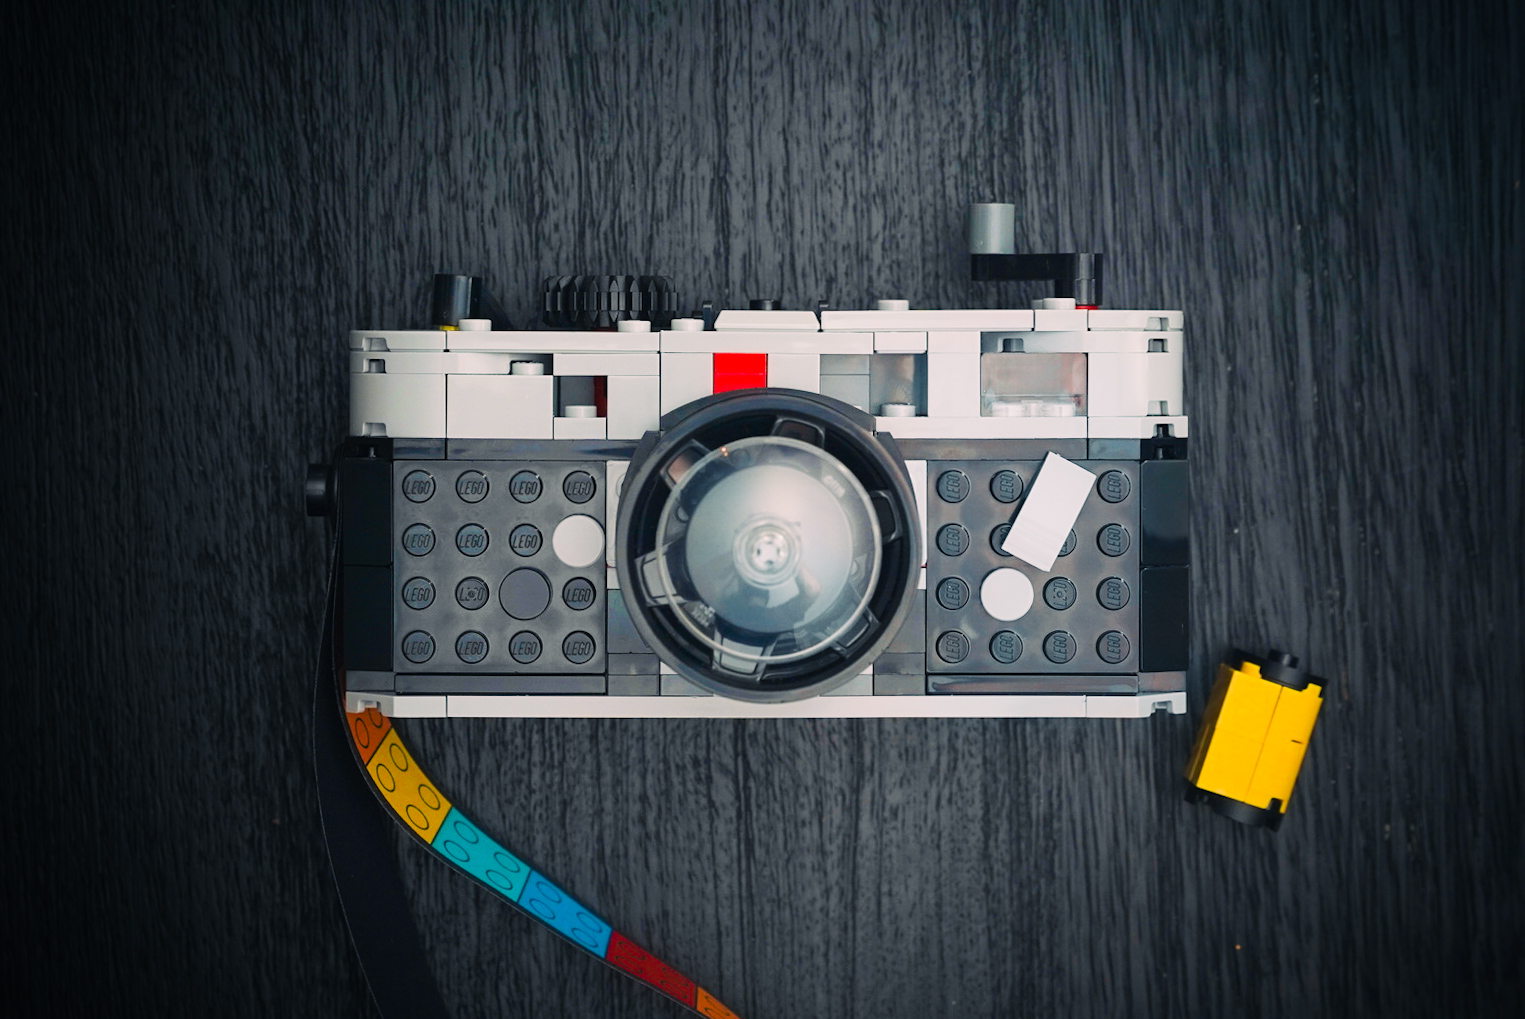
This second version is much more of what I was trying to achieve with my first build. I didn’t think it would be possible with just the stock parts in the LEGO Creator Retro Camera Kit, but it was! This version is 1/3 of a brick (1 plate) taller, and much more closely represents the visual design, shape and layout of a real Leica M6. Best of all, I didn’t need any extra bricks. Everything I needed was still available in the stock parts that came with the LEGO Creator 3-in-1 Retro Camera.
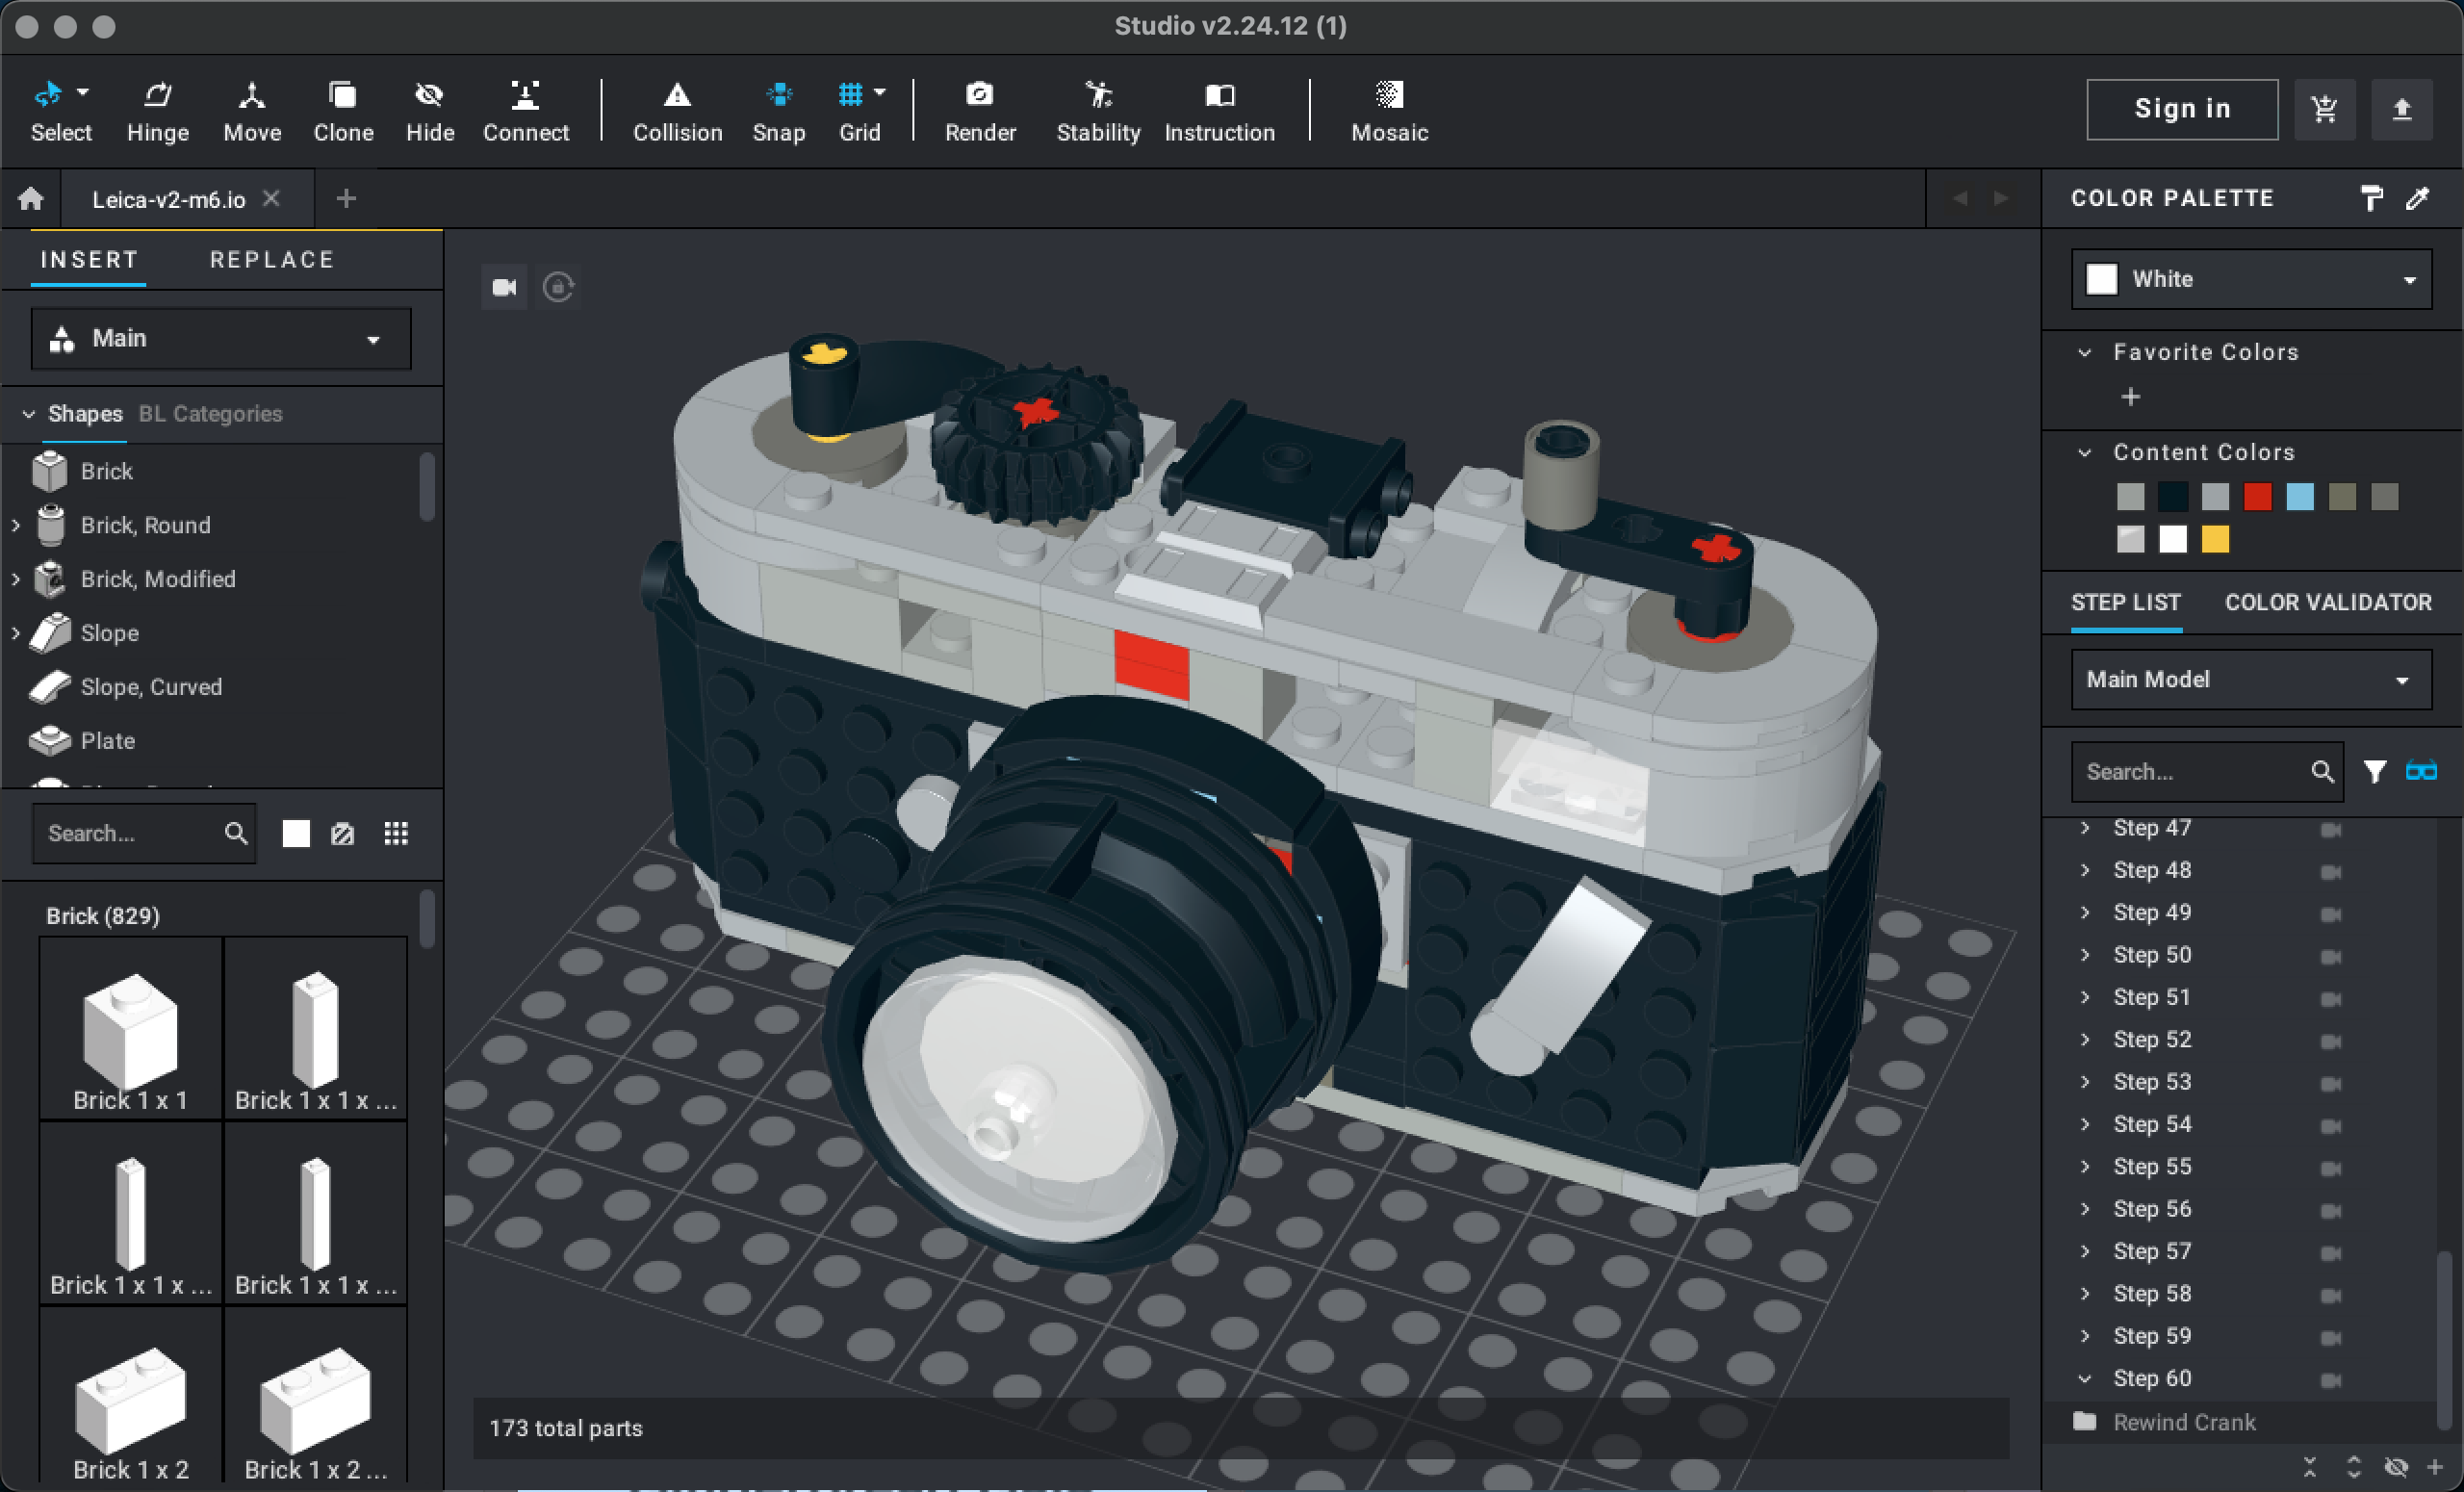
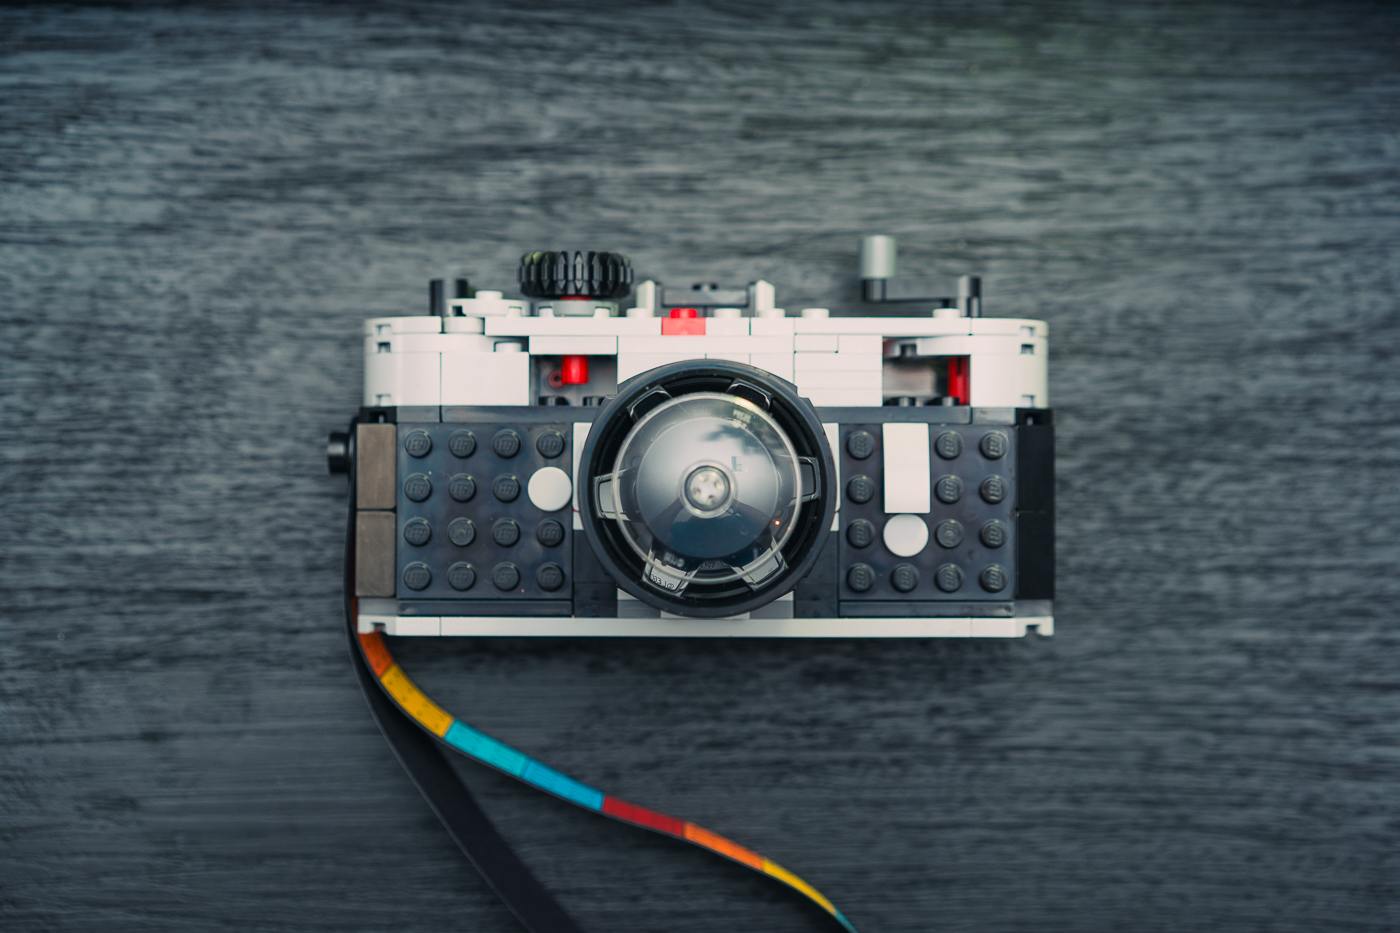
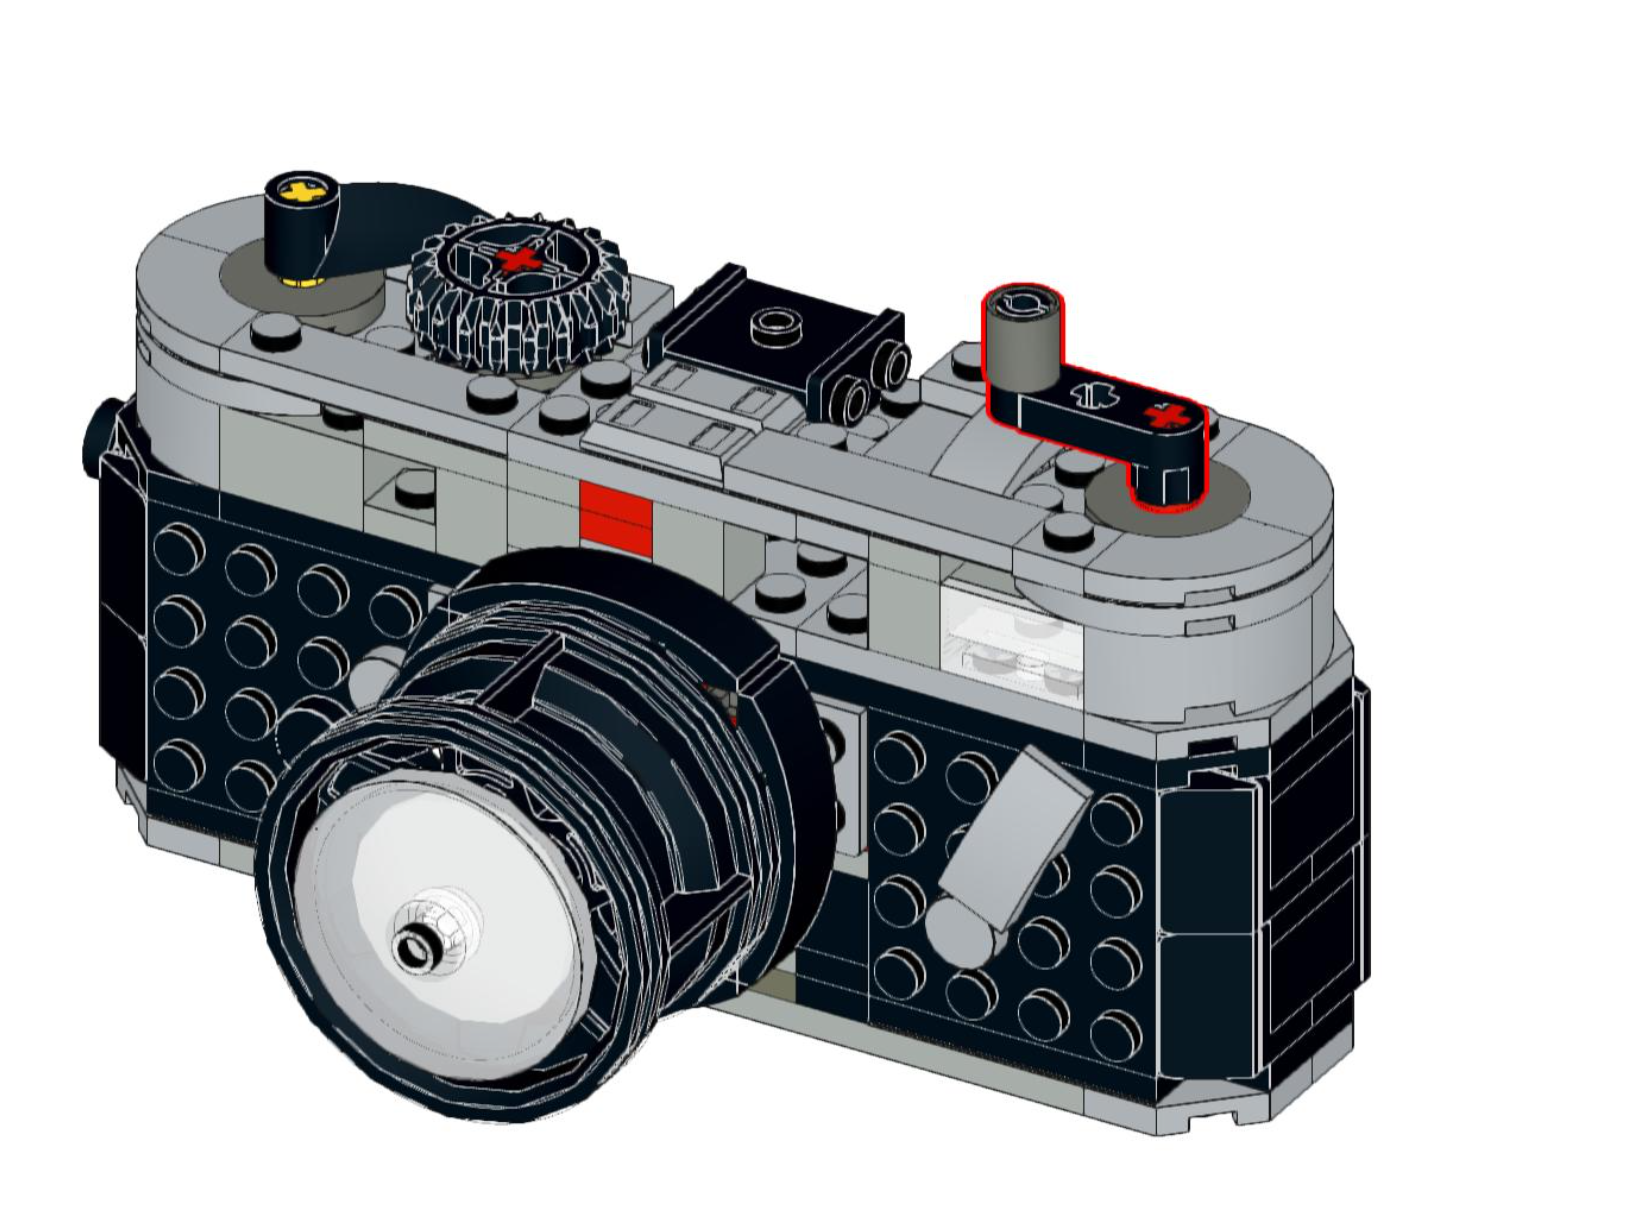
This version rearranges the frameline lever at an angle, as it sits on a real M6. I added an extra opening for the viewfinder illumination window, and I raised the top plate height by the thickness of one lego plate so that the silver top plate better frames the viewfinder window. There’s now more room for a better Leica Red Dot above the lens mount. The rangefinder window is now smaller, just like the real one, and it’s in a more accurate position.
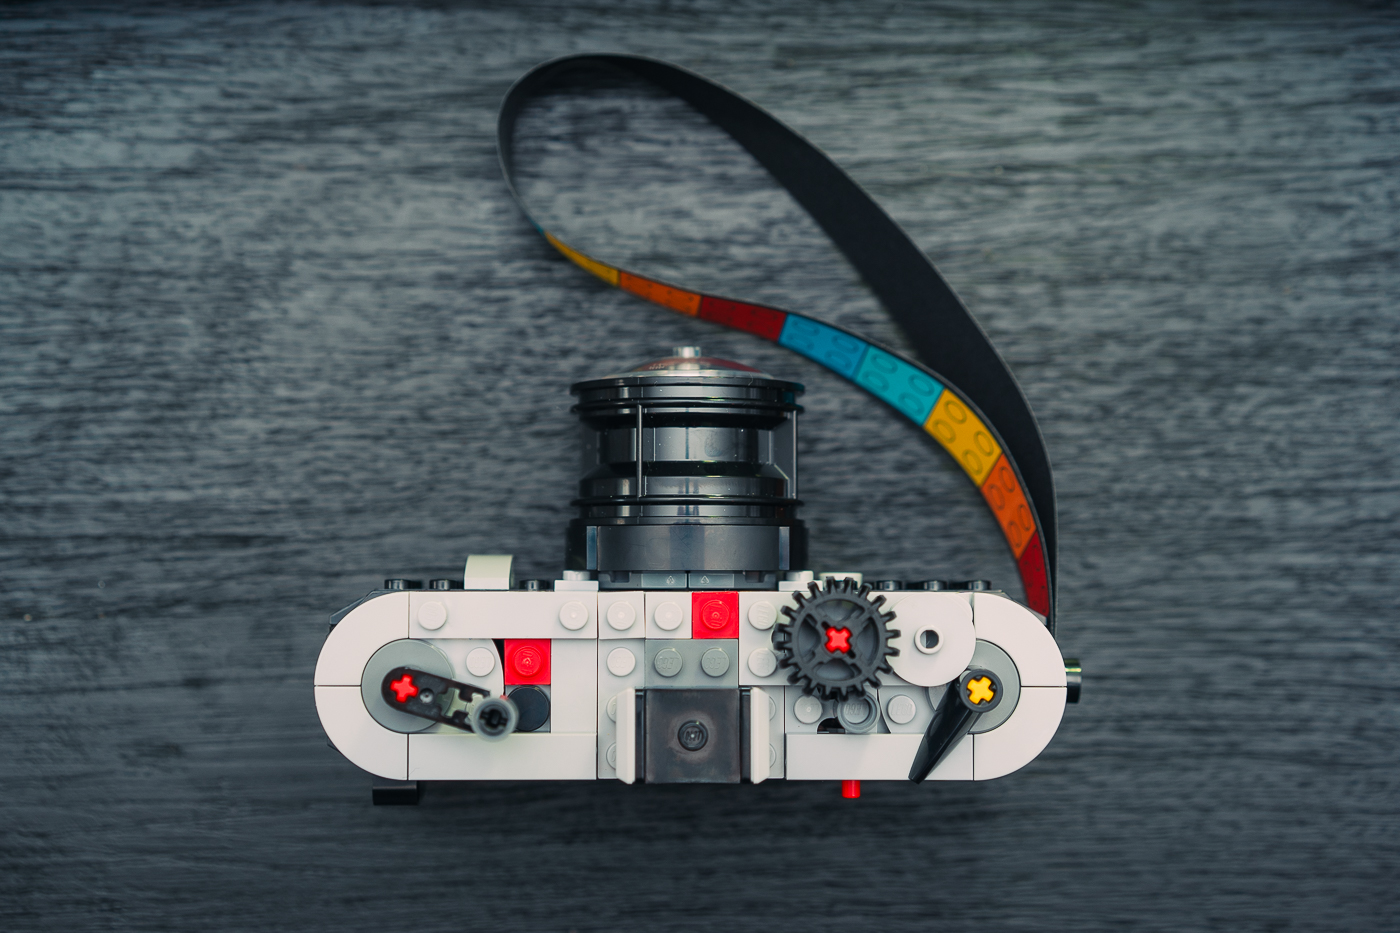
The small height change to the top plate also gives the model the classic Leica “step” on the top plate and allowed me to recess the hotshoe to be the same height as the left-hand part of the top plate, just like a Leica M6.
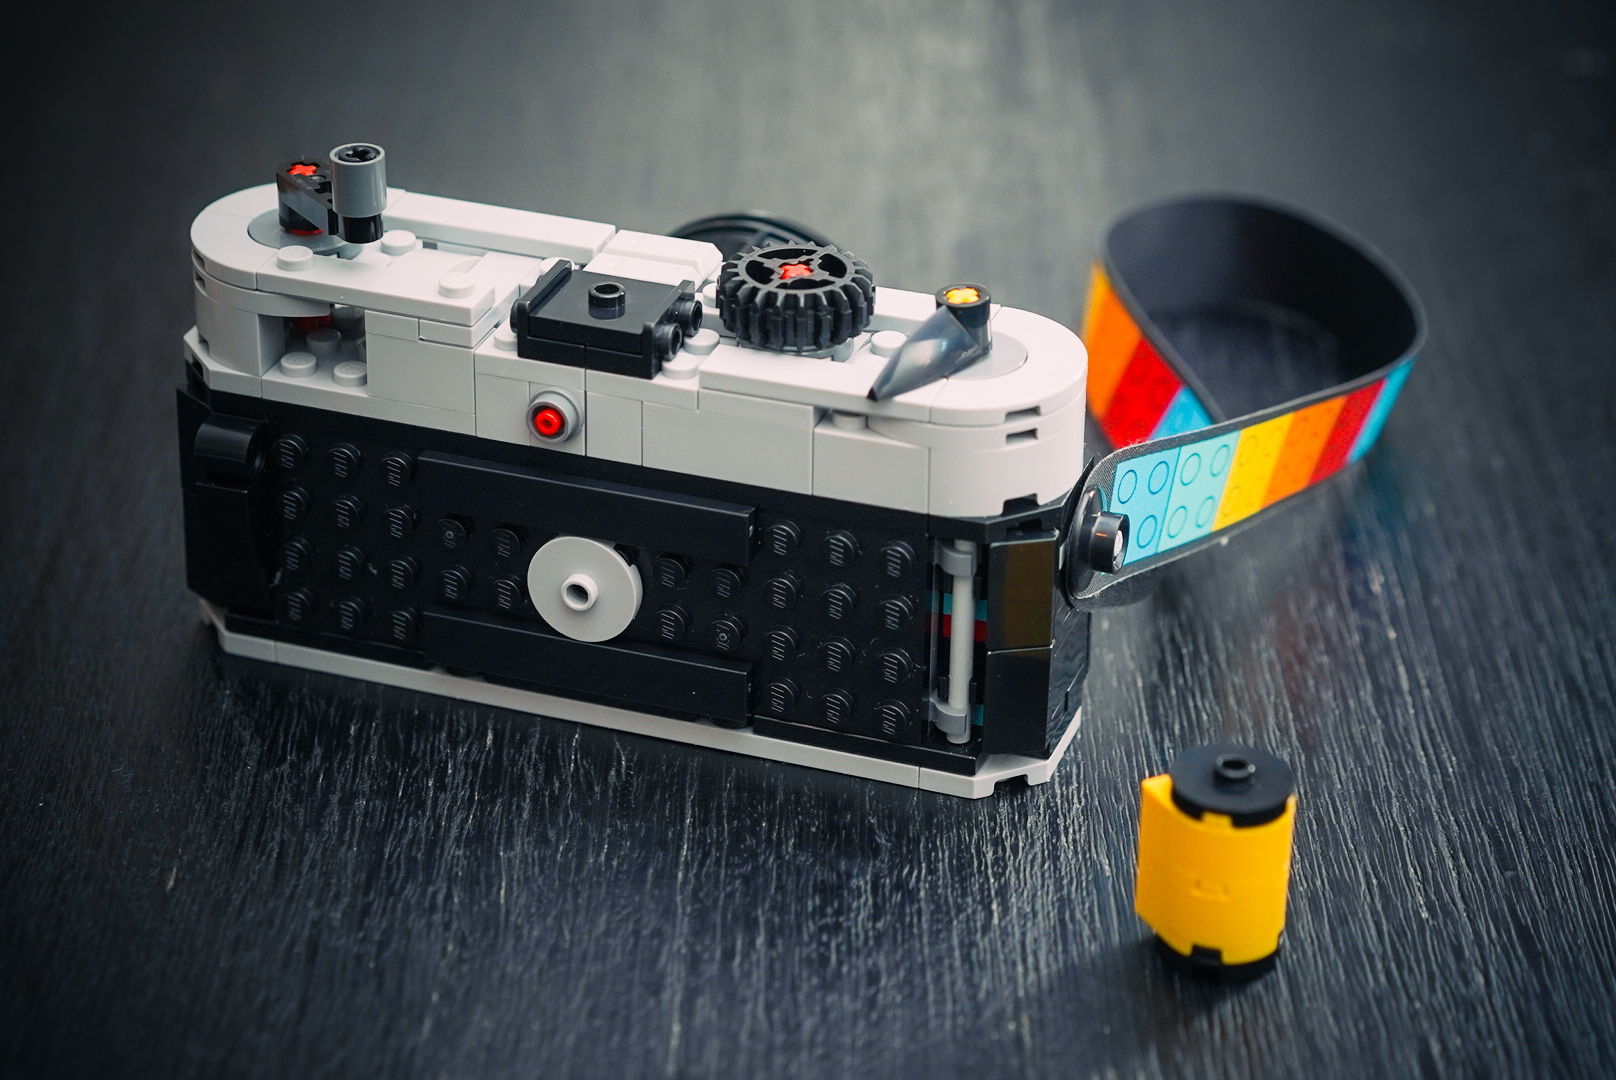
I rearranged the rear of the top plate to bring the flash sync socket into a more centered position under the hotshoe like on the M6, and I added a round LEGO plate and two black tiles to the film door to represent the typical position of the film door and ISO dial on the M6. The whole back of the camera still opens like a more typical SLR, rather than Leica’s bottom plate removal with the flip film door.
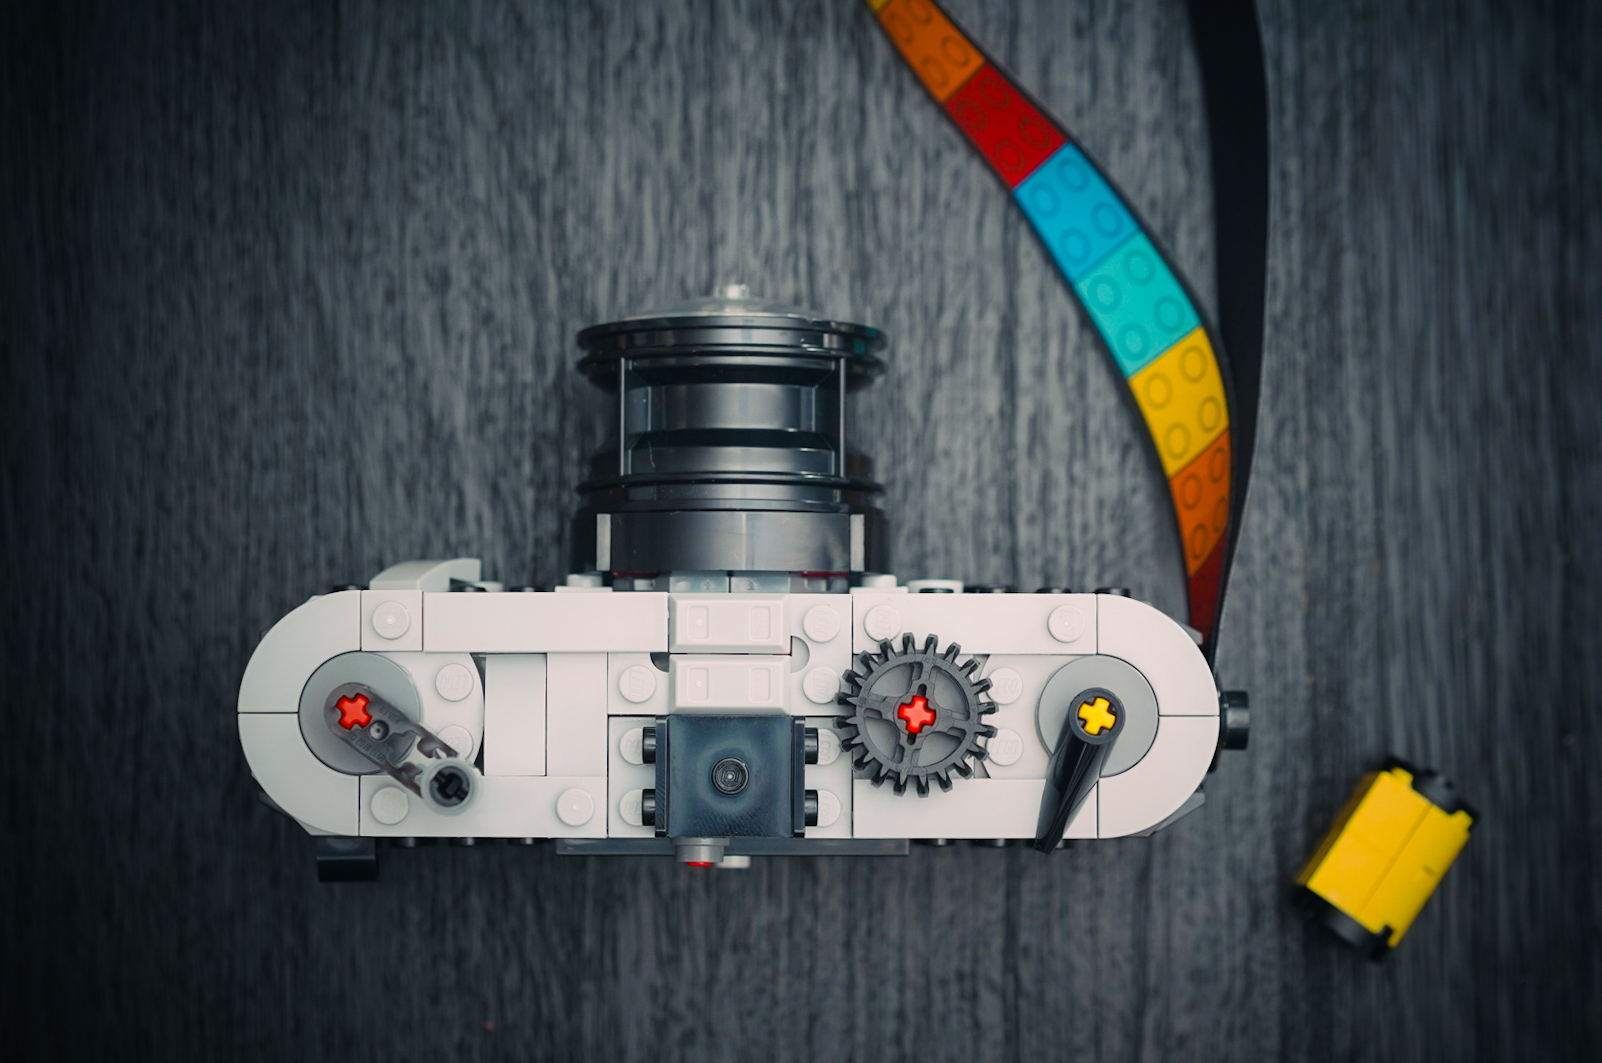
I left the film rewind lever as-is because I couldn’t devise a way to angle like on a real Leica M6. It doesn’t fold anyway and, ultimately, this thing is just a fun toy to display so I don’t mind the cartoony rewind lever.
Ideally, this build could use some additional smooth gray LEGO tiles to clean up the top plate. It could also use some transparent clear 1×1 plates for the rangefinder window and an extra two transparent clear 1x2x1 panels for the rear of the viewfinder and for the viewfinder illumination window. But what you see here can be built without any of these extra parts.
With this new M6 build, it’s still not possible to use the “filmstrip” on the LEGO film canister to fit inside of the film door of the camera because of how I moved the lens mounting deeper into the body to make it look more rangefinder-like. It might be possible to adjust this to make the film strips fit inside the camera body, but I have not yet figured out the best way to do it. Until version three I guess?
Ultimately, what matters more is that this build was done completely with the stock pieces available in the LEGO Creator 3-in-1 Retro Camera kit and nothing more and I think that’s enough of an achievement. I like the look of this build much better than the default generic SLR build and I think it’s a super fun item to have on my shelf next to some real cameras. Maybe someday I can put it next to a real M6.
Instructions
To download the step-by-step PDF instructions for this new and improved Leica M6 version, click the pic above or the link below.
Download the LEGO Leica M6 Rangefinder Camera Build Instructions v2.2 (PDF) here.
Did you end up getting the LEGO Creator 3-in-1 Retro Camera? If you did, let me know what you think of this custom build. I loved the idea of making the kit look more like a real world camera and I’m happy that I was able to achieve that. If you don’t have this kit, but would like to try my latest Leica M6 build, you can buy the kit I used at the links below. Product links in this article are affiliate links that allow this site to earn fees.
Get the LEGO Kit
All of the parts needed to build either version of the Leica M are available in the LEGO Creator 3-in-1 Retro Camera 31147 kit. You can buy it at the links below.
Other Gear Used to Make this Post
Software
Legal Disclosure
Learn Astrophotography
[email-subscribers namefield=”NO” desc=”” group=”Lonely Speck Newsletter”]