

In this review, we take a look at Datacolor’s SpyderX Pro Colorimeter display calibration tool.
Display calibration is one of those things that’s too often forgotten or ignored in the realm of digital photography. With the plethora of devices that we have access to every day, if your primary photo editing display is uncalibrated, it’s likely that your personal photography collection looks slightly different when viewed on your display than when viewed on your phone and different from what your friend would see when you share your photos with them. The first step in trying to mitigate dramatic differences in photo colors across devices is calibration with a tool like the SpyderX Pro.
Why Calibrate?
Let me start by saying that calibration is not always necessary. If you never share your photos, never print, and don’t use your photography in a professional setting, you don’t need to calibrate your display. But if you do photography professionally or work on any other form of professional visual media, or if you prioritize the sharing of your work digitally or in print, calibrating your display may be essential. At the very least, display calibration is the best assurance that your work will be displayed as close to your artistic intention as possible.
Device displays are built around a few common standard color gamuts that define the range of colors that a display should be capable of showing. Most manufacturers at least build their display hardware to try to hit the targets established by those standard color gamuts. Sometimes display manufacturers will even advertise how well a display can show colors from one of these standard color gamuts such as DCI-P3, Adobe RBG or sRGB. The 2020 M1 Macbook Pro, for example, is advertised to be able to display 100% of the DCI-P3 color gamut. You can read more about color gamuts here.
Regardless of what a display is supposedly capable of displaying, or what gamut it was built to display, there is still the issue of calibration. Many manufacturers don’t perform individual calibration on their displays before selling them to customers and so certain variations in manufacturing or hardware choices can create variations in how one display shows any given color relative to another. Even if a display was calibrated to a standard at the factory, displays can actually “wear in” over time. As a display ages, its colors can start to shift out of its original specification. This problem is becoming less common with improvements in display hardware technology.
If you edit a photo on an uncalibrated display, any deviations from those standards will affect your editing slightly. Then, when you share that photo edit to another device, deviations in that device will further affect how the colors appear.
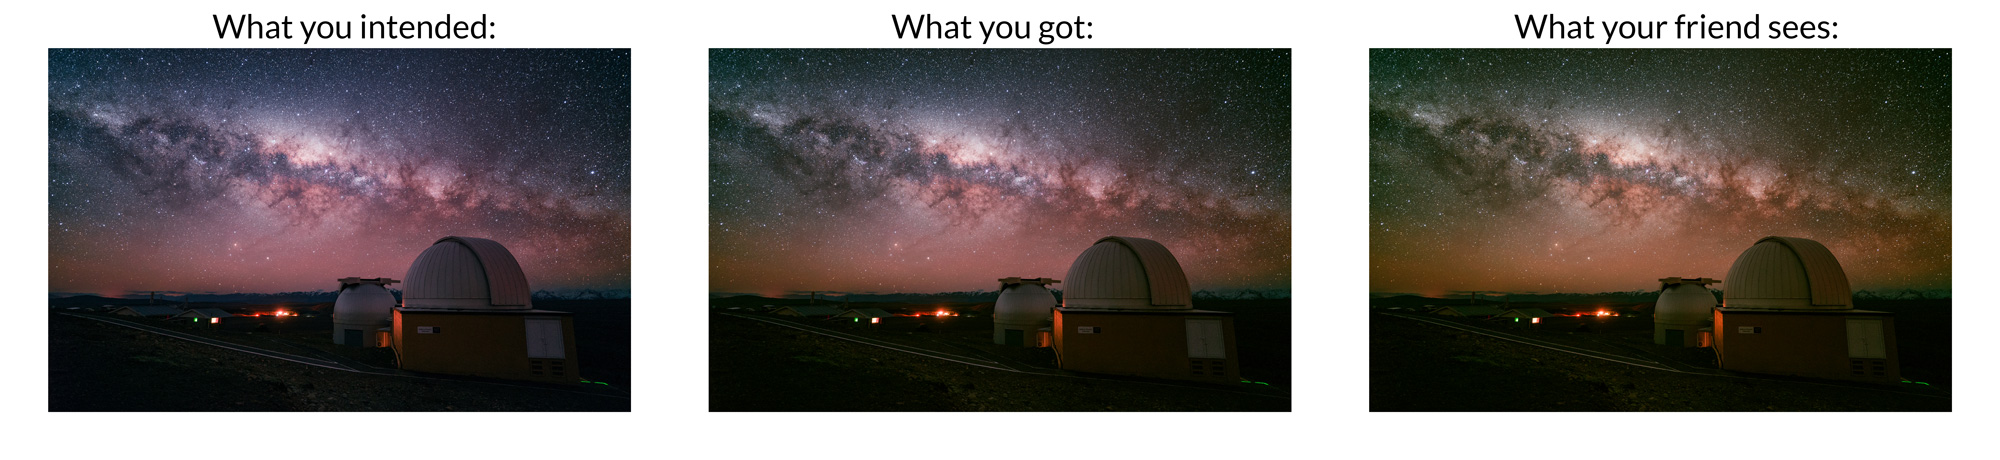
Here’s a simplified example of how display calibration affects images across devices: Imagine that your uncalibrated display is too bluish relative to what a calibrated display should look like. You don’t know this because you don’t have a calibrated display with which to compare it. You edit your photos according to what you see and as a result your photo is unknowingly edited slightly more yellow to compensate for the bluish tint. Now imagine that you share this photo with a friend whose uncalibrated display is slightly more yellow than standard. The photo that they see now has two contributing yellow shifts in color that are affecting your original intention: one from your edit on an uncalibrated monitor and one from theirs. By editing and viewing on two uncalibrated devices, you double count the effects of both inaccuracies, potentially accentuating any differences from what your original editing intention was.
If we instead do our editing on a calibrated display, we can at least mitigate one half of the contribution to inaccuracies, making it much more likely that a photo at least looks closer to your original intention across different devices. If you’ve never calibrated your computer display, it’s possible you are editing your photos on a display that’s slightly out of spec and you’re not giving your photo edits as good of a chance to look like your original intention across multiple displays.
Time to Calibrate
One of the biggest reasons for me to calibrate my display was because I work closely with my wife, Diana, on delivering photo content for Lonely Speck and our other blogs. I noticed that my laptop display was quite different looking than Diana’s laptop display when viewing the same photo. Most notably, photos on her display were always warmer looking and mine much bluer looking.
Some disclosure: a marketing representative of Datacolor reached out to me about trying their SpyderX monitor calibration tool. I agreed and Datacolor sent me a SpyderX Pro for free. While I did receive the SpyderX Pro device for free, I’m under no obligation to promote it and this review contains only my real personal and unfiltered thoughts and opinions about the SpyderX Pro.
The Hardware
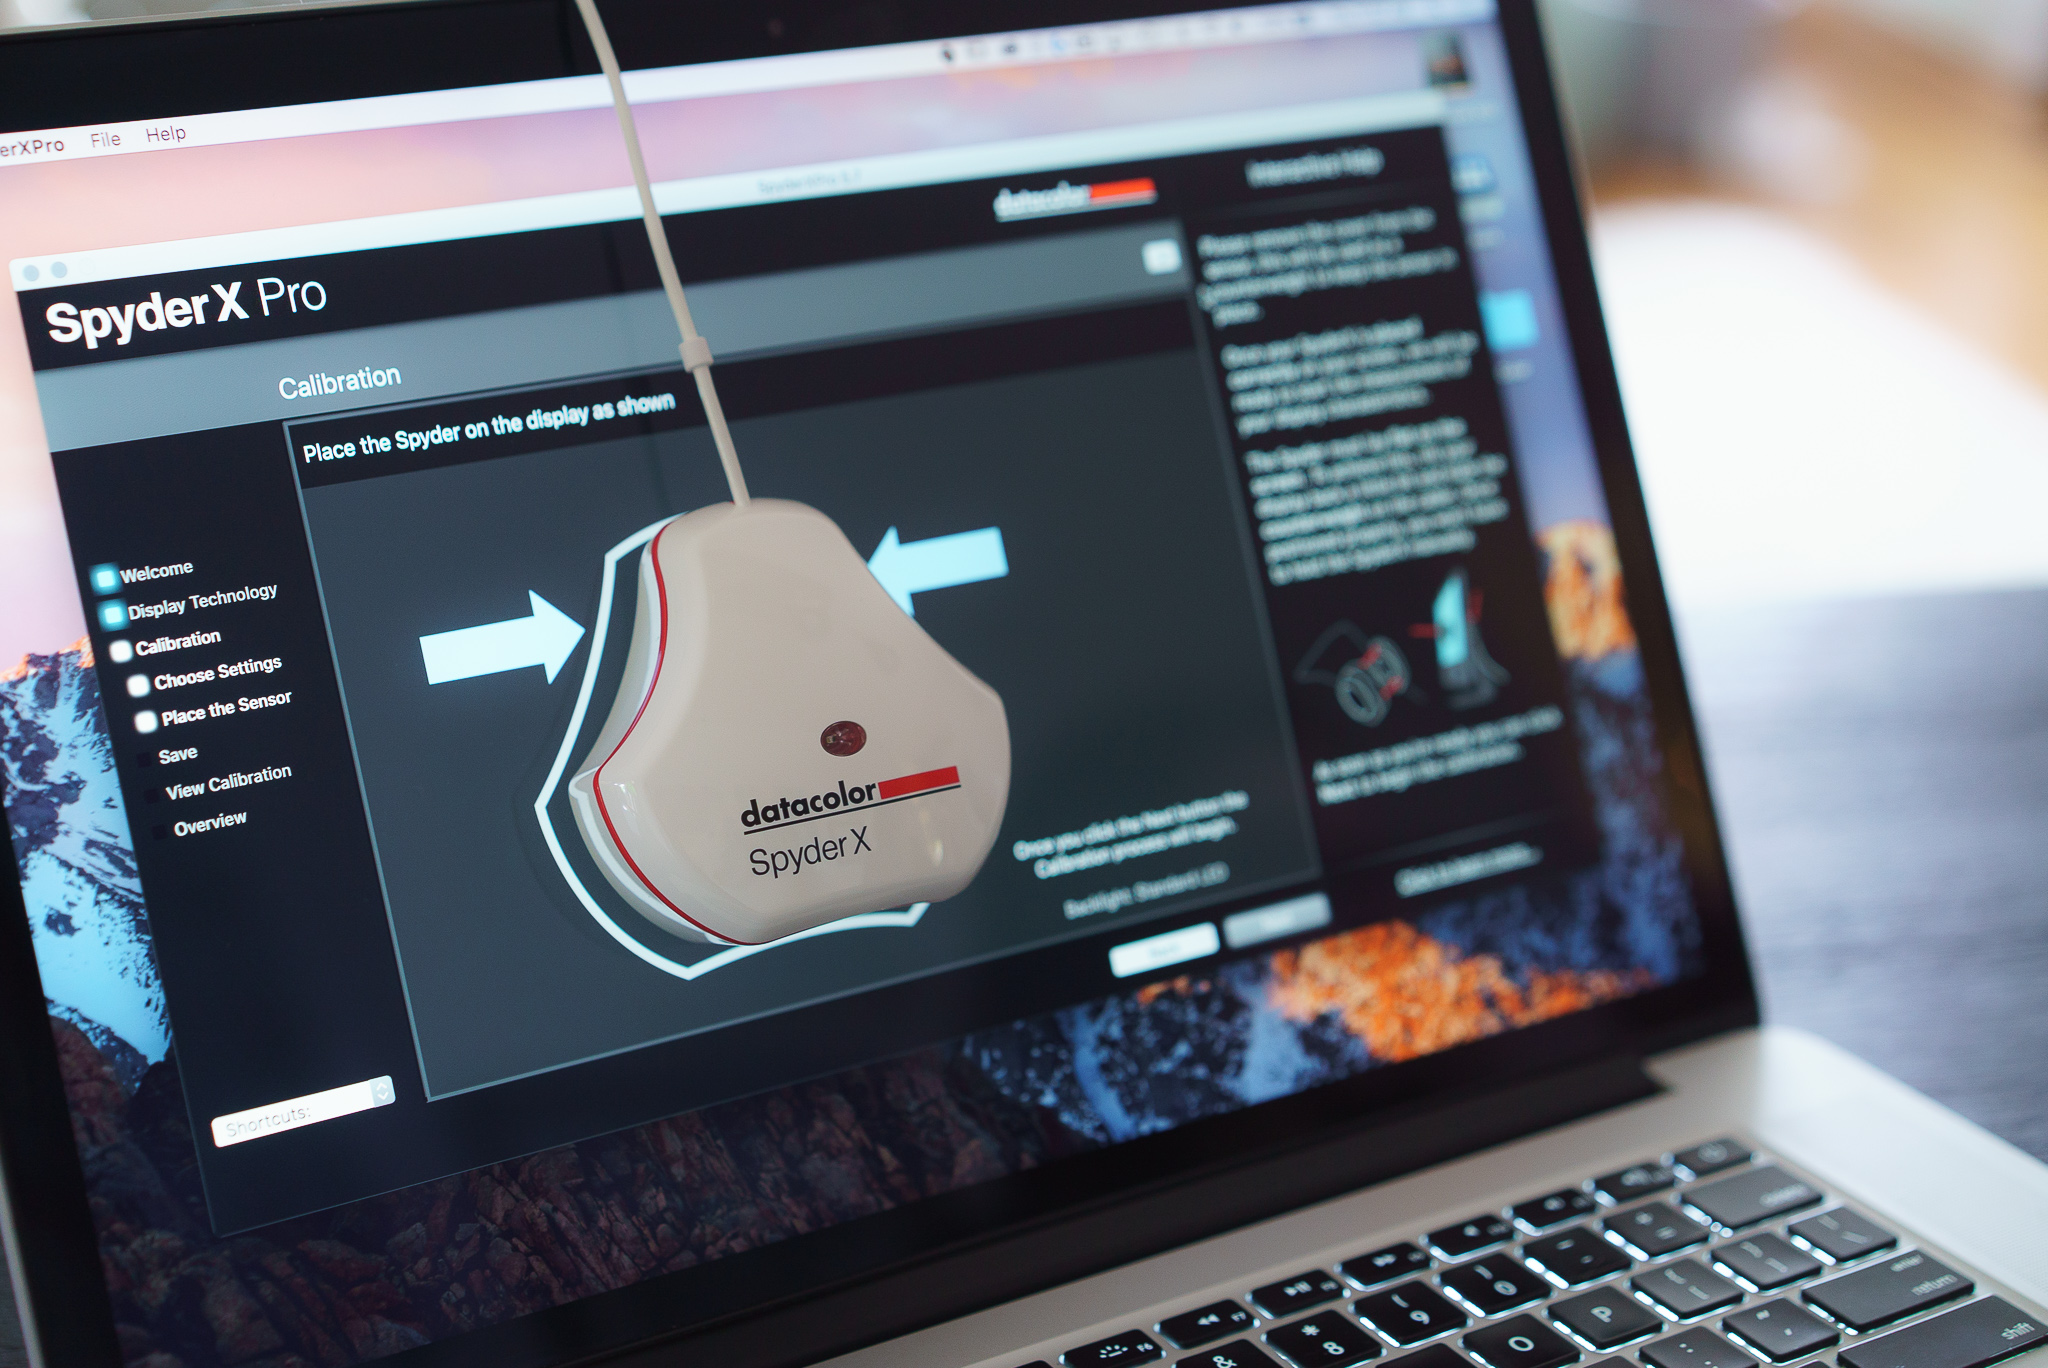
The SpyderX Pro is small white plastic triangular puck with a usb cable. It clamshells open to reveal a small lens. There is a 1/4″-20 tripod thread on one corner of the unit for mounting it on a tripod for calibrating projector screens. It’s notable, however, that in order to calibrate a projector screen with the native SpyderX software, it’s necessary to purchase the more expensive SpyderX Elite version for access to the SpyderX Elite Software.
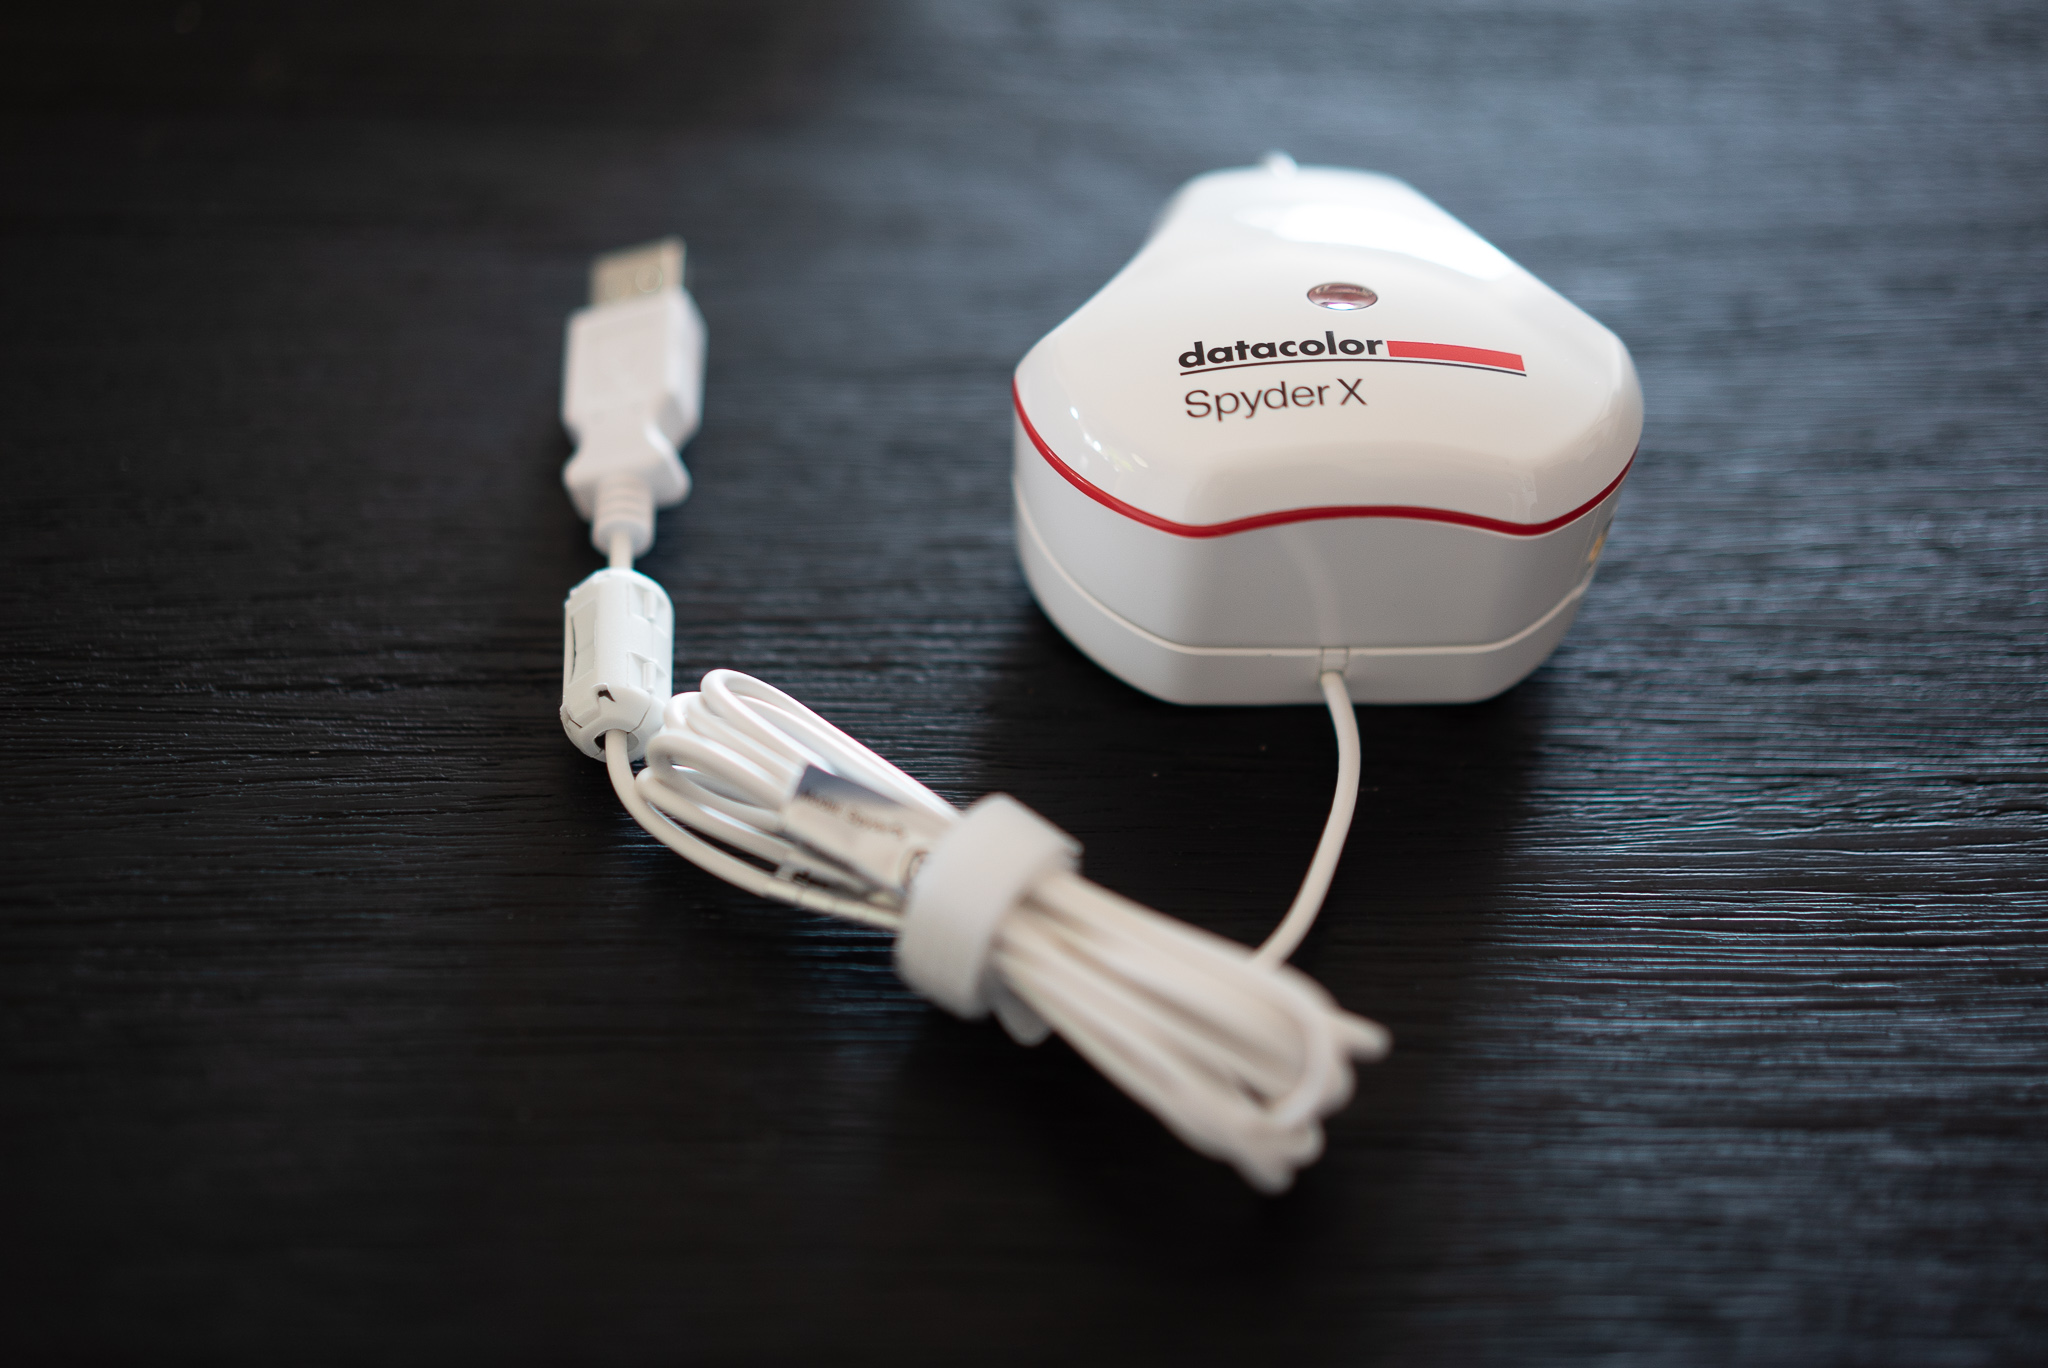
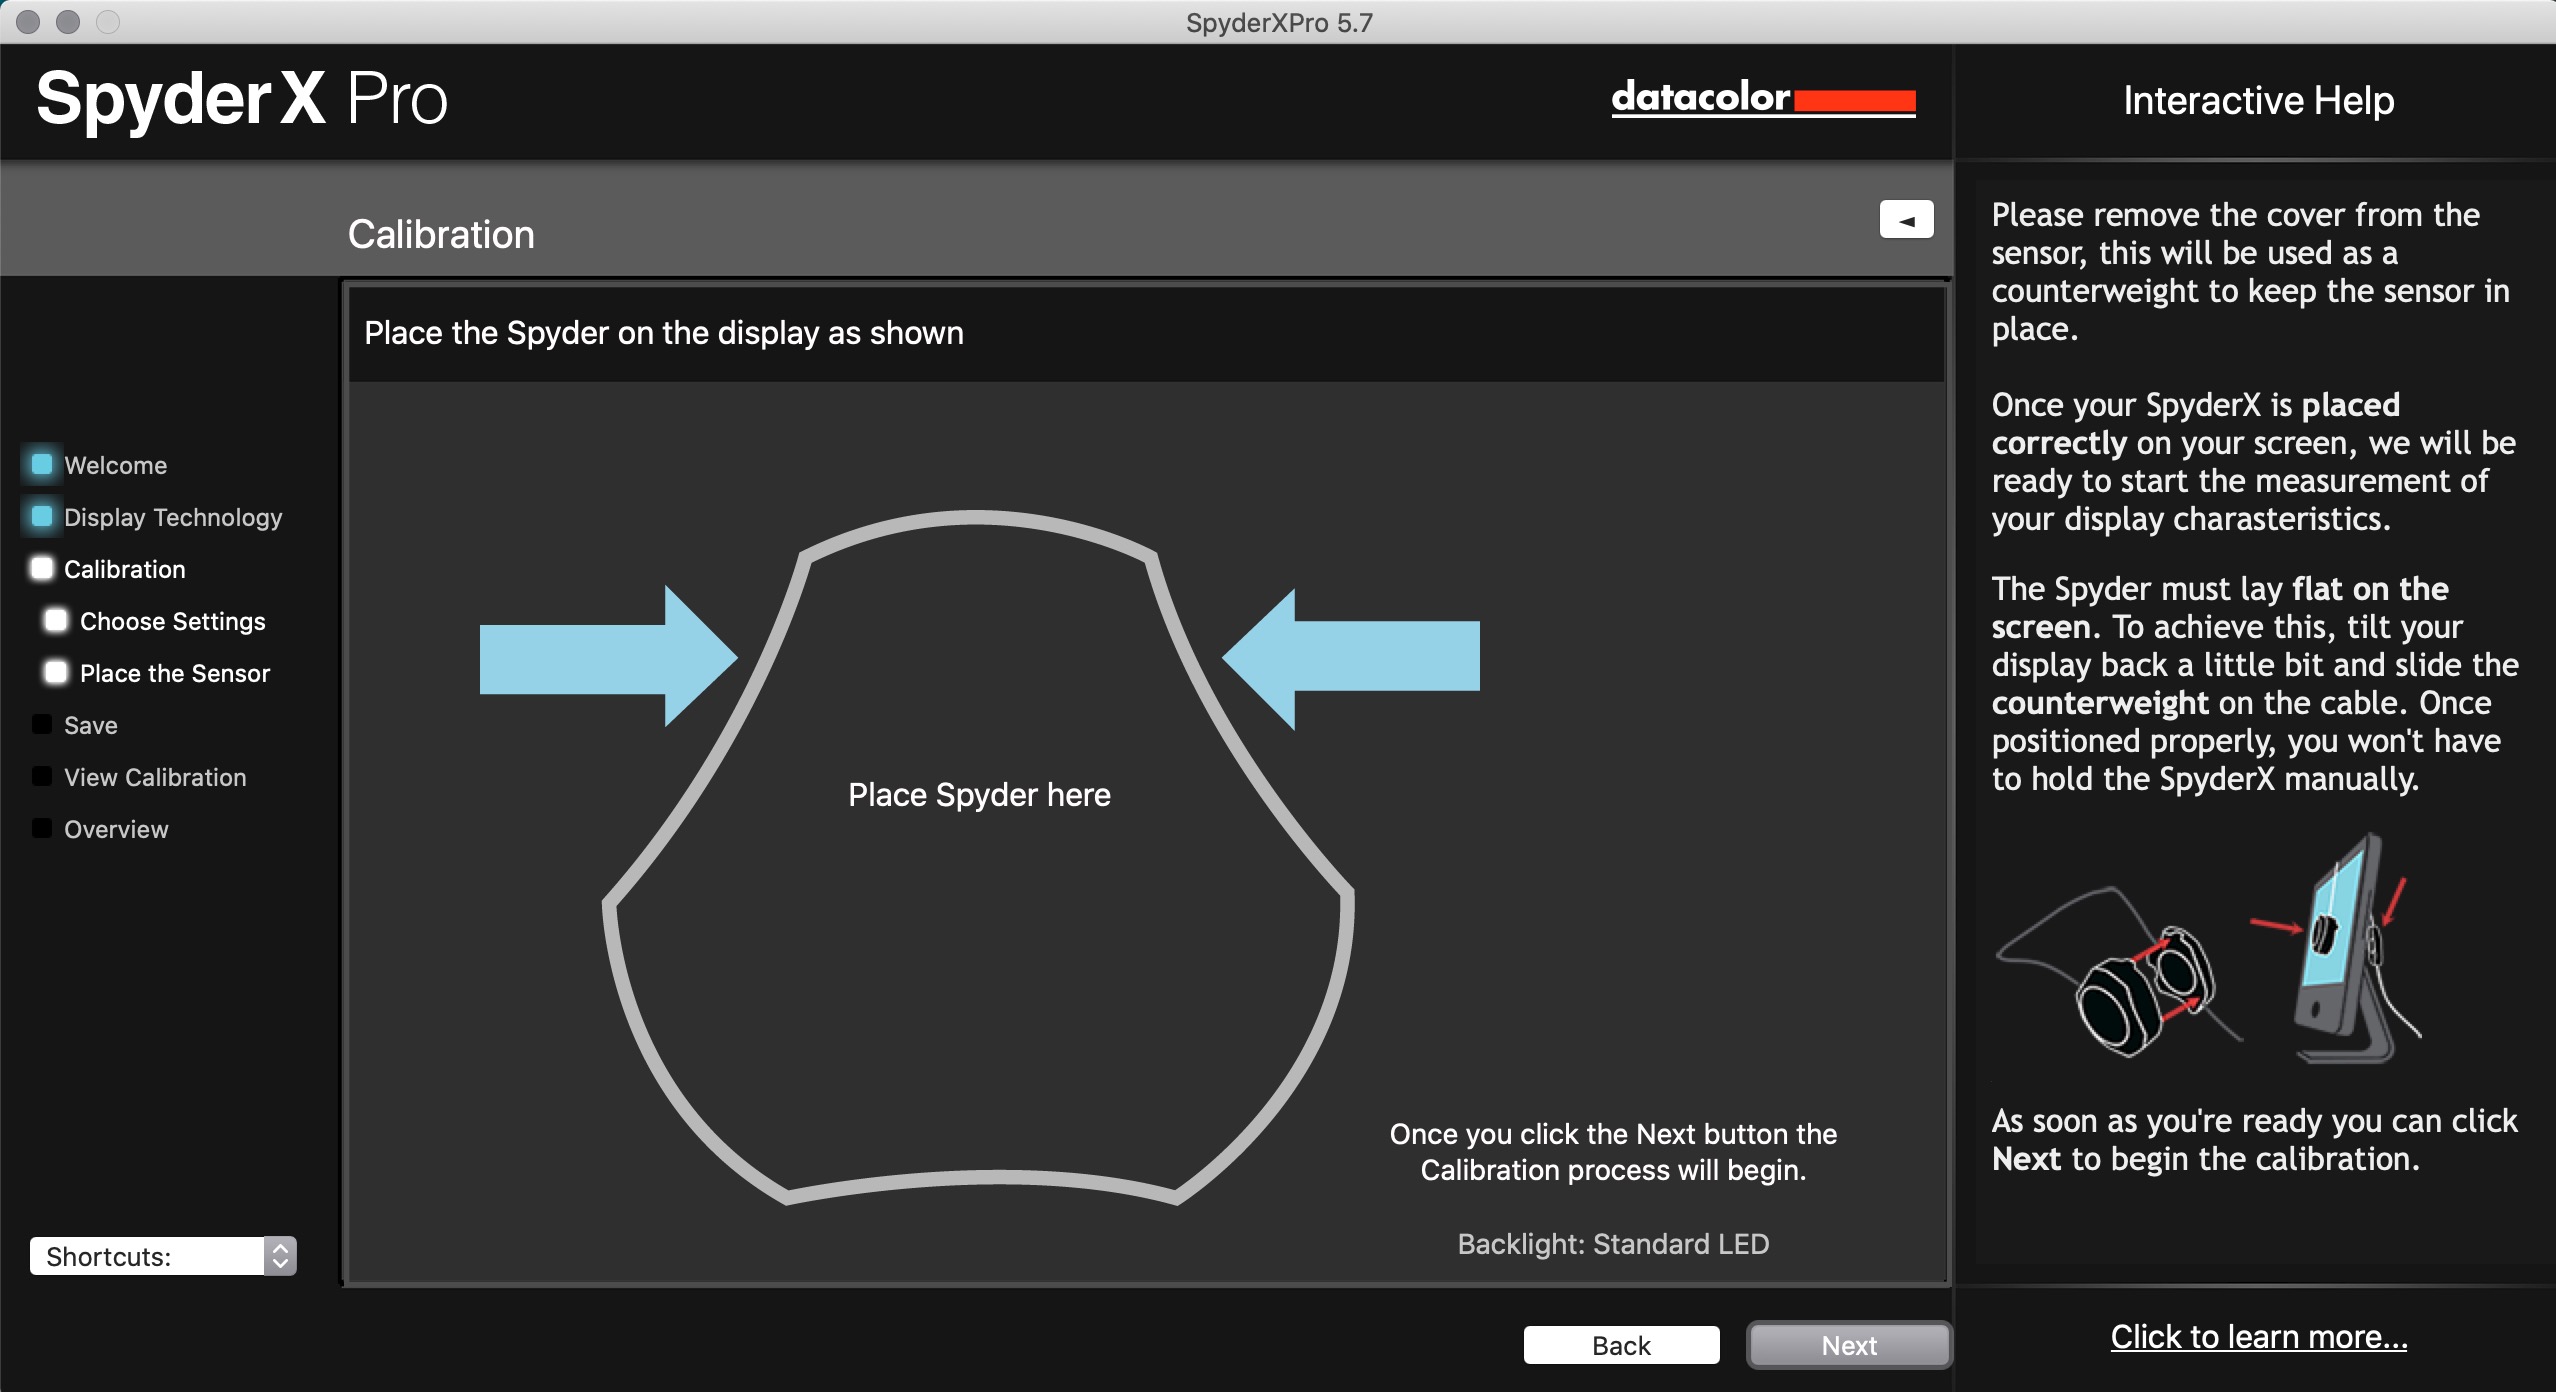
The lens cover of the Spyder X slides on the USB cable to allow the SpyderX unit to hang over different sizes of computer display. The surface that rests against the screen has a recessed lens and a soft pad to protect your display when resting against it.
Overall, the SpyderX unit seems like a simple piece of hardware that’s easy enough to use. Let’s talk about the software.
SpyderX Pro Software vs. DisplayCAL
I used two different types of software with the SpyderX Pro: The native SpyderX Pro software that comes with the unit and the free DisplayCAL software. Both pieces of software were able to provide a good calibration and when using identical settings they both produced nearly identical results. That said, I found the included SpyderX Pro software to be less full-featured than the free DisplayCAL alternative. As I understand it, some of the features that I preferred on the free DisplayCAL software, such as setting a custom white point, are only available on the more expensive SpyderX Elite model.
Futhermore, as of June, 2026, Datacolor has publicly decided to end support for some of their older hardware via a software lockout. It seems to me that this is just a money grab from Datacolor to get you to buy the new model, so for that reason I would only consider using the free DisplayCAL software from
SpyderX Pro Software
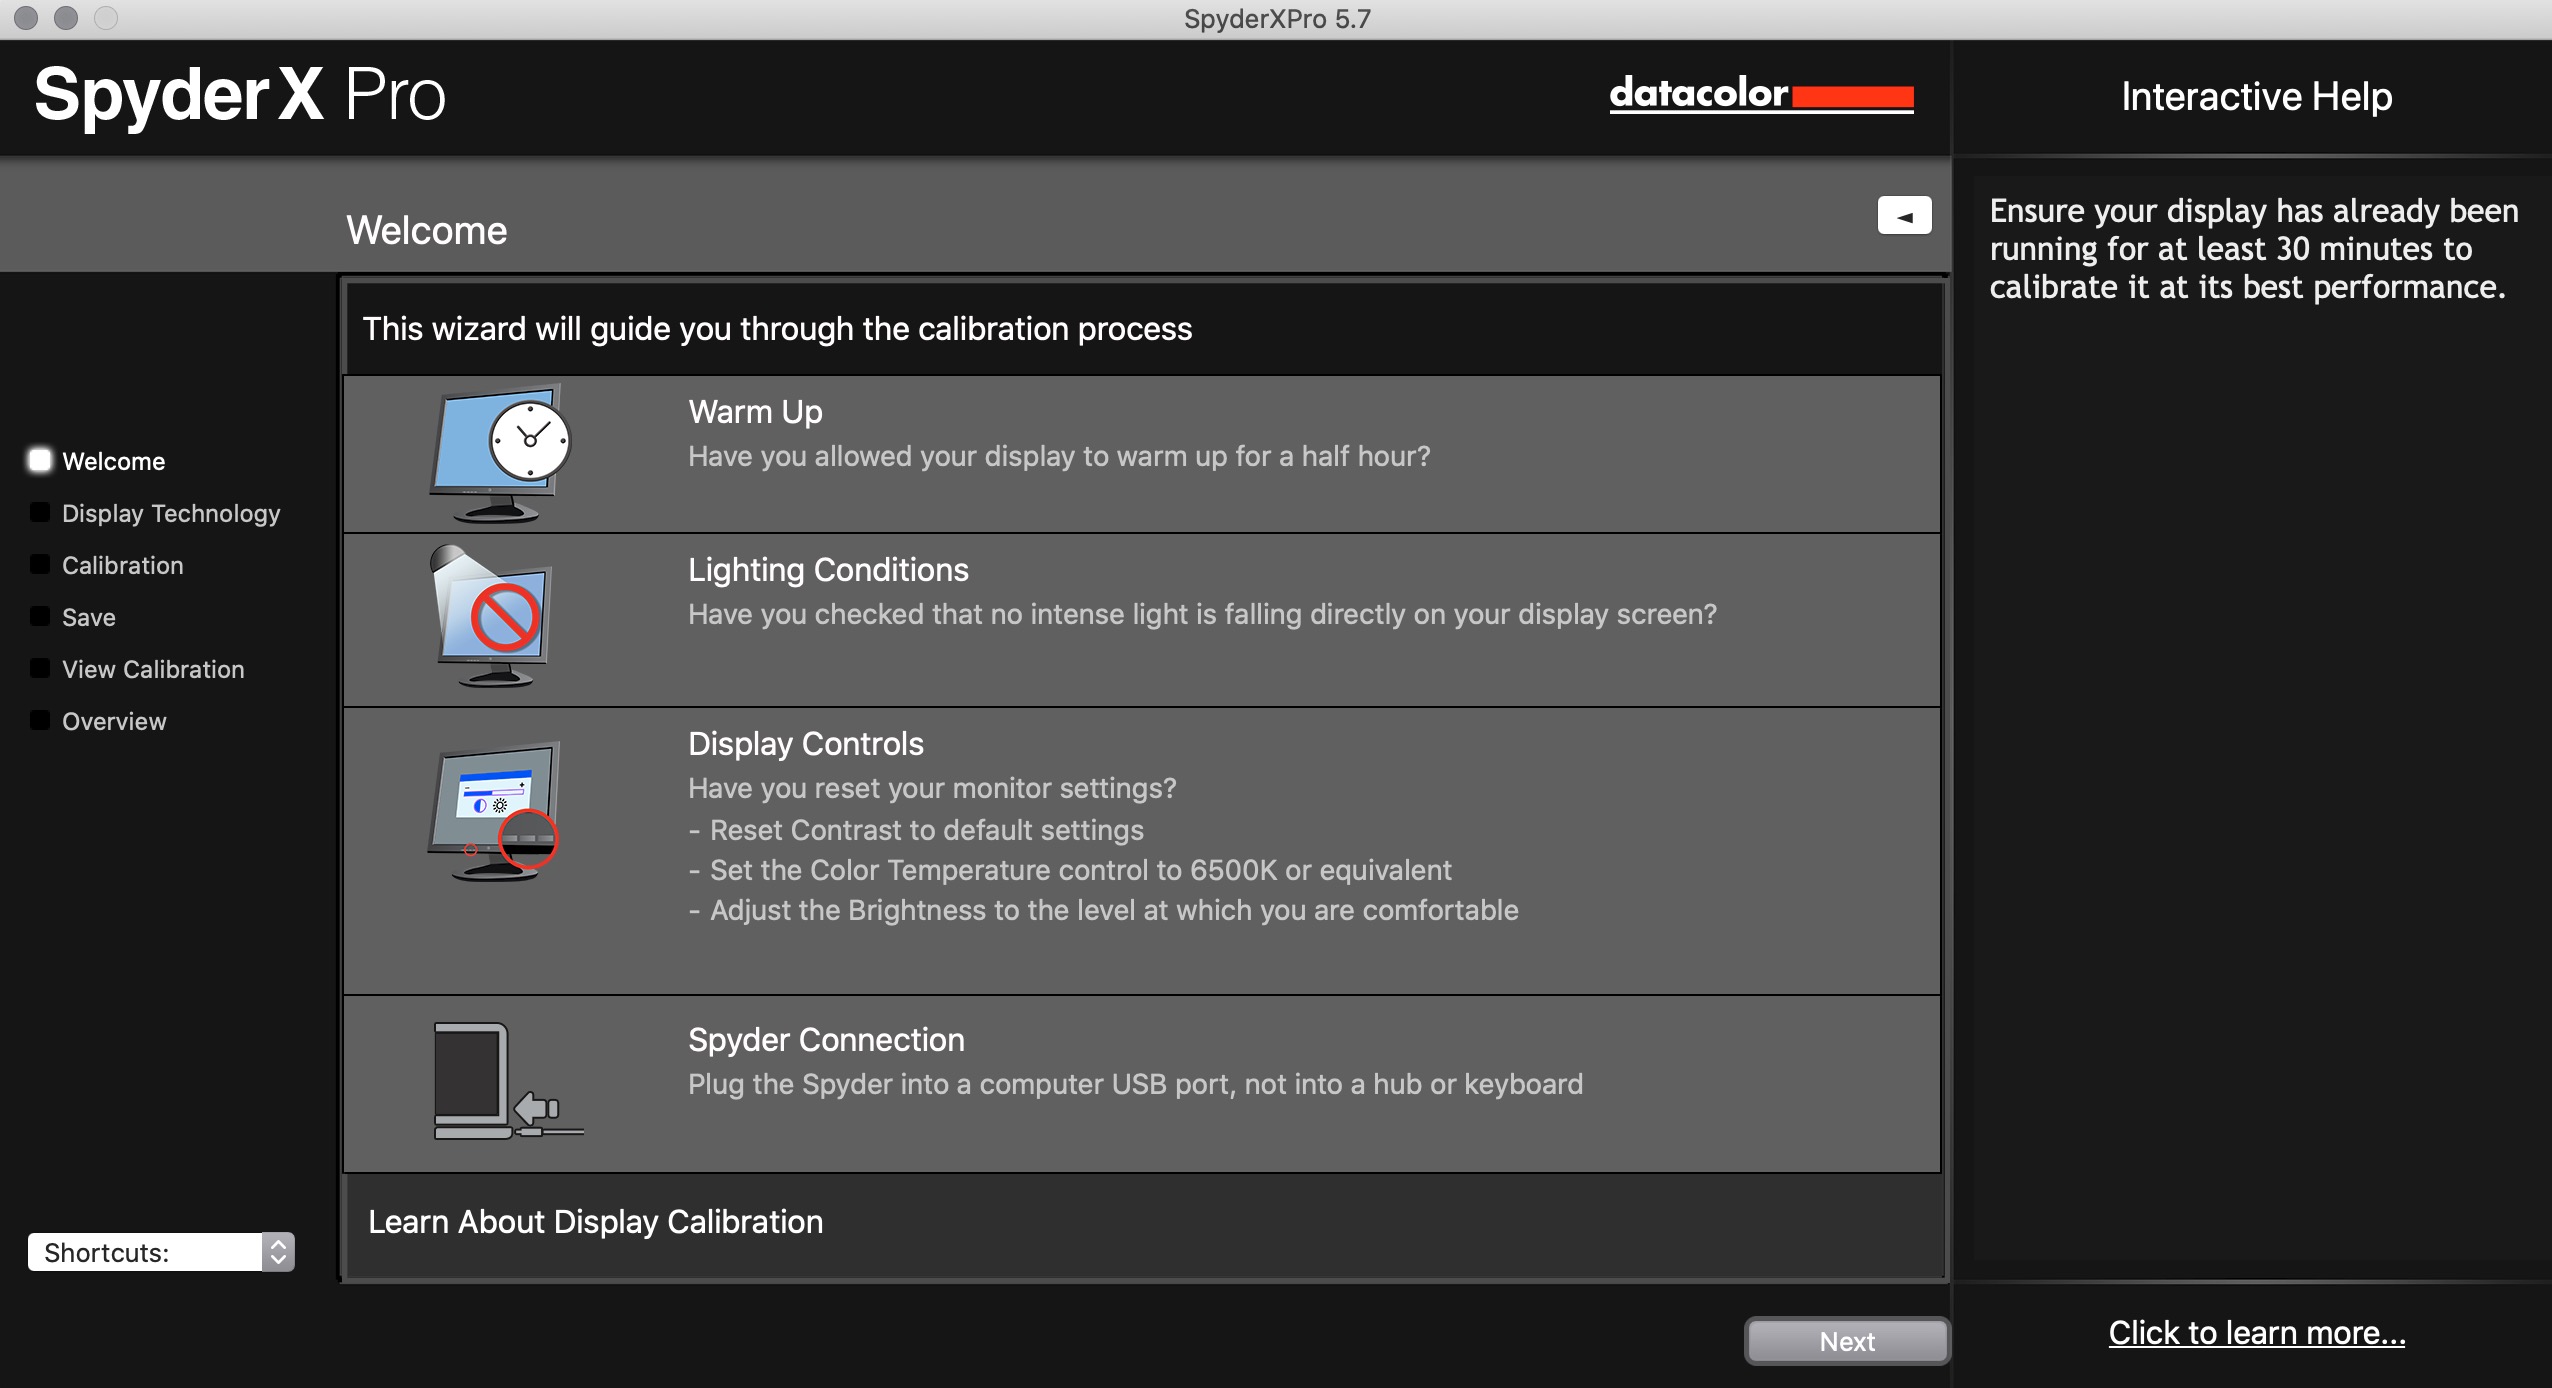
The Spyder X Pro software can be downloaded from Datacolor’s website. It requires activation via a SpyderX Pro Serial Number which is included in the box with the SpyderX unit. A reminder that Datacolor can and will lock you out of using your device software eventually and you should just use DisplayCAL. After installing and activating the software, the SpyderX pro software is fairly fast and easy to use. First, the software reminds you to check a few things before calibrating: warm up the display for 30 minutes, reduce ambient light from falling on the display, reset monitor display controls to defaults, and connect the SpyderX unit.
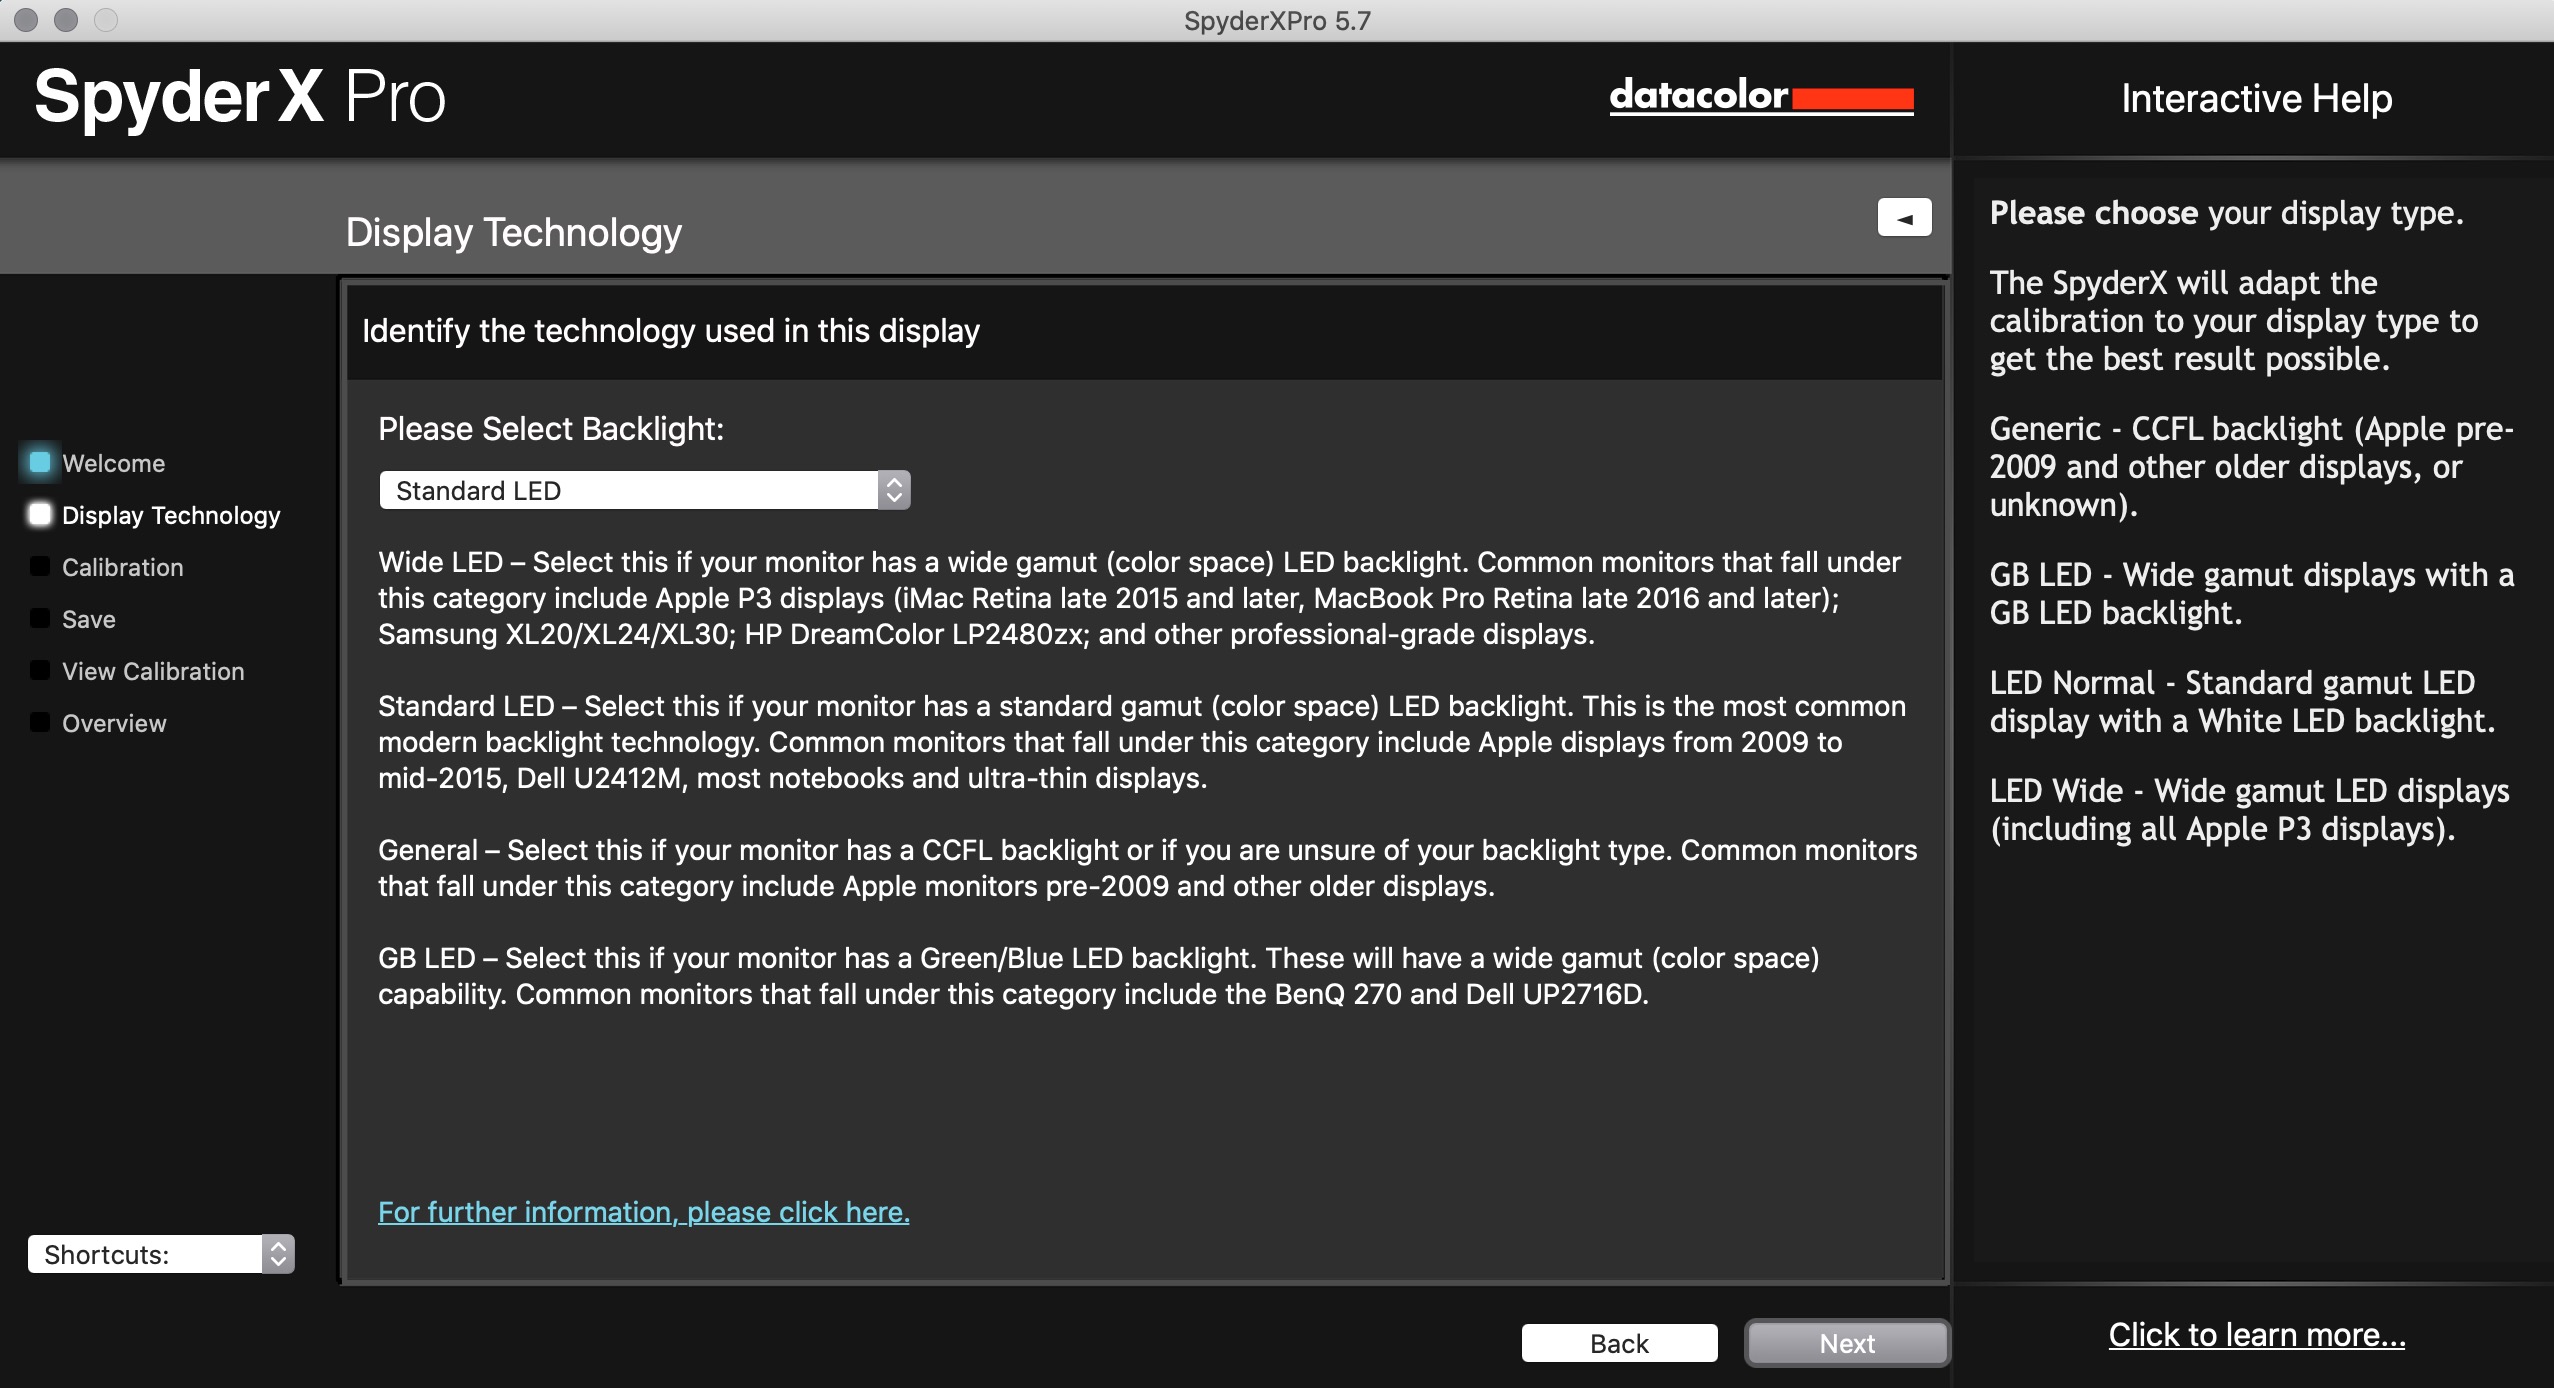
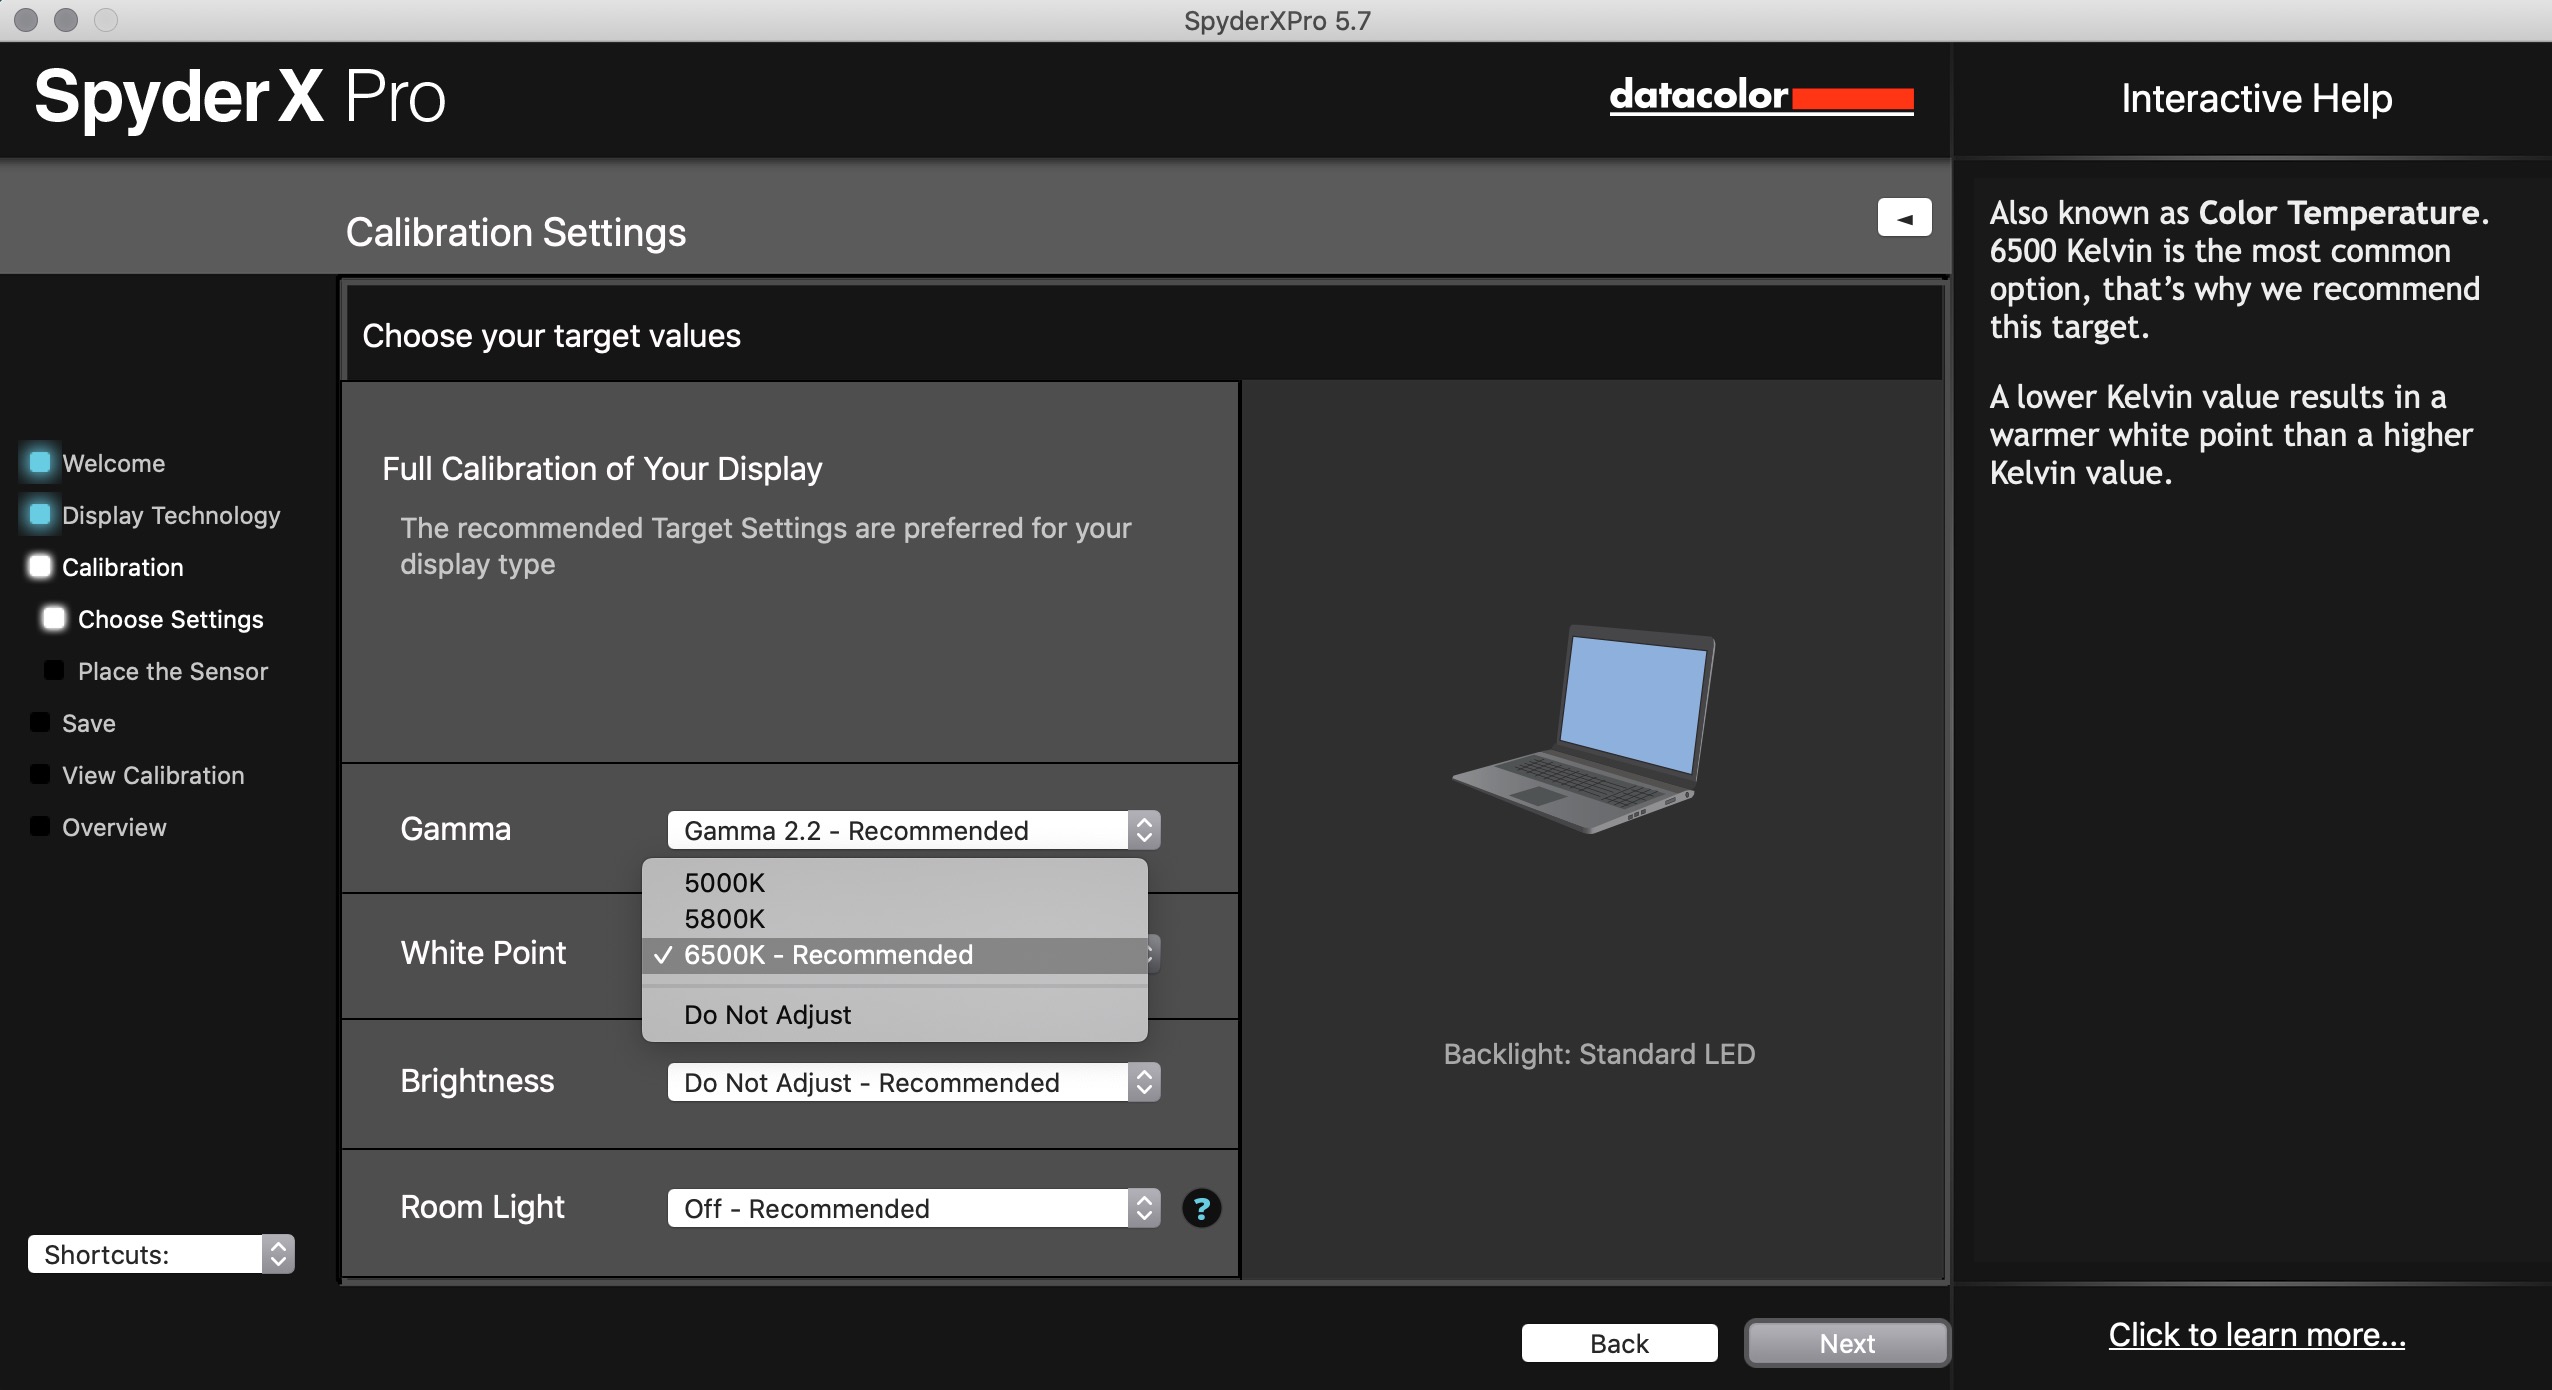
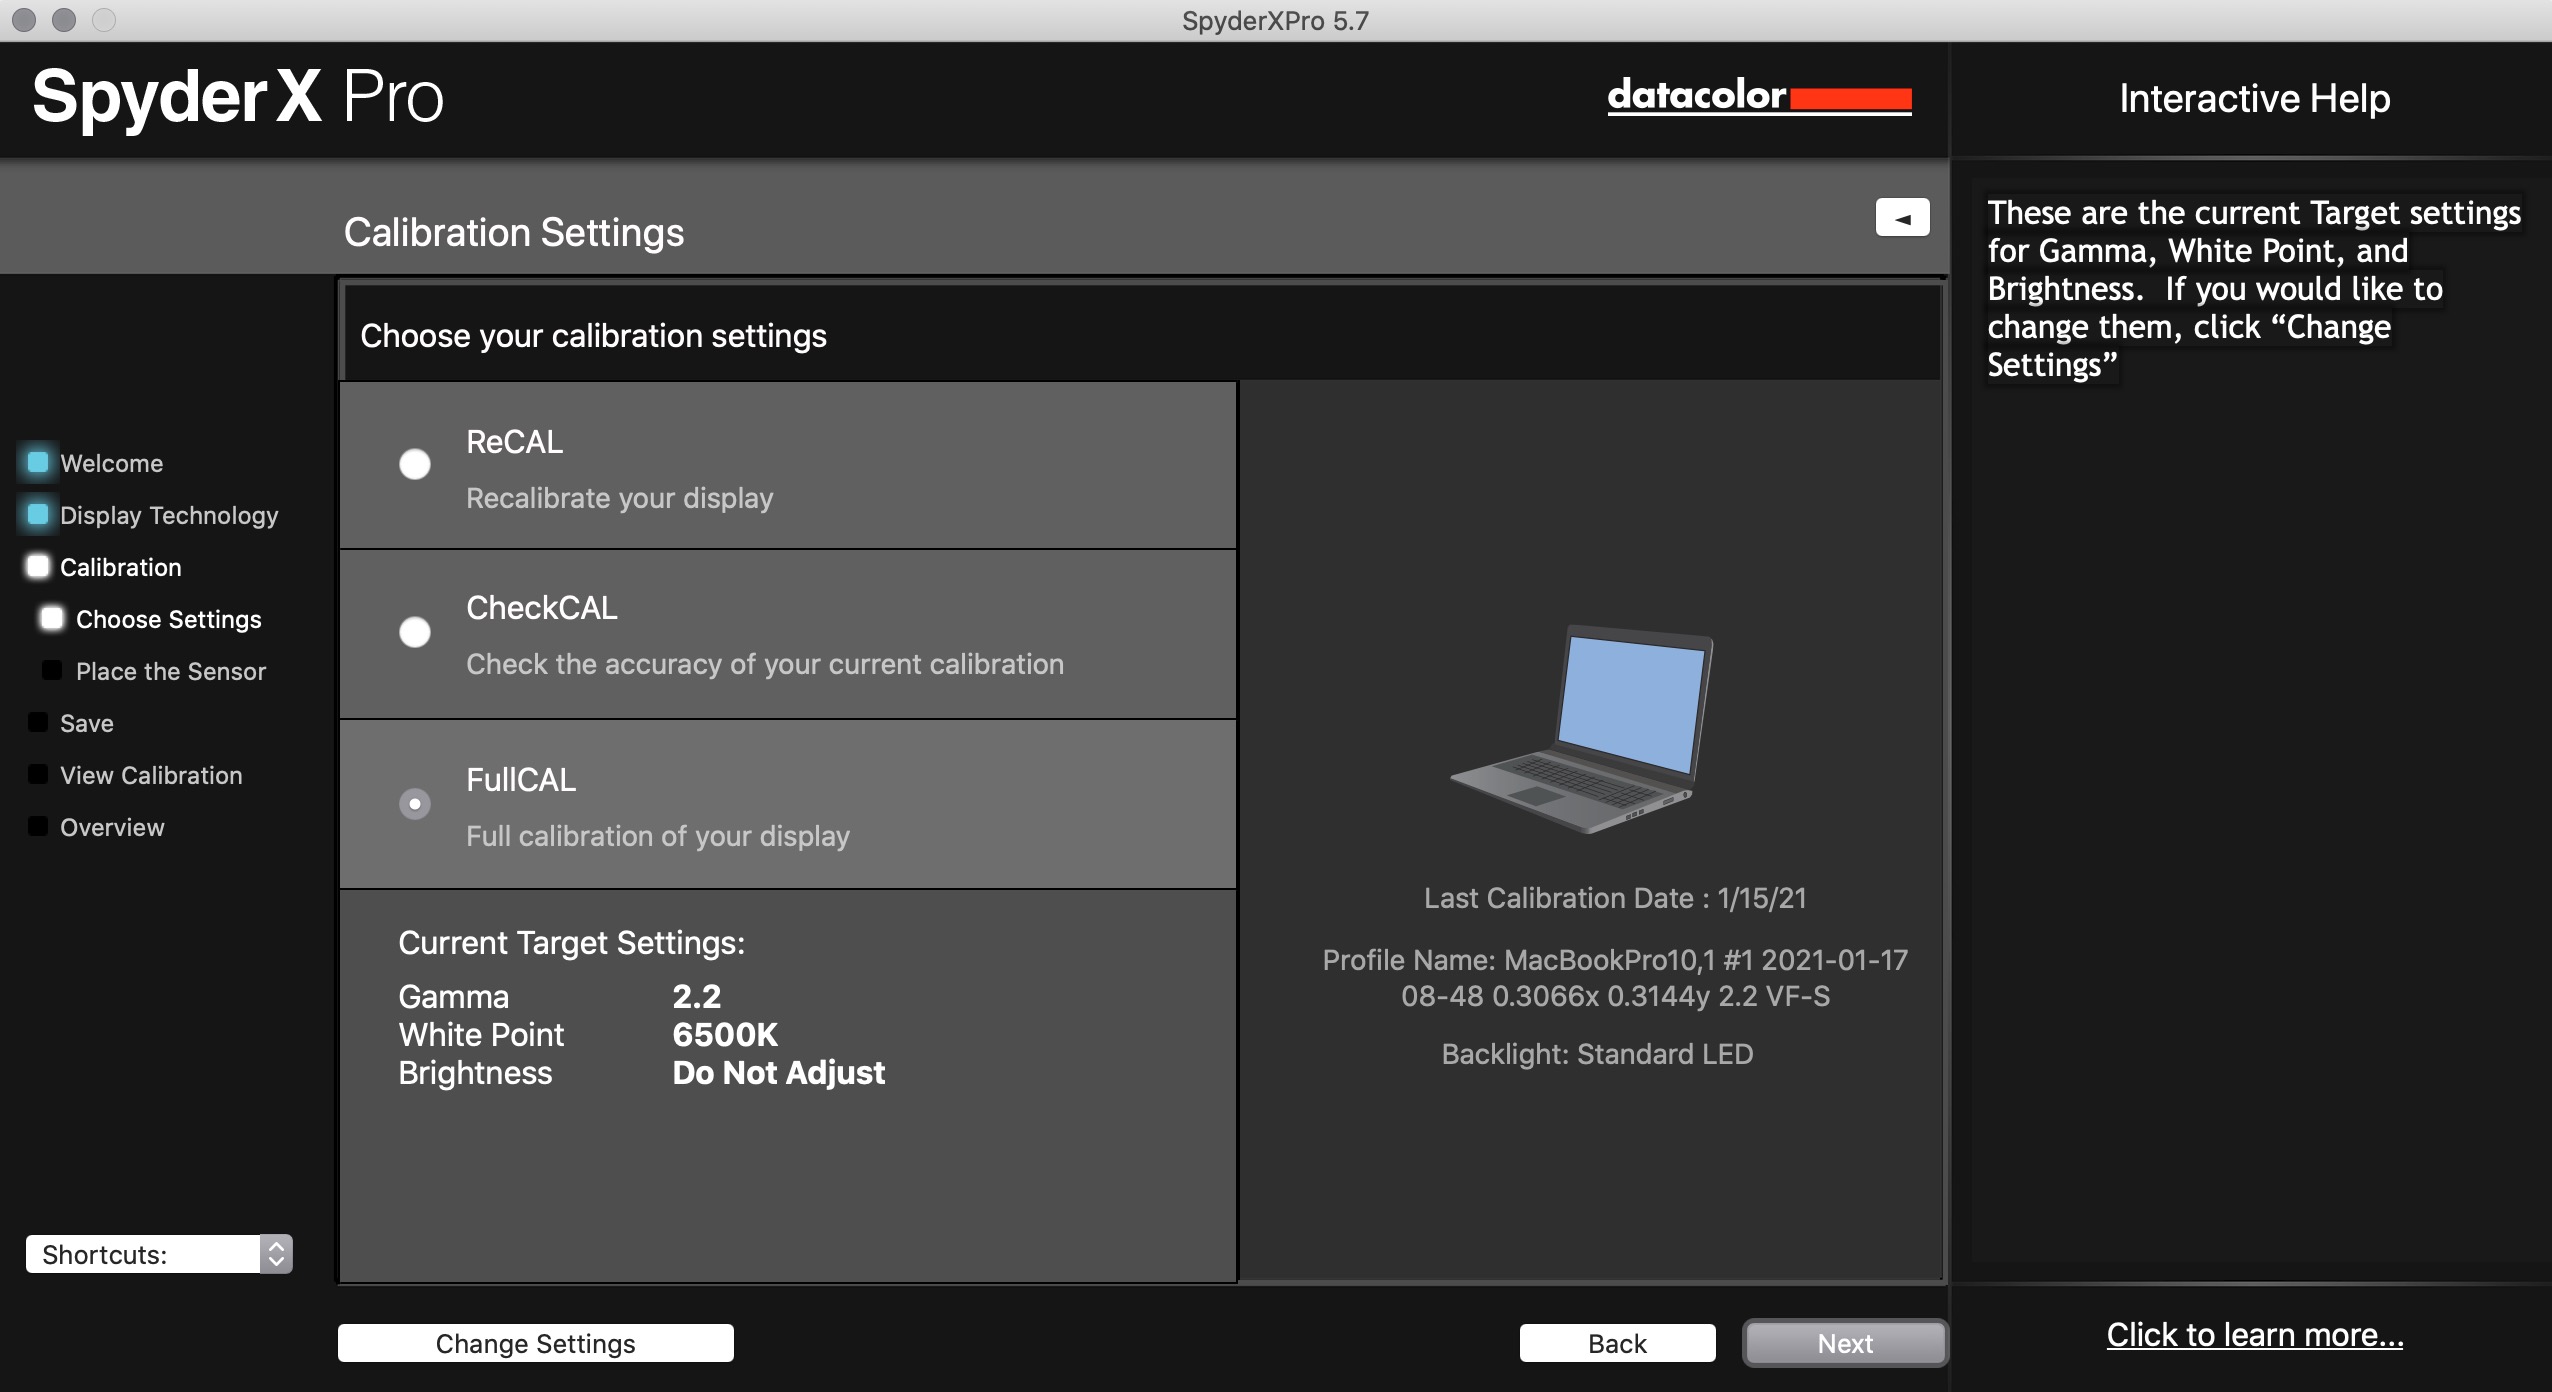
After verifying the pre-calibration checks, SpyderX Pro asks for your monitor backlight type and shows a short guide to help you choose the right setting if you don’t already know. After that, it has you select target settings of Gamma (Default: 2.2), White Point (Default: 6500K), Brightness (Default: Do Not Adjust) and Room Light compensation (Default: Off).
I found it disappointing that SpyderX Pro only allows the selection of one of 4 whitepoint settings: 5000K, 5800K, 6500K, and “Do Not Adjust” which leaves the whitepoint at your display default. If you work in an environment that has dramatically different temperature lighting from any of these 4 options, it’s possible that the whitepoint of the SpyderX calibration will not nicely match your environment, as in the case of my experience. To circumvent this limitation, I ended up using DisplayCAL instead.
Once set up, running an actual calibration on SpyderX Pro is very fast and easy. On my computer, calibration took 1 minute and 15 seconds to complete.

Once calibrated, SpyderX allows you to save and automatically apply the newly generated .icc display profile in the native Windows or MacOS display setting panel.
After the monitor profile is applied, SpyderX Pro has a utility called SpyderProof which is supposed to allow you to see the differences that the calibration has made by showing a collection of professionally shot test photos and allowing the user to switch between “Calibrated” and “Uncalibrated” monitor profiles. You can also load your own custom images.
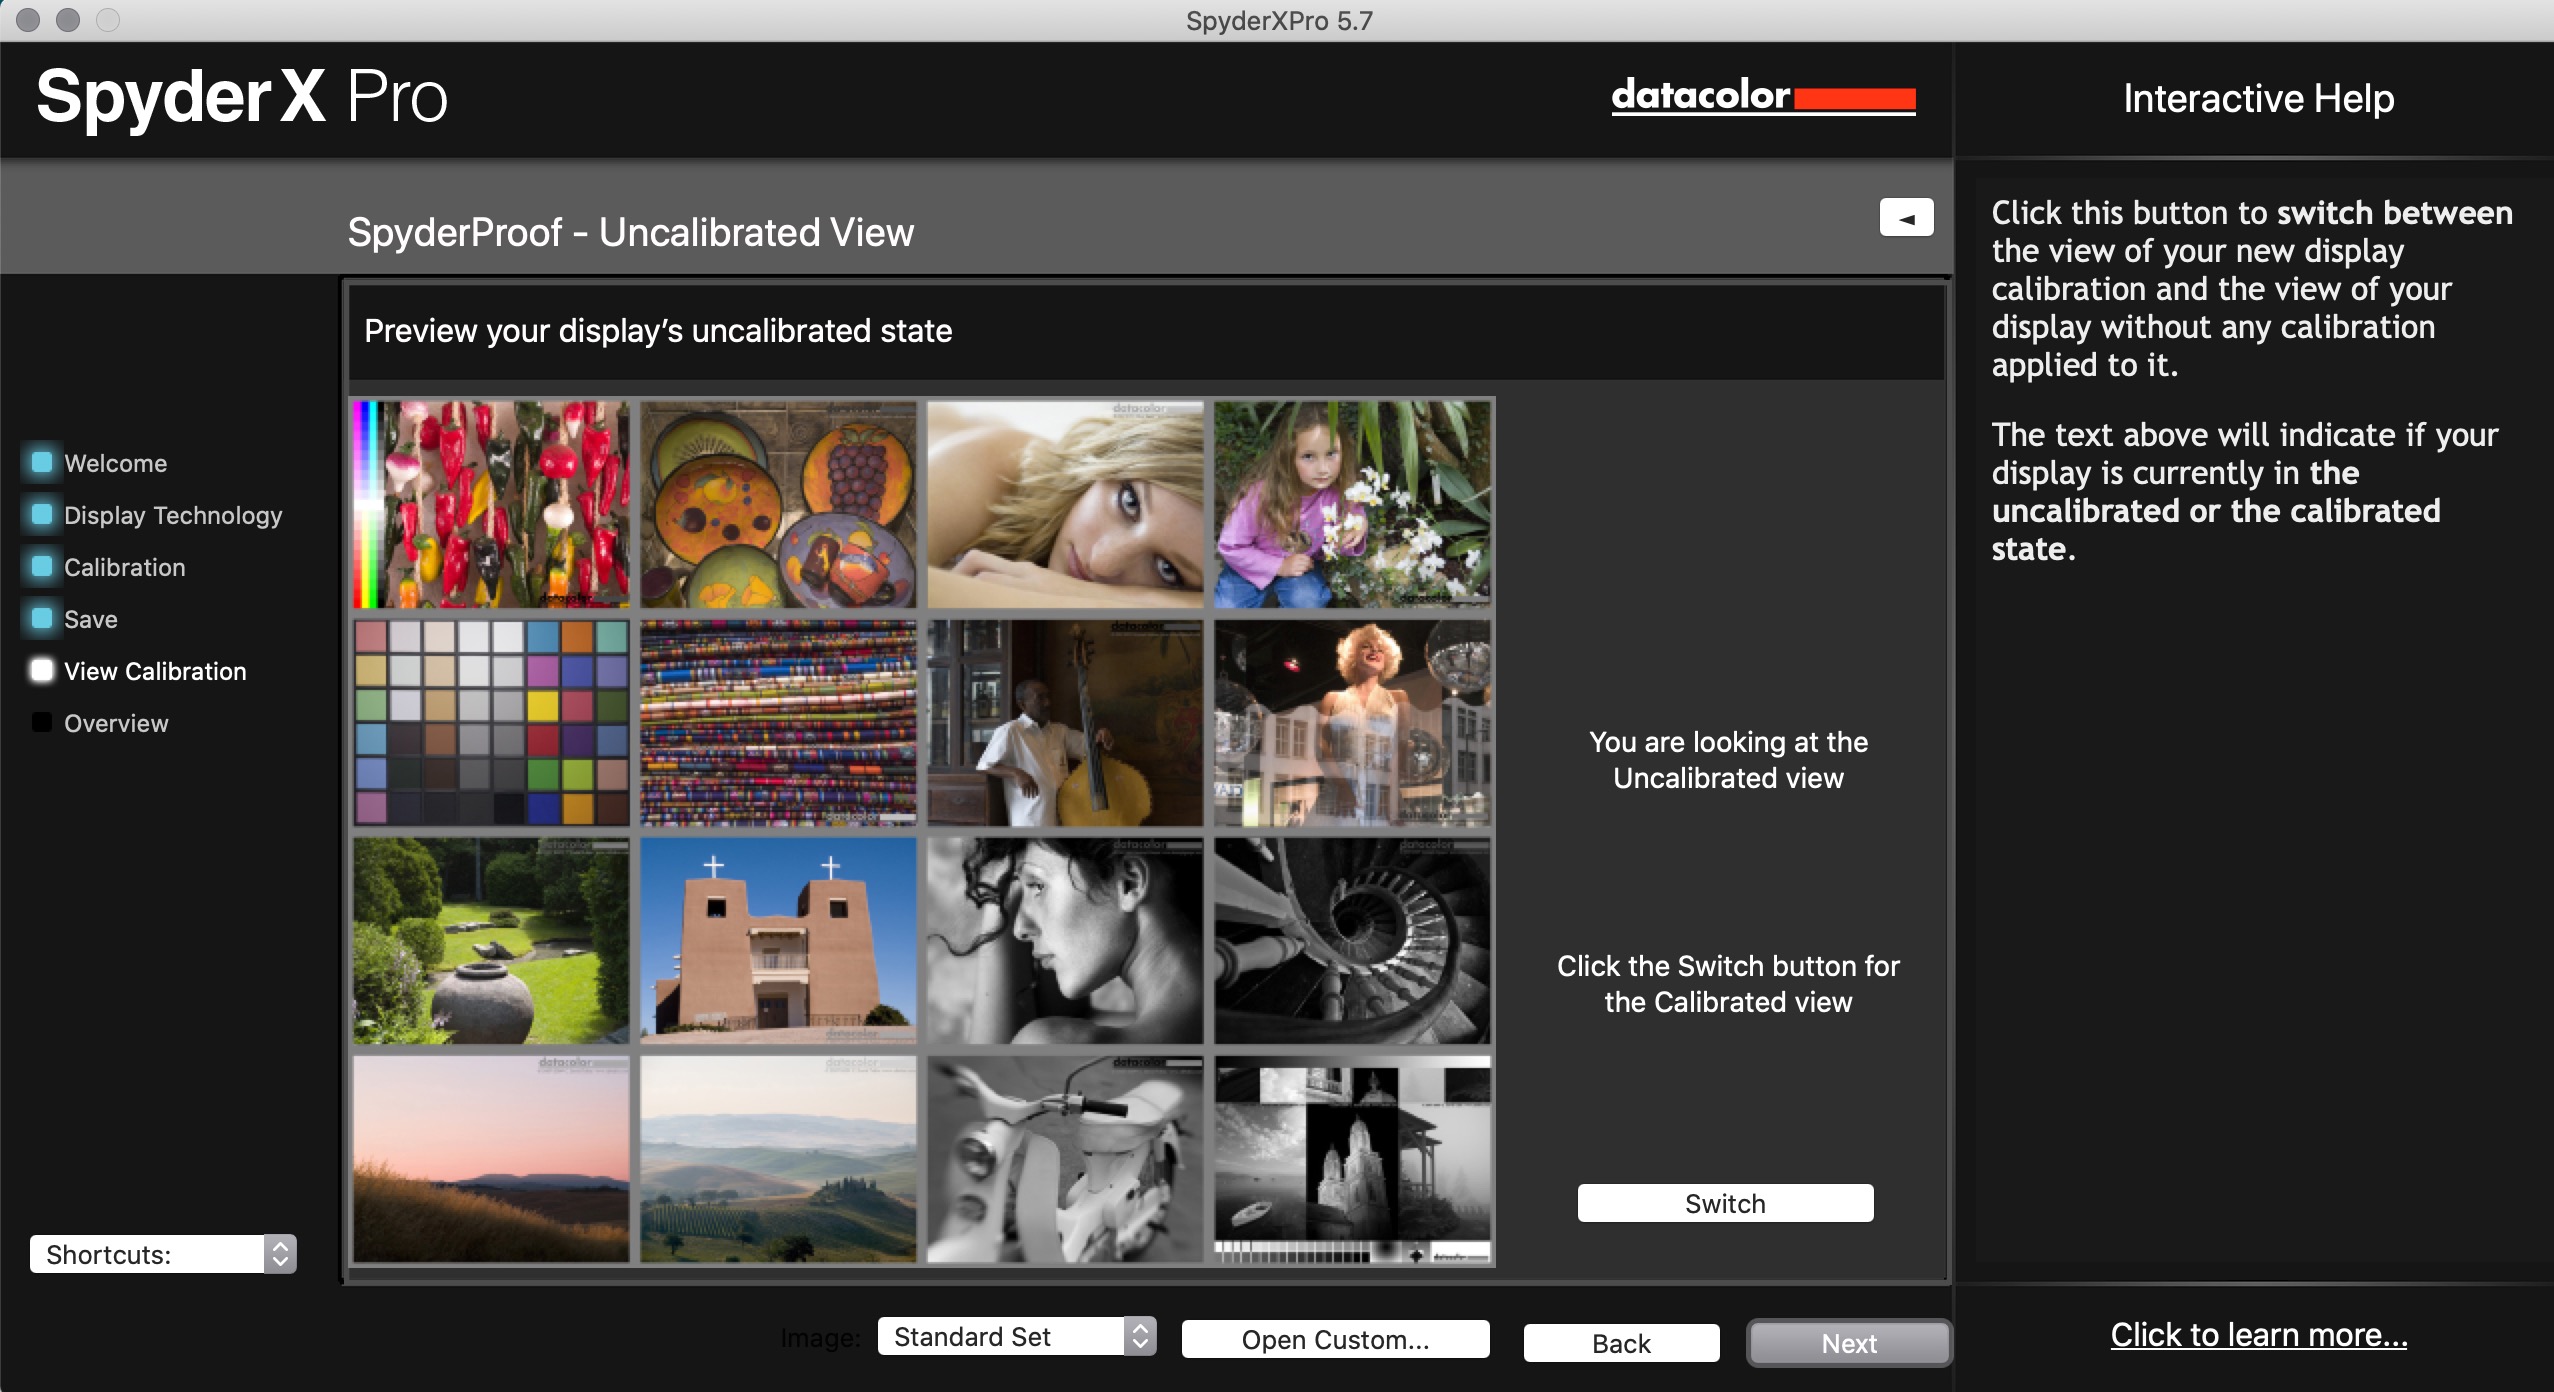
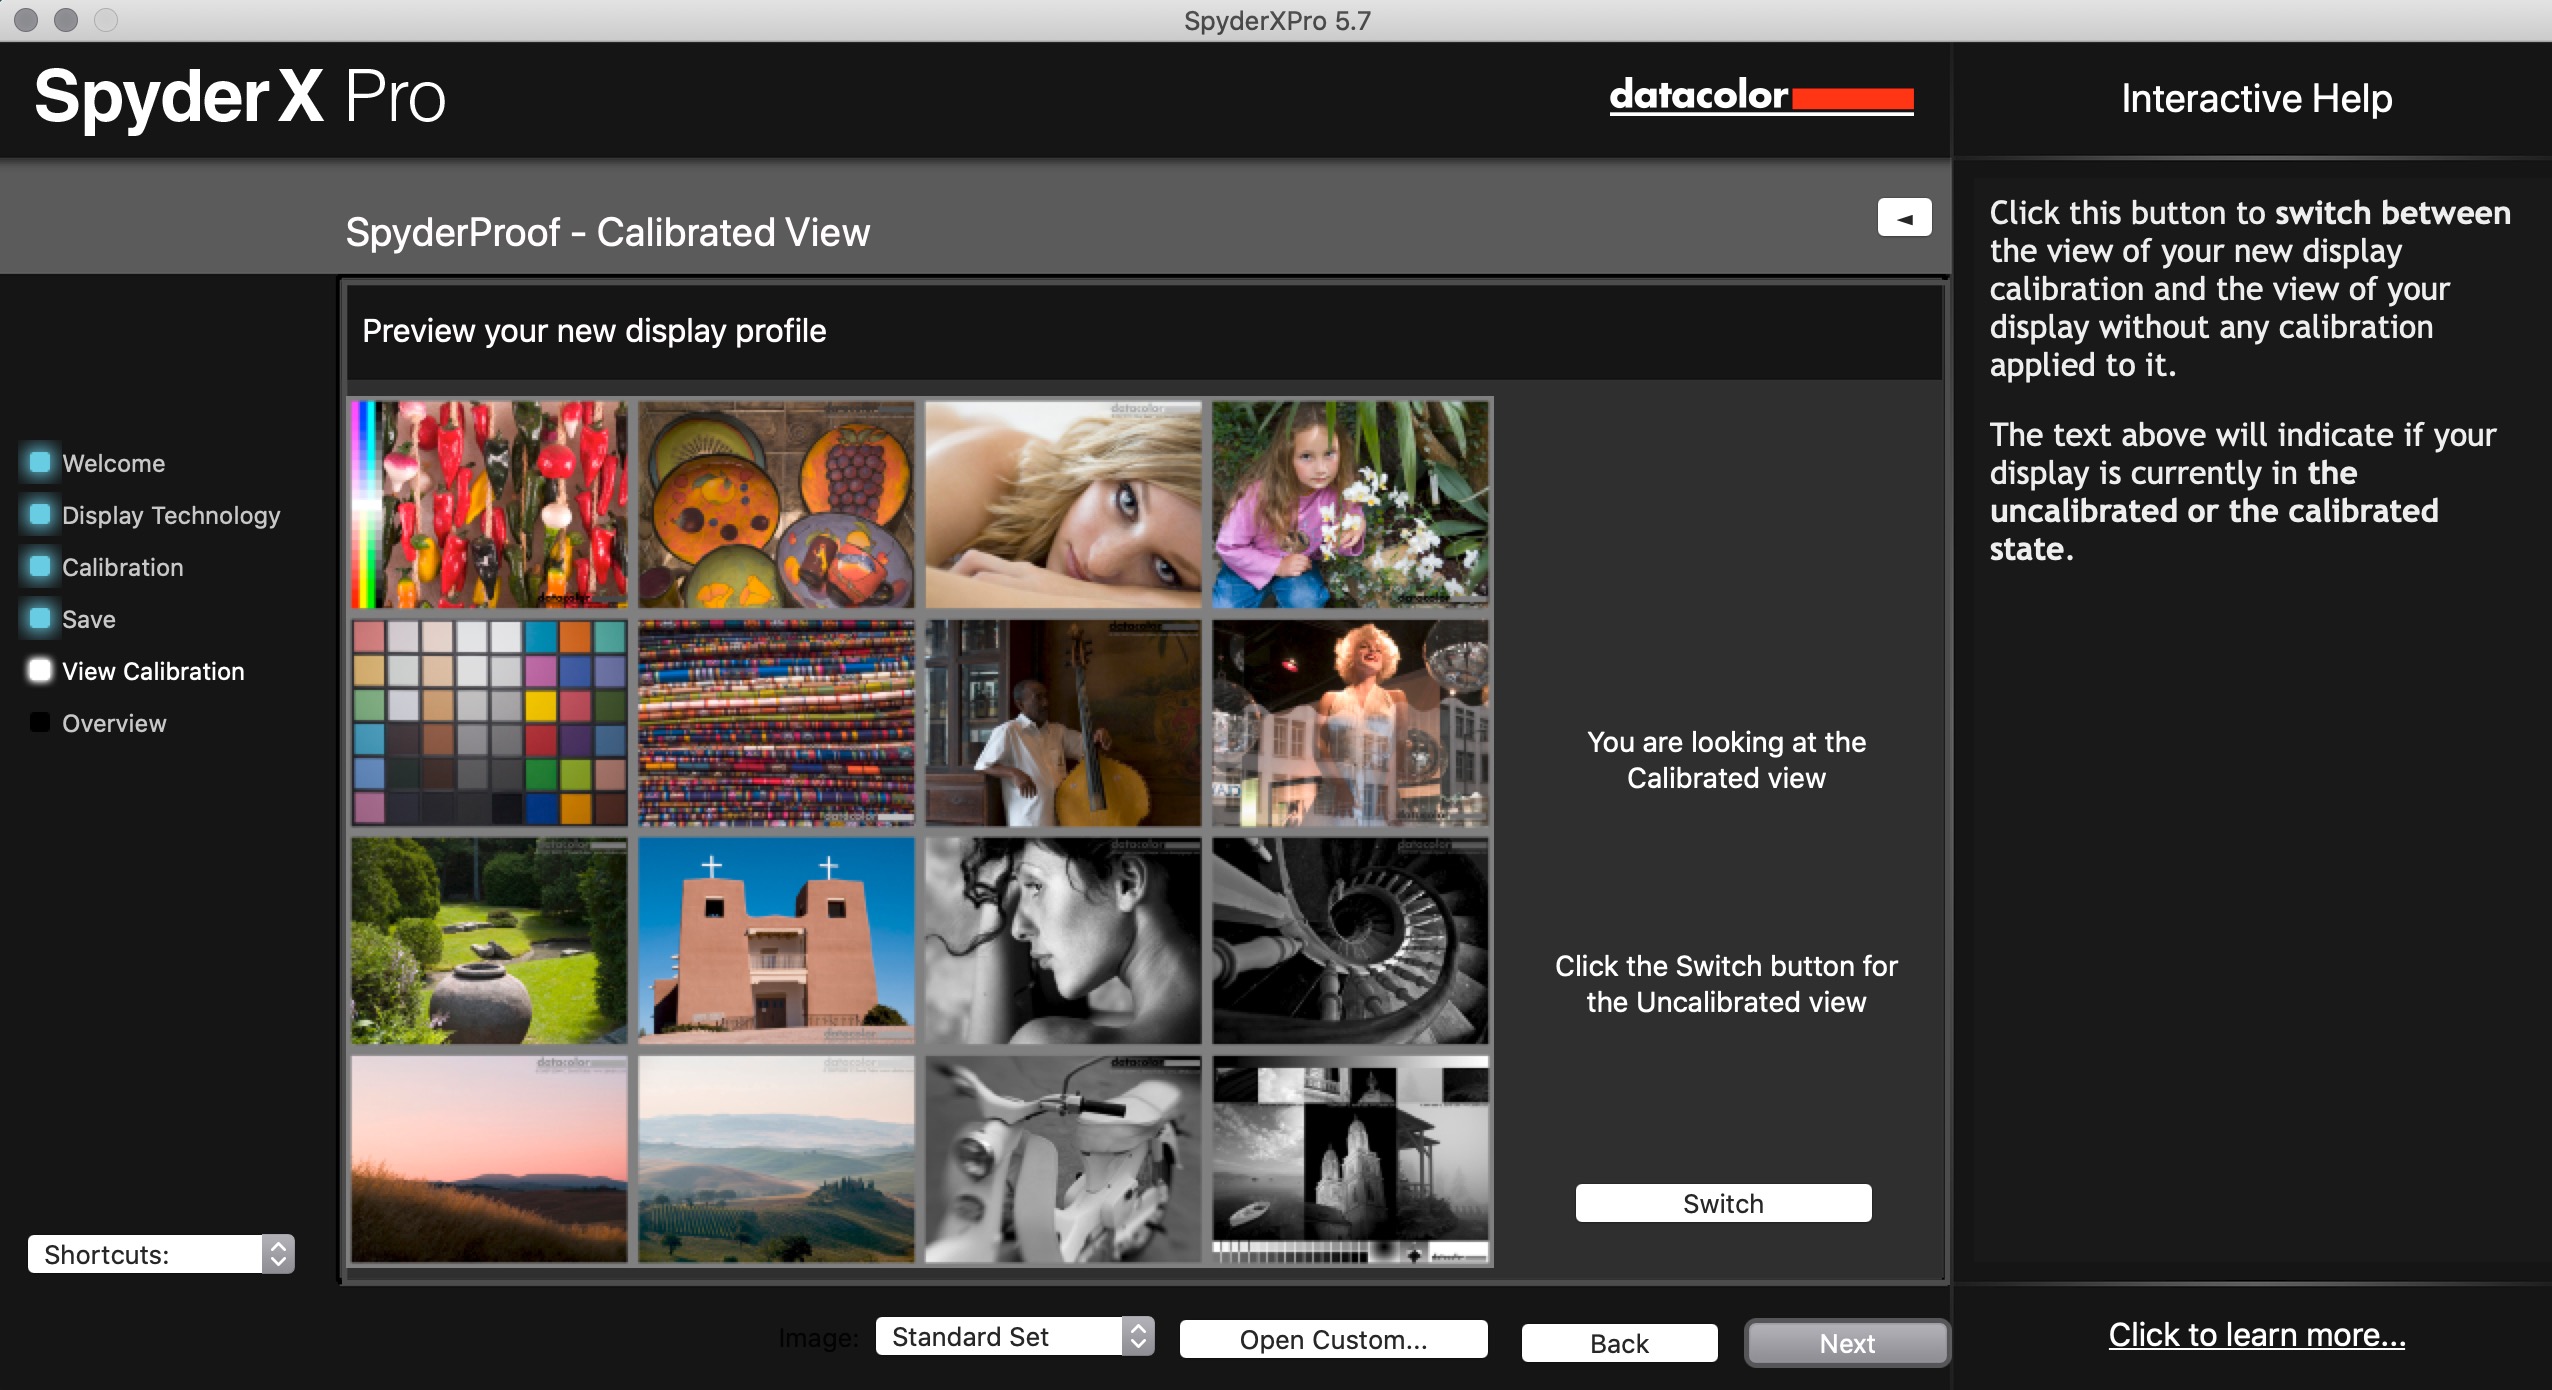
It should be noted that SpyderProof does not show a “before and after”. It rather shows the “Uncalibrated” view by showing its test images with no ICC color management applied, in addition to reverting the display’s ICC profile back to its uncalibrated default. As a result, the test images will probably look a lot worse in the Uncalibrated view than you’d normally expect from your display. Either way, it gives you a simple way to see what the calibration is doing to provide accurate colors.
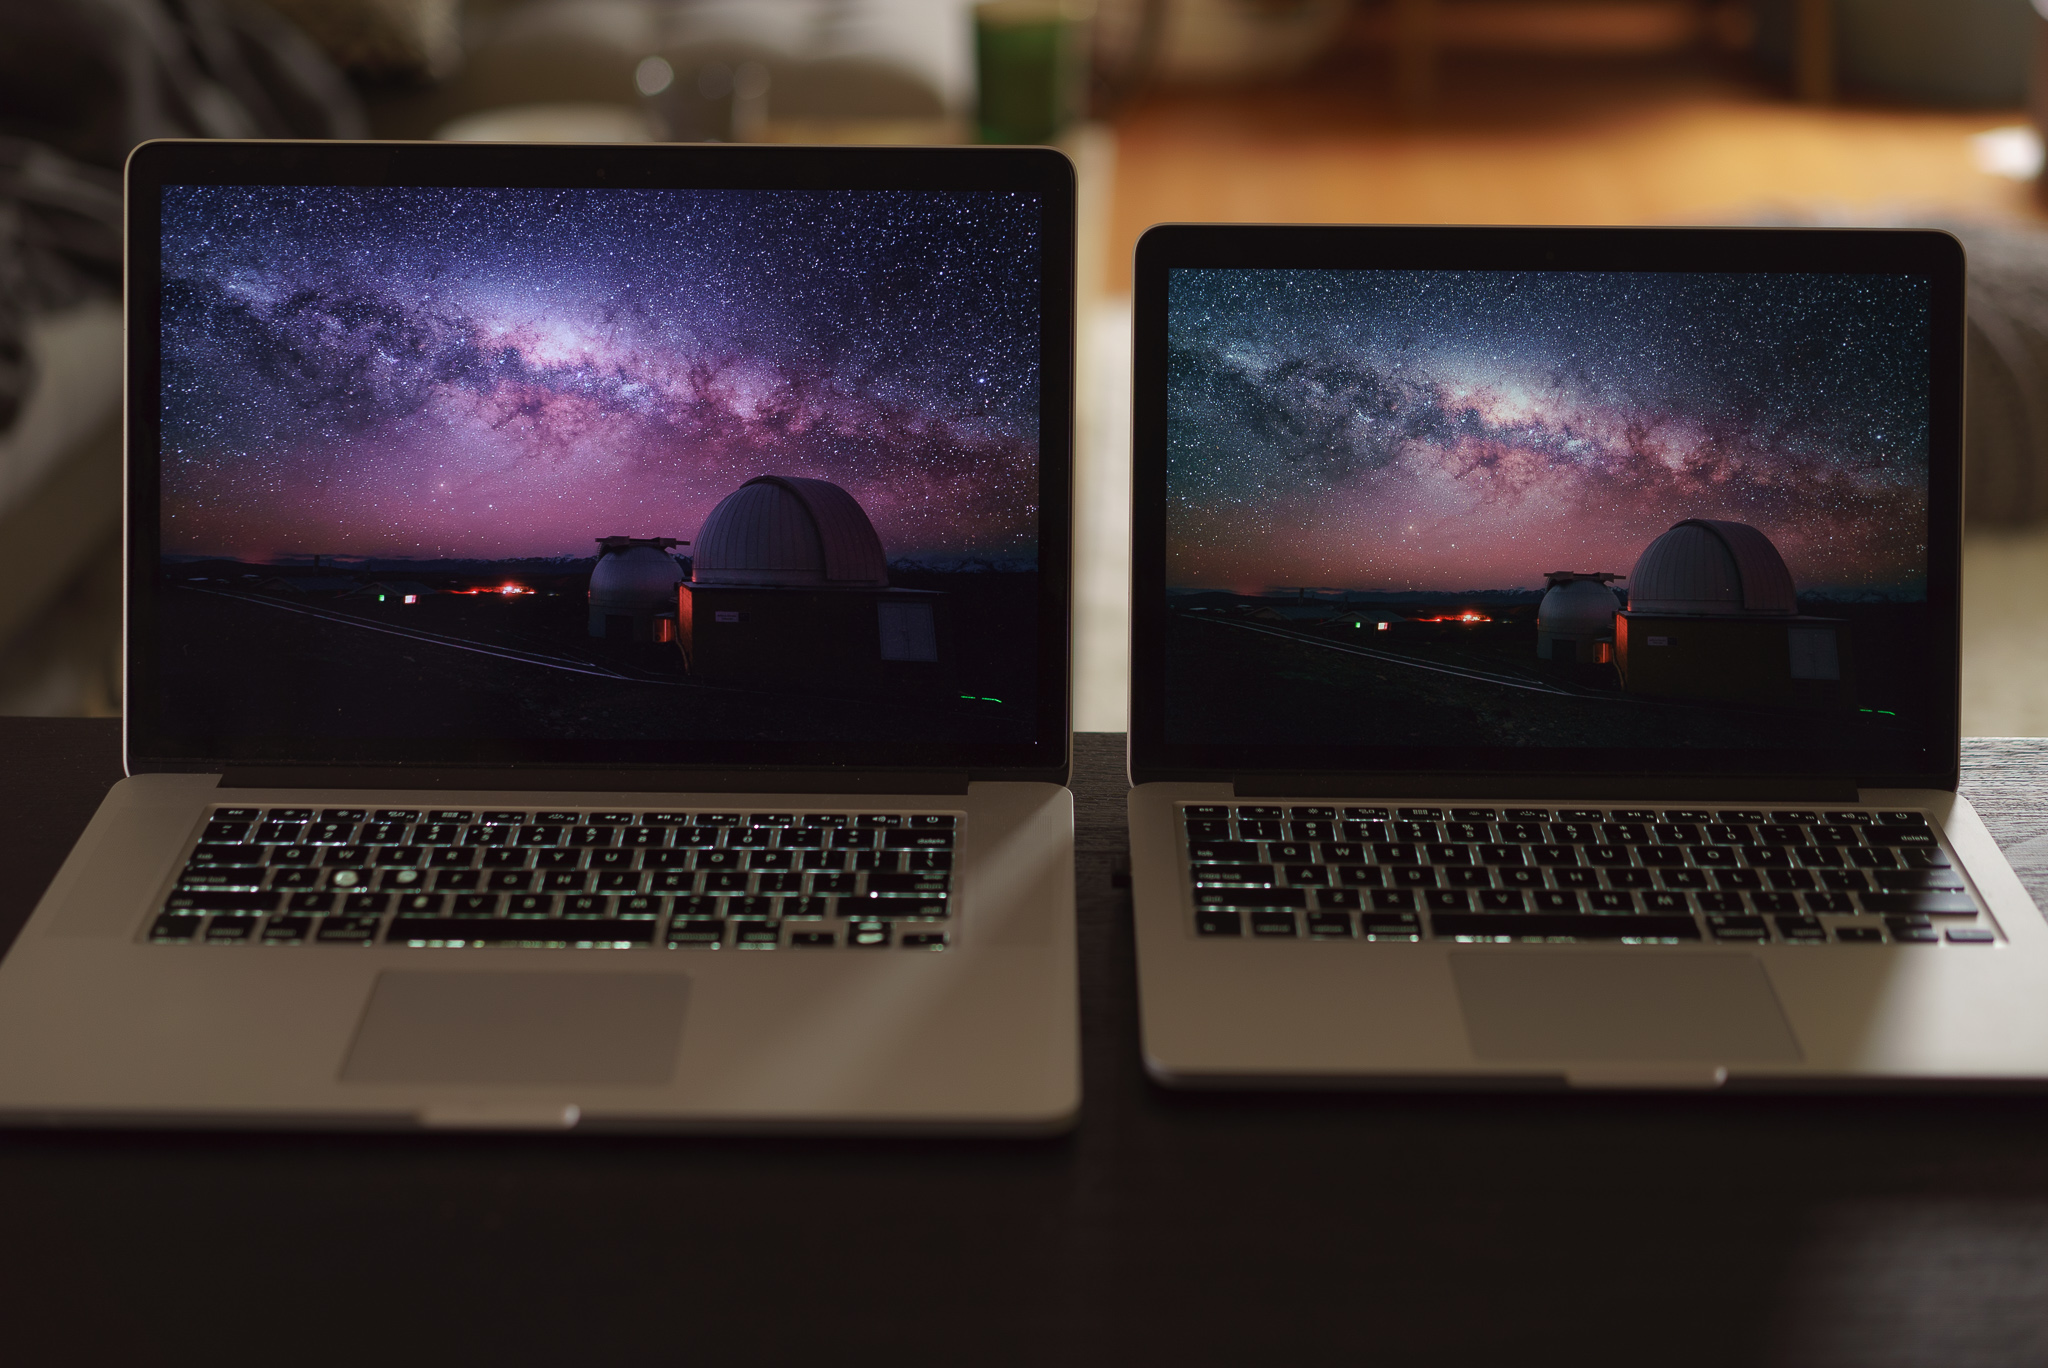
My final test of the success of the SpyderX Pro software was how closely it could match the displays of my Macbook with my wife’s Macbook. Let’s see what our original astrophotography test image looks like on each display now that both have been calibrated:
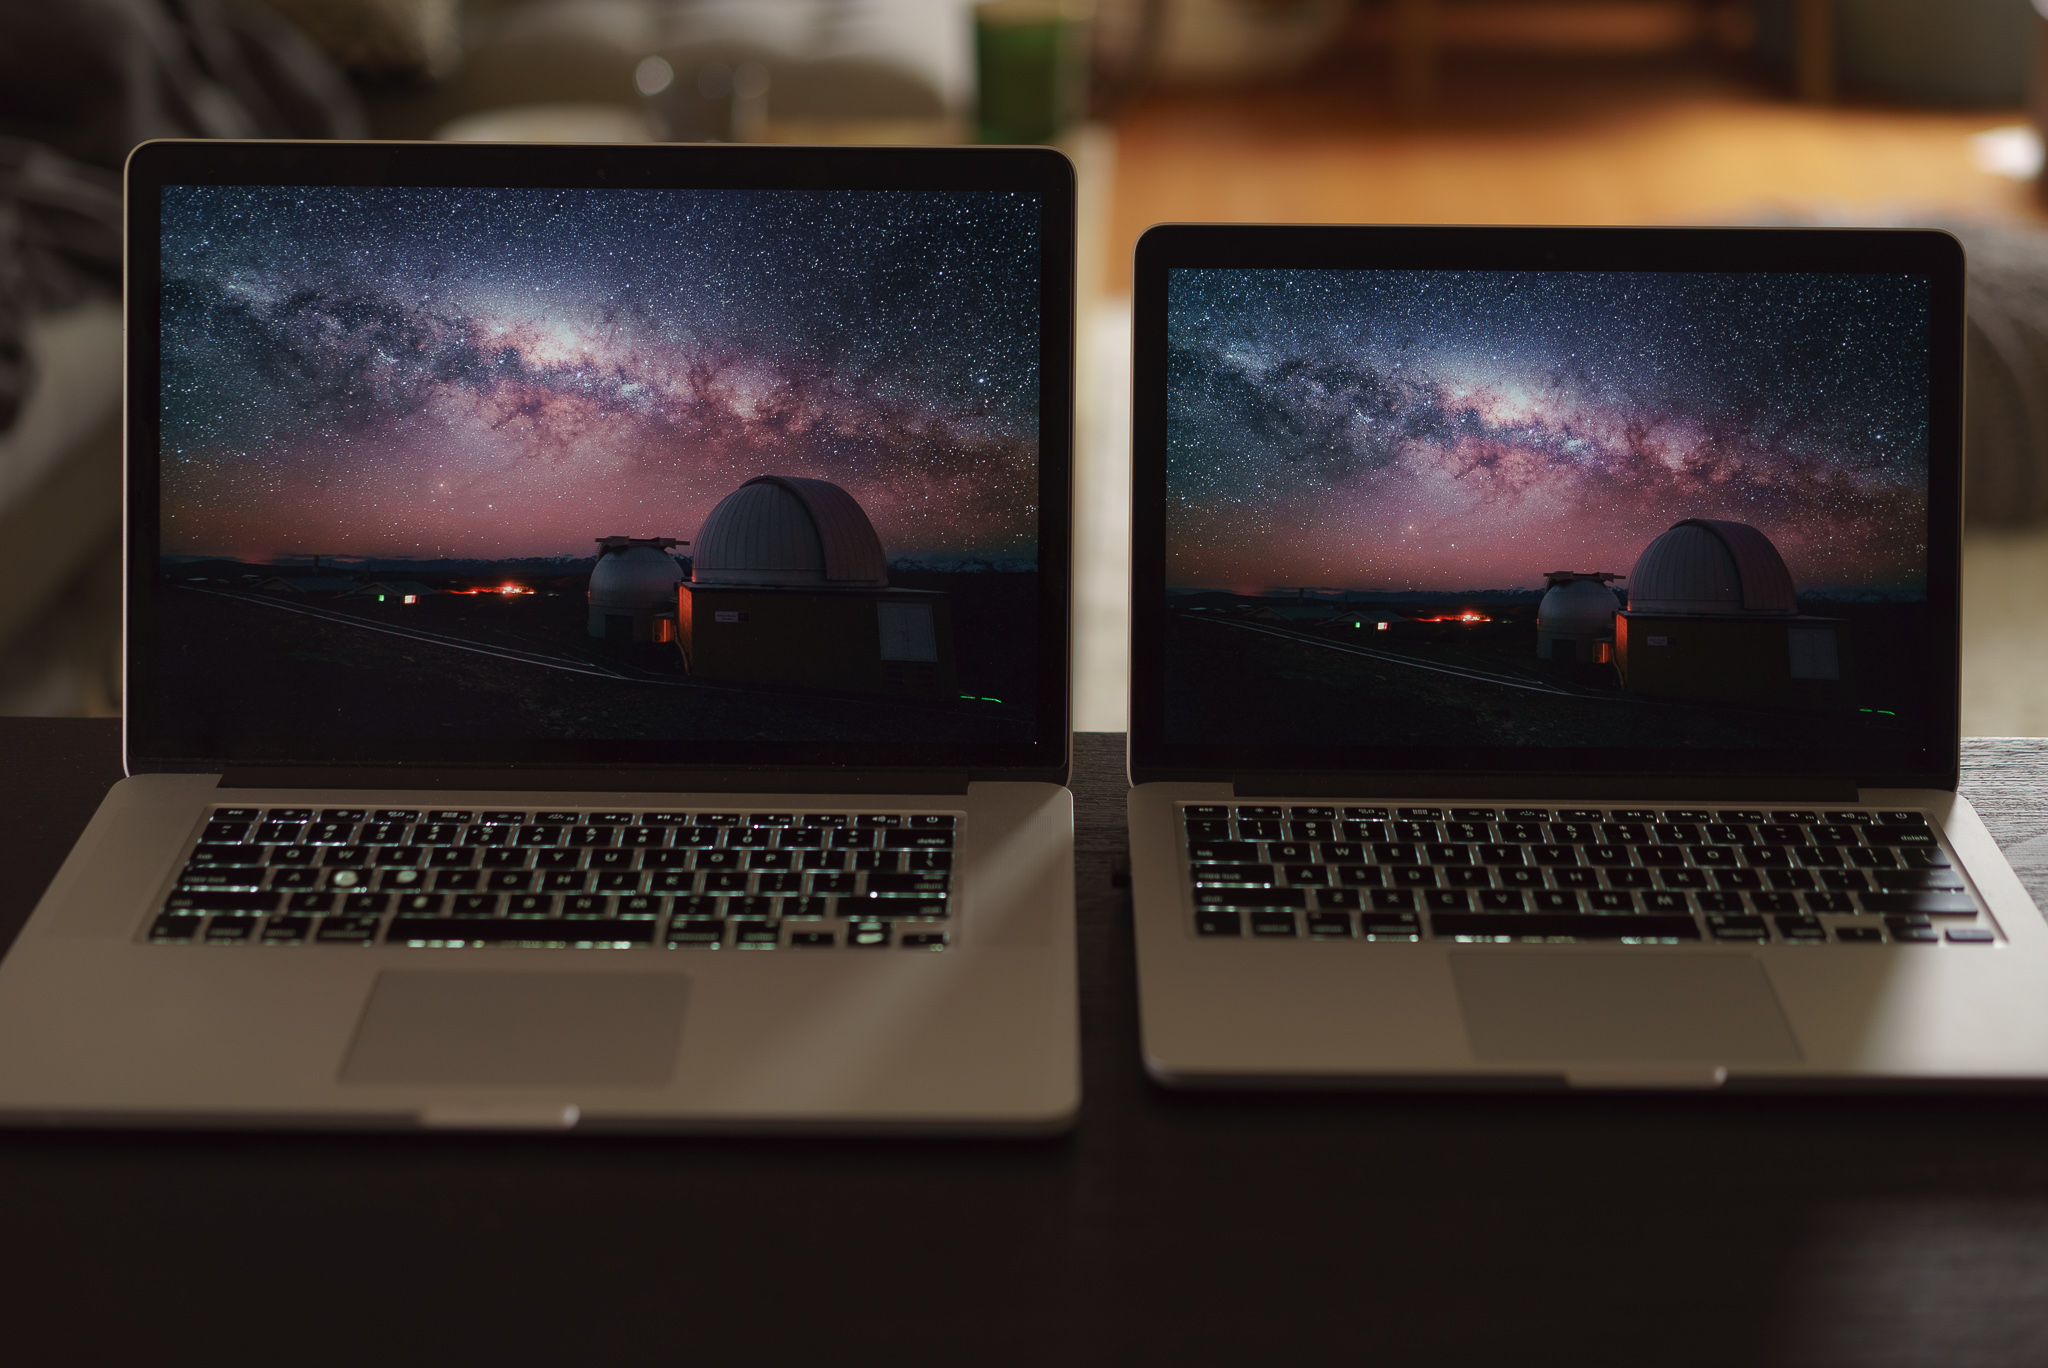
After calibration, our screens looked nearly identical in color, with only a very subtle difference if any, exactly as I want them to be. Compared to the first shot of our computer screens, the post-calibration shows a much more drastic change in color on my 15″ screen when compared to my wife’s 13″ Macbook screen. The blueish tint on my Macbook was corrected and finally my photos look the same between our computers. The real question is, how long has my display been so far out of specification?
Unlock Elite Features with a Free Software Alternative: DisplayCAL
While the included SpyderX Pro software ultimately does provide a good calibration extremely fast, I wish it allowed custom whitepoint targets. When calibrating our displays to the default 6500K whitepoint setting, I found both calibrated displays appeared too warm in our bright daylight lit living room. Having a 7000K or even 7200K setting would have been much closer to matching the normal environment where we use our computers and the white values that we’re used to. Unfortunately, the SpyderX Pro software does not allow setting a custom temperature whitepoint. Such a feature from Datacolor is only available with their more expensive SpyderX Elite model.
But if you want more control over screen calibration without needing to pay the extra dollars for the SpyderX Elite, I’d recommend downloading the free DisplayCAL utility, which works perfectly with the SpyderX Pro. It’s notable that DisplayCAL is much slower at performing calibration when compared to the SpyderX Pro or Elite software. DisplayCAL is a little less easy to use than SpyderX Pro, but it allows for finer tuning of a white point and other more advanced features.
After installing DisplayCAL and the included ArgyllCMS package, DisplayCAL starts in the “Display & Instrument” tab and reminds you to let your monitor warm up for 30 minutes, and to disable or reset any monitor picture settings to their defaults. you select your monitor, backlight type, color calibration instrument.
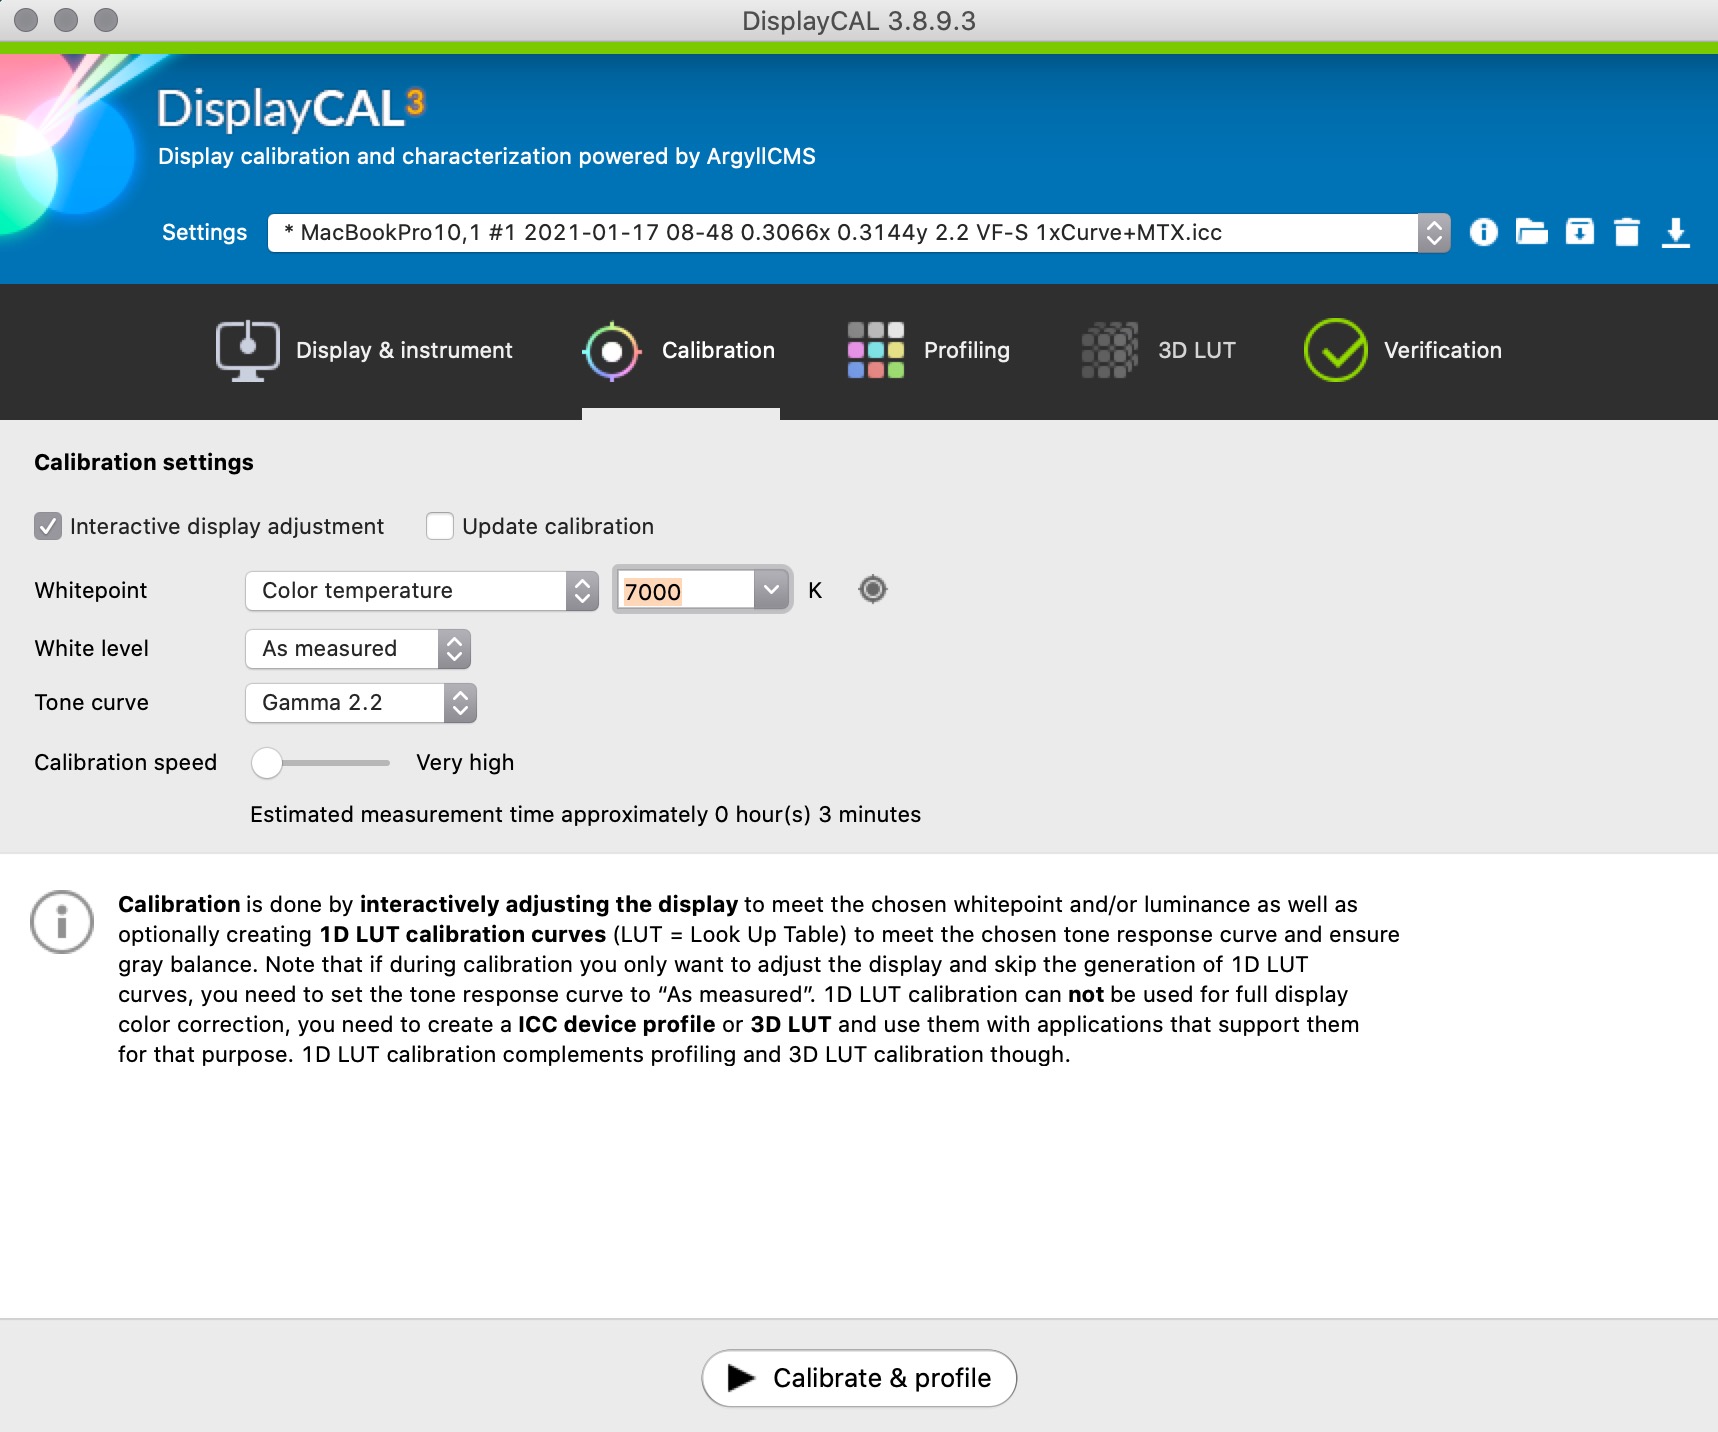
In the “Calibration” tab, DisplayCAL allows the selection of a target whitepoint either “as measured” or via color temperature or chromaticity coordinates. DisplayCAL also allows the user to find custom chromaticity coordinates with a visual whitepoint editor. This tool allows the user to adjust the target whitepoint dynamically to find a whitepoint that looks like pure white in their working environment. This specific utility alone makes DisplayCAL significantly better a tool than the standard SpyderX Pro software. Simply pressing “Calibrate & profile” will walk you through the hardware setup and start the calibration process.
DisplayCAL’s drawbacks are in its complexity and speed. Even the fastest DisplayCAL calibration setting took about 5 minutes (even though it was estimated to take only 3 minutes) on my computer. Compared to SpyderX Pro’s nearly 1 minute calibration, DisplayCAL seems to work at a snail’s pace. Ultimately though, I found that with the infrequency that I expect to need to calibrate my display, the slower pace of DisplayCAL is worth the ability to calibrate our computer screens to a custom whitepoint.
Conclusions
Ultimately, using the the SpyderX Pro on both our computers opened my eyes to the value of a properly calibrated monitor. The takeaway is that the SpyderX Pro is simple to use and very fast and can match multiple displays to a common standard.
While my experience with the SpyderX Pro was generally positive, it’s hard to ignore how the product is hindered by built-in limitations in its software. Specifically, the fact that the SpyderX Pro does not allow the setting of a custom whitepoint is a disappointing omission from the “Pro” software, such a feature only being available on the more expensive “Elite” model.
These limitations are purely software barriers. The hardware is capable, but its included software is carefully stripped of certain features I would think are exceptionally useful for a professional, despite it being called a “Pro” product. These features, which are standard in free software like DisplayCAL, are only available to the “Elite” (at nearly twice the price) if you want them out of the box from Datacolor.
It should be noted that in addition to allowing a custom white point, the Elite version of the SpyderX software does include significantly more features such as a soft proofing, SpyderTune for manual by-eye color adjustments, and StudioMatch, a feature for perfectly matching a large number of displays across multiple computers, perfect for larger studios that want to match the displays of multiple artists. The Elite software also has other expert level features like manual adjustment of calibration curves, and measurement and analysis tools for checking how close your displays can show any given color value or a Color Accuracy test to show the effectiveness of the calibration. Basically, the Elite gives you all the capability of DisplayCAL with much faster calibration times.
I did find a lot of satisfaction in being able to download the free DisplayCAL software to “unlock” some of these features such as custom whitepoint and color accuracy testing. Ultimately, when factoring in the ability to use the free DisplayCAL software and when comparing prices to competing products like the X-Rite i1Display, the Datacolor SpyderX Pro is still one of the the most affordable options for entry into professional level display calibration and it does a good enough job for me to recommend. It’s just a little weird recommending a product in the context of using it with a free software tool and foregoing the software that was built for it in order to get the most out of it.
Ultimately now, I also recommend sticking with DisplayCAL in order to get more longevity out of your SpyderX Pro: it’s likely that Datacolor will try to pull a fast one and discontinue software support for your device in the near future.
SpyderX Pro – Pros
- Very simple to use
- Fast calibration
- Easy to closely match two different displays
- Compatible with DisplayCAL software
SpyderX Pro – Cons
- No custom white point setting in SpyderX Pro software
- Advanced features only available on Elite or with the use of slower DisplayCAL software
SpyderX Pro Verdict: 4.0/5
Recommended
Equipment Links
You can purchase the SpyderX Pro and SpyderX Elite from B&H:
The affiliate links on this page allow lonelyspeck.com to earn a fee when you buy from B&H.
Legal Disclosure
We are a participant in the B&H Affiliate Program which also allows us to earn fees by linking to bhphotovideo.com. We are a participant in the Amazon Services LLC Associates Program, an affiliate advertising program designed to provide a means for us to earn fees by linking to Amazon.com and affiliated sites. The SpyderX Pro was given by representatives of Datacolor to Lonely Speck for free.
Learn Astrophotography
Astrophotography 101 is completely free for everyone. All of the lessons are available on the Lonely Speck Astrophotography 101 page for you to access at any time. Enter your email and whenever we post a new lesson you’ll receive it in your inbox. Updates will be sent out only periodically, usually less than once per week.
[email-subscribers namefield=”NO” desc=”” group=”Lonely Speck Newsletter”]
Help us help you!
Lonely Speck is our full-time job. It’s been an amazing experience for us to see a community develop around learning astrophotography and we’re so happy to be a small part of it. We have learned that amazing things happen when you ask for help so remember that we are always here for you. If you have any questions about photography or just want to share a story, contact us! If you find the articles here helpful, consider helping us out with a donation.
Thanks so much for being a part of our astrophotography adventure.
-Ian and Diana