

Wide field landscape astrophotography is an impressive form of photography, and it’s accessible to nearly everyone with a camera.
Astrophotography has become much easier in the last decade, especially with today’s more affordable, large sensor, high signal-to-noise ratio digital cameras. There are few photographs that have as much existential impact as a nighttime landscape against the Milky Way. In this article, we’ll show you how to make an amazing photo of the Milky Way galaxy with a minimum of effort and equipment.
5-Minute Overview
Learn how to photograph the Milky Way in this quick overview of gear, planning, camera settings, and focusing for night sky photography.
Equipment
There are a few things that you will need. Here is a concise checklist of some of the most helpful things. Also check out our article on putting together your Beginner Astrophotography Kit.
- digital camera with manual controls
- fast lens (f/2.8 or lower preferred)
- tripod
- flashlight or headlamp
- intervalometer remote timer (optional)
- smartphone star map app (optional)
- dark location at a dark time of night
Digital Camera with Manual Controls
It is a common misconception that you need an expensive camera and lens combination to make a great Milky Way photograph. Pretty much any Digital SLR (DSLR) or camera with a Micro 4/3 sensor or larger is more than capable of photographing the Milky Way, especially when paired with the right lens.
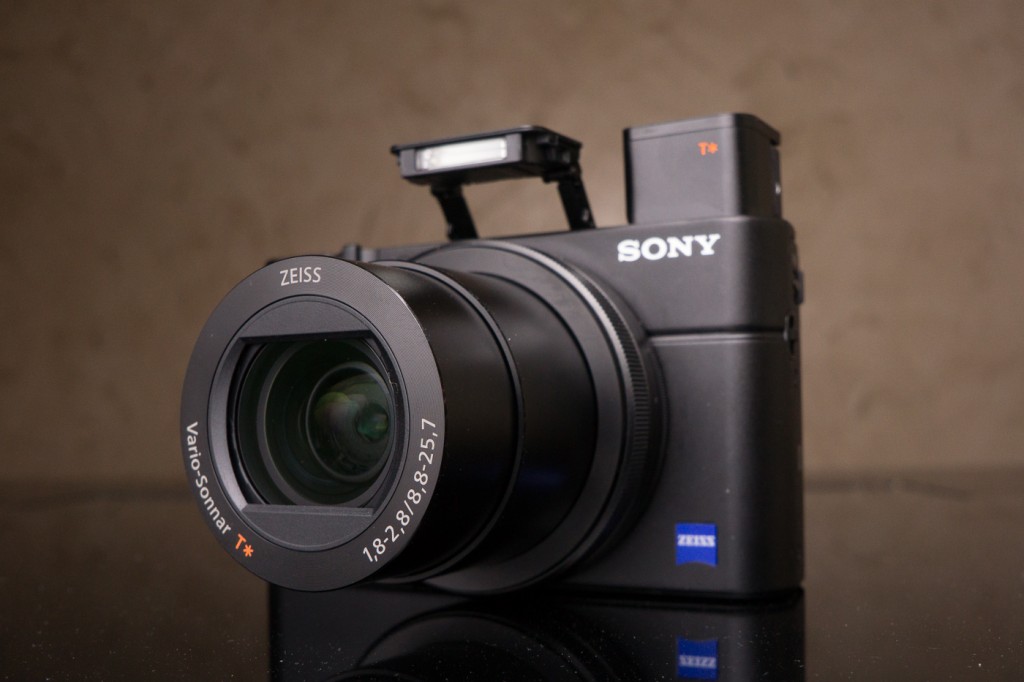
In fact, we’ve spent a lot of time testing the capability of certain point and shoot cameras and even certain smartphones that can photograph the Milky Way. One of our favorite backup cameras is actually the Sony RX100III, a relatively small, but high performance, point-and-shoot camera.
DSLRs and mirrorless cameras are generally the most common high performance cameras available and they offer an excellent price-to-performance ratio. If you’re interested, I personally use or recommend the following modern camera systems, but there are a plethora of other models that will work great. Here are a few of my favorite cameras:
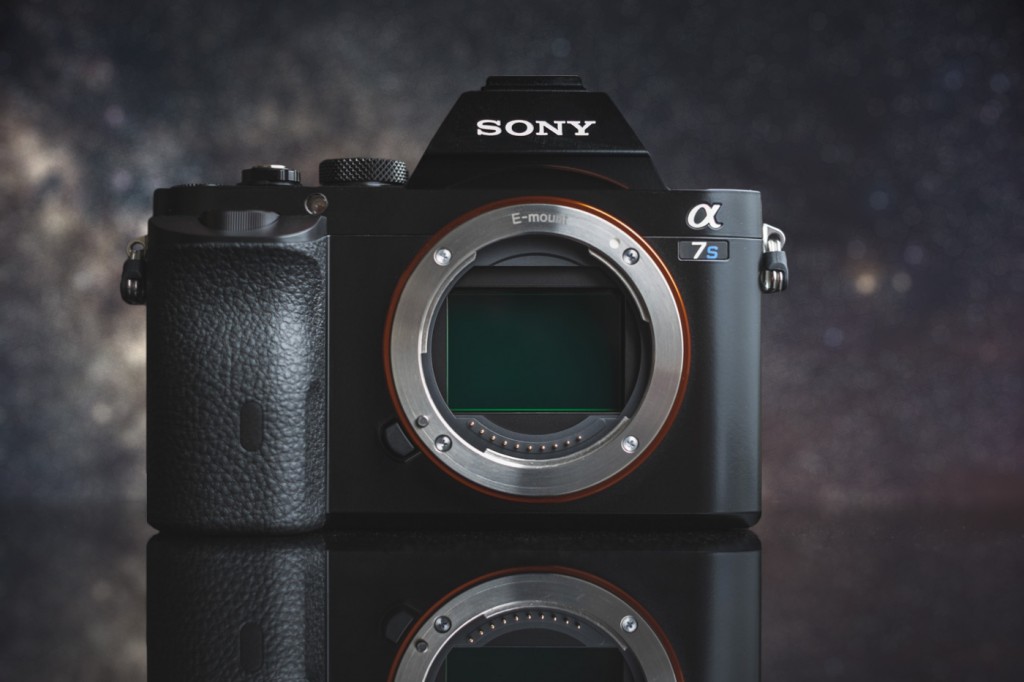
- Full-Frame Mirrorless: Sony a7S (Amazon / B&H ) or Sony a7III (Amazon / B&H)
- The Sony a7S and a7III are our personal favorite cameras for night photography. They shoot super low noise photos in low-light and their bright live-view feeds (especially the “bright monitoring” feature on the a7III) make shooting the Milky Way super easy. Check out our full review of the Sony a7S and Sony a7III.
- Full-Frame DSLR: Pentax K-1 Mark II (Amazon / B&H), Nikon D850 (Amazon / B&H), Canon 5D Mark IV (Amazon / B&H)
- APS-C Mirrorless: Sony a6500 (Amazon / B&H), Fujifilm X-T3 (Amazon / B&H)
- APS-C DSLR: Pentax KP (Amazon / B&H), Nikon D7500 (Amazon / B&H) , Canon 80D (Amazon / B&H)
…almost any budget friendly digital SLR is capable of photographing the Milky Way…
All told, don’t get too hung up on what camera to use. The above ones are some of my favorite but almost any budget friendly digital SLR is capable of shooting the Milky Way and it’s likely that the camera that you already own is worthy of trying.
Fast Lens (Optional)
Let us start by saying that the kit (likely an 18-55mm f/3.5-5.6 or similar) lens that came with your camera is a fine lens to start with. If you’re just getting into trying to shot the Milky Way, stick with what you’ve got. The image below was made with the regular Canon T2i (a much older model) and the Canon 18-55mm f/3.5-5.6. I set it to 18mm and f/3.5, shot a 30 second exposure at ISO 6400 and I think the results turned out great for such a cheap lens.
We are often asked the question: “I have such-and-such DSLR with the 18-55mm f/3.5-5.6 kit lens. Can I photograph the Milky Way with it?” The answer is absolutely yes!

Learning to shoot within the limits of equipment you have is always the first suggestion I make to readers. After a few nights of shooting you’ll start to learn the limits and figuring out what direction to go next will be a lot easier when you’re finally ready to upgrade. Once you’re convinced that you want to improve your results with equipment, some of the information below will be helpful:
In an older revision of this article, I talked about the merits of needing and using a “fast wide angle lens” for astrophotography. But with a bit more experience behind my belt and some more acquired knowledge, I’ve made an amendment to the suggestion and removed the “wide angle” requirement and instead suggest having pretty much any fast lens from 8mm to 50mm, especially an affordable, relatively fast, 35mm to 50mm prime lens with an f/number of f/2 or lower. The advantage of using a longer (less wide) fast lens are two fold: they tend to be cheaper and they can provide extra resolution and light gathering when compared to their wide angle brothers. In order to capture a wider field of view with these longer lenses, it’s possible to stitch together multiple frames for a high resolution panorama with quality levels exceeding those of an expensive medium format camera. Here’s my original suggestion below:
A “fast” wide angle lens will give you the best results when photographing the Milky Way. The important traits are a low aperture f/number rating and short focal length. The lower the f/number rating, the faster and better the lens will be for really dark shooting conditions. Most digital camera kits come with the ubiquitous 18-55mm f/3.5-5.6. While the minimum f/number of that lens (at 18mm) is f/3.5 is a little bit “slow” for Milky Way photography, you can still squeeze by with a slower kit lens like the common 18-55mm. Keep in mind that you will actually see a tangible difference with a faster lens that has a lower f/number rating.

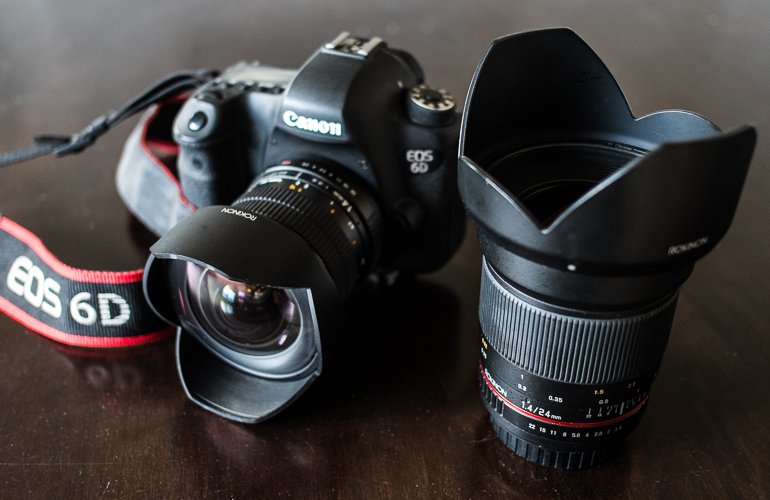
For the most significant improvement in the quality of your landscape astrophotography, I recommend a wide angle with a focal length of about 35mm or less on full-frame cameras, 24mm or less on APS-C cameras and 16mm or less on Micro 4/3 cameras. The Milky Way takes up a huge portion of the night sky and so a lens with a wide field of view will make it easier to capture as much of it as possible. The wider field of view will also allow us to use longer shutter times to gather more light without seeing the effects of the earth’s rotation as star trails. The shorter the focal length, the wider field of view of the lens. If you’re interested in the technical reasons for what makes a good lens for astrophotography, check out my guide on how to pick a lens for Milky Way photography. My absolute favorite lenses to use for Milky Way photography are the following:
- Full-Frame: Rokinon 14mm f/2.8 (Amazon)(B&H) and Rokinon 24mm f/1.4 (Amazon)(B&H)
- APS-C: Rokinon 10mm f/2.8 (Amazon)(B&H) and Rokinon 16mm f/2.0 (Amazon)(B&H)
- APS-C Mirrorless: Rokinon 12mm/2.0 (Amazon)(B&H) and Rokinon 8mm/2.8 Fisheye (Amazon)(B&H)
All of these lenses are relatively affordable and are excellent for nighttime landscape photography. They are available on a wide range of camera mounts including Canon, Nikon, Sony, Olympus, Fuji, and Samsung. You will be hard pressed to find better lenses for night photographs any price. For a more complete list of the best lenses for photographing the Milky Way on your camera system, check out my best lens lists:
- Best Lenses for Milky Way Photograph for Canon
- Best Lenses for Milky Way Photograph for Nikon
- Best Lenses for Milky Way Photograph for Fuji
Tripod
There’s nothing special to remember for your tripod choice, just make sure it’s stable enough for your camera and is light and compact enough that you’ll actually want to carry it around with you. It’s not very fun lugging around a heavy tripod, even if it could support an aircraft carrier. I personally use: the Sirui T-025X( Amazon )( B&H ). One recommendation I always make for photographers looking to buy a tripod is to find one with a ballhead. It’s much easier to quickly re-compose a tripod with a ballhead than one with the more video-centric pan-tilt head. A super cheap yet high quality option for a tripod that I tend to suggest is the ultra cheap Dolica Aluminum or Dolica Carbon Fiber Tripods (Amazon).

Headlamp
Since you’ll be in the dark, a headlamp is pretty much a necessity. I think I once listed this a optional but it really isn’t. You’ll need to see in the dark so definitely make sure you have one. I prefer an LED headlamp with a red “night vision” mode. For a long time I used an older version of the Petzl Tikka XP. It can be switched to night vision mode without needing to cycle through the white lighting modes. This control scheme makes it possible to turn on and off the red mode without blinding yourself with the white mode first. Petzl headlamps are great. I’ve never had one fail on me, the batteries will last for over 7 days straight of continuous output and they do a great job of warning you when the batteries are low with a red blinking indicator. Even when they’re running out of juice, it will keep on lighting for an extended period of time at reduced output so that you aren’t left in the dark.
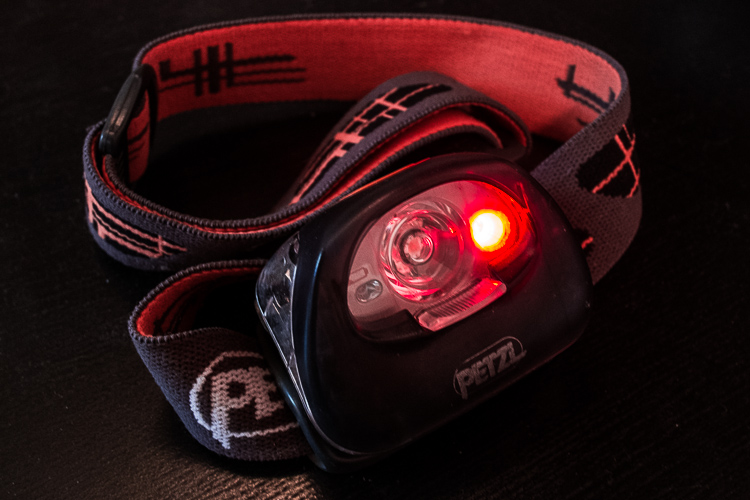
I’ve recently started recommending the newer Tikka R+ headlamp for its USB rechargeable Lithium Battery. It has all the functionality of my older XP headlamp (red night vision mode, variable brightness, waterproof, etc.) but can also be easily recharged via USB so I can keep it juiced up from a variety of power sources like my car, a lithium Battery pack, or even a solar charger.
Intervalometer Remote Timer (Optional)
An intervalometer will allow you to trigger your camera remotely without needing to touch the camera. This is particularly nice to prevent vibration in the camera that can add blurring or streaking in your images. An intervalometer will also allow you to make timelapse sequences and allows you to program exposures longer than 30 seconds when your camera is in Bulb (B) exposure mode. From experience, I particularly recommend the Neewer Intervalometers. They’re less than $20 and have never failed me. Plus, they use AAA batteries just like the my headlamp so I don’t need to carry two different types of batteries. Check if your camera has a built-in interval timer too. Some models like the Nikon D7100 have the functionality built in which makes it great for timelapses. If you’re using a Canon EOS camera, I recommend checking out the Magic Lantern firmware hack. It will enable all kinds of extra functionality like a built-in intervalometer and programmable Bulb timer.
Keep in mind that there are a lot of cameras that feature built in intervalometers (a list of cameras that d0). My Sony a7S and a7II have a built in timelapse apps that allows me to make timed exposures without the need to buy an accessory. Check your camera’s manual to see if your camera has a built in intervalometer.
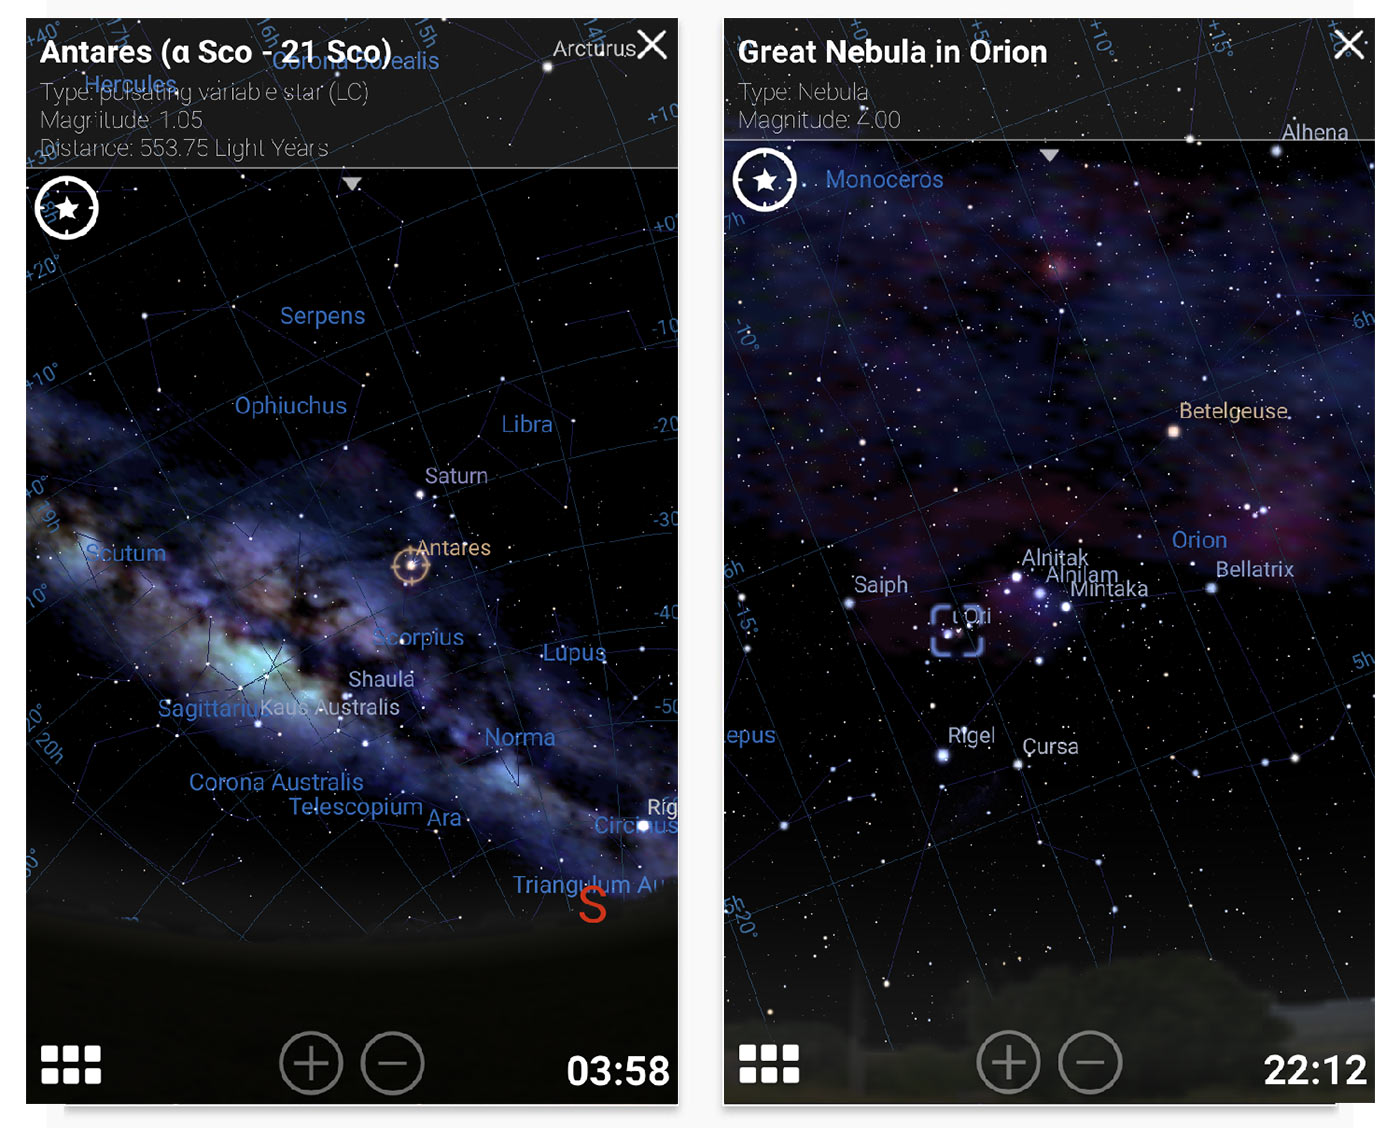
Smartphone Star Map App (Optional)
One of the first challenges of photographing the Milky Way is knowing how to find the Milky Way in the night sky. I personally use and recommend Stellarium for Android or Sky Guide for iOS. Stellarium and Sky Guide show a map of the stars with the plane of the Milky Way in view so you can more easily figure out where to point your camera.
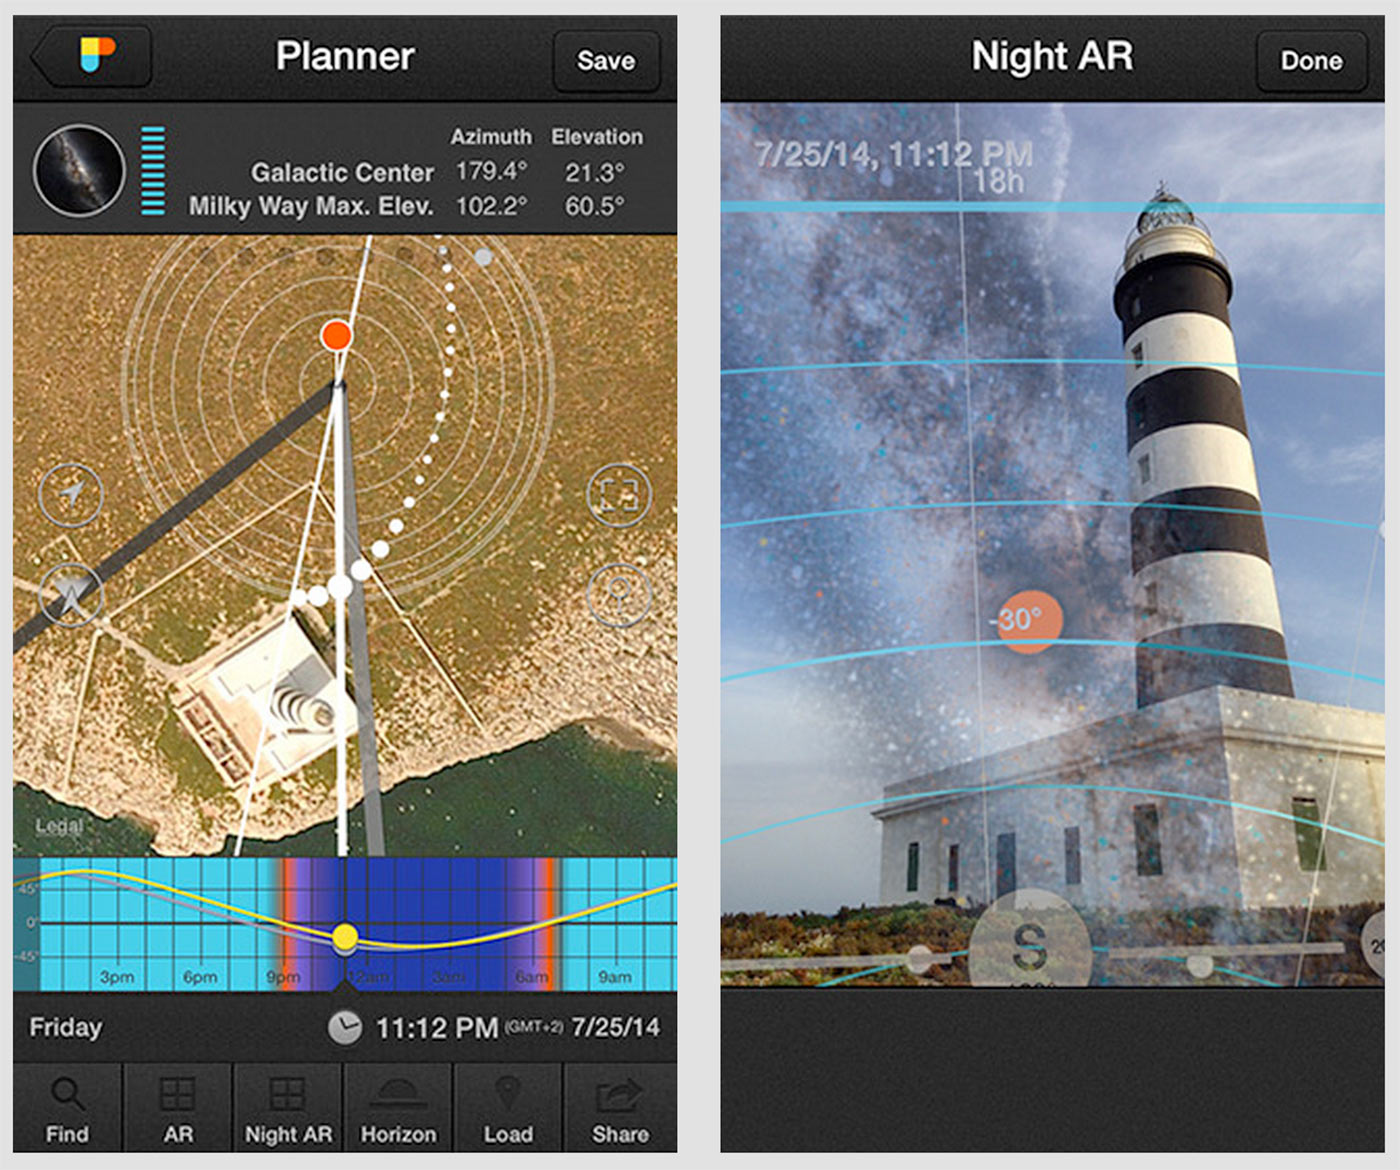
There are also a number of free applications like Night Sky Lite for iOS that will help you find out where the Milky Way is in the sky at any given time of year. The free apps work great if you’re just starting out. Two other great photo planning applications are PhotoPills for iOS or Android and The Photographer’s Ephemeris for Android and iOS which will allow you to plan for the phase of the moon, moonrise, moonset, sunrise and sunset.
The brightest part of the Milky Way is near the constellations Sagittarius and Scorpius but those constellations aren’t completely visible all year or in all parts of the world. To find the plane of the Milky Way at any time of year and in any part of the world, you’ll want to look for which of these constellations will be visible on the night you take photographs:
- Sagittarius
- Scorpius
- The Summer Triangle
- Cassiopeia
- Orion
- Crux
Use the app to familiarize yourself with where those constellations are. That’s where you will be pointing your camera. If you don’t have a smartphone, I recommend checking out the free and open source software Stellarium for Mac, Linux or PC.
Check out a more detailed list of tools and tips for finding the most important constellations in the night sky in my How to Find the Milky Way article.
Dark Location at a Dark Time of Night
Of all the items on the list above, a dark location is probably the hardest thing to find. Two-thirds of the United States population are unable to see the Milky Way Galaxy due to light pollution. Unless you are lucky enough to live in a remote rural location with super dark night skies, you will probably need to make a trek out somewhere relatively remote in order to photograph the Milky Way. This is a great opportunity to explore new places.

If you live in North America, check out Dark Sky Finder, or the Clear Sky Charts on cleardarksky.com. Both have light pollution maps and Clear Dark Sky has weather and seeing forecasts for locations with the darkest skies. If you live elsewhere in the world, check out Dark Site Finder, The World Atlas of Artificial Night Sky Brightness and the Blue Marble Navigator.
Find Open Public Spaces
We recommend finding publicly accessible lands like national parks and state parks as they’re often located away from cities and usually feature unique and beautiful landscapes. Check to make sure that your park is still open at night (most National Parks are Open 24/7).
Once you pick your location, plan on venturing there some time between the last quarter and first quarter of the moon calendar, ideally during a new moon. This is not a hard rule, but the closer date to the new moon, the more time you will have during the night with dark, moonless skies.
Making the Photo
Now that you have all your equipment, are in a beautiful outdoor location with dark skies and have located the Milky Way with your smartphone app, you are ready to make a photograph. There are a number of things that you’ll need to do to make a successful exposure of the Milky Way. Here’s a checklist of what we will cover.
- Set Up Your Camera
- Focusing in the Dark
- Choosing Your Exposure
- Exposure Adjustment
Set Up Your Camera
I am going to suggest some settings that will be a good ballpark start for your exposure. You may not even have to change them for your final exposure but that will depend on things like moonlight, light pollution, your camera, and your lens. We will start here and adjust accordingly. You should be familiar with each of these settings and how to change them. If any of these settings are unfamiliar to you, review your camera’s manual for how to change the setting.
- Shoot in RAW recording mode
- RAW image files contain more data than JPEG files and thus allow for greater flexibility in post-processing adjustments.
- Zoom out to the widest field of view your lens supports (24mm or wider)
- The wider field of view will reduce streaking of the stars due to Earth’s rotation and will allow us to capture as much of the Milky Way as possible.
- Manual focus
- Use manual focus (M or MF) mode on your lens and set it to the infinity mark if possible. We will focus more precisely later.
- Manual exposure
- Set your exposure mode to Manual (M)
- Disable long exposure noise reduction (optional)
- Long exposure noise reduction will reduce grain on your photos by taking a second photograph without opening the shutter to record and subtract noise data from your image. This will usually add additional wait time to each exposure before you will be able to use your camera again for the next exposure, so we usually don’t recommend using this setting for beginners. This way you’ll be able to more quickly tweak your focus, settings, and composition between shots.
- Enable the histogram in the image review (optional)
- This will allow us to see a graphic display of our exposure and adjust accordingly.
- Use manual white balance.
- Many things like light pollution or moonlight can change the white balance of the image so just set it to any manual white balance (we use daylight or 3800K). Use of manual white balance is especially important when shooting a sequence of images (timelapse or stack) in order to prevent unexpected changes from photo to photo. (Note: Since we’re shooting in RAW, we can always make adjustments to the white balance later, so don’t worry too much about exactly which white balance setting you choose.)
Exposure Settings
The exposure settings that I recommend in a dark sky area are dependent on the type of camera and lens that you are using. Use the calculator below to determine the exposure that I recommend you use initially. Once you take your first exposure, you can adjust as necessary based on your exposure histogram.
- The shutter speed is calculated based on the focal length of your lens and the size of your camera’s sensor. Longer focal lengths and smaller sensors require shorter shutter speeds to prevent star trailing.
- The f/number should generally be set to the lowest possible number, preferably f/2.8 or lower if your lens supports it. Lenses with f/numbers of f/4.0 or higher are not recommended.
- The ISO is calculated based on your aperture and shutter speed but it’s a little dependent on the noise performance of your camera. (Adjustments may be needed depending on your camera and just how dark your shooting conditions are.)
For a more complete explanation of how to figure out the exposure for shooting the Milky Way, visit my article on the Milky Way Exposure Calculator for a complete explanation of the calculations that are being used.
Focusing in the Dark
I like focusing before composition because it’s generally easier to focus your camera first, tape your focus ring, and then re-compose later. In general, you will want to make sure your lens is in manual focus mode (M or MF) and is focused at infinity. But rather than just setting the focusing ring to the infinity mark (on some lenses) and forgetting about it, we will want to make more precise focus adjustments to ensure the best possible photo quality. Here are a couple methods that I use to focus in the dark.
- Manual focus with Live View
- This is by far the most accurate method if your camera supports it. Enable live view on your camera and use the focus checking or the digital zoom function on a bright star to make the star appear like a pinpoint. I recommend centering the star in the frame before focusing on it to have the most even focus field. Note that you may need to change the Live View settings on your camera to “exposure simulation” or “manual,” in order to be able to see stars on the LCD. If you cannot see stars in the LCD, try focusing on a flashlight at a distance like in the method below.
- Auto focus or manual focus on a flashlight that is placed far away (greater than 100 feet or so)
- This can be an easy way to get your camera to focus at close to infinity in the dark but can be difficult if you don’t have a helping hand to hold the flashlight for you. It’s often best to place a flashlight next to an object in your frame that is at a distance of 100 feet or greater, the farther the better but after about 150 feet or so, it makes less and less difference. Plus, walking back and forth 300 feet just to focus your camera can be a drag. As soon as you get focus confirmation on the lit object, switch the lens back to manual focus (MF) mode to lock the focus at infinity, being careful not to twist the focus ring and mess up your focusing work. A flashlight can also be helpful if you wish to instead focus on a foreground object rather than infinity.
Regardless of the method of focus, make a test shot of the stars with the exposure settings above to check your focus. Zoom the LCD all the way into the image review to make sure that the stars look like pinpoints, if they are out of focus circular blobs, re-focus and check again. Always zoom the LCD into the preview review to check the focus, don’t take the initial thumbnail at face value. Once your shots are in focus, a piece of electrical tape or gaffer’s tape between the focus ring and the lens body can help prevent you from bumping the focus.
Understanding the Histogram and Adjusting Exposure
The settings that you calculated above when we setup your camera should be a good start. Once you are satisfied with your focus and your framing, the next thing is optimizing your exposure. This is where we will review the camera’s histogram information (The histogram is usually available by pressing “INFO” or “Display” or Up/Down arrows when reviewing photos. It really depends on your camera so check your instruction manual.) Typically we will desire a histogram that shows peaks toward the center of the graph from left to right. See below for examples of histograms for various exposures of the Milky Way.

Try to push your camera to the limits of its light gathering capability without compromising quality. Check and re-check your image review, zoom in on the LCD to check focus, review the histogram for exposure information and re-compose your frame throughout the night. Once you find an exposure you like, you can usually maintain the same exposure throughout the night.
Post Processing
If your image was exposed correctly, you should need only a little bit of post processing. RAW images are typically pretty flat and require some post processing to make the photograph as high quality as possible. I personally use Adobe Lightroom to process my photographs. They usually require a bit of editing to make them look their best.
Check out this before and after to see how much changes can go into a Milky Way edit:
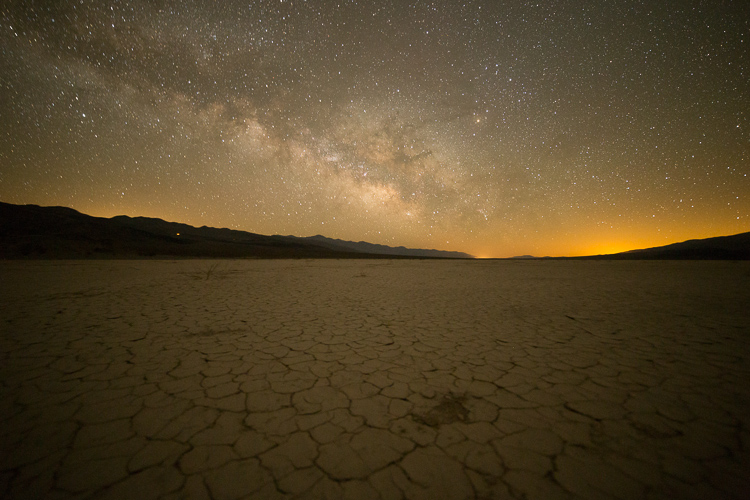
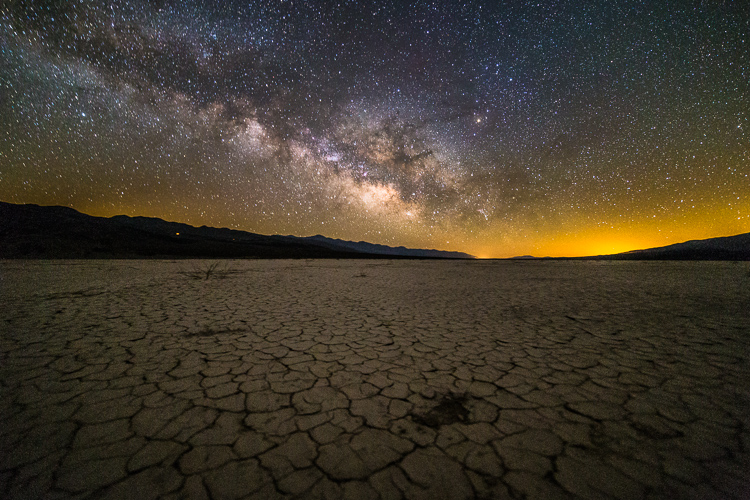
Click here for the complete Post Processing Article
The thing to keep in mind with post processing is that less is usually more. If you push the exposure of your photograph too much in post processing, you will often increase noise levels and reduce the quality of your photograph. For this reason, make your best effort to properly expose your photographs in the camera. There isn’t one right way to process your photograph but I’ve put together a new video tutorial to walk through the complete post-processing workflow that I use on nearly every single one of my Milky Way photographs. It’s very simple and straight forward and should give you a quick way to process of all your astrophotos.
That’s just about it! Even with a very limited set of tools, it’s possible to create some amazing photographs of our home galaxy. This lesson should have give you the most basic information needed to make some amazing Milky Way photographs. You have the tools, now all you need to do is let your creativity go crazy.
Disclosure
We are a participant in the Amazon Services LLC Associates Program, an affiliate advertising program designed to provide a means for us to earn fees by linking to Amazon.com and affiliated sites. We are also a participant in the B&H Affiliate Program which also allows us to earn fees by linking to bhphotovideo.com.
Learn Astrophotography
Astrophotography 101 is completely free for everyone. All of the lessons are available on the Lonely Speck Astrophotography 101 page for you to access at any time. Enter your email and whenever we post a new lesson you’ll receive it in your inbox. We won’t spam you and your email will stay secure. Furthermore, updates will be sent out only periodically, usually less than once per week.
[email-subscribers namefield=”NO” desc=”” group=”Lonely Speck Newsletter”]
Help us help you!
Believe it or not, Lonely Speck is our full-time job. It’s been an amazing experience for us to see a community develop around learning astrophotography and we’re so happy to be a small part of it. We have learned that amazing things happen when you ask for help, so remember that we are always here for you. If you have any questions about photography or just want to share a story, contact us! If you find the articles here helpful, consider helping us out with a donation.
[button font_size=”16″ color=”#136e9f” text_color=”#ffffff” url=”https://www.paypal.com/cgi-bin/webscr?cmd=_donations&business=lonelyspeckblog%40gmail.com&item_name=These+tips+help+keep+lonelyspeck.com+running.¤cy_code=USD&source=url” target=”_blank”]Donate[/button]
Thanks so much for being a part of our astrophotography adventure.
-Ian and Diana
[button font_size=”16″ color=”#136e9f” text_color=”#ffffff” icon=”arrow-left” url=”http://www.lonelyspeck.com/astrophotography-101/” target=”_self”]Back to Astrophotography 101[/button]
Hi Ian. Thanks for this and your other great resources on YouTube. I’m writing to let you know that the link above to the Uni of Pittsburgh article on the color of the Milky Way isn’t active. The link includes your domain as well as the actual domain of the link. The correct link should be: link (.pptx)
Also it’s not a PDF, it’s a PowerPoint file.
Thanks for inspiring me and many others to shoot more, shoot better and show others the beauty that’s there if we’ll all just look up at night.
Thanks Doug!
Quite impressive. You have a lot of great information. But there are also a couple of misconceptions in your article.
Correcting light pollution with color balance is the incorrect method. Color balance is a multiplicative process (scaling the red, green and blue channels up or down with a multiplier). Light pollution is added light so it should be subtracted. If you use color balance (multiplier) to correct light pollution, you are multiplying when you should be subtracting, so at one intensity one can make it look good, but at other intensities it will be incorrect and color balance will be off. So to correct light pollution, and remove airglow from deep sky astrophotography, one should subtract. Do this by moving the lower left corner point in the curves tool or the left slider in the levels tool, moving the point to the right (that is a subtraction operation). The problem with sliders is one can easily clip important data. I have a tutorial on how to do this without clipping.
The use of high ISOs like 3200 to 6400 has a side effect of saturating brighter stars losing star colors. Use of 800 to 1600 works better, then in post processing boost the low end without changing the upper end and you will retain more star color. Note that ISO does not change sensitivity, it is a post sensor gain. Digital cameras have one true sensitivity given by the quantum efficiency of the sensor. So any camera with decent electronics will give higher dynamic range at ISO 1600 than at 3200 or 6400 and higher and collect the same amount of light with the same exposure time and aperture.
ISO does look like sensitivity, but it is more like digital zoom: yes it looks like zoom but you really didn’t gain anything. Let’s say you are doing 30 second exposures at f/2. As you change ISO above 1600 the data numbers get brighter, the camera LCD gets brighter, but you don’t actually record any fainter stars or nebulae. Use of lower ISOs than about 1600 on many camera does not amplify the weak signals enough to get them above downstream electronics noise (Nikons and Sony are exceptions–ISO 800 works well too). If you image at ISO 1600 and 6400, then boost the ISO 1600 image two stops in the raw converter, it will look almost identical to the 6400 ISO image in terms of noise and saturated stars. So all you gain is more saturated stars without any more fainter stars. It is a very simple operational setting in the field to significantly improve ones night images. On the link above, see the first article in the series for more info on this. It shows a plot of dynamic range as a function of ISO. All cameras behave similarly (Nikons and Sony’s keep improving toward lower ISOs unlike Canon’s which flatten out at ISOs below about ISO 1600). Hope this helps.
Roger
Hey Roger,
Thanks for your feedback. I’ve been meaning to make a revised version of this article to include some of these and other corrections and improvements. I enjoyed your tutorial on correcting light pollution. Be assured that I’ll be updating this and other content on my site to better reflect what’s going on with ISO. I have learned a lot in the last few months about this, especially in regards to the differences in performance between the Sony and Canon sensors, all very interesting topics.
Hi Ian, awesome website, even better pics and information to rival that! I recently purchased a Sony a6000 and I’m interested in getting into landscape and night sky (milky way/astrophotography), all while starting from scratch and teaching myself how to use this camera. I used to be a forensic crime scene photographer and used a Canon EOS, so its been a different experience shooting evolving, natural beauty rather than the stationary and morbid. I’m curious if you have ever or can put together a list of items best for the a6000, and some images that you’ve captured with it, to give us mirror less users more hope ? I plan on doing my ordering through your amazon links to help you out.
a6000 user here, and a beginner at night sky photogprahy as well. I just purchased the Rokinon 12mm f2.0 from Amazon; from all the reviews it seems as if its the ideal lens for the a6000 in this application.
Hey Kyle, thanks for the comments! I have an a6000 as well and the first two things I would recommend most for astrophotography are the Rokinon 12mm/2 Manual Focus Lens and a decent tripod. It’s a brilliantly good camera for the money and it paired with that Rokinon 12mm is a great combination for shooting the night sky.