

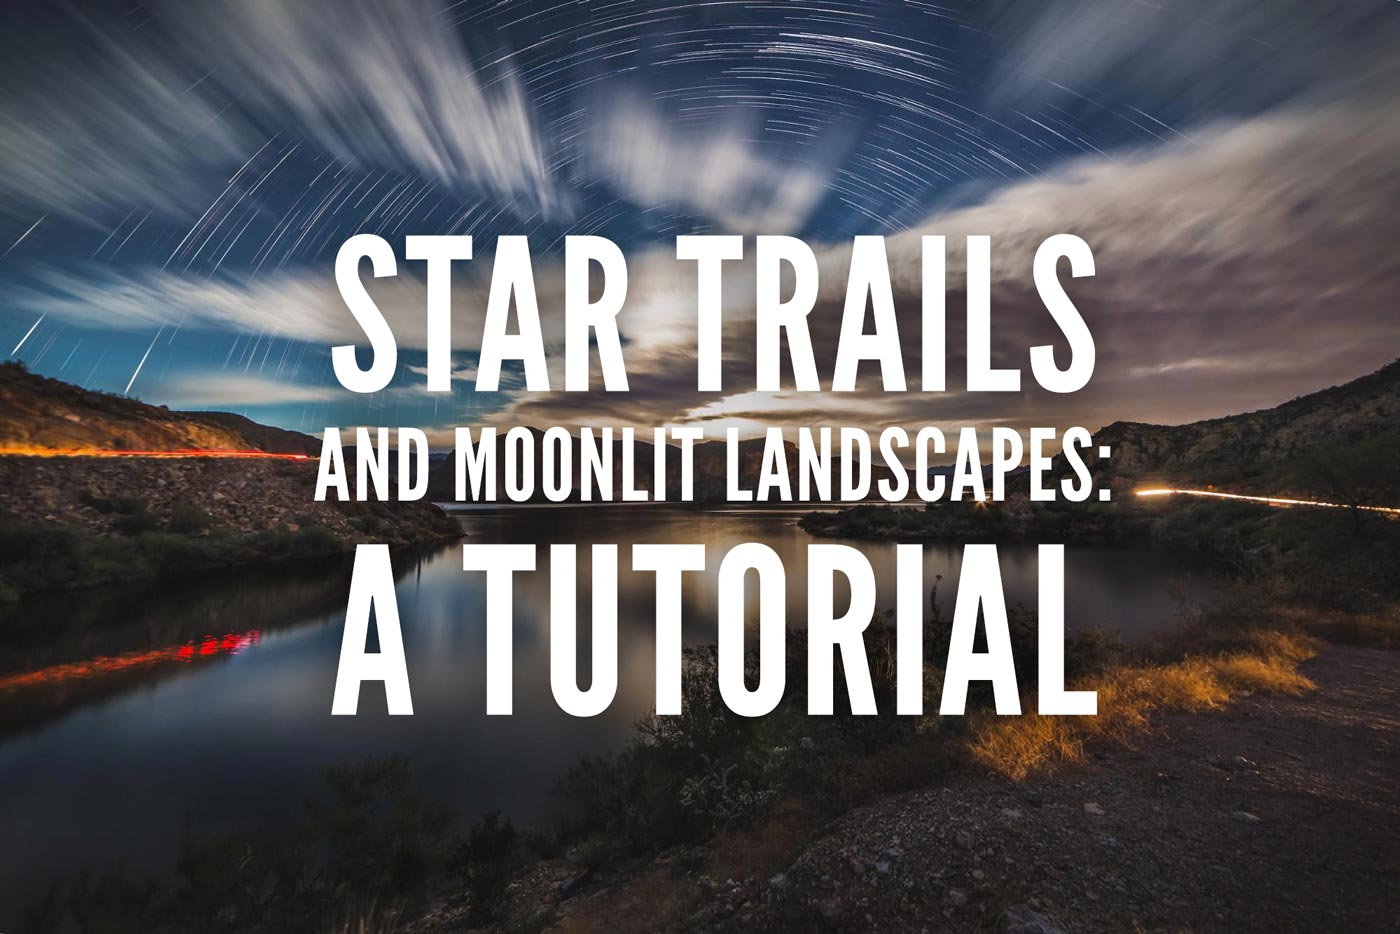
“The first time I made a photograph of a moonlit landscape, I literally said “wow” out loud. I couldn’t believe how much detail the moonlight brought out of the photograph.” In this tutorial, Tyler Sichelski walks through his process for shooting and processing surreal long exposure landscapes under the light of the Moon.
Introduction
Landscape photography is all about chasing the perfect light. Most of us know of this time as “magic hour”; usually 1 hour after sunrise and 1 hour before sunset when the sun is low above the horizon, but sometimes we forget about the other light source in our sky: the Moon.
Photographing under the light of the Moon can create dramatic, surreal landscapes that will set your photography apart from the rest. The full Moon’s surface reflects an average of 12 percent of the sunlight that hits it. The soft moonlight is unlike the harsh daylight and interacts with the landscape in a different way.
The first time I made a photograph of a moonlit landscape, I literally said “wow” out loud. I couldn’t believe how much detail the moonlight brought out of the photograph. In this article I will walk you through the process as I prepare for a moonlit landscape photoshoot, teach you how to capture some amazing shots, and show you how to stack multiple exposures to create an impressive final image. The best part: you can achieve incredible results with entry level equipment.
The first time I made a photograph of a moonlit landscape, I literally said “wow” out loud. I couldn’t believe how much detail the moonlight brought out of the photograph.
Equipment
Here is a checklist of the things you will need for moonlit landscape photography:
- Any Digital Camera with Manual Controls
- Bulb Mode (B) functionality (optional; without it your exposure length will be limited)
- Intervalometer or shutter cable release for making many exposures over 30 seconds
- Tripod
- Flashlight or headlamp
- Dark, interesting location
- The Moon at or near full phase
- Image stacking software (Photoshop or the free StarStax program)
Digital Camera with Manual Controls
You do not need an expensive camera to capture amazing images under the Moon! Any digital camera with manual controls will work. Manual controls give you full control of your camera’s aperture, shutter speed & ISO.
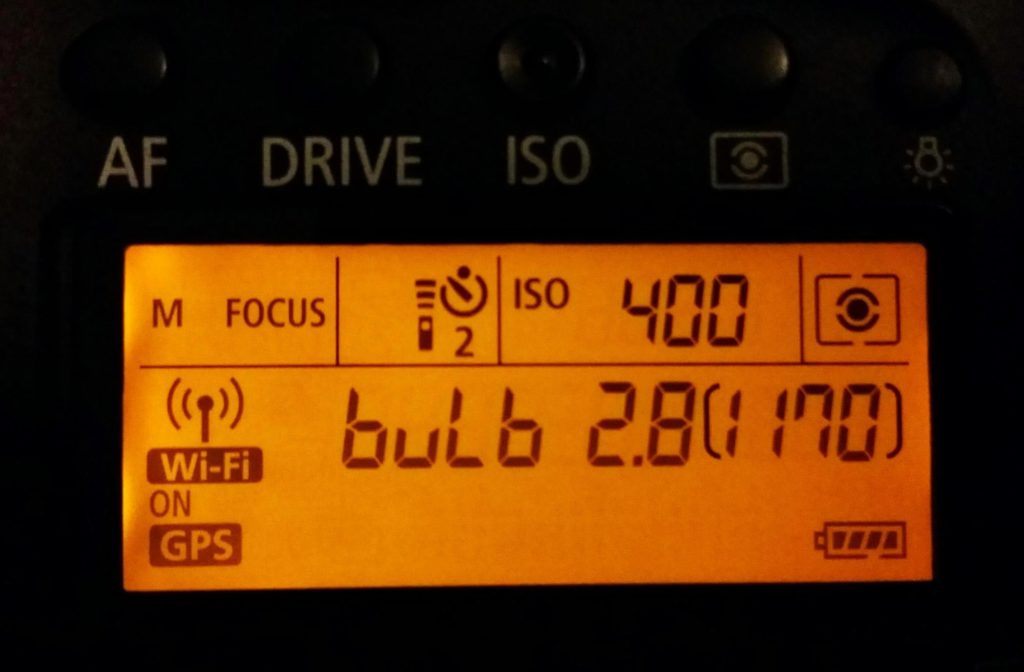
For this shot I will use my Canon EOS 6D
Bulb Mode and Intervalometer
Bulb Mode functionality is ideal, but is not absolutely required. Bulb (indicated as B on your camera), is a shutter speed setting that allows for long exposure times directly controlled by you. Simply put, the shutter will stay open as long as you have the shutter release button pressed. I highly recommend a lockable shutter release cable or an intervalometer to prevent any vibrations that may blur the final image.
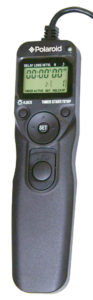
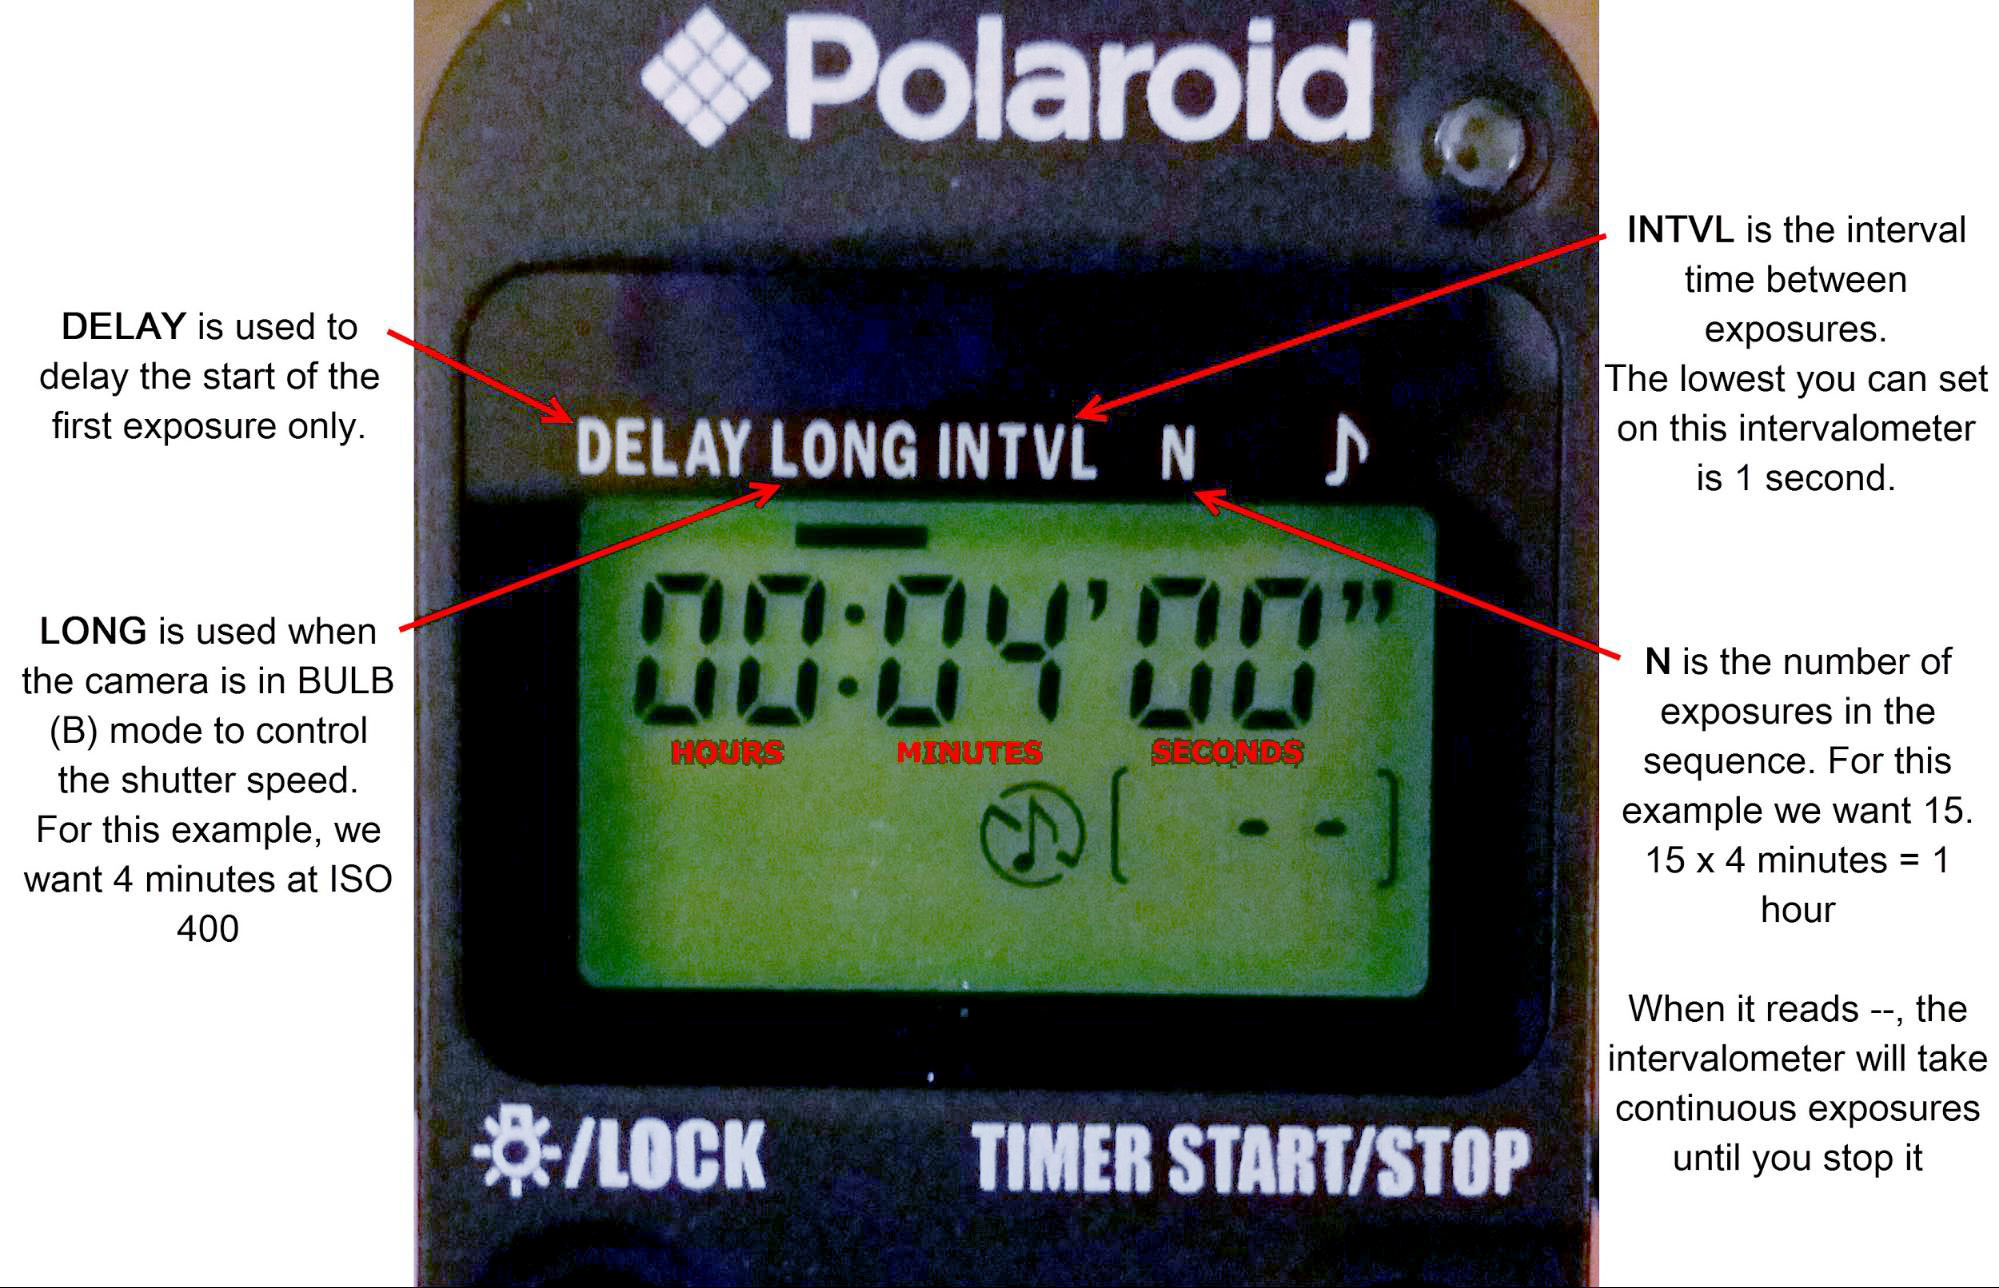
On my Canon 6D and many other cameras, a shutter release cable is necessary for exposures over 30 seconds. For this tutorial, I will be using my cheap Polaroid Intervalometer. I’ll use either the shutter release lock for exposures over 30 seconds or program the interval timer to a specific shutter length. There are a lot of affordable third party intervalometers available. Just make sure you find one that’s compatible with your camera.
Average/Large Aperture Lens
Lenses with a large aperture (low f/number, i.e. f/1.4) are often called “fast” lenses. A lens’s f/number represents its largest possible aperture. The lower the f/number the more light it lets into the camera. I prefer low f/number lenses because they tend to be sharper when *stopped down. For moonlit landscapes, I would recommend using a lens with an f/number of f/4 or lower. Almost any wide angle lens will fit into this category, and that includes the 18-55mm kit lens that most likely came with your DSLR!
*In theory, when using an f/4 lens, you should be able to increase the sharpness of your image by “stopping down” to f/5.6 (as we will in our example) instead of “shooting wide open” at f/4.
Focal length will depend greatly on where and what you are shooting. Shorter focal lengths are great when capturing large scenes, and a long telephoto focal length is great for isolating specific areas in the scenery. Be aware of zoom lenses with a variable aperture like an 18-55mm f/3.5-5.6. The lowest aperture f/number varies from f/3.5 to f/5.6; this means that as you increase the focal length, the f/number will get larger. With lenses like this, it tends to be best to zoom out to its shortest focal length to give you access to the lowest f/number for night photography.
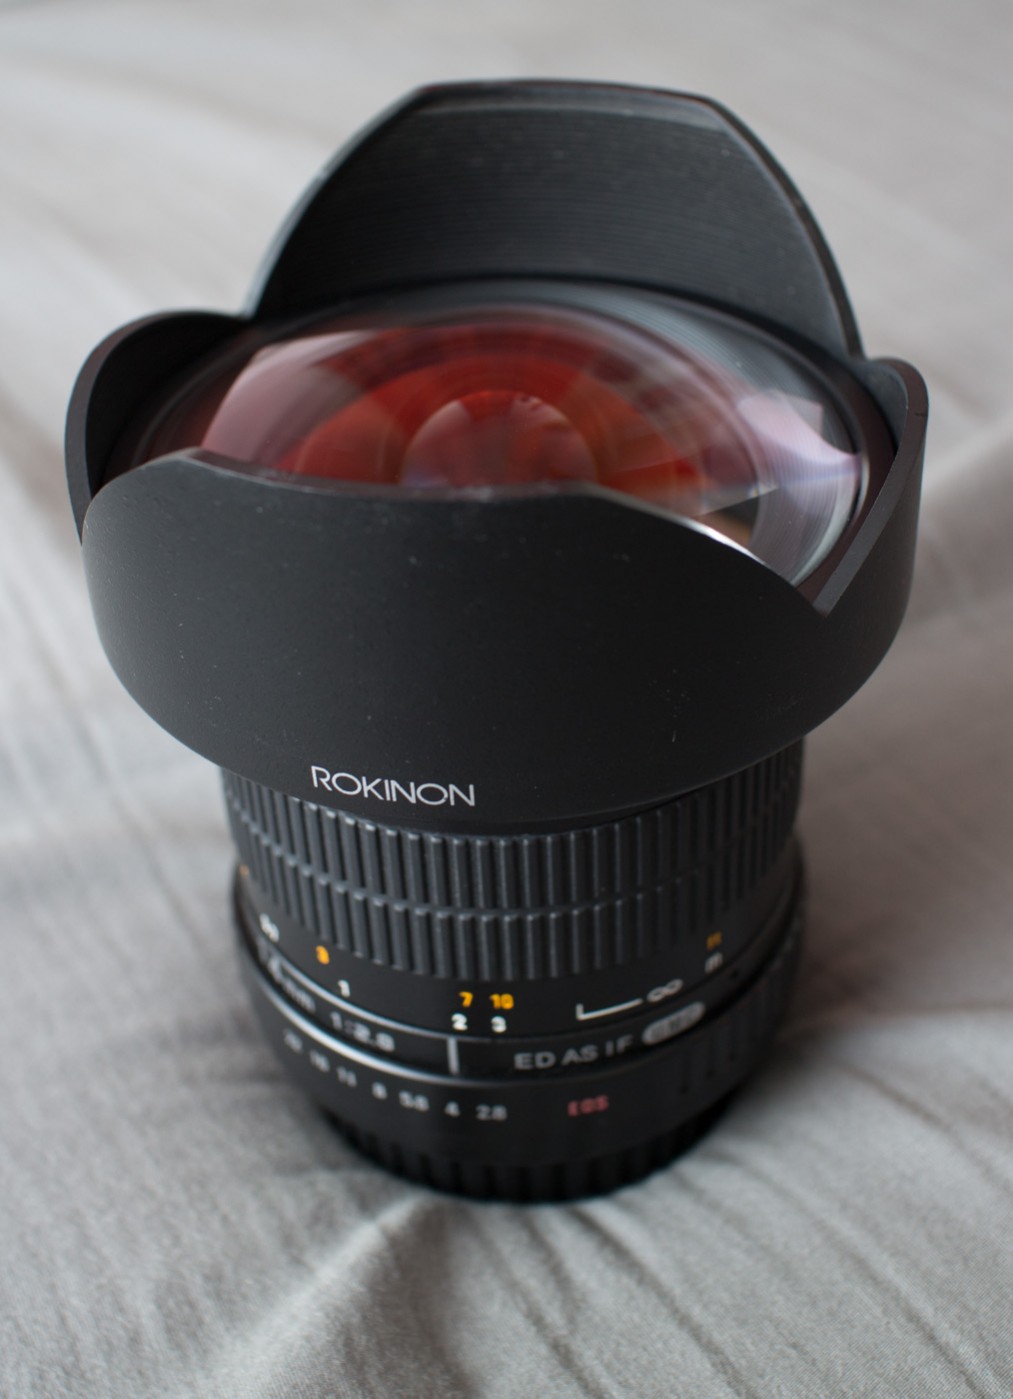
I will be shooting with my Rokinon 14mm f/2.8 lens for this tutorial. It’s a fully manual lens and is very sharp when shooting at f/4. It’s available for most camera mounts and is arguably the best 14mm glass you can buy for the price (less than $400, compared to the Canon 14mm f/2.8L which is well over $2,000). However, on a full-frame camera like my Canon 6D, there is noticeable moustache distortion, most of which can be cleaned up using profile corrections in Adobe Lightroom or the RAW editor of your choice.
Here are some of my recommended lenses for crop sensor DSLRs (APS-C) for under $1000 (from lowest price to highest):
- Sigma 10-20mm f/4-5.6 EX DC HSM
- Rokinon 10mm f/2.8
- Tokina 11-16mm f/2.8 AT-X116 Pro DX II
- Tokina AF 12-24mm f/4 AT-X 124 Pro DX II
- Canon EF-S 10-22mm f/3.5-4.5 USM
- Nikon 10-24mm f/3.5-4.5G ED AF-S DX Nikkor
And here are some of my recommended full-frame DSLR lenses under $1000 (from lowest price to highest):
- Rokinon 14mm f/2.8
- Canon 20mm f/2.8
- Rokinon 24mm f/1.4
- Sigma 17-50mm f/2.8 EX
- Tokina AT-X Pro FX 16-28mm f/2.8
- Canon EF 17-40mm f/4 L USM
- Sigma 24mm f/1.4 DG HSM Art
Tripod
One of the most important pieces of your kit will be your tripod. During very long exposures, it is vital to have your camera rock solid. You don’t want to be sitting around for minutes and have a slight breeze ruin your shot.
There are a lot of brands out there; I personally use the Manfrotto MT190XPRO3 tripod, with a Manfrotto 498RC2 ball head. If I am going to be traveling, I will take my Benro Travel Angle Tripod/Ballhead. I love using ball heads because it allows me to move my camera freely in all directions with one turn of a knob.
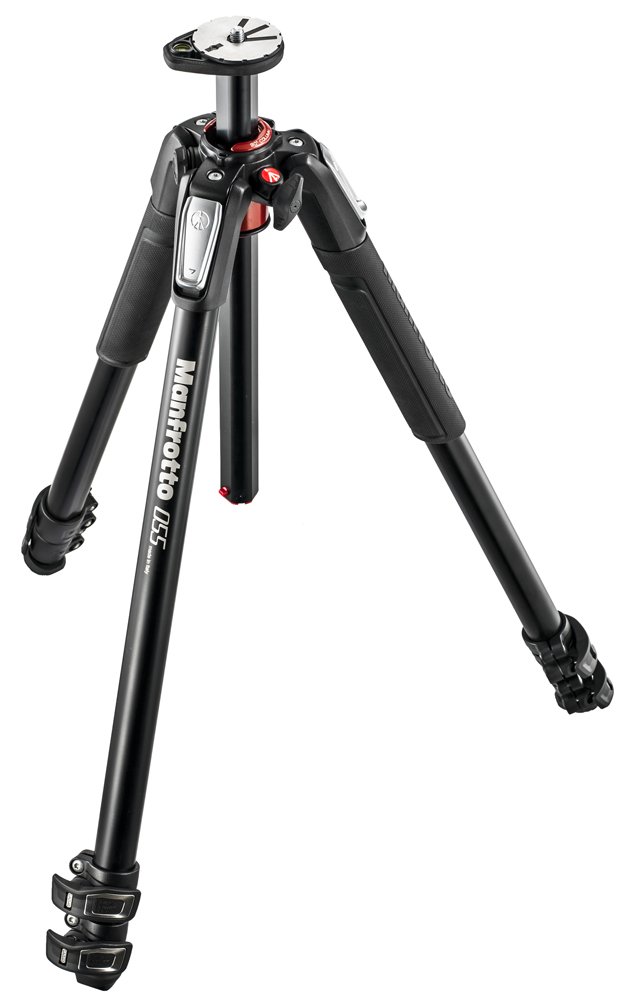
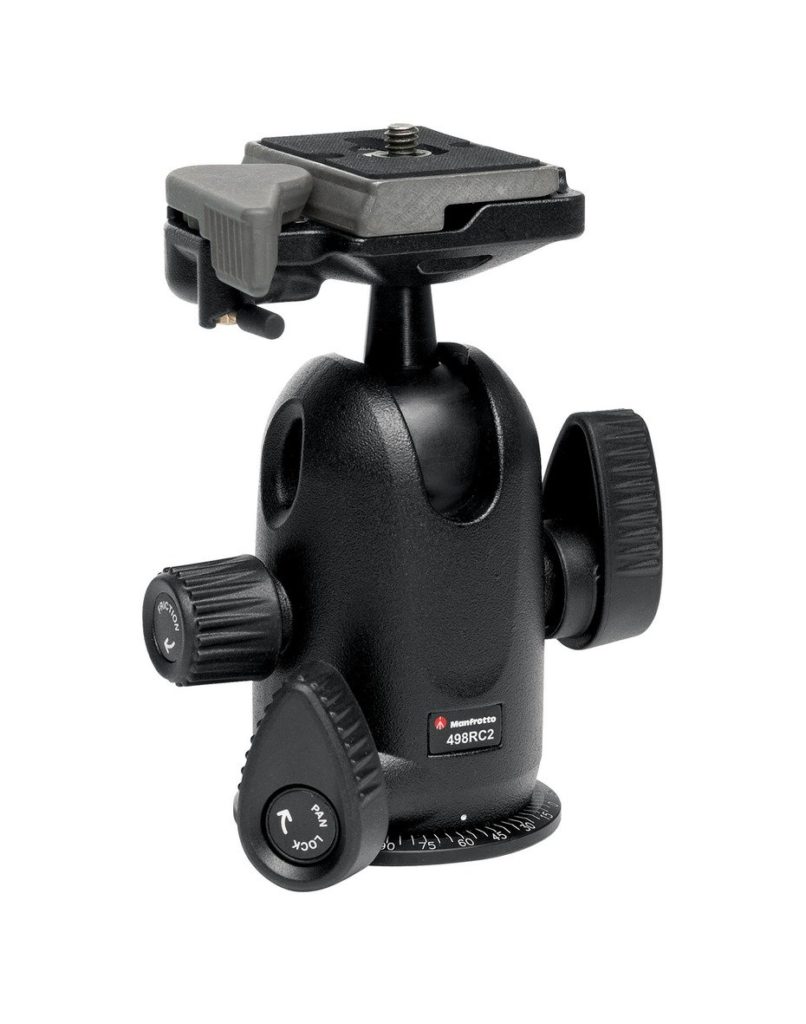
Image Stacking Software
After our shoots, we’ll use Adobe Photoshop or StarStax to combine multiple exposures into one final image. See Post Processing section below for details.
Pre-Planning
The Moon
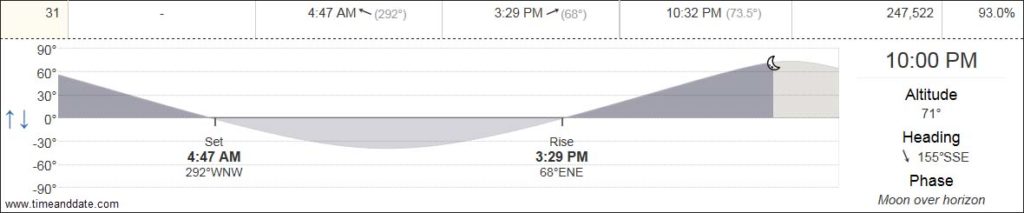
I like to use www.timeanddate.com for a general forecast of when the Moon will be within +/- 3 days of a full Moon and where it will be in the sky on those 7 nights. Also note the altitude the Moon will be at and at what times.
The most dramatic moonlit landscape photos come between 30 – 70 degrees, after astronomical twilight.
The most dramatic moonlit landscape photos come between 30 – 70 degrees, after astronomical twilight. The lower the altitude of the Moon, the more dramatic the shadows on the landscape.
For a more precise Moon forecast and to predict the exact direction of the moonrise and moonset, I use the Photographer’s Ephemeris. The desktop version is free to use, and they also have paid Apple/Android apps that you can take in the field, which is very handy. Another photography planning app with Moon information that I highly recommend is PhotoPills for iOS.
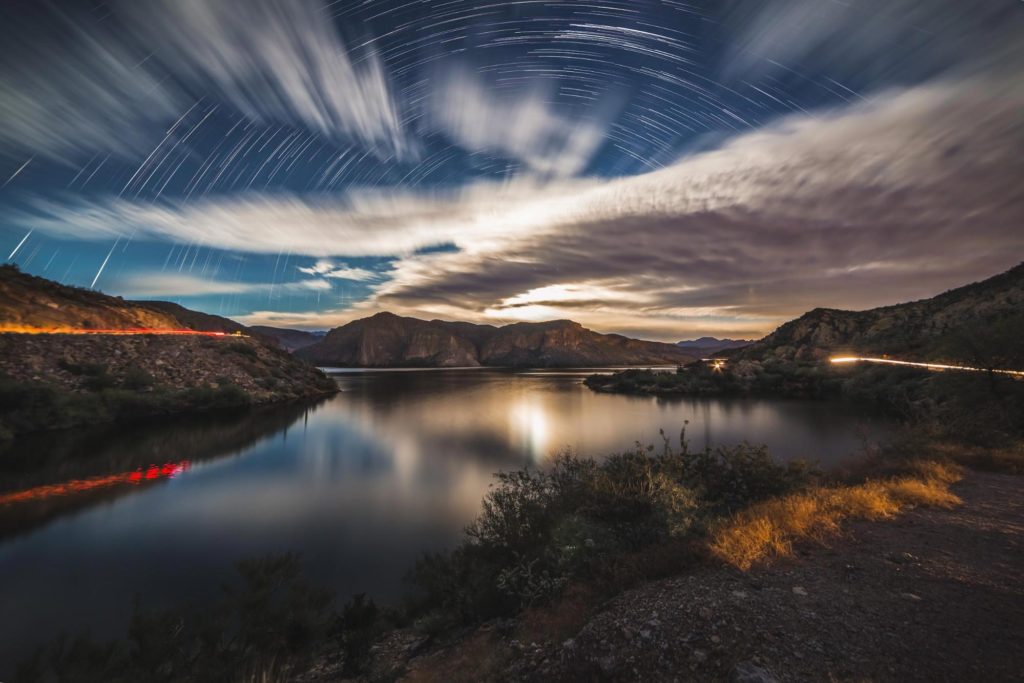
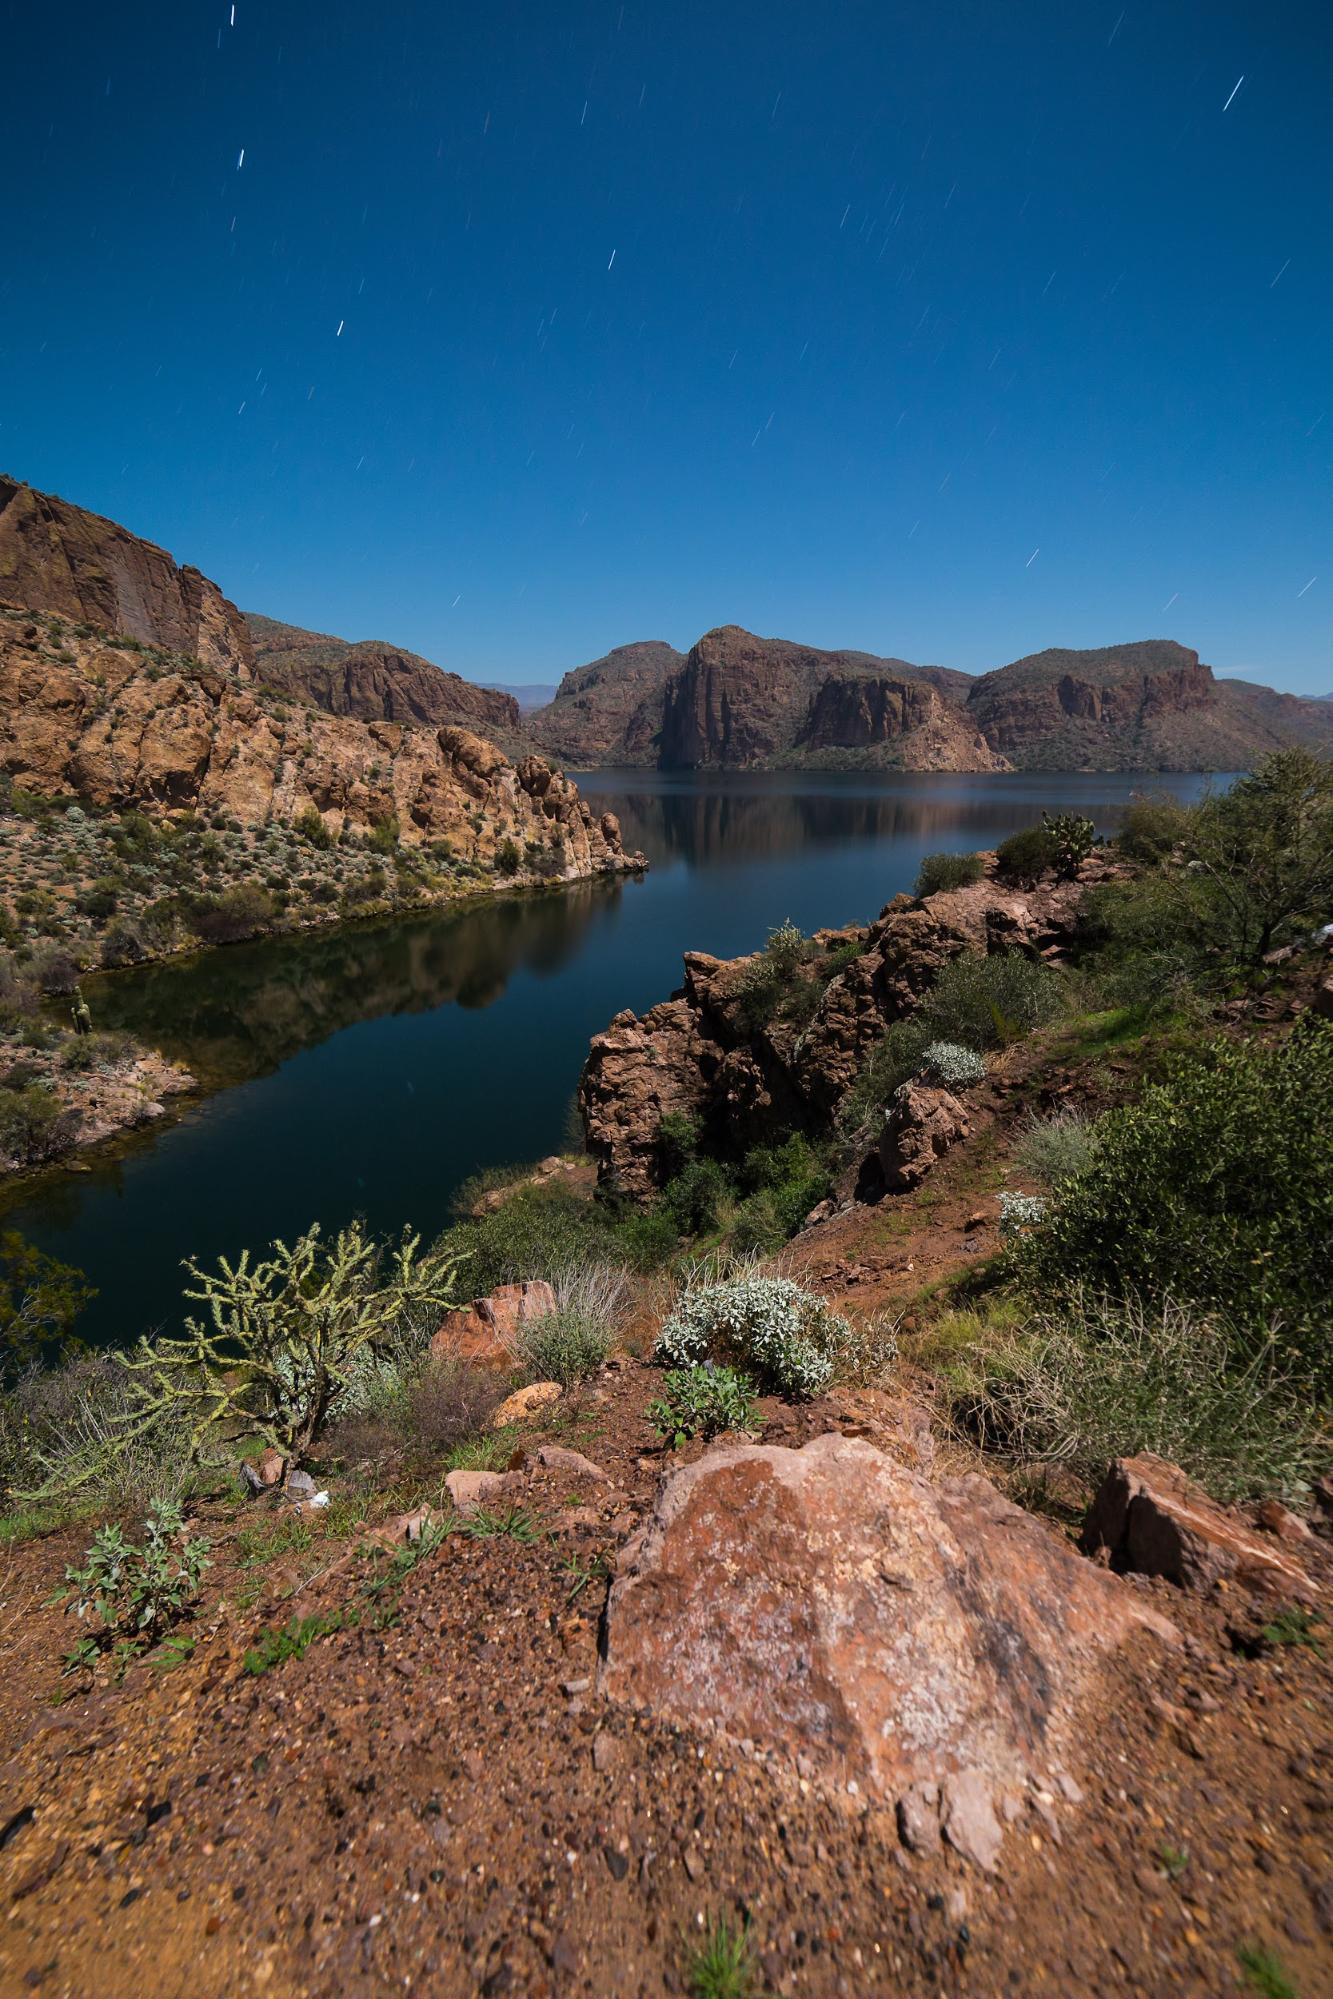
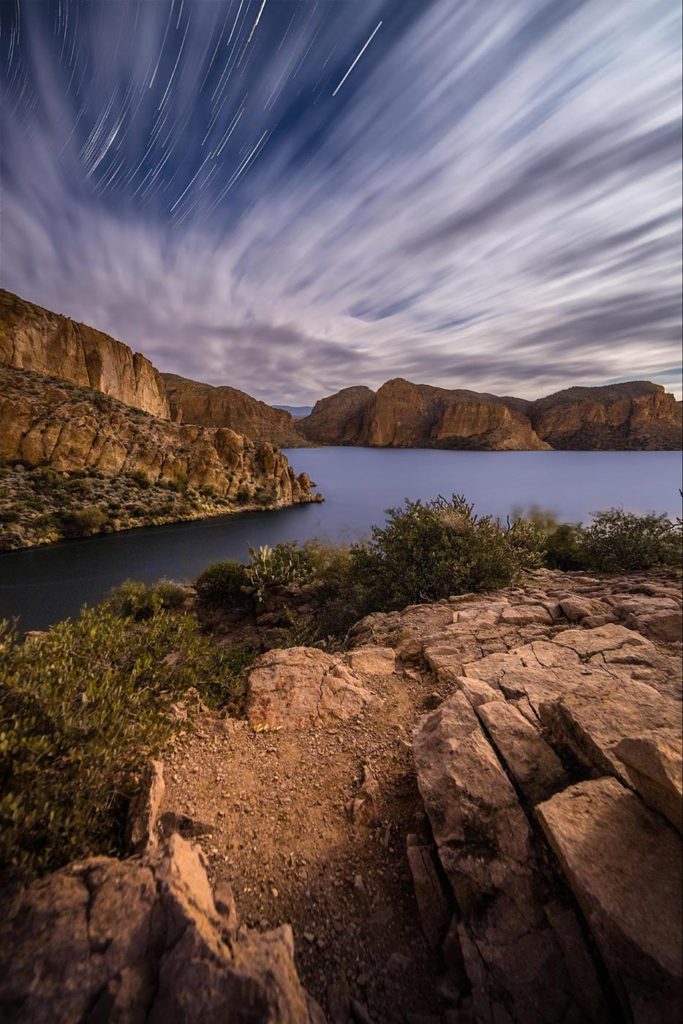
You will want to shoot on a clear/mostly clear night (depending on what you’re looking for in your photo), but don’t be discouraged to shoot on a cloudy night. Remember, long exposures will show a lot of movement in clouds, and that can create a dynamic look. (See the photo at the top of this post for an example.)
Finding the Right Location
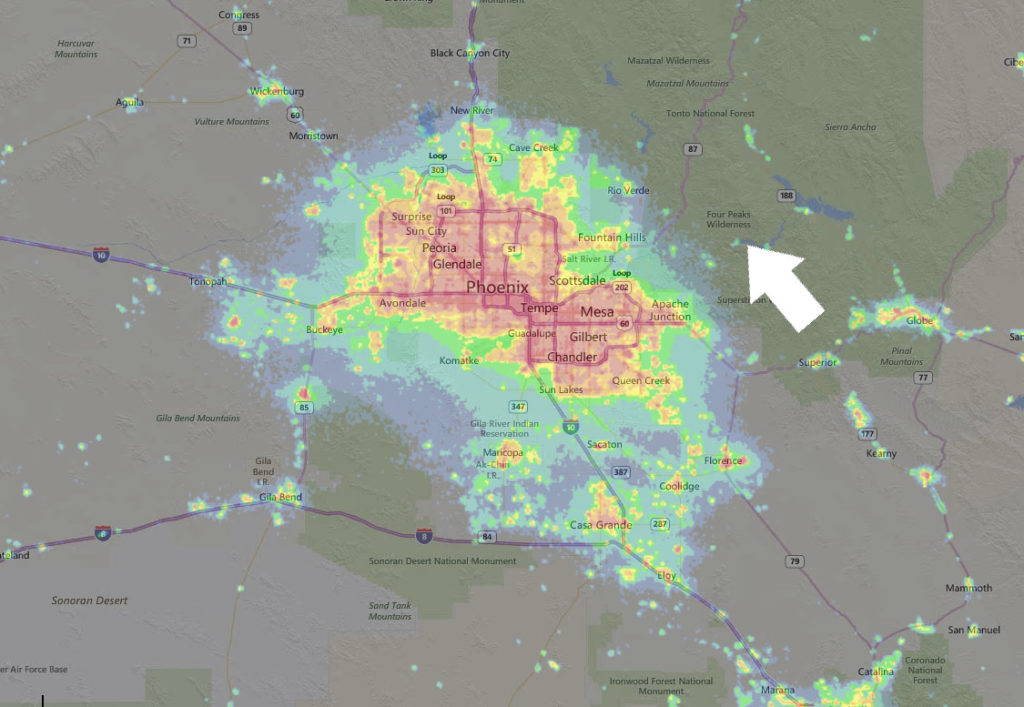
For the best results, I recommend finding a dark location away from the light pollution of major cities. I use lightpollutionmap.info; it has worldwide coverage, and I’ve found it to be very accurate. Tonight I will be shooting at Canyon Lake in the Superstition Mountains outside of Phoenix, Arizona — one of my favorite places to shoot.
I also use Google Earth to scout an area that I’m unfamiliar with. I recommend starting your search at national and state parks in your area, as these often have gorgeous landscapes away from all the city lights.
I try to arrive on location while there is still light, especially if it’s my first time visiting. This will help you familiarize yourself with the location and allow you to start thinking about the composition of your photo. I recommend setting up your camera and taking a few shots while you are close to your car. Once your eyes’ night vision takes over and you become more confident, you can explore more of the area.
Wind will blur trees, bushes, flowers, etc.; keep this in mind if you’re shooting on a windy night.
When planning your shot, keep in mind that long exposures will make calm water look like glass, and choppy water like a ghostly fog. It will also turn clouds silky smooth, moving in the direction of the wind. Wind will also blur trees, bushes, flowers, etc.; keep this in mind if you’re shooting on a windy night.
Time to Shoot!
Now that you have all of your gear packed up, and you’ve picked a location on a moonlit night, it’s time to talk about how to get that shot. Here’s what we’ll cover in this section:
- Camera Settings
- RAW
- White Balance
- Shutter Speed
- Aperture
- ISO
- Long Exposure Noise Reduction (NR)
- High ISO NR
- Focusing in the Dark
- Test shots
Camera Settings
Shooting RAW
There are many articles discussing the benefits of shooting RAW over JPEG, so I’ll keep it simple: Shoot RAW! When shooting JPEG, image information is compressed and lost. No image information is compressed with RAW so you’re able to get higher quality images as well as correct issues with white balance or exposure in post processing.
White Balance
I will be setting a custom white balance of 4100 degrees Kelvin. I find this to look the best with moonlit images. White balance is greatly based on your personal taste, but start somewhere between 3800 – 4300 degrees Kelvin. If you are shooting RAW, you can also change white balance in post processing.
Long Exposure/High ISO Noise Reduction
When shooting any kind of long exposure images, I always turn the Long Exposure/High ISO Noise Reduction to OFF. If turned on, the camera will take a frame of equal exposure and apply it to your image to reduce noise caused by the sensor. For example, if you take a 10-minute exposure, then you will have to wait an additional 10 minutes before being able to take another photo. I personally like to reduce noise in post using the Google Nik Software.
Exposure Triangle – Aperture, ISO & Shutter Speed
The Exposure Triangle is very important to remember, as a change in one of the elements will affect how we use the other two. I will briefly discuss the three, and show examples of different exposures.
Aperture f/number
As was discussed earlier, I recommend a relatively low f/number for these shots. This doesn’t mean you can’t capture images with slower apertures like f/5.6. Just keep in mind that for every full aperture stop, you are cutting the amount of light in half. If your lens collects less light, it means we must compensate with either a higher ISO or longer shutter speed to maintain the same exposure, which might not be as desirable as just shooting with a lower f/number.
The full aperture stops are:
f/ 1, 1.4, 2, 2.8, 4, 5.6, 8, 11, 16, 22
For our example shot with my 14mm f/2.8 lens, I’ll be stopping down to about f/4 to f/5.6. That’s the setting I would recommend if you’re just starting out.
ISO
ISO can simply be understood as the the amplification applied to your camera’s sensor. Higher ISOs yield a brighter image but also brighten up the noise in the image. That being said, don’t hesitate to bump that ISO up if needed. We will want an ISO around 400-800 for this shoot. ISO 100 might seem tempting, but this will require VERY long exposures of 45 minutes or longer. Long exposures like this introduce their own noise, rendering the low ISO pointless. Keep it around ISO 400-800 to start.
Shutter Speeds
The final and most important part of the exposure triangle (for long exposures, at least) is shutter speed. Your final result will vary greatly depending on your shutter speed. I personally love the still water and cloud movement from a shutter speed of about 5 minutes or more. To make these extra long exposures, we’ll need to set the camera to “Bulb” mode to be able to shoot exposures longer than 30 seconds.
Just remember that there’s also a disadvantage to using too long of a shutter speed: Very long shutter speeds beyond 10 minutes will start to introduce extra noise, depending on your equipment.
Focusing in the Dark
The first thing I do before composing a shot or adjusting my exposure is making sure the lens is focused. Since we will be on a tripod, switch your lens or camera to manual focus, and turn your image stabilization function (IS, VR, OSS) off. Stabilization can actually do more harm than good while on a tripod, so it’s best to just turn it off completely. Generally speaking, you will want to be focused to infinity for most shots. Most lenses have an ‘∞’ symbol to indicate when the focus is at infinity. That said, the infinity marker can often be a little inaccurate, so use it with skepticism.
The easiest and most accurate way to focus in the dark is to manually focus on a distant light (min. 100ft/30m away) while in Live View mode. With my camera, I can change my live view setting to “exposure simulation” which allows me to see the light source (even a bright star) in dark conditions.
I have also used a laser mounted to my hot shoe with some Blu-Tack and pointed at a distant object and focused on the laser dot. You can also place a flashlight at that distance and focus on that to achieve the same result.
If you’re having difficulty, take some test shots and check your focus, making small adjustments as needed.
Test Shot
At this point I like to take a test shot by bumping my ISO to its max (H2 – 25,600) and shooting a short 2-second exposure to see what my composition and focus looks like. I like to include some interesting foreground elements and leading lines and put my horizon on either the top/bottom ⅓ of the frame (Rule of Thirds). Once I am happy with the composition, I put my ISO back to 400 for the final shot.
Take the Shot!
So now that I have you thinking about the exposure triangle and scrutinizing your focus, it’s time to take a shot! After the exposure is complete, it’s helpful to look at the histogram. You want to have as much data as possible without losing any data at the edges. You may need to experiment with different exposure times to get the histogram to sit roughly centered.
Below are 5 unedited images of different exposures times at ISO 400, f/5.6. In my experience, I’ve found ISO 400 and an aperture of f/4 – f/5.6 provides me the best long exposure time/noise ratio under a full Moon.
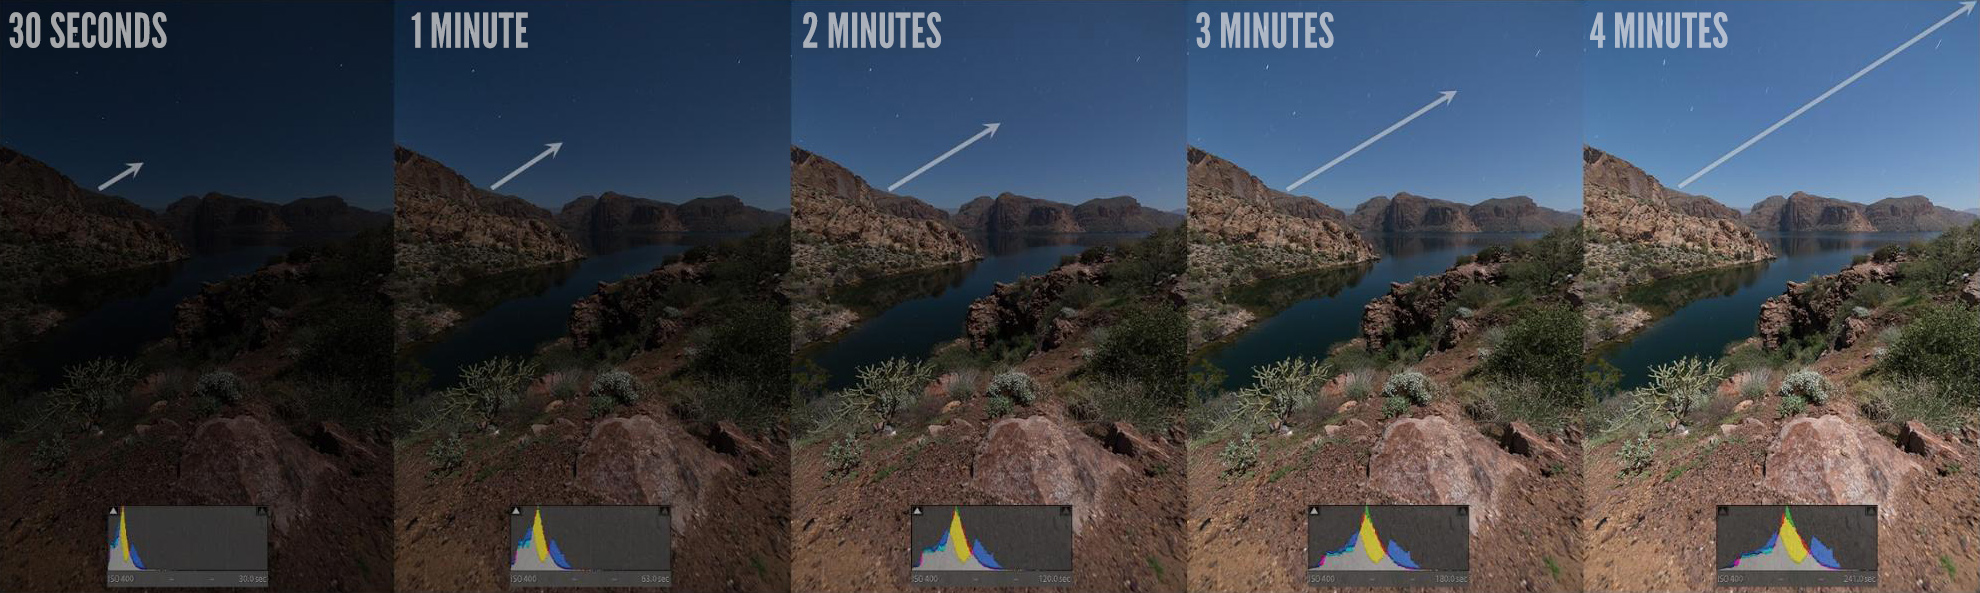
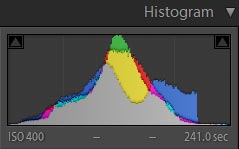
Notice the histogram for the 4-minute exposure is almost perfectly centered with no clipping in the blacks (left side of histogram) or whites (right side of histogram). Here’s a larger look at that 4-minute exposure:
In this case, the 4-minute exposure should give us the best balance between individual exposure time and image quality. In the next section, we’ll program the intervalometer to continuously capture a series of consecutive 4-minute frames for a period of about 30 minutes to an hour. This will result in approximately 7 – 15 total exposures.
Now, in order to get more interesting results for our final image, we’ll use a technique of stacking those exposures to make a final multi-exposure composite.
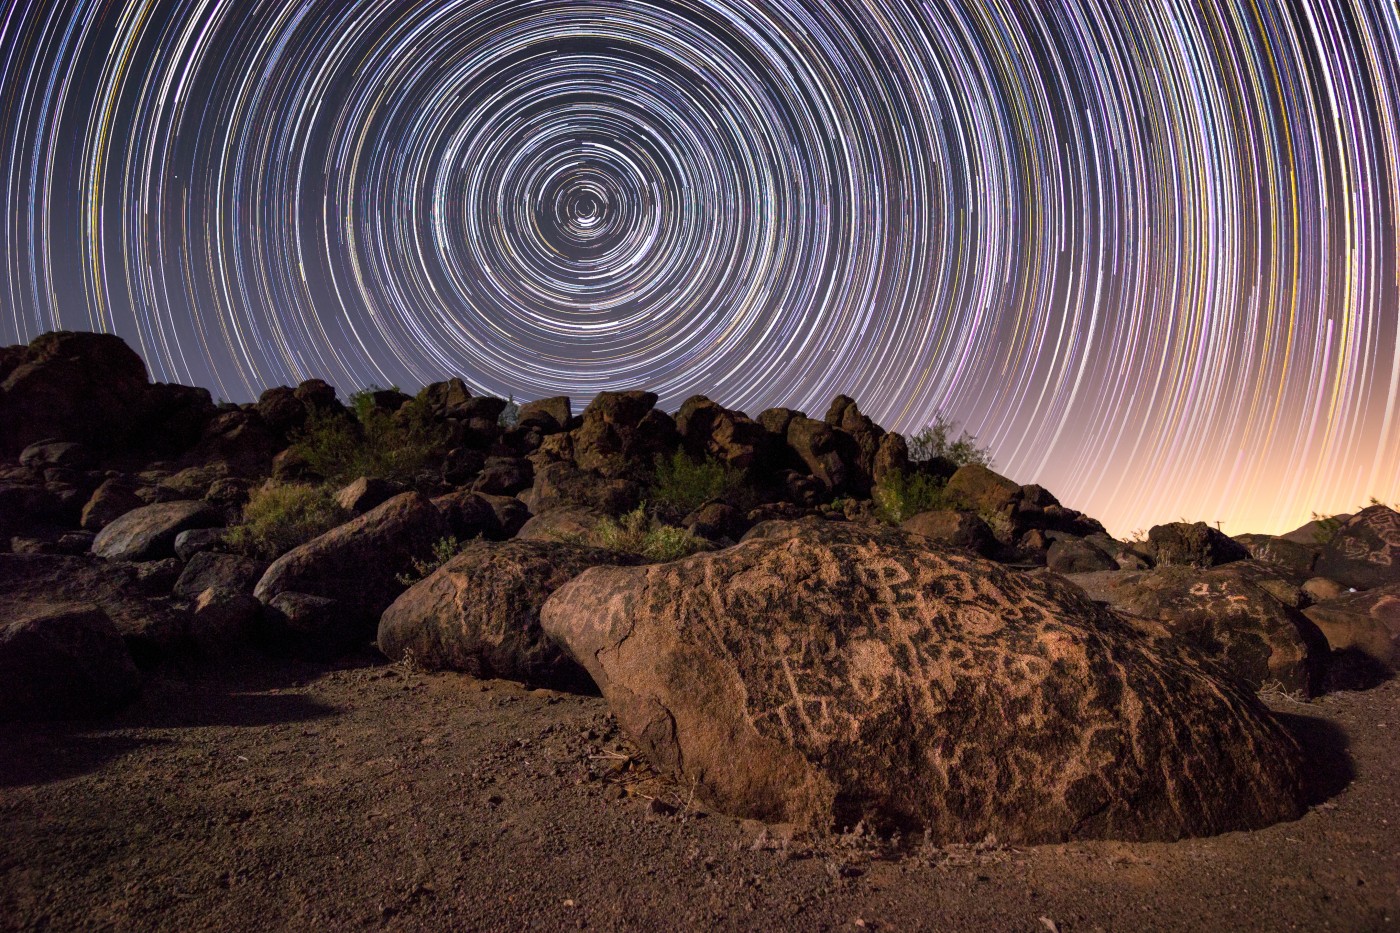
Shooting & Compositing Star Trails
In my moonlit landscape photography, I sometimes like to composite a star trail into the shot for an added layer of interest. The best method of making a star trail photo is to combine many shorter exposures to capture the movement of the stars as the Earth rotates. We already decided on an exposure of about 4 minutes for our example, so now we’re ready to program our intervalometer to capture multiple 4-minute exposures, one after another. Here’s a look at how I programmed my intervalometer to capture a bunch of 4-minute photos:
Once we’ve captured about 30 minutes to an hour of photos, we should have plenty of data to make our final exposure stack.
In the next section I’ll talk about a couple of methods for stacking all the exposures together into a final image.
Post Processing: Stacking Multiple Exposures
Star Trail Stacking in Adobe Photoshop
Back at the computer we can stack the star images together to create the star trails. Here’s a quick example of how to stack and blend star trails in Adobe Photoshop:
- In Photoshop choose: File > Scripts > Load Files into Stack… and select all your moonlit images.
- Alternatively, if you have Adobe Lightroom, you can highlight all the moonlit images you captured. Right click and choose: Edit In > Open as Layers in Photoshop…
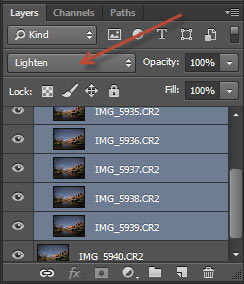
- Once loaded in Photoshop, highlight all layers except the bottom layer and change the blending mode to Lighten.
- That’s it. Now you can flatten the image (Layer > Flatten Image) and Save.
Star Trail Stacking with StarStax
There is also a great program made by Markus Enzweiler called StarStax which will effectively do the same thing as Photoshop. StarStax is a very powerful yet simple way to stack exposures. Its purpose-built for star trails, and it has some features that aren’t available in Photoshop. The best part about this program is that it is entirely free, opening up this type photography to everyone.
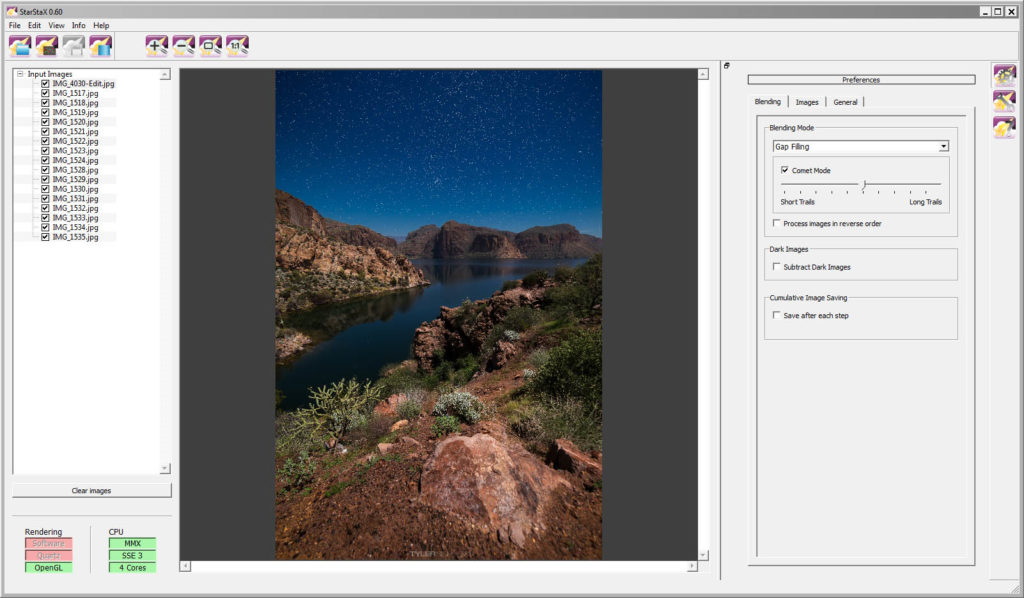
The major benefit of using StarStax is a Blending Mode called “Gap Filling” which will fill in gaps in the star trails that we missed during the 1 second interval between exposures. There is also an option under Blending Mode called “Comet Mode” which will fade your stars slightly with each exposure, giving the illusion of movement to your star trails. Note that this “Comet Mode” is more effective when shooting with shorter shutter speeds like 30 seconds.
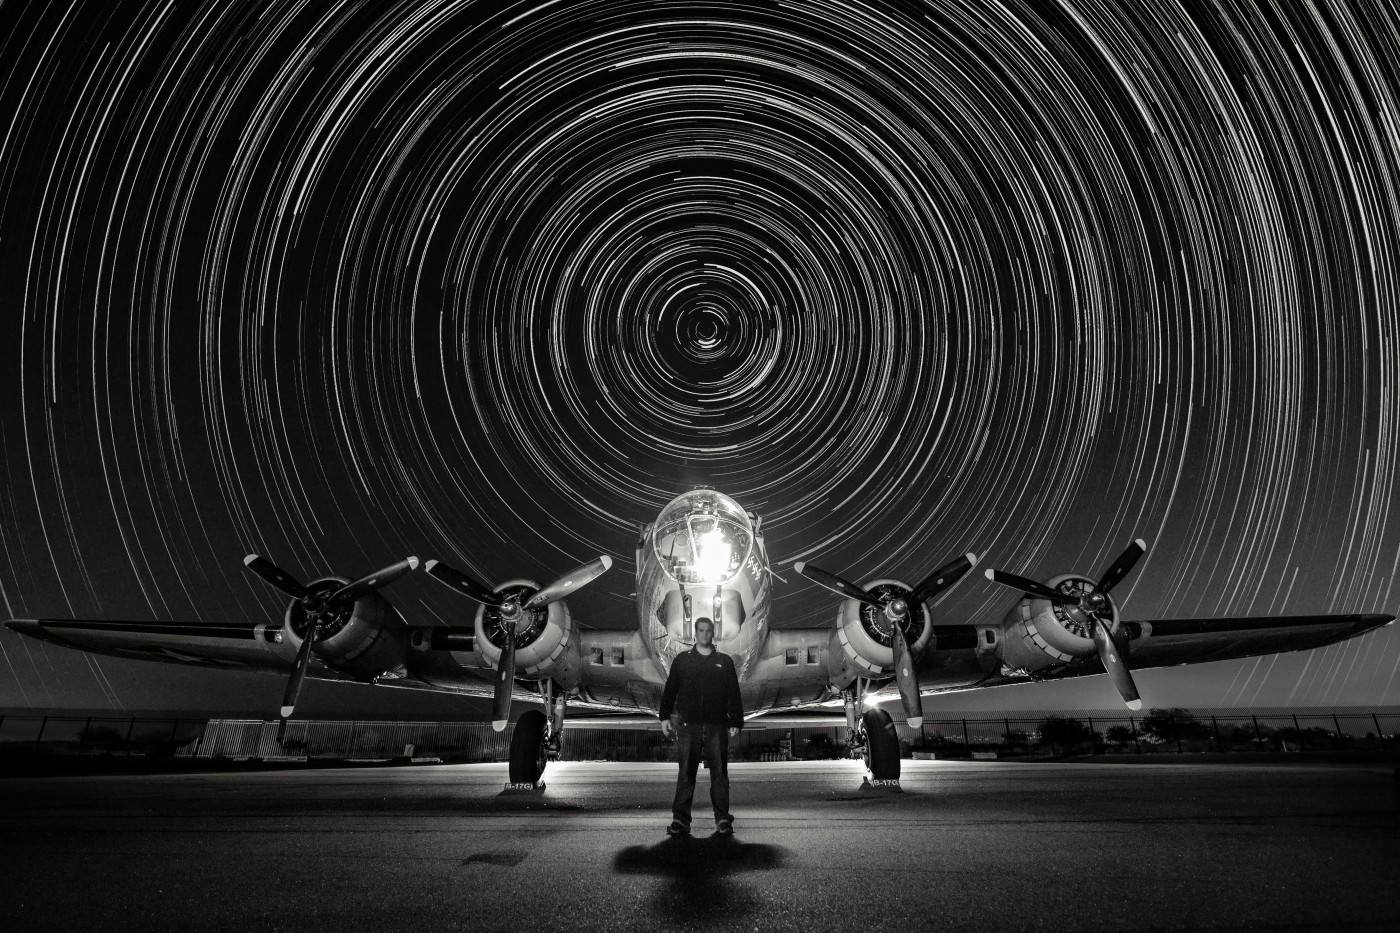
Here’s what our final images look like after our final stacking process:

More Examples
That’s about it! Remember: it doesn’t require the best equipment to have some fun and get spectacular nighttime photos. So explore, get creative, have fun and most importantly, stay safe!
This article originally appeared on our sister photography site, The Photon Collective, here.
From the Editor:
Disclosure
We are a participant in the Amazon Services LLC Associates Program, an affiliate advertising program designed to provide a means for us to earn fees by linking to Amazon.com and affiliated sites. We are also a participant in the B&H Affiliate Program which also allows us to earn fees by linking to bhphotovideo.com.
Learn Astrophotography
Astrophotography 101 is completely free for everyone. All of the lessons are available on the Lonely Speck Astrophotography 101 page for you to access at any time. Enter your email and whenever we post a new lesson you’ll receive it in your inbox. We won’t spam you and your email will stay secure. Furthermore, updates will be sent out only periodically, usually less than once per week.
[email-subscribers namefield=”NO” desc=”” group=”Lonely Speck Newsletter”]
Help us help you!
Believe it or not, Lonely Speck is my full-time job. It’s been an amazing experience for us to see a community develop around learning astrophotography and we’re so happy to be a small part of it. I have learned that amazing things happen when you ask for help so remember that we are always here for you. If you have any questions about photography or just want to share a story, contact us! If you find the articles here helpful, consider helping us out with a donation.
[button font_size=”16″ color=”#136e9f” text_color=”#ffffff” url=”https://www.paypal.com/cgi-bin/webscr?cmd=_donations&business=lonelyspeckblog%40gmail.com&item_name=These+tips+help+keep+lonelyspeck.com+running.¤cy_code=USD&source=url” target=”_blank”]Donate[/button]
Thanks so much for being a part of our astrophotography adventure.
-Ian
[button font_size=”16″ color=”#136e9f” text_color=”#ffffff” icon=”arrow-left” url=”http://www.lonelyspeck.com/astrophotography-101/” target=”_self”]Back to Astrophotography 101[/button]
Hi just wondering if you tried shooting star trails with Sony rx100 series or Canon g7x. I understand that Canon g7x offers a star trails in one of their settings
Why aren’t any of the photos showing up in this post? (I do see them in your other articles).
Great article! Just one query here – why are you using multiple shots for the foreground? How does a single shot of the foreground differ from the multiple shots?
Thanks in advance!
Stay Crazy
Saurabh