

In this video tutorial I walk through a technique for reducing noise and improving image quality by combining multiple astrophotography exposures. I also demonstrate what to do when auto-alignment tools, like Photoshop’s Auto-Align Layers function, fail to properly align your images.
Introduction
Lately, I’ve been on an exposure stacking kick. Combining a bunch of consecutive exposures of the night sky can greatly improve image quality and it has allowed me to use smaller, cheaper and more compact gear (like a point and shoot or even a smartphone) without making too many compromises in image quality. Stacking is a technique that’s been used by astronomers and astrophotographers for decades. Most of the telescope photographs that you see from observatories like the Hubble Space Telescope were made by combining hundreds of separate photographs with hours and hours of data to yield such beautiful images of the night sky.

In the video tutorial below, I walk through the techniques that I use to combine several exposures of the Milky Way using Adobe Photoshop. The resulting photograph from combining just 8 separate exposures offers a great improvement in the quality of the image by reducing noise and revealing more detail.
If you’re drooling over the latest, expensive camera body and lens offerings in hopes to improve your landscape astrophotography, consider using image stacking instead of spending a boatload of money on new equipment. You’ll find that with some careful use of stacking, even a basic DSLR with manual controls can make some very high quality images of the night sky.
What to Expect (Before and After)
[himage]
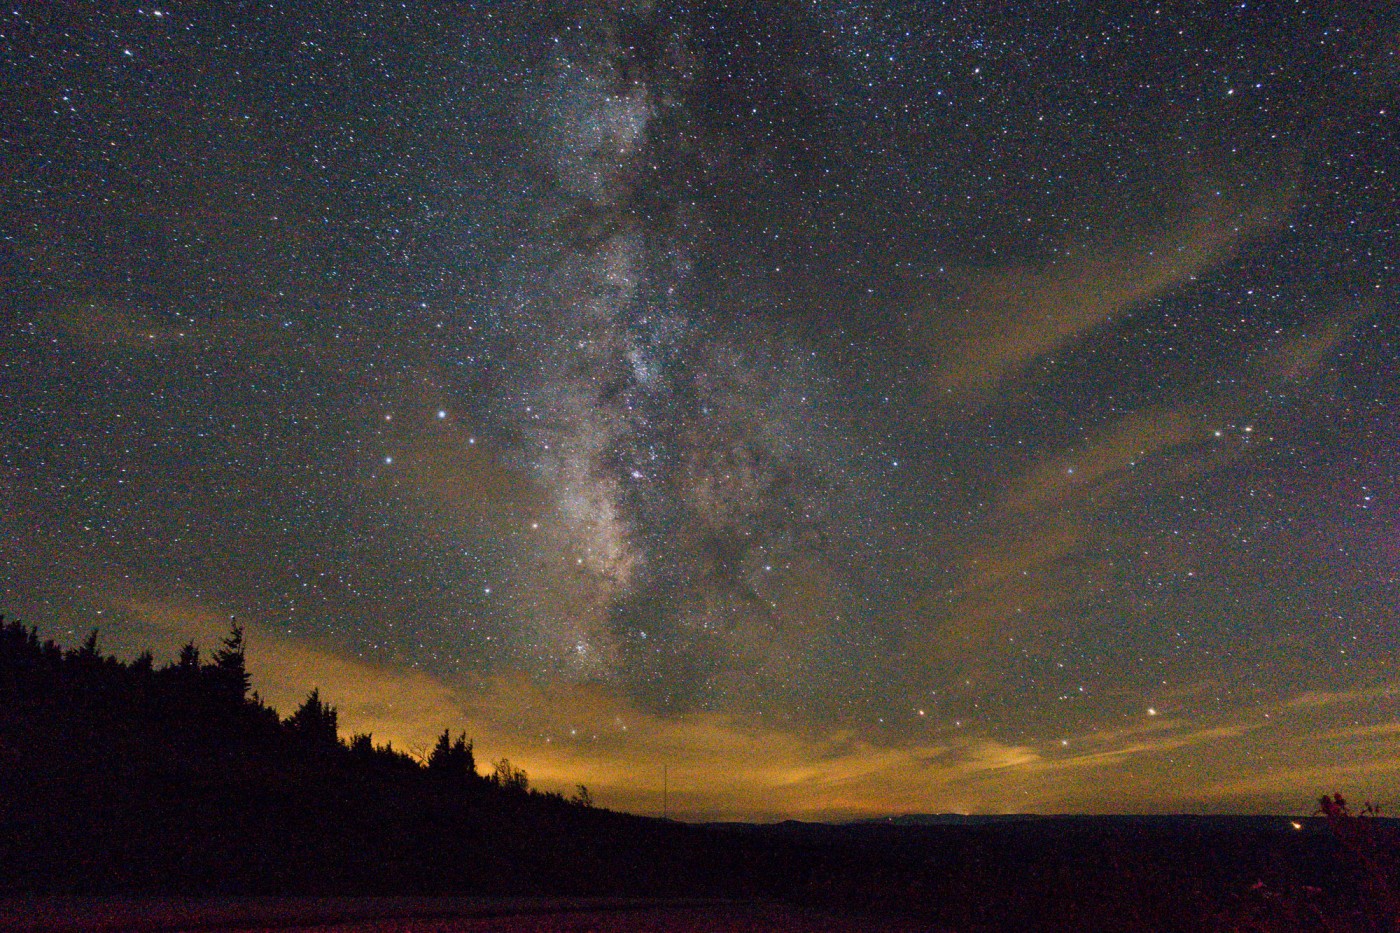
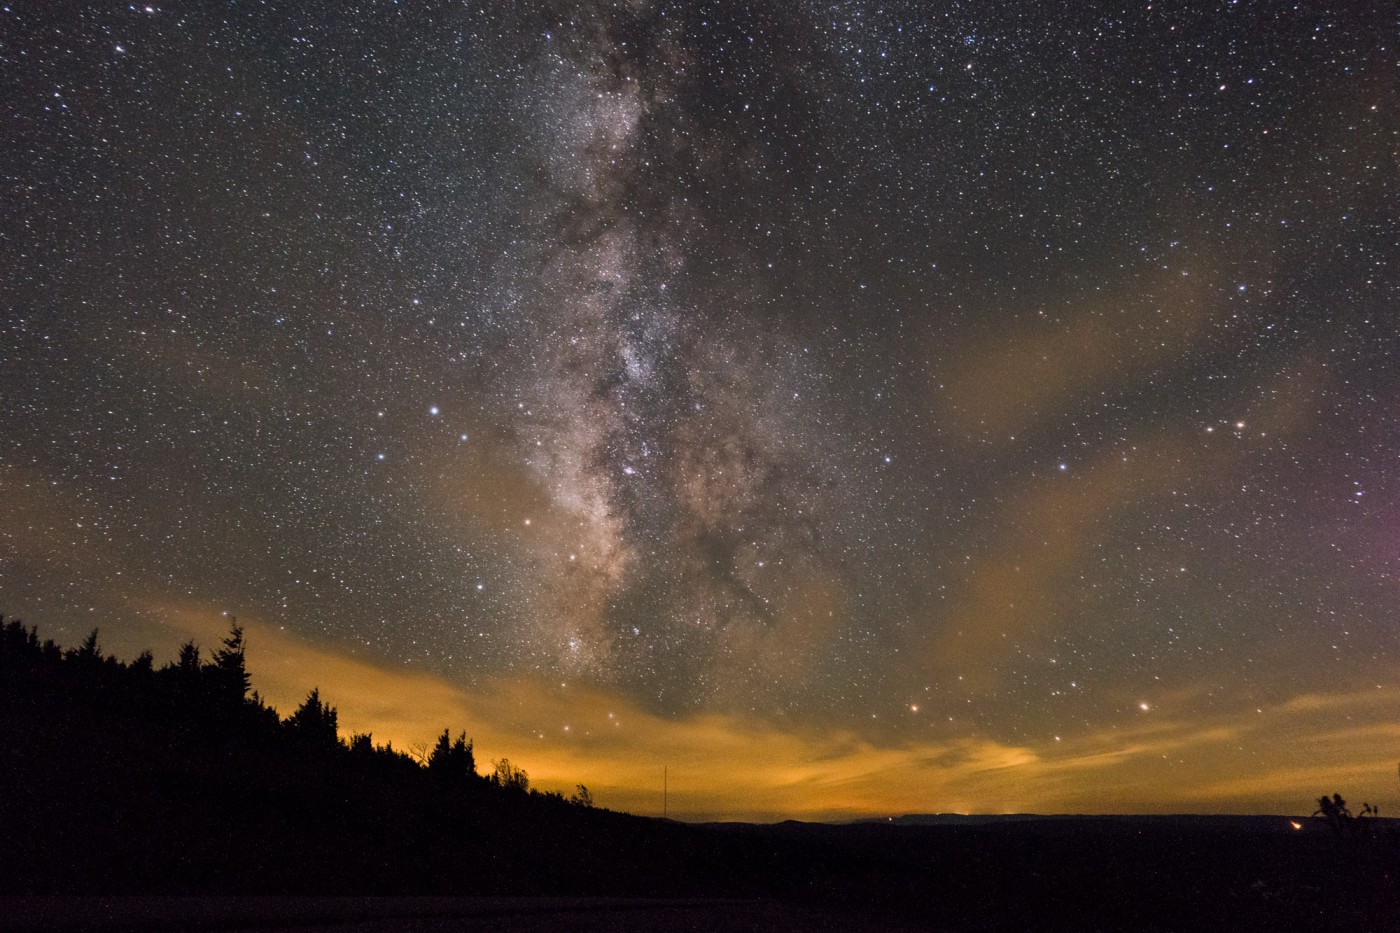
[/himage]
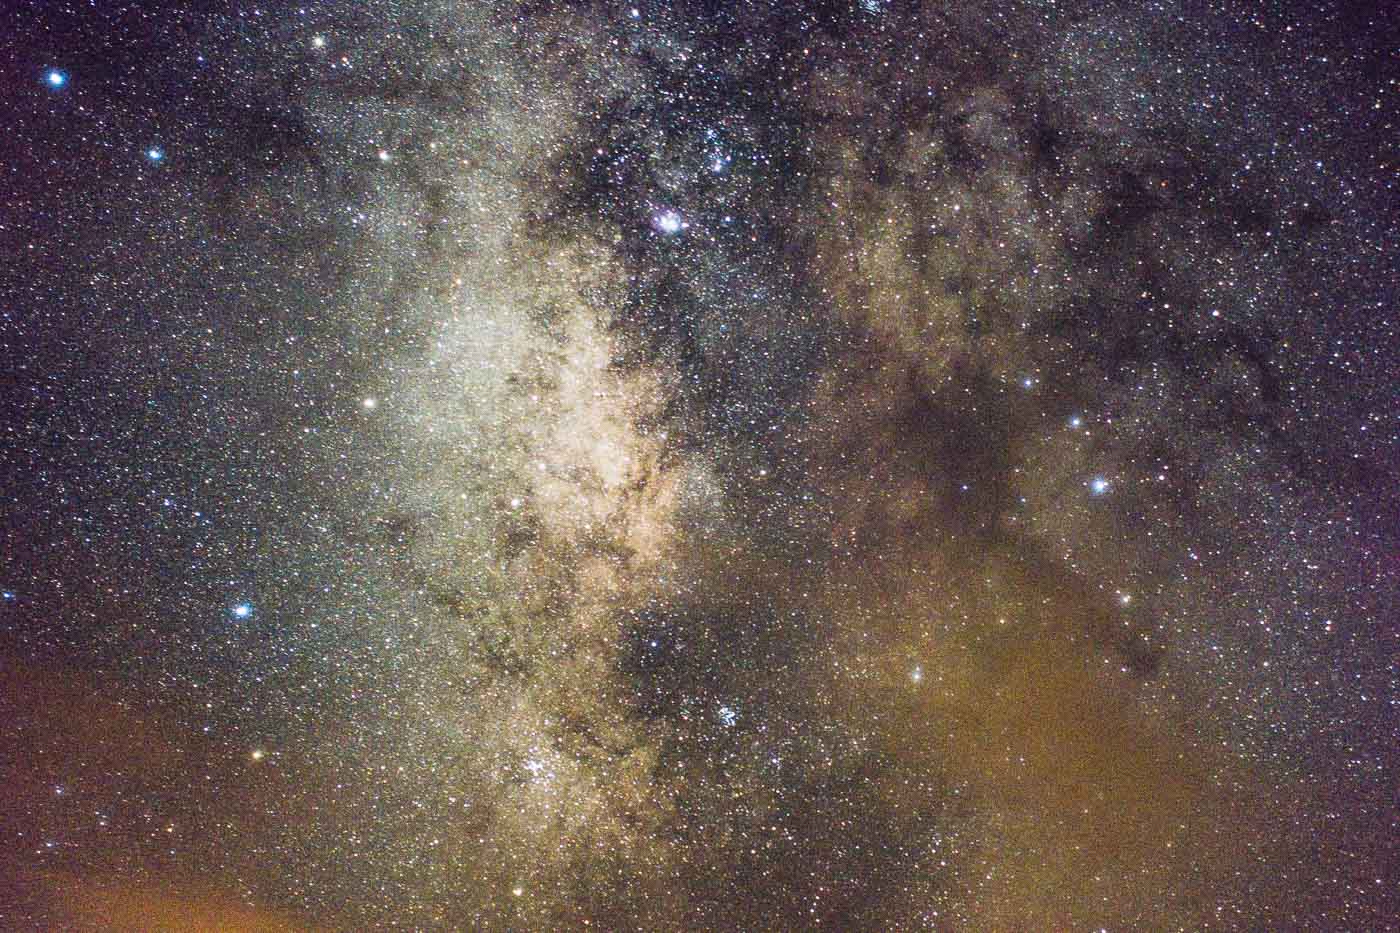
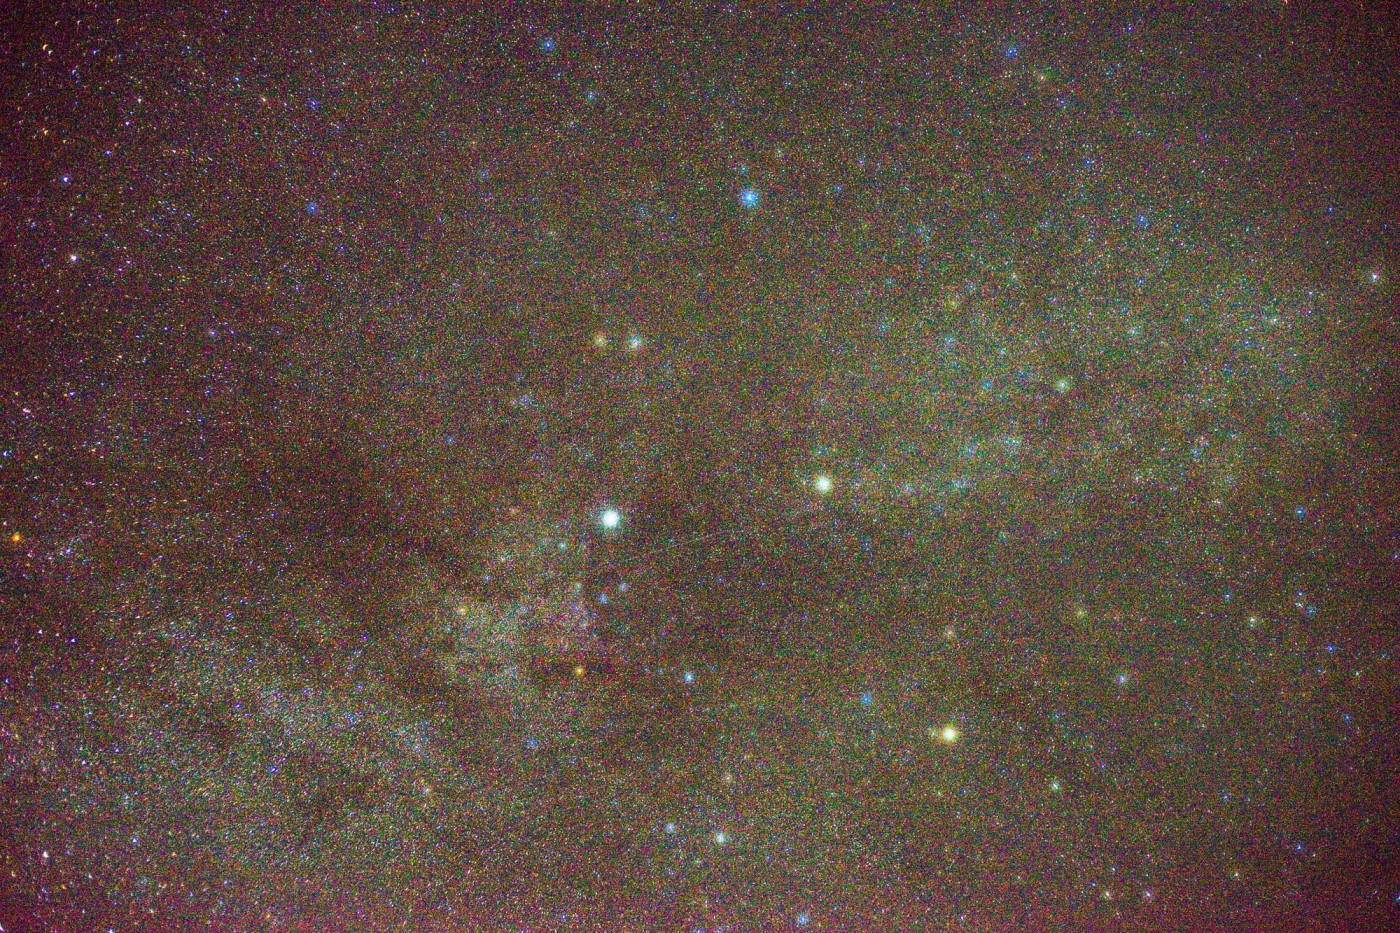
Sony RX100III, 8.8mm, f/2.8, ISO 1600, 8 x 20 seconds
In the video tutorial below, I use some relatively noisy sample images made with the Sony RX100III (read our full astrophotography review). You can see the before and after example image above. This particular tutorial focuses on the use of the Adobe Lightroom and Adobe Photoshop and addresses one of the common problems that many of our readers have experienced when following my original video tutorial on Landscape Astrophotography Image Stacking when using these pieces of software.
Stacking un-tracked exposures of the night sky requires alignment of each exposure to compensate for the rotation of the Earth. Photoshop has an auto-alignment tool that can line-up multiple exposure layers but sometimes the tool will fail to properly align the images, resulting in a low-quality final image with blurry stars. There are a lot of reasons that Photoshop might fail to align your layers: clouds, lens distortion, and even light pollution can prevent automatic alignment.
This video walks through the method that I use to align my exposures after some basic edits and I also cover what to do when the auto-align layers feature in photoshop fails to work properly. Check it out and let me know what you think in the comments.
Photoshop Exposure Stacking Video Tutorial
Alternative Layer Auto Alignment and Star Stacking Software
Adobe Photoshop is typically my primary go-to piece of software for stacking landscape astrophotos but I should also mention some of the other options that you may want to try that may produce good results. Even if it is my personal choice, Photoshop can be a beast of a program and it’s not purpose built for astrophotography. Most of the below pieces of software are made for photographs of deep sky objects but they can often also be used to make stacks of wide angle landscape astrophotos too.
I’ve had varying results on each of these pieces of software. Sometimes they work perfectly and other times they too will have problems with alignment but they’re worth a shot if you’re looking for other automatic options. If you know of any other software tools that you think other photographers will like to try, let me know and I’ll add them to this list.
Starry Landscape Stacker
Starry Landscape Stacker is probably the most intriguing of all the software packages that I’ve used. It’s only available for MacOSX but it automatically stacks and masks landscape astrophotography, perfect for the stuff that we love to make at Lonely Speck. I’ve had generally good success with small stacks (8-12 exposure max) but it starts to produce mixed results if too many exposures are used. I’m still putting the software through the paces but I plan to make a quick video walkthrough of Starry Landscape Stacker in the near future. If you’re on MacOSX, this is a great App to try.
DeepSkyStacker (DSS) (Free)
DSS is probably the most well-known astrophotography stacking program. A lot of Lonely Speck readers have shown me their excellent results from the use of DSS. It’s completely free and available for use on Windows.
Nebulosity
Nebulosity is an image stacking program that’s available for both Mac OSX and Windows. I’ve had the most success with Nebulosity when using longer lenses (50mm and longer) and mixed results with untracked stacks using ultra wide angle lenses. You can download and try it in demo mode to see if it works well for you.
More Before/After
In order to give you a better idea of the results that we can expect from image stacking, check out these before/after examples of image stacks made with the technique outlined in this tutorial.
[himage]
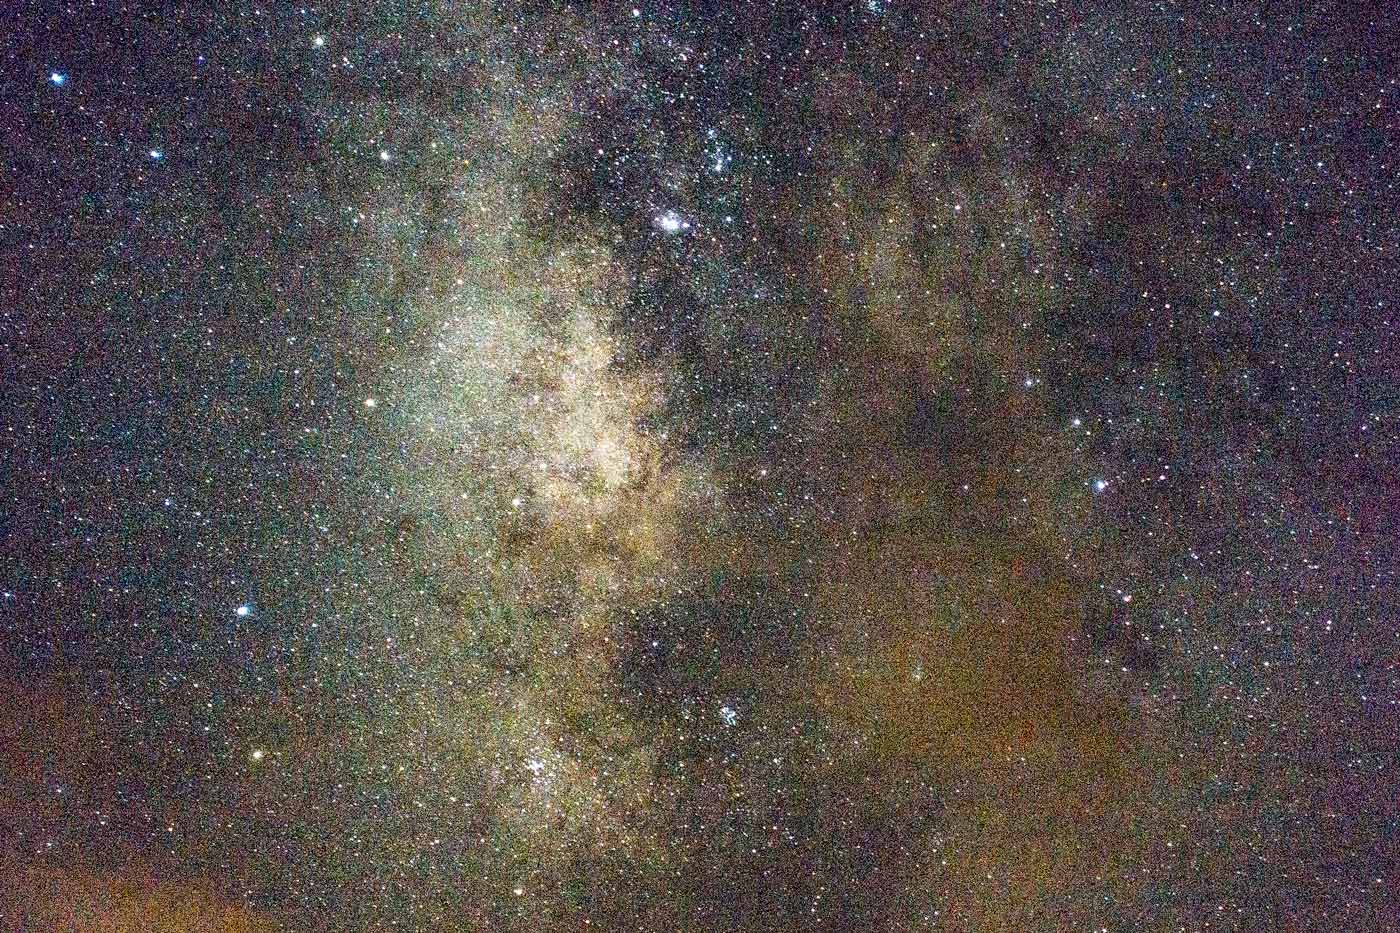
 [/himage]
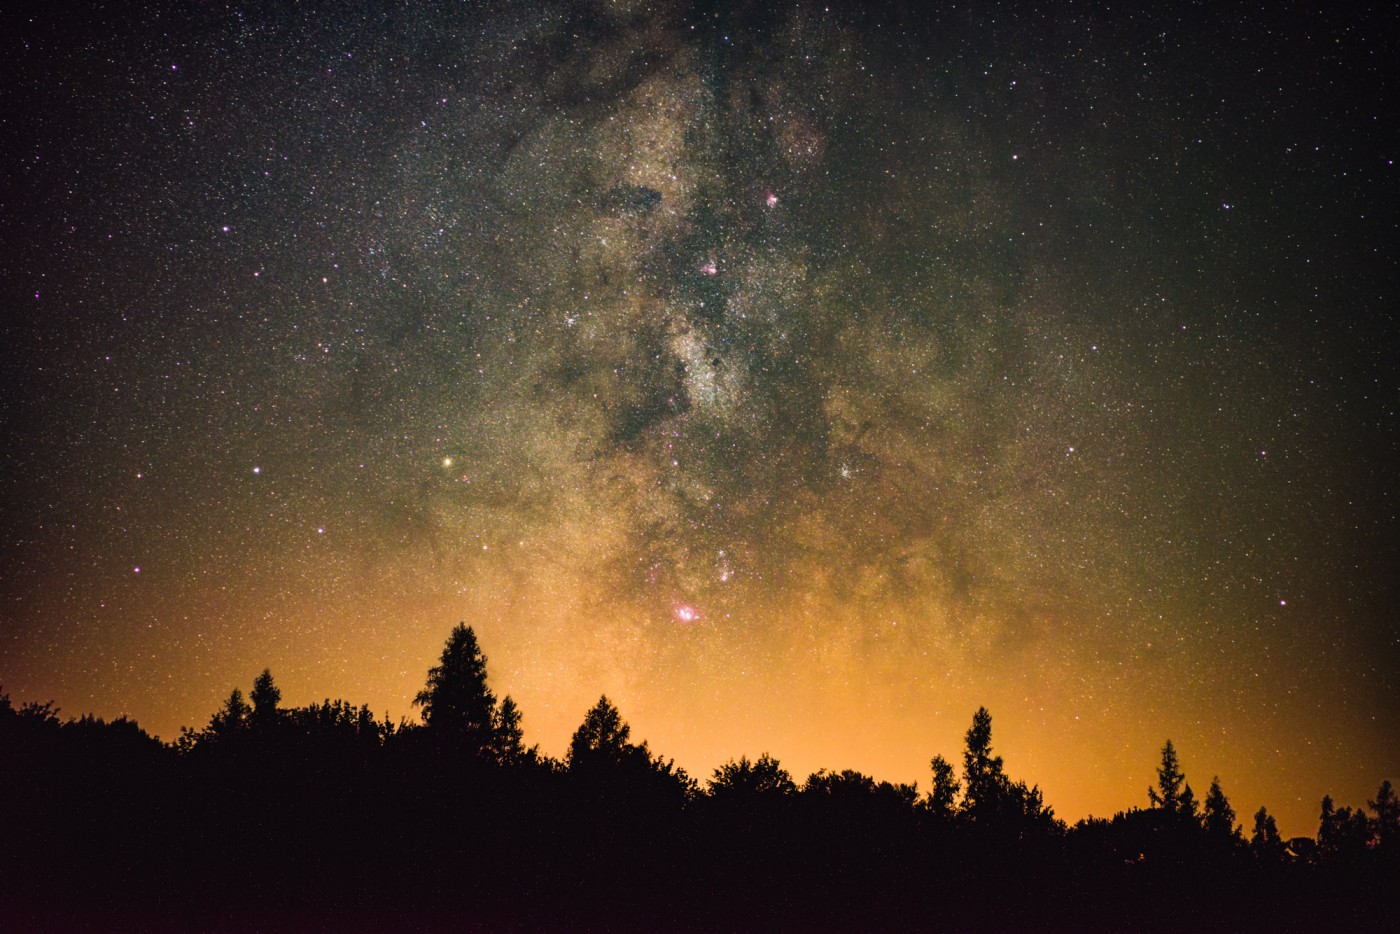
Sony RX100III, 25.7mm, f/2.8, ISO 1600, 8 x 10 seconds
[himage]
[/himage]
Sony a7II, 55mm, f/2.5, ISO 1600, 32 x 5 seconds
[himage]
[/himage]
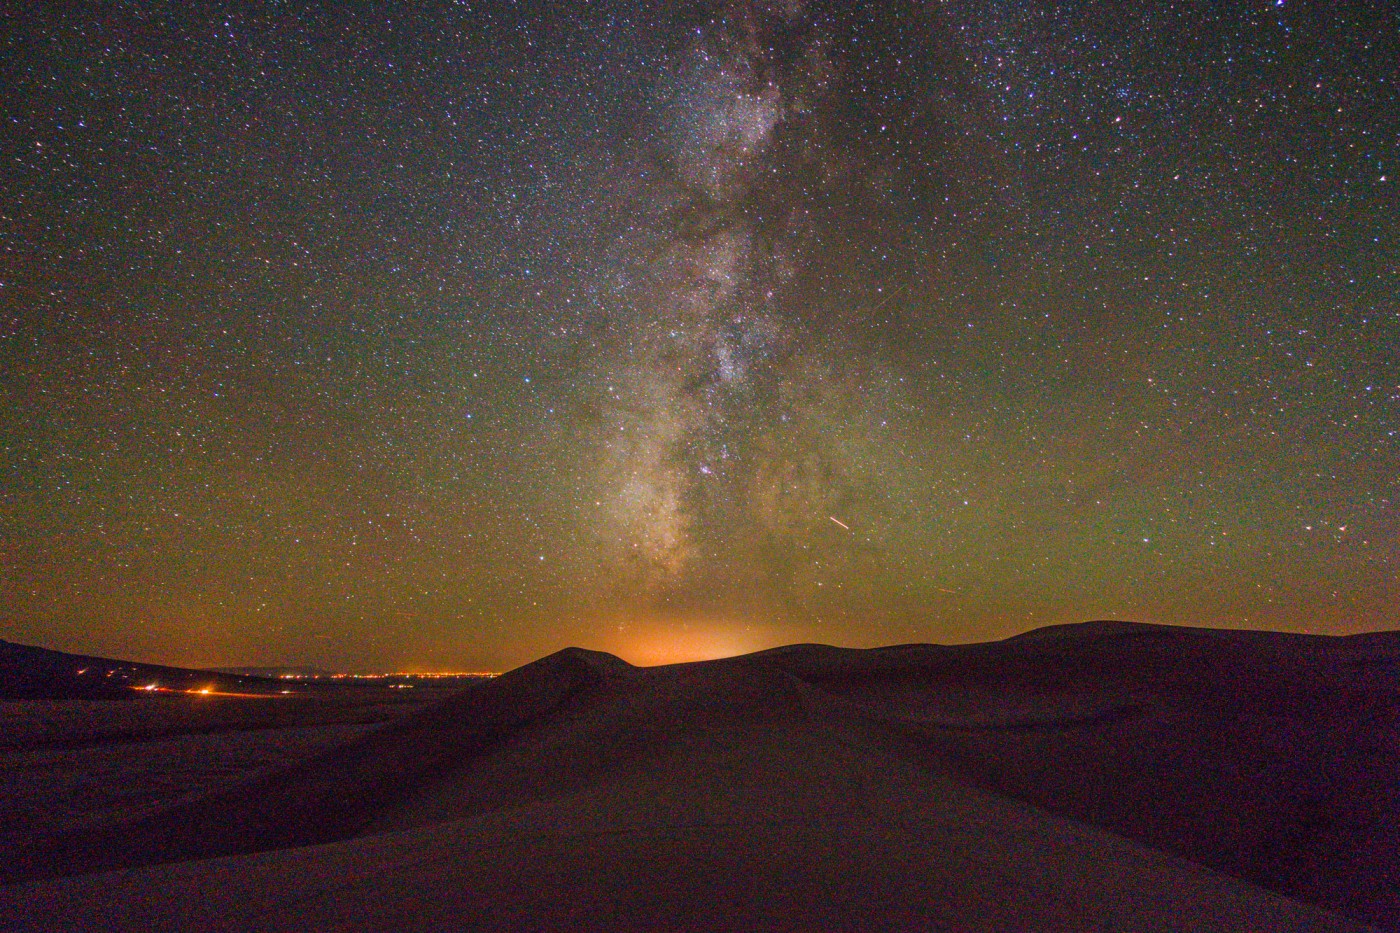
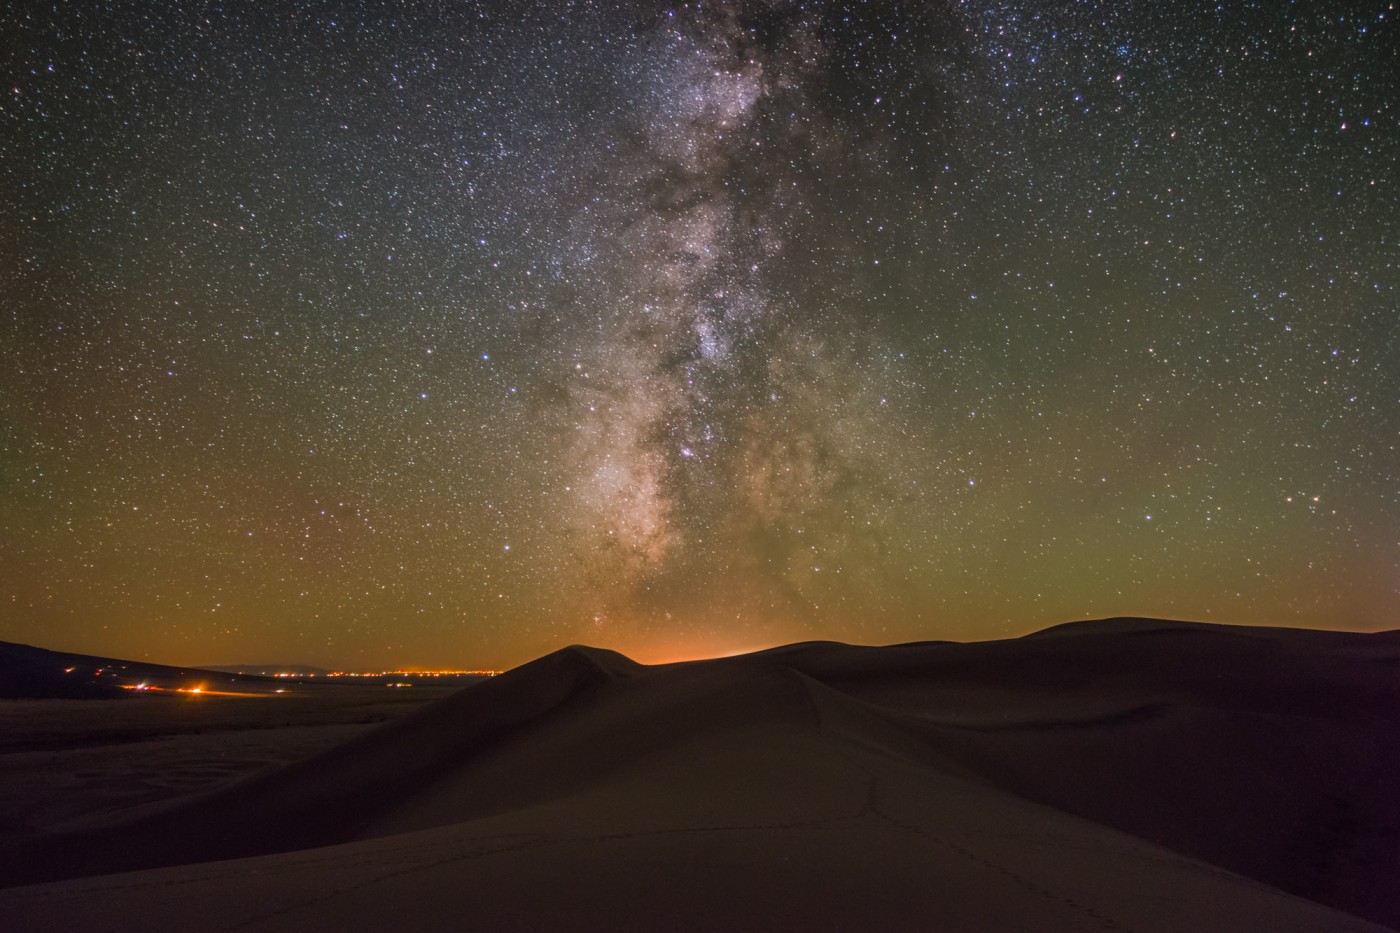
Sony RX100III, 8.8mm, f/2, ISO 1600, 54 x 20 seconds
[himage]

[/himage]
Sony a7II, 50mm, f/2.8, ISO 6400, 16 x 6 seconds
Conclusion
Try out exposure stacking! While you’re out shooting the Milky Way, take a few extra exposures and try combining them in post processing. Even just a few exposures combined in post processing can make a huge difference in final image quality. Stacking can greatly improve the results you can get from very limited equipment. I have made it a normal practice in almost all of my astrophotos and I’ve seen a great boost in image quality as a result.
I hope this tutorial was helpful, let me know if you have any questions in the comments section below.
Equipment
- Sony RX100III (Amazon / B&H)
- Sony a7II ( Amazon / B&H )
- Sony 55mm/1.8 (Amazon / B&H)
- Sirui T-025X Compact Carbon Fiber Tripod ( Amazon / B&H )
Disclosure
We are a participant in the Amazon Services LLC Associates Program, an affiliate advertising program designed to provide a means for us to earn fees by linking to Amazon.com and affiliated sites. We are also a participant in the B&H Affiliate Program which also allows us to earn fees by linking to bhphotovideo.com.
Learn Astrophotography
Astrophotography 101 is completely free for everyone. All of the lessons are available on the Lonely Speck Astrophotography 101 page for you to access at any time. Enter your email and whenever we post a new lesson you’ll receive it in your inbox. We won’t spam you and your email will stay secure. Furthermore, updates will be sent out only periodically, usually less than once per week.
Help us help you!
Believe it or not, Lonely Speck is my full-time job. It’s been an amazing experience for us to see a community develop around learning astrophotography and we’re so happy to be a small part of it. I have learned that amazing things happen when you ask for help so remember that we are always here for you. If you have any questions about photography or just want to share a story, contact us! If you find the articles here helpful, consider helping us out with a donation.
[button font_size=”16″ color=”#136e9f” text_color=”#ffffff” url=”https://www.paypal.com/cgi-bin/webscr?cmd=_donations&business=lonelyspeckblog%40gmail.com&item_name=These+tips+help+keep+lonelyspeck.com+running.¤cy_code=USD&source=url” target=”_blank”]Donate[/button]
Thanks so much for being a part of our astrophotography adventure.
-Ian
[button font_size=”16″ color=”#136e9f” text_color=”#ffffff” icon=”arrow-left” url=”https://www.lonelyspeck.com/astrophotography-101/” target=”_self”]Back to Astrophotography 101[/button]
Hi Ian, I love this technique and thanks for sharing and making it easy to follow. I am having trouble when I blend the foreground. Since the final stack is warped and rotated a lot compared to the first, when I brush it in, I am brushing in stars from the foreground stack which contains the blurry stars. Do you have any tips for dealing with this? Thank you.,
Is it better to edit before or after stacking?
Rewatch the video at around 3:30, Ian explains, that the image already has been edited in his standard workflow!
Hi Ian!
I’m just getting into Astrophotography, and I was curious about the techniques you used in this article:
I look at the completed stacks, and they don’t look sharp to me. Now that could be the JPEG compression, but the original photos look “better”, even though there is more noise. Is that actually the case?
Also, since I don’t have the money for Adobe CC, I was curious if this stacking technique is possible with GIMP?
Thank you so much!
Hey Ian,
Great tutorial. I do not use/own adobe photoshop, only adobe lightroom 6.0. Is it possible to stack images and have a similar outcome using only lightroom?
No. Lightroom cannot stack images in the sense of layers that would be necessary to perform multiple image noise reduction.
Hey Ian, thanks for the share! Saved my first image. Although the second time I did it, I ended up with vertical purple banding (like thick magenta streaks going downwards, maybe pattern noise?). Do you have any idea on what I should do to remove it? I’ve tried some third party de-banding but to no avail. Thanks!
Hi Ian, first off – thank you for the amazing site – I just started Astrophotography last year, and feel like I owe 99% of my knowledge of it, to your site. I’ve purchased a few lenses through your links to try to show some appreciation!
I have used this exposure stacking tutorial a few times – with pretty good results, but I feel they could be better. The step I seem to run into trouble is during the manual alignment. When I go into free transform mode and start to align the stars, I can get most of them to disappear in one area of the image, but when I move to another part of the image – and drag it around to rotate, skew, or warp – the area where the stars were aligned, are now thrown out of alignment. Then it constantly a game of aligning one section, only to throw the other part out of alignment – and the stars become visible again. It looks like in your tutorial when you adjust each section, for the most part – the stars stay aligned and blacked out. Is there anything that I may be doing wrong, or a trick I’m missing to keep all the areas of the photo aligned?
Thanks again for your awesome site!
Hey there, I’ve gone through the process for the first time yesterday and encountered the same problem. It seems like you cannot rotate the image for every seperate corner, since it rotates the whole layer. By holding ‘control’ and dragging the corner, only the chosen corner will be affected.
Try using the warp tool for further corrections, it does a great job (zoom in to only change small regions of the image)