

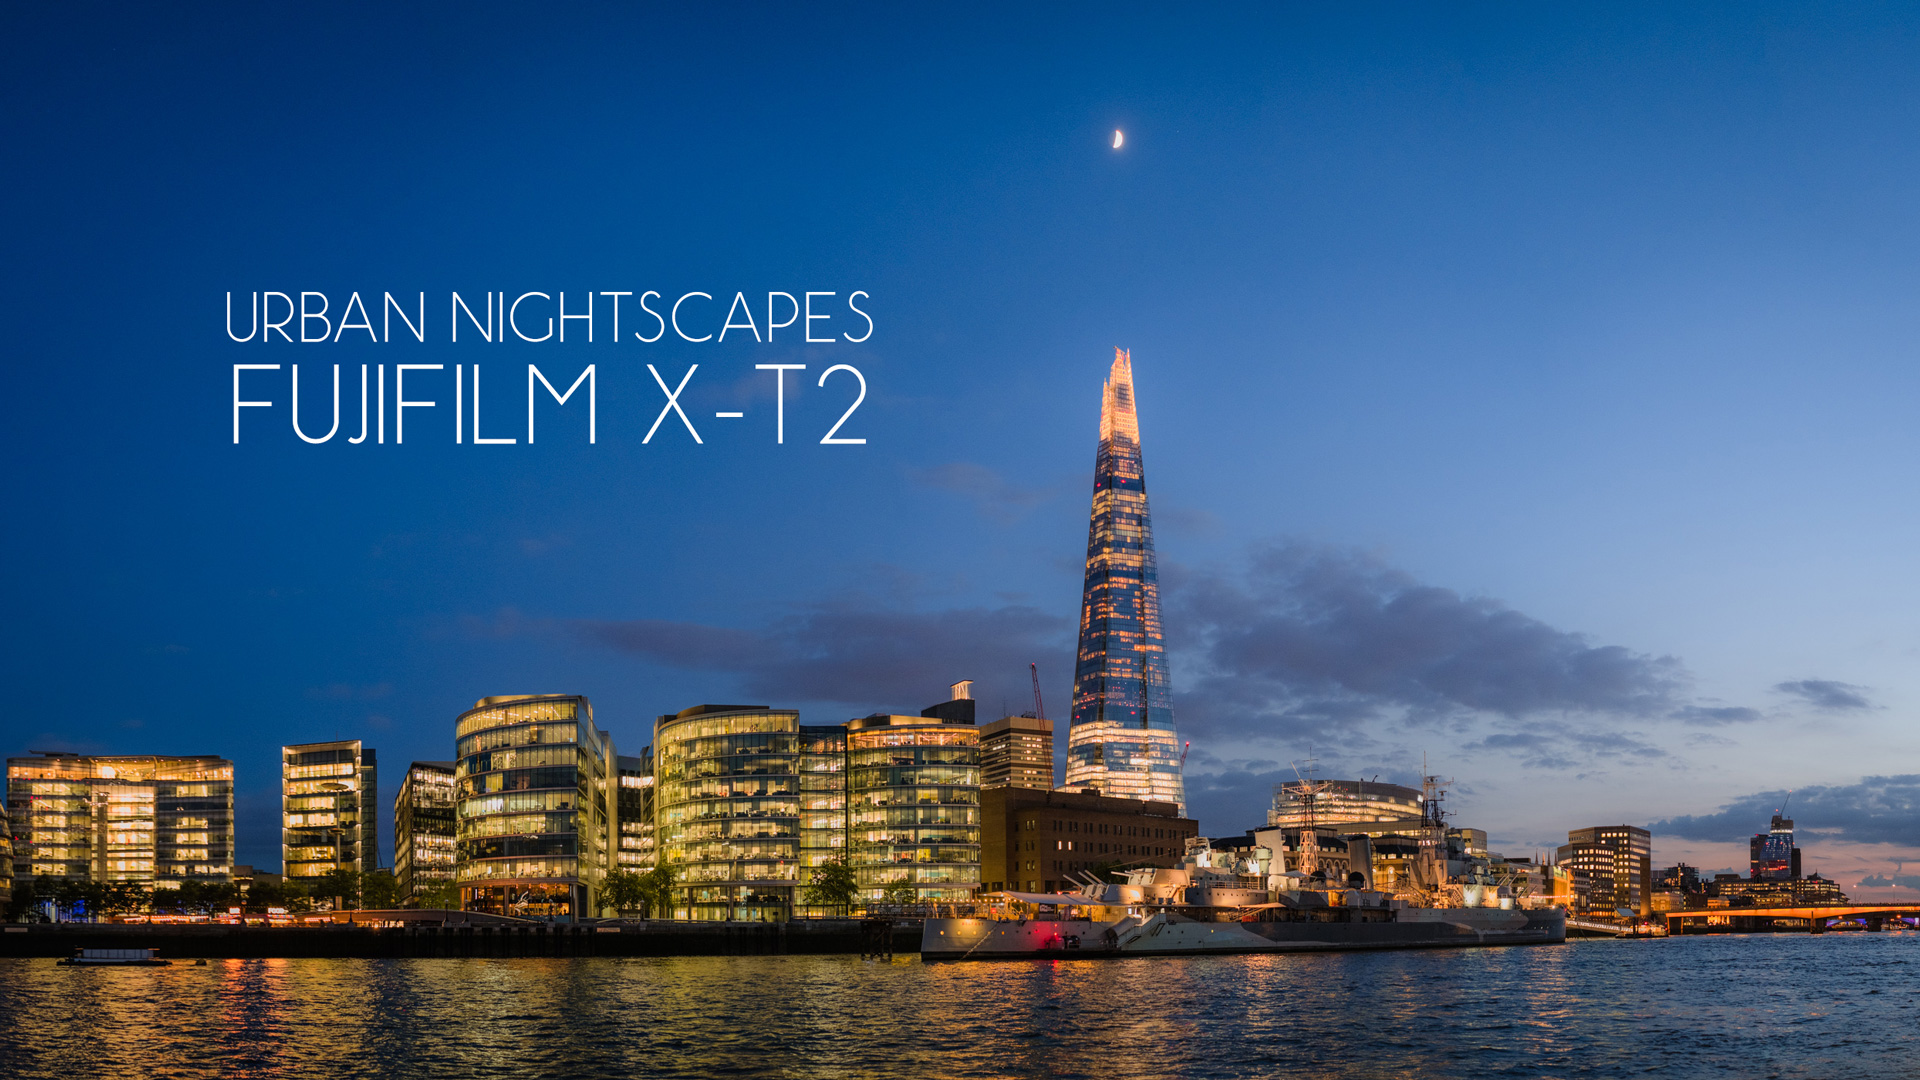
Using one of my favorite techniques for astrophotography, I take a shot at shooting ultra high resolution urban nightscapes with the Fujifilm X-T2. In this user experience review, I test the X-T2’s low light shooting performance while exploring the cities of London, England and Edinburgh, Scotland at night.
Introduction
This summer was a bit of a different adventure for me in terms of night photography. My fiancée, Diana, and I spent the better portion of a month traveling (for the first time) around England, Scotland and Ireland. I came equipped and prepared to shoot some astrophotography, expecting opportunities as we explored the Scottish Highlands and other rural areas known for relatively dark skies. But in typical UK summer fashion, the majority of our trip was met with daily rain showers and cloudy night skies. As the opportunities for astrophotography outings diminished, I shifted my focus toward the city lights. My tools of choice for this trip was the Fujifilm X-T2 and the Rokinon 35mm/1.2.
My original intention for this review was astrophotography centric, particularly to evaluate the X-T2 for shooting ultra high resolution landscapes under the night sky using a method of panorama stitching. It’s a method I’ve written about before and it’s become my personal favorite technique for maximizing image quality when shooting photos at night. Since I didn’t get to shoot the night sky, I fell back on the city lights. Sometimes we just need to take what we can get.
With our jet-lagged arrival in London and the X-T2 in hand, we had a great excuse to wake up in the late afternoon and stay up until sunrise walking the quiet city streets.
Later that month, we did some more late night walks in Edinburgh. And while I saw nearly no stars on our trip, I returned with a collection of urban night photos that I was really happy with.
The Kit
Adhering to our typical minimalistic packing routine, I brought with me only a few pieces of gear to shoot night scenes in London and Edinburgh:
- Fujifilm X-T2
- Rokinon/Samyang 35mm f/1.2
- Sirui T-025X
- PureNight Light Pollution Filter
- X-T2 Arca L-Bracket
The Project: Ultra High Resolution Urban Nightscapes
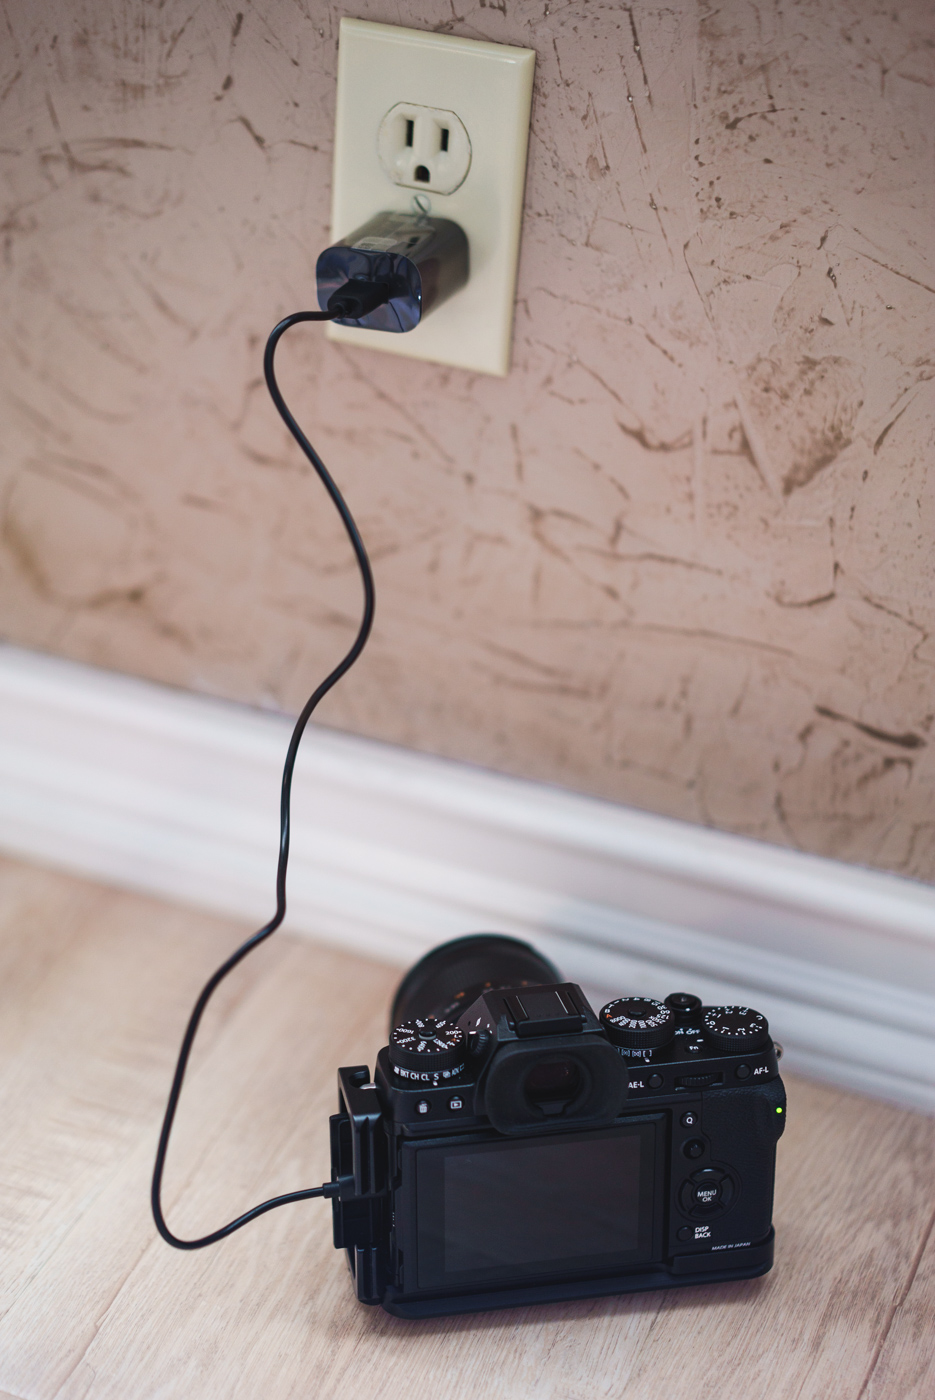
I chose the Fujifilm X-T2 for a few reasons: resolution, portability and low-light capability. I love to pack light when traveling and a small consideration was the X-T2’s capability to be charged directly from a micro USB cable. It’s a small feature but one that makes it very nice for travel as I did not need to pack the external charger just for the camera.
On top of its portability, the Fujifilm’s X-Trans III sensor is particularly good a producing low noise, high resolution raw photos. I was a fan of the performance of the original X-T1 and the increased resolution and newer sensor on the X-T2, among other improvements, seemed to fit the bill for this project. It’s also one of the higher resolution APS-C cameras available on the market. With the X-T2, I specifically wanted to concentrate on capturing 50+ megapixel photos using panorama stitching. With a 24 megapixel sensor, just a few exposures with the X-T2 would allow me to easily capture more than 50 million pixels of data.
The upward trend of technology has just recently started to make 50+ megapixel cameras available on the market. Canon has released their studio targeted 5DSR and on the far end of the spectrum, Hasselblad released the 100.9 megapixel H6D-100c, one of the first true medium format digital cameras. But at a price on par with an entry level luxury coupe, the high cost of entry into the “realm of many megapixels” is far too steep for most photographers. I wanted to show that it’s possible to reach resolution numbers that meet and exceed the capability of such an expensive camera as the H6D-100C with a comparably modest small format camera.
The Camera: Hardware Impressions
The X-T2 is a flagship of the APS-C range of cameras available on the market, regardless of brand. On paper, it features some of the highest specifications for any APS-C camera on the market. Among its top specs are 24.3MP stills, UHD video, 14 frame per second rapid fire silent shutter continuous shooting (up to 11 with the mechanical shutter), 325 autofocus points with almost 50% sensor phase detection coverage, and a 100 frame per second electronic viewfinder.
Its retro styled control scheme is one that may polarize many photographers. Personally, I’ve found it particularly conducive to the manual exposure and manual focus technique that’s necessary for both night photography and successful panorama stitches. If you’re familiar with the Fujifilm X-T1, there’s almost nothing different about the X-T2 in terms of general control scheme. There have been small improvements in both software and hardware with the addition of more software programmable button, a thumb accessible control joystick and unlock-able exposure dials but the story here is pretty much the same as the X-T1.
Viewfinder and Screen
I found the X-T2 viewfinder to be markedly different from the older X-T1 and that’s a good thing. It runs at a higher frame rate that reduces when necessary for low-light shooting. It’s not as night-vision capable as the Sony a7S or a7SII, but its performance in low-light conditions is good. With the latest firmware, it has the ability to set a much reduced brightness level for shooting in dark conditions. The biggest improvement, however, is the X-T2’s new feature that allows the use to disable all image processing for the viewfinder output (PREVIEW PIC. EFFECT). Disabling this setting makes it possible to see a “more raw” image through the viewfinder or monitor that’s more representative of what you’d get from an unedited raw file. It makes the image through the viewfinder appear flatter and less contrasty but with more visible detail in the highlights and shadows, making it much easier to visually evaluate exposure success. I found that I enjoyed this “flat” setting significantly more than the default which, regardless of film simulation setting or shadow/highlight setting increases the contrast of the viewfinder too much to easily evaluate shadow or highlight detail visually.

One of the features that I most enjoyed about shooting with the X-T2 was the camera’s improved tilt-screen. The original X-T1 only allowed the monitor to tilt for horizontal compositions. The X-T2 adds one more axis to the tilt mechanism, allowing it to be tilted while using the camera in the vertical, grip-up orientation. It’s significantly more typical to shoot panoramas with the camera in a vertical orientation and so the X-T2’s tilt screen greatly improved the overall shooting experience.
Example Images and Shooting Experience
Our first night photography outings of the trip were in London. With the help and guidance of a fellow photographer, Leo Hoang, we set out to capture some of the staple London landmarks. First on the list, and probably the most difficult shot of the trip (in terms of shooting and post-processing) was Big Ben and the British Parliament building. This shot has been done a million times by other photographers and so I wanted to try my hand at recreating it with a 100+ megapixel panorama, at midnight (12:01, actually), with light trails from passing cars and busses. There were a few factors that made this kind of shot difficult: the lights on Big Ben shut off at about 12:02 AM, multiple instances of passing busses and cars would be needed to form a complete looking set of light trails, and the building is lit so brightly that it pushes into the realm of high-dynamic-range shooting.
I needed to greatly pull down the highlights and lift the shadows in my processing of the photo and I’m happy with the results that came out of the X-T2. Even after a lot of pushing, the shadows remained relatively clean and I found that highlight details were retained very well. The resulting panorama was 147 megapixels.
The X-T2 fared even better shooting in the opposite direction from the Westminster Bridge. The view of the London Eye is a much lower dynamic range scene so nearly now shadow lifting or highlight pulling was necessary, resulting in a very clean and nearly noise free result in a 50 megapixel panorama.
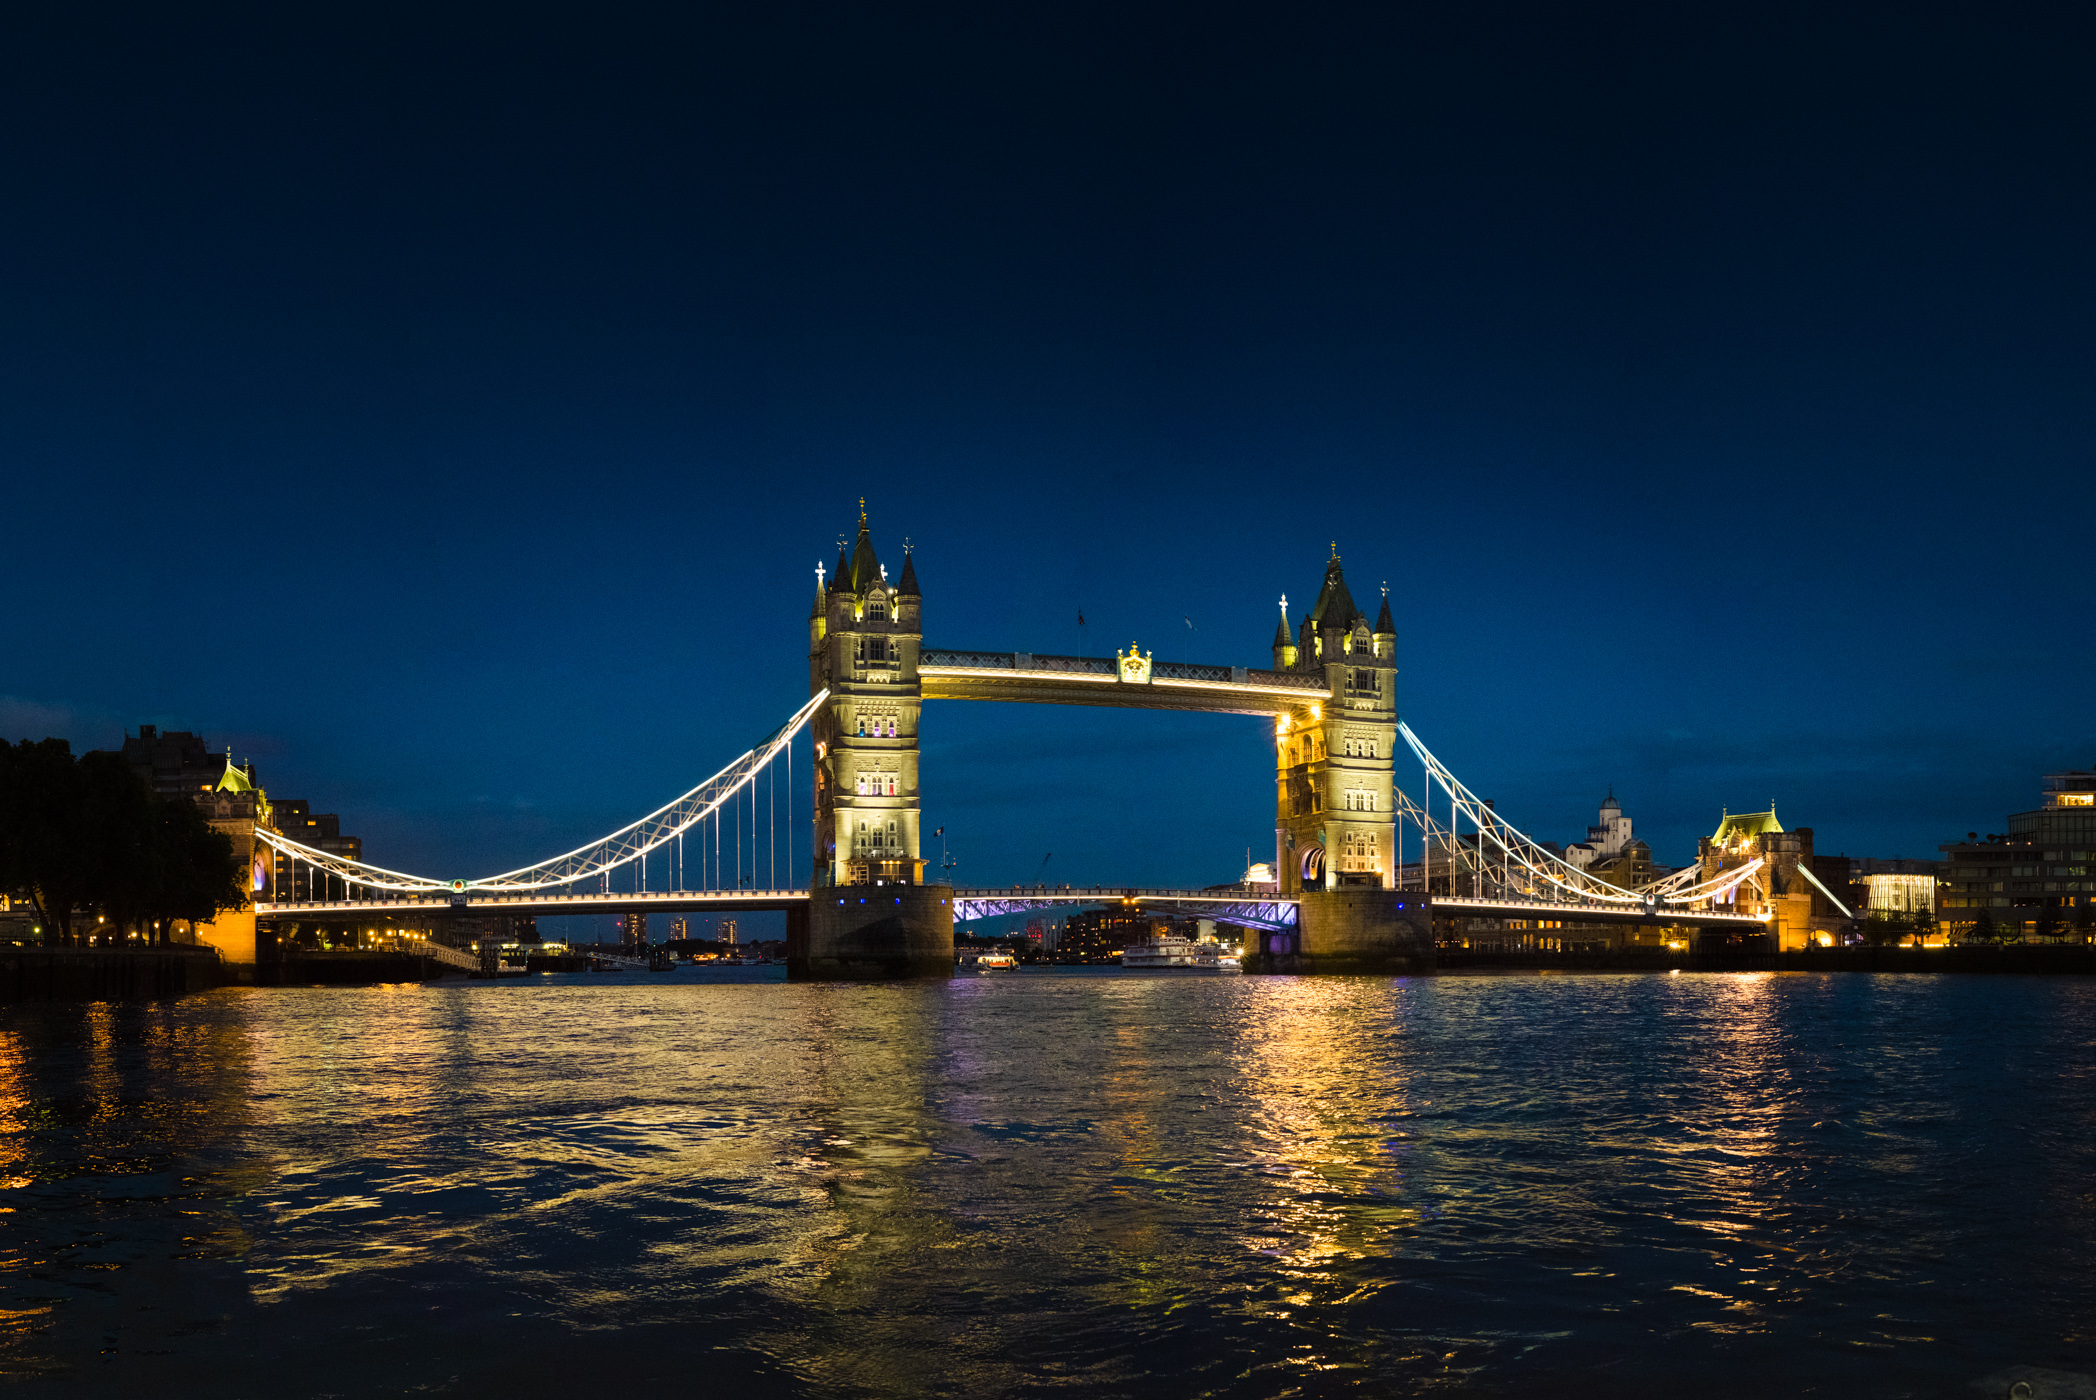
On a second night of shooting, we returned to the Thames river to shoot from the ferry port near the Tower of London, which features a great view of the Tower Bridge and The Shard skyscraper. Since the dock of the ferry terminal shifts with the flow of the river, I did not have the option to shoot a low-ISO long exposure so I was forced to shoot with a faster shutter speed handheld, pushing the ISO up past 1600 for my initial shot of The Shard and all the way to ISO 12800 for the Tower Bridge.
At max ISOs and moderate f/numbers, the X-T2 still produces relatively clean images. Just like the X-T1, grain is well controlled and pleasant with very little color/chroma noise present, even when shooting at maximum ISO settings. My stitches weren’t completely perfect here as I chose as slow a shutter as I thought reasonable to handhold, about 1/50th of a second for the 35mm f/1.2 lens I was using. With the combined motion of the dock I was standing on and my own limitations for handholding, a few frames of the stitch were not completely free of motion blur. Even so, I’m happy with the final results. Both stitches exceed 87 megapixels of resolution. The biggest thing that I noticed about the X-T2, after shooting two handheld panoramas was just how fast it feels in operation compared to the older X-T1. The X-T2 shutter has significantly less blackout time by comparison, a huge improvement over the sluggish second curtain of the X-T1.
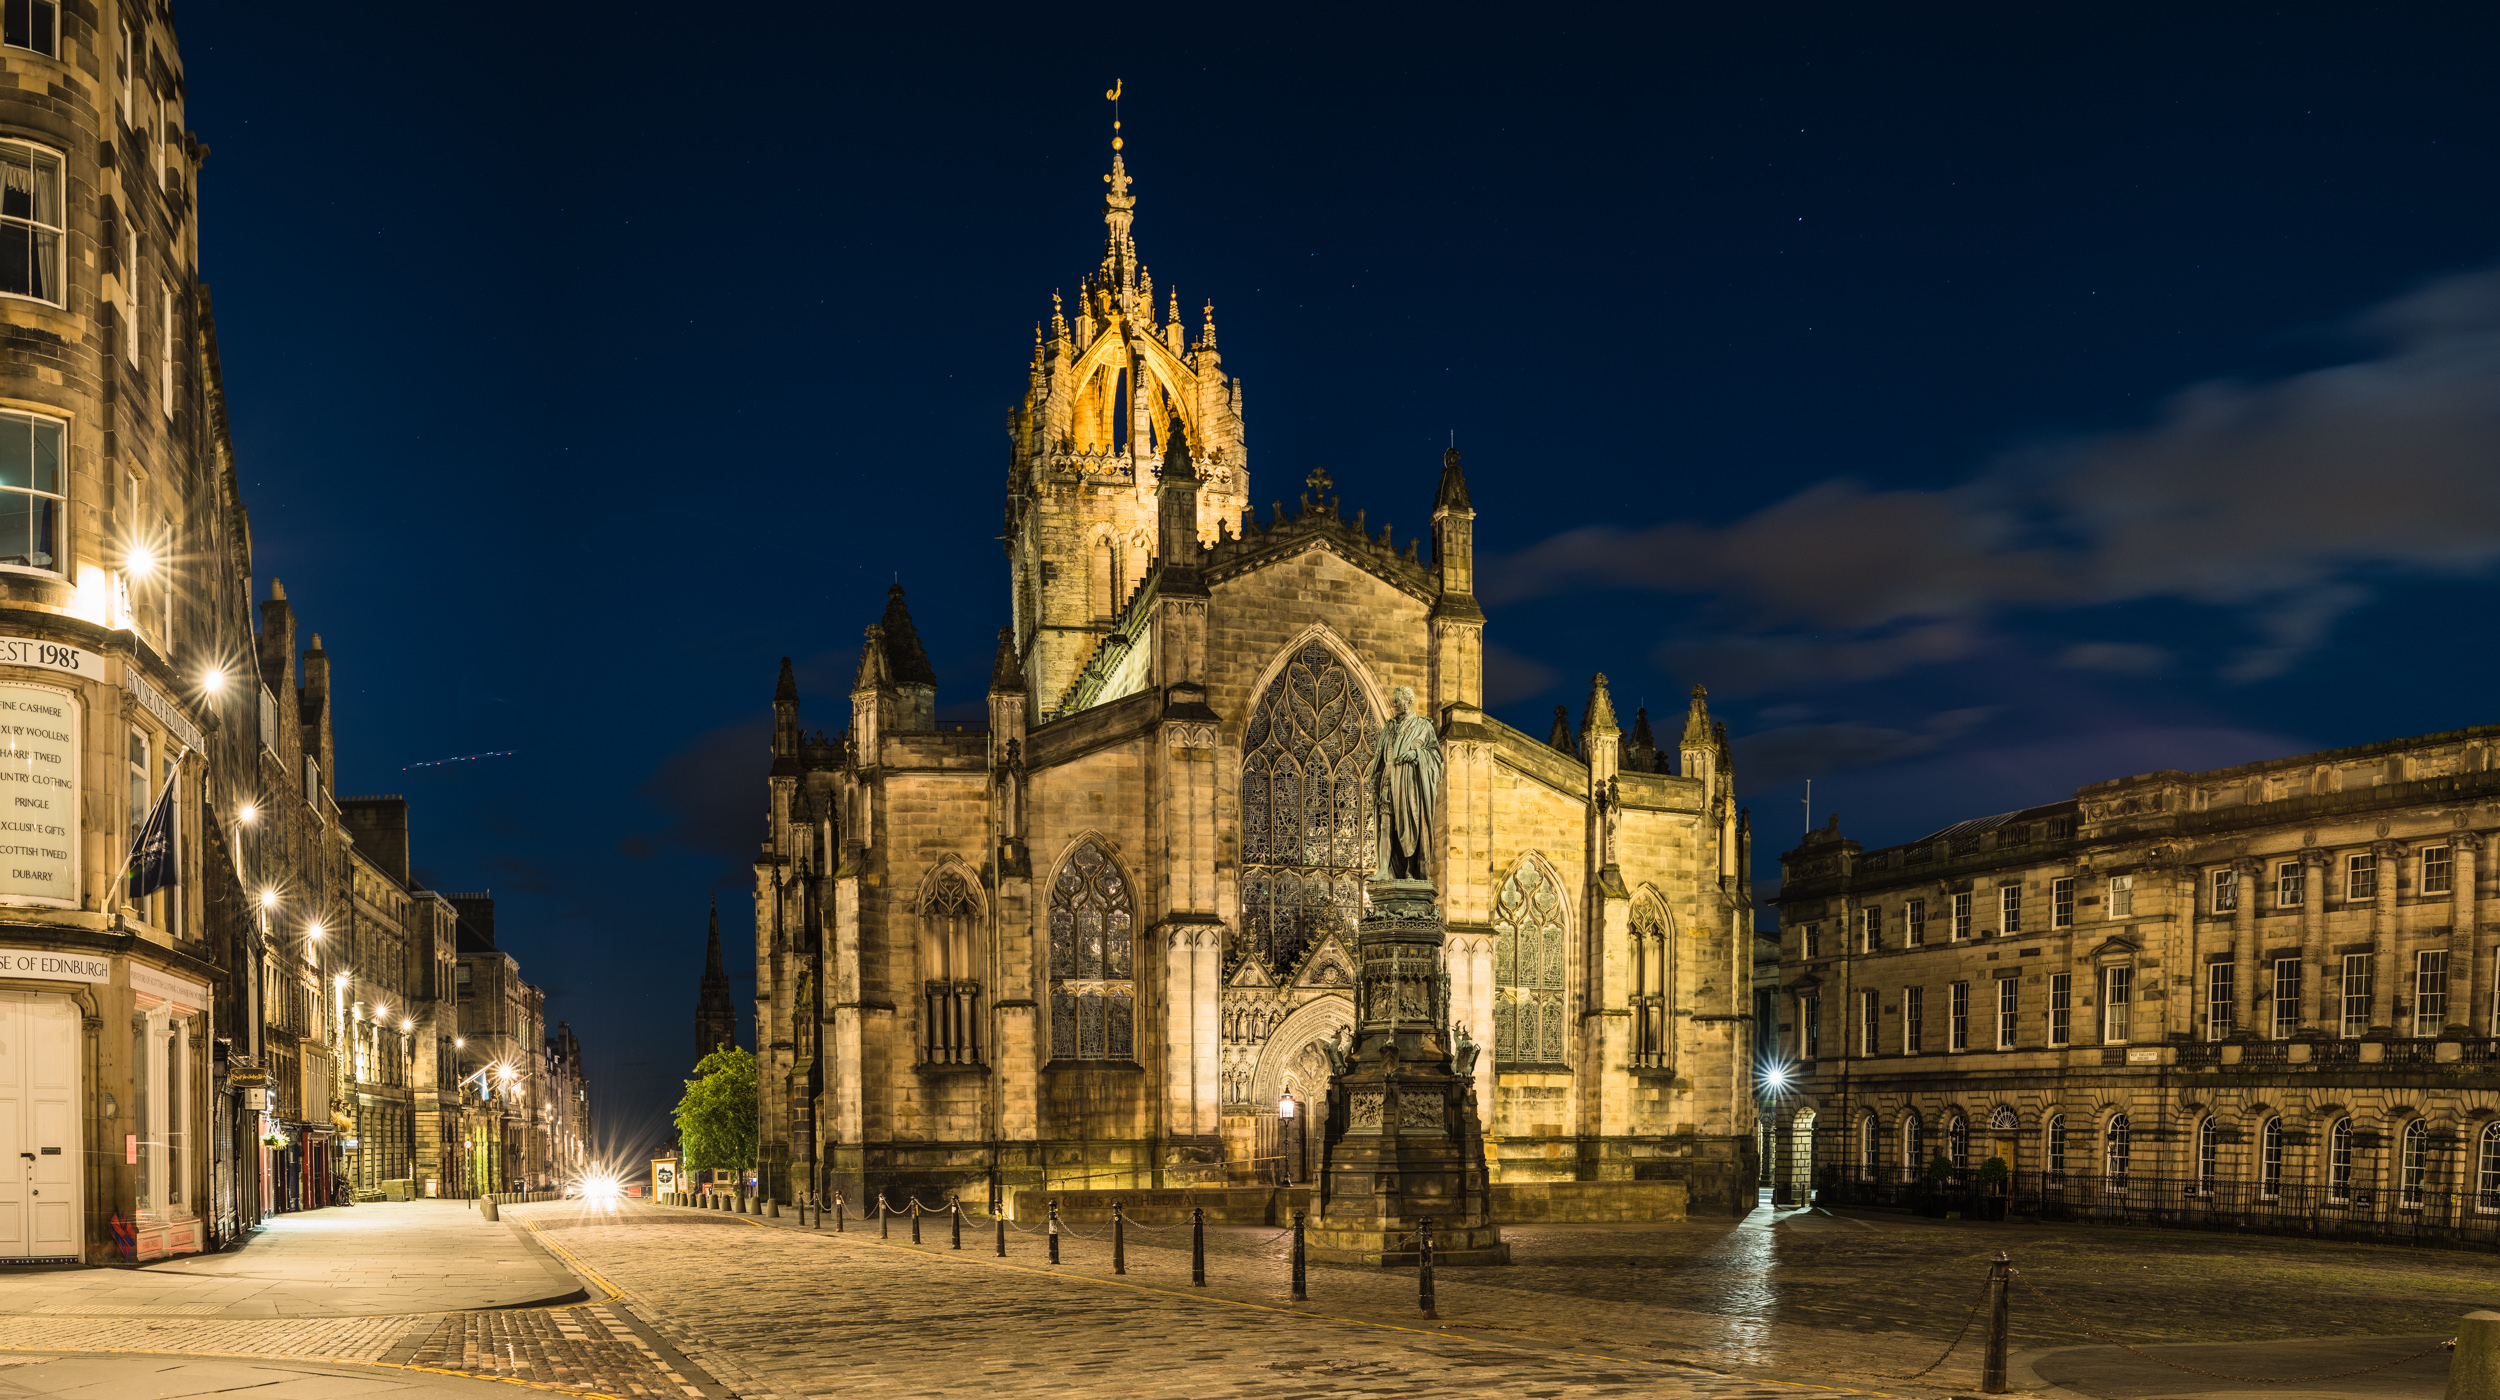
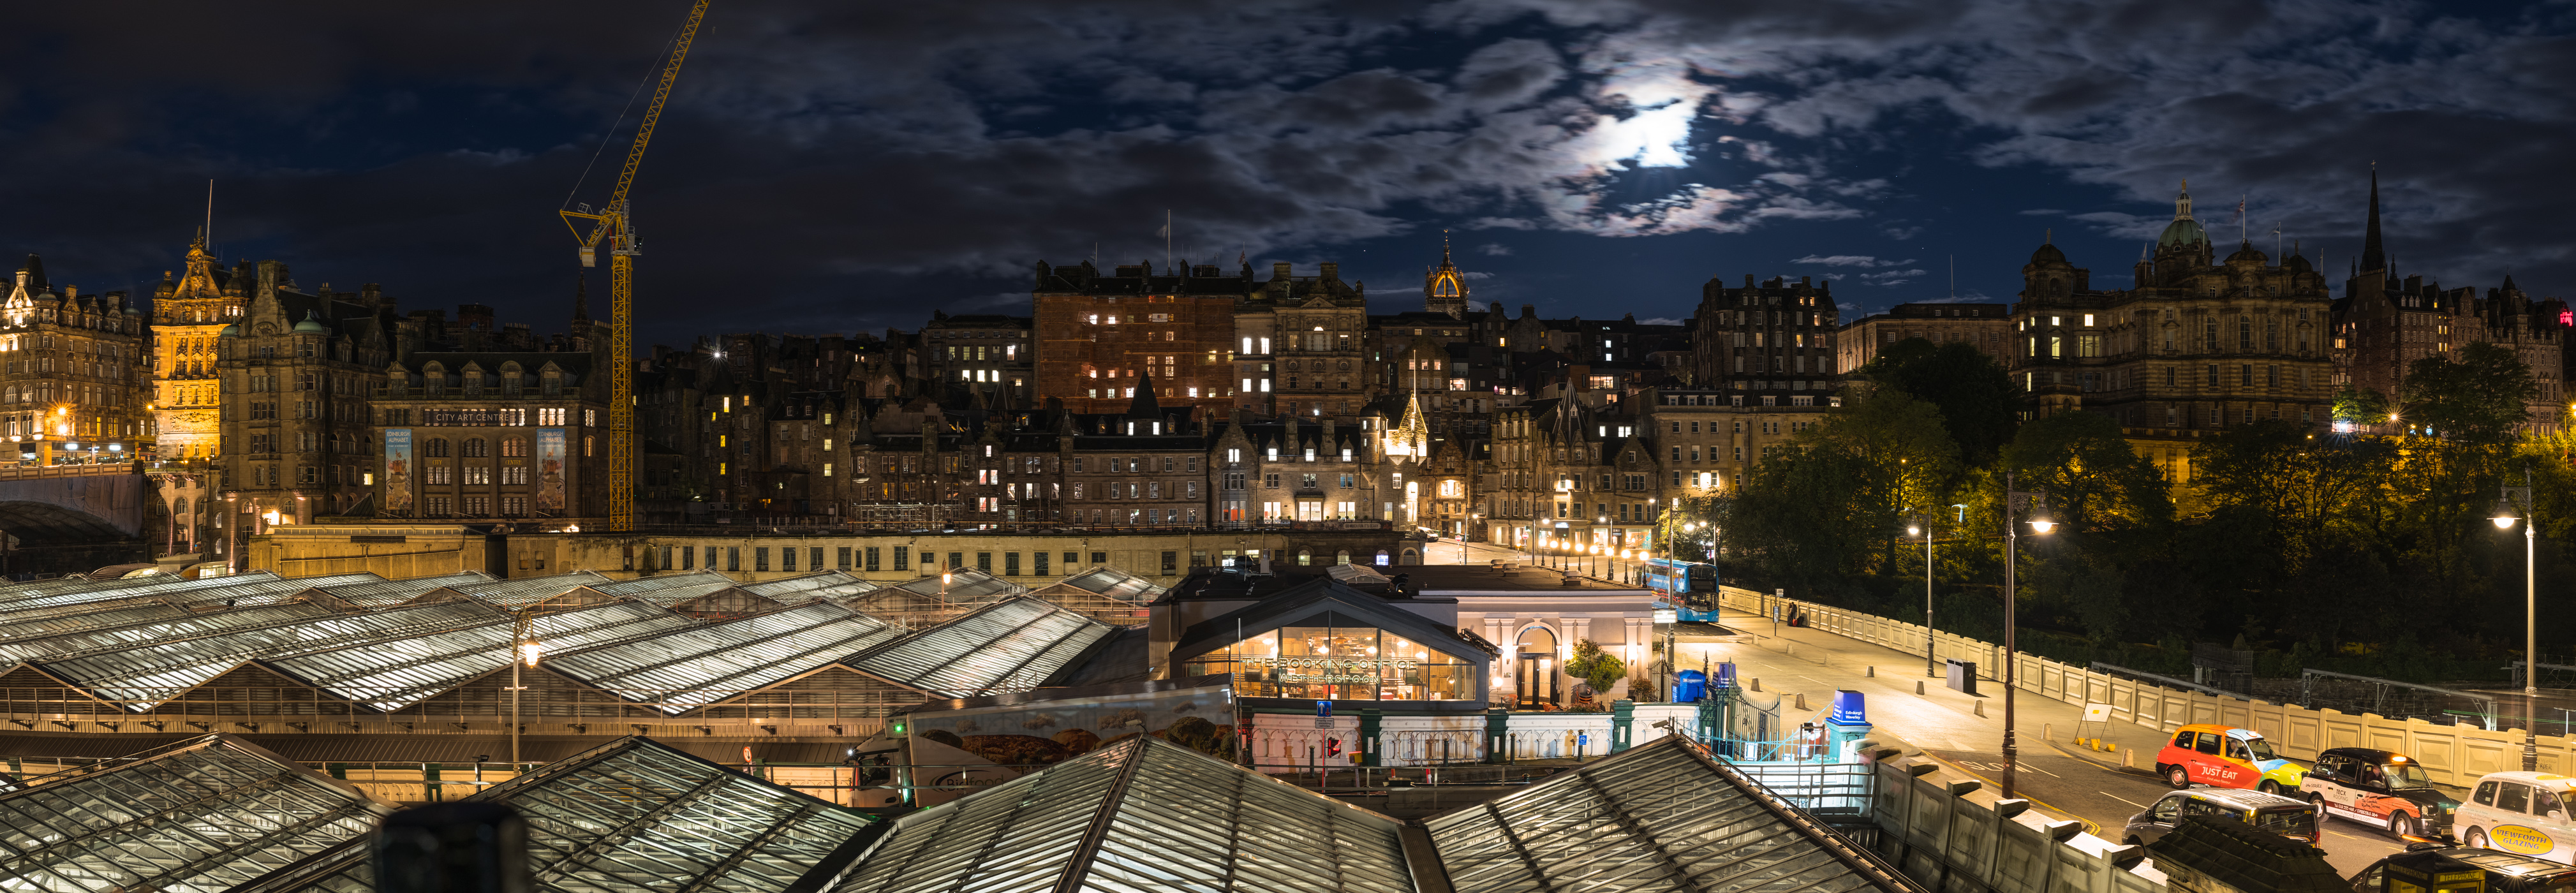
The next opportunity we found to shoot urban nightscapes was in the Scottish city of Edinburgh, a highlight of the trip. Edinburgh’s Old City offered excellent night photography opportunities with its cobblestone streets, narrow alleyways and dramatic lighting.
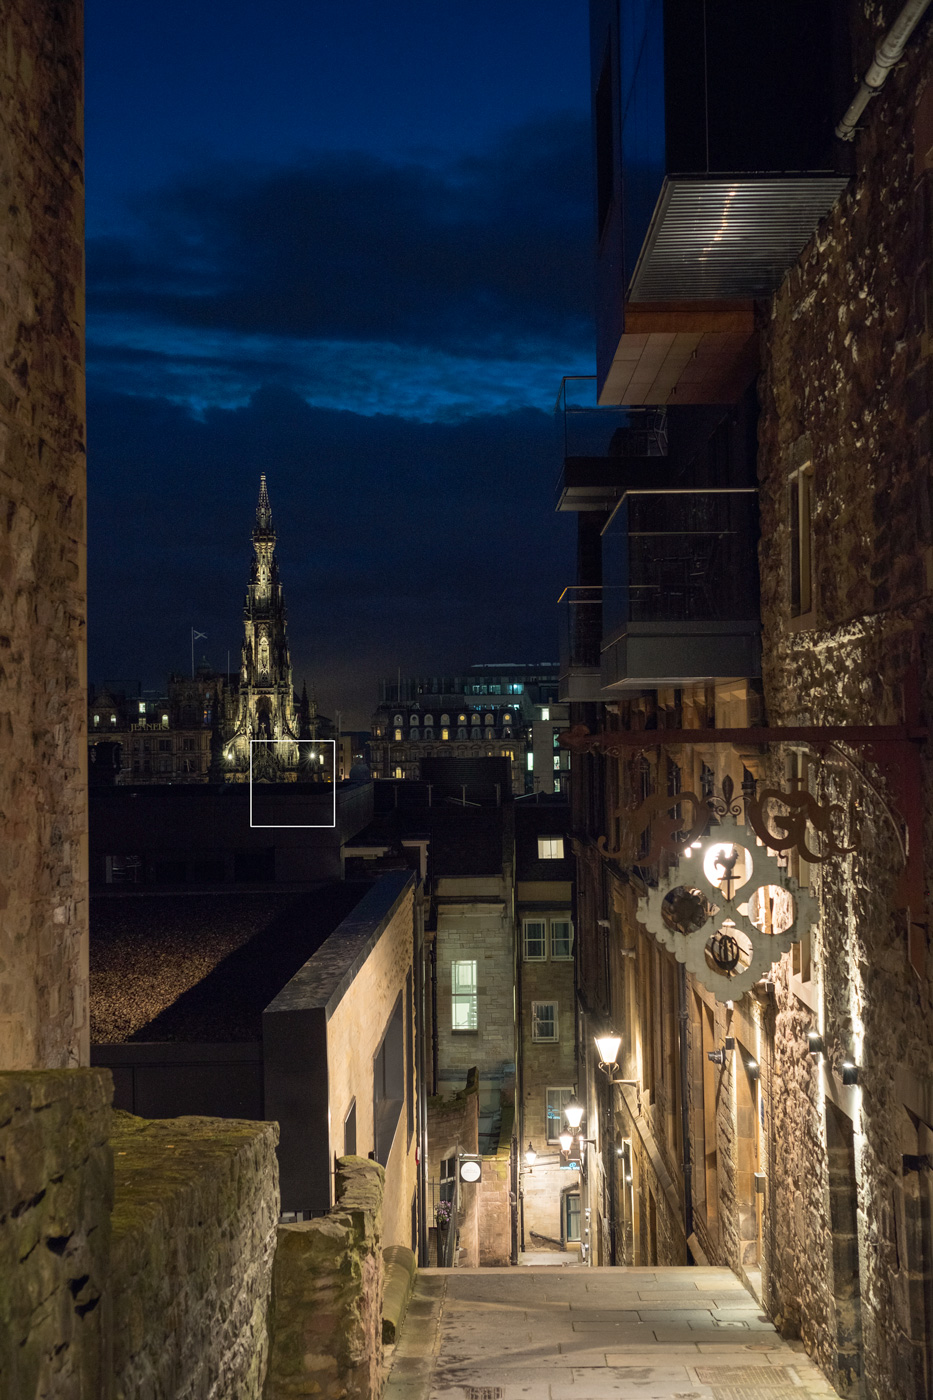
One of my favorite alleyways that we found was called Advocate’s Close which has a direct line of sight from the Old Town to the Victorian styled Scott Monument in the distance. For my shot of Advocate’s Close, I first captured my panorama for the complete scene with the X-T2 on the tripod, after which I shot several handheld photos of various passers-by. In post-processing, I was able to substitute the frame of a passer-by into the panorama for the final stitch. The final photograph of the woman walking Advocate’s Close is 71 megapixels.
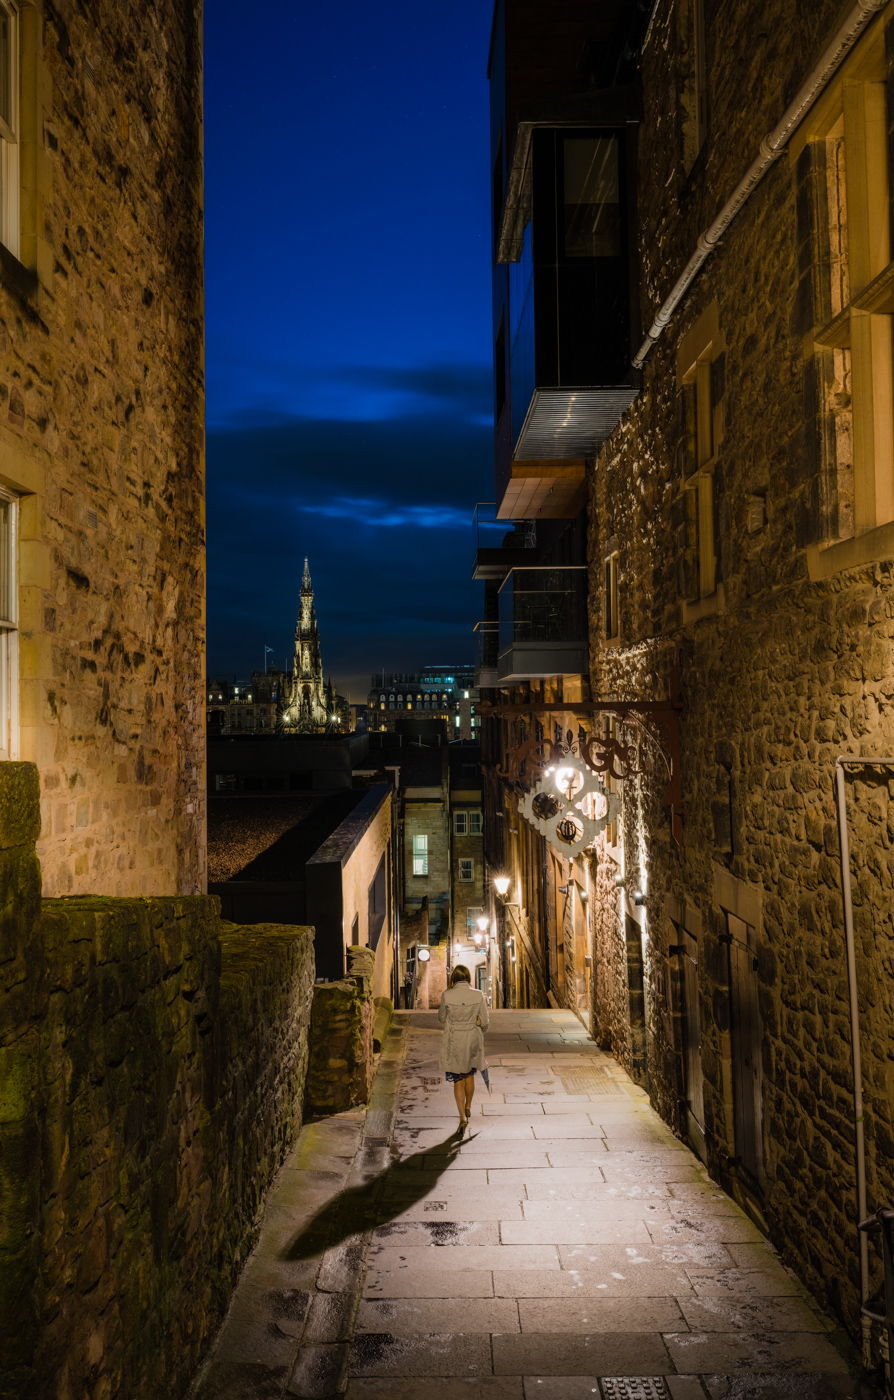
I also used the photo opportunity in Advocate’s Close to shoot an ISO-invariance test with the X-T2. Shooting an ISO-invariance test is useful for evaluating a camera’s ISO and dynamic range performance, particularly when shooting conditions are light limited, such as astrophotography or other extremely low-light situations. Check out my article about how to test your camera’s ISO performance. In a few words, an ISO-invariance test is performed by shooting identical exposures, varying only the ISO settings of the camera from the lowest to the highest settings. Then, in post-processing, we equalize the brightnesses of each exposure and compare. DPReview uses the same test in their latest camera reviews.
Upon close inspection of the image at 100% magnification, we can see the small variations in noise at each ISO setting of the camera. Unlike the Fujifilm X-T1, it appears that the X-T2 is not as ISO-invariant. The differences between each ISO setting is small but there is more shadow noise present at ISOs from 200-800 above which shadow noise improves noticeably. From ISO 1600 to ISO 12800, noise levels are nearly identical.

What does this test mean? It means that when using the X-T2 in low-light conditions, there is a small advantage to shooting at ISO settings higher than ISO 800 for the cleanest shadow details. The results of this test are very similar to the results I found for the Sony a6000, but with markedly less chroma noise. It’s likely that the sensor in the X-T2 is based on the same Sony sensor used in the a6000 and other similar cameras.
Diana and I continued exploring the streets of the Edinburgh Old Town. One of my favorite shots of the night was of Edinburgh’s Balmoral Hotel from North Bridge Street. I used the same technique of shooting Big Ben, waiting for multiple instances of buses and cars passing before making an exposure. The final result was 68 megapixels of resolution. I will admit that the retro control scheme on the X-T2 makes exposure adjustments a little bit slower than what I expect on a DSLR or more contemporary camera design. For instance, switching from handheld friendly short shutter times to longer exposures requires two steps: adjusting the shutter dial to “T” (timed) and then adjusting one of the control dials to the desired shutter time. It’s not usually an issue for this type of shooting, but it’s still something to get used to.

From just north of the bridge street photo location, we found a viewpoint overlooking the train station towards the Old Town. While I’m not usually akin to shooting wide format panoramas, it was a great opportunity to capture a wide sweeping panorama of the old town skyline under the rising moon. One of the most notable things I found after shooting so many panoramas is how much I enjoy the X-T2 tilt screen in vertical orientation. It greatly improves the speed with which you can compose and evaluate results versus the older configuration on the X-T1 (and many other Fujifilm or Sony mirrorless cameras). I don’t know why I love it so much, it’s such a simple thing but it really does make a big difference. The tilt screen makes the X-T2 that much more suitable for vertical shots (and panoramas alike).
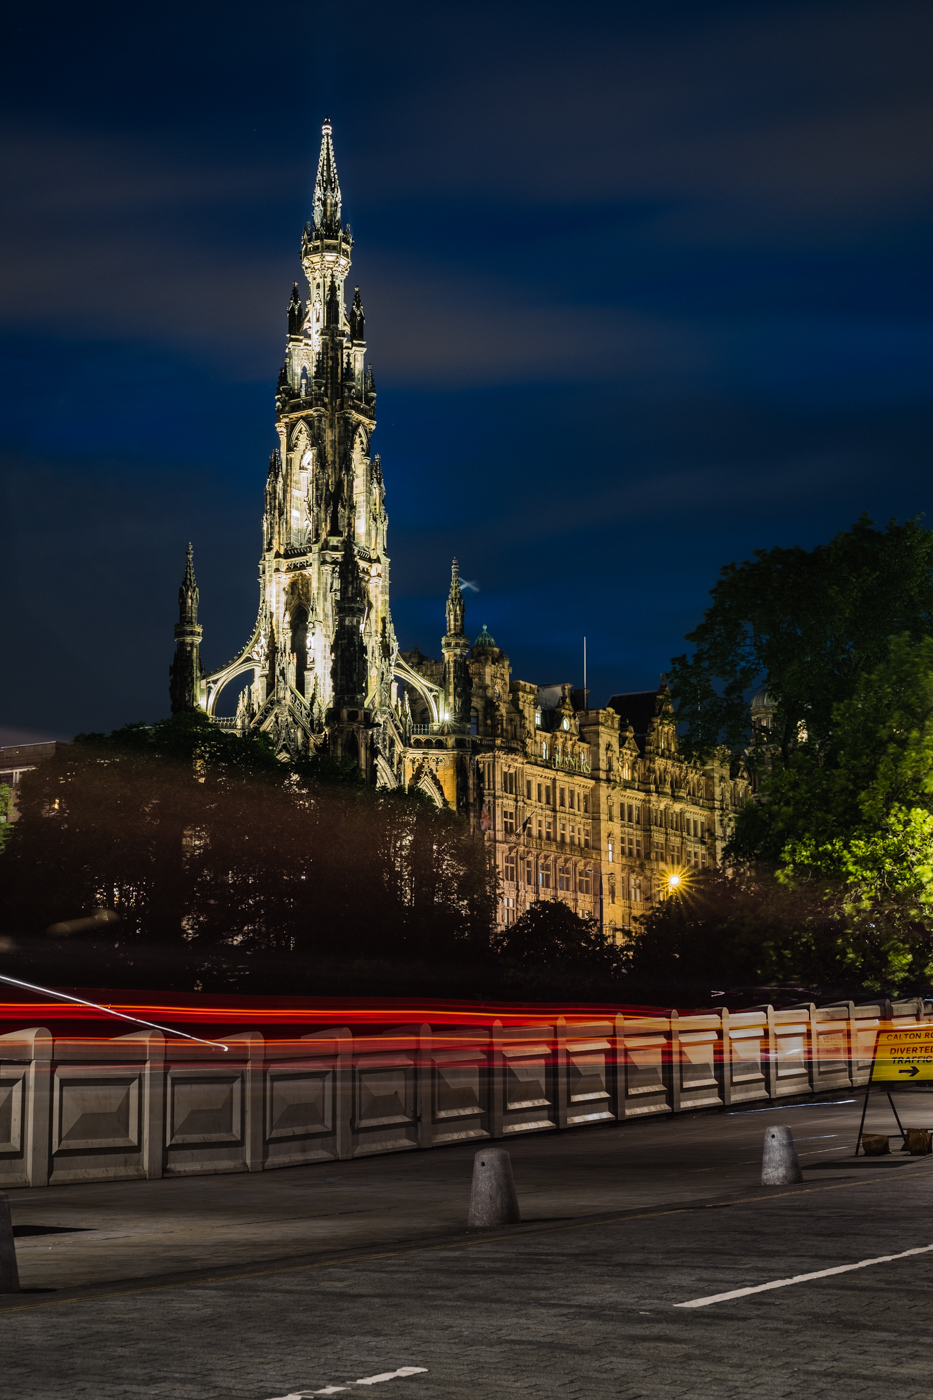
Getting a little weary after so much walking and panorama shooting, we continued back towards our Airbnb in the Old Town, snapping a single long exposure still (non-panorama) of the Scott Monument as a car passed by.
As we ended our walk for the night, we descended the inclined cobblestone streets of the Old Town and I shot my final long exposure panorama of the night. This shot is of the rising moon above an eerily lit empty intersection of shiny cobblestone. Diana and I were pretty tired from so much walking that I decided to only shoot a two frame pano for final photo resolution of 41 megapixels.

While I shot no astrophotos with the X-T2, my time shooting urban nightscapes with the camera mirrored much of the techniques that I love using for astrophotography. Panorama stitching has become my favorite technique for achieving improved image quality in night photography and the X-T2 was a great camera for this type of methodical shooting. The X-T2 was built to shoot in manual. I used it entirely with a manual focus lens, primarily using the focus magnification function of the camera to evaluate my focus. The dedicated control dials, vertical tilt screen and easily customizable controls made for a great shooting experience.
Overall, I’m super happy with the photos it produced. With a little work and post processing, the panorama stitching technique allowed me to relatively easily produce very high resolution photos that meet or exceed the resolution of a medium format digital camera. While it’s in no way a substitute for a dedicated medium format body, I think the X-T2 was a great camera to use for this panorama stitching technique.
Conclusion
The Fujifilm X-T2 is a very fun camera to use, particularly for manual methodical shooting. It looks and feels almost identical to the X-T1 but with small and welcome improvements. In particular, the ability to vertically tilt the monitor and remove the picture effect preview from the viewfinder/monitor makes for a more natural shooting experience. The focus selection joystick makes adjusting a focus magnification point significantly faster. The low-light performance and image quality of the camera lives up to the great Fujifilm reputation and resembles that of the X-T1 but with greatly improved resolution. In many ways, the X-T2 feels like the camera I wanted the X-T1 to be.
Fujifilm X-T2 Pros:
- Great low-light performance, comparable to full-frame
- Excellent control scheme and control customization
- Vertical and horizontal tilt screen
- Ultra smooth electronic viewfinder
- Ability to disable picture effect processing from viewfinder/monitor
- Improved shorter shutter blackout time
- USB rechargeable
Fujifilm X-T2 Cons:
- Slightly larger and heavier than X-T1
- Expensive compared to the competition
Fujifilm X-T2 Verdict: RECOMMENDED! (4/5)
Equipment Links (B&H)
- Fujifilm X-T2
- Rokinon/Samyang 35mm f/1.2
- Sirui T-025X
- PureNight Light Pollution Filter
- X-T2 Arca L-Bracket
Disclosure
We are a participant in the Amazon Services LLC Associates Program, an affiliate advertising program designed to provide a means for us to earn fees by linking to Amazon.com and affiliated sites. We are also a participant in the B&H Affiliate Program which also allows us to earn fees by linking to bhphotovideo.com.
Learn Astrophotography
Astrophotography 101 is completely free for everyone. All of the lessons are available on the Lonely Speck Astrophotography 101 page for you to access at any time. Enter your email and whenever we post a new lesson you’ll receive it in your inbox. We won’t spam you and your email will stay secure. Furthermore, updates will be sent out only periodically, usually less than once per week.
[email-subscribers namefield=”NO” desc=”” group=”Lonely Speck Newsletter”]
Help us help you!
Believe it or not, Lonely Speck is my full-time job. It’s been an amazing experience for us to see a community develop around learning astrophotography and we’re so happy to be a small part of it. I have learned that amazing things happen when you ask for help so remember that we are always here for you. If you have any questions about photography or just want to share a story, contact us! If you find the articles here helpful, consider helping us out with a donation.
[button font_size=”16″ color=”#136e9f” text_color=”#ffffff” url=”https://www.paypal.com/cgi-bin/webscr?cmd=_donations&business=lonelyspeckblog%40gmail.com&item_name=These+tips+help+keep+lonelyspeck.com+running.¤cy_code=USD&source=url” target=”_blank”]Donate[/button]
Thanks so much for being a part of our astrophotography adventure.
-Ian
Hi finally I get a good review of the XT-2.. !!Thank you for this ..I am planning a trip to NZ in July 2018 & I must have watched your NZ video 5 times 😛 ……I saw online that the X-trans sensor performs better in H-Alpha region..I know it’s been sometime since the review but can anyone you weigh in on this?
Will you mod X-T2 with kolari vision or lifepixel Halpha filter?
How is Rokinon 35mm f1.2 for night sky?