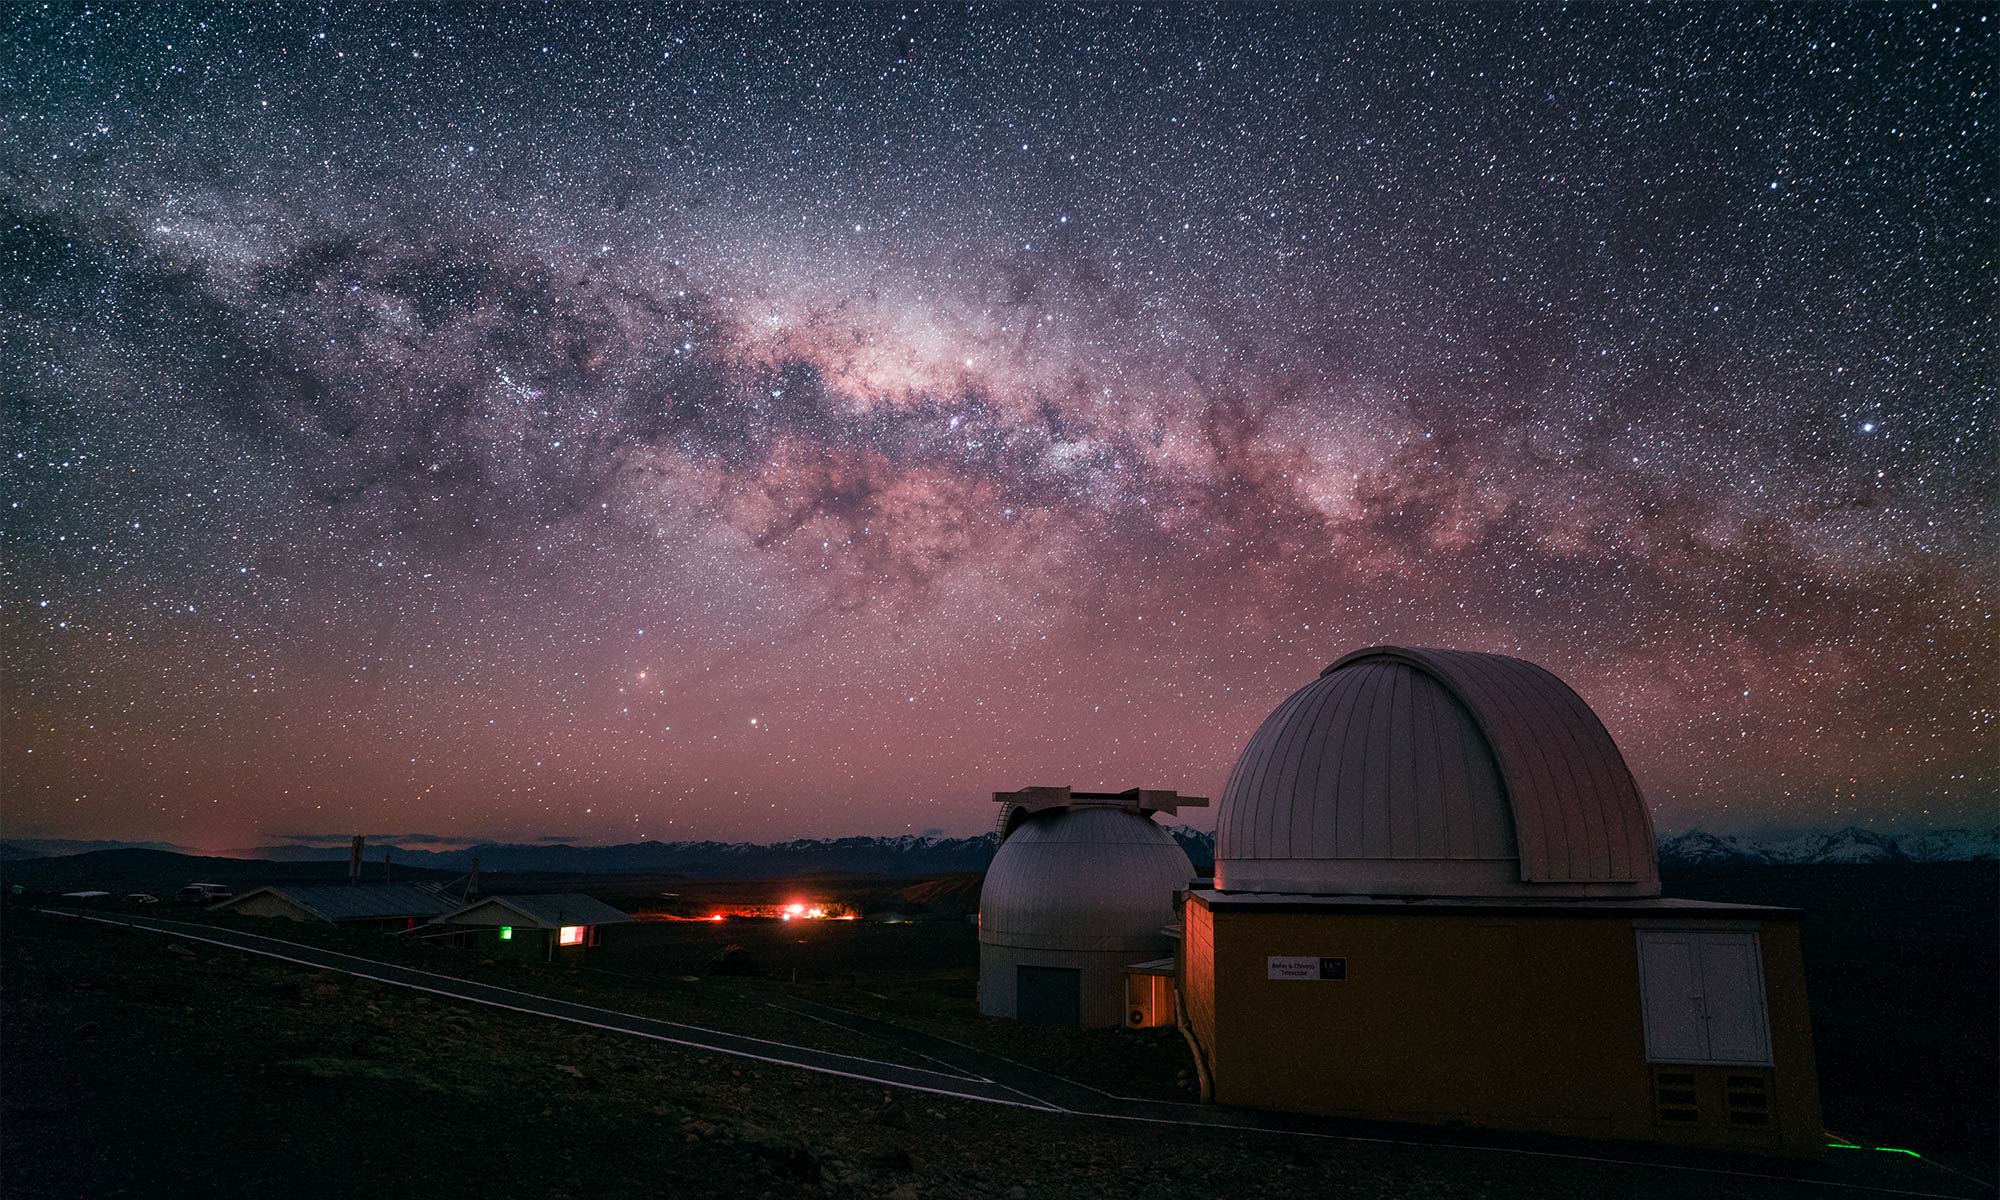

I often find myself drooling over news of the latest digital camera gear and lenses. I think we all do it a little. Astrophotography has benefitted greatly by the advancement of digital photographic technology and I’m always on the lookout for gear and techniques that will help increase the quality of my astrophotography. Most of all, astrophotography is more accessible than it has ever been because of newer, more affordable and more advanced technology.
I’ve made it a point to experiment with capturing the night sky on affordable and limited gear like point-and-shoot cameras and even a smartphone. I consistently support the idea that you don’t need the most expensive camera gear to learn how to photograph the night sky. That said, the point-and-shoot cameras and smartphone that I tested still use advanced modern technology to do what they can do. They have modern, back-illuminated CMOS sensor and the latest in miniaturization tech.
What if we instead approach astrophotography by going full retro?
I did not start learning photography on film cameras. My family’s first digital camera was the Sony DSC-P1, a 3.3 megapixel point and shoot and quite possible the coolest toy I had ever played with at the time. I think I was about 13. So, the first real personal experiences I had with photography were digital. I did not really get to shoot photos on film until my freshman year in college when I enrolled in a class on film photography. The class was overenrolled with seniors but I showed up anyway for the first three classes until the professor finally allowed me to “officially” enroll.
I already had the basics of photography down when I entered that class: aperture, shutter speed and ISO were all things I understood. But film taught me other things: pre-visualization, preparation, and more care in composition. It also gave me a whole new form of satisfaction from photography: surprise. There really is something special about seeing a negative right after it was developed by hand or seeing a photographic print for the first time, long after the moment captured has passed.
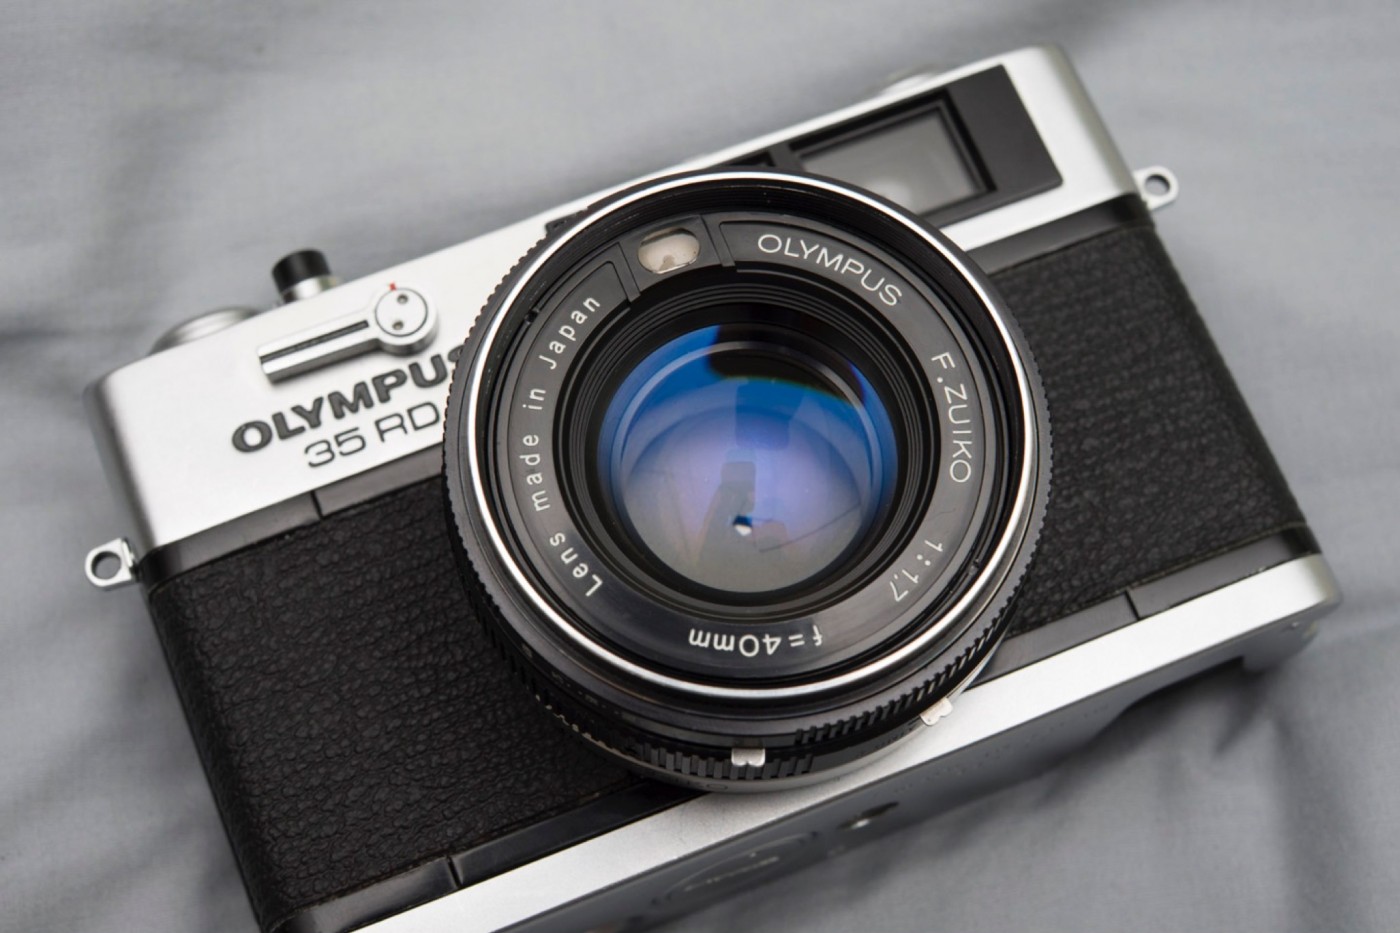
When I left college, I kept my film camera. I’ve since owned several film systems including a Canon Elan 7E, Mamiya RZ67, and finally an Olympus 35RD. Something I didn’t do after leaving college: develop film. For the last 6 years, I held on to every roll of film I shot without developing a single one.
Of course, in the last 6 years, the prevalence of the film industry has rapidly declined to almost nothing. When I graduated college, it was still possible to go to any corner drugstore and have C-41 roll processed within 1 hour. That’s no longer a thing.
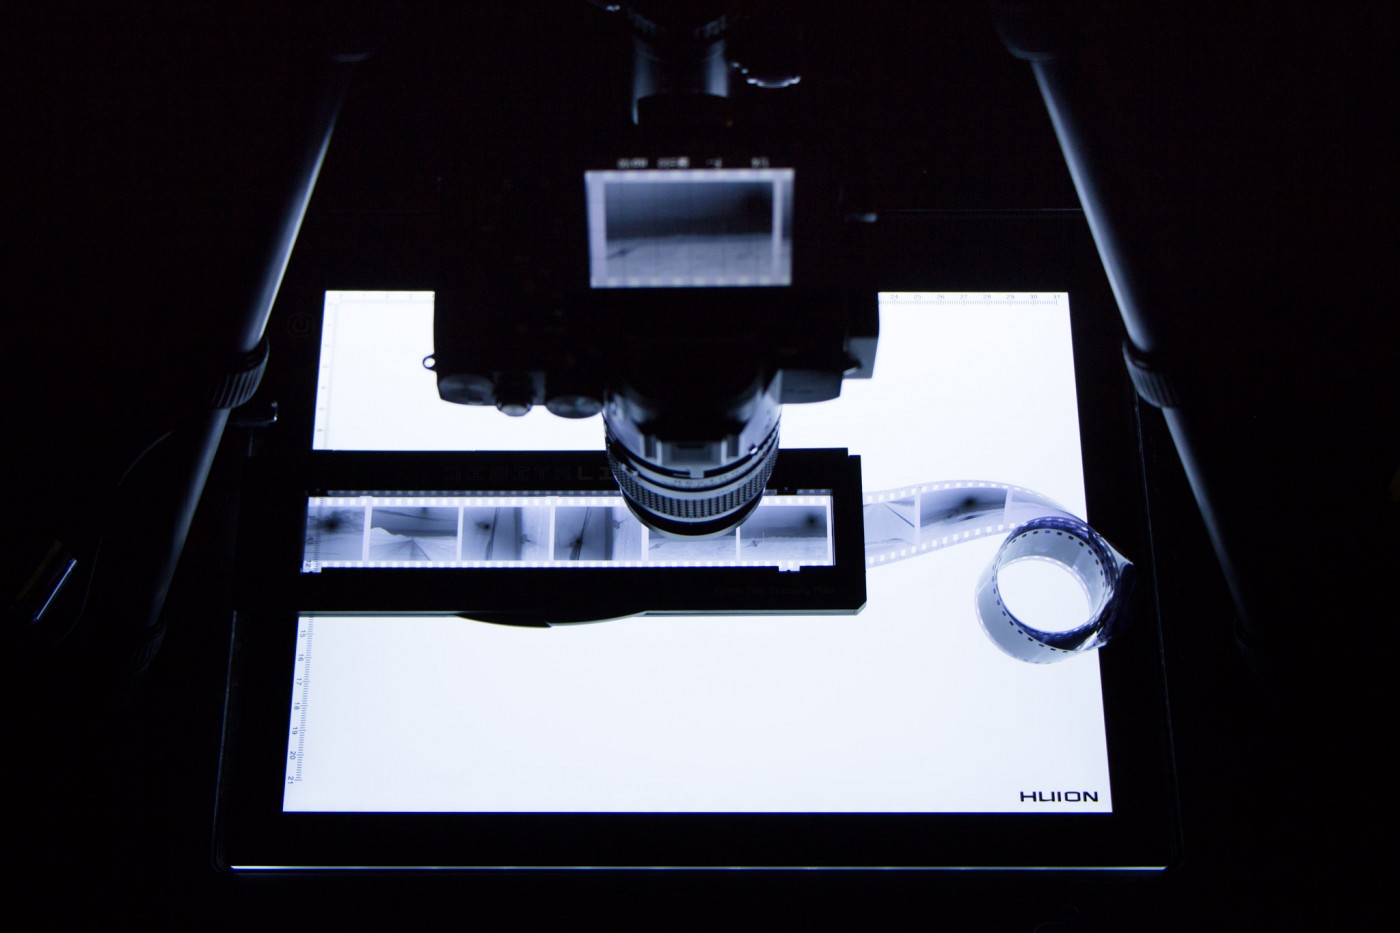
A few weeks ago, I pulled out my bag of 6 years of undeveloped film: about 35 rolls in total, some color and some black and white. After much searching for a place to get all the rolls developed, the color rolls were dropped off at a local photography shop, the last one in town that still developed film on-site. Most of the black-and-white rolls were developed at home by my fianceé, Diana, and me. The result was almost 1200 film negatives that I tediously digitized one-by-one using my Sony a7S, a light table and a 1:1 macro lens.
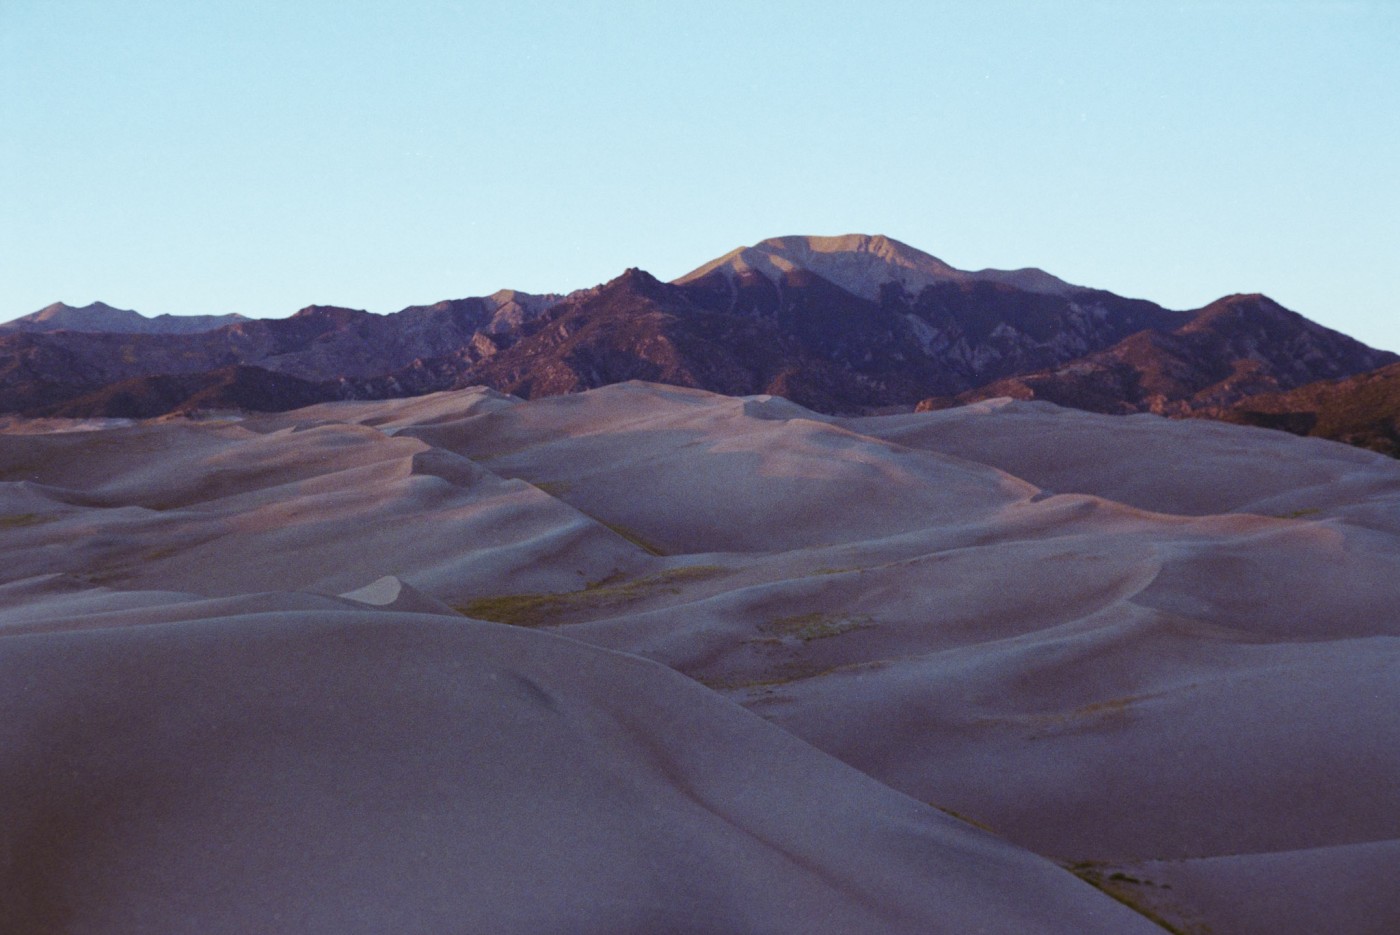
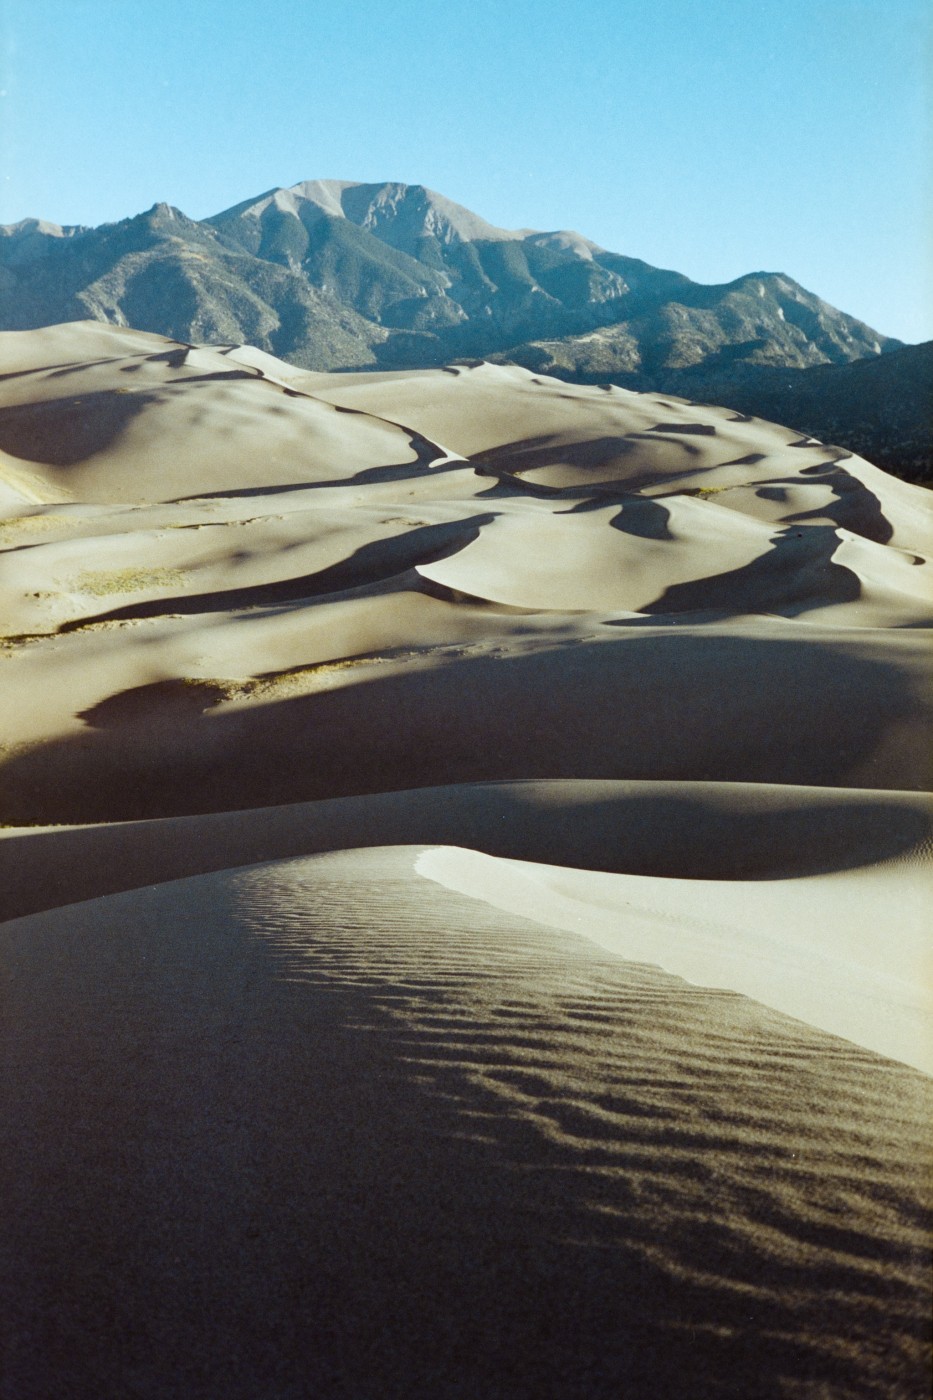
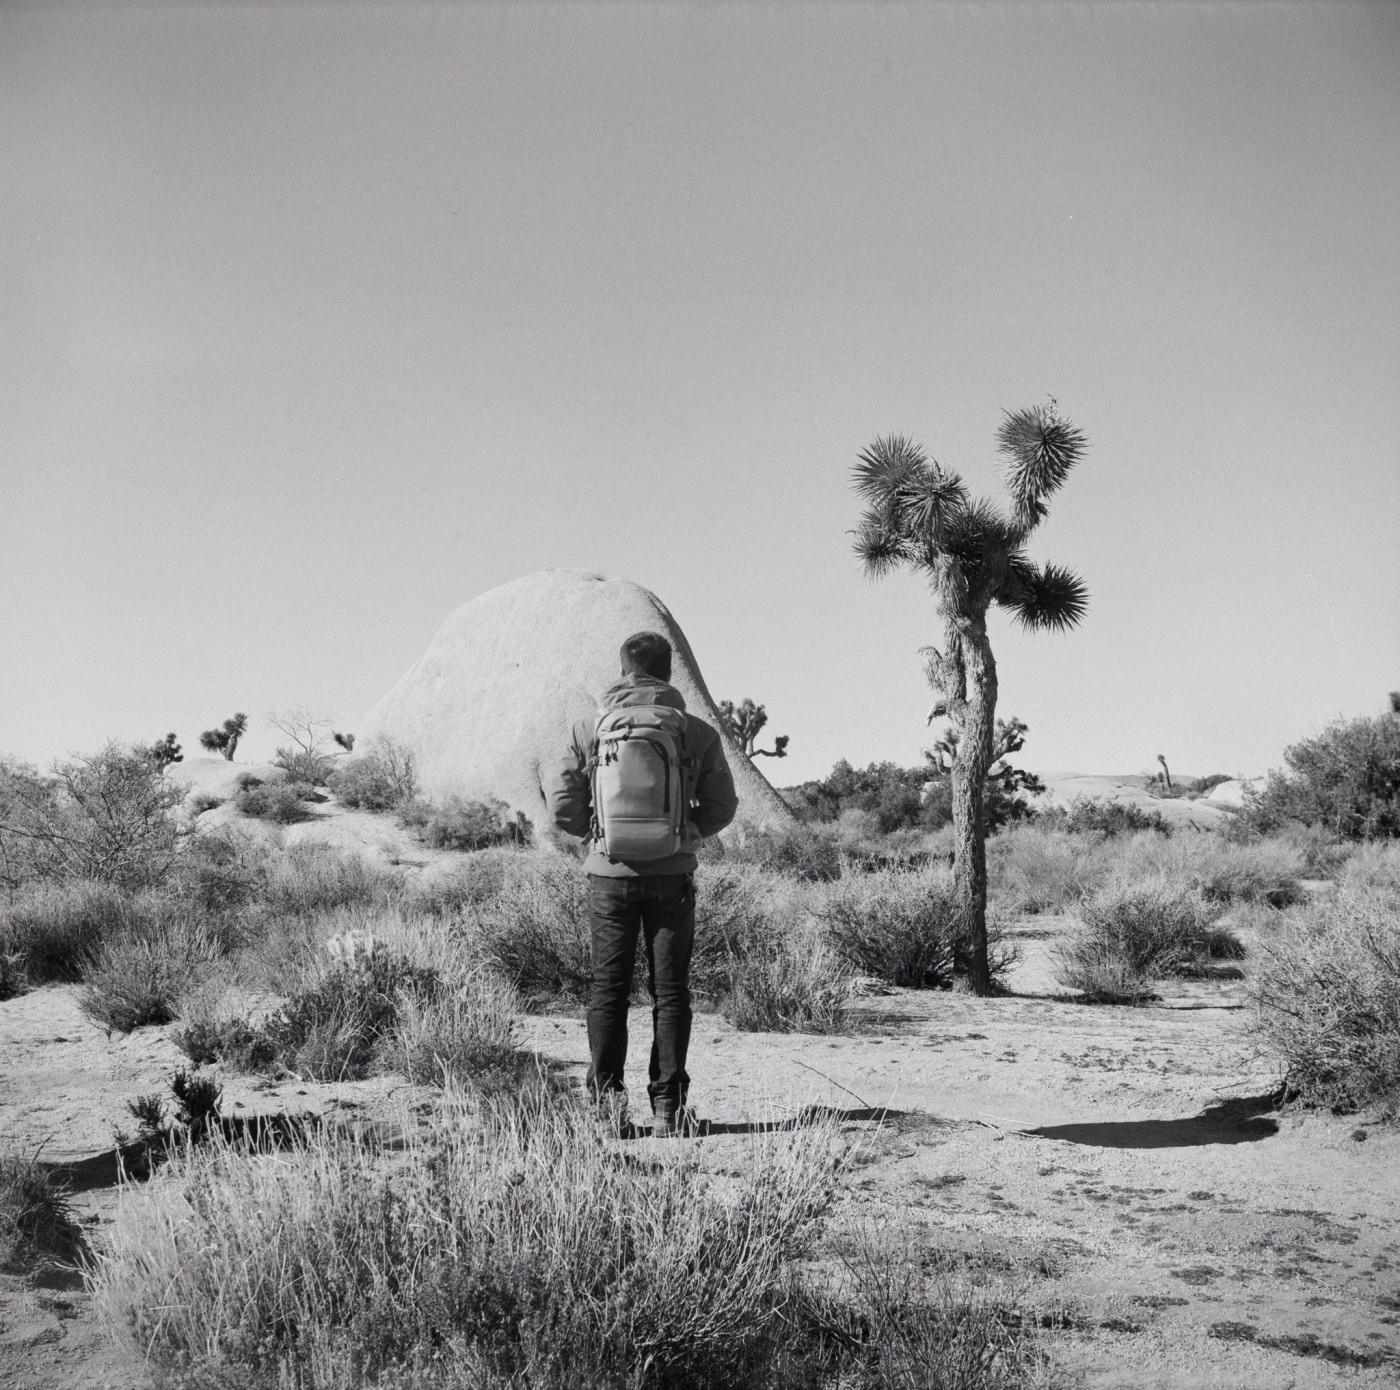
One of the interesting things about letting my film rolls sit undeveloped for years is that I nearly forgot about most of the moments they contained. Seeing them show up on the computer after scanning was like newly experiencing each moment. One of the rolls that I was most excited about seeing for the first time was from a trip that Diana and I made to Great Sand Dunes National Park in Colorado in October of 2015. My primary digital camera at the time suffered a malfunction and was in the shop for repair. So, I brought the Olympus 35RD and one roll of film on our backpacking trip through the dunes.
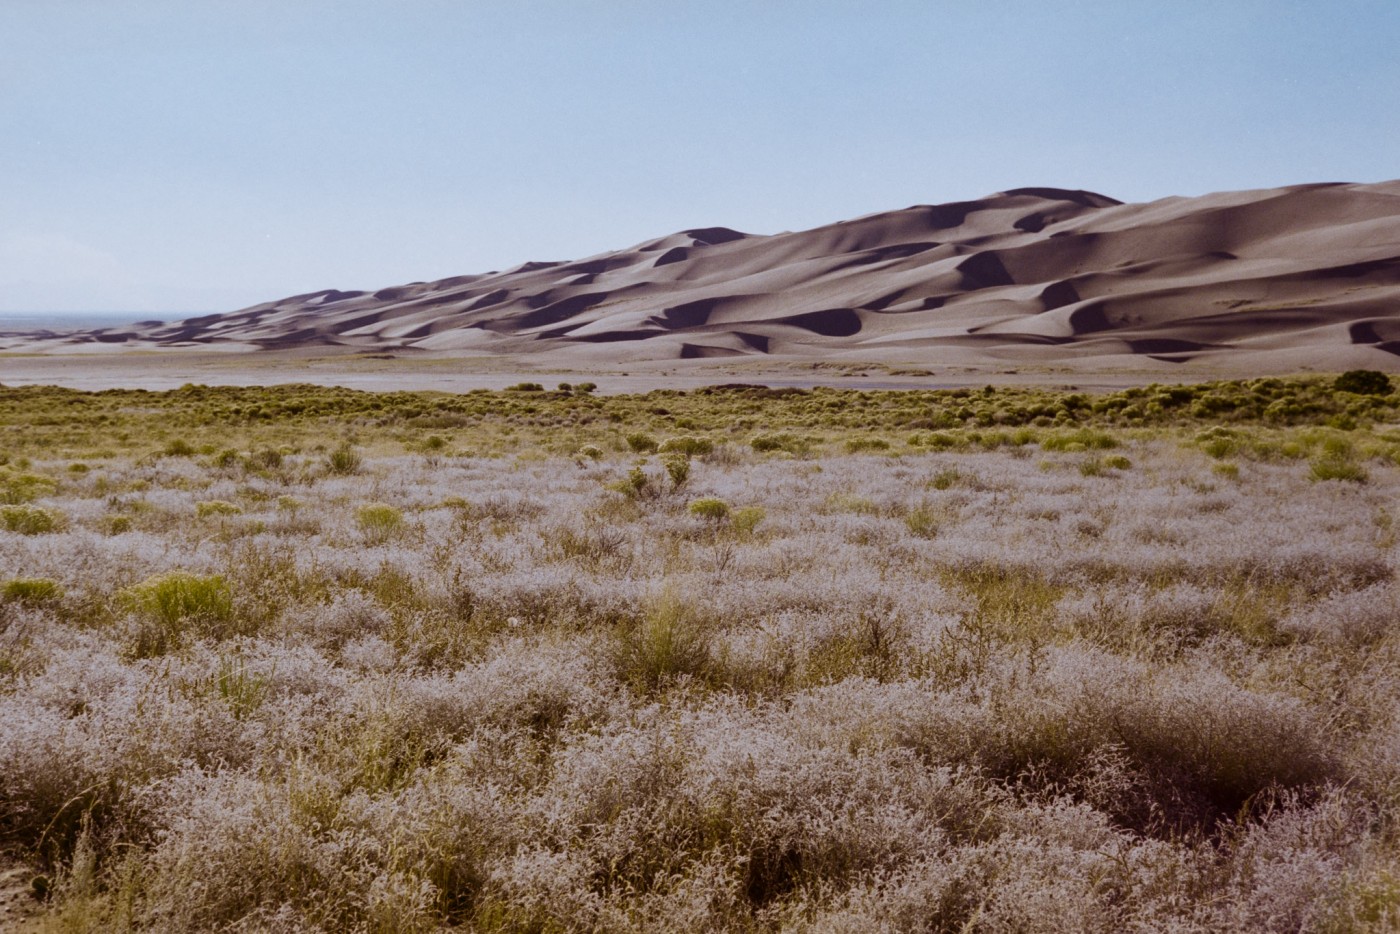
Camping on the sand dunes is only permitted if you hike over the summit of the dunes, out of view of the entrance road to the park. The hike is relatively short but once at the dunes, it’s entirely uphill through sand. At certain steep sections, the sand gives way on each step making the hike a lot more difficult than we anticipated. Although the air was relatively cool, we were still exposed to the hot afternoon sun through the entire hike. It was not until we reach our campsite that we found a break from the sun.
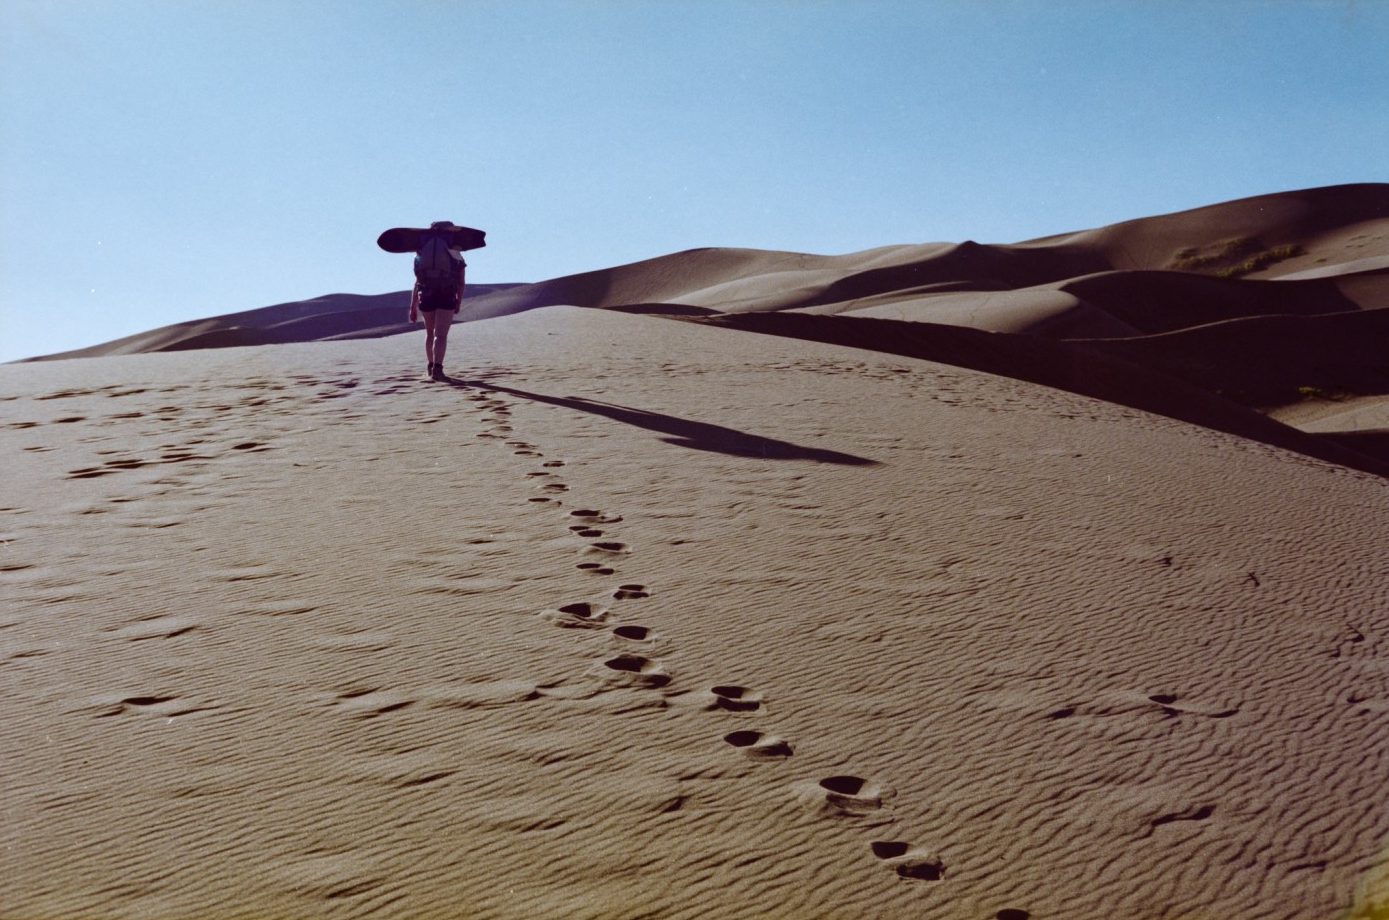
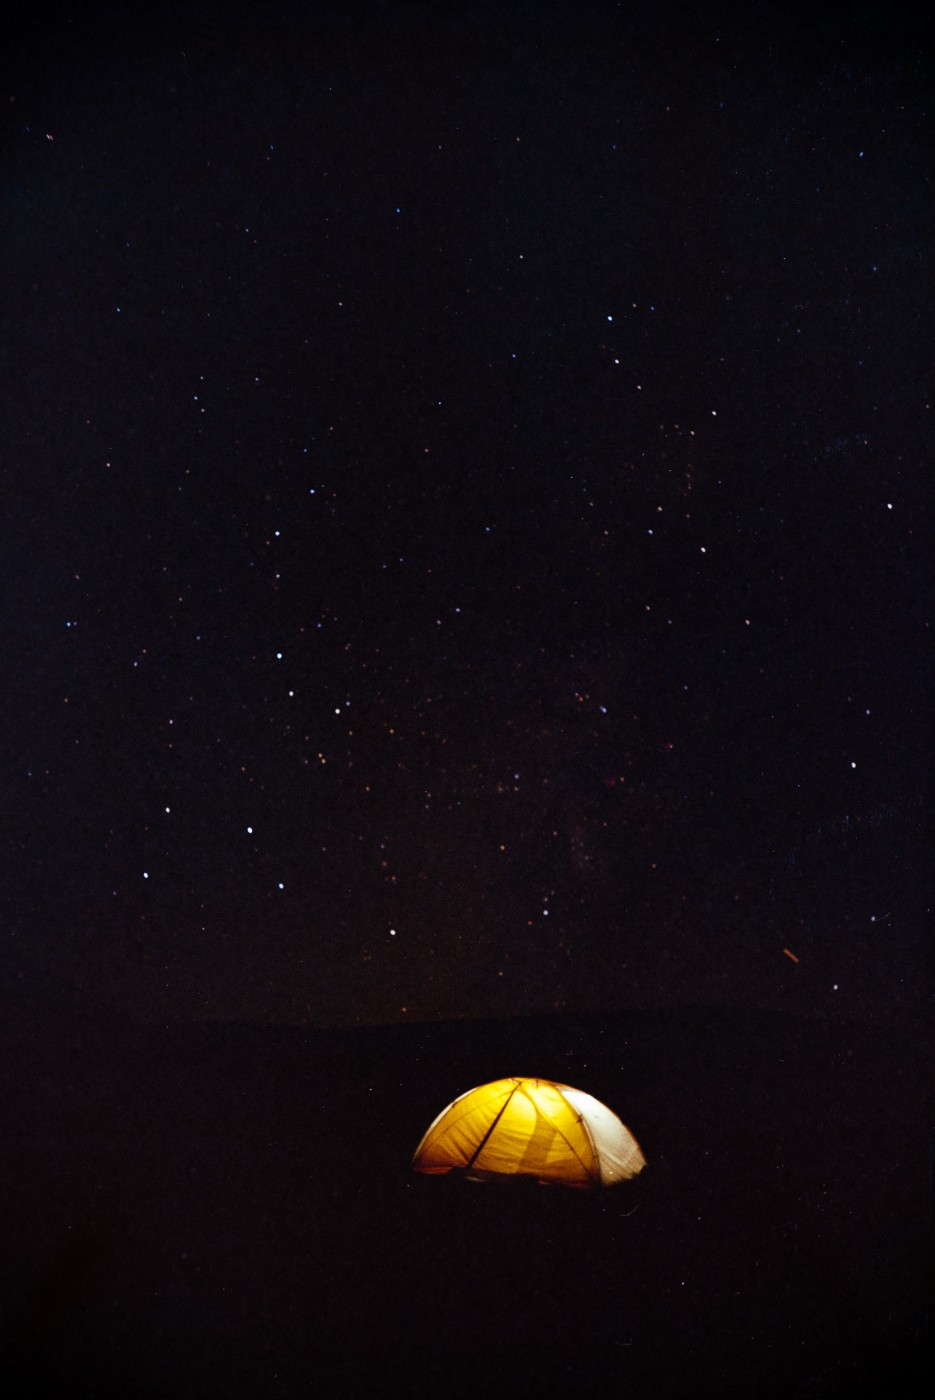
After setting up our tent, I made a short outing at sunset to grab a snap of the last bit of light on the dunes before retiring to our tent for dinner and to prepare my photography gear for the night. I remember not really expecting to capture much at night with my little film rangefinder but I knew I was going to try anyway.
The Olympus 35RD is probably not the best film camera kit for attempting astrophotography. While it does have a bright f/1.7 lens, framing and composition at night is basically impossible through the small viewfinder window. The rangefinder split image was impossible to see in the dark so focusing was just done by trusting the focus scale. I also had no way of remotely triggering and holding the shutter for Bulb mode so I was left to do it by hand. A cable release would have been helpful here.
I had the camera loaded with Fujifilm Superia X-TRA 400. There are definitely better films for low-light but it’s what I had at the time.
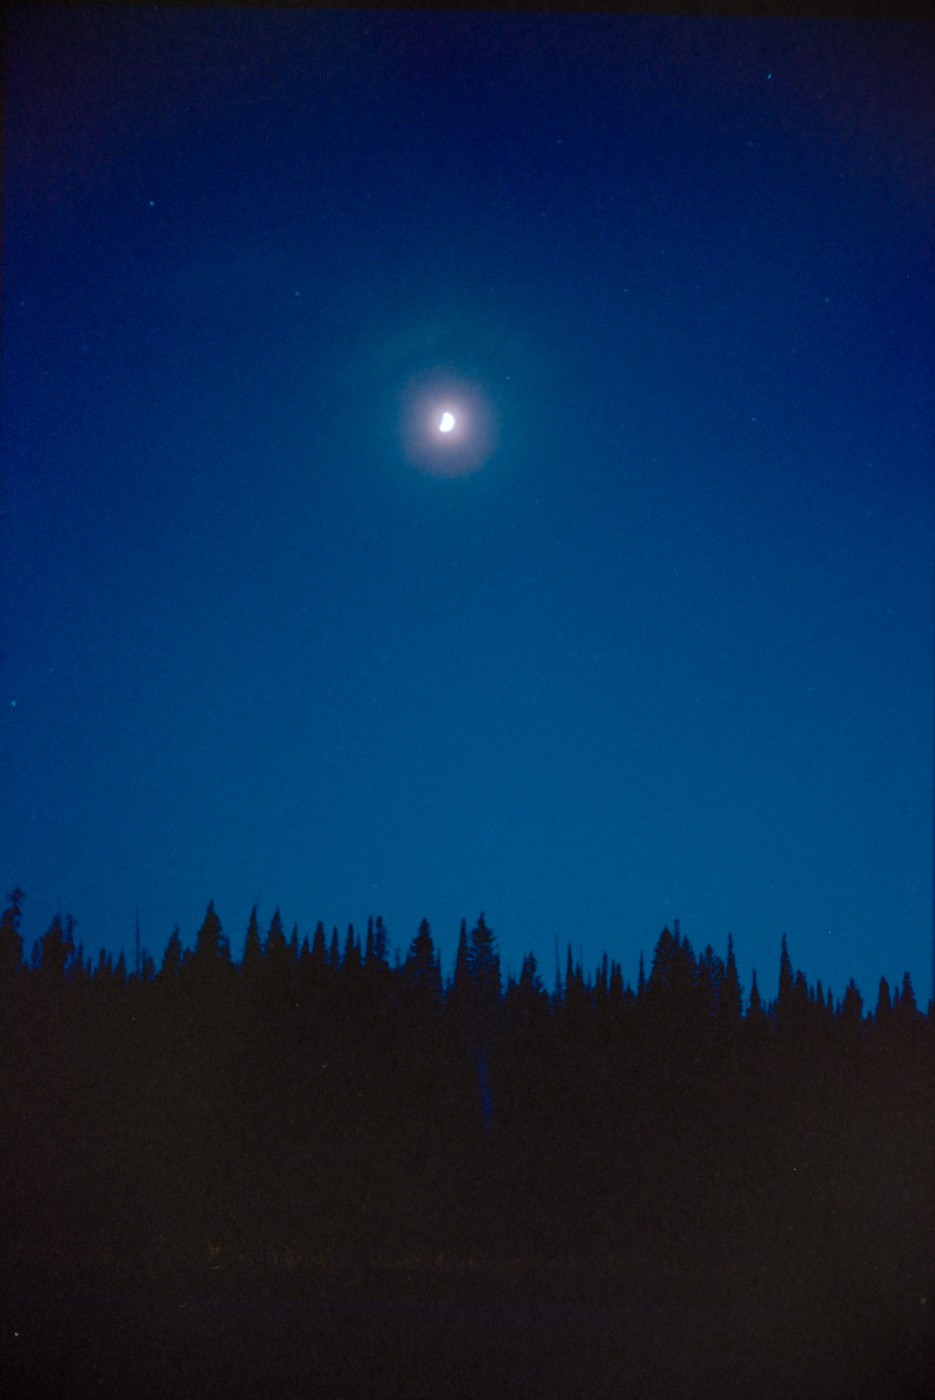
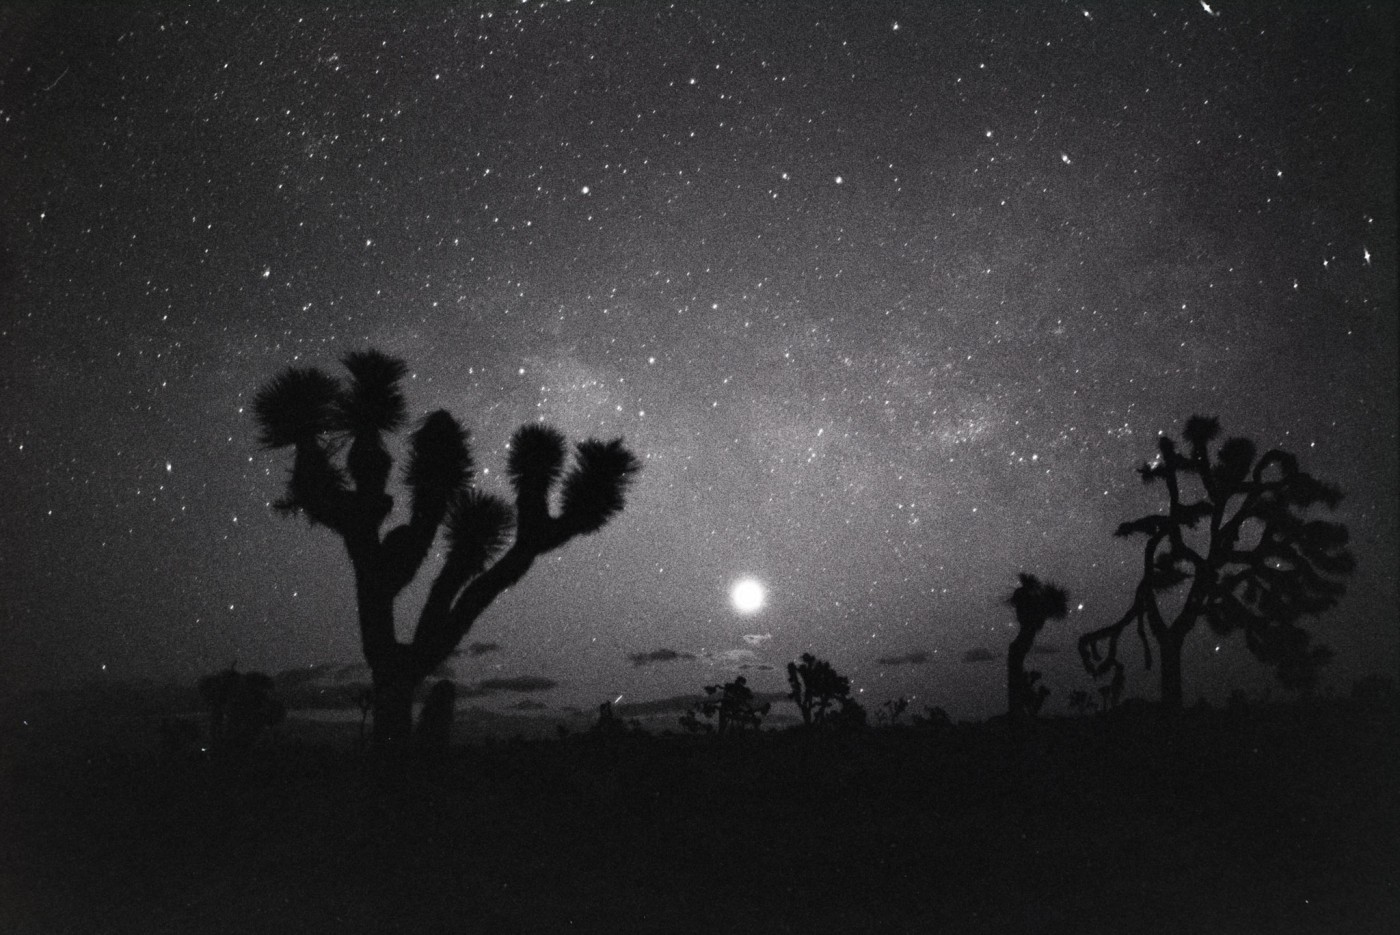
Typically, for a 40mm lens, I wouldn’t recommend more than about 15 seconds for shooting an untracked photograph of the Milky Way in order to avoid star trails. My Milky Way exposure calculator recommends 13s. I tried a bunch of exposures ranging from about 10 seconds to 20 seconds, all of which turned out too dark. I didn’t know this while shooting, of course, since I was using film.
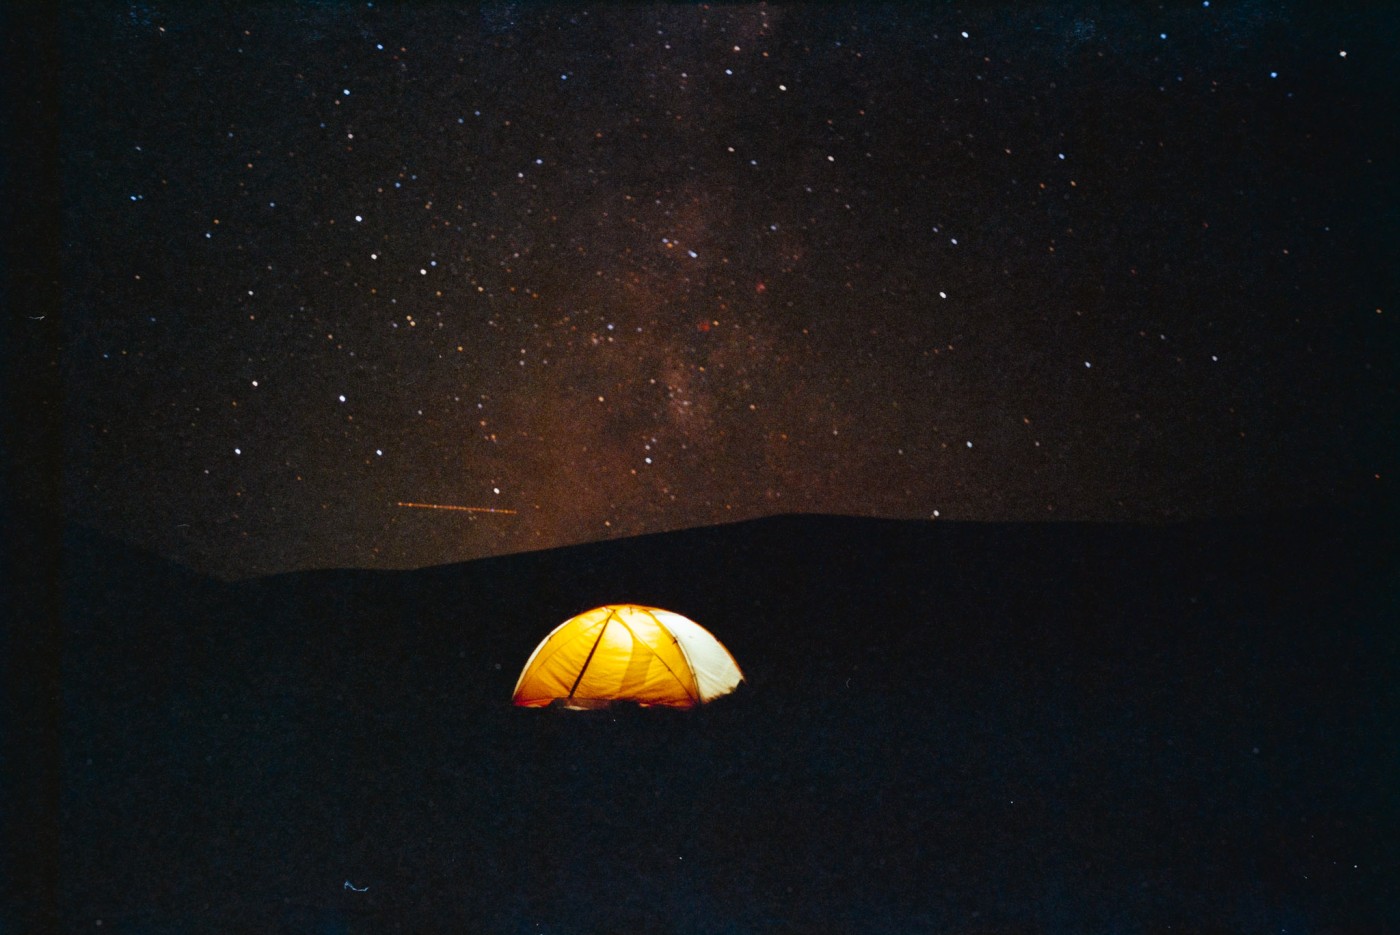
While most of my shots used too short of a shutter to really yield an acceptable photograph, I did make one last photograph that was greater than 30 seconds long. It just barely met the threshold of exposure for the Milky Way to come through in the photograph. In the photo above, you can even see some bright red splotches of the Omega Nebula and the Eagle Nebula in the galactic plane! Ok, so it’s not quite the tool that is our modern digital cameras, but film is actually capable of capturing the Milky Way, even without tracking. Just use a fast lens and a long shutter time!
We left the Great Sand Dunes not even knowing whether or not my photos of the night sky would turn out. I’m glad I got at least one.
The Great Sand Dunes trip wasn’t my only attempt to shoot photos of the Milky Way on film with the little Olympus 35RD. After scanning all the film negatives, I uncovered another couple rolls that were even older, this time from Joshua Tree National Park in February of 2014. There was a roll of Acros 100 6 x 6 daytime shots made with Diana’s Lubitel 2 and one roll of Ilford Delta 3200 made on my Olympus 35RD.
Disappointingly, most of the shots I made on the Olympus 35RD were terribly out of focus. At the time, the rangefinder was completely out of tune so I had no way of confirming focus. The scale on the lens was not accurate so most of my shots of the night sky were actually focused past infinity.
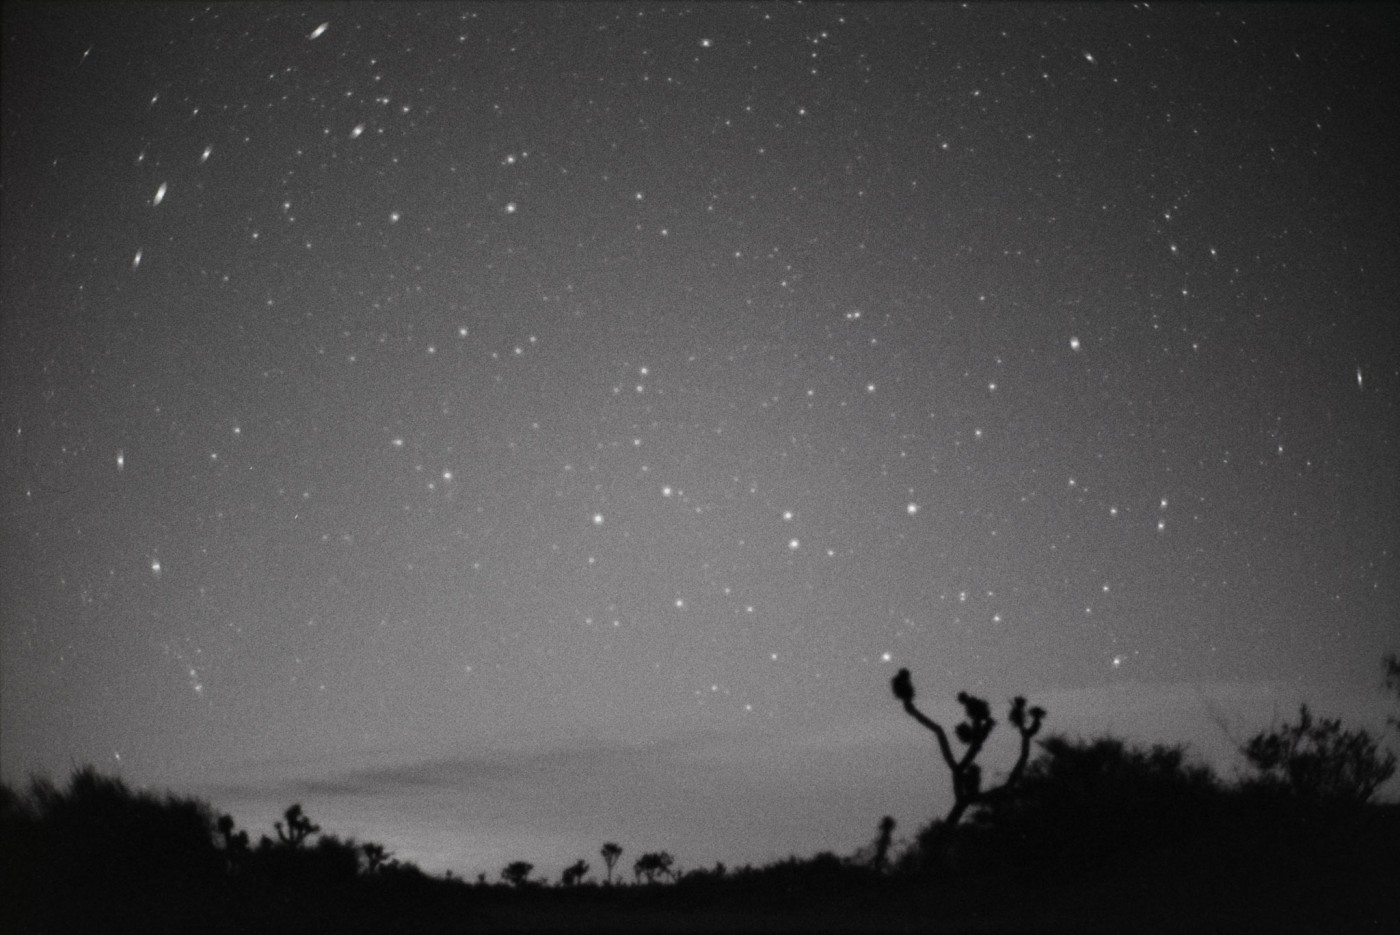
Being late February, the Milky Way Galactic center did not rise until just before sunrise. Most of my initial (out-of-focus) shots were of relatively “blank” portions of the sky. The higher sensitivity Ilford Delta 3200 film did a much better job of capturing more light in the sky than the Fujifilm Superia 400. As the Milky Way galactic center started to rise, I snapped a few more shots which were, still, unfortunately out of focus. Even so, it’s actually pretty amazing how well the Delta 3200 film picked up details in the sky around the galactic center.
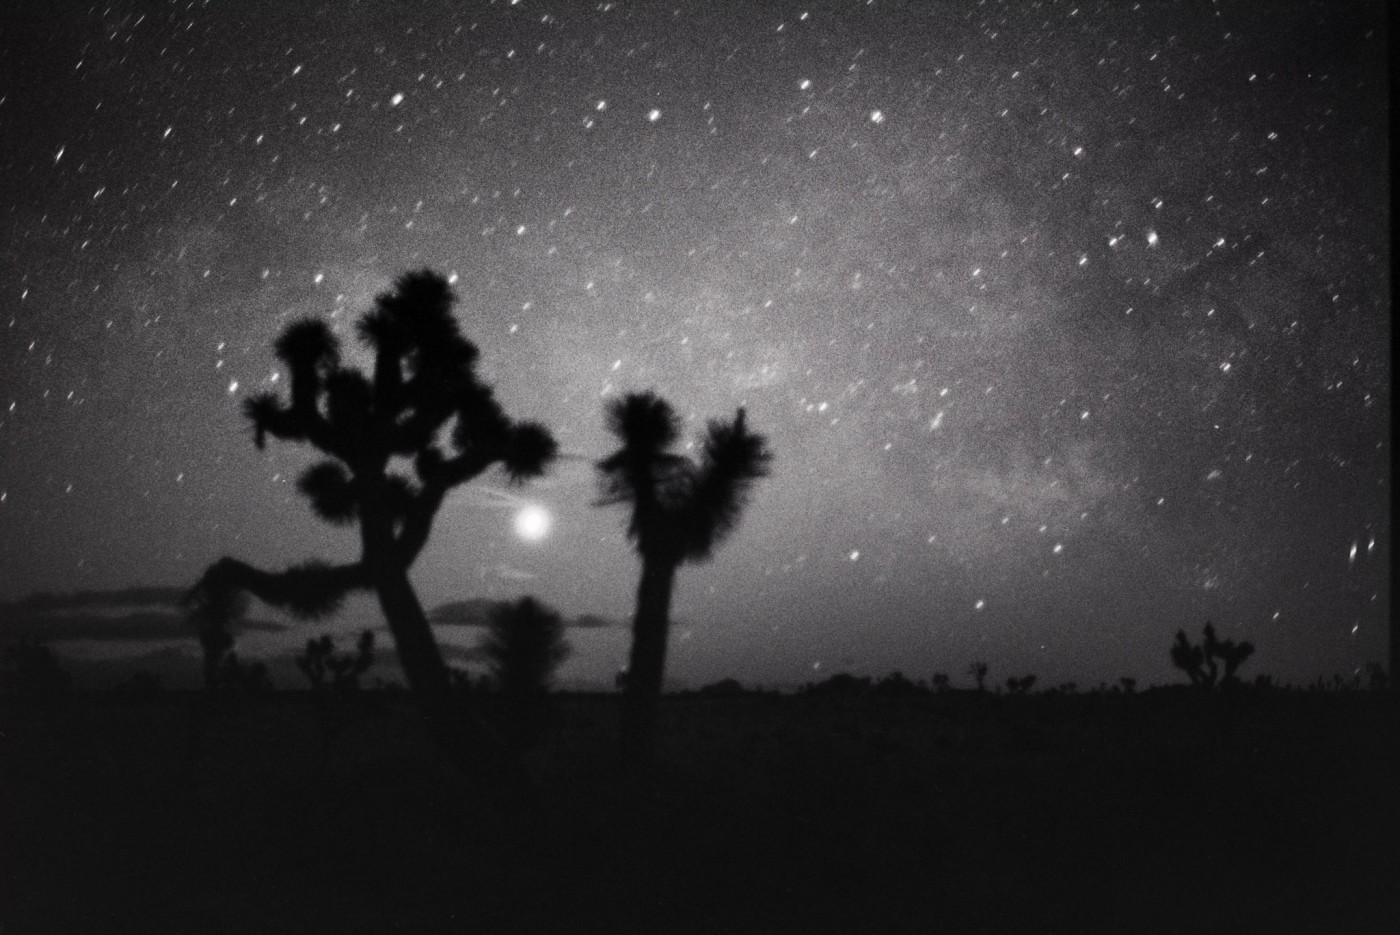
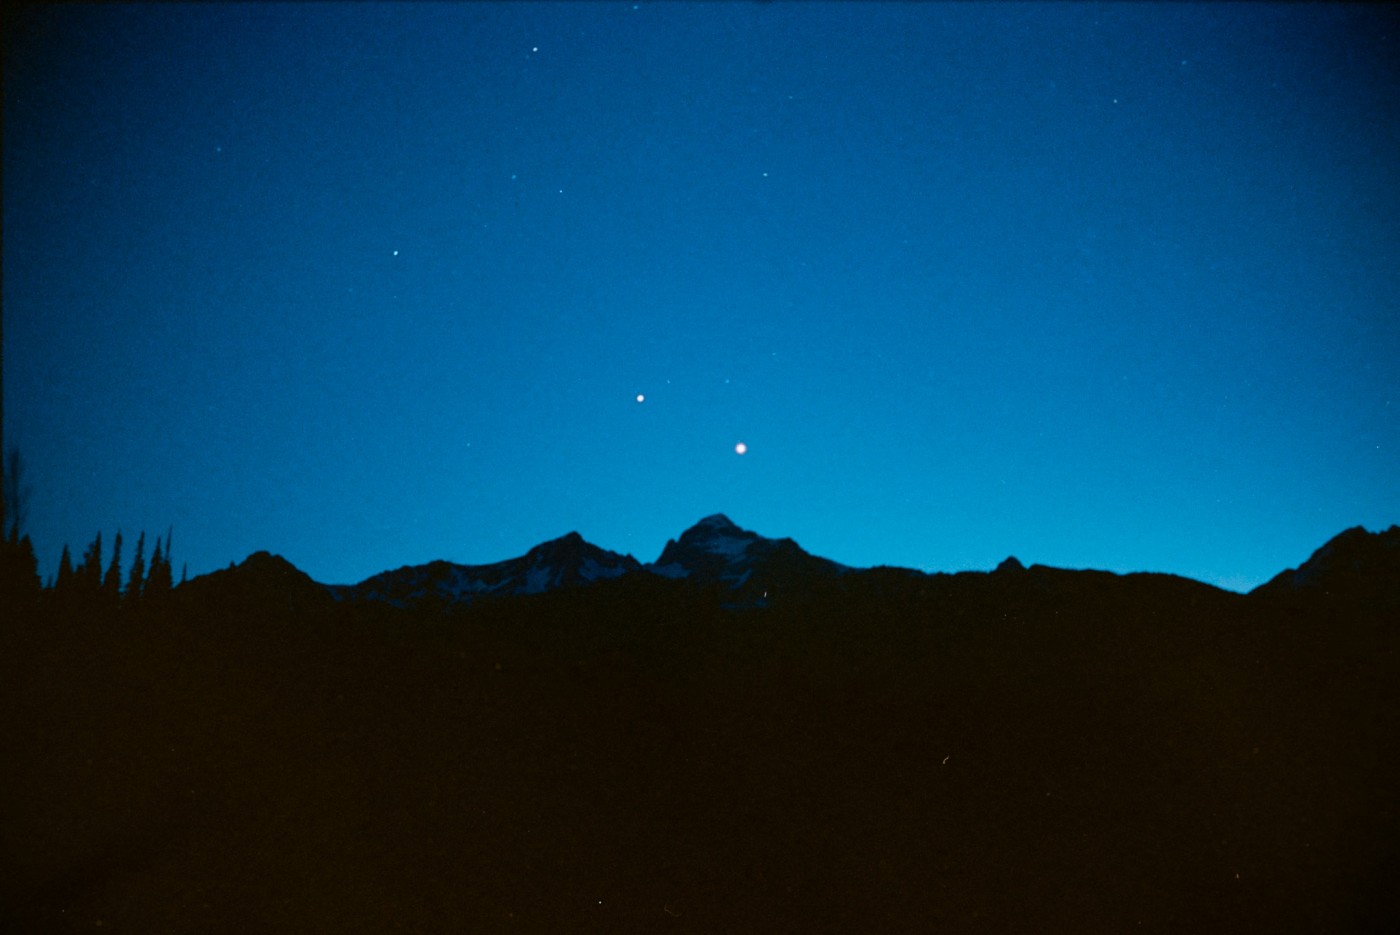
After making a few more exposures and (blindly) changing compositions, I decided that I’d try using the focus scale on the 35RD to roughly focus on the Joshua trees, rather than infinity. As it turned out, and as a result of my out-of-tune camera, the new focus setting I used was much closer to the true infinity setting of the lens and my final shot came out much sharper than my earlier attempts.
In this shot, Venus can be seen low and bright on the horizon, just below the bright core and dark dust lanes that line the plane of the Milky Way. The exposure I used for the shot was roughly 20 seconds at f/1.7.
My two feeble attempts at shooting the Milky Way on film were a fun experiment with a dying medium. I have no doubts that if I attempted astrophotography with some more suitable film equipment, I would be more successful. I think the experiment was a lot of fun, especially after seeing the results years later. If you have an old film camera lying around, maybe grab a roll of high ISO film and try few astrophotography exposures.
Some guidelines when attempting to shoot the Milky Way on film:
- Shoot with a fast lens. The lower the f/number, the more light the camera can collect. Low f/number lenses will also make framing and focusing easier to accomplish in the dark.
- Use a cable release or remote to prevent camera shake.
- Use a high speed film. ISO 400 is the bare minimum unless you’re using a tracker. Don’t be afraid to try black and white films. I used Ilford Delta 3200 with success. Of course, if you don’t care about making the stars look like pinpoints, lower speed films will work great for long exposure star trail photos.
- Bracket. Experiment with a bunch of shutter times and take notes on what you tried. Don’t be afraid to extend your shutter time past typical recommendations. Reciprocity failure might mean you’ll need to accept a little star trailing in order to extend your shutter time to collect an adequate amount of light.
- Check you camera’s focus for infinity in the daytime and tape the focusing ring down. An angle finder with magnification on an SLR will help in this regard.
- Scan your film into digital for some extra post-processing capability.
About Scanning
Scanning your film negatives allows a couple benefits: it serves as a digital backup and you can share your film shots online and on social media. Scanning also allows you to apply color correction and push/pull exposure in post-processing. I “scan” my negatives with a 1:1 macro lens and my digital camera. I used the following kit to digitize my negatives:
- Sony a7S (Amazon / B&H)
- Vintage Minolta 50mm 1:1 macro lens and adapter from Minolta MD/MC to Sony E
- DigitaLiza Film Scanning Mask
- Huion A4 Light Table
- Invert-able Tripod
This setup allowed me to scan the film relatively quickly. I was able to use the macro lens at 1:1 and stop down to about f/8 for maximum sharpness and depth of field (the film never lays perfectly flat). This setup also allowed me to scan the lager 120 film negatives from medium format cameras.
Conclusion
Film was challenging! With film, there was no way to truly scrutinize focus or exposure on the fly. Composition was difficult (nigh impossible) with my little rangefinder. Even with all the difficulty, there is still something very special about the photos I made of the night sky on film. I’m so happy that I managed to create a couple successful analog photos of the night sky. Beyond my feeble attempts, I think there’s a lot more room explore astrophotography on film.
If anything, this exercise has given me even more appreciation for the digital tools that we now have at our disposal. Digital cameras are amazing. The immediate feedback we get from seeing the photo instantly after capture is absolutely invaluable to speeding up the learning process.
Disclosure
We are a participant in the Amazon Services LLC Associates Program, an affiliate advertising program designed to provide a means for us to earn fees by linking to Amazon.com and affiliated sites. We are also a participant in the B&H Affiliate Program which also allows us to earn fees by linking to bhphotovideo.com.
Learn Astrophotography
Astrophotography 101 is completely free for everyone. All of the lessons are available on the Lonely Speck Astrophotography 101 page for you to access at any time. Enter your email and whenever we post a new lesson you’ll receive it in your inbox. We won’t spam you and your email will stay secure. Furthermore, updates will be sent out only periodically, usually less than once per week.
Help us help you!
Believe it or not, Lonely Speck is my full-time job. It’s been an amazing experience for us to see a community develop around learning astrophotography and we’re so happy to be a small part of it. I have learned that amazing things happen when you ask for help so remember that we are always here for you. If you have any questions about photography or just want to share a story, contact us! If you find the articles here helpful, consider helping us out with a donation.
[button font_size=”16″ color=”#136e9f” text_color=”#ffffff” url=”https://www.paypal.com/cgi-bin/webscr?cmd=_donations&business=lonelyspeckblog%40gmail.com&item_name=These+tips+help+keep+lonelyspeck.com+running.¤cy_code=USD&source=url” target=”_blank”]Donate[/button]
Thanks so much for being a part of our astrophotography adventure.
-Ian
I think these film shots are pretty amazing. Maybe it’s the artistic collision between how we have seen crisp, digital images of the Milky Way for the past generation against these imperfect, grainy analog photos, but I found them to be striking.
When I finally get away from the East Coast light pollution to get some MW shots, I’ll be sure to bring film along for the ride.
Have you revisited using film since these were taken? There aren’t too many high speed color film stocks out there, but some remain that could possibly yield good results.
Thanks for all the info – – –