

In this short video, travel with Lonely Speck to Alabama Hills, California to demo the SharpStar in the field to achieve perfect critical focus on the stars.
It’s been a little while since we started shipping the SharpStar in February of 2016. The feedback from our customers since then has been overwhelmingly positive and we’ve shipped SharpStars to 37 different countries around the world. When we first made the SharpStar, we had our hands full with orders and shipping so I never got to finish my video of how the SharpStar works in the field, falling back on my old SharpStar video. The operation of the new SharpStar2 is still identical to the original SharpStar but it’s significantly more effective and I really wanted to make a video that showcases the real user experience of the SharpStar.
Focusing at night can still be a big challenge when photographing at night and the SharpStar is a tool that can make a huge difference in the process and boost confidence and reliability of focus. To demonstrate the SharpStar for this video, Diana and I traveled out to one of our all time favorite spots: Alabama Hills, California to shoot some photos of the Milky Way and really put the SharpStar to the test. Join us in field as we shoot some night photos of the Eastern Sierra Nevada mountains and the Alabama Hills with the use of the SharpStar.
The Resulting Shot
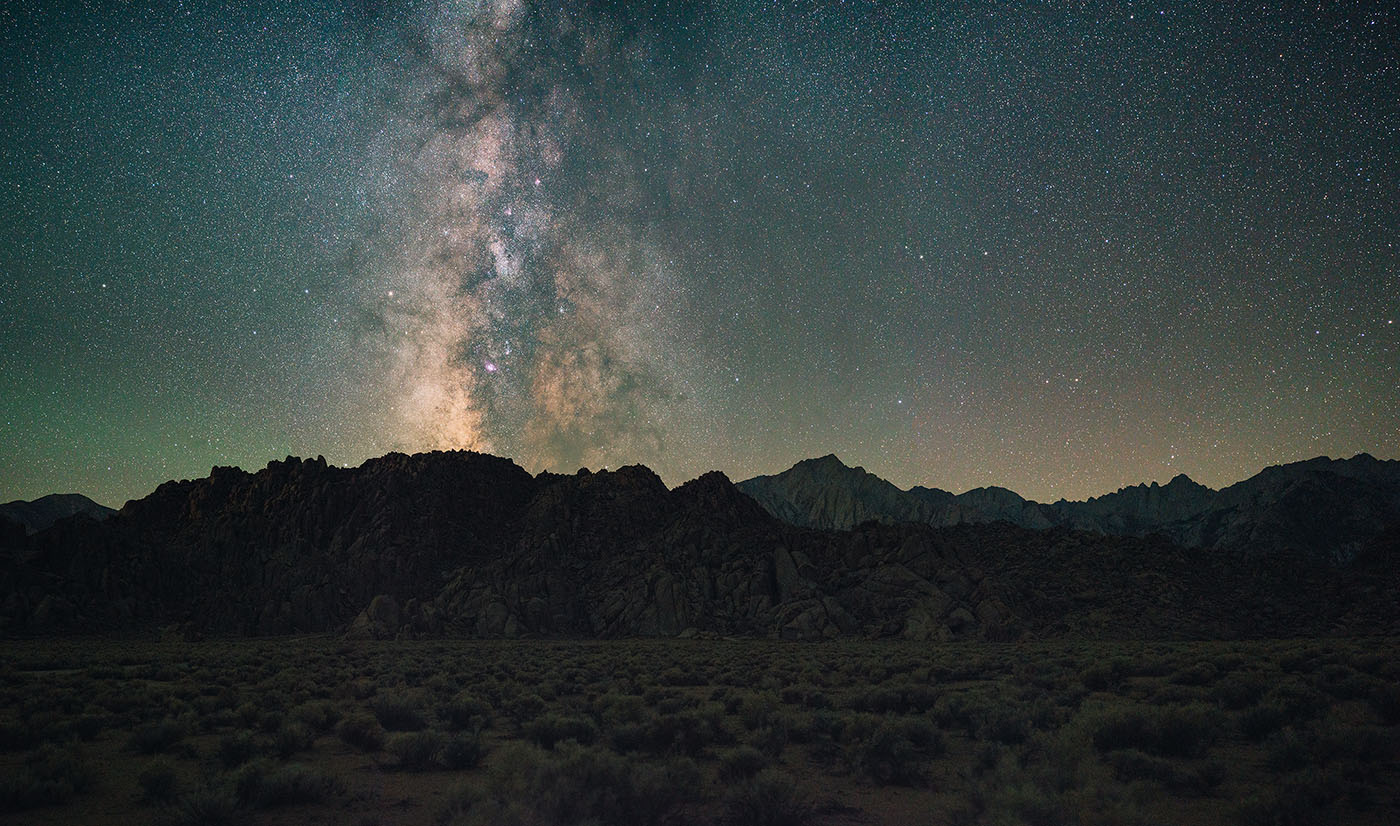
The final shot made that night with the aid of the SharpStar was a two-row 12 frame panorama (tutorial) with 4 exposures stacked per frame for a total of 70MP. Detail in the shot is extremely fine tuned as a result of the use of the SharpStar. I processed it exclusively with my latest premium preset pack: Film Speck Pro. I think it’s one of my favorite shots of Alabama Hills so far!
Equipment
In this video, we tried out some new equipment, namely the Zeiss Batis 18mm f/2.8 and a borrowed a7S body (thanks Rick!) as the “model camera” for the dusk/blue hour shots, filmed with the Mitakon 50mm f/0.95. Some opening shots of our drive up were made with the OnePlus 2 smartphone and the Feiyu G4 Pro Gimbal. The demonstration was filmed with the RX100III and the SharpStar was used on the Sony Zeiss FE 55mm f/1.8. I would have loved to have filmed the whole video on the Mitakon f/0.95 but I only had one camera body available by the time we were able to get to the demo. All of the video footage of the focusing process is actual live view recording from the a7S.
Sony a7S
Sony Zeiss FE 55mm f/1.8 + SharpStar2
Zeiss Batis 18mm f/2.8
Mitakon 50mm f/0.95
Sony RX100III
Sirui T-025X
OnePlus 2
Feiyu G4 Pro Gimbal
Petzl Reactik+ Headlamp
Get the SharpStar
The SharpStar focusing filter is now shipping worldwide, exclusively from Lonely Speck. Buy it here:
[button font_size=”20″ color=”#c8232b” text_color=”#ffffff” icon=”” url=”https://lonelyspeck.com/sharpstar” width=”” target=”_blank”]Buy SharpStar[/button]
Credits
Video and photos by Ian Norman and Diana Southern.
Music Credit: Josh Woodward
“I’ll Be Right Behind You, Josephine” by Josh Woodward
“California Lullabye” by Josh Woodward
Free download: http://joshwoodward.com/
This video footage is copyright Ian Norman and/or Diana Southern
To use the video content of this work outside the scope of this license, please email us.
Disclosure
We are a participant in the Amazon Services LLC Associates Program, an affiliate advertising program designed to provide a means for us to earn fees by linking to Amazon.com and affiliated sites. We are also a participant in the B&H Affiliate Program which also allows us to earn fees by linking to bhphotovideo.com.
Learn Astrophotography
Astrophotography 101 is completely free for everyone. All of the lessons are available on the Lonely Speck Astrophotography 101 page for you to access at any time. Enter your email and whenever we post a new lesson you’ll receive it in your inbox. We won’t spam you and your email will stay secure. Furthermore, updates will be sent out only periodically, usually less than once per week.
Help us help you!
Believe it or not, Lonely Speck is my full-time job. It’s been an amazing experience for us to see a community develop around learning astrophotography and we’re so happy to be a small part of it. I have learned that amazing things happen when you ask for help so remember that we are always here for you. If you have any questions about photography or just want to share a story, contact us! If you find the articles here helpful, consider helping us out with a donation.
[button font_size=”16″ color=”#136e9f” text_color=”#ffffff” url=”https://www.paypal.com/cgi-bin/webscr?cmd=_donations&business=lonelyspeckblog%40gmail.com&item_name=These+tips+help+keep+lonelyspeck.com+running.¤cy_code=USD&source=url” target=”_blank”]Donate[/button]
Thanks so much for being a part of our astrophotography adventure.
-Ian
Which size of Sharpstar2 I should buy for Rokinon/Samyang 12mm f/2.0 NCS CS?
I’m not sure how to choose the right size.. I guess it’s 75mm…
There are a few aftermarket filter holders for the rokinon/samyang lenses. Search for Haida or Fotodiox. Samyang even releases it’s own filter holder, the SFH-14.
Nevermind, they are all for filters larger than 100mm
Hi!
I use a Rokinon 14mm f/2.8 and of course it has that permanently-mounted shroud. Is there a solution for mounting the Sharpstar on it?
Thanks, and thank you for all the helpful advice you give on this website! It’s really been very useful!
John
I’m really pleased with the Sharpstar 2 – I got another larger one as I was so pleased with the first one. It’s particularly useful with Nikon lenses where the focus calibration of infinity on the ring is often off and especially so on the 20mm f/1.8 where manual focus is a total pain due to tiny ring movements causing the focus to go off a lot. Once you’ve got experienced with particular lenses and how the focusing behaves it’s often works to just get the star points as small as possible in magnified LiveView, but this tool makes it a more reliable task, at least for for me. I now use it on a Sigma A 35mm f/1.4, which produces staggeringly sharp images to the edge when well-focused, and is also easier to focus the the Nikon 20. My larger one gets stuck on the end of a 200-500 where I am just starting to experiment with narrower shots – given that the focus on infinity shifts with the zoom this is then invaluable. I just leave the Cokin adaptor on the end and slide the Sharpstar in and out.
Glad to hear you’ve enjoyed using the SharpStar2! Agreed that the Sigma 35mm/1.4 Art is an amazingly sharp lens. I’m convinced that it’s basically the best 35mm available today, regardless of price.
How is the Batis 18mm for astro?
I love it! It is, however, right on the cusp of working well with the SharpStar2 so it requires a rather bright star. Wish it was f/2.0!
I think it’s the best wide angle lens I have ever used.
Do you know if this is compatible with the Rokinon Super wide angle lenses? I know I can’t use a filter on it as it is a curved glass. Would definitely love to have this if it will work. Thanks so much!
I’ve had success holding the sharpstar2 filter in front of the lens. Hold it flat and with live view you should be able to line it up centered. Then dial in your perfect diffraction spikes and mark your critical focus on your ring with a small dot of nail polish or similar!