

An unusual method for photographing star trails creates a rain-like effect.
I haven’t made a star trail image in a while because I’ve been lately concentrating on capturing the Milky Way. The idea for this image is based off of something I learned from a tutorial by Andy Chatman: Photographing the Color of Stars. Andy shows us a very simple method to capture the color temperature of stars by using defocused star trails. This is cool because it can help us identify what kind of stars we are seeing from blue supergiants to red dwarfs. The execution is a little bit time consuming but it’s extremely easy. If you are a little bit patient, you can get spectacular results.

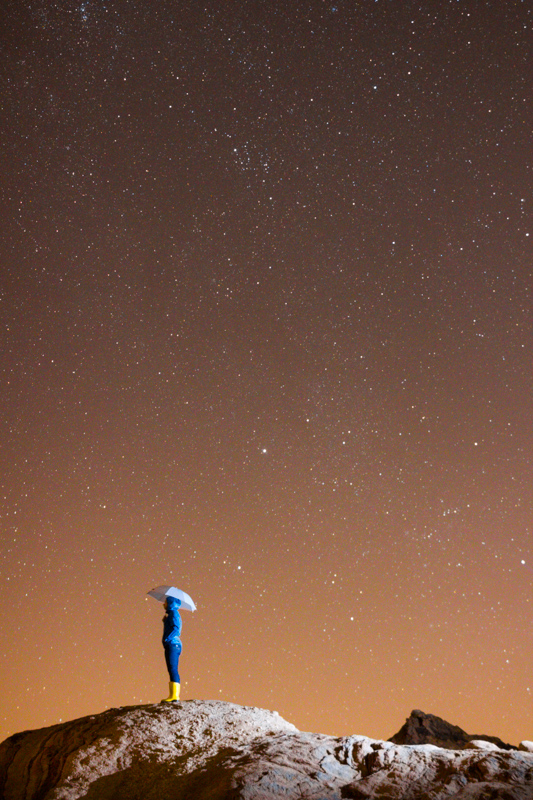
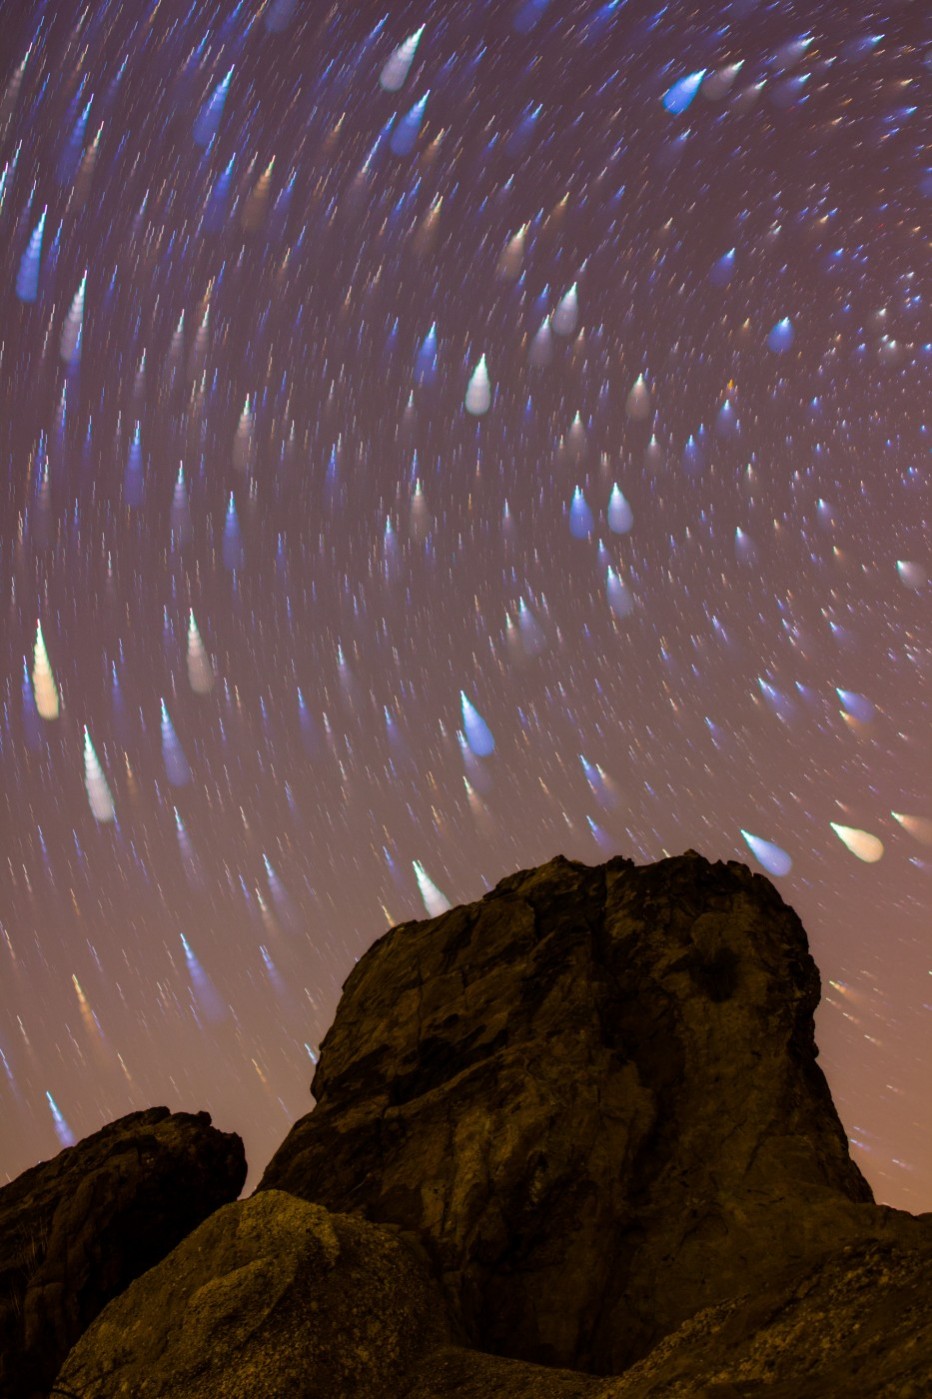
The image above uses Andy Chatman’s defocused star trails method to create the comet like effect. Let’s take a quick look at how to make this image.
What you will need:
- Camera with Manual Focus and Manual Exposure Capability
- Tripod
- Strobe or Flashlight
- Intervalometer (Optional)
- Adobe Photoshop or the GIMP (The Gimp is free and open source)
Camera with Manual Focus and Manual Exposure Capability
You will need a camera that can at least support manual focus and manual exposure capability. For this image I used a Canon EOS 550D (Rebel T2i) Digital SLR.
Tripod
Pretty much any stable tripod will work for this shot. You will want to be careful to not bump your camera or tripod while working. We will be taking about 10 to 20 exposures consecutively and we’ll need the tripod to be in the exact same location from shot to shot.
Strobe or Flashlight (Optional)
A strobe or flashlight is not explicitly necessary but it’s nice if you want to fill in detail in your foreground rather than having a silhouette. For this particular image, I used a strobe to the right of the frame to light up Diana and the foreground. If you don’t have a strobe, you can also use a simple flashlight to “paint” the foreground with light.
Intervalometer (Optional)
An intervalometer or remote timer will allow you to setup a predictable time lapse sequence of photographs and will allow you to take exposures longer than 30 seconds. For this particular image, I settled on 60 second photographs with 2 second intervals between each photograph.
Adobe Photoshop or the GIMP
You will need some sort of software to combine multiple images in layers. I used Adobe Photoshop CS6 but you can also use the free and open source program called the GIMP. Download the GIMP from the official site here. You can also pick up a free trial of Adobe Photoshop here. I’m sure there are other options but either of these programs will work perfectly.
Making your exposures
Frame your shot looking east
First things first, let’s frame up our foreground with a generous amount of sky. Since we will be periodically defocusing our camera’s lens between each shot, we want the stars to “rise” in the sky as we make our exposures. This will ensure that the stars will be less and less in focus as they rise and appear to fall like rain in the final composite. In order to make sure this is the case, point your camera toward the eastern half of the sky. The stars rise in the east and set in the west, just like the sun and moon. If we keep our framing towards the east, it will allow us to start our photo sequence in-focus and then slowly defocus it between shots. If you point your camera toward the western half of the sky, it will make your star trails appear to travel upward rather than down. See the very last image in this article for an example of defocused star trails pointing toward the western half of the sky.
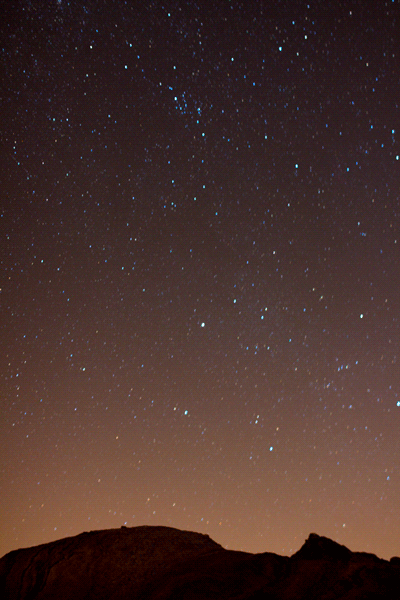
Expose for the foreground
We will be making several exposure to produce our final image. First we will concentrate on making the foreground image. I used a 15 second exposure at f/2.8 with an ISO of 3200. If possible, I recommend that you actually try to keep your ISO much lower, preferably below ISO 1600 to keep noise levels low.
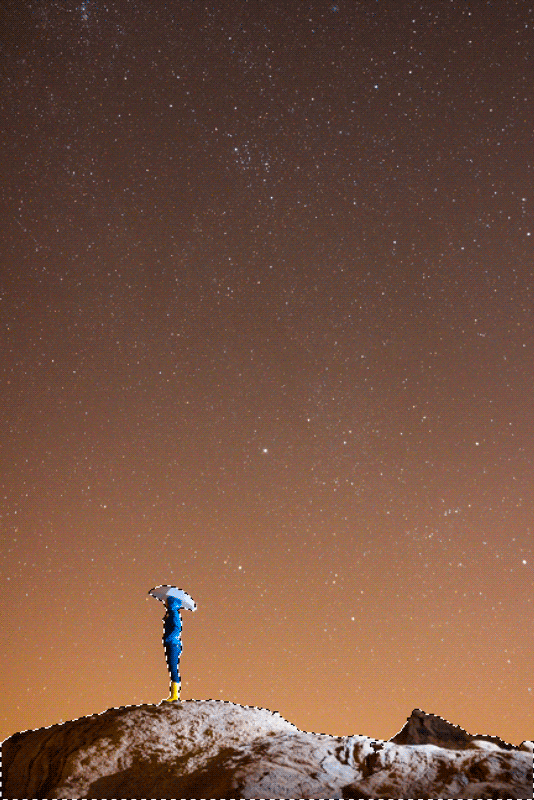
To fill in the foreground with a strobe or flashlight, you can either place your strobe on a light stand just out of frame and trigger it with a PC cord tether or wireless trigger or you can have an assistant manually trigger the strobe during the long exposure. If you don’t have a strobe and light stand, you can have an assistant paint the scene with a flashlight or if you do not have an assistant, set a countdown timer to give yourself time to walk out and paint the foreground with the flashlight or strobe yourself. I’m sure you can find some way to do it. In this particular photograph I used a strobe, light stand and some wireless triggers. Don’t worry too much about the stars in this particular image, just make sure your foreground looks good and that you have a distinct line of separation between the foreground and the sky so that we have an easy time compositing our images together later.
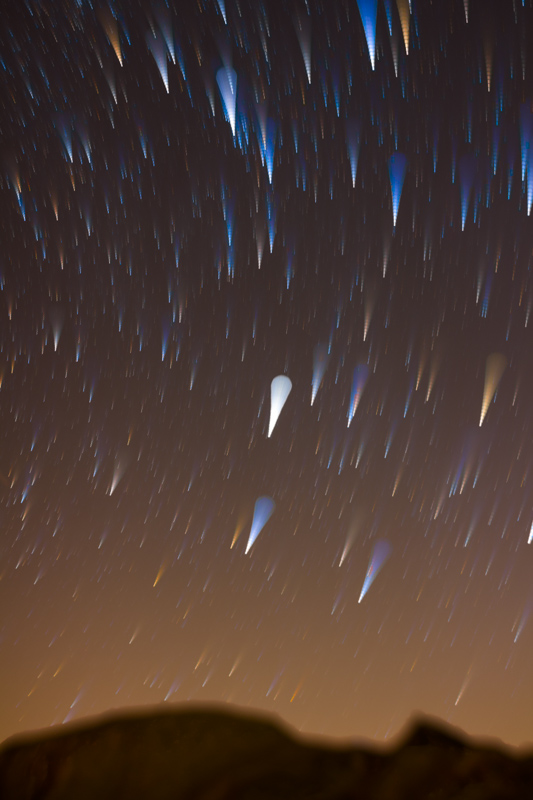
Capture your star trails
Once you’re satisfied with your foreground exposure, we can move on to capturing the defocused star trails. There are a few things that will help your defocused star trails exposures.
- A total of 10 to 20 separate exposures
- 2 to 5 second intervals between exposires
- 30 second to 1 minute long exposures
- ISO 400 to ISO 1600 is usually acceptable
- Low f/stop number (wide open)
I used an intervalometer to take about 18 photographs of 1 minute each at f/4.0. You will want your exposures to be about 30 second to 1 minutes long and use a relatively low f/stop number. This allows for ample time to capture the light from the stars, but more importantly, it allows time for the earth to rotate enough that the stars will appear to move between shots to create the trail effect. Don’t worry too much about ISO, just pick one that gives you ample amounts of stars without being too noisy.
If you don’t have an intervalometer, you can just take your exposures manually one after another, but be sure to not bump your camera or tripod from the original position we used for the foreground exposure. The more images you take, the longer your star trails will be. If you use an intervalometer, set an interval of 2 to 5 seconds between photographs to allow you time to rotate the focus ring on your camera lens. Start your first exposure in focus and after an exposure is complete, just rotate your focus ring a few degrees to pull the focus a few degrees away from infinity. Don’t worry too much about how much to adjust the focus, just be relatively consistent between shots.
After 18 minutes of exposing and pulling focus, I was able to capture this sequence of 18 images:
Post-Processing the Star Trails
Once you have your sequence of images, you should be ready to pull everything into your image editor. Compositing the trails can be done in 3 easy steps:
Load the Images as Layers
In Photoshop: File > Scripts > Load Files into Stack…
In the GIMP: File > Open as Layers…
Set the Blending Mode of Each Layer to “Lighten” or “Lighten Only”
In the Layers Palette, set the blending mode of each layer to “Lighten” in Photoshop or “Lighten Only” in the GIMp. This will show only the brightest pixels in our image and the final result should look like the below image.
Flatten and Save
Once you have set the blending mode, your image should have some colorful star trails. Now just flatten the image by right clicking a layer in the Layers Palette and choosing “Flatten Image.” When your image is flattened into one layer, save it. Now you should have a great star trails image:
(note: I cloned out the satellite and plane streaks in this image)
Add in the foreground as a layer
Once you have the star trails saved, open it and your foreground image together as layers in a new document.
In Photoshop: File > Scripts > Load Files into Stack…
In the GIMP: File > Open as Layers…
Be sure that the foreground layer is on top of the star trails layer.
Select only the foreground elements you wish to keep
Select the foreground layer and make a selection of just the elements of the foreground you want to keep. In photoshop I like to used the “Quick Selection Tool” and in the GIMP I like to use the “Foreground Select Tool.”
Turn your selection into a layer mask
Once you have carefully selected the foreground elements you wish to keep, turn it into a layer mask:
In Photoshop: with the foreground layer selected, click the “Add Layer Mask” button at the bottom of the Layers Palette.
In the GIMP: right-click the foreground layer and select “Add Layer Mask.” When the “Initialize Layer Mask To” prompt comes up, choose “Selection” and select “Add+”.
This should “hide” the sky in your foreground layer and make the star trails layer visible.
Flatten and Save
Now that your foreground and star trail images should be properly composited, just flatten the image by right clicking a layer in the Layers Palette and choosing “Flatten Image.” When your image is flattened into one layer, save it. All done!
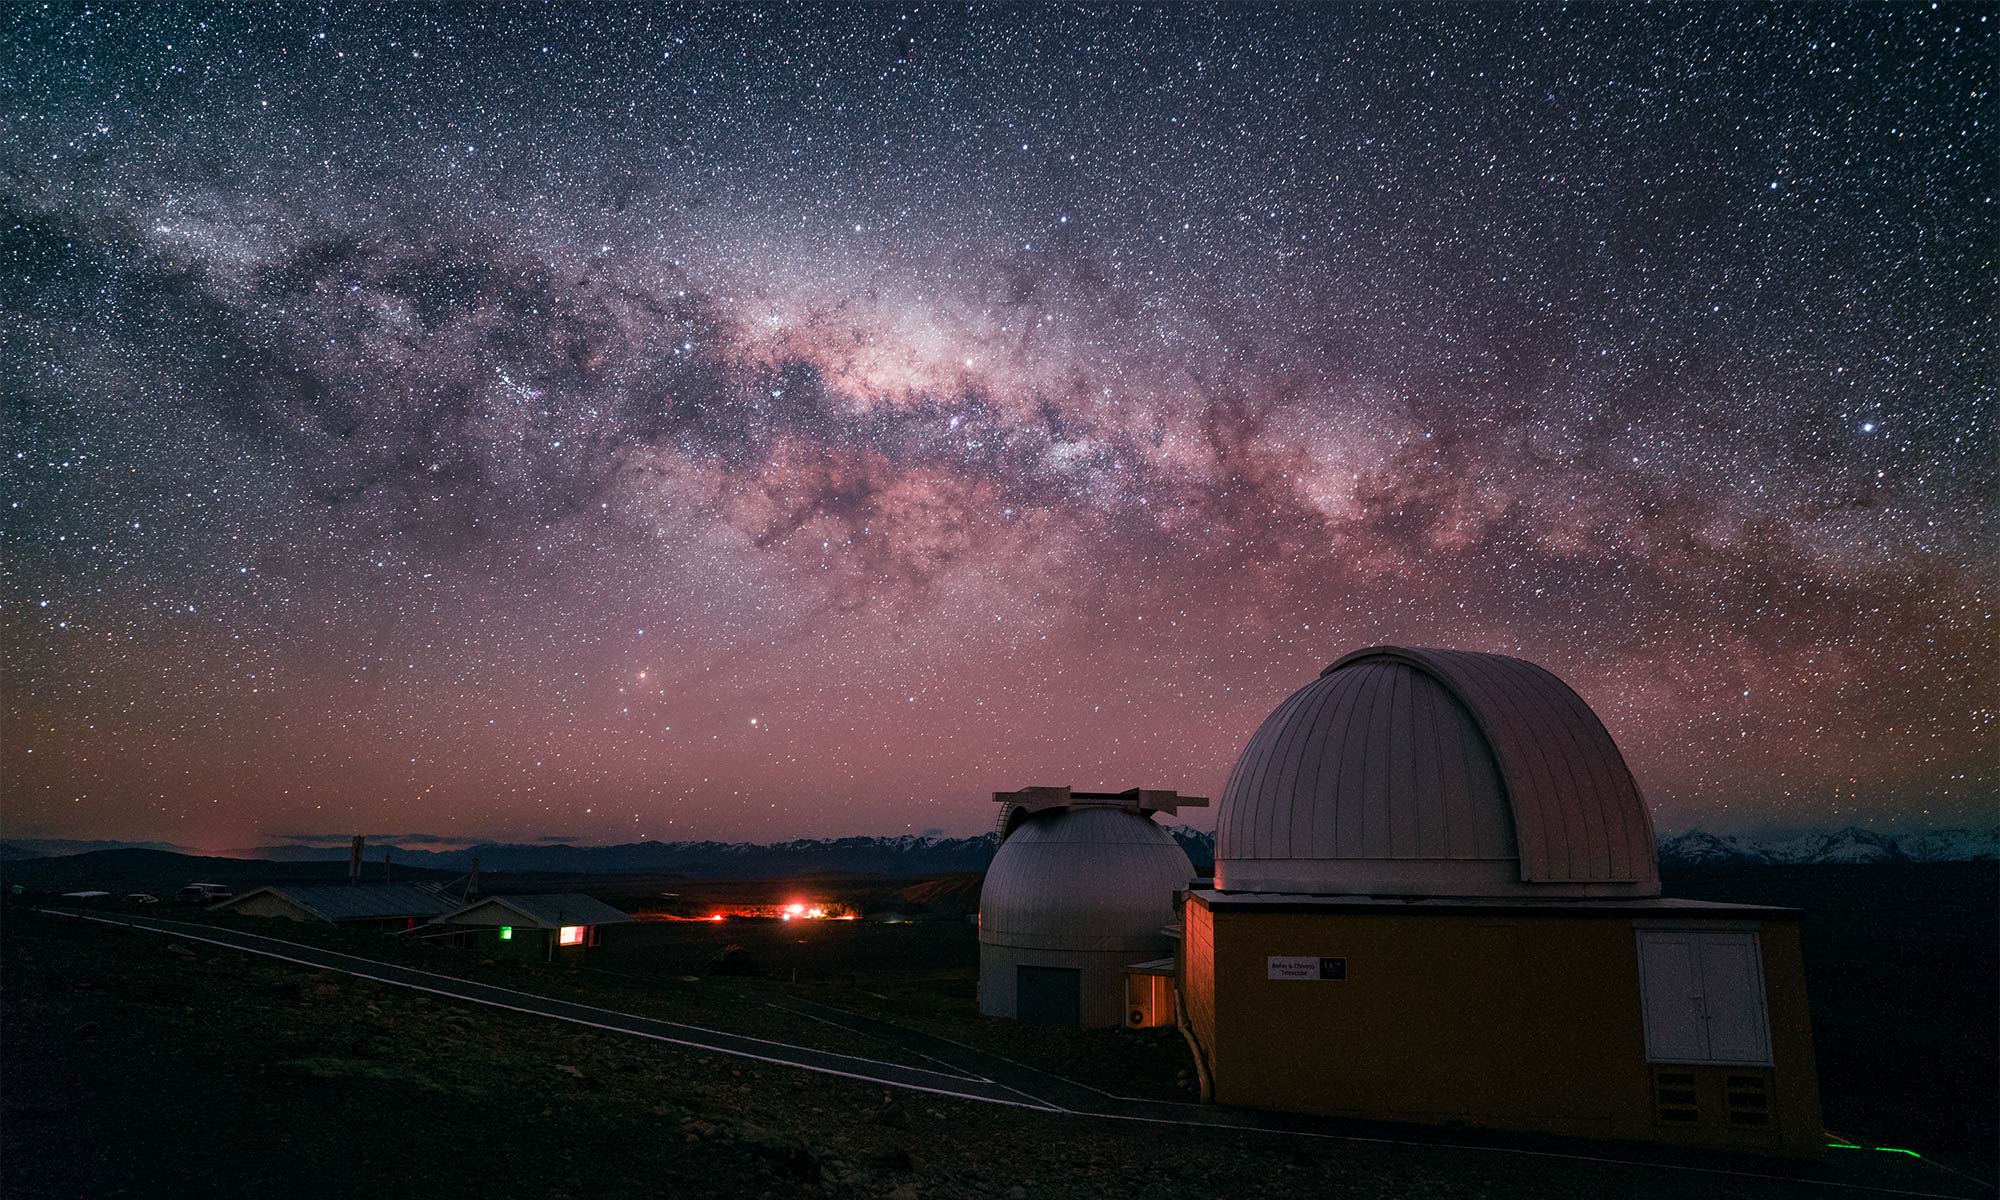
I hope this tutorial was helpful for you. Let me know if you have any questions or feedback. If you would like to share your star trail images, jump over to the student showcase and add your images to the flickr group. If you are interested in learning how to make images like this with me, check out one of my workshops. Finally, let me leave you with another image made the same night:
![]()
I’m curious as to why you took multiple exposures.
I achieved the same effect (30 years ago) just by pulling focus. Manual camera, 35mm film. One image, same effect. And without all that tedious mucking about in GIMP.
Have you tried doing this in a single exposure?
This is awesome. Thanks!
Clearly presented and informative .. thank you ..