
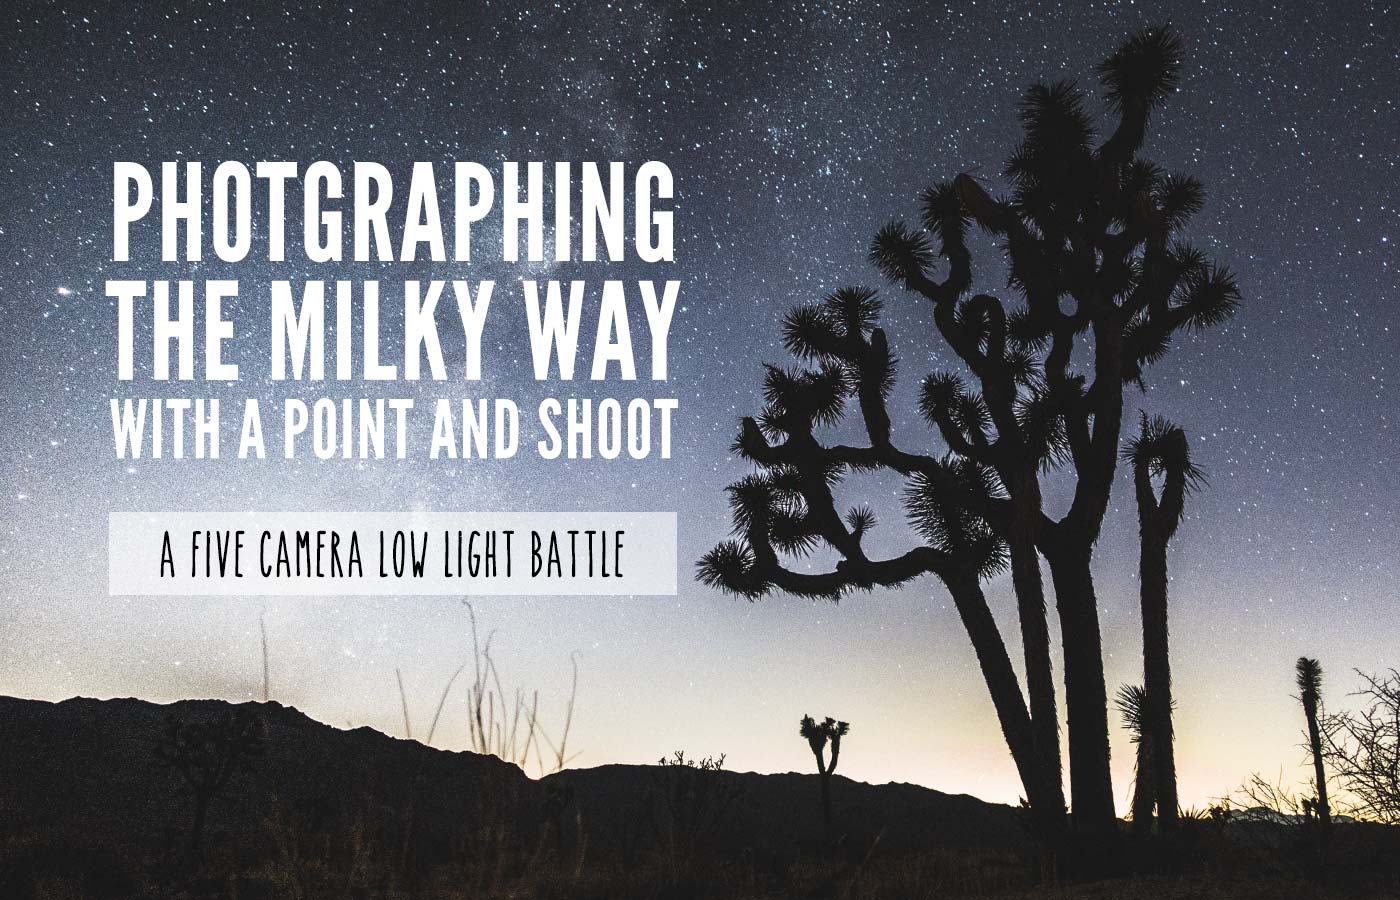
Can you photograph the Milky Way with a point and shoot? We put five of the best point and shoot cameras against each other to see what’s possible and find out which one is the best. Read more to find out.
Introduction
Point and shoot cameras as we originally knew them are dead. Smartphones have almost entirely wiped-out the small camera market and with good reason: convenience. But what if you want to do types of photography that are impossible on a smartphone? What about extremely low-light shooting? What about astrophotography? We selected 5 of the very best selling point and shoot models to compare for this article and to test their capabilities in low light. With larger sensors and fully manual control capability, these cameras define the latest generation of point and shoot built for the photography enthusiast. They’re made for serious photography in a tiny package. We have always loved the idea of having a compact camera capable of capturing the stars. Furthermore, we have had an exceedingly hard time trying to finding examples of such things being done successfully. So, we figured, why not go a head and try it ourselves?
The Cameras
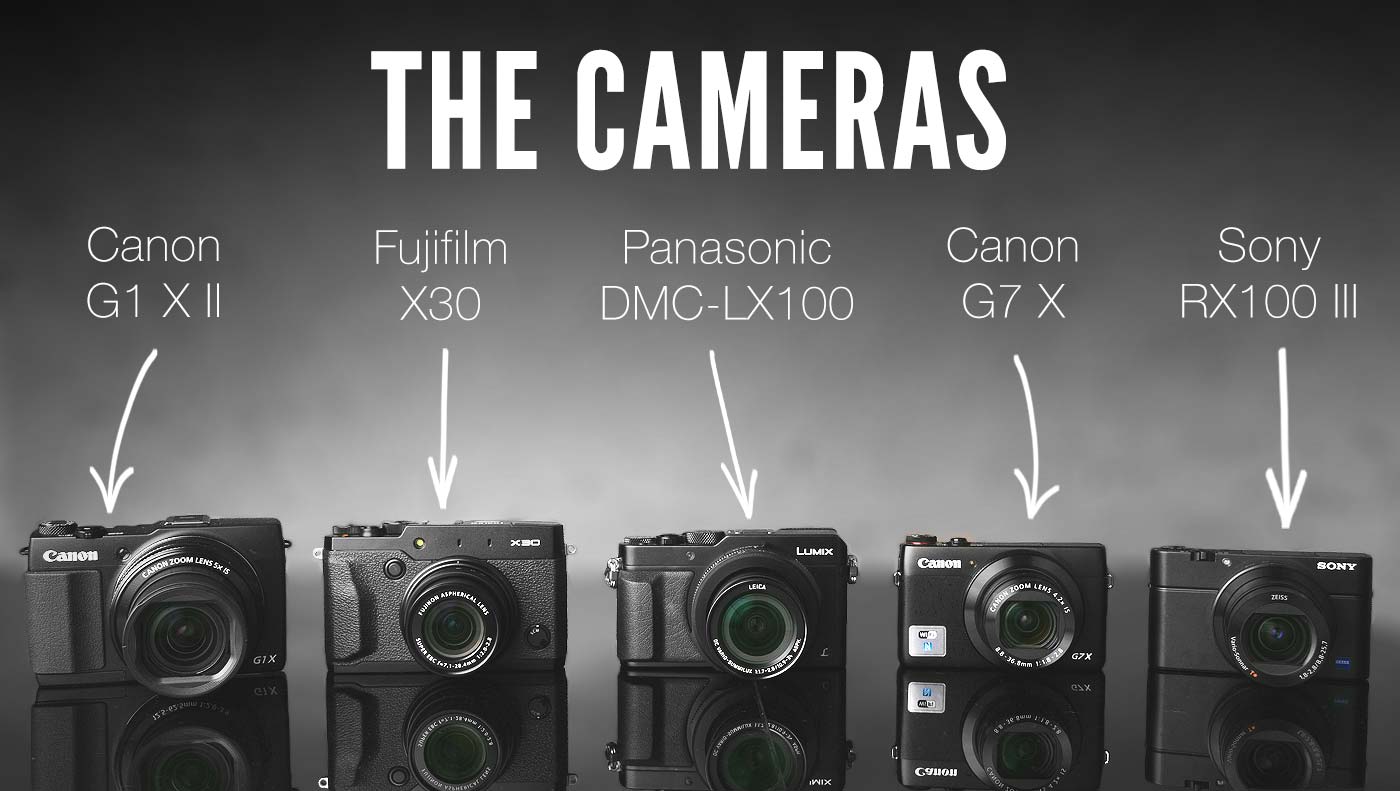 All of the cameras here fall into some specific requirements: They need to have a non-interchangeable lens, a relatively compact form factor, a sensor that is smaller than APS-C (24mm x 16mm) and each needs to cost less than $900 new. Naturally, this constraint eliminated some higher end point and shoot cameras with full frame or APS-C sensors like the Sony RX1R or Fujifilm X100T. Here’s a list of what we compared:
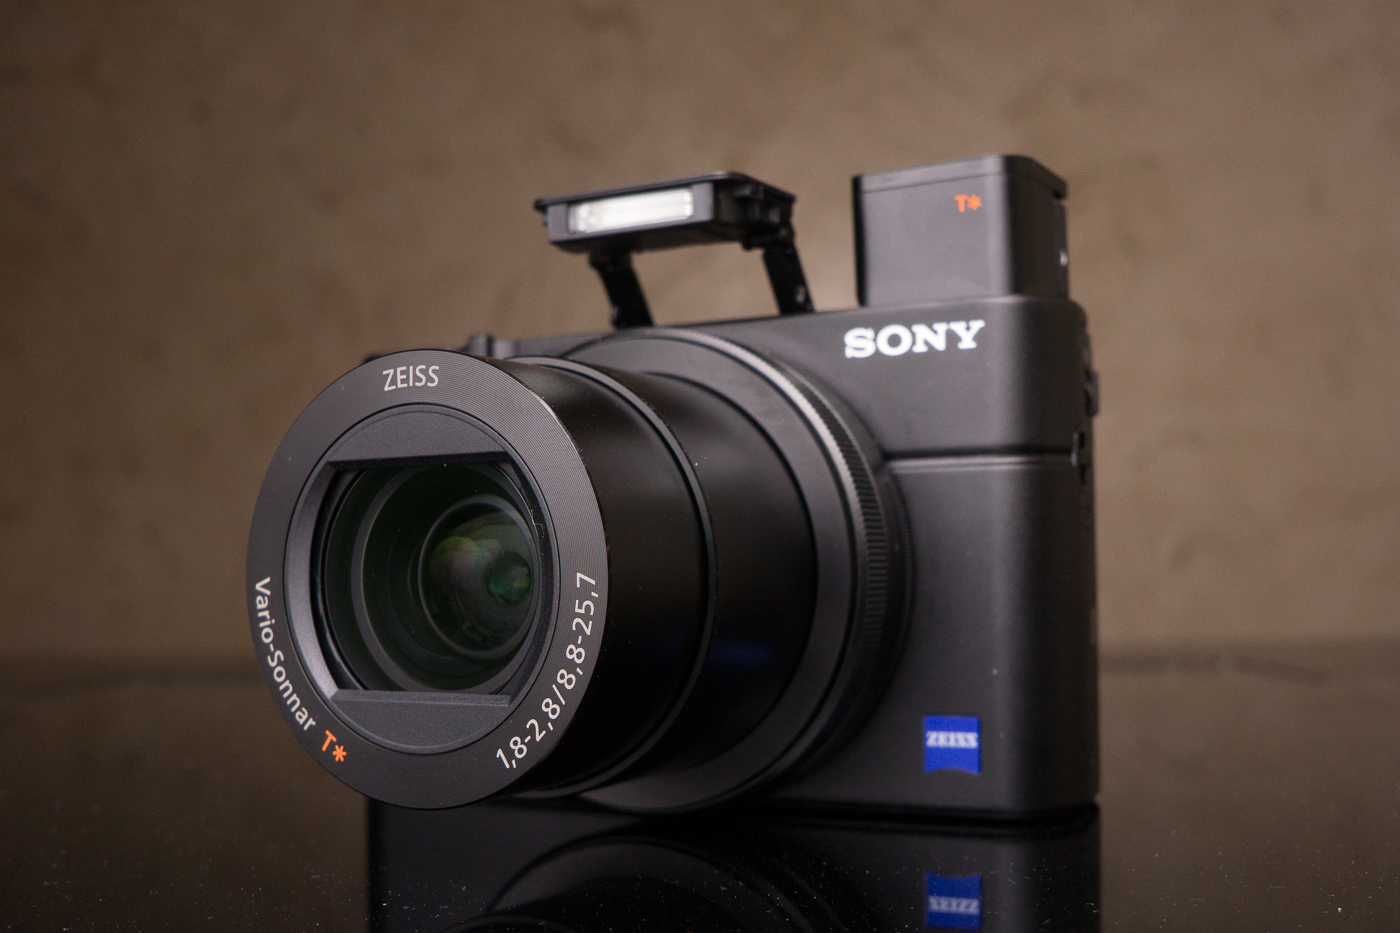
- Sony RX100 III
- The RX100 III is the third iteration of the excellent RX100 series of cameras from Sony. It features a 1″ sensor and a fast f/1.8 lens which should be good for low-light. It’s the smallest of the bunch and one of the only cameras here that can be called truly pocketable. It has a lot of features any photographer would enjoy: a tilting LCD, a pop-up viewfinder, built-in ND filter, and image stabilization.
- Canon G7 X
- The G7 X is undoubtedly Canon’s attempt at competing with the RX100 series. It too features a 1″ sensor and a fast f/1.8 lens for low-light shooting. It’s a hair larger than the RX100 III but still falls into the pocketable category. It also has a tilting LCD, image stabilization and a built-in ND filter but no viewfinder like the RX100 III. I does, however, sport a more versatile 4.2x zoom lens as opposed to the RX100 III’s 2.9x zoom.
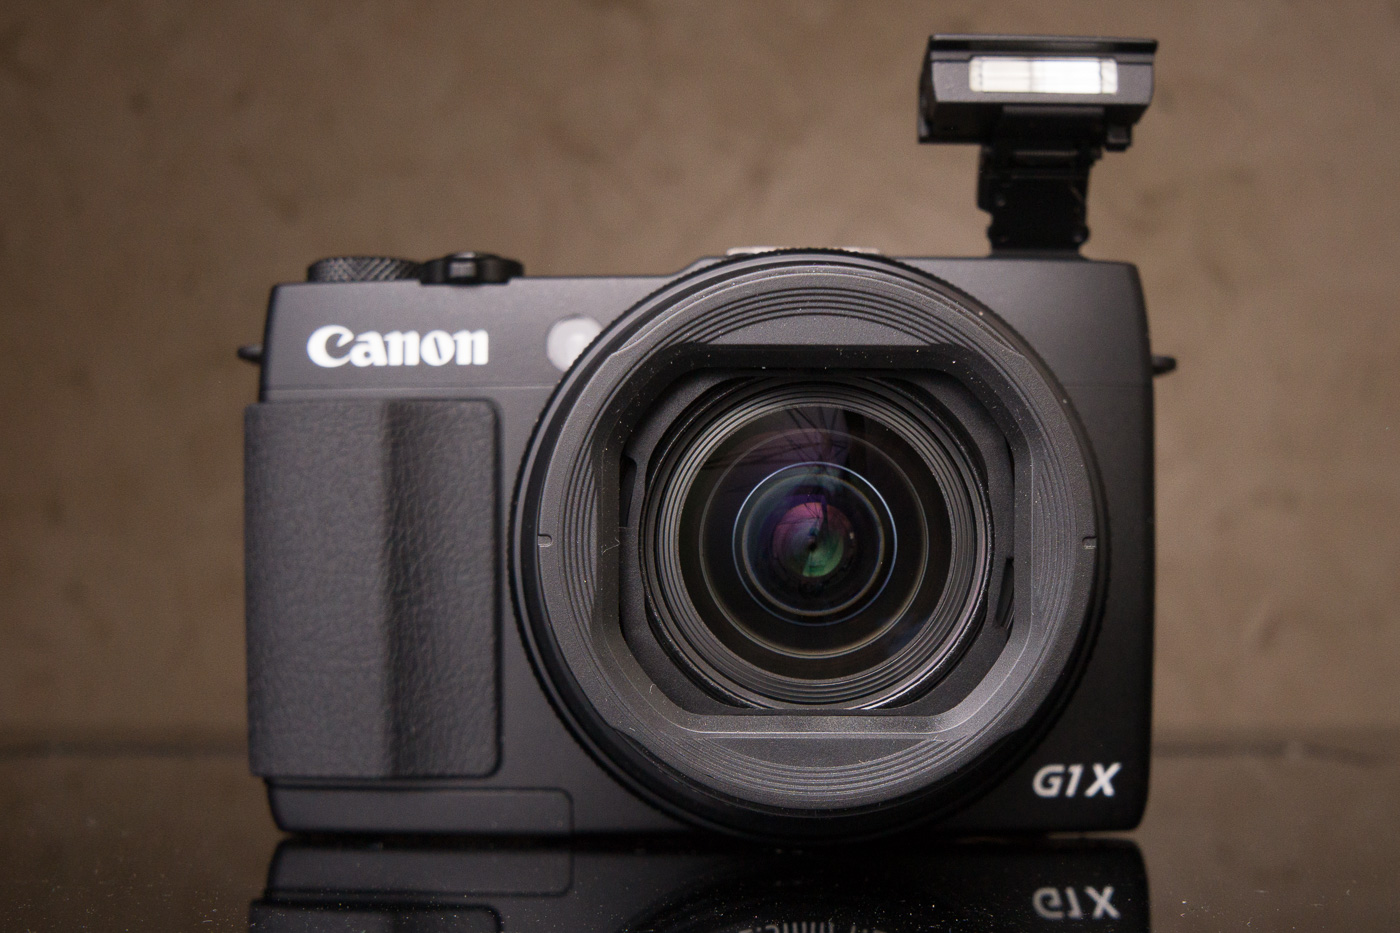
- Canon G1 X II
- The G1 X II is the G7 X’s bigger brother. It has the largest sensor of the group at 1.5″ and a fast f/2.0 lens so it’s immediately a candidate as a low-light shooter. It’s the largest and heaviest of all the cameras in the comparison but we think the sensor size might provide some advantage when shooting in low-light. It has a tilting LCD but no viewfinder.
- Panasonic Lumix DMC-LX100
- The DMC-LX100 comes in just behind the Canon G1 X Mark II in terms of sensor size with a 4/3″ sensor but also boasts the fastest lens in the group at f/1.7. It wields an electronic viewfinder and internal 4K video recording but no tilting LCD. It has a unique control scheme reminiscent of a Leica or of many of the modern Fujifilm X-Series cameras like the X100T or the X-T1. It’s shutter speed and aperture are controllable via dedicated dials, rather than the menu/control dial configuration of most of the cameras here.
- Fujifilm X30
- The Fujifilm X30 is Fujifilm’s midrange X-Series point and shoot, situated in their lineup just behind the X100T. Unlike the X100T or the Panasonic DMC-LX100, it doesn’t have the more traditional dedicated shutter speed and aperture dials but instead has the more contemporary M-A-S-P dial found on most modern enthusiast digital cameras. It hasthe smallest sensor of the group at 2/3″ and a fast f/2.0 lens. It also has a digital viewfinder in addition to a titling LCD.
The Challenge
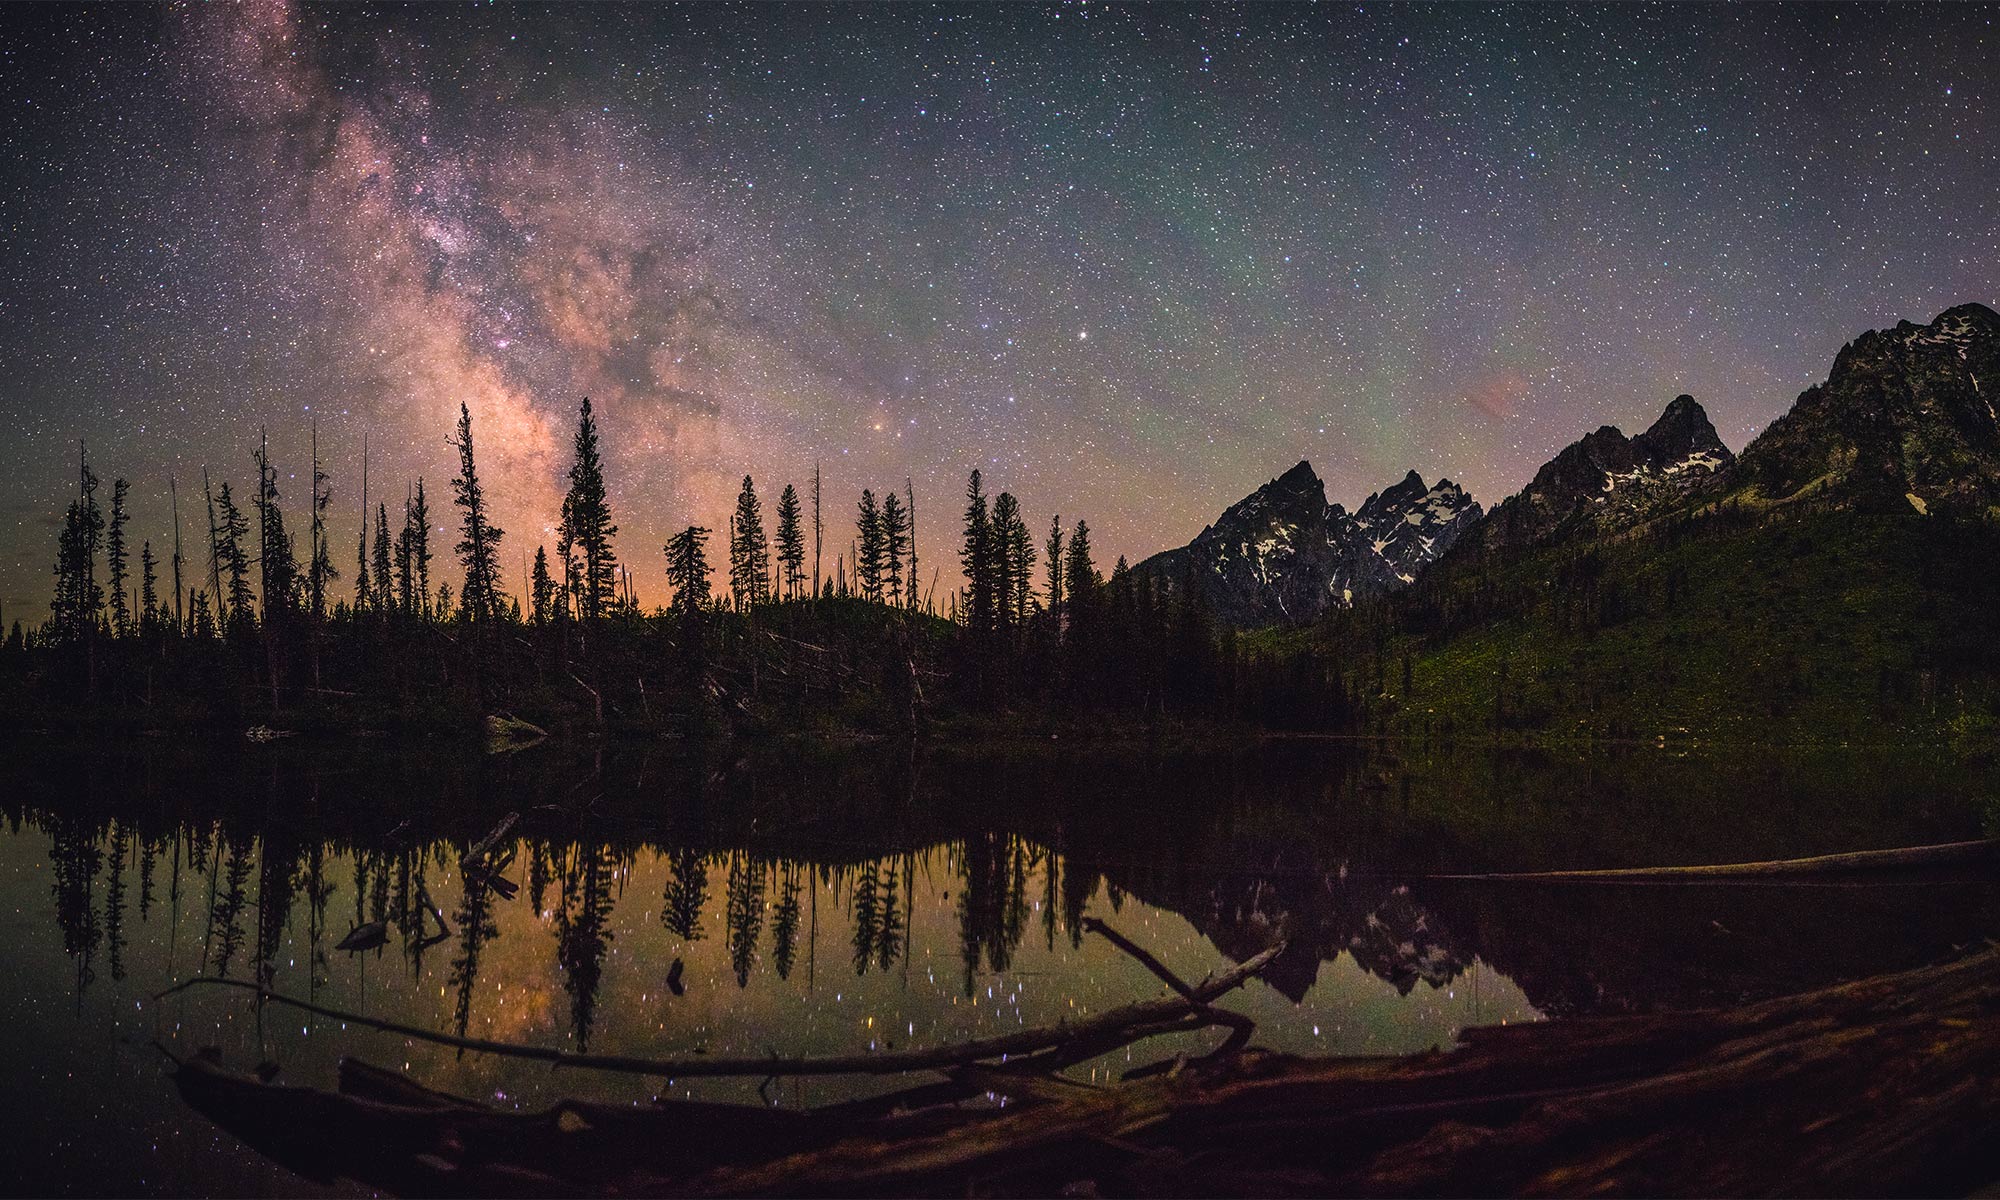
The challenge is photographing the Milky Way. Normally, when we’re teaching someone how to photograph the Milky Way, we would not recommend a point and shoot and would instead recommend a large sensor interchangeable lens camera with a wide angle lens. Usually that means something like a DSLR or mirrorless camera with an APS-C sized or full frame sensor. Or favorite camera for shooting the stars at this time is the full frame Sony a7S (full review). The cameras compared here all feature sensors smaller than APS-C but larger than the tiny 1/1.7″ standard that we’re familiar with in most older generation and budget point and shoots. We can’t think of a more difficult exposure challenge for such small cameras and I think it will be exciting to see what they can or cannot do. For the challenge, we traveled to Joshua Tree National Park in California, just a few hours east of Los Angeles. It’s a place with relatively dark skies in the area. We traveled there hoping that, with a little careful planning, we might be able to catch some of the more interesting parts of the Milky Way before it sets below the horizon. From November to February the Milky Way’s galactic center gets obscured by the sun so shooting the Milky Way becomes a little more constrained compared to other times in the year.

We planned the shoot using my favorite desktop planetarium software: Stellarium. It showed that we should have a good view of the area of the night sky just below the bright star Altair around the constellation Aquila. Mars would also be visible the night of our shoot so it was likely that we would capture it as well.
Night Sky Shooting Experience
The first important factor in comparing each of these cameras is its handling experience, especially in the context of shooting the night sky. A camera targeted toward the photography enthusiast should be built for the photography enthusiast. We’ll comment briefly about the user experience each has to offer and how we enjoyed shooting with it under the dark skies of Joshua Tree National Park. Each camera was set to shoot in RAW and daylight white balance. For exposure, I used roughly the settings recommended in my Milky Way exposure calculator which was 20 second, minimum f/number and ISO 3200 for all cameras. Each camera was mounted low to the ground at a height of 10 inches off the ground on a tripod. Focus was acquired first and we shot 5 images with each camera, checking focus in between shots to try and hit critical focus. After the shoot, the best image from each camera was brought into Adobe Lightroom and each photo was white balanced and adjusted with identical contrast and curves adjustments. All of the images were resized for web at 1400px wide. If you want to see 100% crops, check out the next section. Here’s what it was like to shoot with each camera:
Sony RX100 III
 I must say that I was immediately impressed with the RX100 III. From the first moment that I handled it I was very happy with how much they packed into this camera. The viewfinder is very natural to use and feels just like the viewfinder on my a6000 or Sony a7S, just smaller. I like that it has a pop-up flash and a tilting LCD and that all of these things fit into a camera that can fit in a jacket pocket or a purse. For shooting at night, the tilting screen made it very simple to make a low-to-the ground shot, a practice that I use often for capturing foreground objects (like a joshua tree) against the night sky. All of the controls operated just like a much bigger Sony camera so I had no problems whatsoever getting it quickly set up for night shots. One of the features that stood out specifically was the Fn-button menu which is completely customizable so that you have quick access to your most used functions. I used it to promptly set my white balance, enable manual focus, and set my ISO.
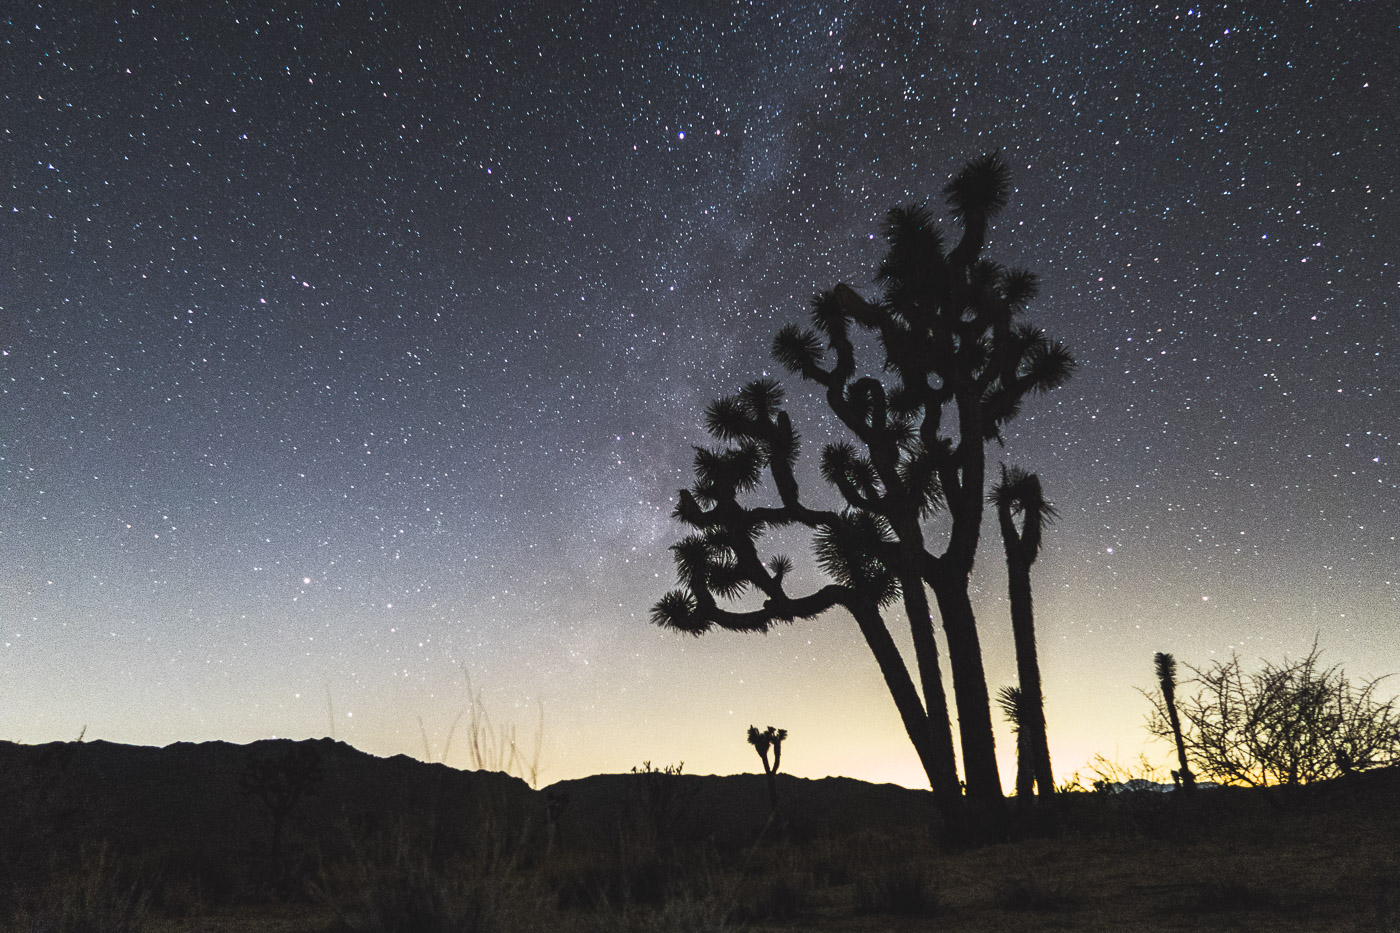
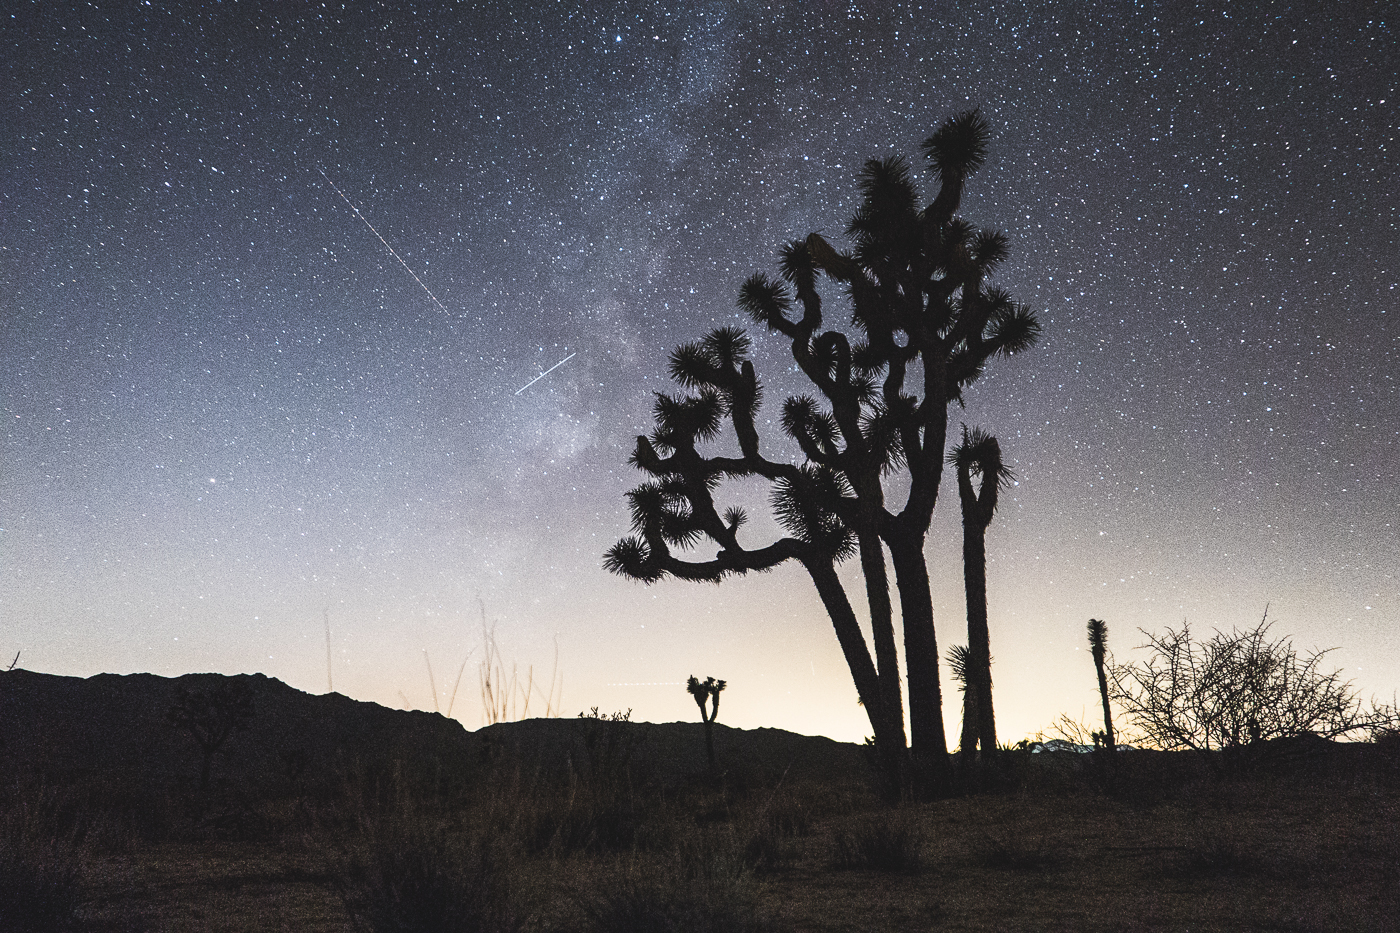
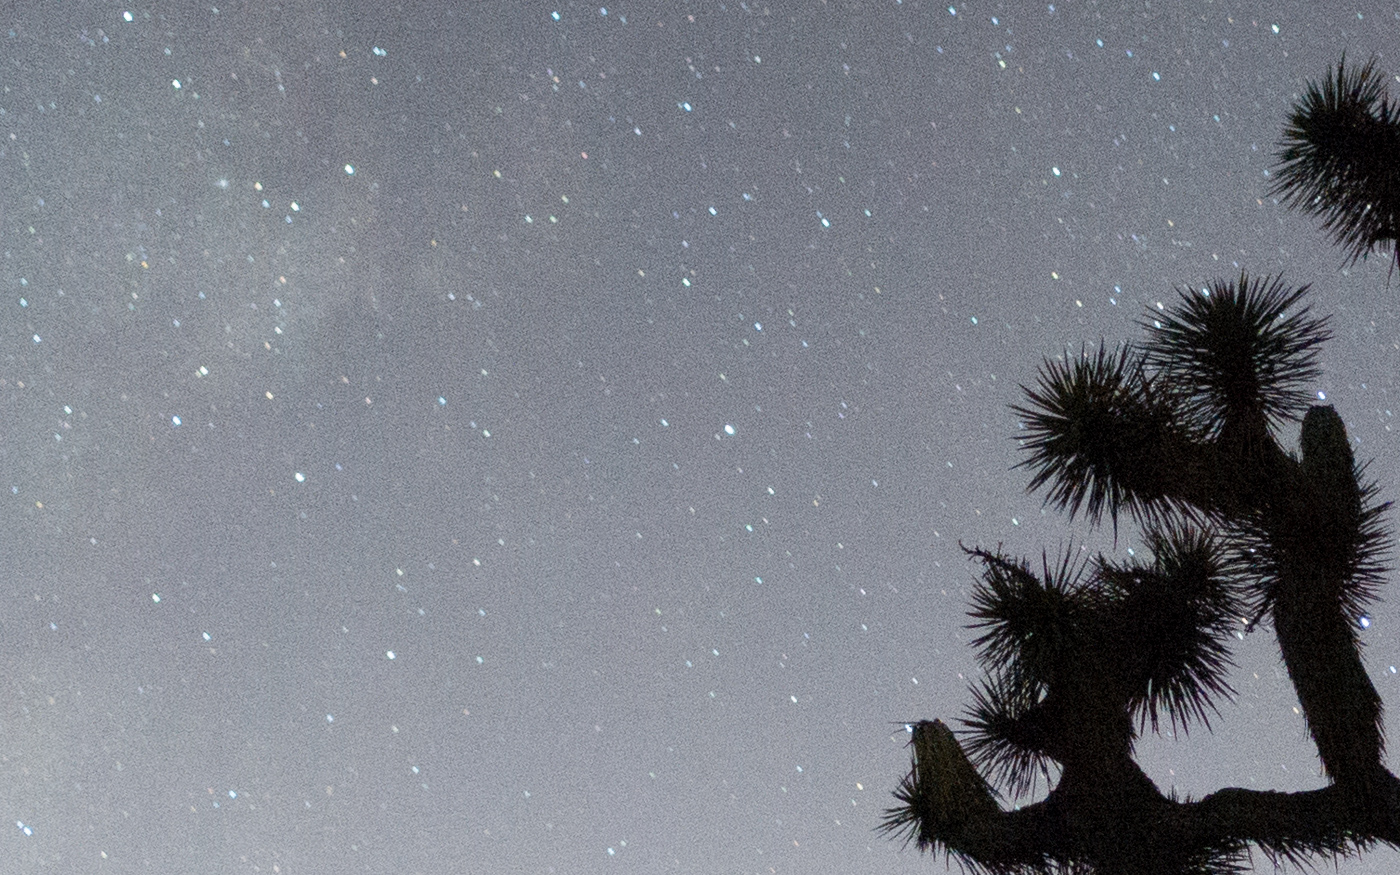
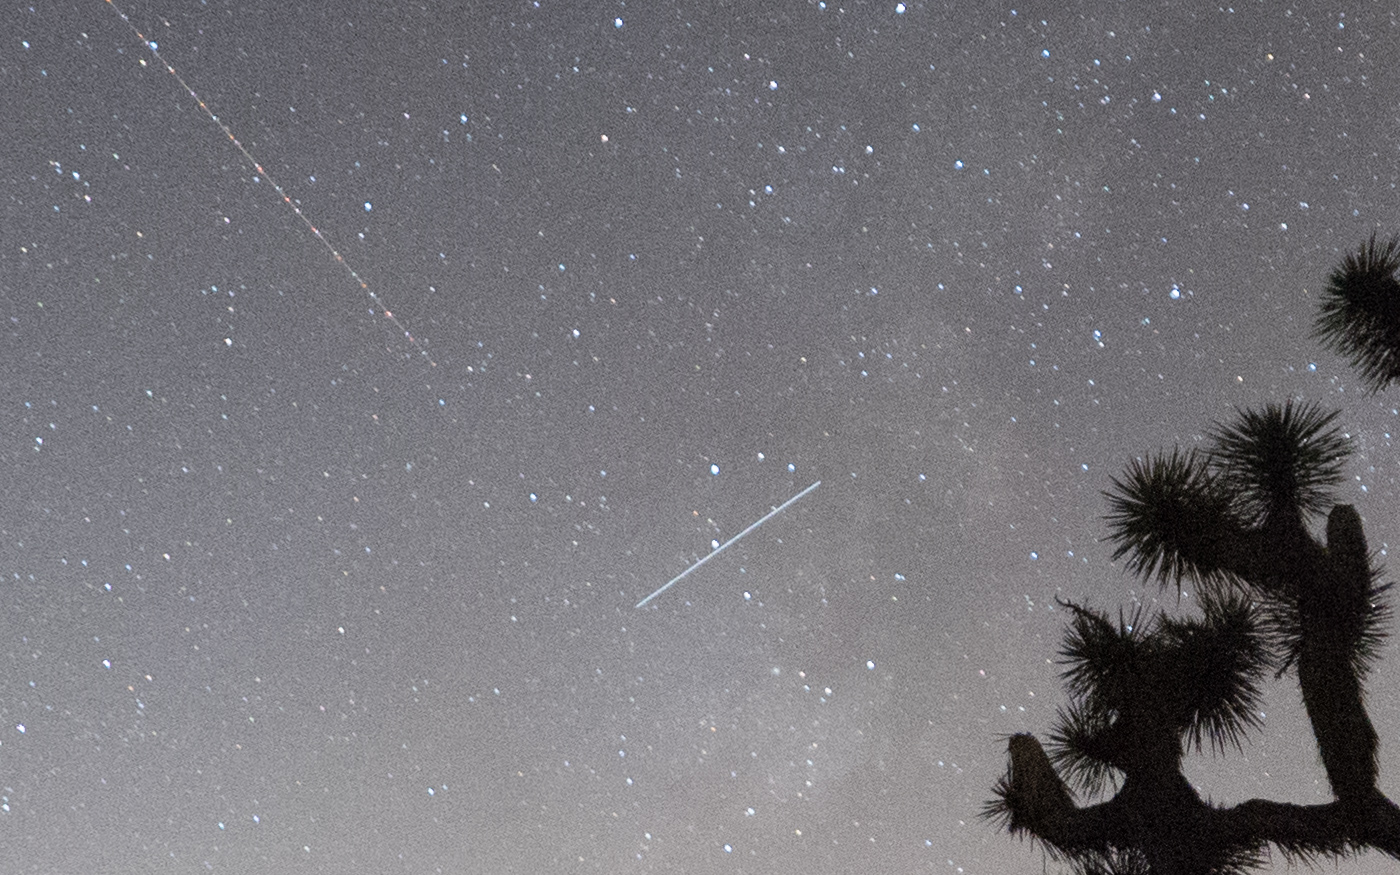
 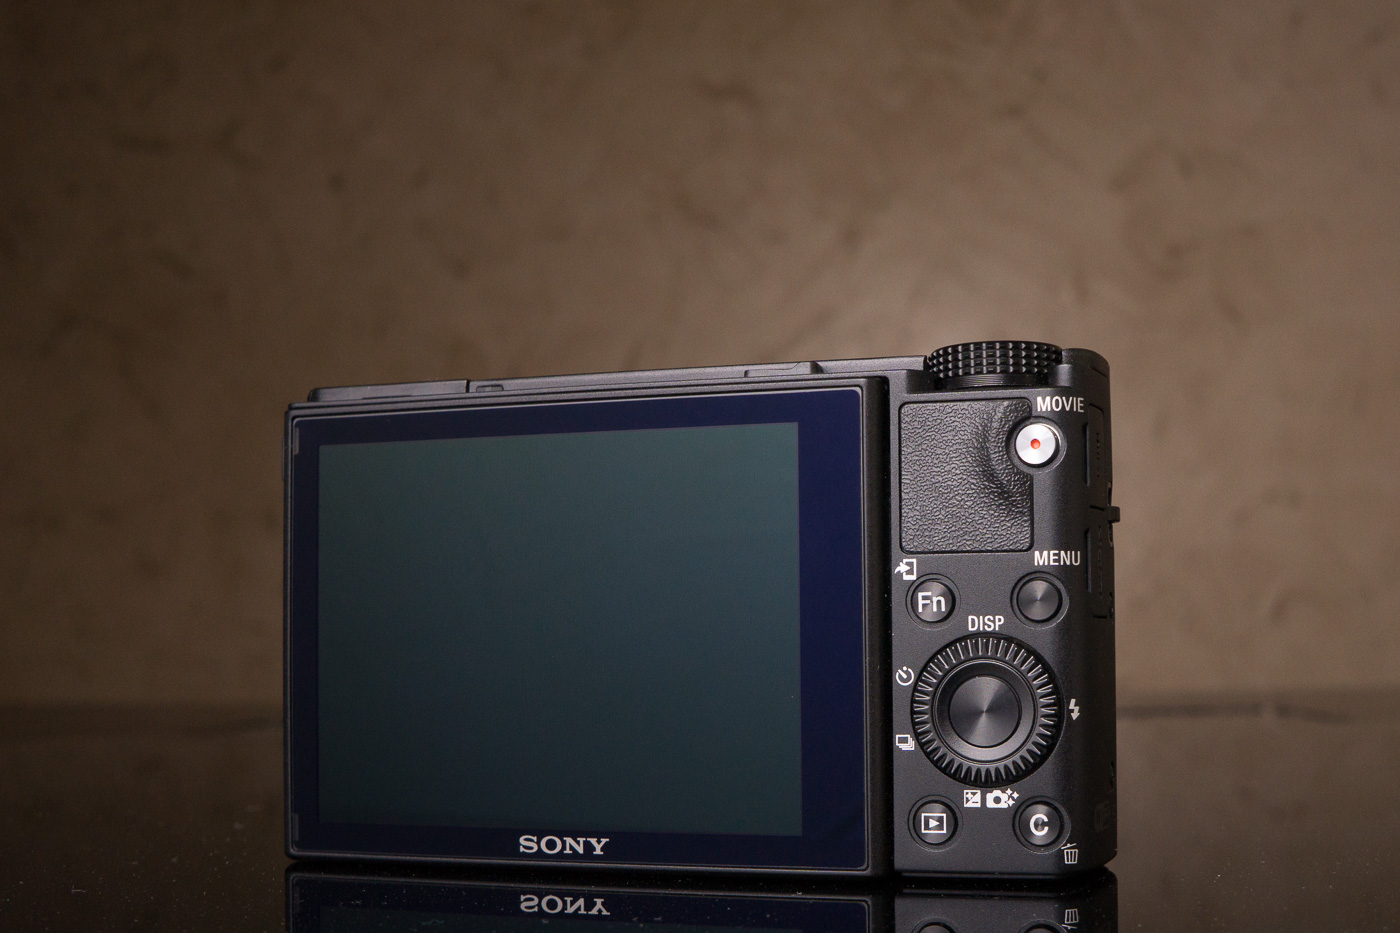 Manual focusing on the RX100 III was relatively easy, even in the pitch dark. When in manual focus mode, the front control ring adjusts the focus and it’s very quick to change focus. It felt almost directly connected to the focus mechanism but there’s a little bit of non-linearity that makes it possible to make either fine or fast adjustments. Overall, very fast and very simple to acquire focus. I was also impressed by the camera’s capability to still pick up some fainter stars on the live-view feed despite the camera’s small size.e For the RX100 III, we set a shutter of 20 seconds to minimize star trailing, f/1.8 to maximize light gathering, and ISO 3200. The camera captured a lot of detail in the Milky Way and I was pretty happy with the low amount of noise for such a small camera. Furthermore, the details in the joshua tree are tack sharp. I am frankly amazed that a point and shoot as small as the RX100 III made a photo like this:
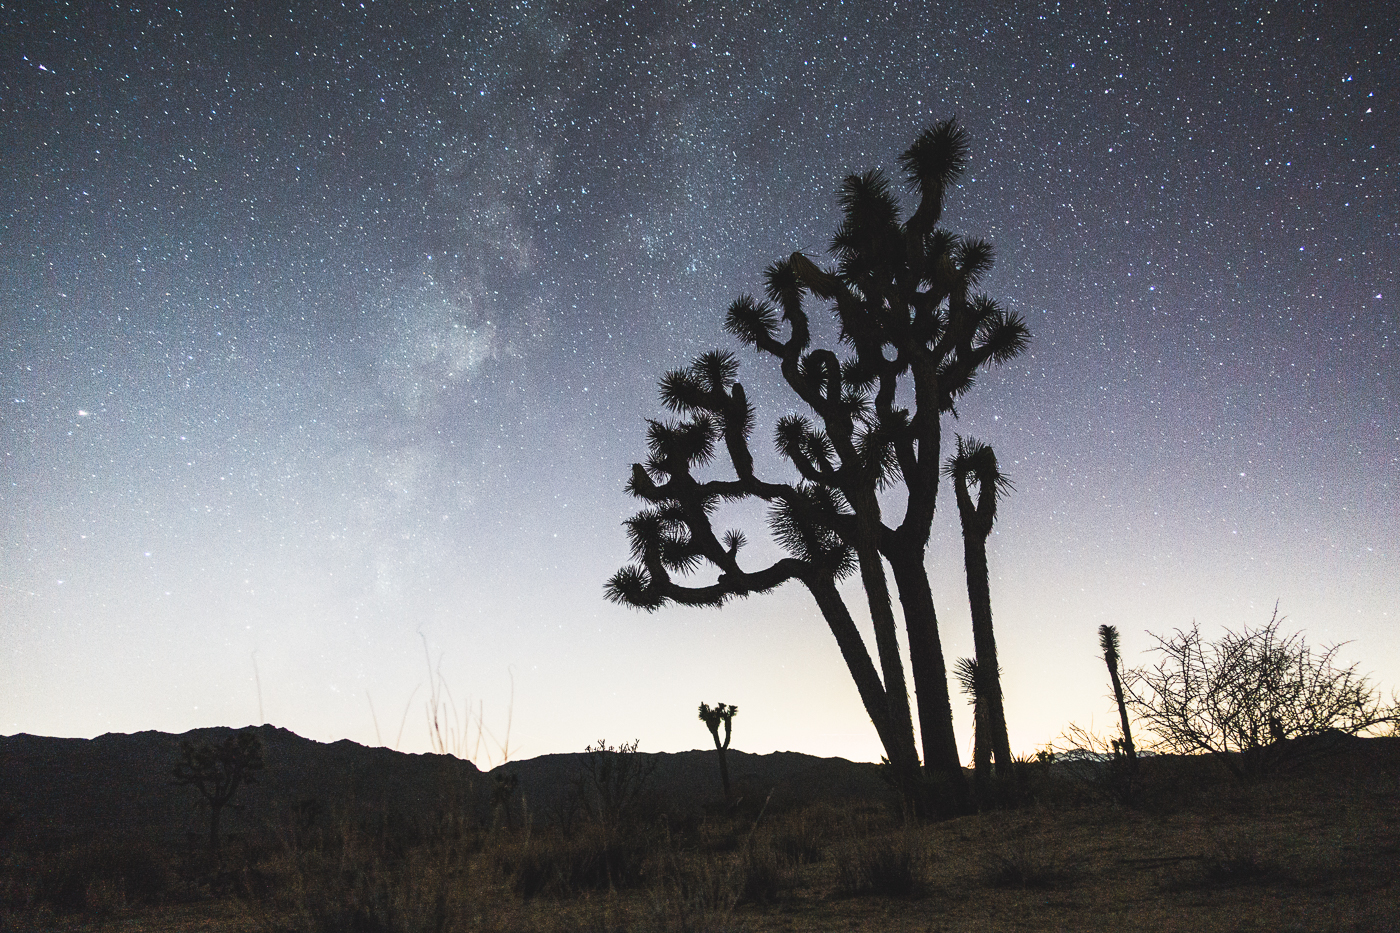
The brightest star on the left side of the frame is Mars and you can make out some of the dark dust lanes in the Milky Way. (Cool!) After seeing this first image from the RX100 III, I had high expectations for most of our other cameras, particularly those with larger sensors. Let’s see how they do…
Canon G7 X
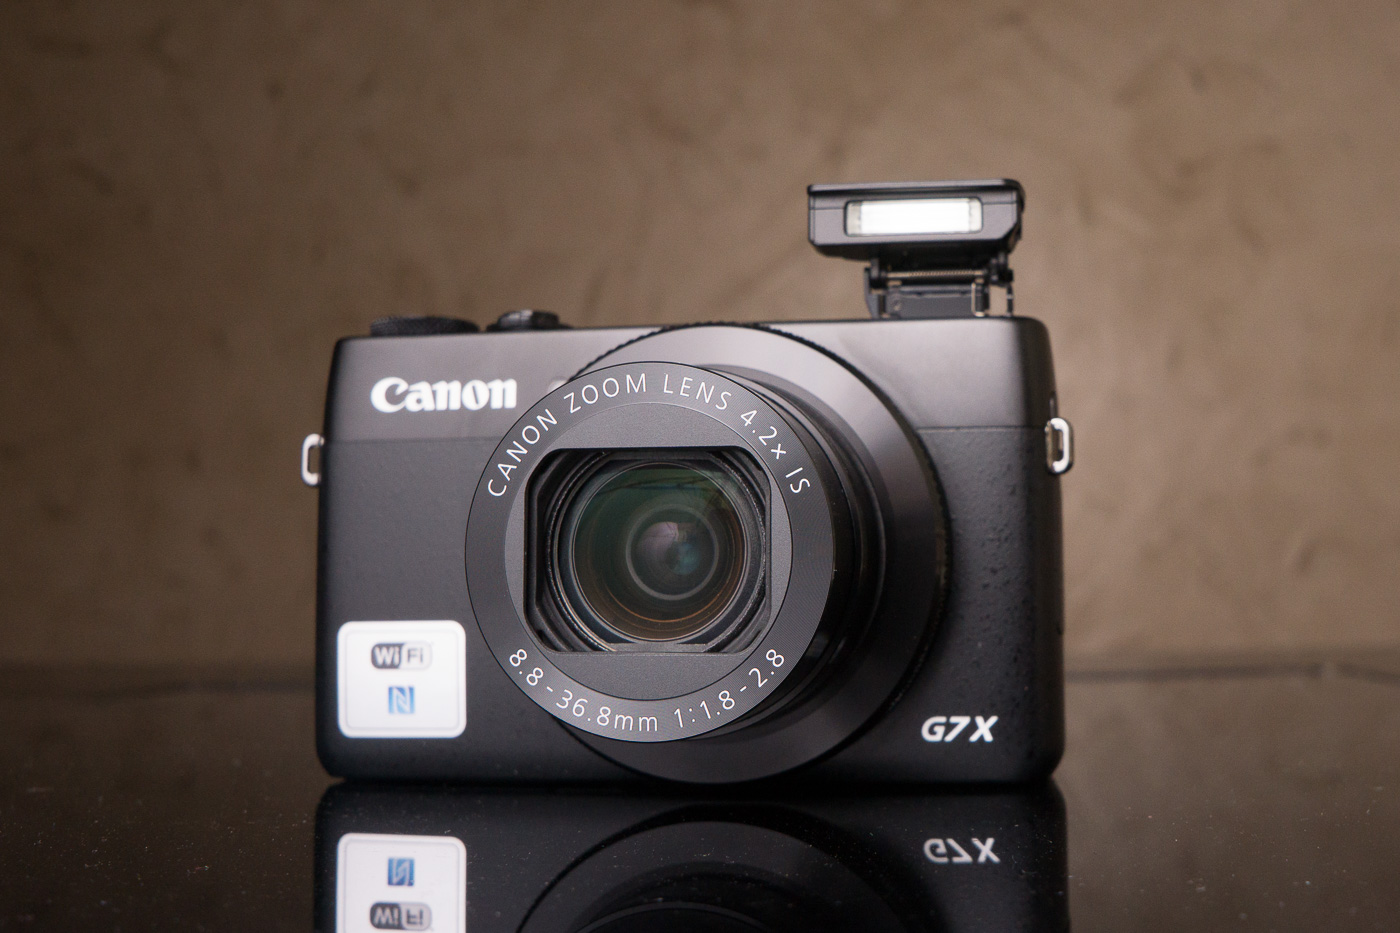 The G7 X is very very close in specifications so the RX100 III. Handling the camera, it feels slightly more robust than the RX100 III, probably because it uses a hard plastic body rather than the satin metallic of the RX100 III so it seems less prone to scratches or dents than the RX100 III might be. It’s hard to describe how different the cameras feel in hand, despite how similar they look. After having such a good time using the RX100 III’s viewfinder during daytime shooting, I was disappointed that the G7 X did not also have one. Some people might be just fine using the back LCD but a viewfinder really does make a huge difference in the experience. The lack of a viewfinder makes the G7 X feel like a less serious camera than the RX100 III. That said, we didn’t need a viewfinder for our night time test. Shooting at night initially seemed like it would be just as easy on the G7 X as the RX100 III. Its tilt screen allowed me to easily frame the shot from a low-to-the-ground position and setting all the necessary exposure settings was just as simple, albeit different than the RX100 III. Where I ran into a snag was focusing. Manually focusing the G7 X at night is a downright painful operation to perform. When putting the camera in manual focus mode, there are a couple ways to adjust focus depending on the camera’s settings: either you can use the rear control wheel on the back of the camera or, more traditionally, the lens ring. There are, however, two huge issues when trying to manual focus with the G7 X.
 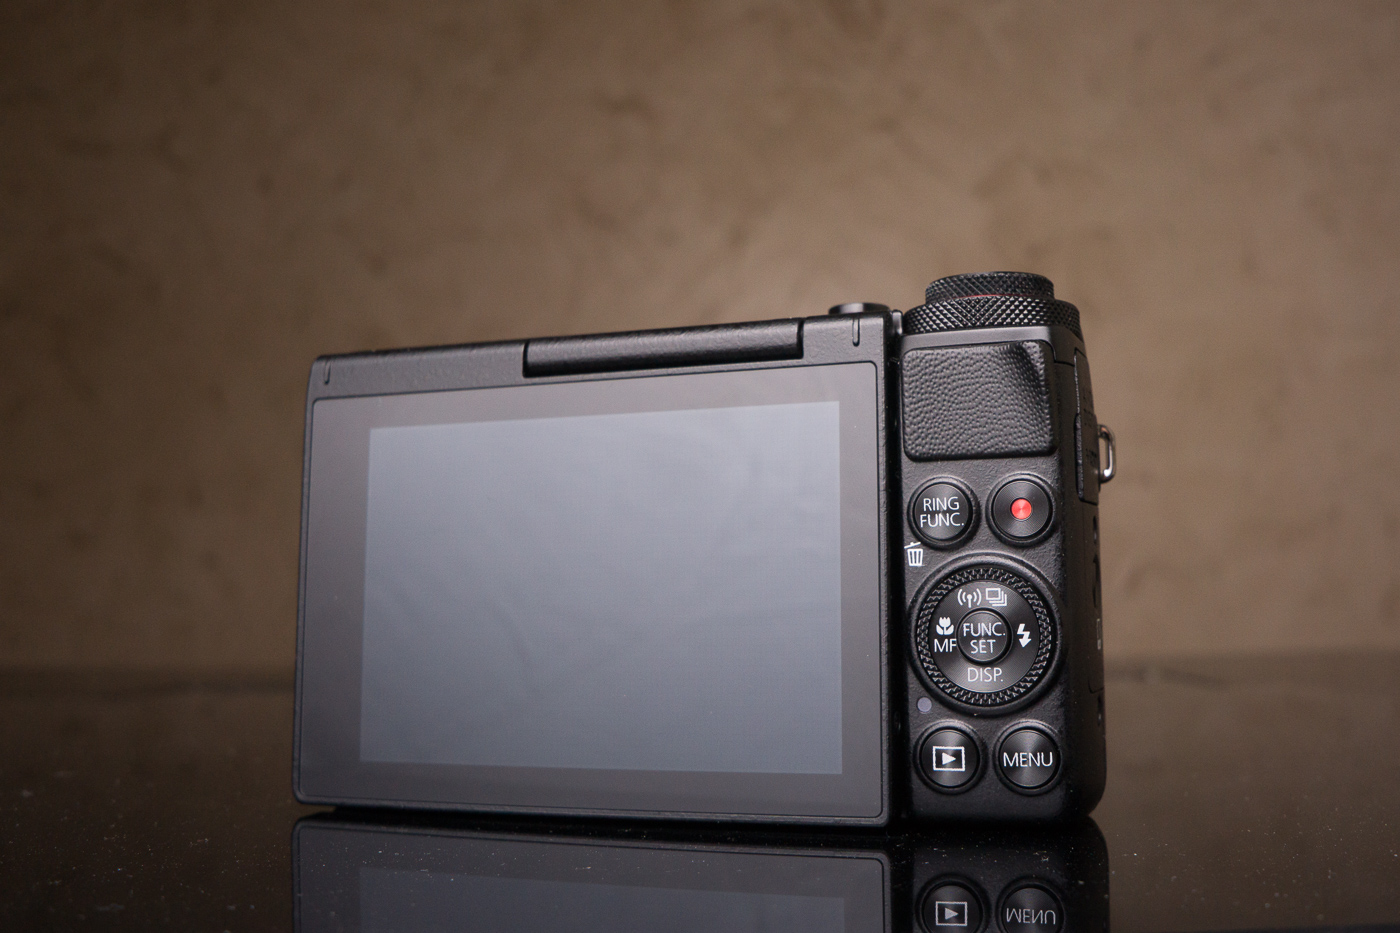 Manual focusing the G7 X seemed really really slow. Both control dials that can control focusing are indexed with clicks and each click moves the focus just a little bit. It requires 166 clicks in order to travel from minimum focus distance all the way to infinity (yes, I counted). The front lens ring only clicks 44 times per rotation so it’s necessary to rotate that ring almost 4 full rotations just to get the lens to move through its focus range. (Note: as mentioned by a few commenters, some further exploration in the manual reveals that the focus can be changed more rapidly by using the up and down directions of the rear pad. This was not immediately apparent as the choice method of racking manual focus but it certainly speeds things up a bit once you know it.) I don’t know why Canon used such counter-intuitive controls for focus.
Secondly, manual focusing changes from shot to shot by default. For example, when manual focusing at infinity, the camera resets the focus to an arbitrary point between 2 and 5 meters after every single shot. As a result, I had a very hard time acquiring accurate focus with the G7 X when shooting at night. (Note: some readers have pointed out that the G7X has a manual focus lock. Straying from any camera design conventions that I’m used to, holding the shutter half-way and pressing the rear directional pad to the left two times will fully engage the lock. I have no idea why the focus lock is not the default behavior of the camera in manual focus mode.) Overall the quirky focus controls made my time with the camera rather frustrating.
The interesting thing about the G7 X’s focus lock mode is that it looks just like the standard manual focus mode found through the same button without pressing the shutter halfway. There is no indication on screen or otherwise of this “focus lock mode” being enabled but at least it actually does hold focus.
It’s like there are two distinctly different manual focus modes, both which look exactly the same in terms of on-screen indication. One that shifts focus upon pressing the shutter halfway (which is stupid, there’s no reason for that when in manual mode) and one that works they way you would expect. I think that no matter what, when in manual focus, the focus should never change unless the user is doing it intentionally. At least there is a remedy, but it seems like a bug to me
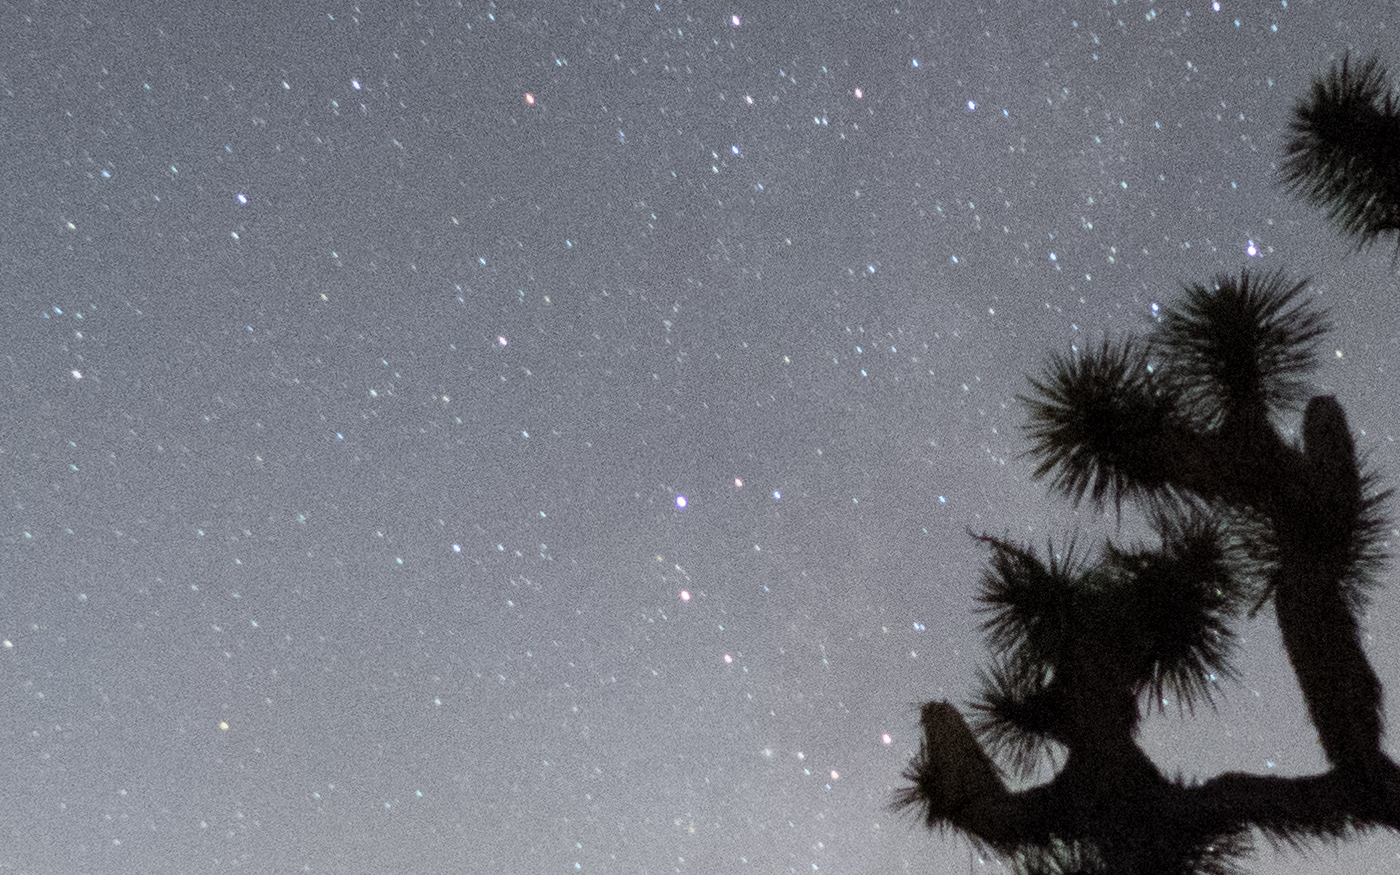
Of the few properly focused shots, I made a successful exposure at 20 seconds, f/1.8 and ISO 3200.
Overall, the noise levels appear on par with the Sony RX100 III, even a little bit cleaner perhaps. The sharpness of the image, however, leaves something to be desired when directly compared to the RX100 III. I may attribute this to the very difficult time I had when attempting to focus the camera but this was the best of 5 shots I made that night.
Canon G1 X Mark II
 The G1 X II feels big. I was surprised at how heavy it was. It does feature a much larger sensor and a wider zoom range than all the other cameras (24-120mm equiv.) but even so, it feels like it should be in a completely different weight class. It’s heavy enough that I wouldn’t advise using it without a strap, it’s just too heavy to hold in one hand for extended periods of time. It’s surprising, given its increased size and specs, that the G1 X II does not feature a viewfinder. You’re instead limited to using it via its large tilting LCD.
 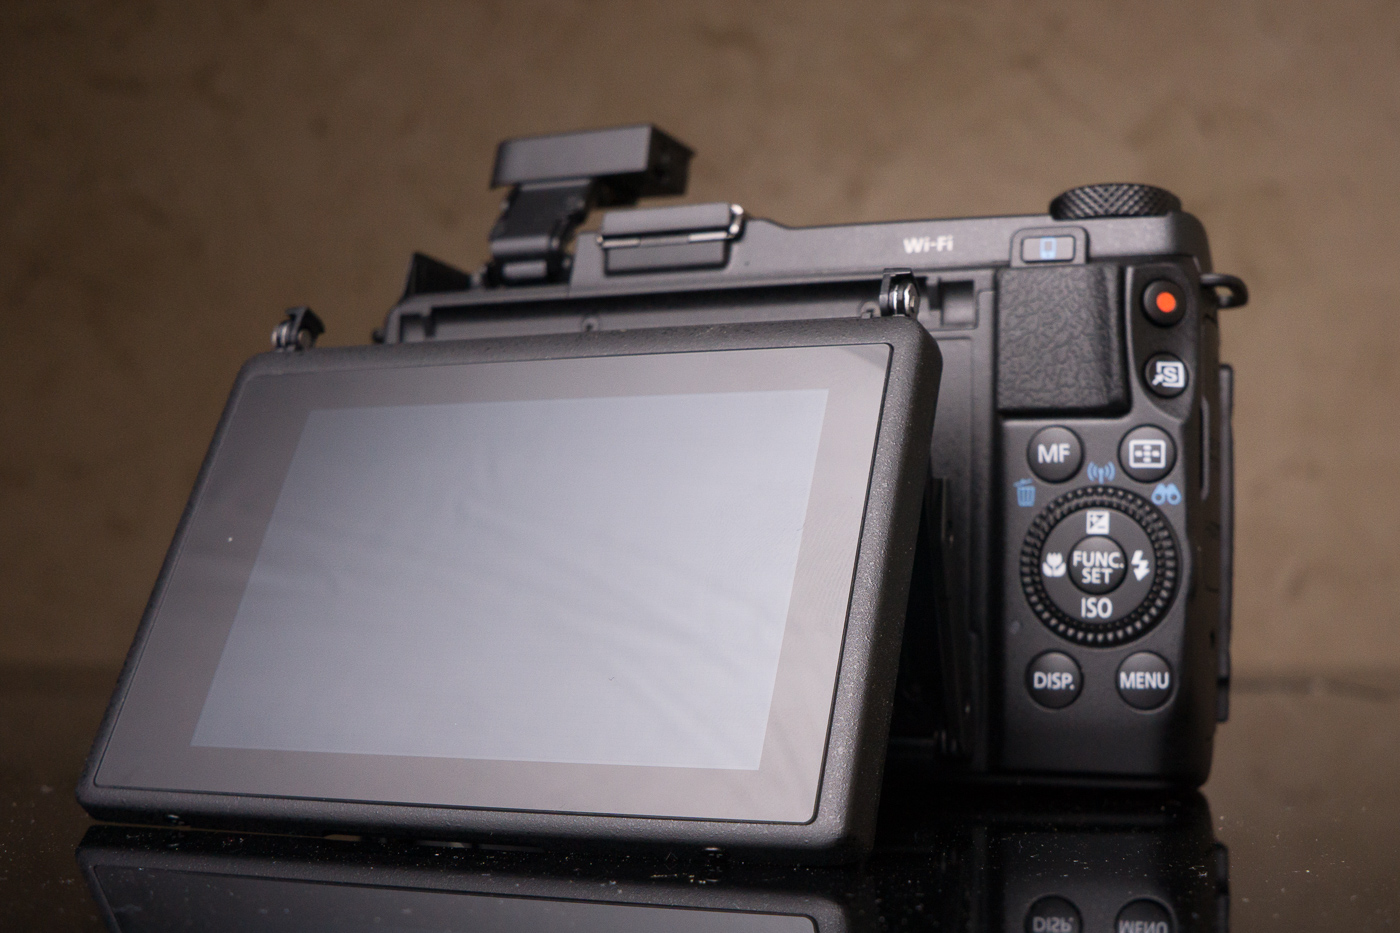 Setup of the G1 X II was almost the same as the G7 X. Manual focusing was similarly difficult as the G7 X but for different reasons. The live view feed on th the G1 X II is very low quality. When using manual focus with a magnification assist, it literally looks like they ran the live view feed through a blur filter before sending it to the LCD. As a result it was basically impossible to gauge critical focus, especially in dark conditions. Similar to the G7 X, the manual focus distance gets reset after each photo making it impossible to hold critical focus from shot to shot. Forgetting the issues with focusing for a second, I am definitely happy with the image quality of the G1 X II. However, I don’t think that noise or details are any nicer than the smaller sensor cameras above, despite its larger sensor/lens specs. It should be noted that although the G1X II features a much larger sensor, it is also only 12.8 megapixels versus the 20+ megapixels on the G7 X and RX100 III.
Panasonic Lumix DMC-LX100
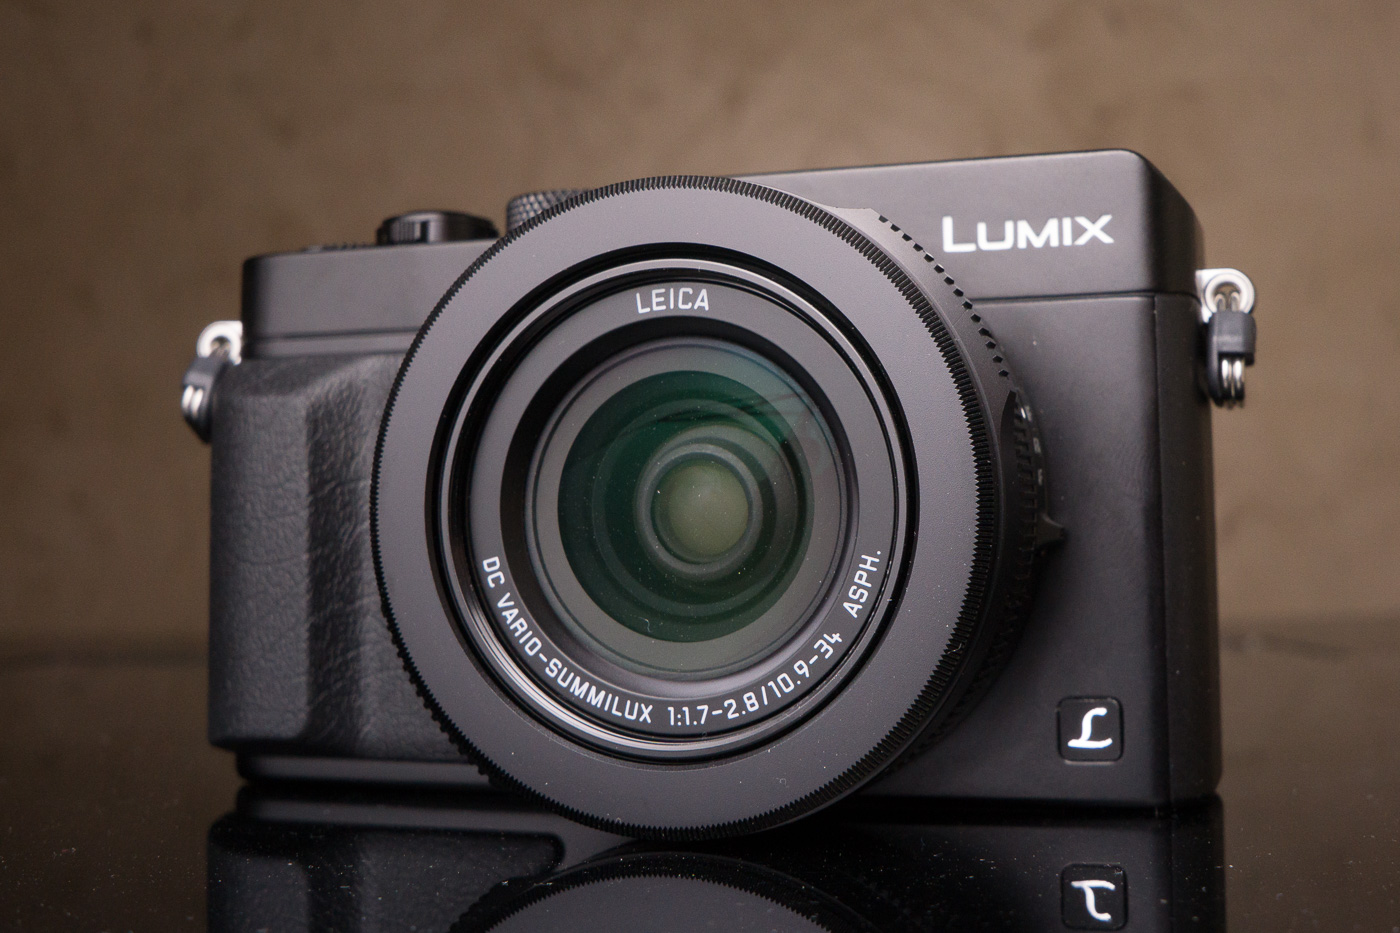 The Panasonic DMC-LX100 is surprisingly lightweight for its size. It’s only a little bit smaller than the Canon G1 X II but feels about a half pound lighter. It also has a much better grip than the G1 X II with a nice large thumb protrusion. Of all the cameras tested here, the LX100 felt the best in my hands. I really like that it has a viewfinder, making it really nice to use for most handheld shooting but I was mildly disappointed that it did not feature a tilting LCD. I also really like the control configuration on the LX100. It is similar to the Fujifilm X100T with dedicated dials for shutter speed and aperture, reminiscent of a Leica which made operation of the LX100 extremely fast.
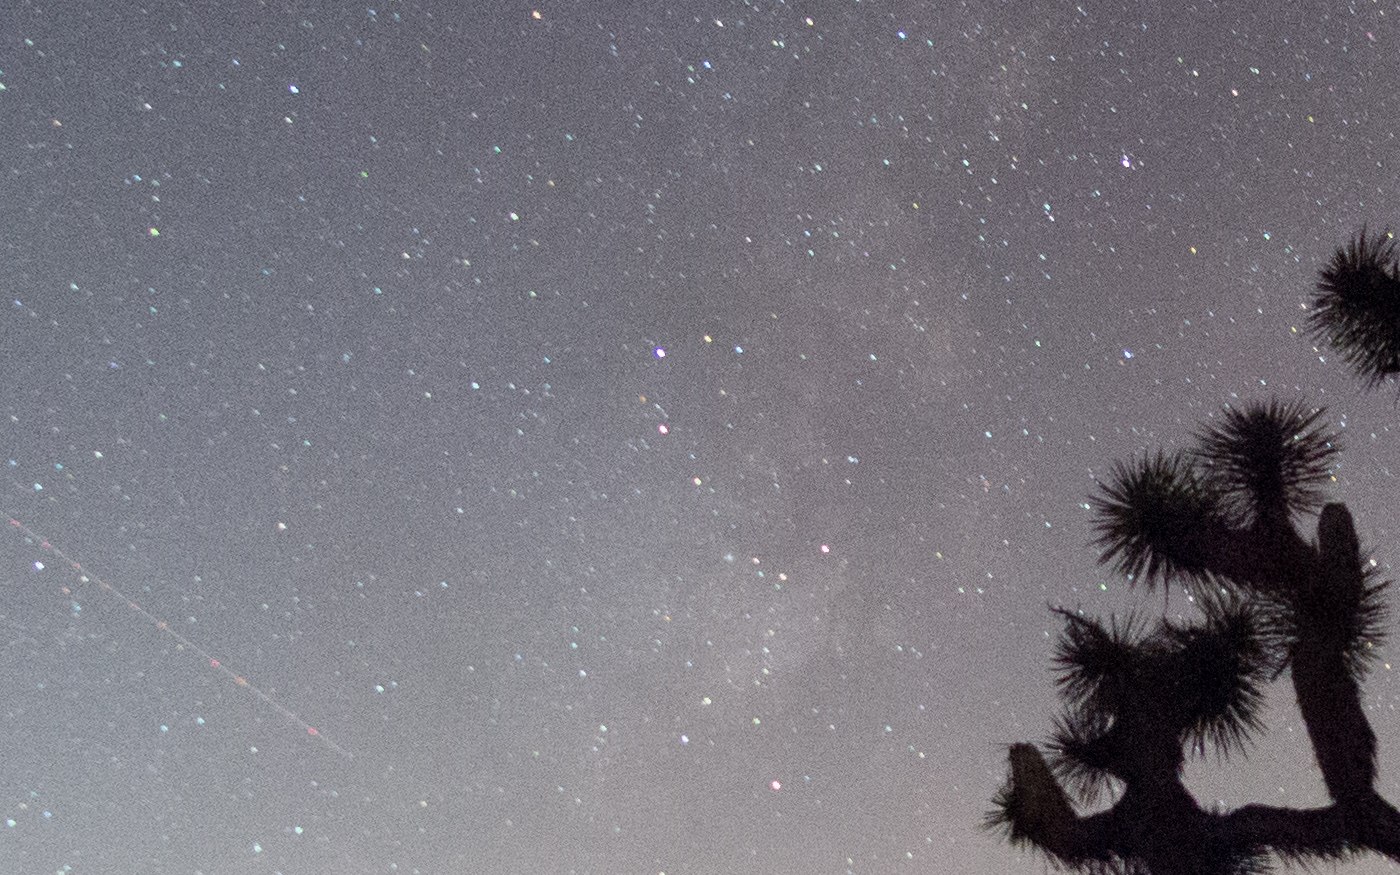
 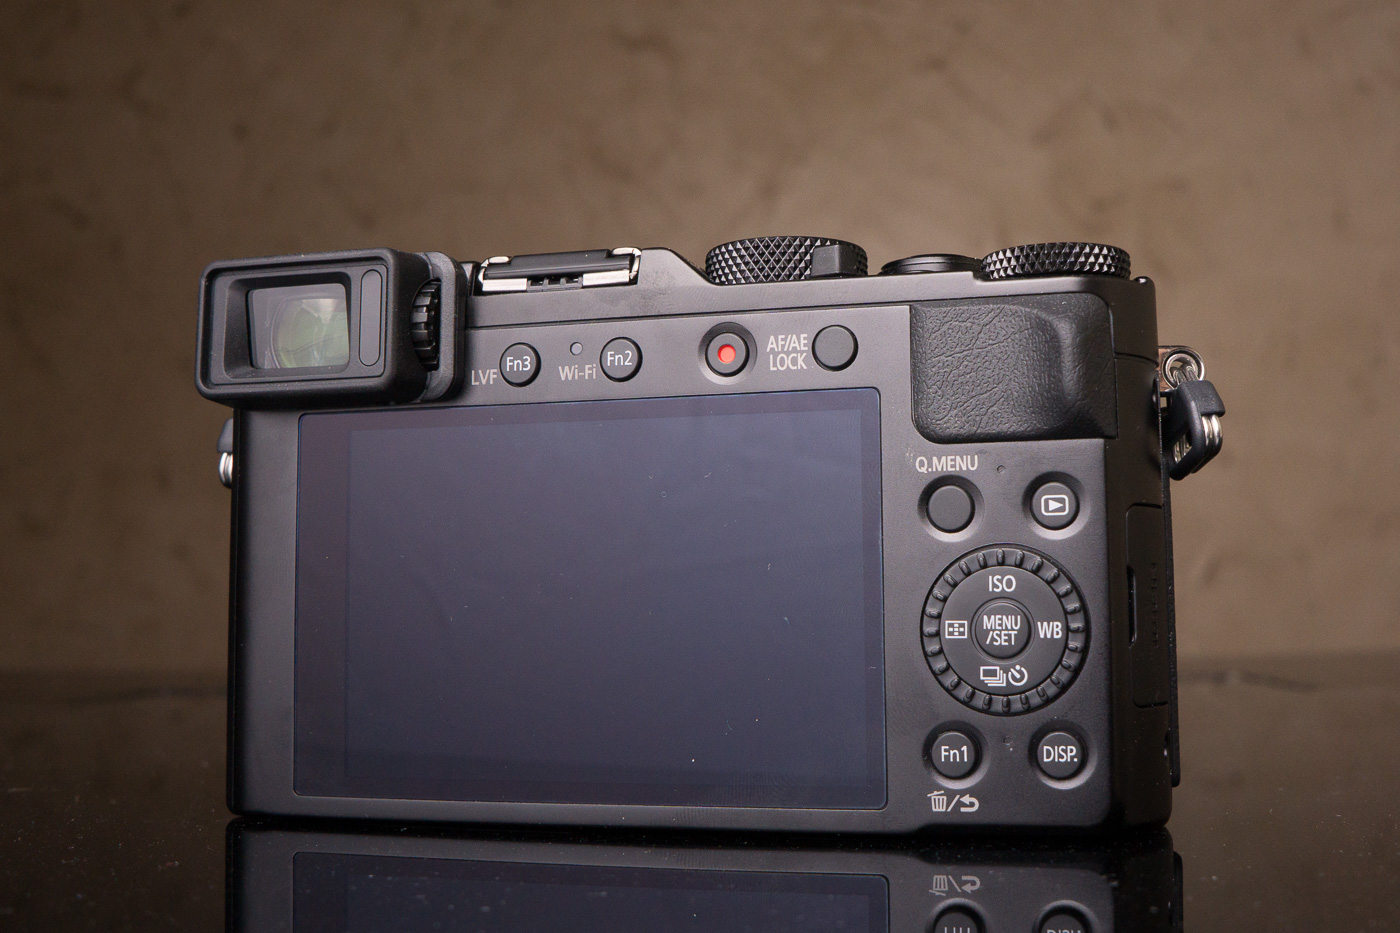 Setup for the shot was very easy on the LX100, I only wish it had a tilting LCD to make lower shots easier to compose. Other than that, it was very easy to manual focus and the camera felt very fast in operation. The LX100 has a dedicated mechanical switch for choosing manual focus so there was no searching through menus needed as with the previous three cameras. The focusing felt nearly linear and required only a small amount of rotation to get through the focusing range. Overall, the LX100 was a joy to use, the only negative I could find was that it didn’t have a tilt screen so a low slung shot was a bit more difficult to frame. Image quality seems better than the Canon cameras, especially in regards to detail (focusing was much easier than on the Canons) but perhaps actually a bit heavier grain than any of the previous cameras. I would have expected the larger 4/3″ sensor on the LX100 to be better with grain and noise than the smaller 1″ sensor on the RX100 III.
Fujifilm X30
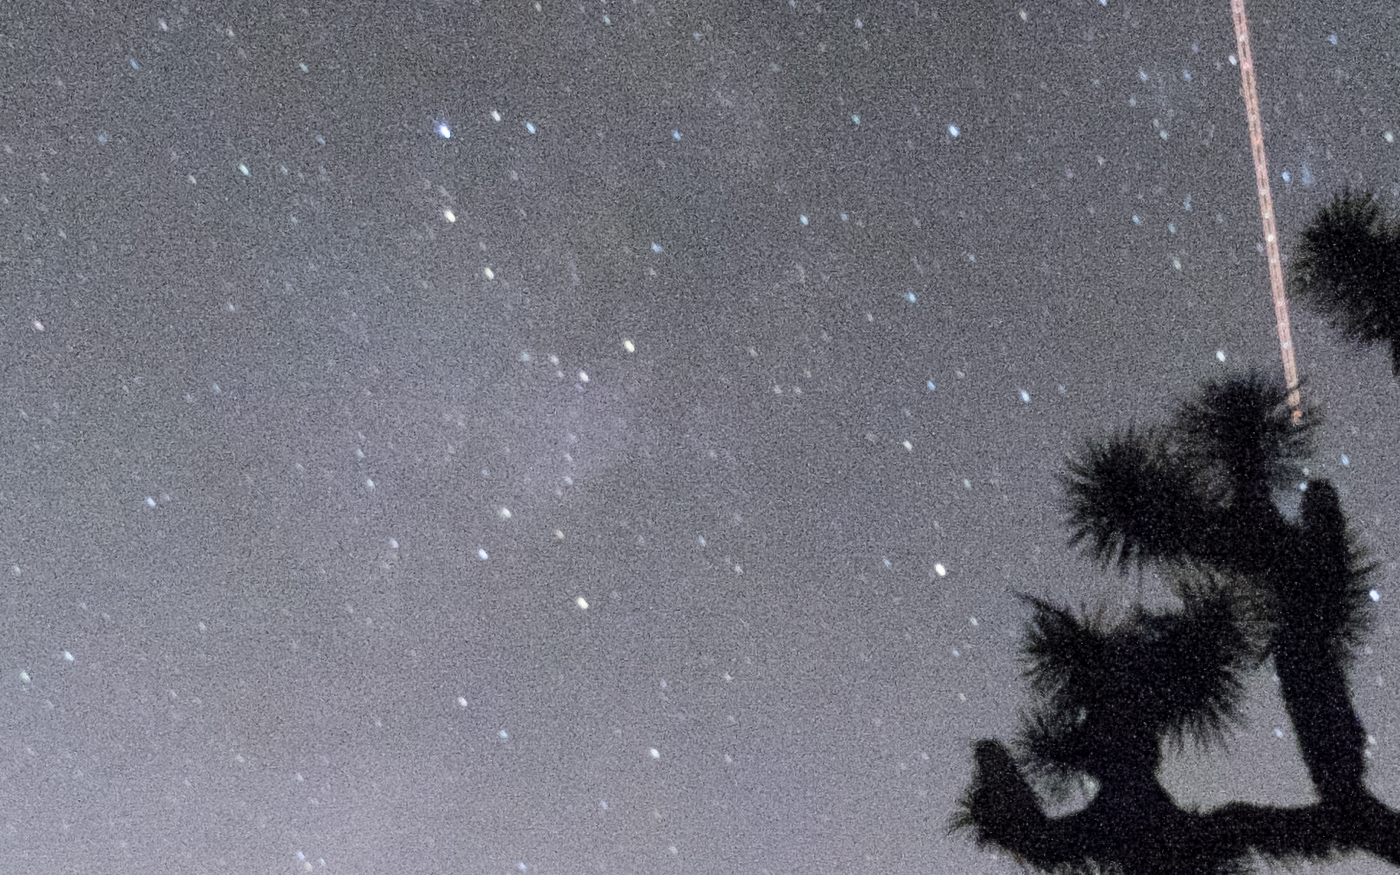
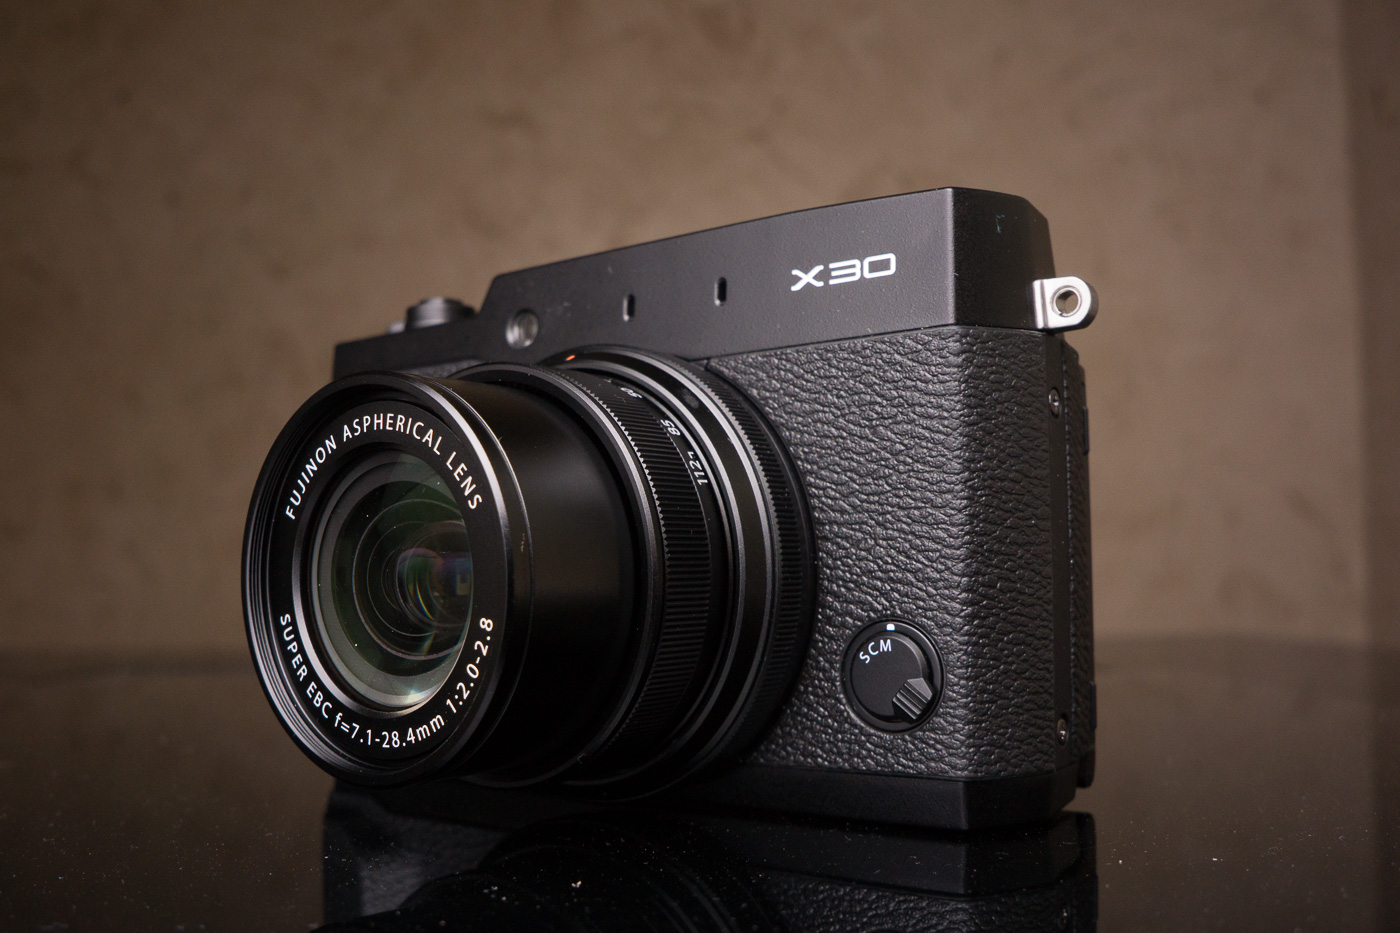 The Fujifilm X30 was an unexpected disappointment to use. There were a number of things that just didn’t seem to work well on the camera, especially in comparison to some of the other contenders. I was happy that it had a viewfinder but the placement of the finder nearer the center of the camera made it less nice to use in daylight when compared to the viewfinders on the RX100 III and the DMC-LX100, especially since it did not have a deep eyecup. I was also happy that it had a tilting LCD like most of the other cameras (save for the LX100). It also has a dedicated mechanical switch for choosing manual focus and the manual focusing ring is fast to use but the live view feed was very dark and difficult to focus at night so I was limited to setting it to it’s infinity mark via its electronic distance scale (which is rarely accurate). I did not know prior to selecting the X30 for this shootout that it has inherent limitations that completely hinder its low-light shooting capability. The X30 is not capable of shooting simultaneously at high ISO and long shutter speed. Setting the ISO to 3200 and the shutter speed is limited to 1 second at the longest. If setting the shutter to 30 seconds, the ISO is limited to 100. This limitation prevents the X30 from being able to shoot at low enough exposure values for shooting the Milky Way.
 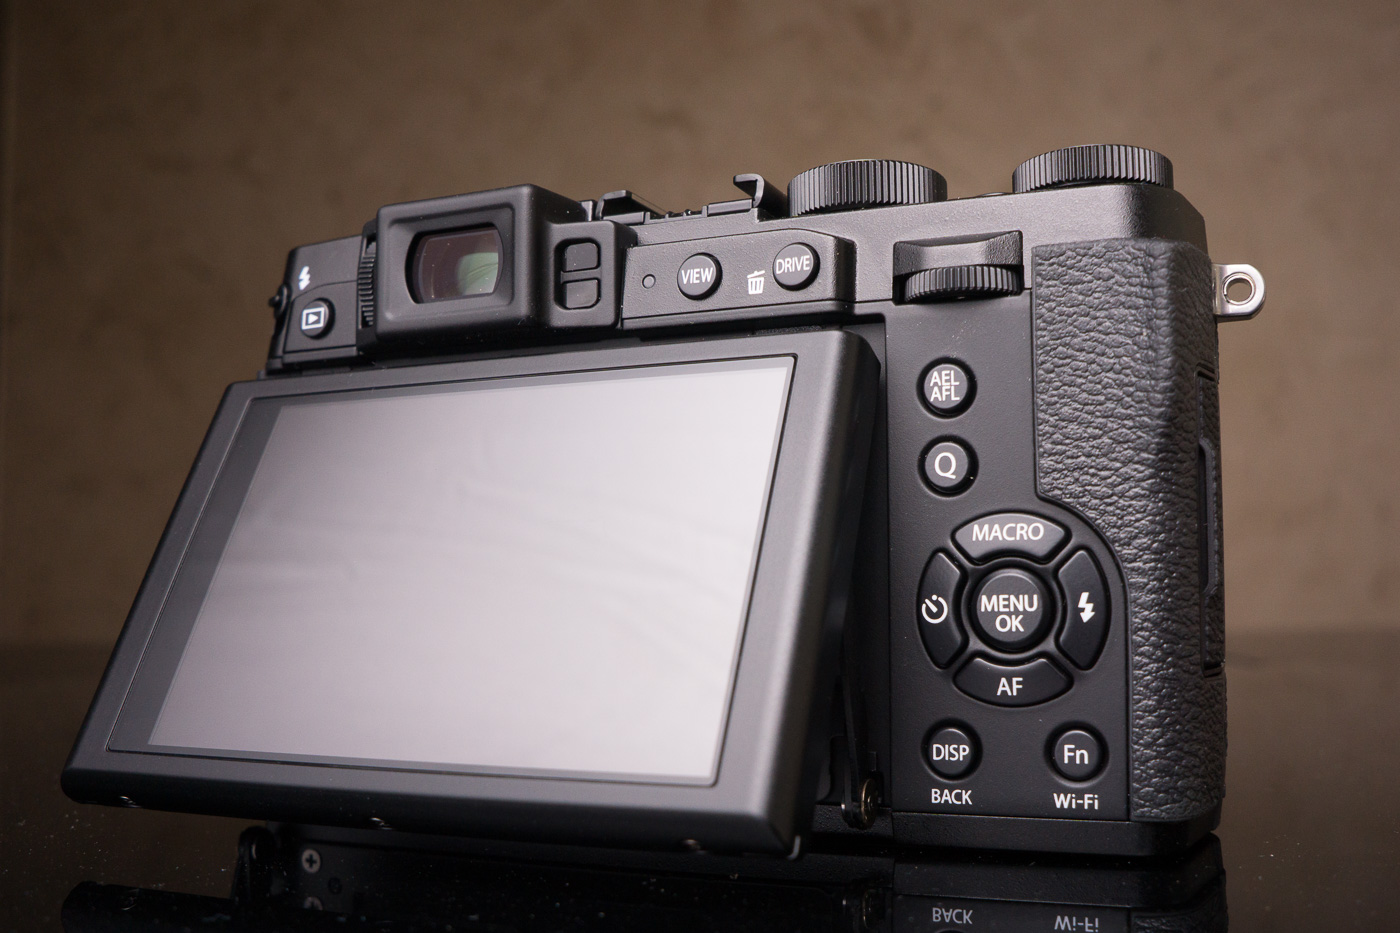 Despite the hindering exposure limitation, I still made an exposure with the X30 by shooting a 30 second shutter at f/2.0 and ISO 100 (the brightest exposure I could get out of it). I then pushed the exposure 5 stops in post processing to try and match the brightness of the exposures from all the other cameras just to see what the camera could do even with this limitation. Pushing in post processing is very similar to what the camera would do anyway for ISO gain so I think this is a valid method. The only problem is that this is post-camera-electronics so it’s much more prone to noise than if I was able to shoot at ISO 3200. The results are comparatively disappointing but better than I would have though for being shot at ISO 100. I would never have expected an enthusiast oriented camera to have such limitations. I think it’s easy to conclude that the X30 is not made for low light shooting but it’s still interesting that I was able to coax as much brightness out of the image and that the Milky Way is even remotely visible.

I think it’s fair to say that the X30 was a disappointment. I’m not sure why Fujifilm built in such limitations. Compared to their amazing X-T1 and X100T, the limitations built into the X30 make it seem like a toy.
RAW Image Quality Compared
Let’s take a look at all the images at a 100% crop to compare how each camera did in regards to noise and detail. All of the below crops are white balanced but otherwise unprocessed RAW exported directly to JPEG with default Lightroom settings. The X30 file was pushed several stops to approximately ISO 3200 to match the brightness value of the other cameras. Note that the Fujifilm X30 image is out of focus: it was impossible for us to acquire proper focus with the limited live view feed on the camera.
Conclusions
So it’s possible to capture the Milky Way with a point and shoot, how exciting! I am honestly rather impressed by the image quality results from nearly all of these cameras. It should be noted that the Fujifilm X30 is hindered by it’s built-in exposure limitations. However, even with this limitation, it was still possible to coax the Milky Way out of the X30’s severely underexposed RAW image which is impressive in its own right. I really wanted to like the X30 as I love all the other Fujifilm cameras I have used in the past but it’s just not up to the competition in this shooting environment.
As far as gauging image quality, I would have to initially point out my two personal favorites: the Sony RX100 III and the Panasonic Lumix DMC-LX100. Both the Sony and the Panasonic were the most fun of the bunch to use and their images speak for themselves. I think the G1X II and the G7 both have good image quality but they are exceedingly difficult to use for this type of photography. The G7X and G1 X II, are both bested by their rivals when it comes to shooting experience. The lack of a viewfinder on both the G7 X and G1 X II make for a mediocre daytime shooting experience and I think (even with the discovery of things like the G7 X’s focus lock mode) their manual focus systems are complete and utter rubbish. If you’re shopping for a point and shoot, look at the RX100 III or the LX100 first. It’s possible to make a clean image of the Milky Way with all four of these cameras but I wouldn’t want to try to do it again with the two Canons.
On the tail end, if you’re looking for a point and shoot that can do low-light photos, the X30 should not be considered due to its built in exposure restrictions. Both the RX100 III and the LX100 performed very well from both a handling and an image quality standpoint. Both were a downright joy to use and neither felt at all like a point and shoot in operation, save for their fixed lenses. They’re both very high quality, very serious cameras for the photography enthusiast. Both offer different experiences for different photographers: Some will love the compact pocketable size of the RX100 III while others might like the much more ergonomic grip and larger body of the LX100.
The LX100 also has a few unique tricks up its sleeve like internal 4K video recording, dedicated shutter speed, aperture, exposure compensation dials, a manual focus selector switch right on the lens, and a variable aspect ratio selector. The RX100 III also has its own unique features over the LX100 like 20.1 megapixels (almost twice that of the LX100), a tilting LCD for low slung shots or even selfies, and a retractable viewfinder.
I would have no hesitation buying either the Sony or Panasonic, they’re both excellent cameras. Between our two favorites, the LX100 and the RX100 III, and in the context of this challenge, I must give the edge to the Sony RX100 III. It has slightly lower overall image noise when shooting in these conditions. It also has noticeably more resolution (for stills), and its tilting LCD makes low tripod composition much easier which is a huge benefit in terms of usability.
Winner:
Sony RX100 III
UPDATE: April 2015
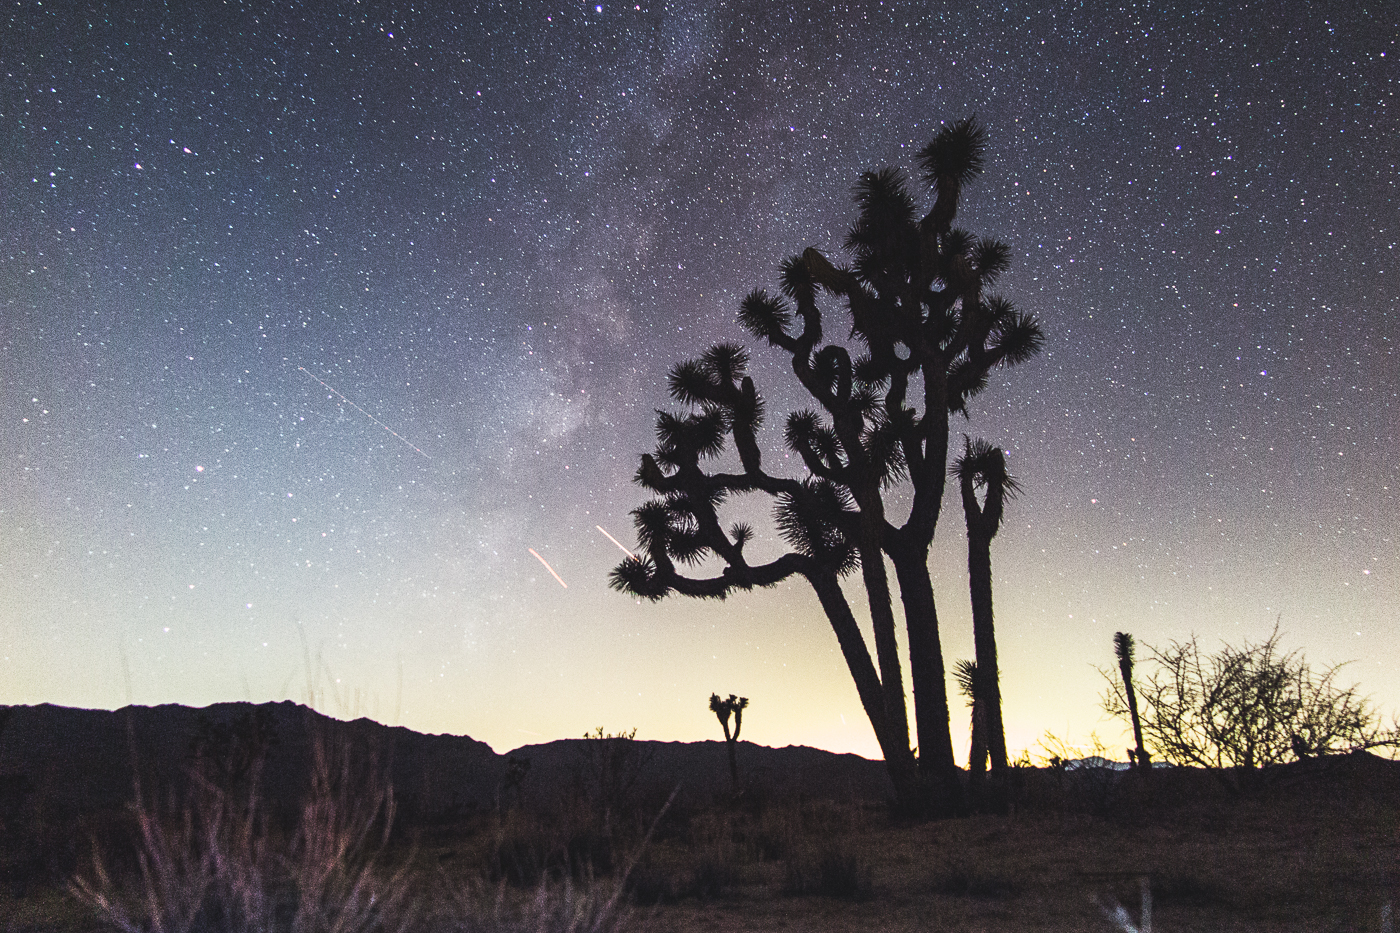
We liked the RX100 III so much that we decided to buy it from B&H to serve the role as a compact backup camera and travel friendly shooter. Check out our continued astrophotography review of the RX100 series. We think its diminutive size and excellent low-light performance make it the perfect “real camera” for social situations and for times when bringing a big camera just is not practical. We have since been able to shoot with the RX100 III in more favorable conditions for astrophotography and just as our comparison here indicates, it performs most excellently. In April of 2015 we returned to one of my favorite locations for astrophotography: Trona Pinnacles, California and returned with some satisfying results:
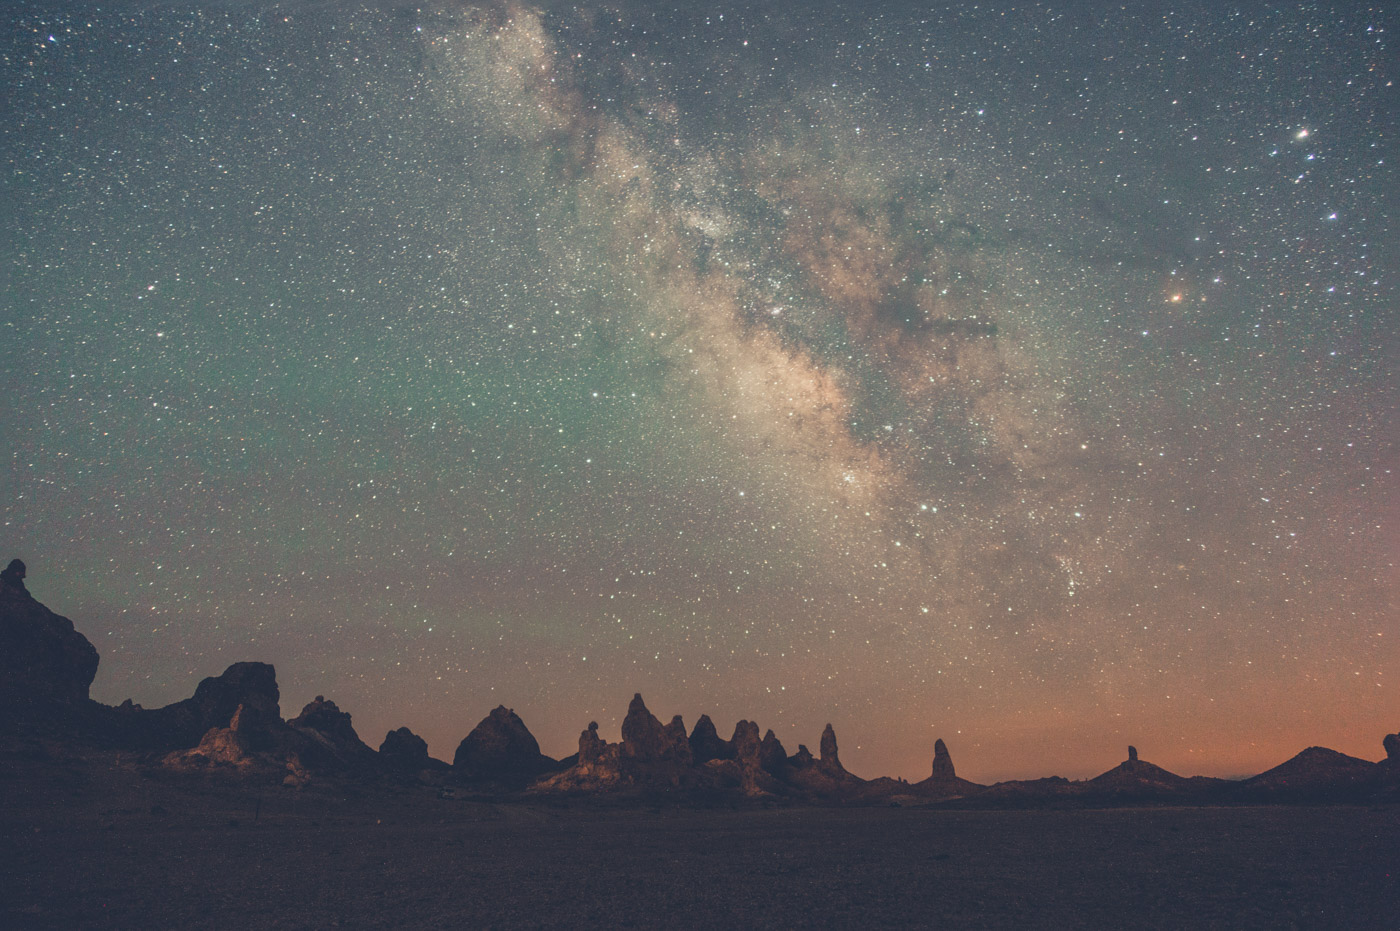
Everything about the camera performed great in these very dark conditions. I cannot communicate enough how easy it was to use the camera for astrophotography. Manual focus on the stars was simple, the tilt screen made it nice to use low to the ground, everything behaved just as I would have expected from a full frame Sony camera. If you want a compact camera that can shoot excellent photos in extremely low light, any of the cameras here will work but the RX100III offers a particularly well rounded experience with uncommonly good performance.
We hope you enjoyed this review! It’s our first gear battle but it certainly won’t be our last. If you have any questions or comments, let us know in the comment section below. Also, if you have any specific requests for future reviews, we’re always looking for suggestions!
Links:
- Sony RX100 III (B&H)
- Panasonic Lumix DMC-LX100 (B&H)
- Canon G7 X (B&H)
- Canon G1 X II (B&H)
- Fujifilm X30 (B&H)
Disclosure
We are a participant in the Amazon Services LLC Associates Program, an affiliate advertising program designed to provide a means for us to earn fees by linking to Amazon.com and affiliated sites. We are also a participant in the B&H Affiliate Program which also allows us to earn fees by linking to bhphotovideo.com.
Learn Astrophotography
Astrophotography 101 is completely free for everyone. All of the lessons are available on the Lonely Speck Astrophotography 101 page for you to access at any time. Enter your email and whenever we post a new lesson you’ll receive it in your inbox. We won’t spam you and your email will stay secure. Furthermore, updates will be sent out only periodically, usually less than once per week.
Help us help you!
Believe it or not, Lonely Speck is my full-time job. It’s been an amazing experience for us to see a community develop around learning astrophotography and we’re so happy to be a small part of it. I have learned that amazing things happen when you ask for help so remember that we are always here for you. If you have any questions about photography or just want to share a story, contact us! If you find the articles here helpful, consider helping us out with a donation.
[button font_size=”16″ color=”#136e9f” text_color=”#ffffff” url=”https://www.paypal.com/cgi-bin/webscr?cmd=_donations&business=lonelyspeckblog%40gmail.com&item_name=These+tips+help+keep+lonelyspeck.com+running.¤cy_code=USD&source=url” target=”_blank”]Donate[/button]
Thanks so much for being a part of our astrophotography adventure.
-Ian
As an astrophotographer, I have to say the Canon G1 X II and Fujifilm X30 are the superior RAW samples for Milky Way. The Sony is cleaner but there are definitely less stars in their RAW image which reminds of the “star eater” issue that some folks love to deny. The disappearance of those tiny stars speaks to a lower inherent ability to record faint nebulosity (especially H-alpha). I suppose one could argue that a “serious” astrophotographer would not be looking at point and shoot cameras (a fair point), but the seemingly noisier results (and more revealing) of the Canon and Fujifilm give the end user more final say over what the image will show or not show. After all, a little bit of work in post can make any of those raws look like Sony. I guess it comes down to whether you want to have the most effecient raw for stacked astro images. Most people who do shoot occasional night landscapes don’t care enough about these distinctions so yeah…
Regarding the Panasonic lx100. With the push of a button it creates its own WiFi which then enables remote control via smartphone. The “tilting viewfinder” is redundant as now its on your phone along with the controls… Great for astrophotography.
You’ve got a specific star mode for the canon G7x: really super easy to use with spectacular rendering. Give it a try! 😉
Thanks for this super cool test. I can only add that I tested pure-randomly the strartrails scene mode (manually impossible) on tiny Nikon Coolpix A900 and catched whole Iridium18 flash here at 4th pic, during LAST 20sec shot of whole sequence:
http://www.astro.cz/fotogalerie/ctenarske-fotogalerie/nejnovejsi-fotografie-ctenaru.html?id=5092
Wow excellent article! If only you could do a new review of the LX15 with the F1.4 vs RX100mk5 that would be awesome!! Please!!!!!! I am waiting 🙂
I agree. I to would like to see the lx10/15 compared against the rx100 3/5!
Please please please do a review of the LX15!
Yes, please, add Panasonic LX10/LX15 and Canon G7 X Mark II!