

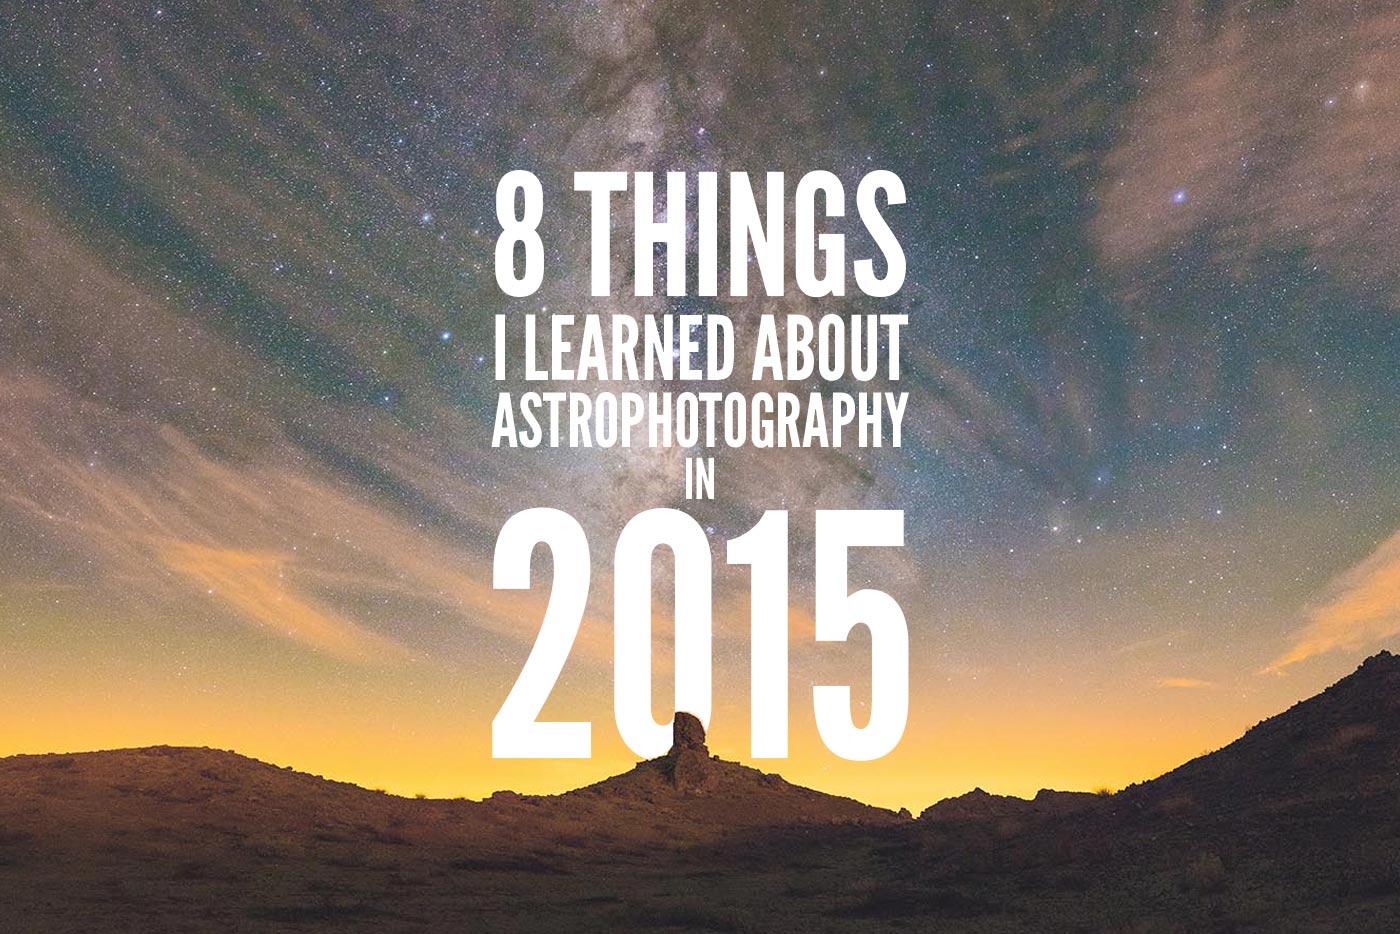
These are a few of my favorite things that I learned about astrophotography in 2015.
Introduction
2015 was a spectacular year. I made some of my favorite astrophotos this year and I even had the pleasure to meet some of you in person and share astrophotography experiences face-to-face. My girlfriend Diana and I traveled to many new places and experienced so many beautiful things.

I approached each post on Lonely Speck this last year as a project and I learned a lot doing each one. If I’m interested in learning a new technique, or talking about one that I use regularly, the project challenge is to organize that technique into a concise and beginner friendly recipe. Sometimes I spend months trying to perfect a technique or build a tutorial so that it can be explained in a 15-20 minute video or post.

When I review a piece of photography gear, I make sure that I know every detail about the operation of that gear and I won’t put it down until I’m satisfied with the images that I’ve produced with it. I don’t write daily on Lonely Speck because I want to make sure that the content that I’m writing is the best it can be.
These are a few of the lessons that I learned while writing for Lonely Speck in 2015.
1. Your Gear Doesn’t Really Matter
I shot on a wide range of gear this year from the top-of-the-line full-frame cameras to wickedly slow lenses to point-and-shoots and even smartphones. There’s something that holds true for all of these pieces of equipment: they all impressed me in their own ways. Modern cameras are simply amazing.

Yes, there are always bigger and better tools. But all too often I hear from photographers that are looking to sell off all their current gear in order to buy the latest and greatest full-frame sensor monster that everyone is talking about.
Newer, bigger and more expensive equipment usually does make a difference in improving image quality, but you can usually achieve greater improvements by learning new techniques, sticking with the gear you have and mastering it.

The one experience that really reinforced this idea in me was when my Sony a7II, the one “serious” camera that I opted to bring on our 50 U.S. State road trip (northtosouth.us), died in the middle of our trip. Without warning, the a7II just stopped working and I was stuck with nothing but my smartphone and the Sony RX100III (Full Review). Yes, the Sony RX100III isn’t a typical point-and-shoot, but in the realm of astrophotography, it’s probably a piece of gear that would otherwise be left at home for the bigger and better camera.
So, I embraced the little point and shoot as my “serious” camera while the a7II was sent in for repair. As it turned out, the RX100III made some great photos. They were almost as clean straight out of the camera as what I would have expected from an APS-C DSLR.
Shooting on a more limited camera also prompted me to employ a lot more use of advanced techniques that I usually reserve for rare occasions. I made a lot of multi-exposure stacks and when doing so, the results often met or even exceeded the quality of what I normally expected from a full-frame DSLR. And that leads me to:
2. Astrophotography is About Gathering Data
Astrophotography is a process for gathering light: a very small amount of photons that traveled hundreds to thousands of light years, gathered by a lens and converted to electrons by a sensor and recorded as data. The photons from these distant stars are our raw data. The more data we can collect, the better quality of the image.
If we were picking equipment and planning an astrophotography shoot that’s going to give us the absolute best data in a single exposure, we’d want a very large sensor camera and a very large aperture lens to collect the most light. Finally, we’d want to choose a place like Low-Earth-Orbit to place the camera in order to minimize the effects of “noisy” disturbances like light pollution and atmospheric distortion.
[himage]
 [/himage]
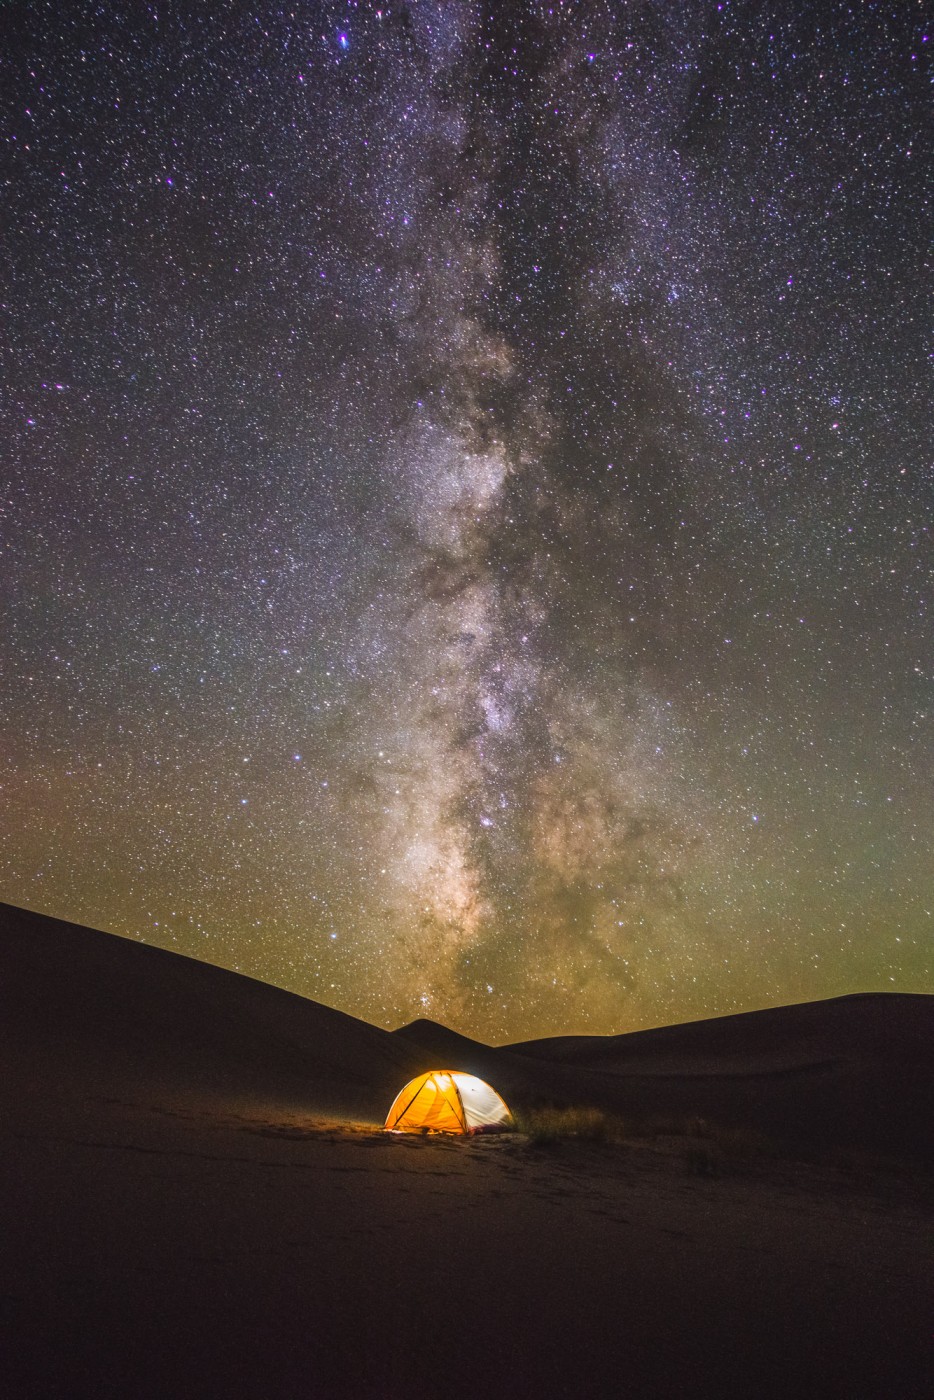
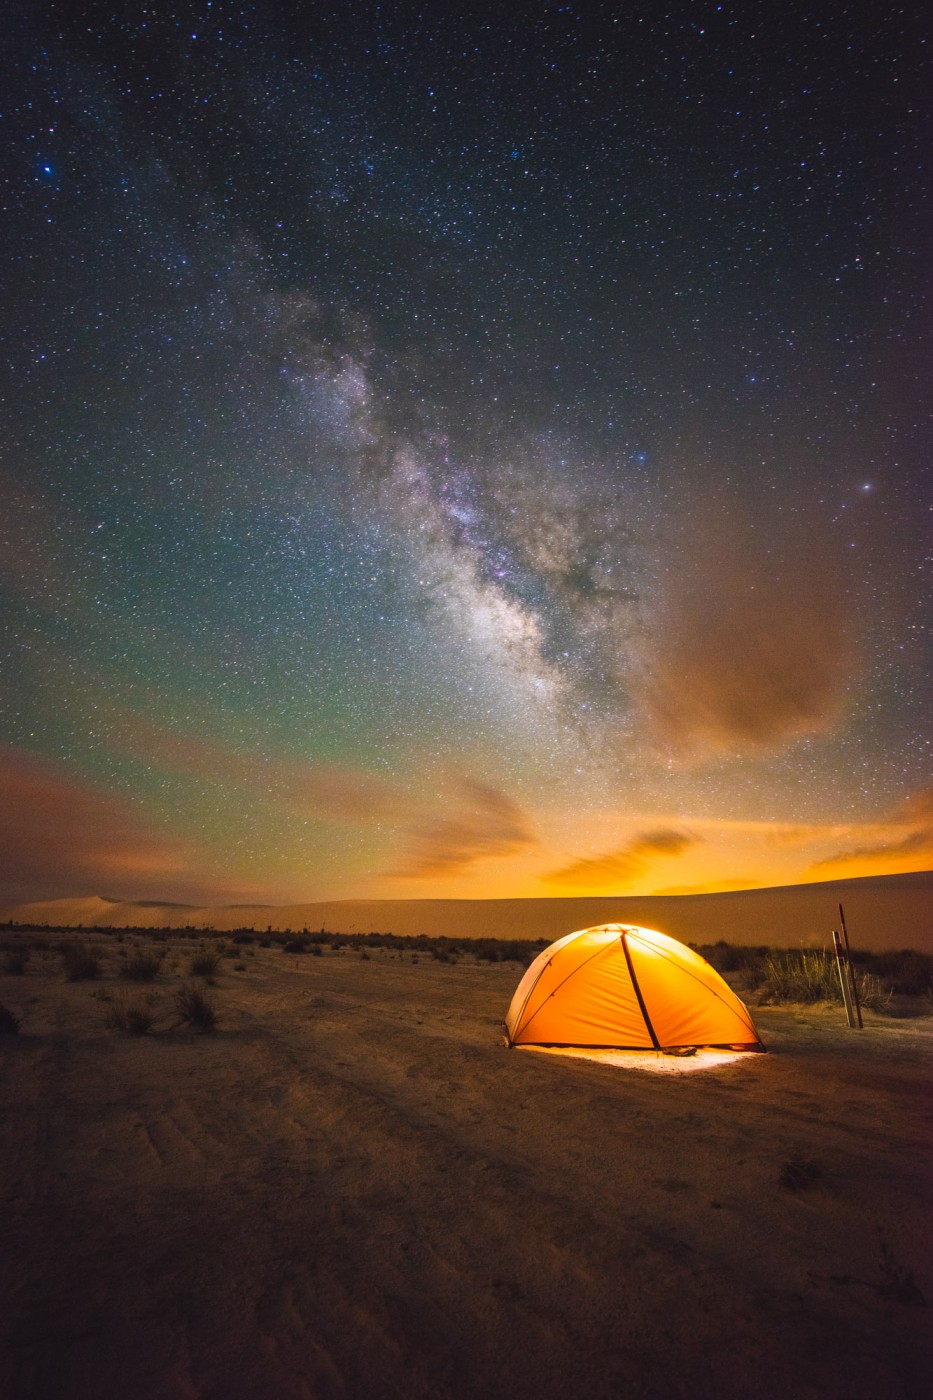
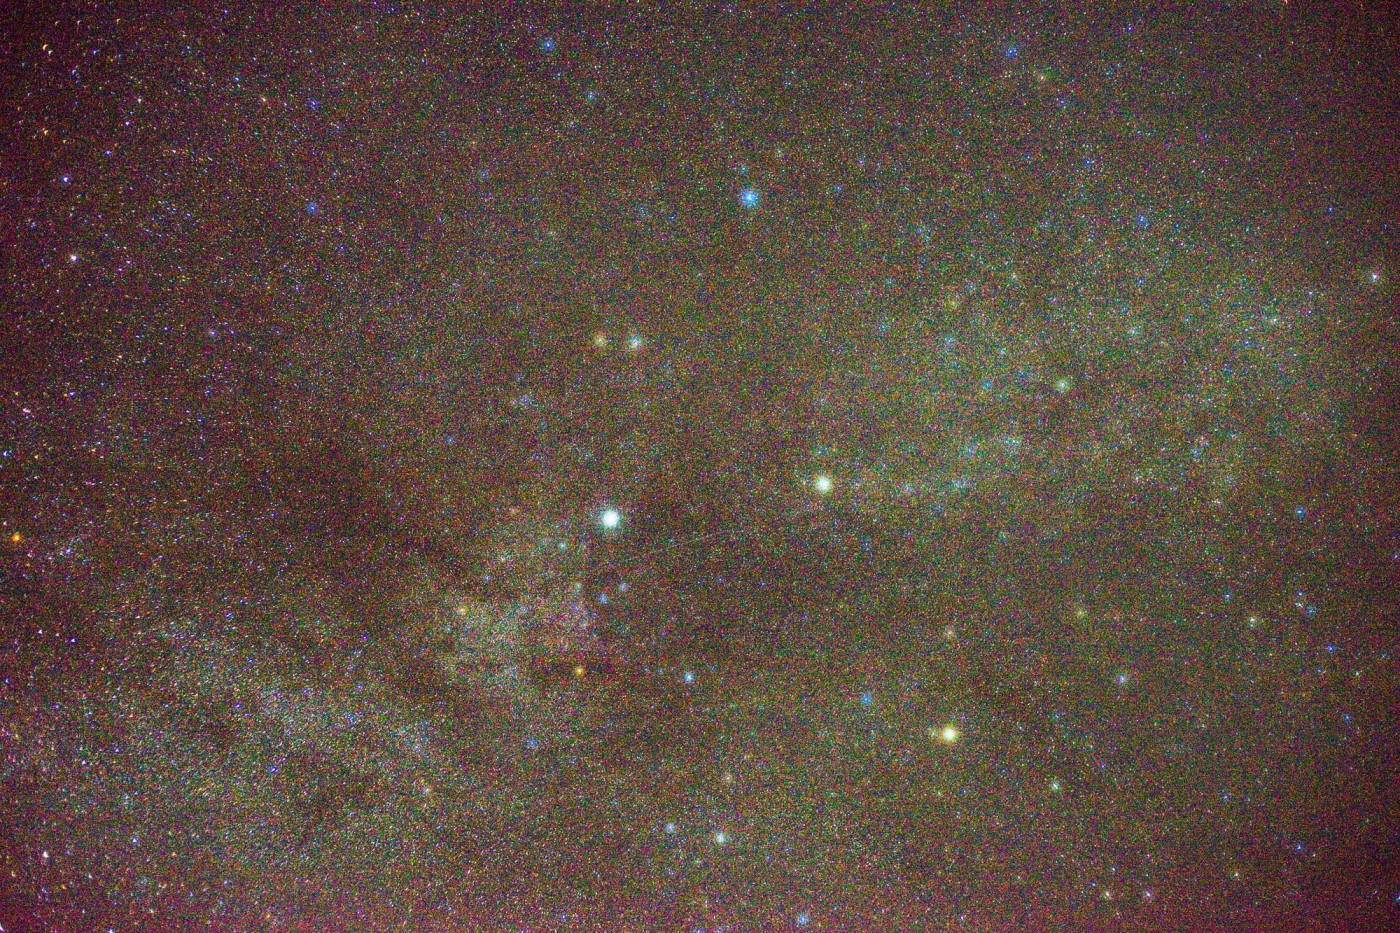
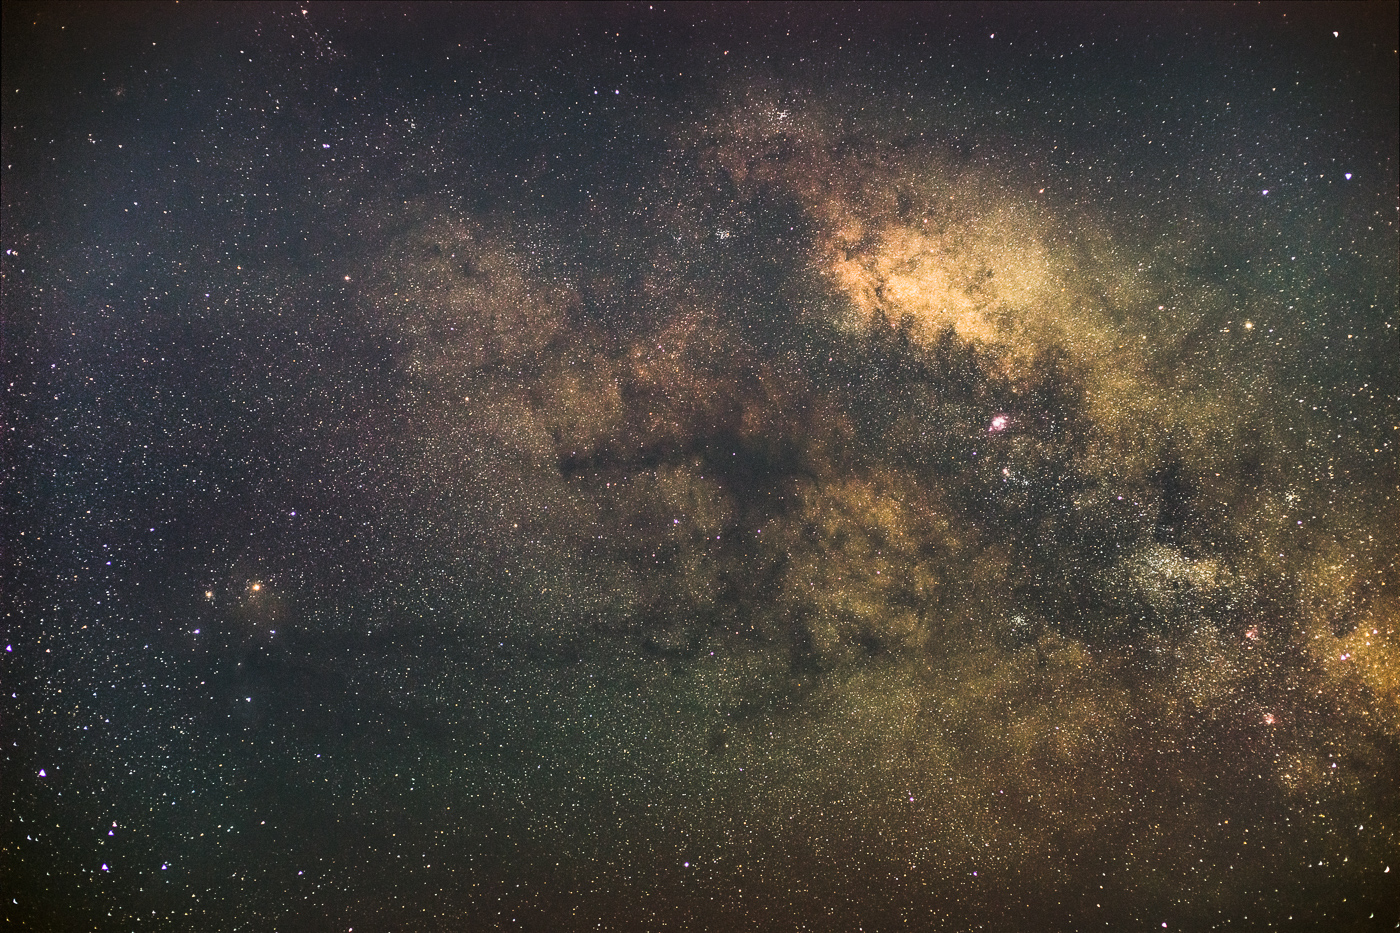
Before and After Image Stacking. 50mm, 15x6s, f/2.8, ISO 6400
Of course, we don’t always have the Hubble Space Telescope at our fingertips, but that doesn’t mean we can’t make a good astrophoto with our small-sensor small-lens point-and-shoot camera in a mildly light polluted, earthly location.
Little cameras with little lenses don’t collect very much light. But by combining many exposures, we can increase the amount of data we are collecting and improve image quality. This technique is called exposure stacking (tutorial) and it’s essentially the same exact technique used by the astronomers controlling the Hubble Space Telescope for photographing the most distant and oldest parts of our universe.

I made a lot of exposure-stacked images this year, especially with the Sony RX100III, and that made it possible to make some very high quality images from some very limited gear. If you want to improve the capability of the equipment you already have, take more exposures and stack. You can read about image stacking in our latest tutorial on the subject.
3. I Learned to Love Classic Manual Focus Lenses
My favorite piece of gear that I used in 2015 was the Voigtländer 15mm f/4.5 Heliar III (full review) manual focus lens. It’s vintage in feel but modern in optical quality. With a minimum f/number of f/4.5, it’s certainly not the fastest lens out there and thus it’s only OK in low-light conditions. With this lens, I shot most of my photos using image stacking, as I mentioned above, in order to improve the quality of photos that I could get from it.
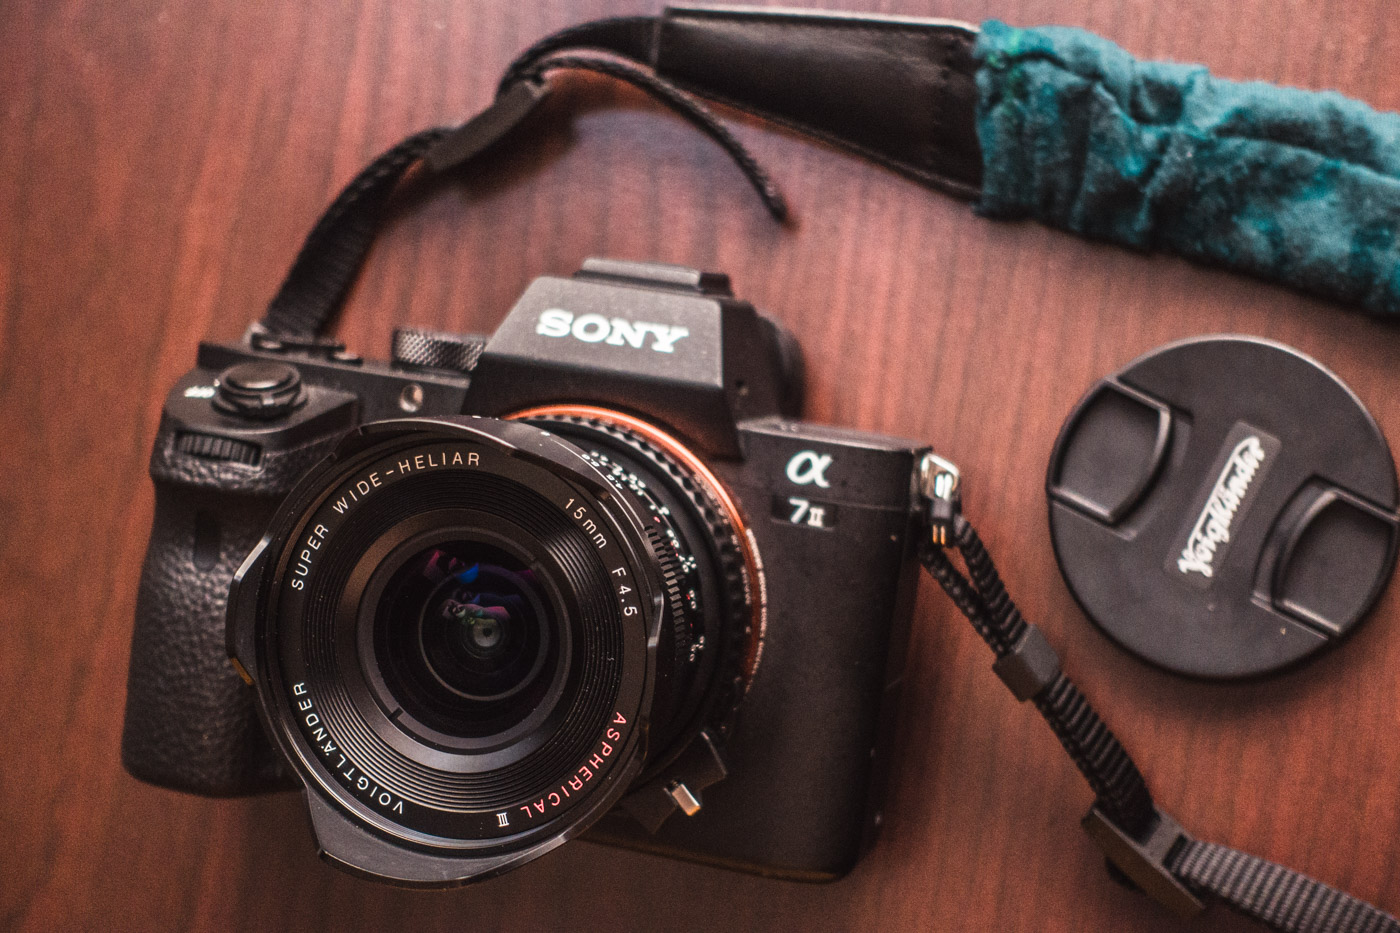
What I really love about using a manual lens like this is the feel. It has a perfect manual focusing ring. If mounted with the right adapter, infinity focus can be set perfectly, right at the hard-stop of the infinity mark, so there’s absolutely no fuss with focusing. Set it and forget it.
With the increased popularity of mirrorless cameras, adapting manual lenses has become easier than ever. Some of my favorite lenses are those offered in the Leica M mount, especially those from the more affordable Voigtländer brand. Most of their lenses are very small and compact, and all of them exhibit unique characteristics in image quality.
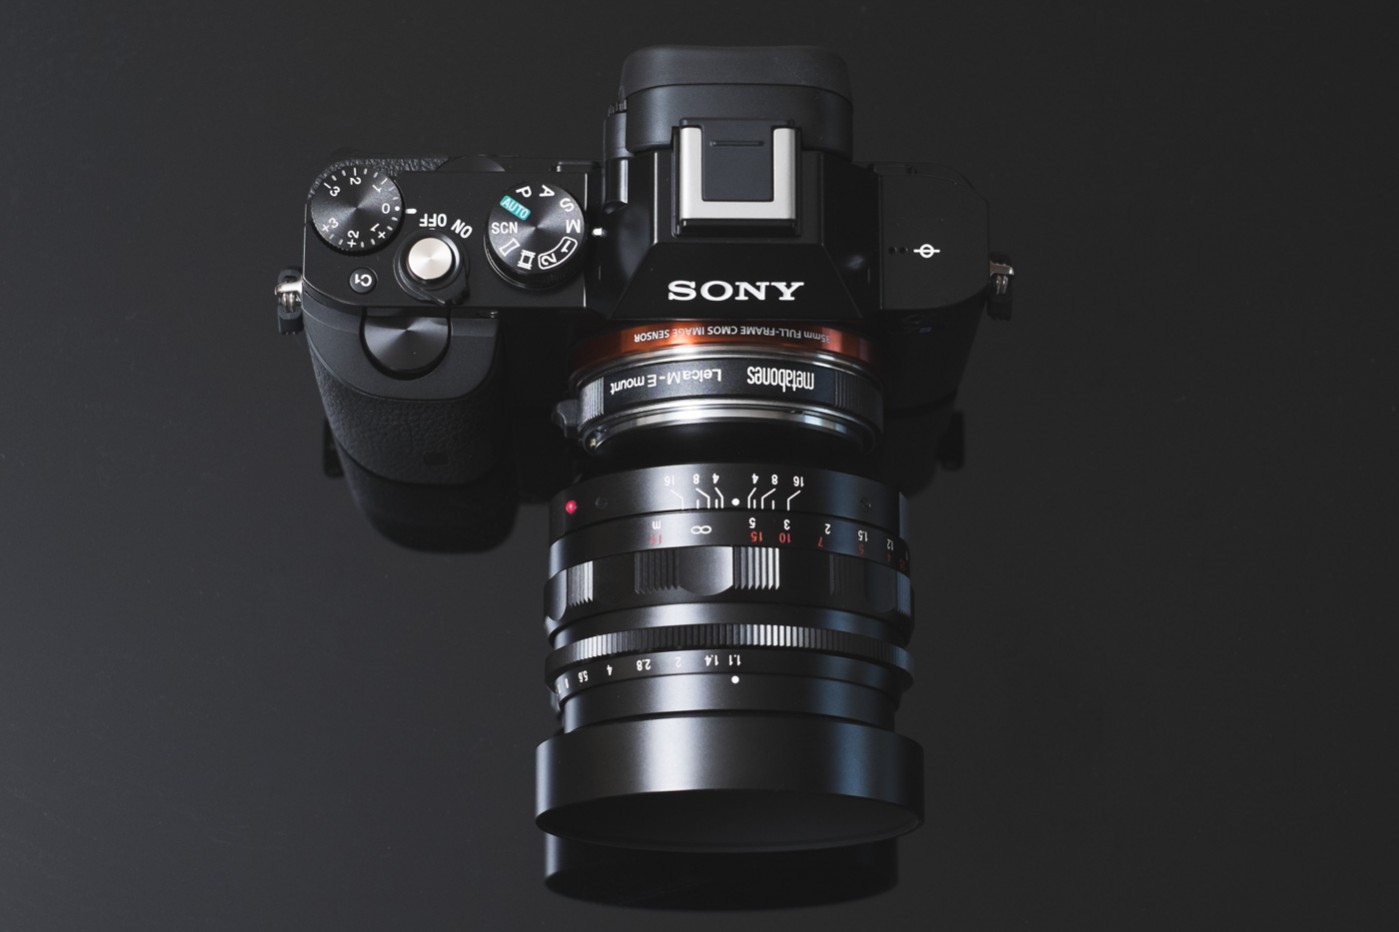
I’ve never found my Voigtländer lenses to ever be optically perfect. In fact, some of them might even be considered poor performers in some regards. Voigtländer’s 50mm f/1.1 Nokton is the most aberration-heavy lens I have ever seen when set to f/1.1. That said, I learned to stop it down to f/2.8 or f/4, and it has produced some of my favorite astrophotos to date.
When I compare my experiences using these classic manual focus lens designs to precise and modern autofocus lenses like my Sony Zeiss 55mm f/1.8, it almost feels like a different form of photography.
The Sony Zeiss 55mm f/1.8 has a modern focus-by-wire design that pops up an electronic distance scale and magnified focusing assist as soon as the manual focus ring is rotated. The focusing ring of the lens is also only finely textured and flush with the barrel of the lens, a design that intends the focusing ring to be forgotten, a secondary feature that’s expected to be used only sparingly. Don’t get me wrong, I love my modern 55mm f/1.8 but sometimes it’s nice to use some fully manual glass.
4. I Learned to Love the 50mm Prime
I’m usually the first to recommend the use of a fast wide angle prime like a 24mm f/1.4. But you don’t necessarily need the fastest wide angle lens to make great landscape astrophotos. Some of my best astrophotos were made on a regular old 50mm prime lens. Pretty much every lens manufacturer has one, and they start out pretty affordable. Even with a cheapo nifty-50 (full review), it’s possible to capture some wonderful details of the night sky.
My favorite technique is to combine several images into a moderately wide angle panorama. The 50mm can resolve finer detail than a shorter lens, so the final panorama usually has a much higher quality look than a single exposure shot on a wide angle lens.
I still love using wide angle lenses for astrophotography. They’re perfect for making a timelapse video, and it’s easier to compose a successful shot of the Milky Way with a wide angle lens. I still stand by the idea that it’s much easier to photograph the Milky Way with a wide angle lens, but if I’m out to create a super high quality and high resolution photograph of the night sky, I’d rather use a 50mm and make a panorama stitch (tutorial).
5. Focusing is Still Challenging
If there’s one thing that I scrutinize the most while shooting astrophotography, other than composition, it’s focusing. When working in the dark, it can be easy to accidentally bump the focus and ruin your next shot. I’ve made many a failed astrophoto by forgetting to re-check my focus, so I’ve made a habit of scrutinizing my focus as often as possible.
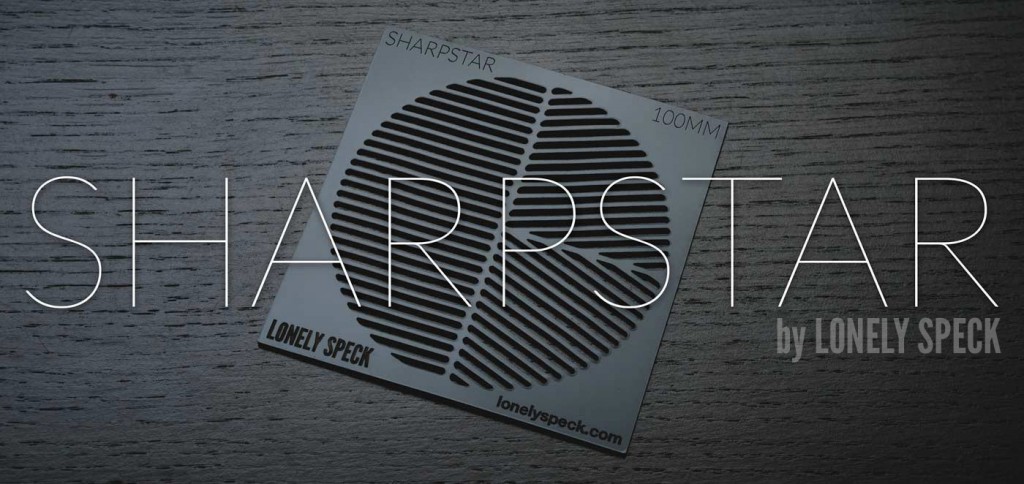
One of the things that has completely changed the way I approach focusing is the use of a focusing mask. While writing my latest tutorial about focusing, I knew that I couldn’t exclude the concept of a Bahtinov Mask, a simple tool that astronomers can use on their telescopes to help achieve precise focus.
There weren’t any off-the-shelf Bahtinov mask solutions for photography that I liked, so I made one called the SharpStar by Lonely Speck. Now I’m finding myself using the SharpStar often to achieve critical focus. It has removed the fuss of the focusing process for me and I hope that it will help other astrophotography enthusiasts in the same way. You can place an order for the SharpStar here.
6. Don’t Be Afraid to Stop Down a little
There’s a lot of fuss about lens aberration performance in the astrophotography community. This year, Tyler Sichelski wrote about a technique for removing aberrations in Photoshop, and I wrote an article about the various types of lens aberrations that affect astrophotos. I do find myself trying to find the very fastest lenses with absolutely no coma or astigmatism. But there’s an easier solution than buying a new expensive lens to get that extra bit of performance: just stop down.
Yeah, yeah, I know that you bought that f/1.4 lens so that you could use it at f/1.4. It is true that your lens will produce a brighter image of the night sky, with less noise at f/1.4 than if you had stopped the lens down to f/2 or f/2.8. But being able to stop that lens down just a little bit brings distinct benefits in sharpness, reduced aberration, and improved vignetting characteristics (which is particularly helpful for panorama stitching (tutorial).
Every camera lens ever made produces a sharper and more uniform image when stopped down a bit, and that should be reason enough to dial in a slightly higher f/number. Furthermore, an f/1.4 lens stopped down to f/2.8 will usually outperform a lens with a minimum f/number of f/2.8 in the sharpness and vignetting department.
The Canon 50mm f/1.8 STM (full review) is a mediocre lens for astrophotography at f/1.8, but it’s an excellent lens for astrophotography at f/2.8. Stop it down, and stop worrying. If you’re worried about not collecting enough light, stack some exposures.
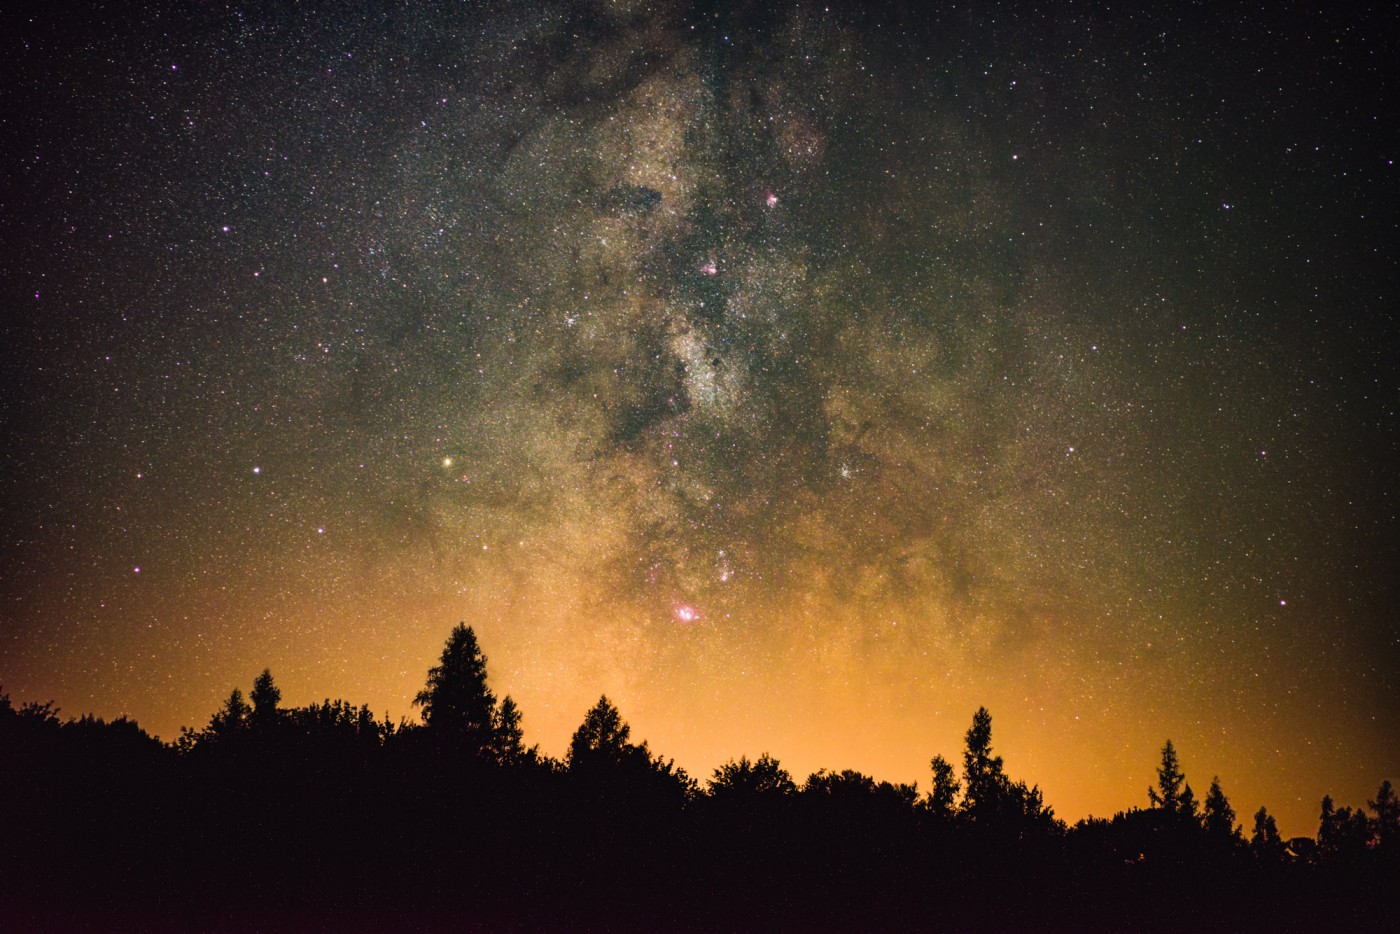
7. The Aurora is One of Nature’s Most Spectacular Shows
I was fortunate enough to witness and photograph the Aurora Borealis twice this year. In 2015, increased solar activity made for many opportunities to photograph the aurora, even at lower latitudes.
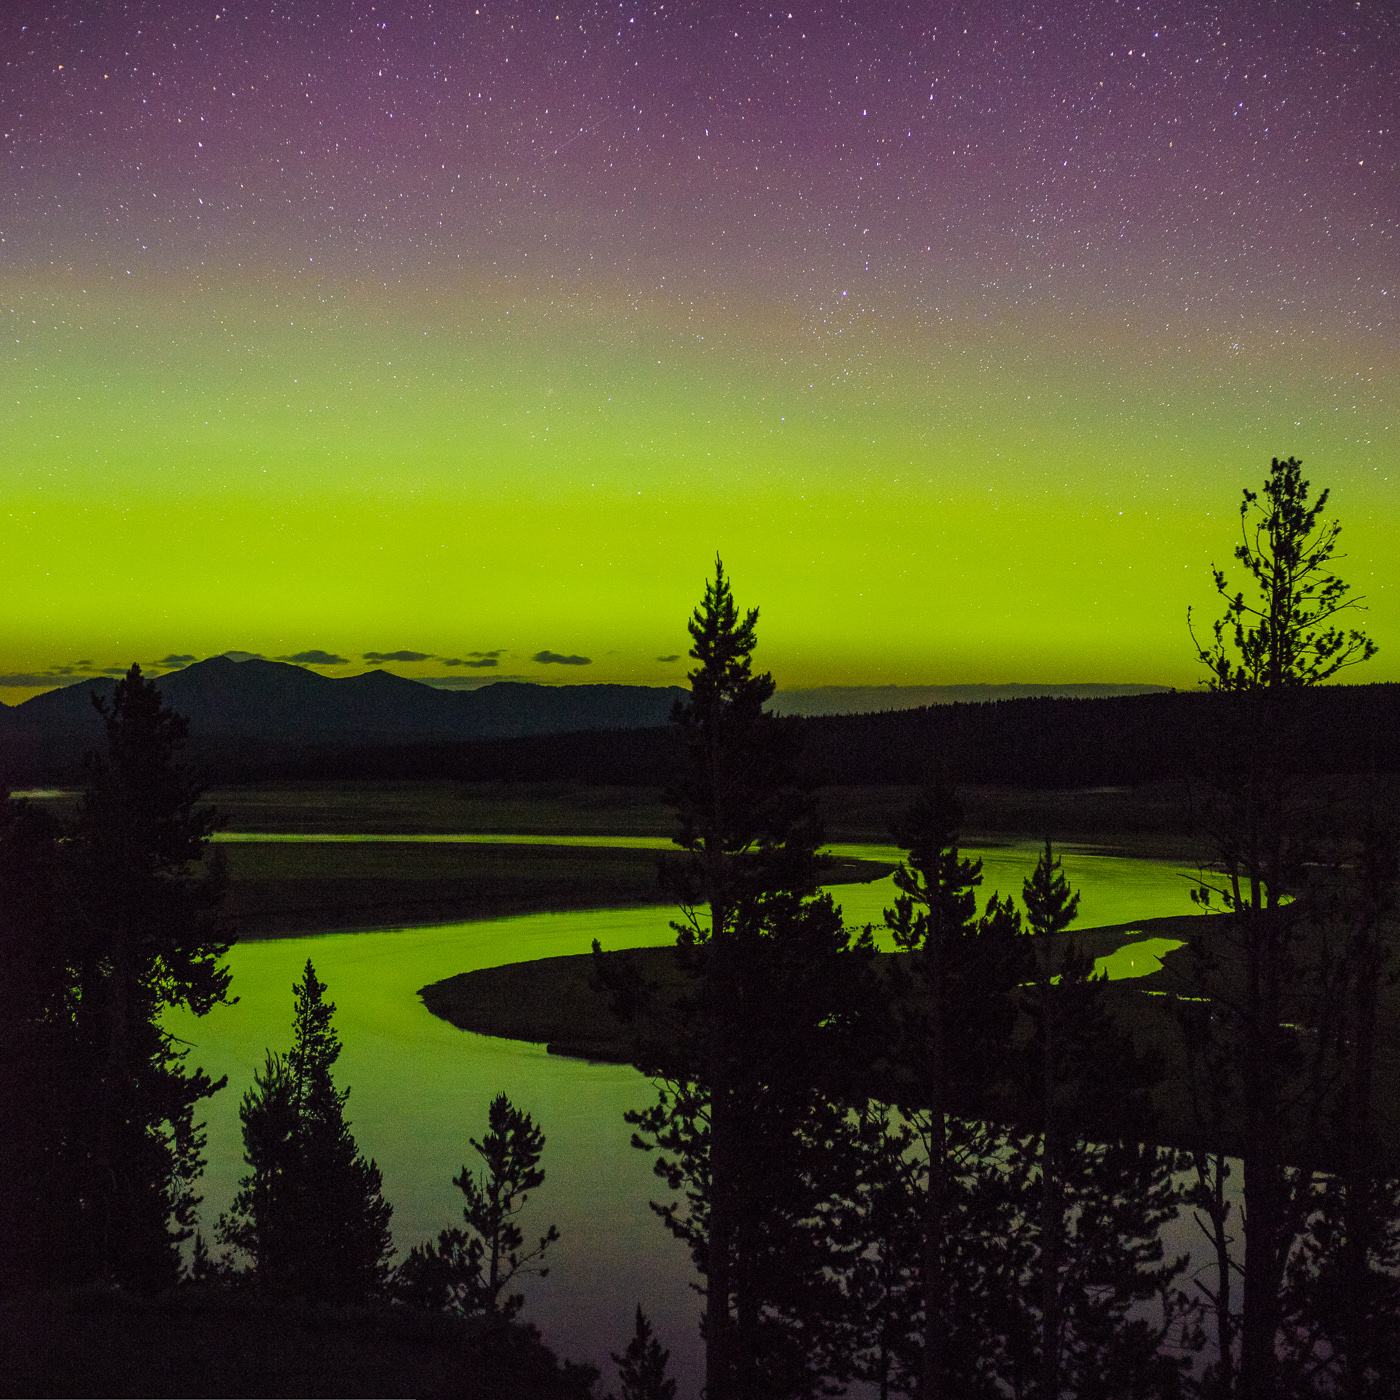
Our first night shooting the aurora was in Yellowstone National Park, Wyoming. Diana and I were just about to quit photographing for the night when I noticed a strange glow in the sky. It looked like cirrus clouds or something, but then they appeared to move. I remember thinking, “there’s no way that’s the aurora,” before looking again and realizing that it probably was. I promptly pulled the car over, fumbled with my camera and made my first exposure of one of the most brilliant and colorful displays of aurora in decades and the first aurora that we had ever seen.
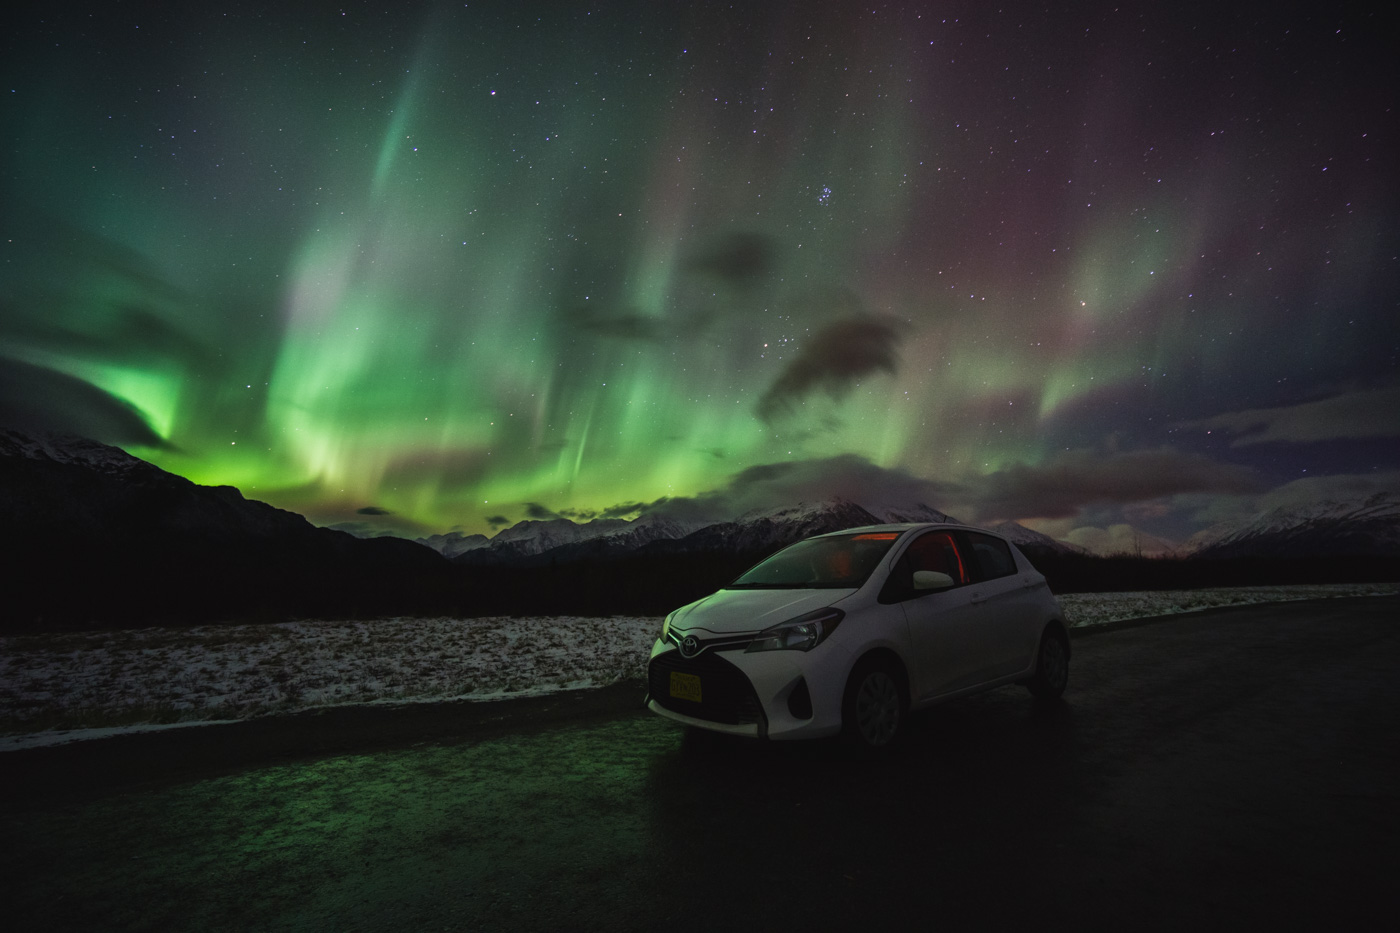
Our second opportunity to photograph the aurora was, appropriately, from Alaska. We visited Anchorage (northtosouth.us) for a couple weeks where we hiked and photographed wildlife aplenty (photoncollective.com). We had a lot of fun photographing bald eagles, but I really wanted another opportunity to photograph the aurora.
I monitored the aurora activity every day we were there, and either it was too cloudy or too inactive to be able to see it in Anchorage. Then, only a couple days before our scheduled departure, I got an alert from my “Aurora Alert” app saying that there was a high probability of intense auroral activity that evening. It just happened to be the only clear night that we had seen in weeks.
We thought that the aurora was spectacular from Wyoming but we had no idea just how amazing it would be from Alaska. In Wyoming the colors were completely muted and invisible to the naked eye. There was structure to the aurora but the intense magenta and green wasn’t apparent without a camera.
In Alaska, the aurora was much more intense. The green hues and purple glowing parts of the aurora were actually visible to the naked eye and the brightness and motion of the aurora was amplified greatly compared to our previous experience.
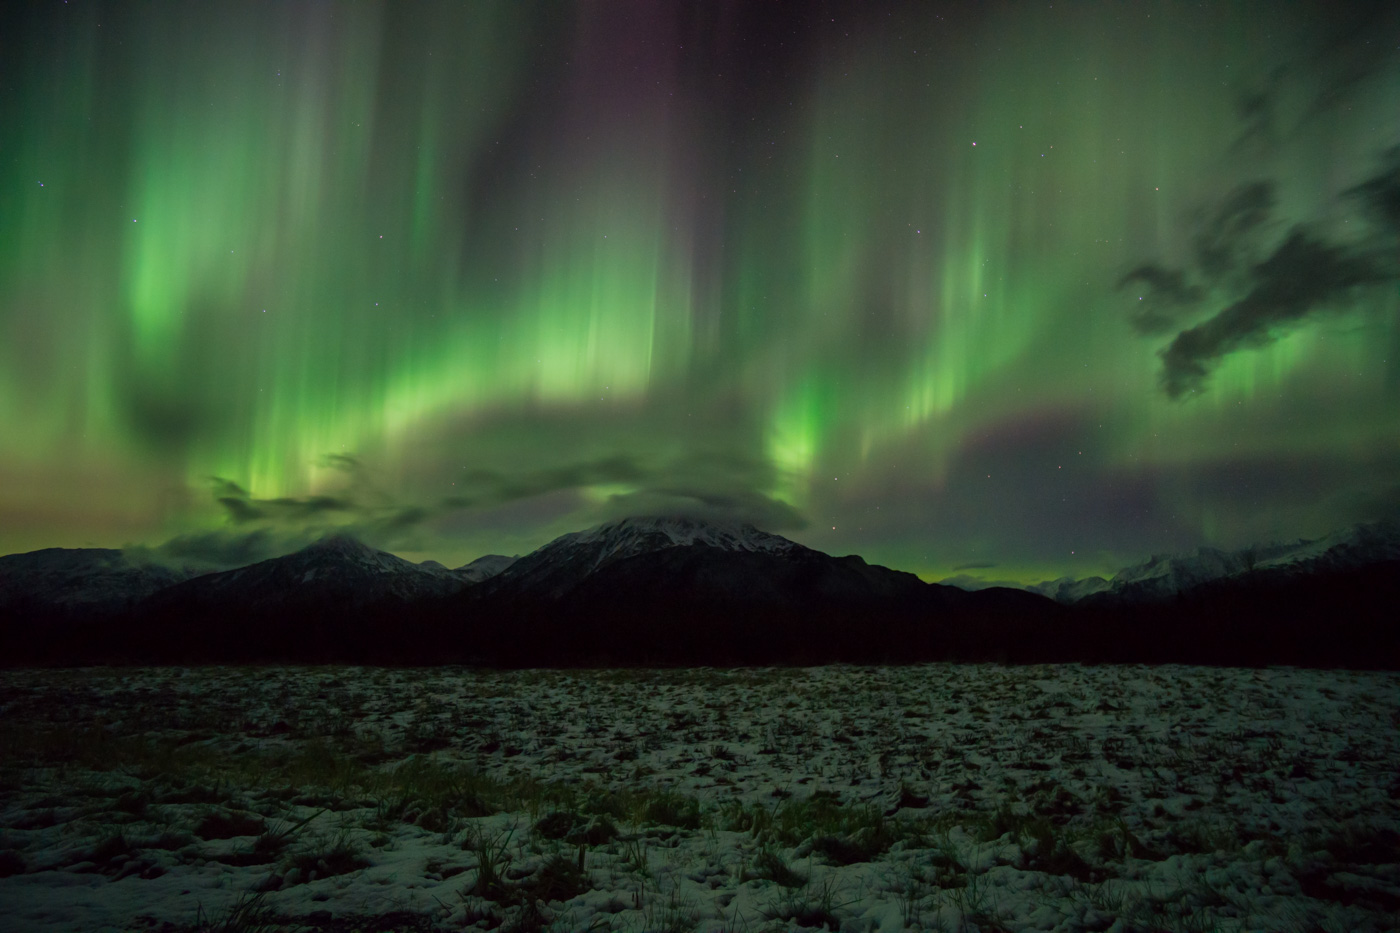
It really did feel like Mother Nature was putting on a show just for us, and it was absolutely spectacular and beautiful. I was literally jumping up and down in excitement and yelling “wow!” at the top of my lungs. I spent half my time watching it slack-jawed and dumbfounded, too wowed to even concentrate on taking photographs.
If you ever have the opportunity to witness the aurora, don’t pass it up.
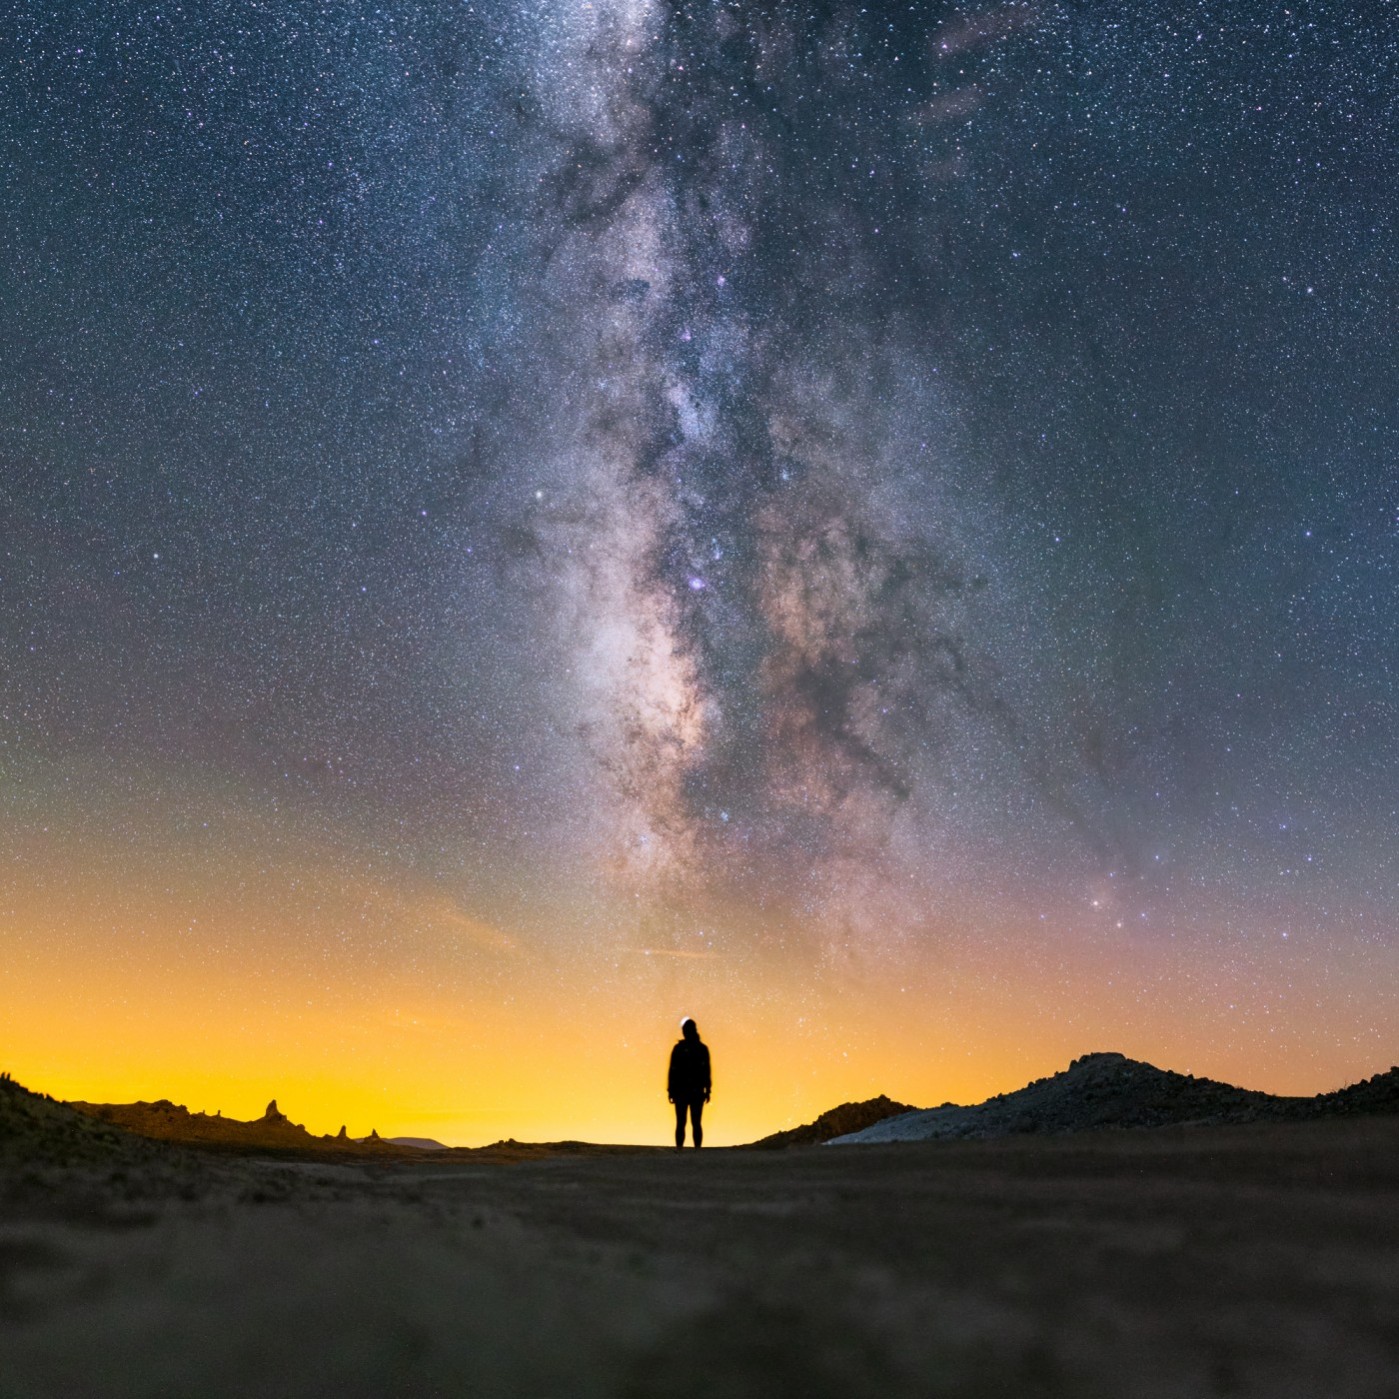
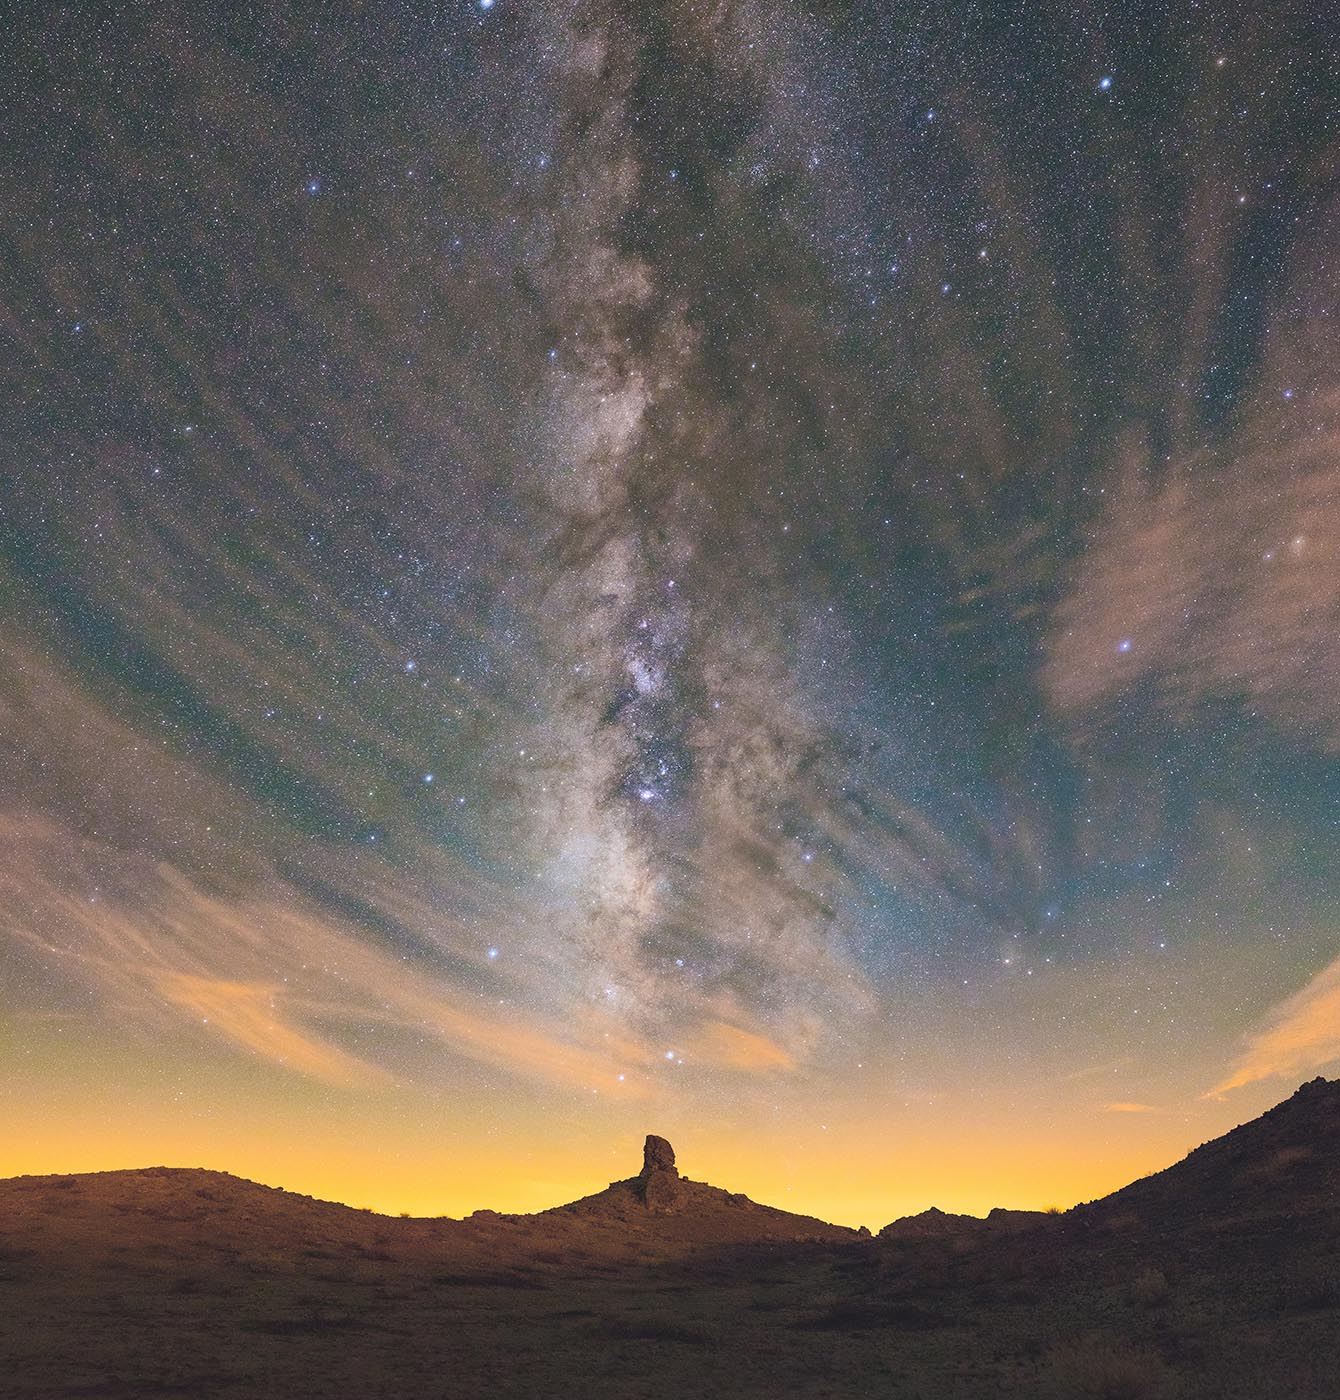
8. Light Pollution Sucks
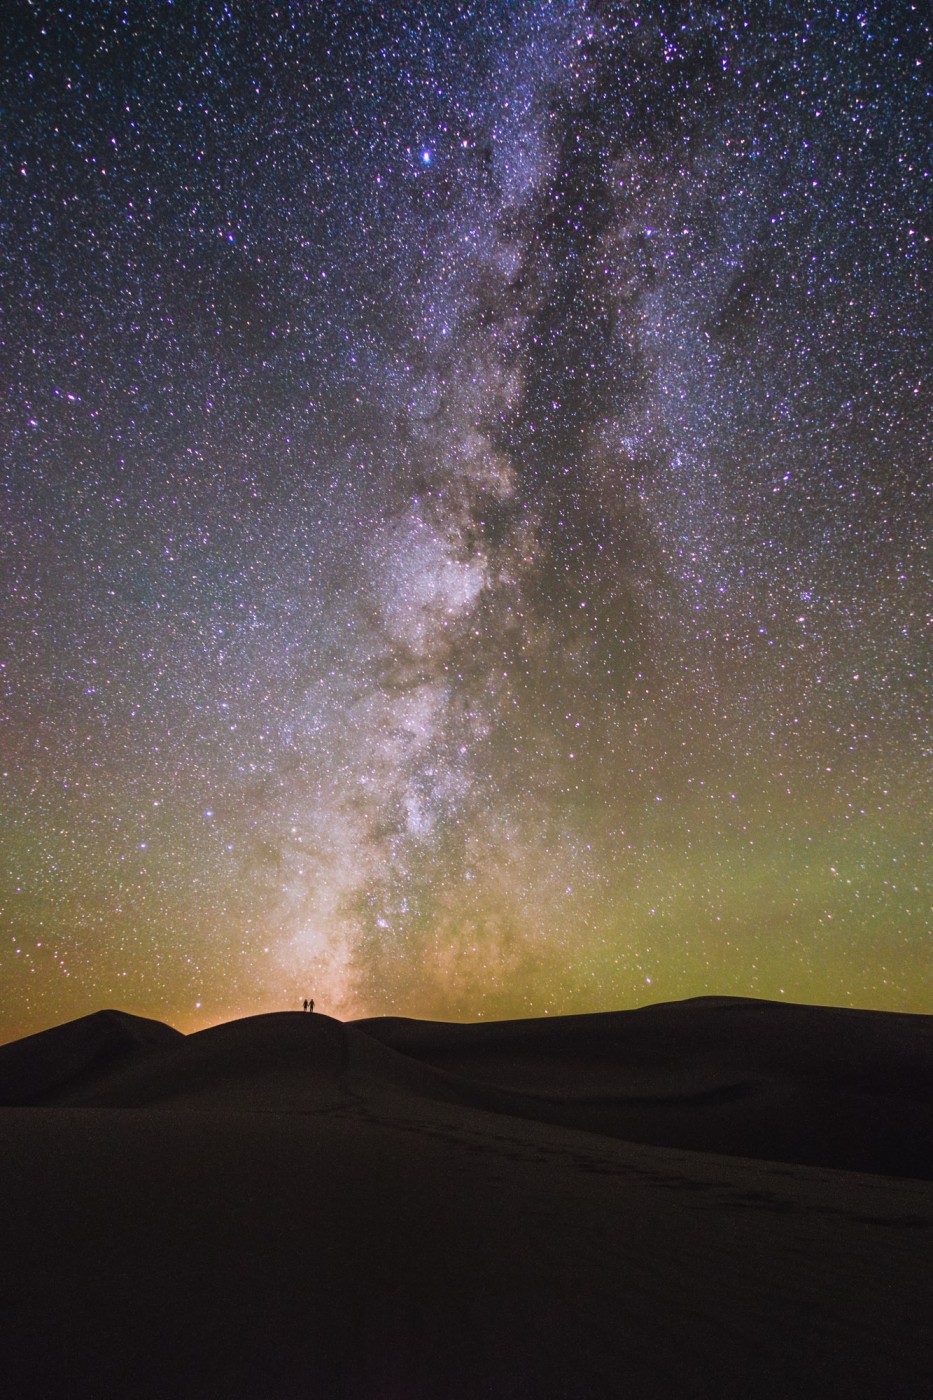
Seriously everyone. This one’s important. Light pollution absolutely sucks. I don’t know of any other way to describe it. Being from Los Angeles, where most nights have cloudless skies, it’s a damn shame that we can see only a handful of stars. I remember being a child and looking up at those amber skies thinking that that was it. That’s what space looks like from Earth. Orion’s Belt, Sirius, perhaps a planet or two and the Big Dipper, all suspended in an amber soup of light pollution.
But then I remember the first time I went camping in the desert and saw the Milky Way for the first time. That moment is engrained into my memory forever and ever since then I have had a constant itch to seek out places with truly dark skies.
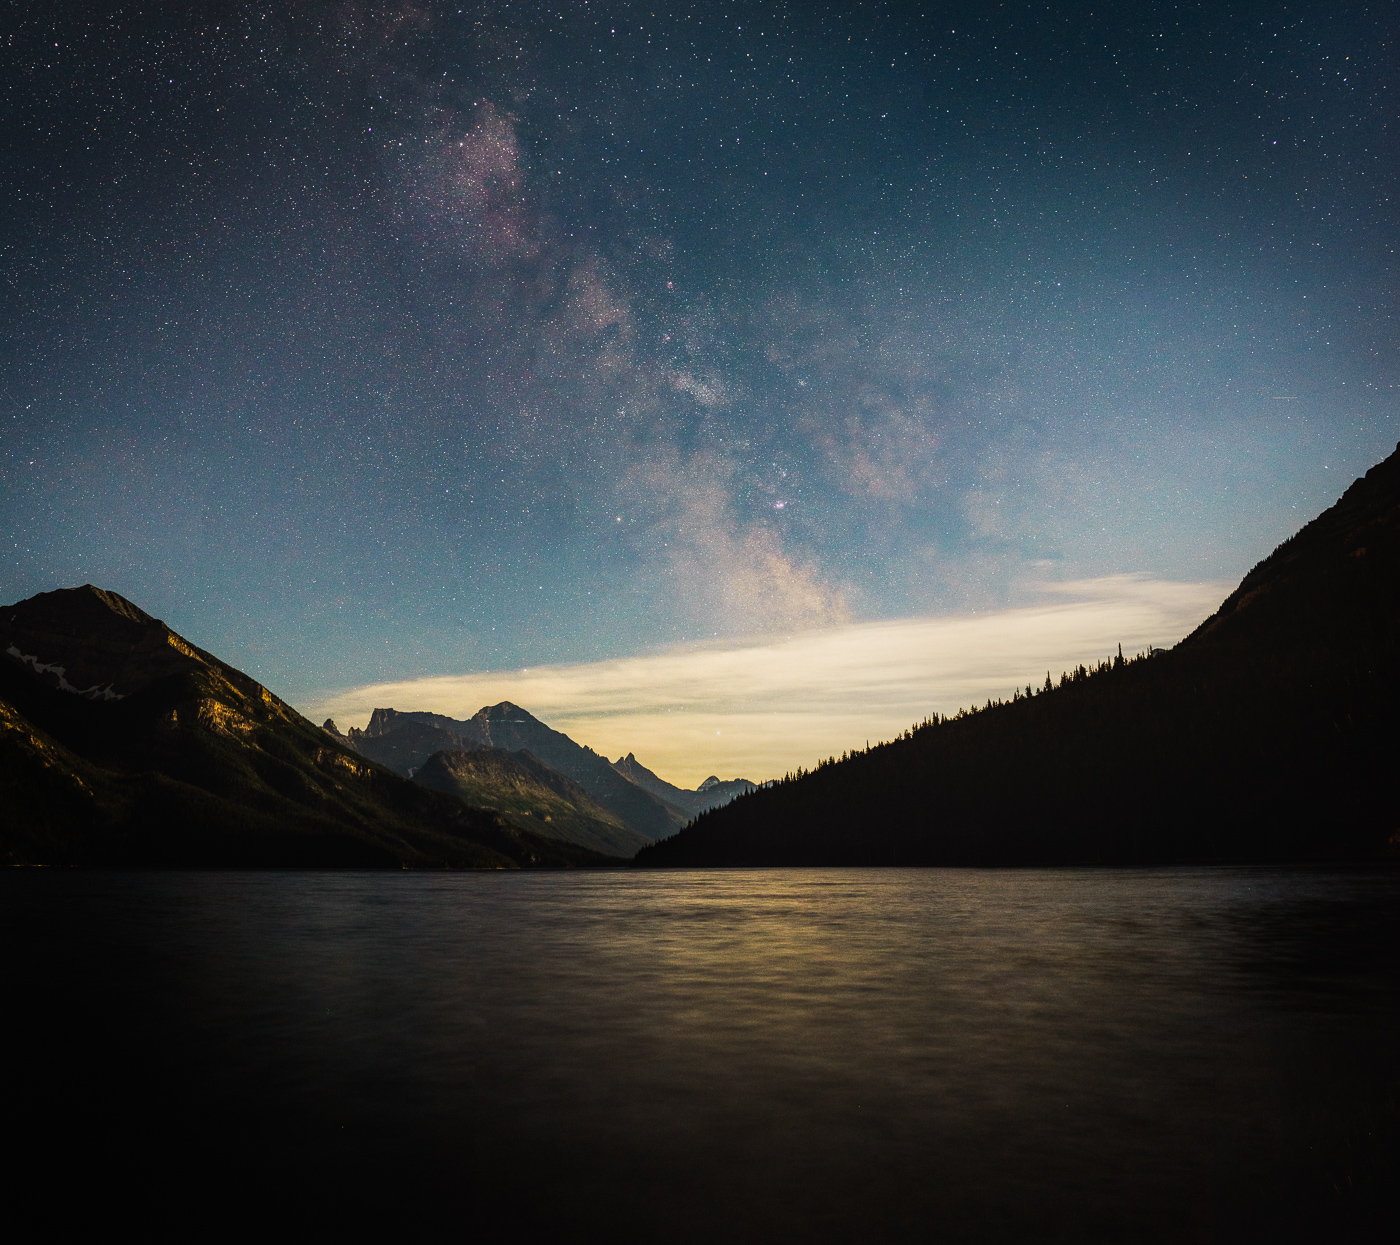
Since then, I’ve been spoiled by the rural American West. Dark skies are much more accessible and prevalent here than they are in many other parts of the world. By contrast, when traveling to the East Coast, I had a very hard time trying to find dark skies.
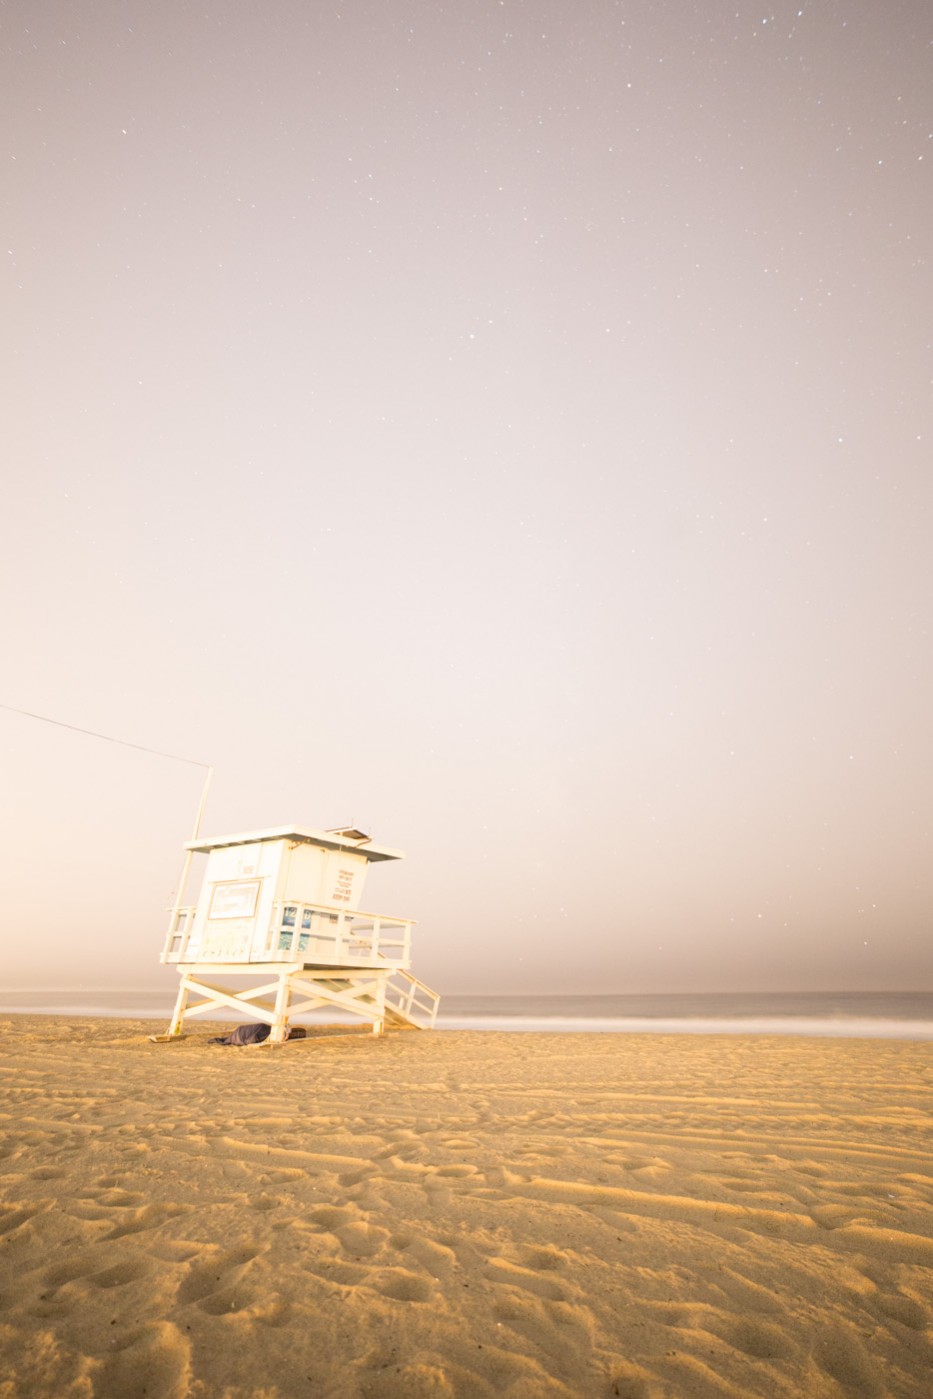
My entire Sony 28mm f/2 lens review was upended by the fact that there were basically no suitable locales for astrophotography. I settled on shooting from a small beach in Massachusetts, the darkest place I could find for my test shots, but the light pollution was still a huge challenge. I got my shots, but I’m honestly just saddened by how muddied up they are from the ugly glow of all those sodium vapor lamps.
I don’t think that we’ll ever clearly see the Milky Way from the middle of Los Angeles or Chicago or New York City (save for some massive power outage). Those places have lost the night sky forever. And while I don’t think that we’ll ever see the end of light pollution, I do think that there are some things that can be done.

It’s still possible for us to preserve the few places with dark skies that we have left. Some of the most impactful actions to protect the darkness of the night sky have been made by the International Dark-Sky Association (IDA). In 2015 alone, they found success in designating 17 new Dark Sky Places, recognizing communities that have decided to actively employ responsible night-time lighting practices to help preserve the darkness of our night sky.
Through the IDA’s efforts, many communities are learning how to embrace the beauty and rarity of their dark skies and are learning techniques and implementing practical regulations that will help preserve our night sky for future generations. I highly recommend visiting the IDA’s website and consider supporting their efforts through a donation or membership. They’re the world’s protectors of the night sky and they need your help.
Conclusion
I think astrophotography has greatly intensified my appreciation for the world that we live in. I hope that my infrequent writings over the past several years have helped you to discover just a little bit of that appreciation for Earth. It’s a beautiful place that deserves to be captured and shared, but more than that, it deserves to be protected.
As in the words of Carl Sagan, “Our planet is a lonely speck in the great enveloping cosmic dark. In our obscurity – in all this vastness – there is no hint that help will come from elsewhere to save us from ourselves.” (Pale Blue Dot: A Vision of the Human Future in Space by Carl Sagan)
Clear Skies,
Ian
Disclosure
We are a participant in the Amazon Services LLC Associates Program, an affiliate advertising program designed to provide a means for us to earn fees by linking to Amazon.com and affiliated sites. We are also a participant in the B&H Affiliate Program which also allows us to earn fees by linking to bhphotovideo.com.
Learn Astrophotography
Astrophotography 101 is completely free for everyone. All of the lessons are available on the Lonely Speck Astrophotography 101 page for you to access at any time. Enter your email and whenever we post a new lesson you’ll receive it in your inbox. We won’t spam you and your email will stay secure. Furthermore, updates will be sent out only periodically, usually less than once per week.
Help us help you!
Believe it or not, Lonely Speck is my full-time job. It’s been an amazing experience for us to see a community develop around learning astrophotography and we’re so happy to be a small part of it. I have learned that amazing things happen when you ask for help so remember that we are always here for you. If you have any questions about photography or just want to share a story, contact us! If you find the articles here helpful, consider helping us out with a donation.
[button font_size=”16″ color=”#136e9f” text_color=”#ffffff” url=”https://www.paypal.com/cgi-bin/webscr?cmd=_donations&business=lonelyspeckblog%40gmail.com&item_name=These+tips+help+keep+lonelyspeck.com+running.¤cy_code=USD&source=url” target=”_blank”]Donate[/button]
Thanks so much for being a part of our astrophotography adventure.
-Ian
[button font_size=”16″ color=”#136e9f” text_color=”#ffffff” icon=”arrow-left” url=”https://www.lonelyspeck.com/astrophotography-101/” target=”_self”]Back to Astrophotography 101[/button]
HI THERE!
Im just wandering, after this great tips…how did you manage to have 8.8mm shot with the rxIII?
thanks!
I certainly share your enthusiasm for astrophotography and your love of the night sky.
It comes through in all your writings. Being out under the stars, there is nothing like it, particularly on a warm night. Kindred spirits are hard to find but they can be found in some obscure corner of the www.
Well I’m glad to have you here Matt!
Thanks for everything you’ve written! I just got my first full-frame camera and I’ve been trying to figure out the best lightweight lens combination for landscape and astrophotography – not an easy thing to do. Your tutorials were very helpful, especially when I realized I can panorama stitch images to get good milky way shots without carrying around a fast wide-angle. I do backpacking trips in the 50-100 mile range several times a year, so a lightweight kit is very important to me.
So I got the Sony 28mm f/2 for my walkaround lens, and it’ll also be my milky way lens using panorama stitching. I’m still getting a Voigtlander 15mm for landscape shooting and for star trails shots, as those can’t be panorama stitched. I usually shoot star trails when it’s close to a full moon anyway, so f/4.5 is fine. I can’t wait!
I have learned so much from your site, and I’ve made a few milky way photos that I’m really happy with, thanks to what I’ve learned here. But as I started shooting, #8 hit me REALLY hard in the mid-Atlantic. It’s a bit daunting to read things on sites like “you don’t have to be in Death Valley to make astrophotography” and yet every example photo is there, or New Zealand, or Iceland, etc. for exactly why it’s so difficult in most of the developed world. But I’m planning some trips to Cherry Springs, PA and Spruce Knob, WV to salvage some of the few dark sites I can get to in a weekend.
Thanks for all the info, and happy shooting!
Steve
Hi Ian,
I’ve learned a lot from your posts. I have a Sony A7II and am interested in trying time lapse and star trails. My question is do you have a recommendation for an external battery pack for my camera. I realize a 200-300 image time lapse will not be possible with a single battery, and I do not want to put on a battery grip as then I’d have to buy an additional l-bracket and have a heavier camera than I want.
Thanks for your suggestions!
Bill
I’ve gotten way over 300 images in a time-lapse with the wasabi batteries in my a7.
Another thing you could do is get a big battery pack and directly connect it to the camera and tripod, I believe people have done that before. I could be wrong though.
Great summary of the year. Can’t wait to see what’s in store for 2016!