

I don’t typically use filters for the type of astrophotography you see on Lonely Speck. Filtering for specific wavelengths of light is a common practice for astronomy and deep sky imaging. But most filters made specifically for astrophotography tend to be very specialized and very expensive. Luckily, there’s an option for those on a tight budget: the Hoya (Red) Intensifier (Red Enhancer RA54) Filter. In this short review, we test out the Hoya Intensifier while shooting the Milky Way from Trona Pinnacles, California.
Introduction
Before trying the Hoya Red Enhancer filter, I had never used a filter for astrophotography. Other than the SharpStar2 for achieving precise focus on the stars, I didn’t know of an immediate reason to use a filter while shooting basic night photography.
Many dedicated astronomy filters are made to filter out everything but a very narrow band of light, specifically for targeting certain parts of the spectrum, like infrared or Hydrogen Alpha. These narrow band filters are usually best reserved for shooting on a full-spectrum camera or dedicated astronomy sensor. Other more common photographic filters like a UV filter, polarizer or neutral density filters don’t really provide any tangible benefits for astrophotography.
The Hoya Red Intensifier (Red Enhancer RA54)
The Hoya Red Intensifier (Red Enhancer RA54) (also just called the plain “Intensifier”) is a special application filter that’s intended to enhance red and orange colors, particularly for autumn foliage.
The Hoya Red Enhancer is also known as a Didymium filter. It filters out the yellow-orange portion of the spectrum from about 575nm to 600nm. The original application for a Didymium filter is to protect the vision of glassworkers from the bright yellow-orange color of the hot sodium in the glass. As I originally learned from Nick at Noctilove, this type of glass should make a good light pollution filter.
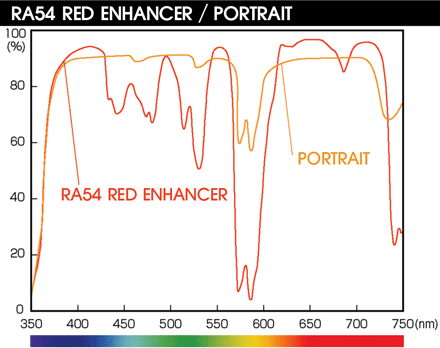
The part of the spectrum that the Didymium filter removes is also the exact color of most sodium vapor lamps, one of the most common sources of light pollution. Many city and suburban street lamps and industrial lighting use these yellow-orange lights. They’re slowly being replaced with LEDs in major cities, but sodium lamps are still one of the most common types of outdoor lighting. Being able to filter out most of this type of light should provides a distinct benefit for astrophotography.
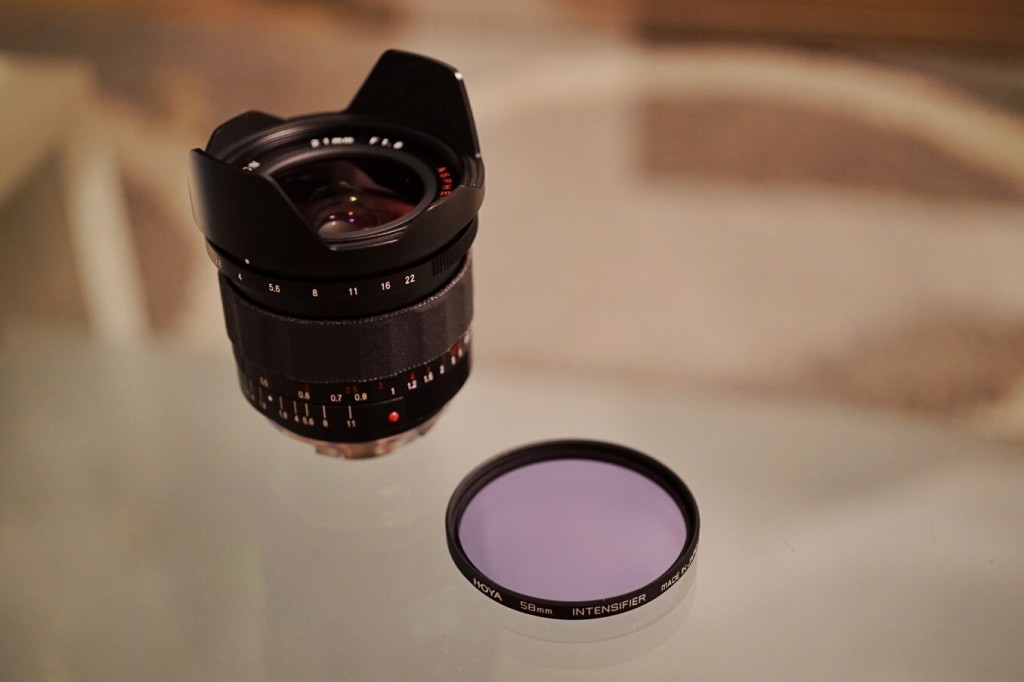
At first glance, the Hoya Red Intensifier filter looks like a pretty plain filter. It’s a relatively clear looking filter but with a very subtle colored tint. It can appear pink, cyan or bluish, depending on the light it’s viewed under.
As far as I can tell, it appears that this filter does not have any anti-reflective coating as reflections off the surface of the filter glass appear to have no colored tint. A lack of coatings shouldn’t really affect most astrophotography but photographers should be aware when using it in other situations; it may cause unwanted reflections, particularly when shooting with very bright light sources in the frame.
Other than that, there’s nothing else to say about the appearance of the filter. It’s a pretty standard looking thing and comes in most common filter thread sizes from 49mm to 77mm.
Testing the Hoya Red Enhancer for Astrophotography
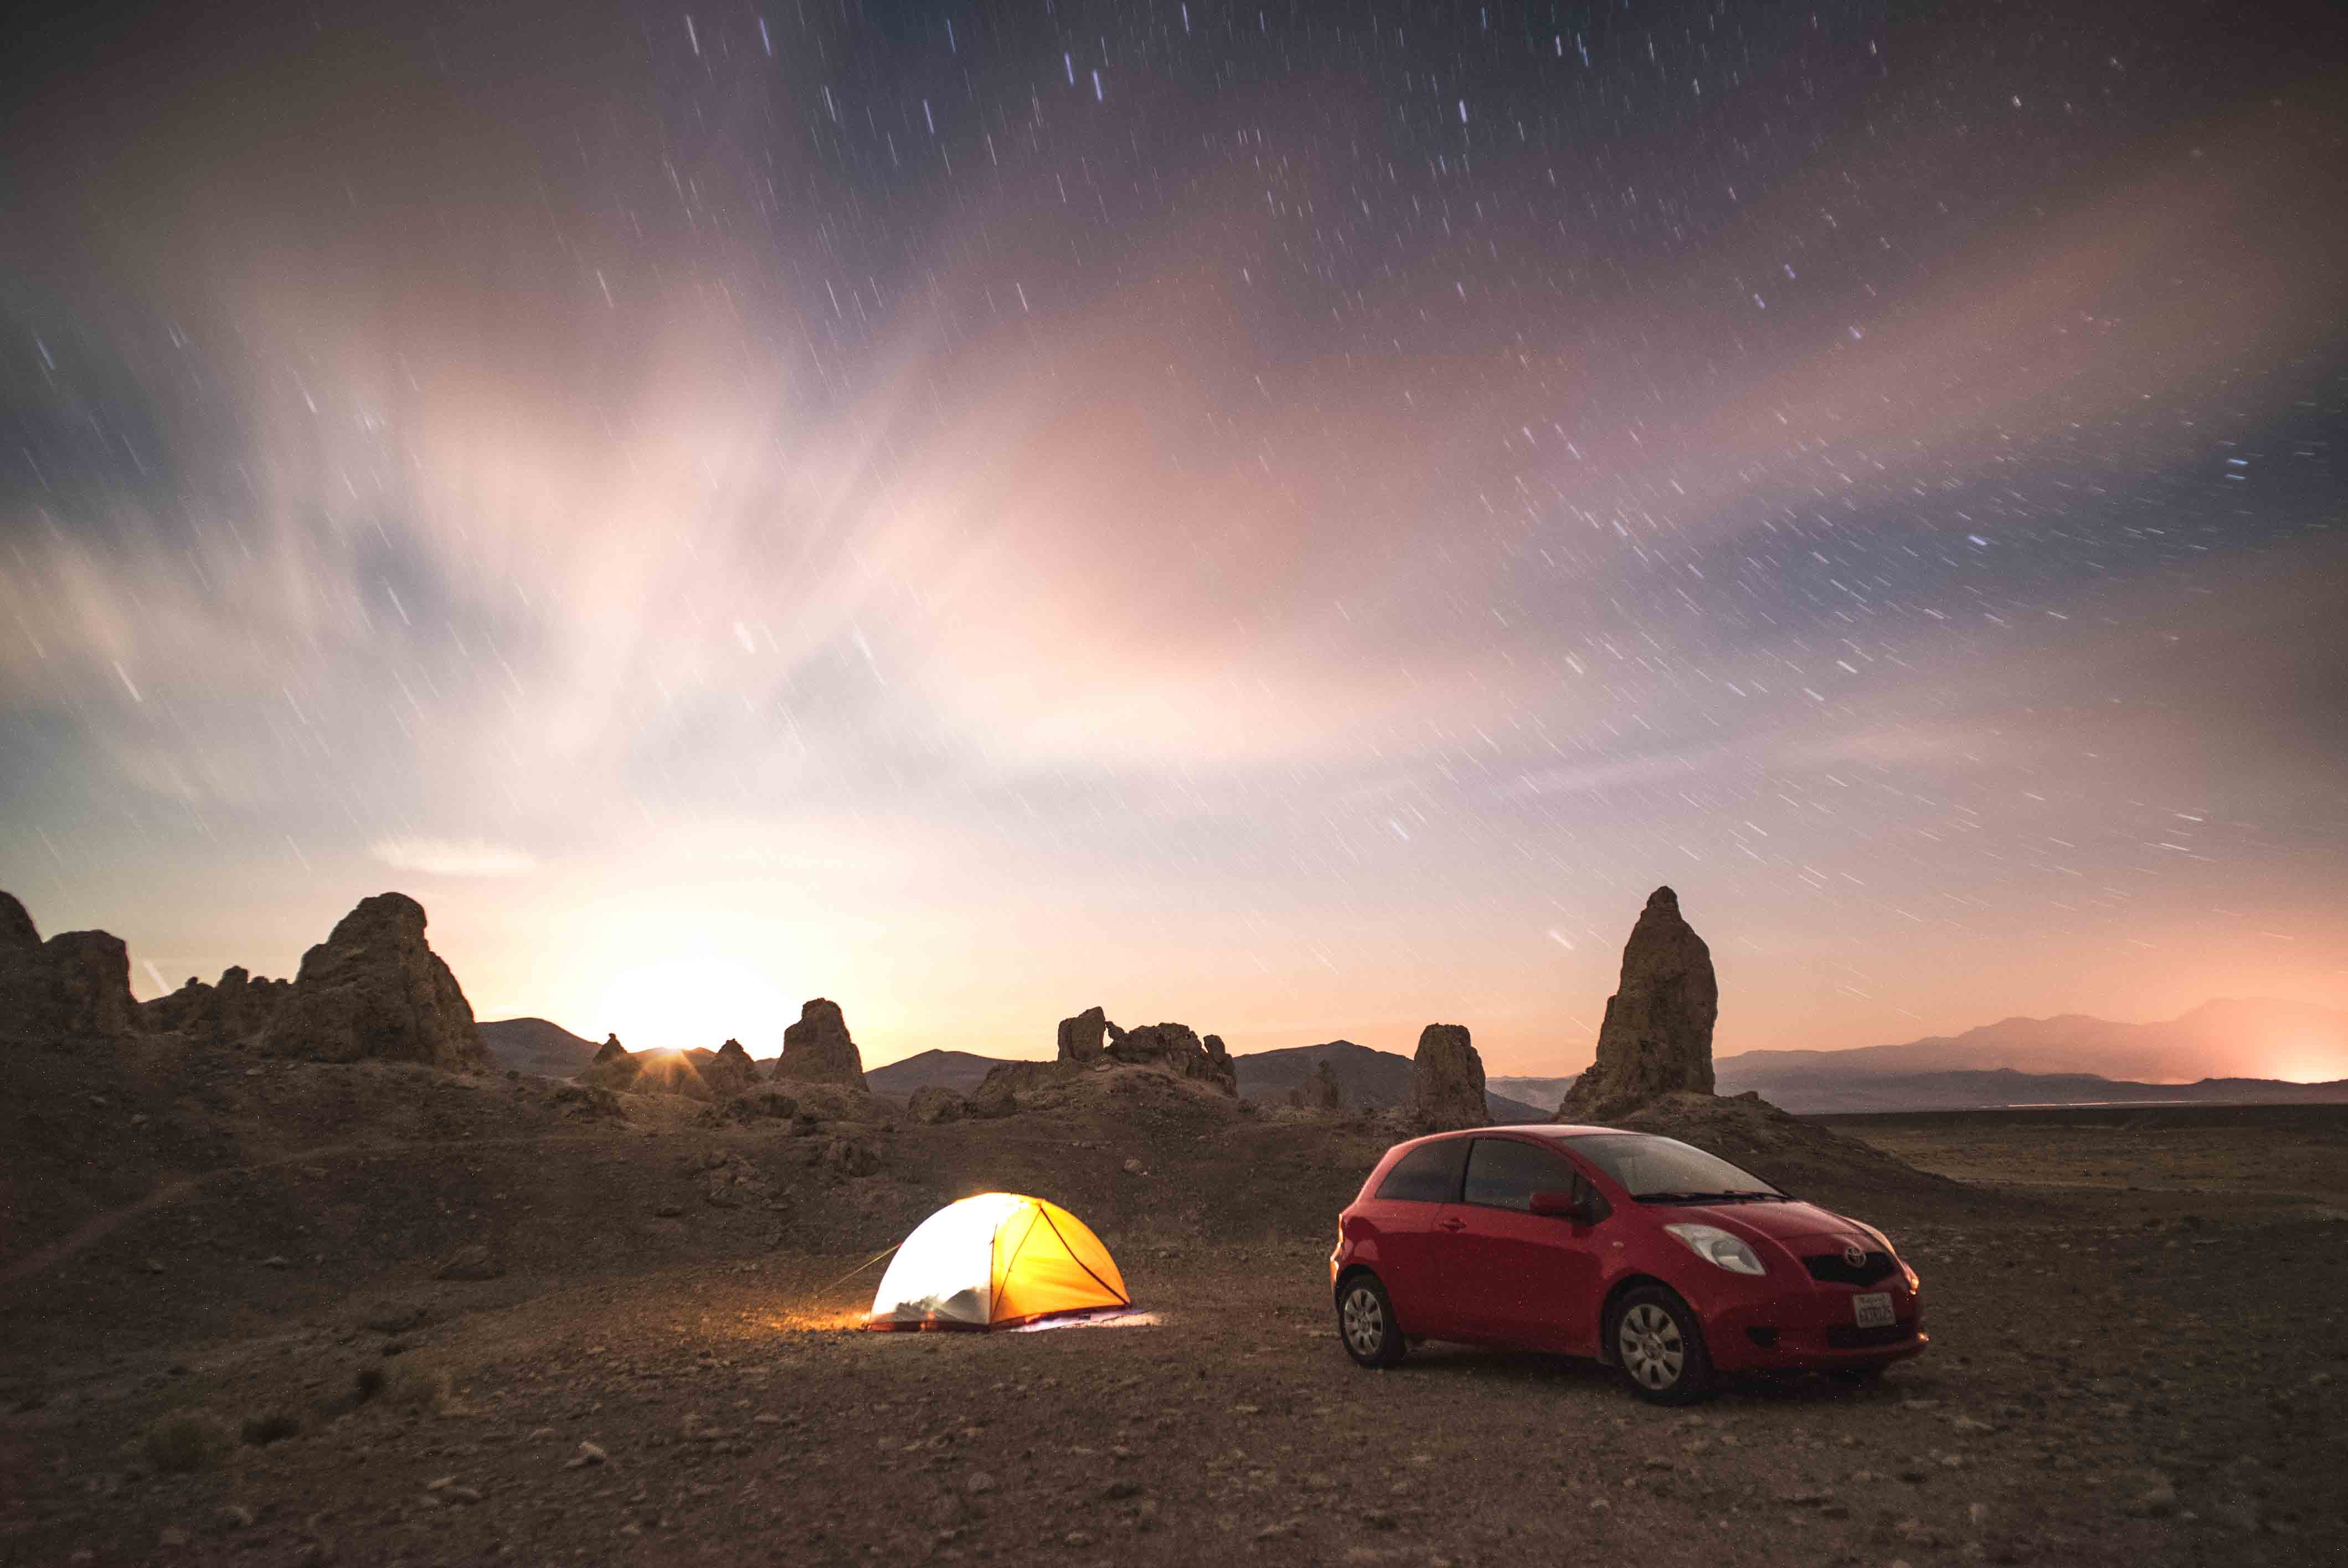
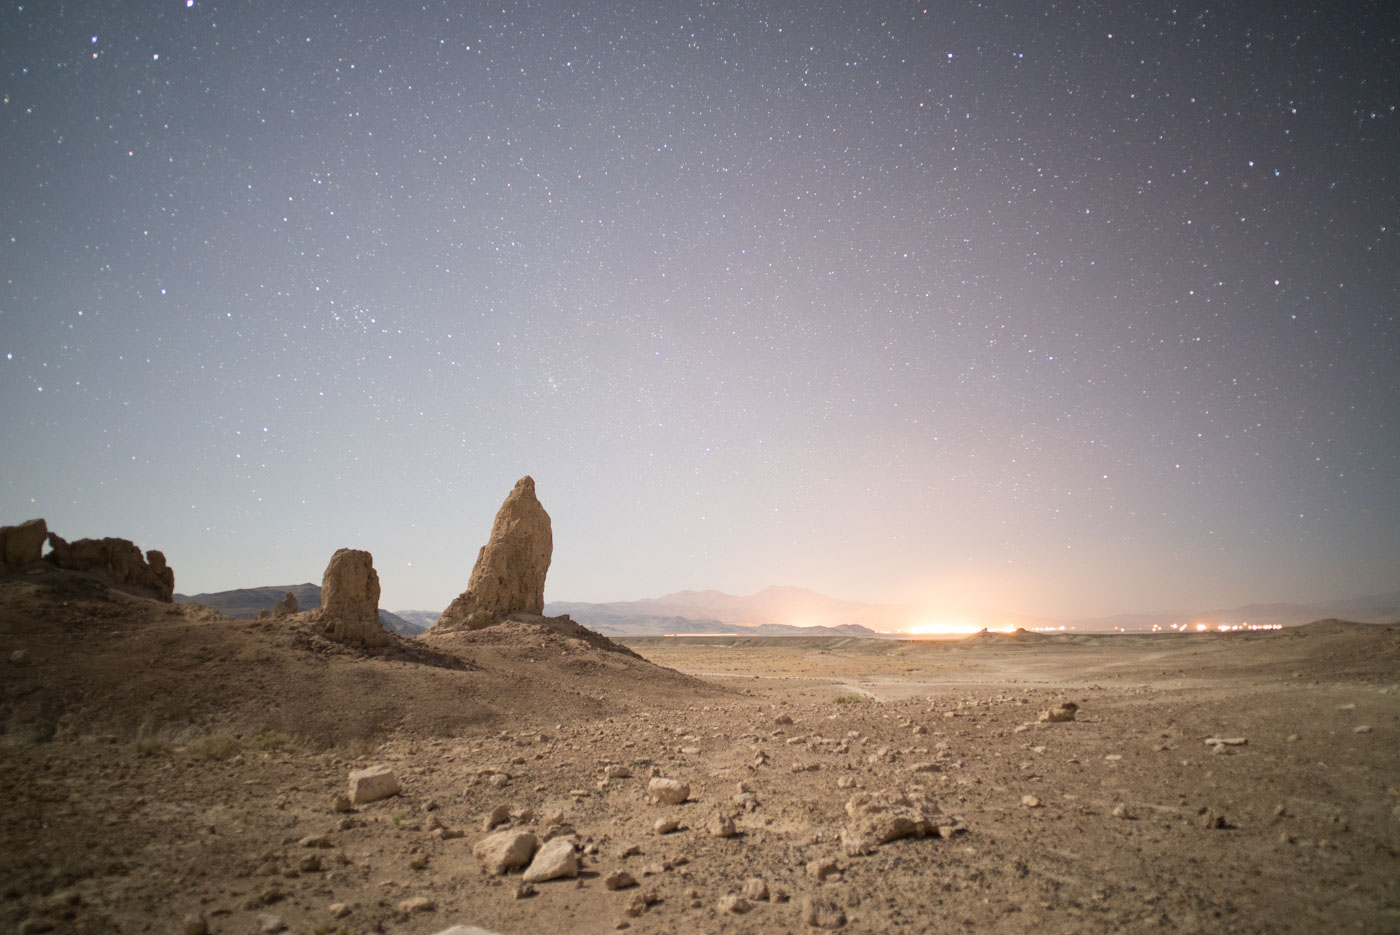
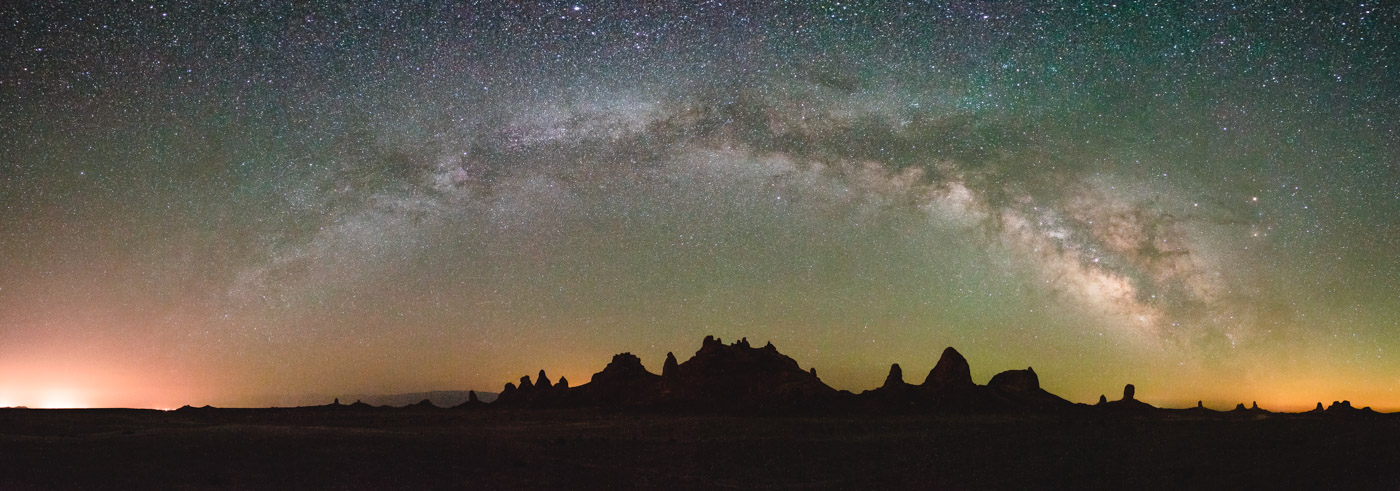
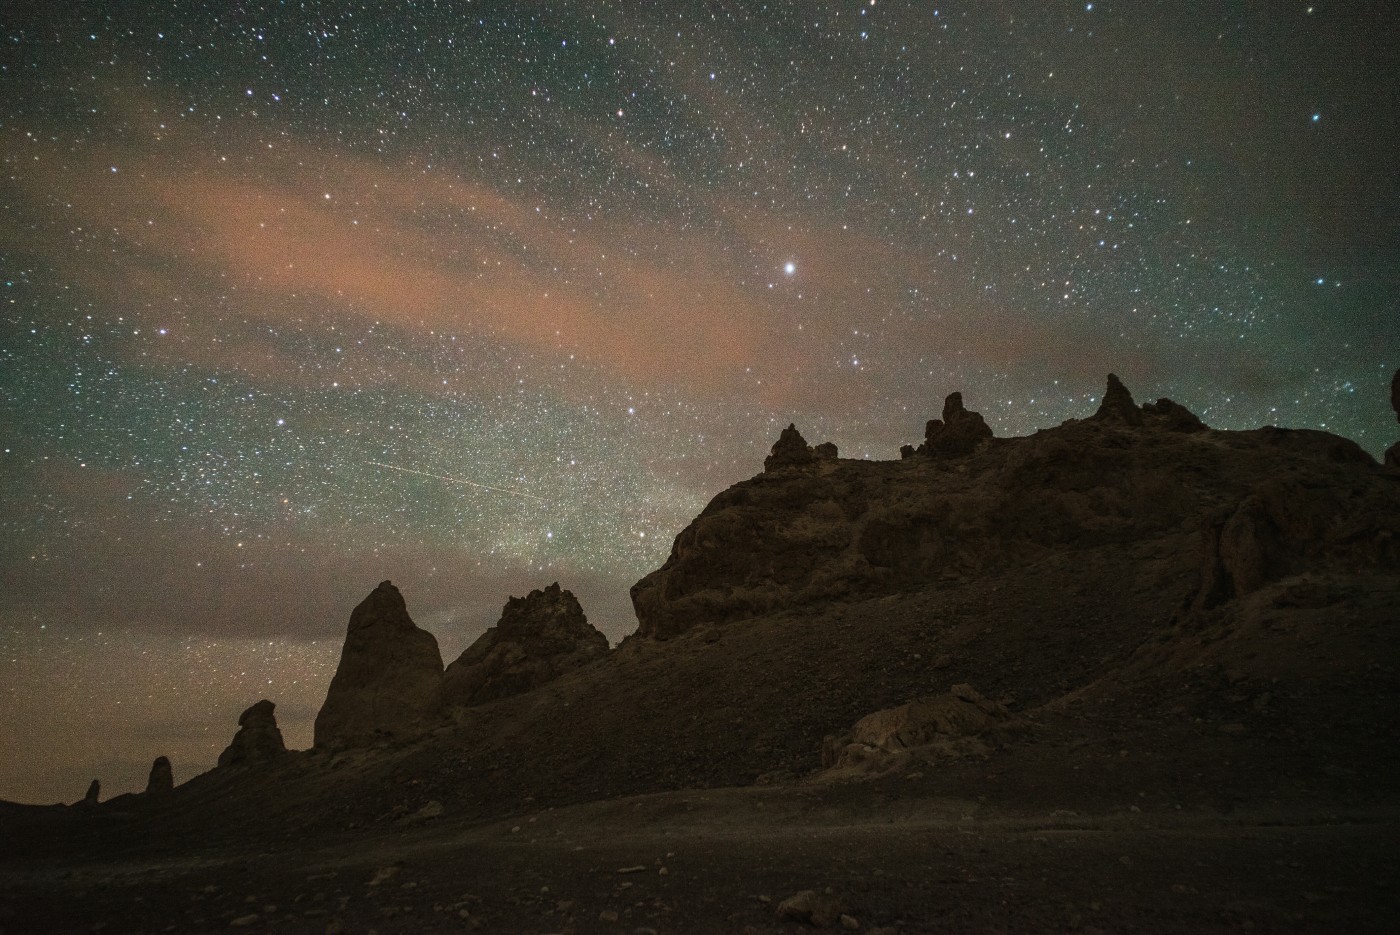
To test the Hoya Intensifier, I traveled with my girlfriend to Trona Pinnacles, California. It’s one of my favorite spots for astrophotography and is the site of our upcoming Lonely Speck Meetup 2016. Trona Pinnacles is a relatively dark sky location but there are still a few distict light pollution sources in the area: Ridgecrest to the west, Trona to the north, and Barstow to the South. Each of these towns create a mild orange glow visible in astrophotos.
Our test was made on a Sony a7S and two different lenses: the Voigtlander 21mm f/1.8 Ultron and the Sony Zeiss FE 55mm f/1.8 Sonnar T*. Each lens was fitted with a Hoya Red Intensifier for its respective filter size (58mm for the Voigtlander and 49mm for the Sony Zeiss).
Test shots were made in pairs: One set of shots was made with the filter removed and another identical set was made with the filter installed. The camera was set with identical settings for each set of shots. All photos were made with daylight white balance, manual exposure and manual focus. Let’s take a look at a first test shot:
Before:
After:
This first test shot was made on the Voigtlander 21mm f/1.8 Ultron wide angle lens. The partially illuminated moon was still visible so the sky was naturally blue. As you can see, the filter noticably reduces the yellow glow created by the sodium vapor lamps of the mineral mining plant in Trona, California. The sky is darker and deeper blue and less hazy with the filter installed. Overall contrast is increased and you can see that the scene is slightly darker, likely since a portion of the ambient light spilling on the landscape is from the light pollution of Trona.
So far so good. The results were immediately noticeable, the filter seems to be doing its job of filtering out some light pollution.
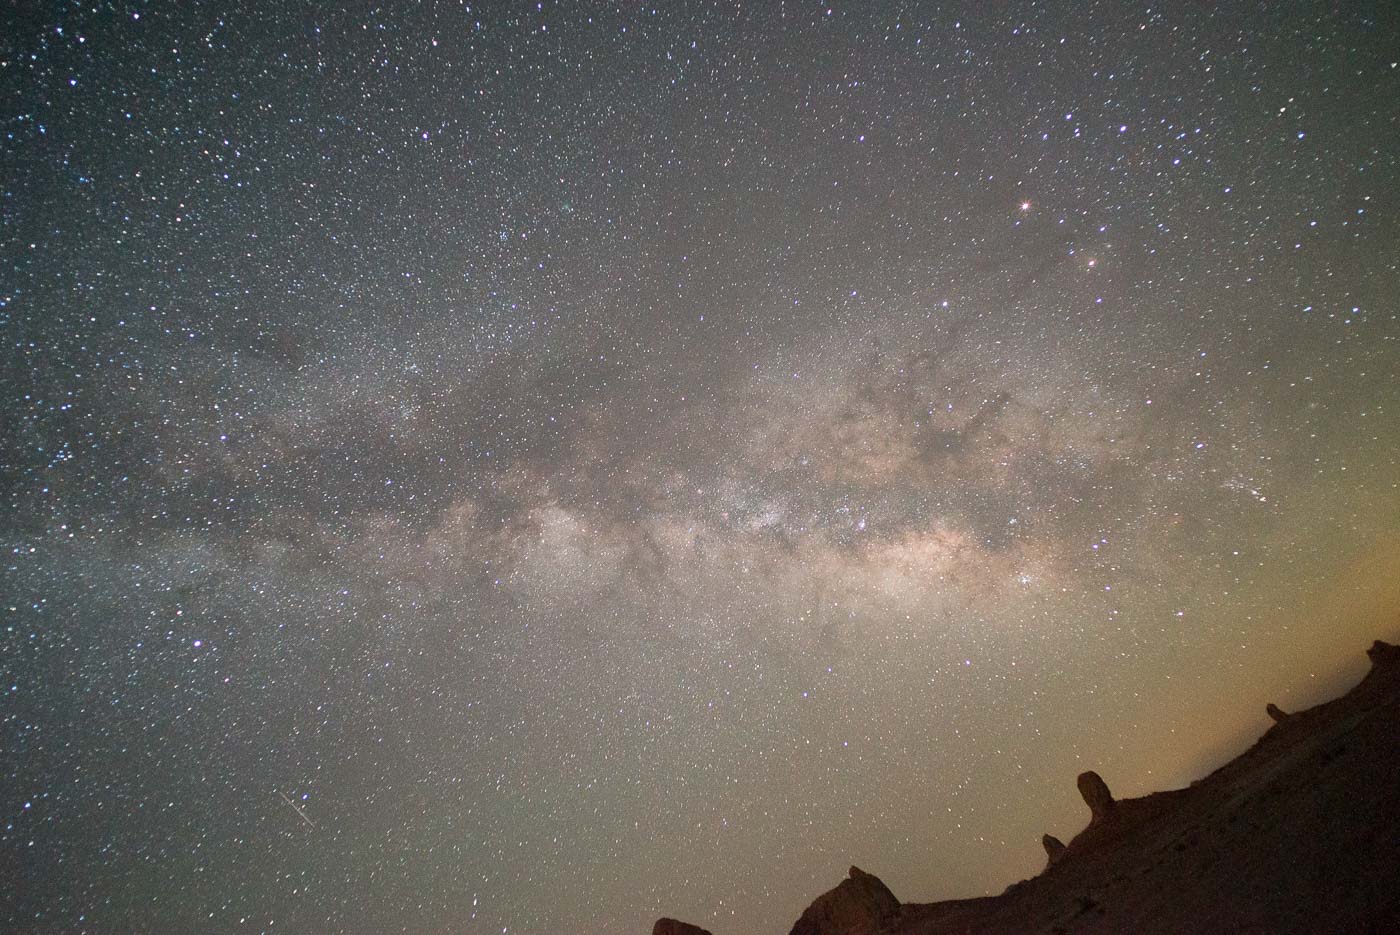
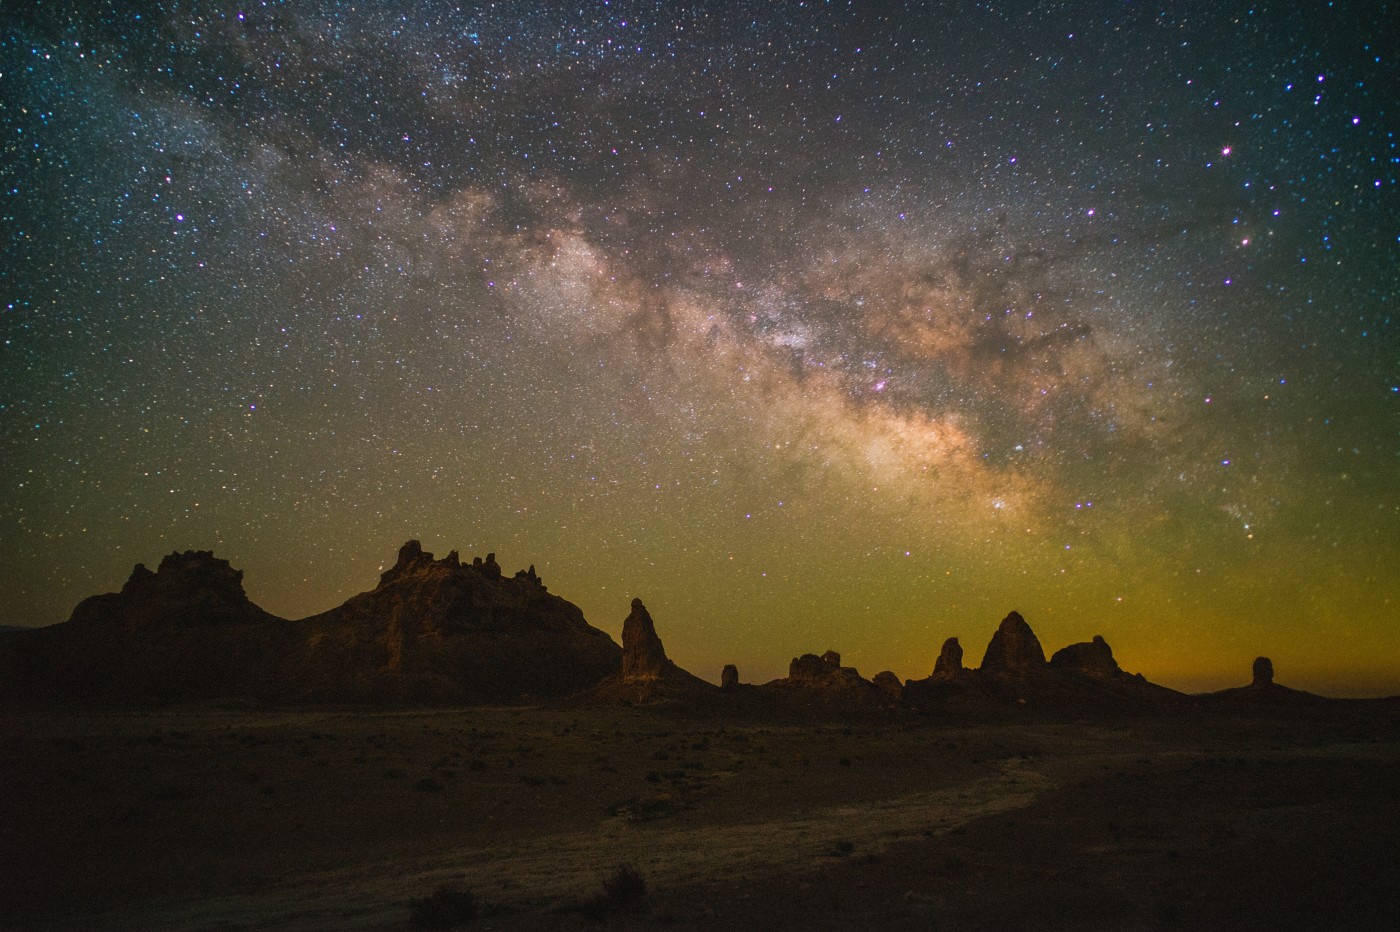
Let’s take a look at another test image, this time of the Milky Way Galactic center, made after I had waited for the moon to set below the horizon.
Before:
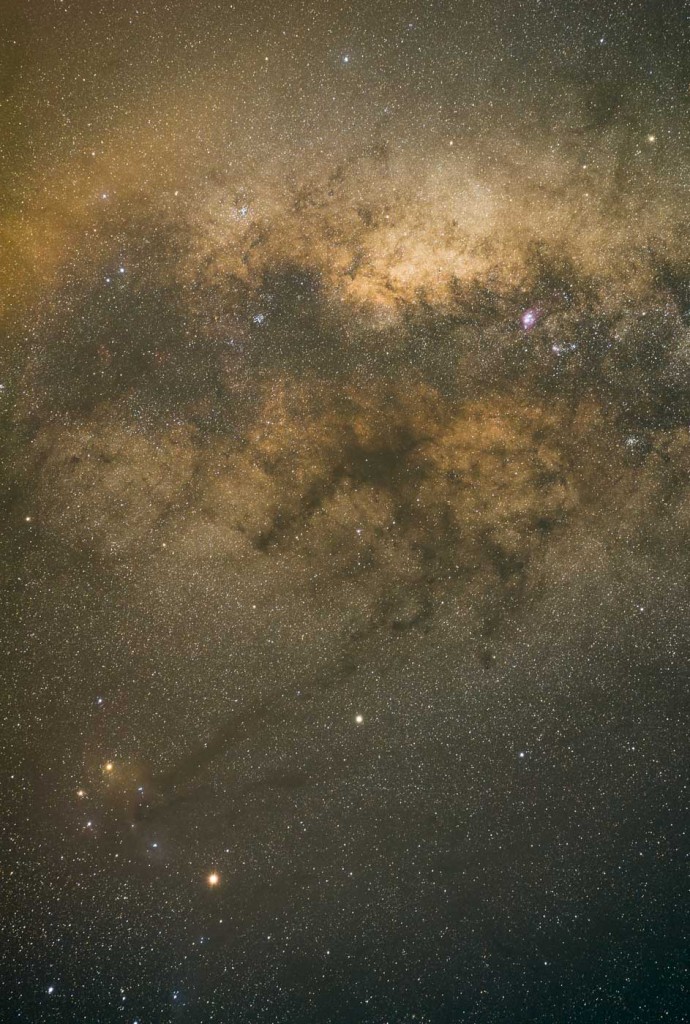
After: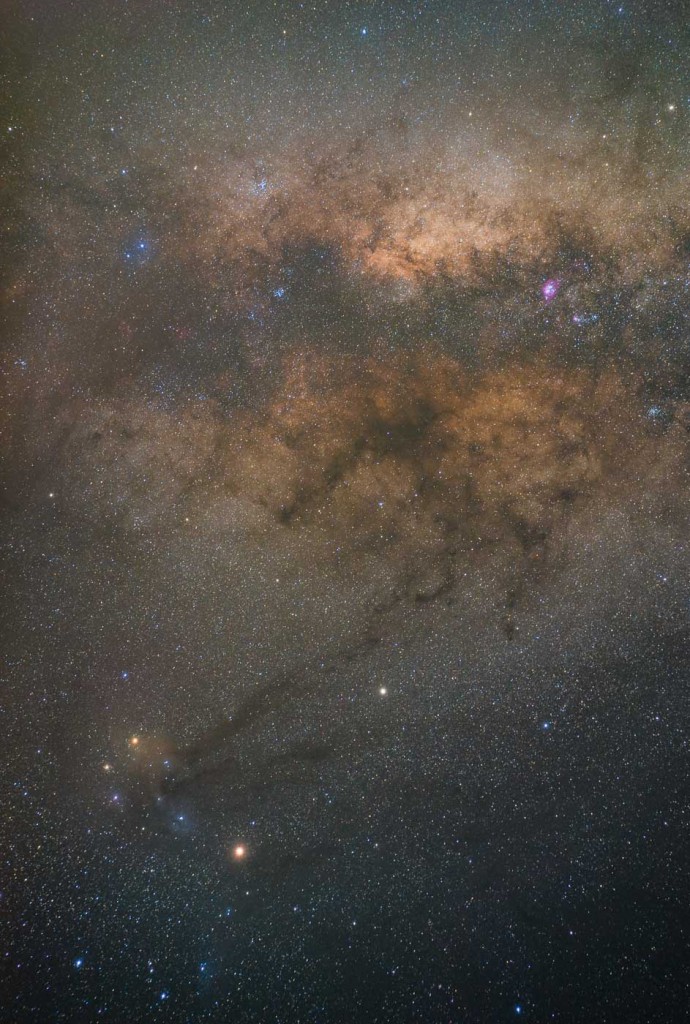
This second test shot above was made with the Sony Zeiss FE 55mm f/1.8 Sonnar T*. Each image was made with the camera set to daylight white balance and by stacking 30 exposures to reduce noise. Images are normalized for brightness but post processing is otherwise identical between test images.
And below is a comparison of completely unedited images (exported straight from RAW) that should give you a good idea of the difference the Hoya Red Intensifier can make:
Before: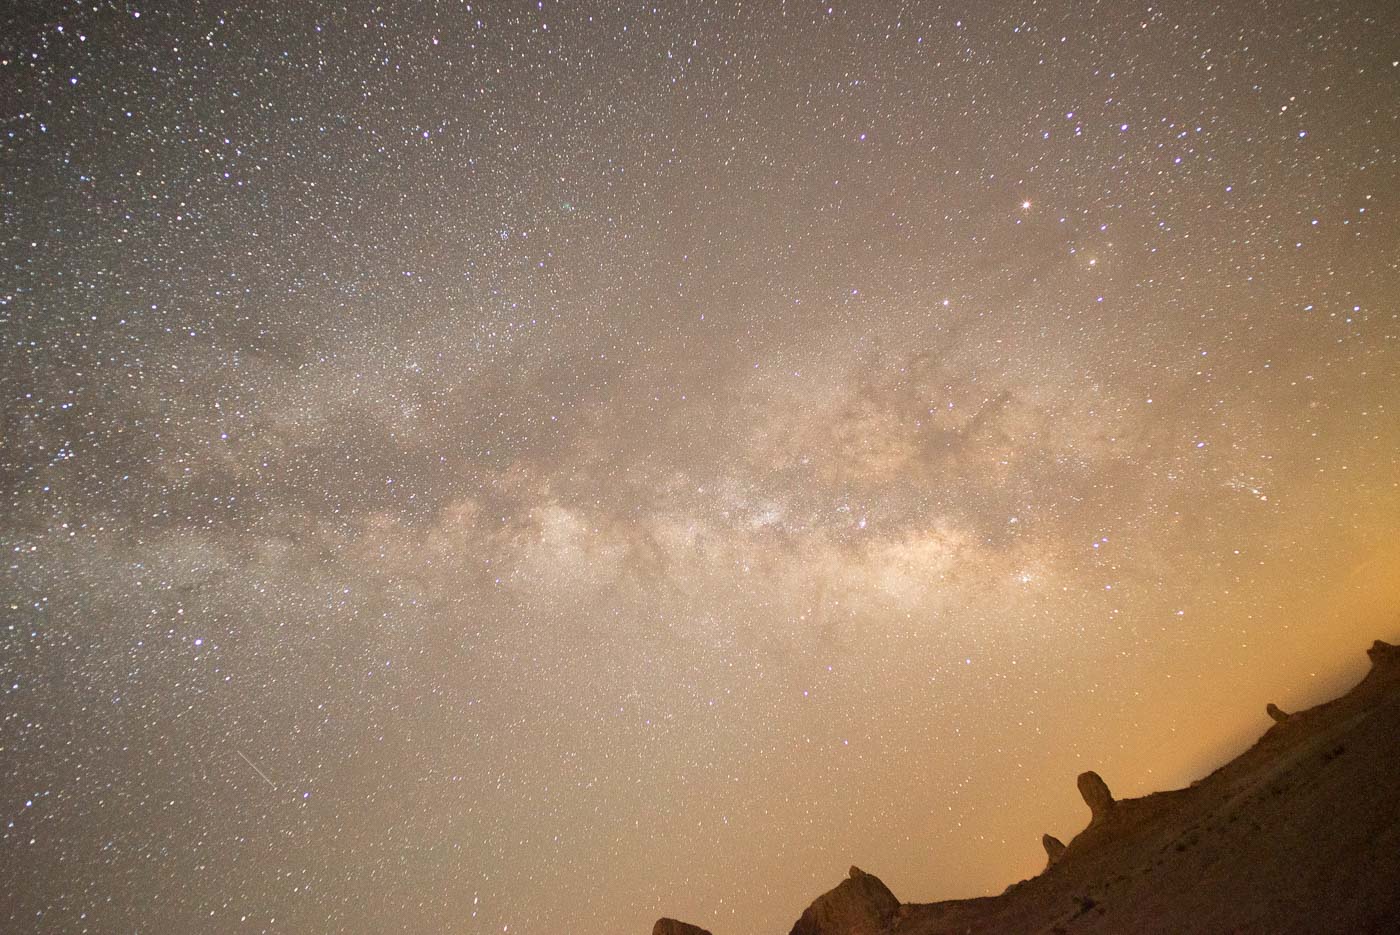
After:
If you’d like to see these as straight-out-of-camera RAW files, check out the download link to a zip of 3 before and after pairs of shots shot using the Hoya Red Intensifier. The files included in the .zip below are unedited and exported directly to DNG.
Want to see some RAW before/after files?
Download a .zip of RAW files (65.9MB)
The advantages of the filter become a lot more apparent when shooting the galactic center. The Hoya Red Intensifier seems to have almost completely neutralized the yellow/amber hues caused by the distant town of Barstow. The image with the filter installed shows more variety in color, especially when it comes to the blue, red and orange nebula of Rho Ophiuchi around the star Antares. The photo without the filter still looks acceptable but editing the shot to include a good balance of color would be a lot more difficult to achieve due to the orange tint. Overall, the filter really seems to have made a positive difference in the results and I’m super happy with how pronounced the faint colors are when they aren’t drowned out by light pollution.
What about in heavily light-polluted areas?
In the comments below, Anthony Roggio asks: “Any shots with this filter in a heavily light-polluted setting? Somewhere near a major city maybe?”
I shot the following sample of the constellation Orion in Simi Valley California, near Los Angeles. It’s a pretty heavily light polluted area and the photos from the location initially had a lot of amber tint to them.
Before:
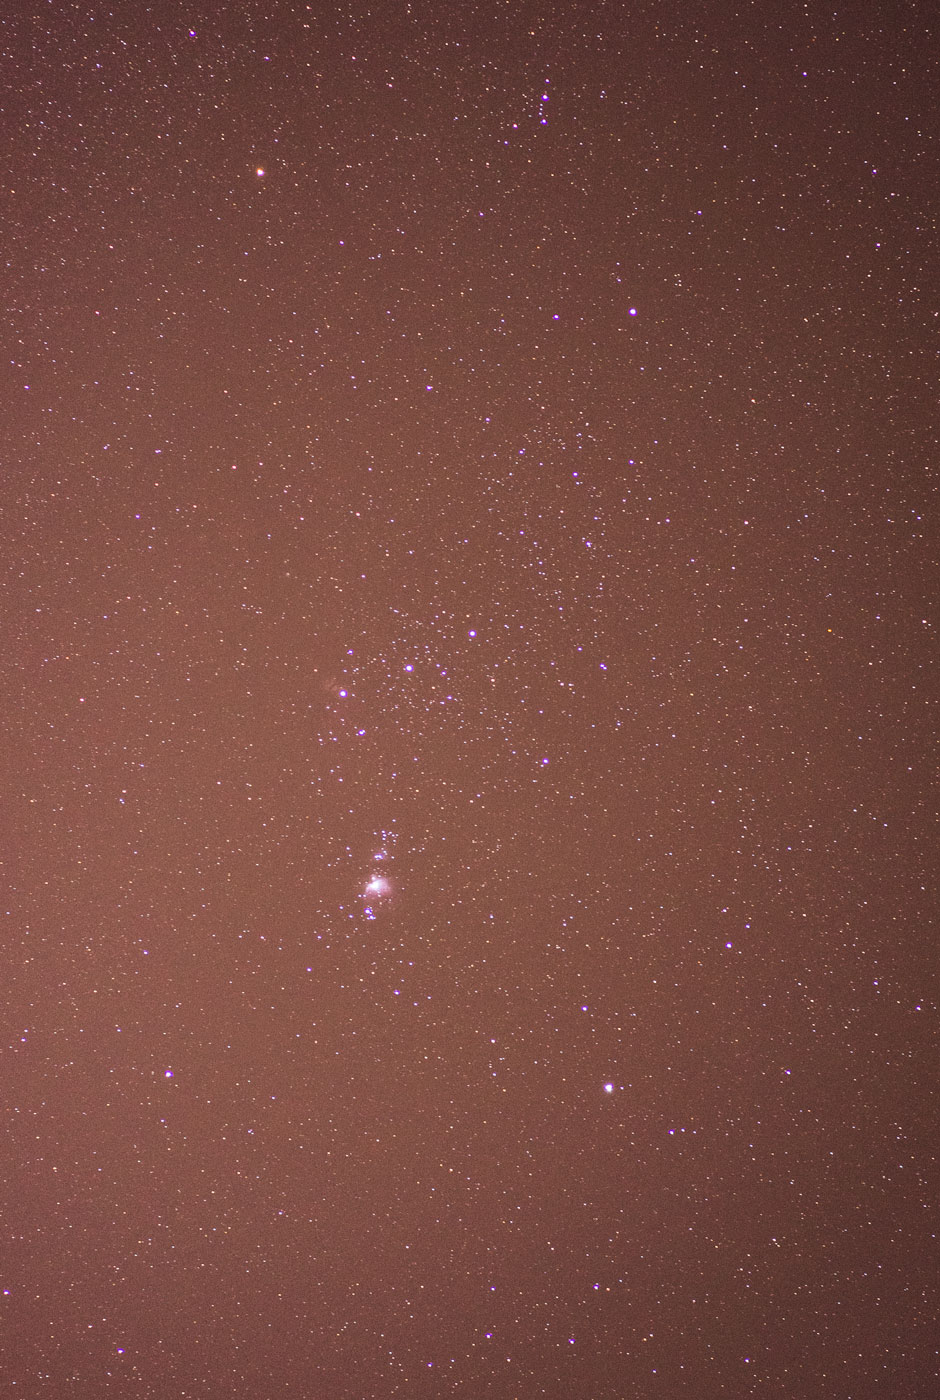
After:

The light pollution filter seems to have completely neutralized the amber tint. I still think that the light from Los Angeles was too intense to really start to get some of the faintest nebula detail from the constellation Orion, but it’s neat to see how the filter removes the amber glow.
More Samples Made with the Hoya Red Intensifier Filter
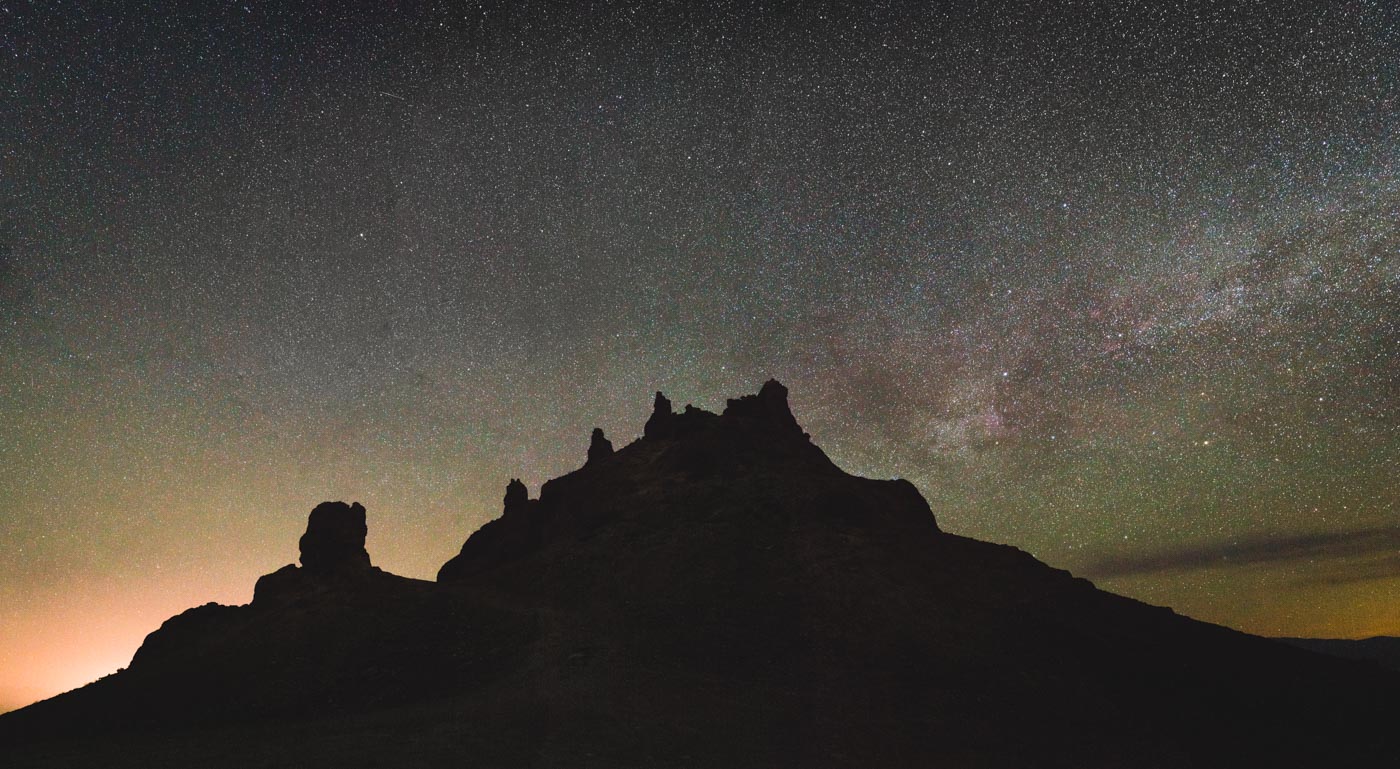
I continued to shoot for the rest of the night with the Red Intensifier filter installed. Overall I’m very happy with how much staturation is apparent across the sky. Nebula are colorful, airglow (the green glow) is saturated and the bright light pollution on the horizon seemed greatly diminished from what I am typically familiar with at Trona Pinnacles. Here are a few more examples made with the filter installed:
Conclusions and Verdict
The results of using the Hoya Red Intensifier on the night sky is subtle but tangible. I very much prefer the results with the filter installed. I never thought I’d find myself thinking a filter as being essential for astrophotography but I think I’m going to keep using one on all my lenses. It’s cheap, it reduces light pollution, it works. Highly Recommended!
Hoya Red Intensifier Pros:
- Greatly reduces the effect of light pollution, neutralizes yellow tinge from Sodium lamps
- Affordable
- Available in most common filter thread sizes (49mm-77mm)
Hoya Red Intensifier Cons:
- Does not appear to have any anti-reflective coating
- No square version available for filter systems
- Reduces some light transmission
Highly Recommended! (4.8/5)
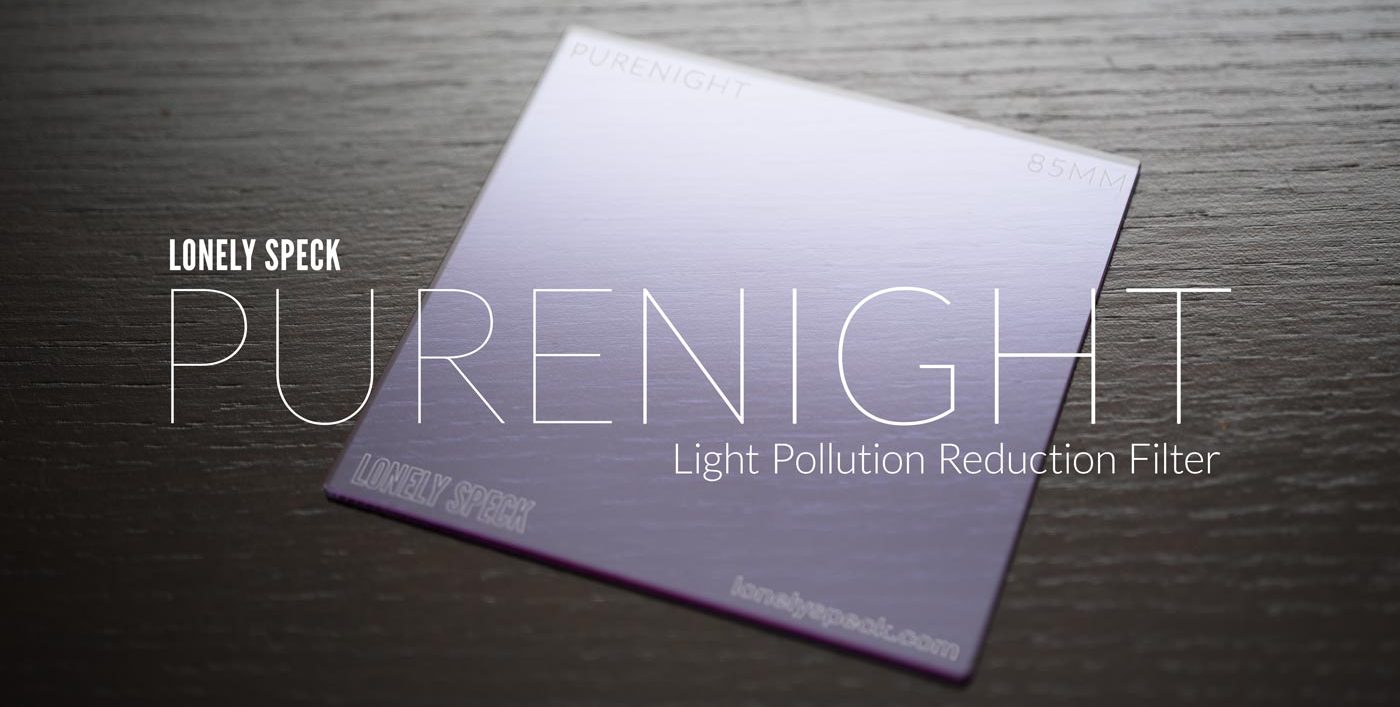
Lonely Speck PureNight
We saw some of the shortcomings of the Hoya Intensifier and the requests by many photographers for a square version of the filter so we decided to make our own light pollution filter called the PureNight. PureNight is stronger in filtration than an intensifier, multi-coated for better anti-reflective properties and is now available in square 85mm, 100mm and 150mm sizes.
Links:
- Hoya (Red) Intensifier (Amazon / B&H)
- Make sure you buy one labeled just plain “Intensifier” or “Red Intensifier”. The Blue and Green ones are not the same.
- Voigtlander 21mm f/1.8 (Amazon / B&H)
- Sony Zeiss FE 55mm f/1.8 Sonnar T* (Amazon / B&H)
- Sony a7S (Amazon / B&H)
Disclosure
We are a participant in the Amazon Services LLC Associates Program, an affiliate advertising program designed to provide a means for us to earn fees by linking to Amazon.com and affiliated sites. We are also a participant in the B&H Affiliate Program which also allows us to earn fees by linking to bhphotovideo.com.
Learn Astrophotography
Astrophotography 101 is completely free for everyone. All of the lessons are available on the Lonely Speck Astrophotography 101 page for you to access at any time. Enter your email and whenever we post a new lesson you’ll receive it in your inbox. We won’t spam you and your email will stay secure. Furthermore, updates will be sent out only periodically, usually less than once per week.
[email-subscribers namefield=”NO” desc=”” group=”Lonely Speck Newsletter”]
Help us help you!
Believe it or not, Lonely Speck is my full-time job. It’s been an amazing experience for us to see a community develop around learning astrophotography and we’re so happy to be a small part of it. I have learned that amazing things happen when you ask for help so remember that we are always here for you. If you have any questions about photography or just want to share a story, contact us! If you find the articles here helpful, consider helping us out with a donation.
[button font_size=”16″ color=”#136e9f” text_color=”#ffffff” url=”https://www.paypal.com/cgi-bin/webscr?cmd=_donations&business=lonelyspeckblog%40gmail.com&item_name=These+tips+help+keep+lonelyspeck.com+running.¤cy_code=USD&source=url” target=”_blank”]Donate[/button]
Thanks so much for being a part of our astrophotography adventure.
-Ian
I recently tried the Hoya Intensifier filter on a Rokinon 24mm f/1.4 during an astro excursion in Northern New Mexico. I was very impressed with the light pollution filtering abilities of this filter. Just bought the 67mm thread version for my 12mm lens.
Awesome to hear! I’m certainly liking mine!
Which would you recommend for M.W. shots, Samyang 14mm that cannot use this filter or Samyang 16mm that can use a 77mm version of this filter. Thank you
Hi IAN,
I see there 2 types on amazon website:
Hoya 77mm Intensifier Red Enhancer Filter
and
Hoya 72mm Red Intensifier Glass Filter
Except the mm difference, which one are you reffering to?
Those are the same from what I understand, except for their different sizes of course.
Ian, thank you very much for the valuable information!
I have a few questions if anyone cares to advise. I’m from Europe but I have a friend who should be going to the US soon and may be able to get this filter for me.
I would love to try this on my Samyang 14mm (no filter threads). Since the clip-on version doesn’t seem to exist for now, at least at a reasonable price, would it be in any way viable to somehow attach a 77mm one in front of the lens – cheap DIY style ?
Some of you mention vignetting. So for instance if I want to use this filter on a 52mm lens, should I do the obvious and buy the 52mm size, or would it be better to buy a bigger version and use step-up rings to make up for the difference?
Thank you very much in advance for any help on this!
Best wishes,
José
Hi Jose,
14mm Sammy is to wide and the front element is big to use 77mm filter on it. You will have severe vignetting and I am not sure if it worth doing this. You might consider to use different type of lens.
Regards,
Emil
I’m using the Tokina 11-20 which runs 82mm filters. This only goes up to 77mm. Any good options for 82mm?
New, but for a price, there is still some Tiffens around in size 82: link
But I’d suggest loitering on ebay looking for used Tiffen or Singh-Ray to try to get sensible cost. A Tiffen 82 went for $56 back in Dec.
I would suggest the Tiffen that William Shaw mentioned. In the meanwhile, I’m contacting manufacturers to see if I can maybe get some of these in bulk, perhaps even in a square filter size. The Tiffen Cokin P one is ridiculously expensive and I want to find a cheaper alternative.
Thank you, William and Ian!
Great post Ian!
The Hoya Intensifier seems impossible to get in Europe. Amazon doesn’t ship here, and B&H changers almost double the price for shipping and customs handling.
I see German made B+W filters include a Red Enhancer filter in their offering, i.e. the B+W F-Pro 491 Redhancer Filter. Judging from a graph I found in a review, it seems to block out the same parts of the spectrum as the Hoya. Cannot find a lot of info on it though, but I assume it would allow the same application as the Hoya?
Wim
Wim – are you sure about Amazon – they sent mine to the UK from the US without any problems at all. Maybe UK is not part of Europe… I found the B+W thing on the web but no-one who could supply it, and it appears Tiffen are not producing enhancers any more – my attempt to order one kinda vapourized.
The only other option I found, although it is a LOT more expensive: the Singh-Ray enhancer does the job of cutting the street-light yellow – my 95mm just arrived and I think it is more neutral in its colour balance than the Hoya (the yellow acquires a magenta-ish tinge if you look at a street light through the Hoya, and this is absent from the Singh-Ray). Singh-Ray is an (expensive) option if you must have larger or square, or low-profile options to address vignetting concerns. Though on my Nikon 20/1.8 there is no vignetting from the Hoya 77mm. For the money it is clearly a great choice, as Ian’s great review points out. I’d be very interested to hear more affordable solutions for sizes above 77mm and rectangular shapes. I saw a rumour somewhere that Optolong were working on clip-ins for Nikons – anyone heard that or know if it’s real?
Hi all
I tried to get an Hoya Enhancer red as well here in Germany. From the german importer for Hoya it isn’t available due to “economical” reasons. Importing from US is quite expensive.
Unfortunately the B+W 491 Redhancer is not in the production range at B+W anymore, but it seems few dealers have it in stock. I found one used in very good condition.
The B+W 491 is also made from Didymium glass and shows a similar absorbance spectrum.
I will give a try on my Samyang 12 mm and my Fuji X-E2.
Michael
@Ian: GREAT!!!!!!