

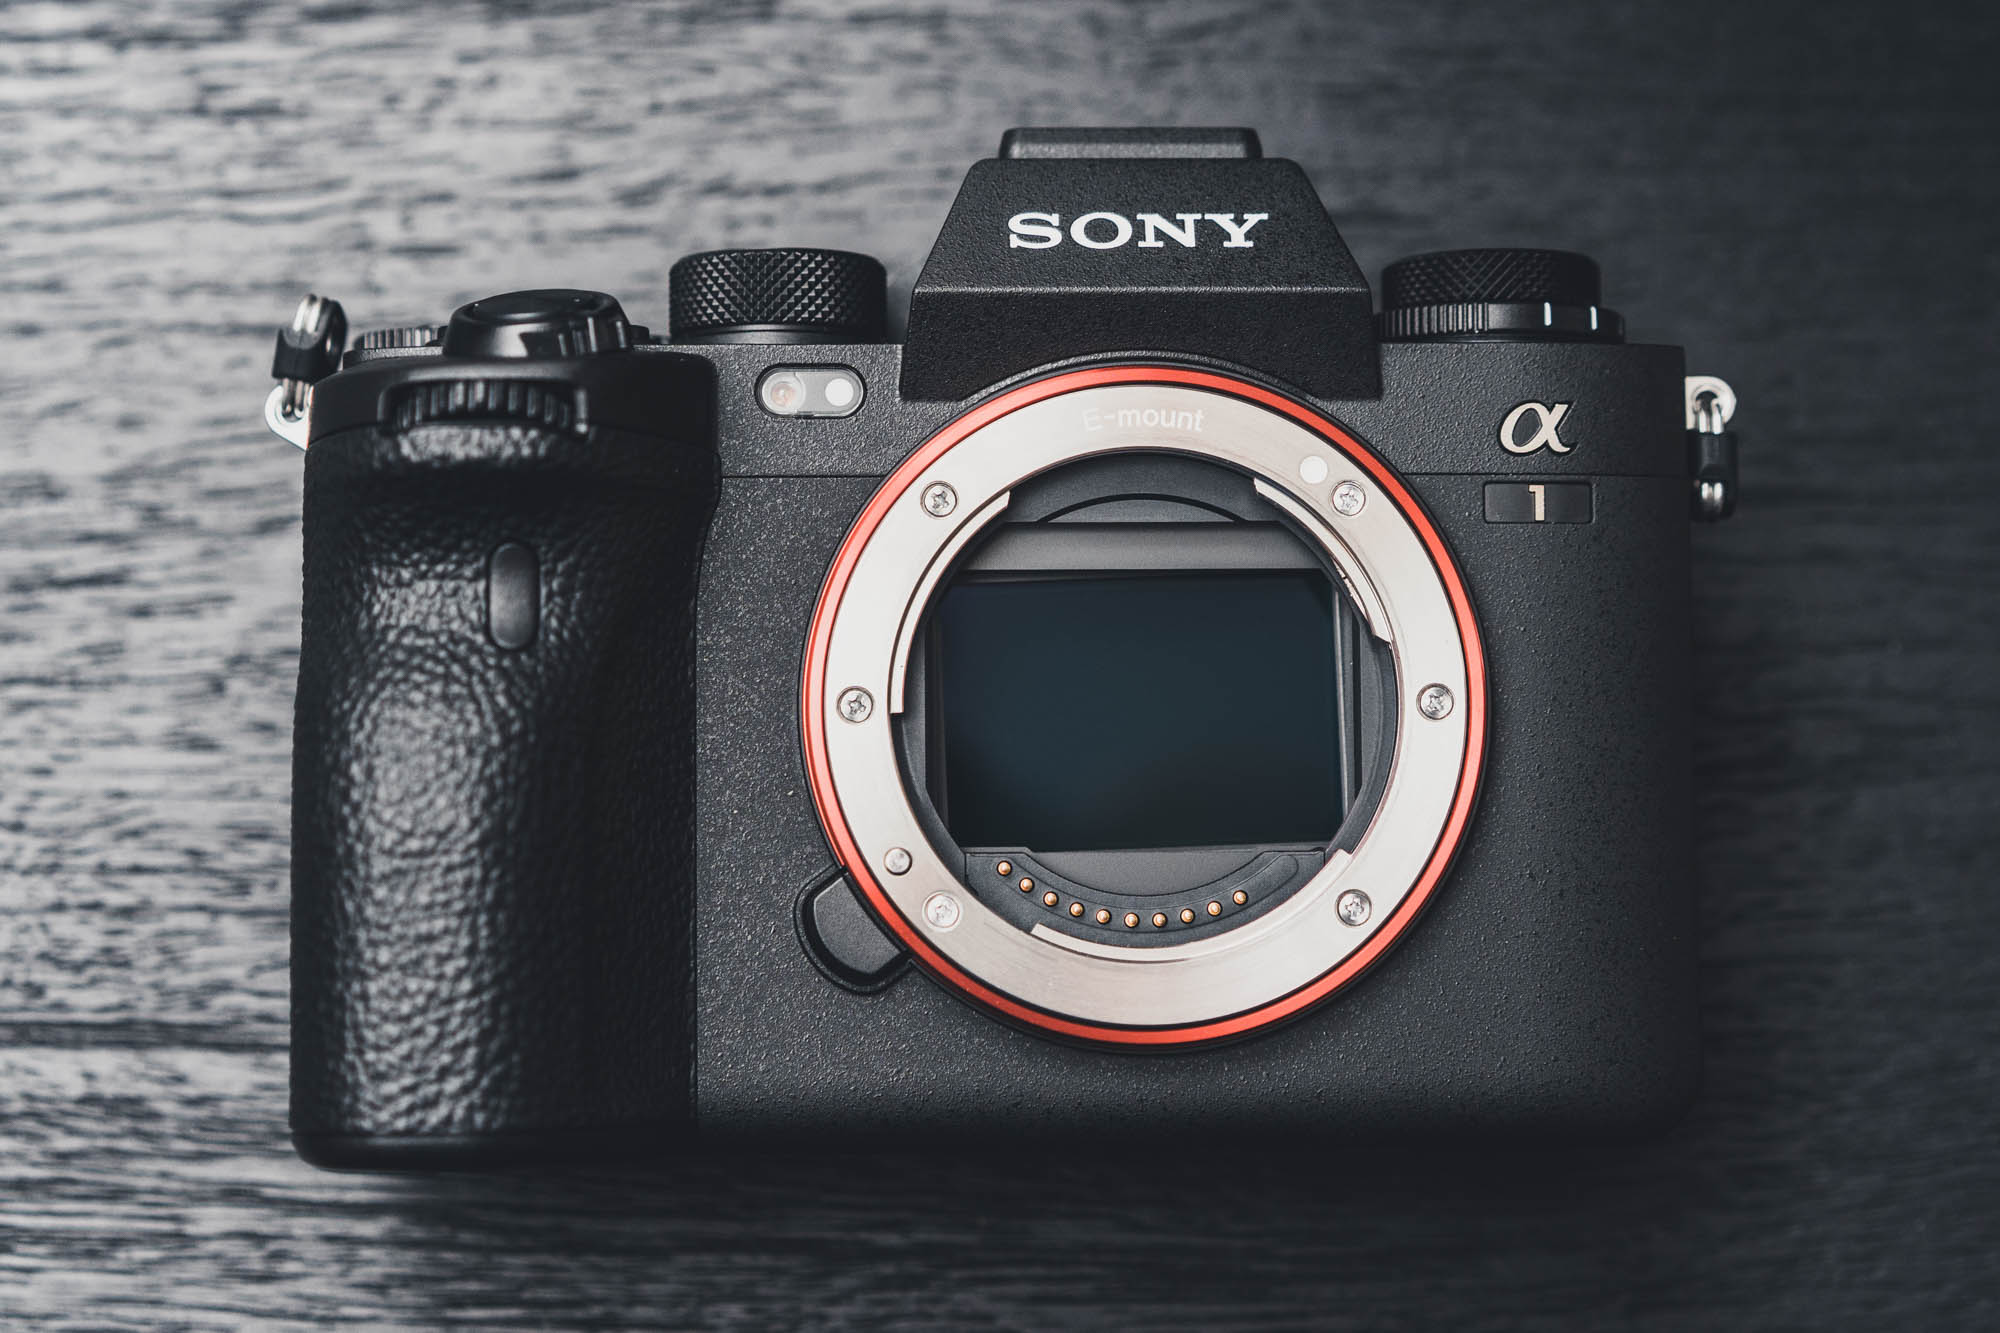
The Sony a1 is Sony’s new premium flagship camera. It’s the best of Sony’s lineup, but is it the best camera for you? Here are my thoughts on the Sony’s most expensive Alpha camera.
Intro
The Sony a1 is the master of all trades in Sony’s Alpha camera lineup. Sony has combined the very best features of the a7 and a9 lines of cameras into a single body: resolution, speed, and video. It has 50 megapixels, can shoot raw stills at up to 30 frames per second, and records 8K video. Its shutter is rated for 500,000 actuations and it has the highest resolution electronic viewfinder on the market. If you were to ask me “what is the best camera I could buy at any price?” I would probably answer: “the Sony a1”. But the real question should be: “what is the best camera for you?” That answer isn’t so straightforward.
When I had the opportunity to shoot with the a1, I was very excited to be able to use a camera with such a beefy specification list, but I’m not blind to the fact that this is a very expensive camera. Let’s see what those hard earned dollars can buy, and how that translates to real-world usage.
Body and Handling
In price and specifications, the a1 is sort of like Sony’s mirrorless-era equivalent of Canon’s 1D X Mark III or Nikon’s D6. It sits high on top of Sony’s lineup in both specification and price, but eschews the typical expectations of such a camera in terms of form factor. Rather than the huge double grip DSLRs that are synonymous with birding and sports photography, we’ve got another small mirrorless body that looks almost identical to Sony’s compact a7 or a9 line of full-frame cameras… it looks very much like the a7III we’ve owned for a few years.
A few years ago, when we compared the Sony a7III with our previous choice for night photography, the Sony a7S, much of our review of the a7III was about the incremental and subtle improvements that Sony had made over the development of their Alpha line of cameras. After 3 years since the release of the a7III, the new a1 seems like a similar evolution. Most of the noticeable changes that the a1 presents are generally subtle or under the hood. A few of those changes are a little less subtle.
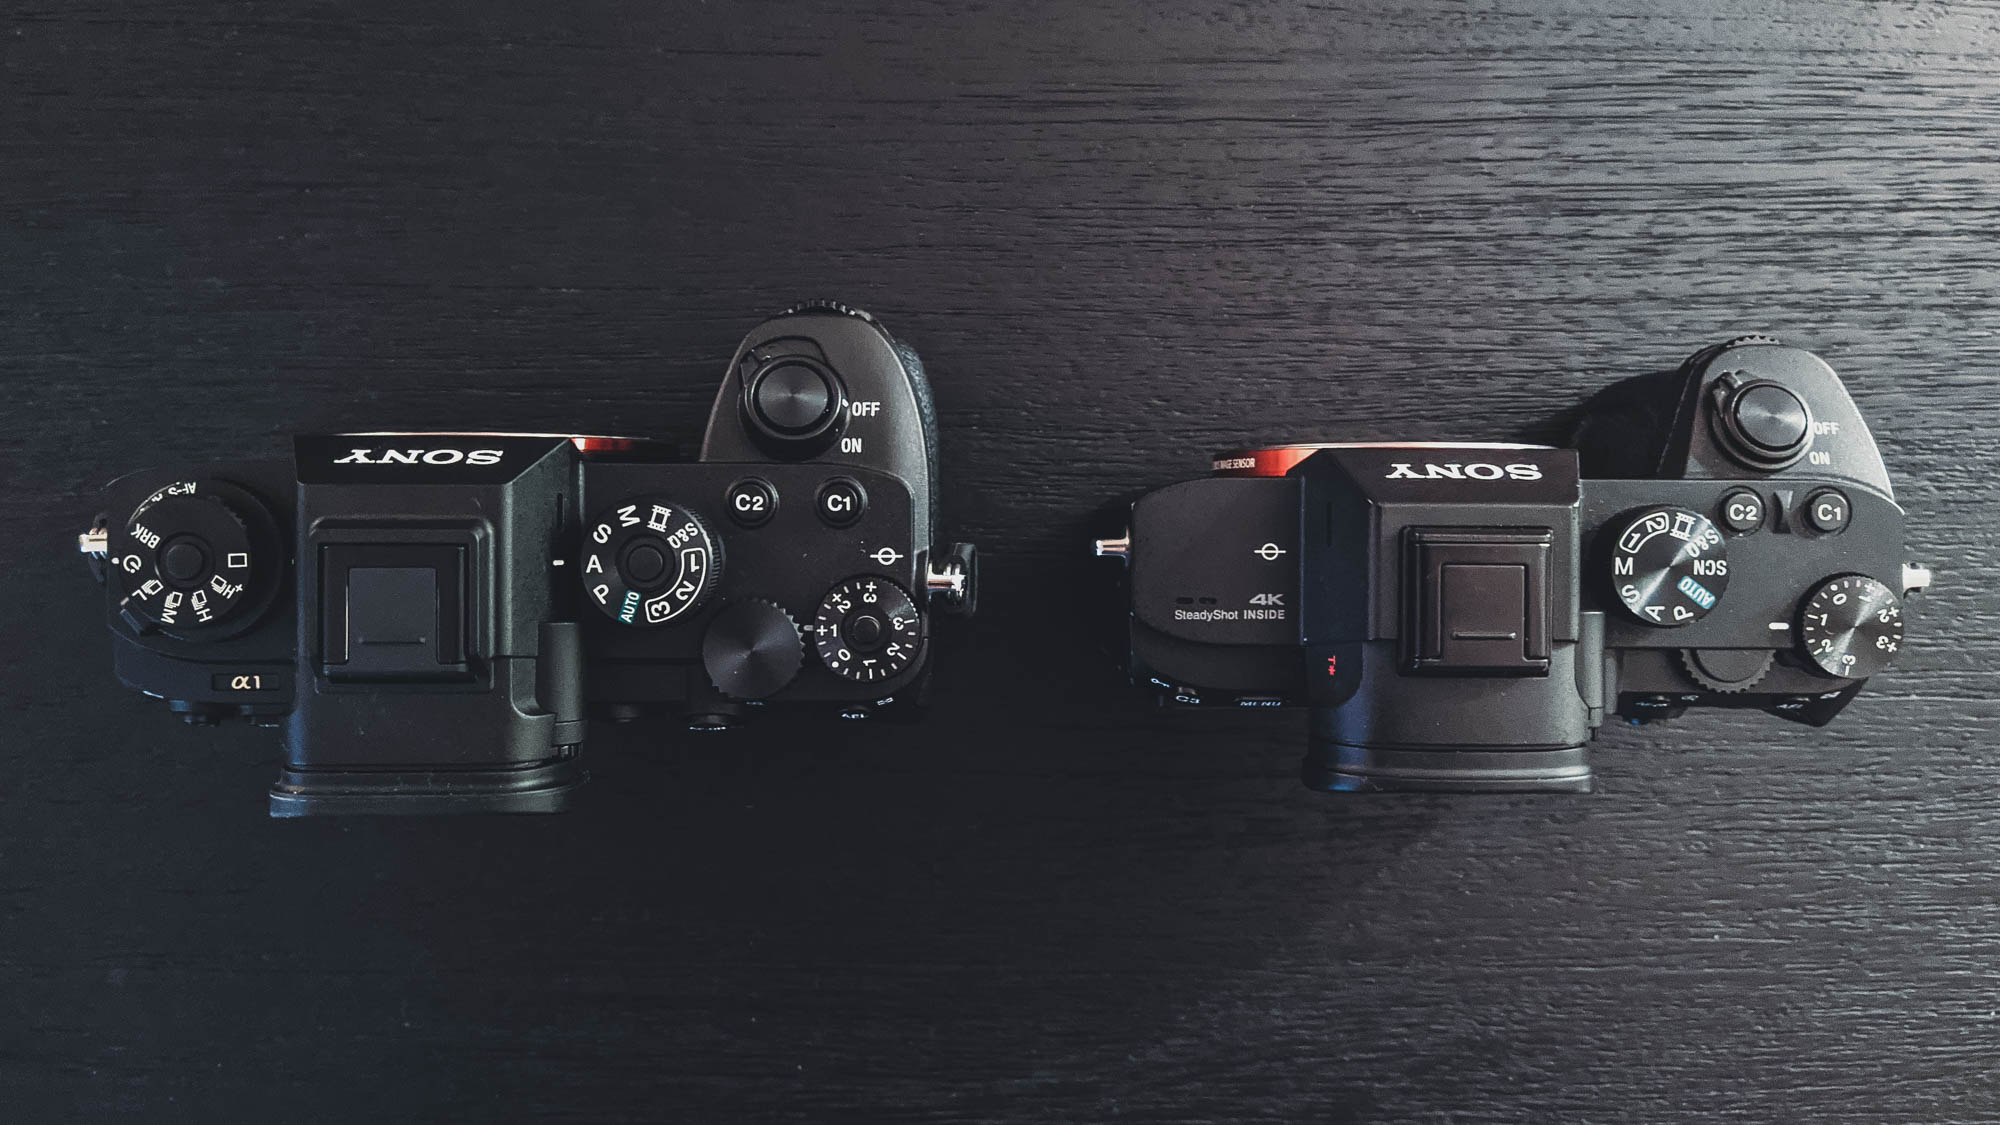
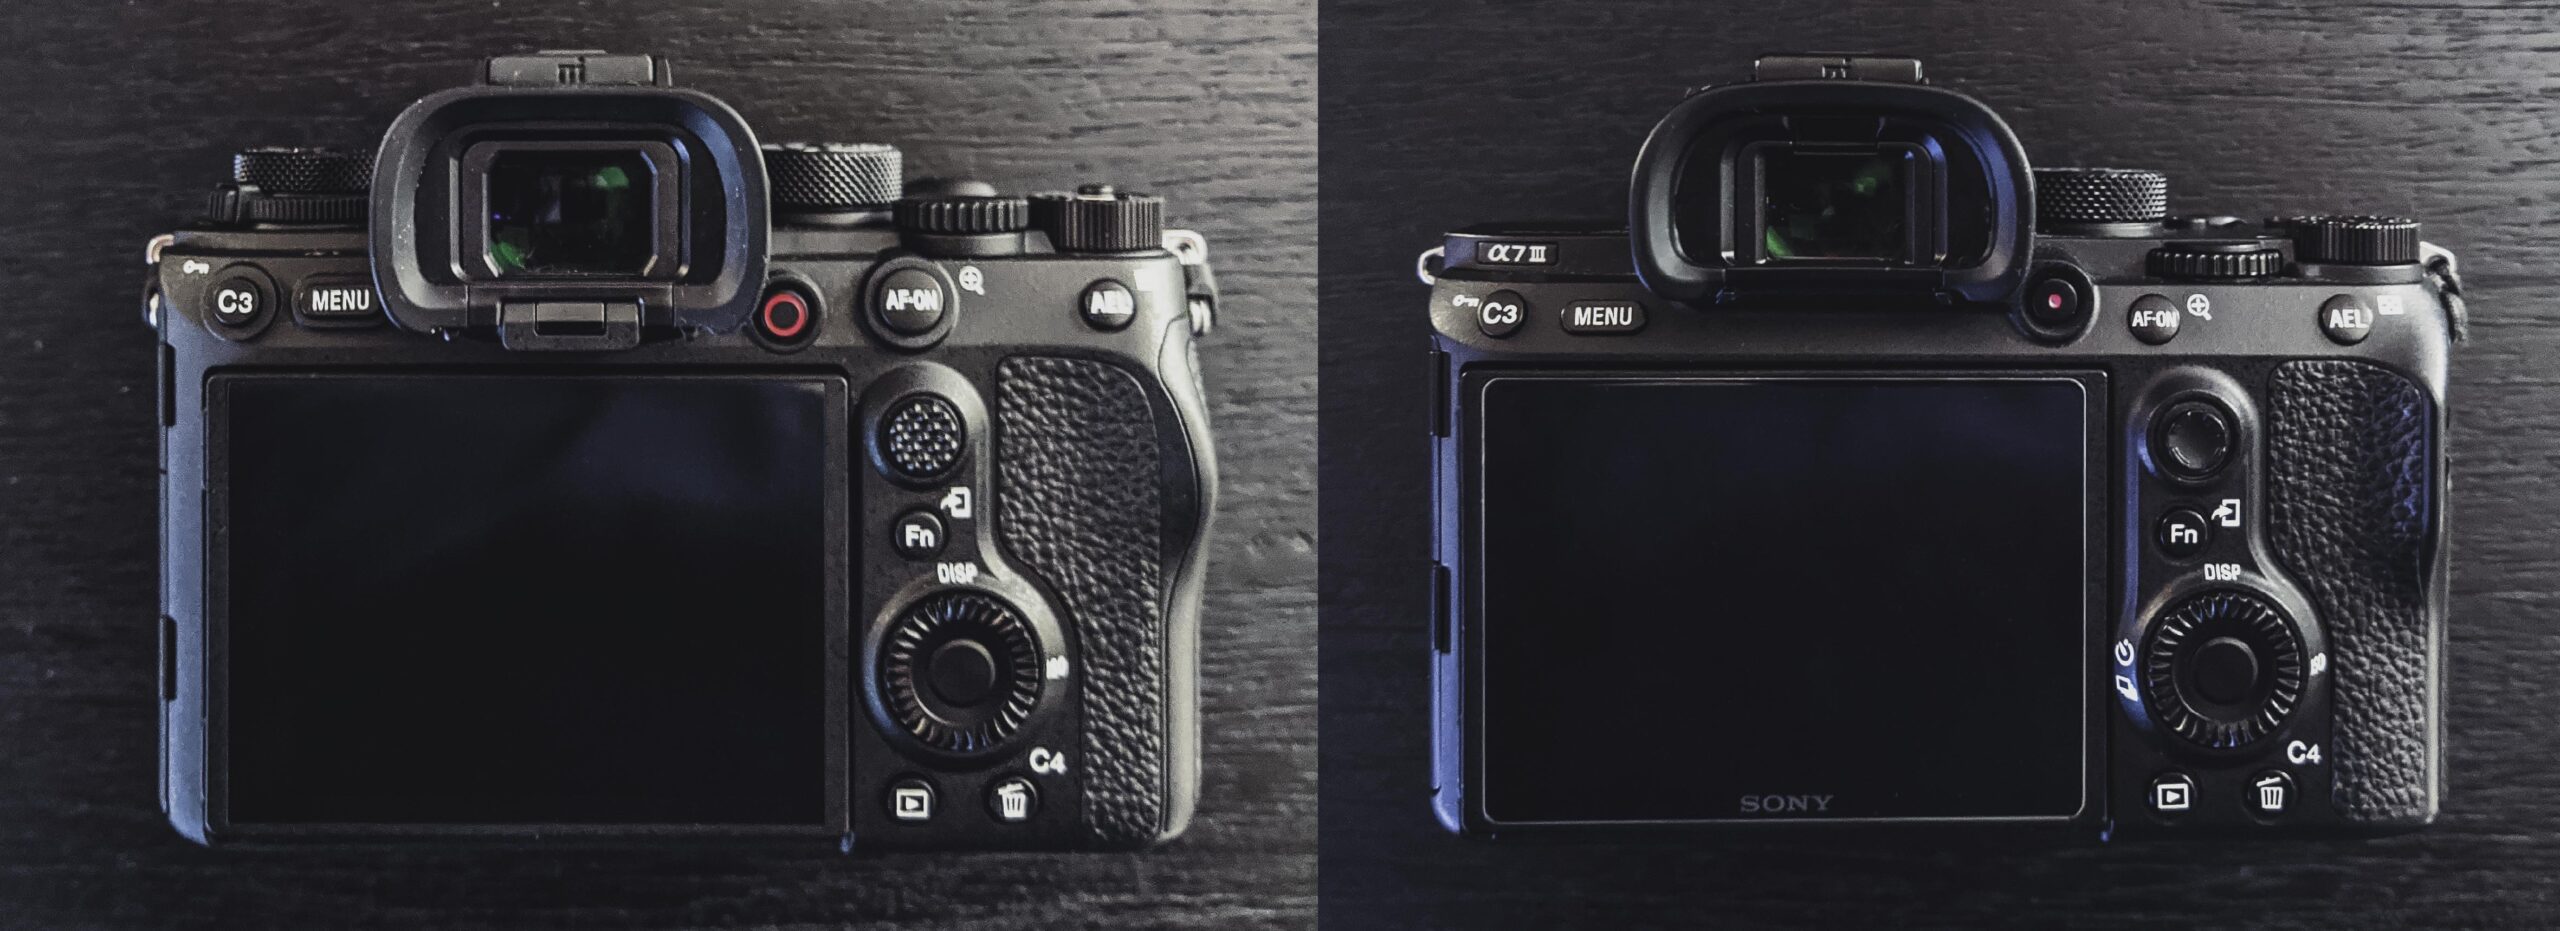
Looking at the Sony a1 alongside the Sony a7III, it’s not immediately apparent that the a1 is a whole lot different. On first glance, the camera bodies look really similar. It has the same camera body shape, the same rear button positions, the same tilting LCD. Save for an extra top dial for selecting focus and drive modes on the a1, it’s clear that the a1 is very similar to any of the other current-gen Sony Alpha cameras. One thing that isbarely noticeable in photos of the camera body: the body is thicker and taller overall and that means the grip is just a little bit taller than the a7 series cameras which gives room for a pinkie finger and thus makes the grip slightly more comfortable.
Something that’s not immediately apparent is that nearly all of the buttons and dials on the Sony a1 are customizable, just like we’ve come to expect from our a7III. But the a1 does customization even better: now it’s possible to customize each button separately for stills, movie and playback modes. The same applies to the custom Fn menu: you can make one custom menu for stills and one for movie mode.
A Middling Monitor
In terms of physical features, the first thing that I want to talk about is the rear LCD monitor of the a1 because it’s the easiest thing for a reviewer to criticize. It is basically the same exact LCD that we have on our 3 year old Sony a7III. It tilts but doesn’t swivel, so its tilt function is only useful for landscape oriented shots. It’s also not suitable for selfie-oriented shots, making it much less appealing as a vlogging camera when compared to the Sony a7SIII or a7C bodies.
The most obvious other gripe for a new flagship camera is that this rear monitor is an 800 pixels by 600 pixels resolution (1.44M dot) LCD panel which is marginally lower resolution when compared to cameras like the Nikon Z7II, Canon R5 and Panasonic S1R as they all have 960 pixels by 720 pixels (2.1M dot) panels in their rear displays.
In practice, this comes out to 333ppi on the a1 versus 400ppi on the competition, both of which would be considered “retina” displays at normal viewing distances of 9 inches or greater. Ultimately, the a1 rear monitor is still a “good” display, but on the camera that’s positioned to be the very best of Sony’s Alpha cameras, it feels like a misstep.
Beyond just the physical specifications of the a1’s rear monitor, I’m very happy that Sony has (finally) implemented a more complete and functional touchscreen interface with the a1. On previous generations, the touchscreens on Sony cameras left a lot to be desired. One of my biggest criticisms of the a7III was that the touchscreen could only be used for focus point selection. On the a1, we get a completely new interface with a menu designed to work for touch. Now, nearly everything in the menu is selectable via the touchscreen, making it more intuitive to navigate. I did, however, find it interesting that shutter time and aperture are still only adjustable via the control dials and cannot be changed via the touchscreen.
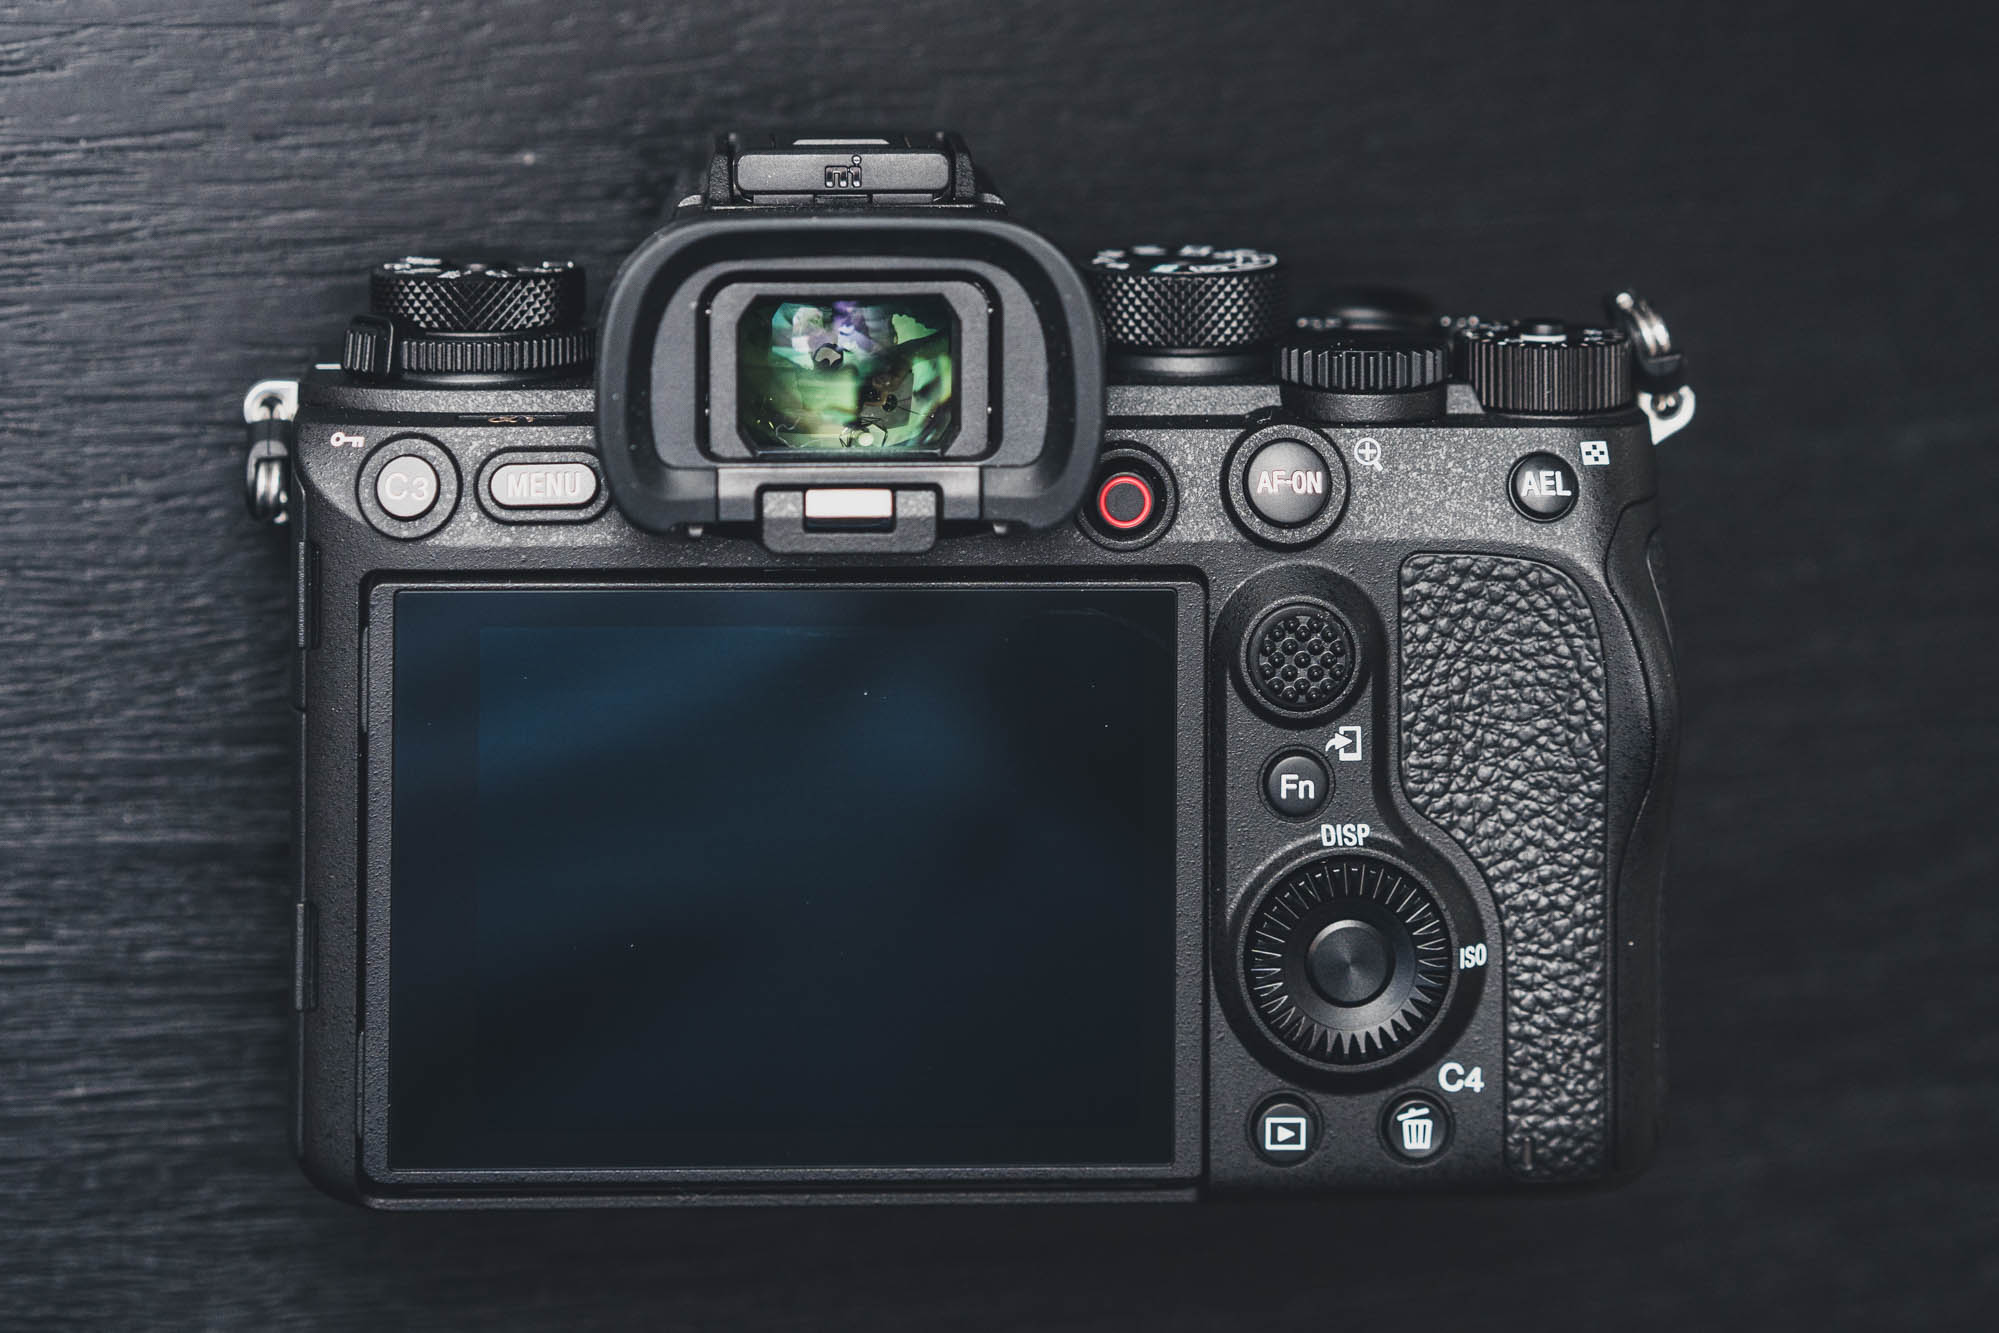
The Best Viewfinder
Where the a1 makes up for its slightly lacking rear monitor specification is in its electronic viewfinder. It’s simply spectacular. It’s a 9.44M-dot OLED EVF(that’s a 2048 pixels by 1536 pixels resolution) with a 0.9x magnification. That’s a really good magnification spec. The most striking thing is just how large the viewfinder is when you look through it. It’s like a big window through to your lens. At the moment, the only other camera with this same high resolution viewfinder is the Sony a7SIII.
It’s hard to describe just how BIG the a1’s viewfinder really is when looking through it, so I made a graphic to show how it compares to other Sony cameras like the a7III. Most full-frame and other high-end cameras max out at roughly a 0.75x-ish viewfinder, very similar in image size to the Sony a7III viewfinder, shown in the center below:

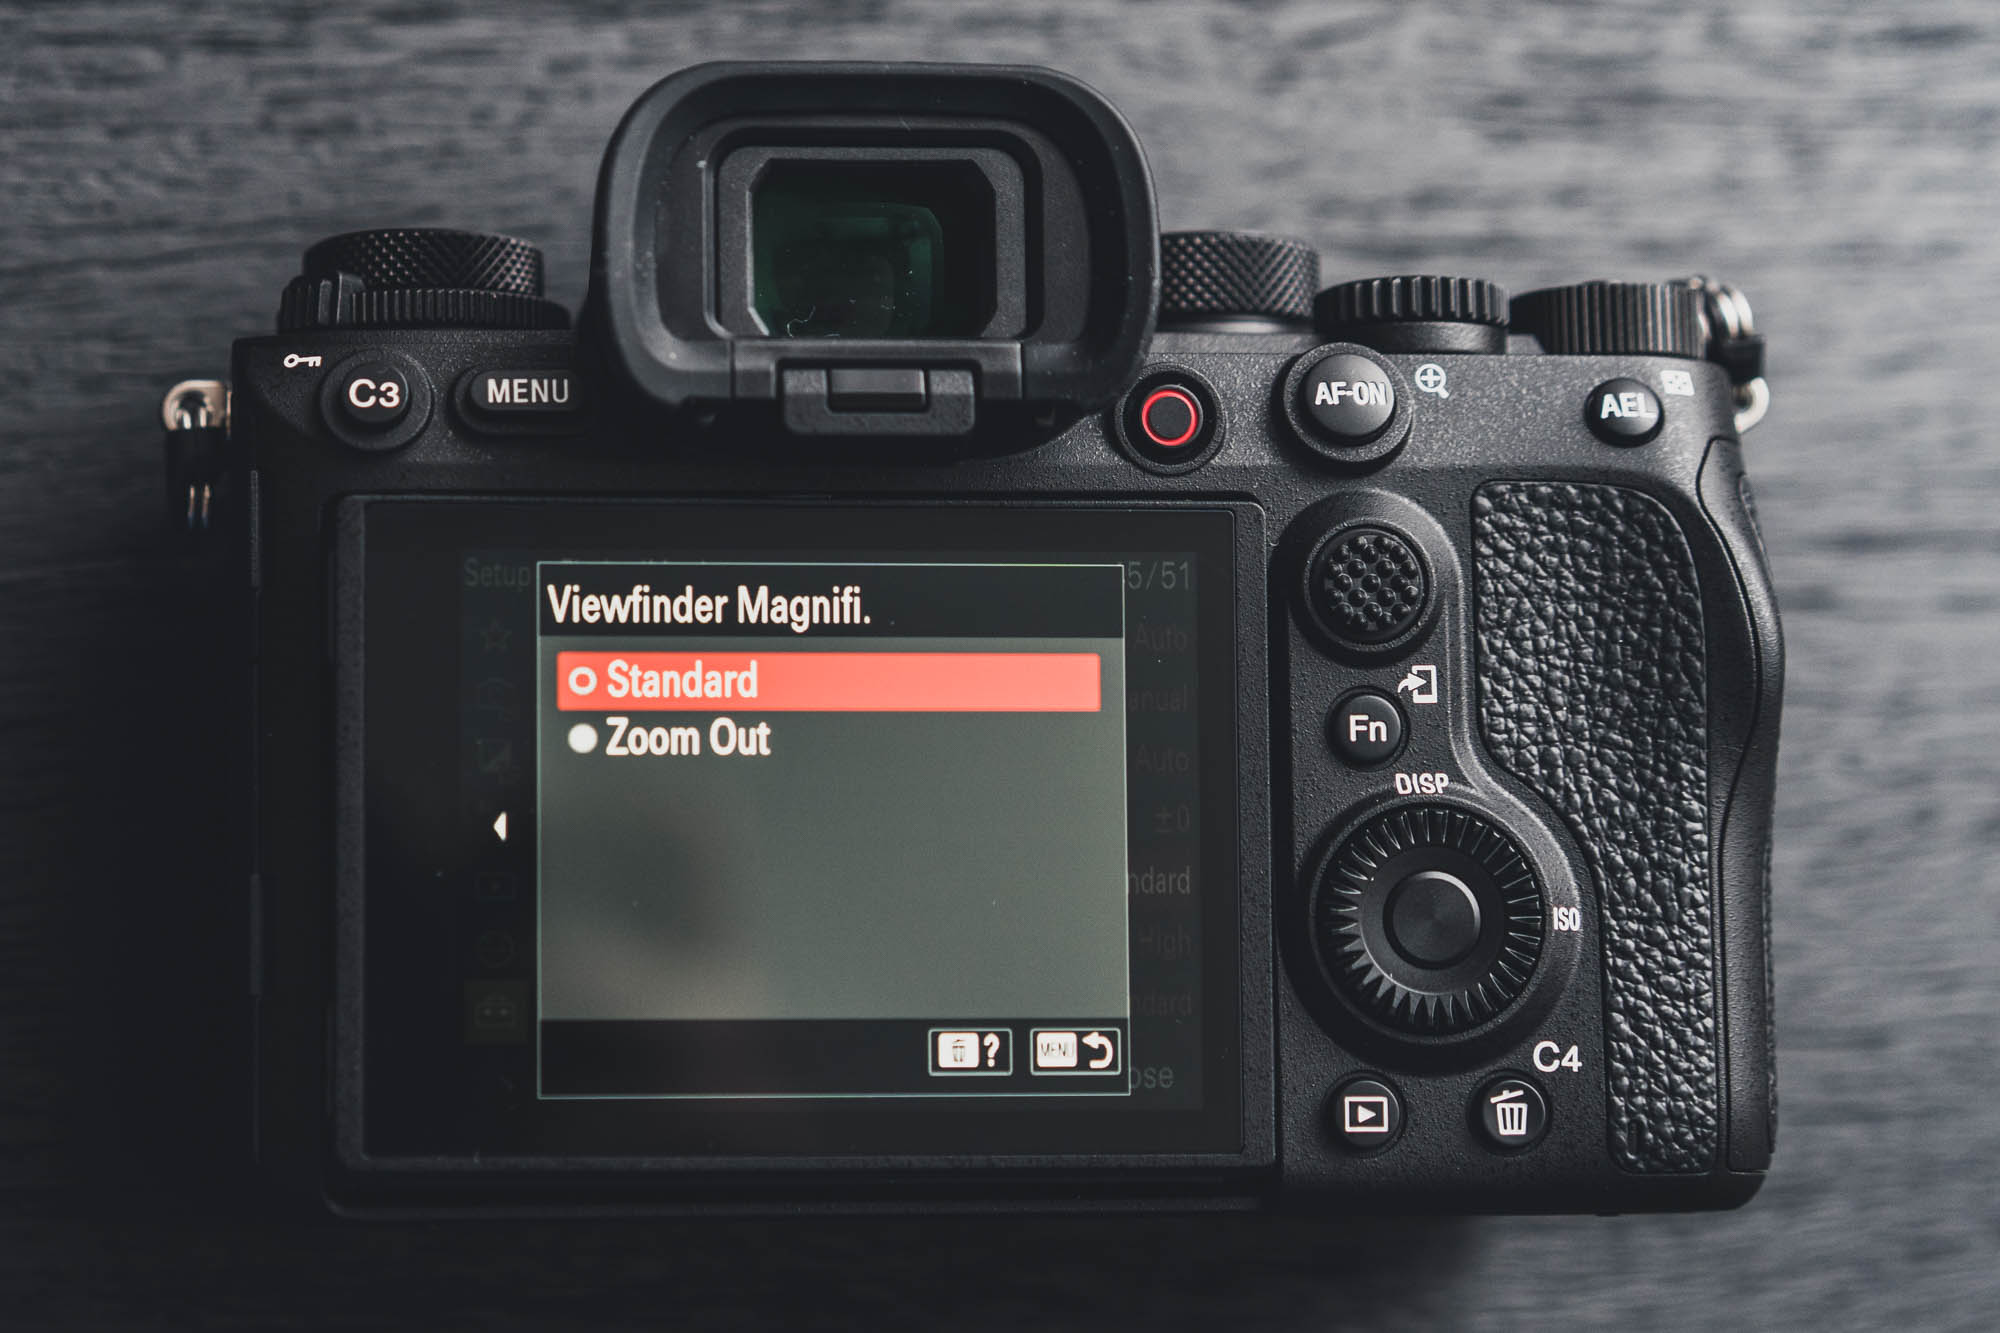
Basically, the a1 has the highest resolution and largest viewfinder on the market. Photographers also have a few ways of customizing the view through the EVF. It can either be set to its full 2K resolution or a much higher frame rate (240fps) mode with slightly reduced resolution. For glasses wearers, it’s also possible to reduce the viewfinder image size by selecting the “Zoom Out” setting for viewfinder magnification in the menu to make it easier to see from an increased eye point distance.
It’s notable that the EVF does drop a bit in resolution when half pressing the shutter button, particularly noticeable in AF-C mode, which could make it seem as if the image suddenly went slightly out of focus. After some experience, I came to trust the autofocus well enough that this visual change did not bother me too much. Even so, it’s still the best viewfinder I’ve ever used on a camera so far. The jump in size feels like the difference between using an APS-C DLSR and a full-frame DSLR, but in this case it’s even bigger than pretty much any full-frame camera out there.
Dialing it Up
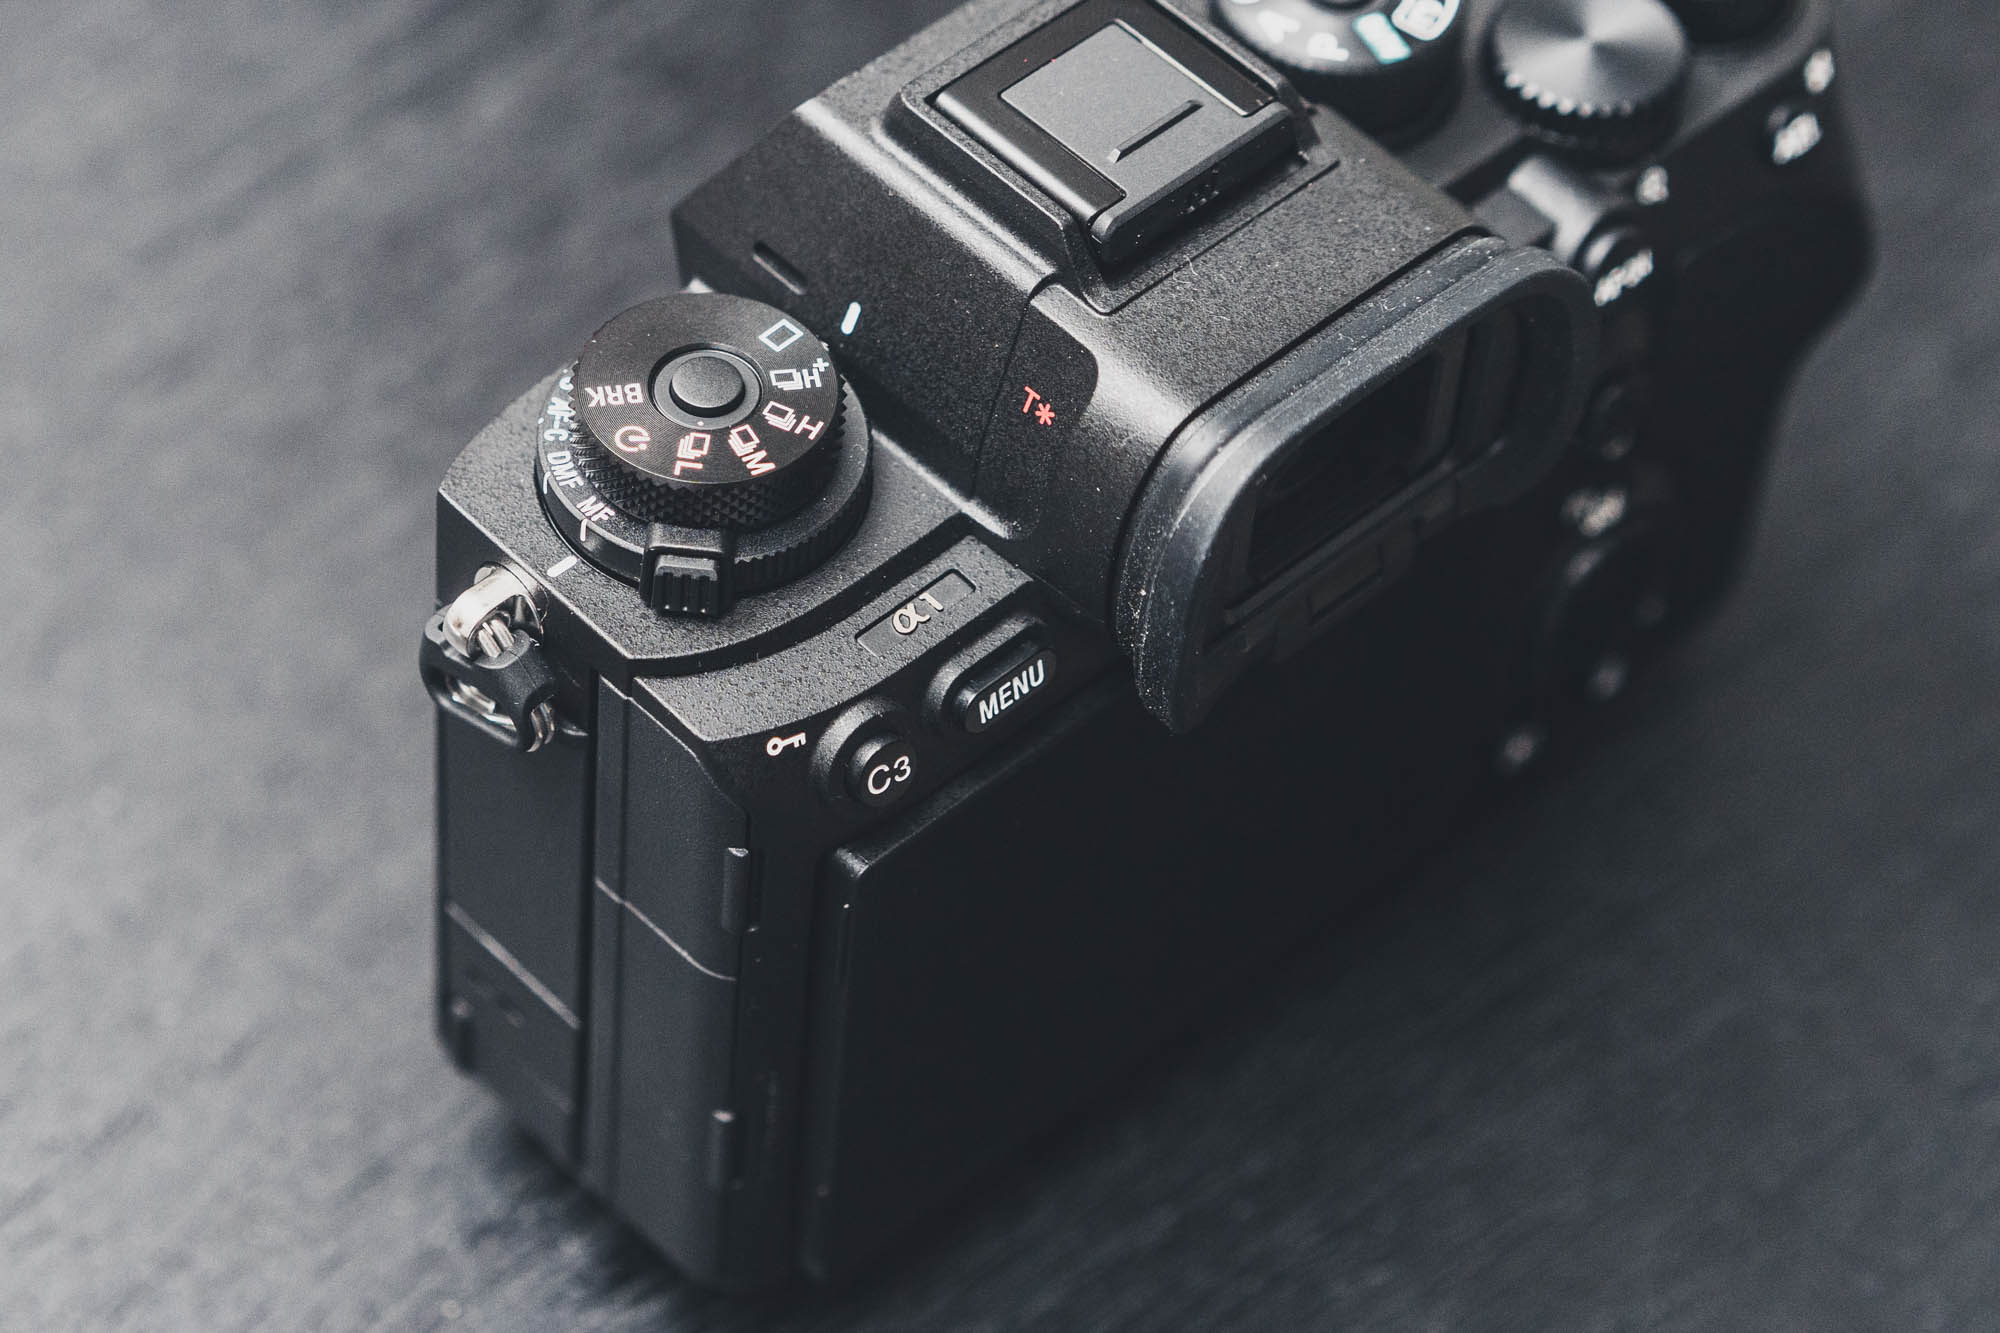
In terms of control dials and buttons, the a1 feels just like any a7 series camera, save for the additional dial on the left side of the camera’s top plate. Similar to the a9 series, the top left dial is used for selecting the drive speed and the focus mode. Personally, I’m not actually sure I prefer the physical dial control of the a1 over the just-as-easy rear button menu default of the a7 series.

While it seems easy enough to be able to switch from single shot to continuous with the dial, some of the other modes such as bracketing or self-timer present a problem: If you want to change the number of bracketed images or the self-timer length, you still need to enter the camera menu, either through the main menu button, or by programming a separate custom button to “Drive Mode”. This behavior effectively splits up the complete drive speed functionality across a dial and a separate menu. By contrast, the a7 series can do it all in a single quick menu that’s accessible with a single button press.
I feel a little bit like the addition of this extra dial is like trying to throw a solution at a problem that didn’t exist in the first place. I can see how it can be slightly quicker in some cases, but it’s certainly slower in other cases.
It’s also notable that the drive mode/focus mode dial and exposure mode dials both need to be “unlocked” by actively pressing the top button while turning them. The exposure compensation dial is similar, but can be toggled as locked or unlocked.
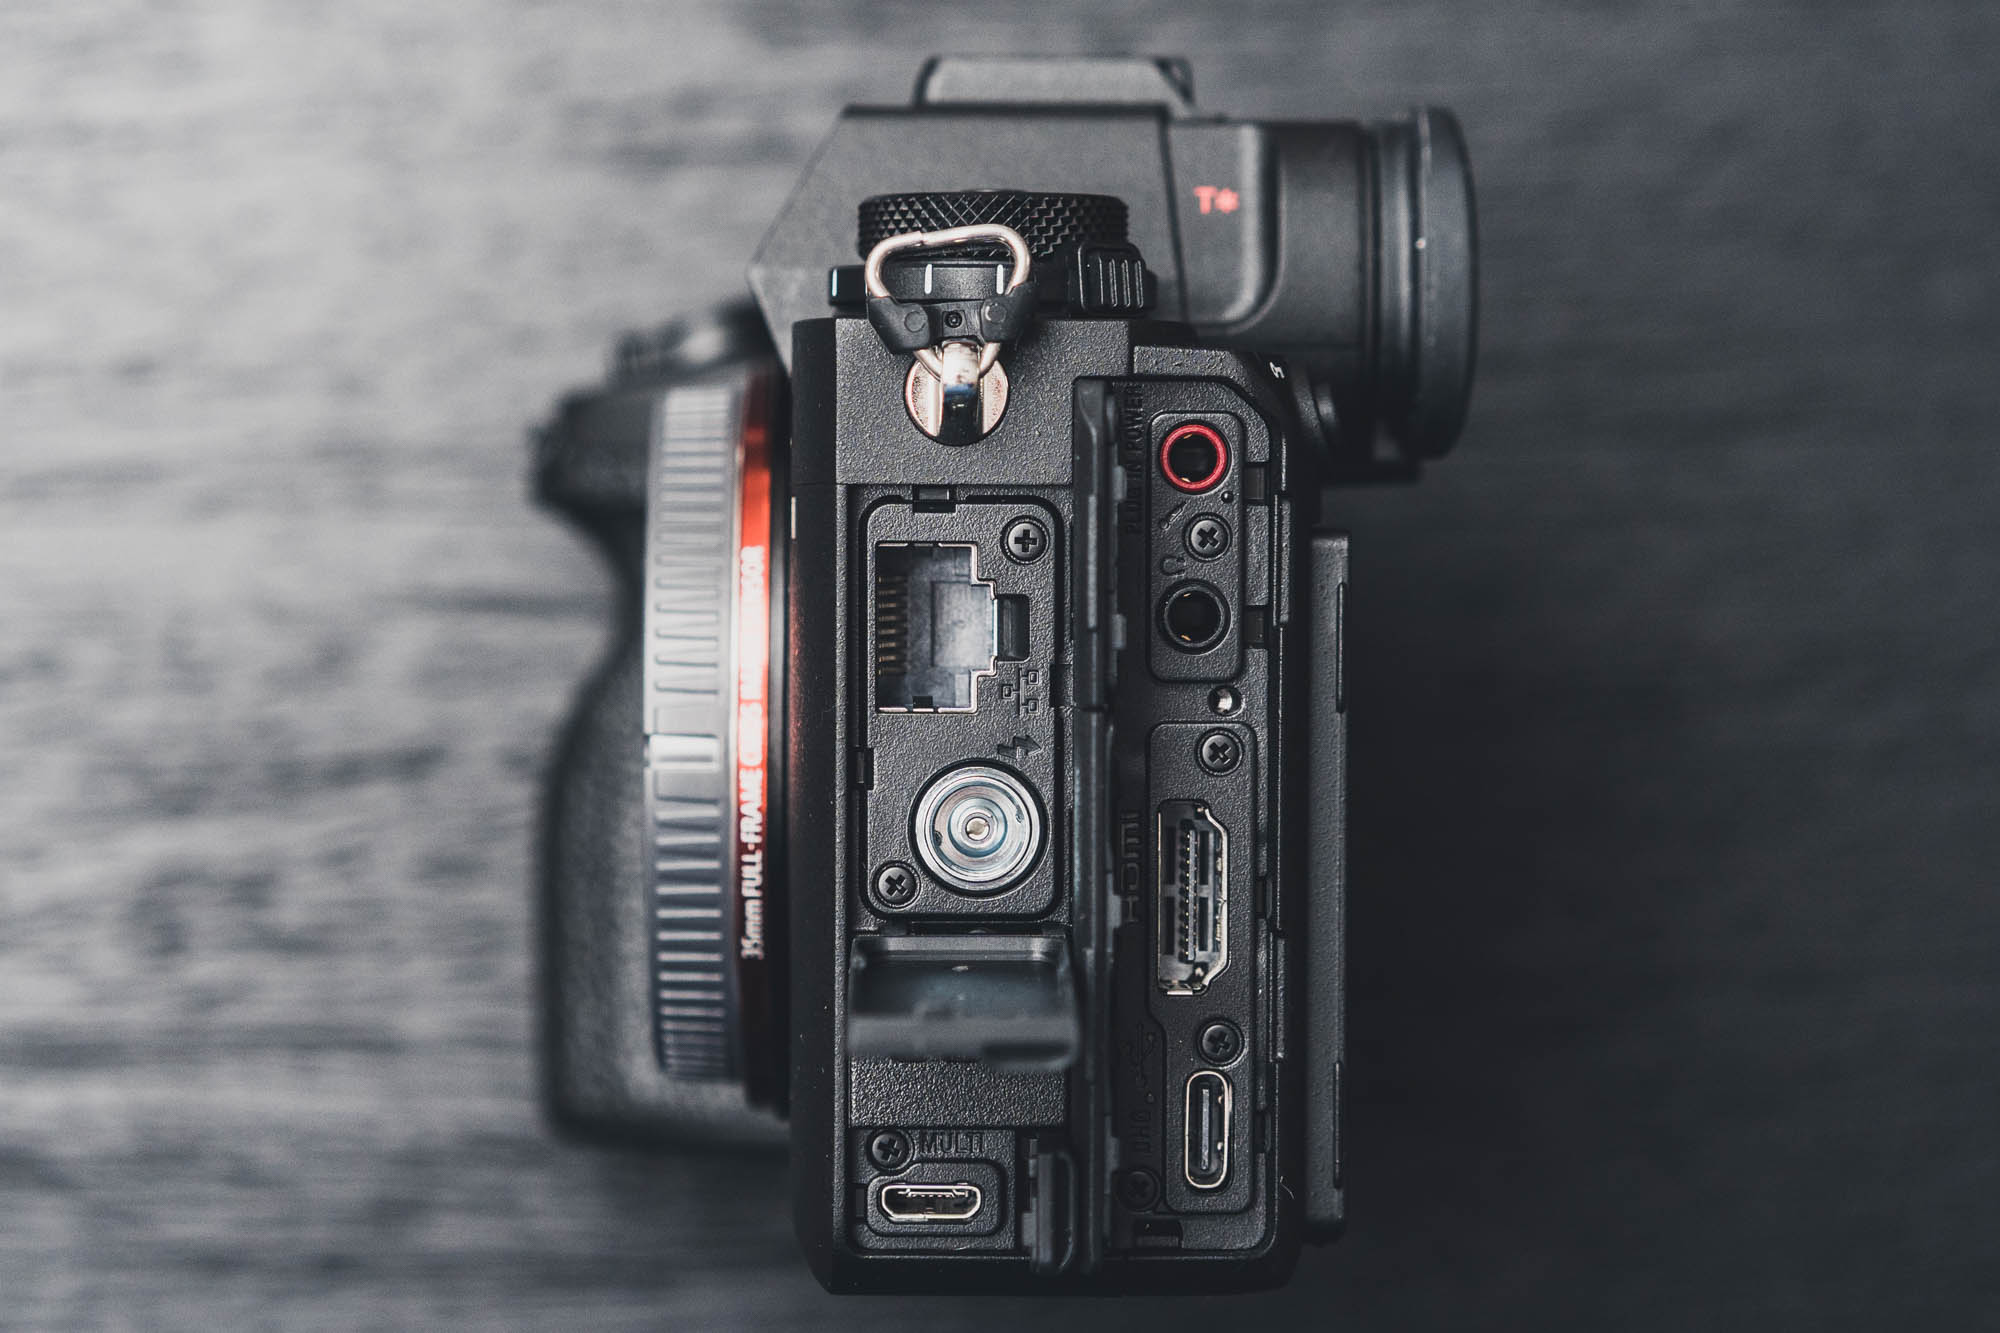
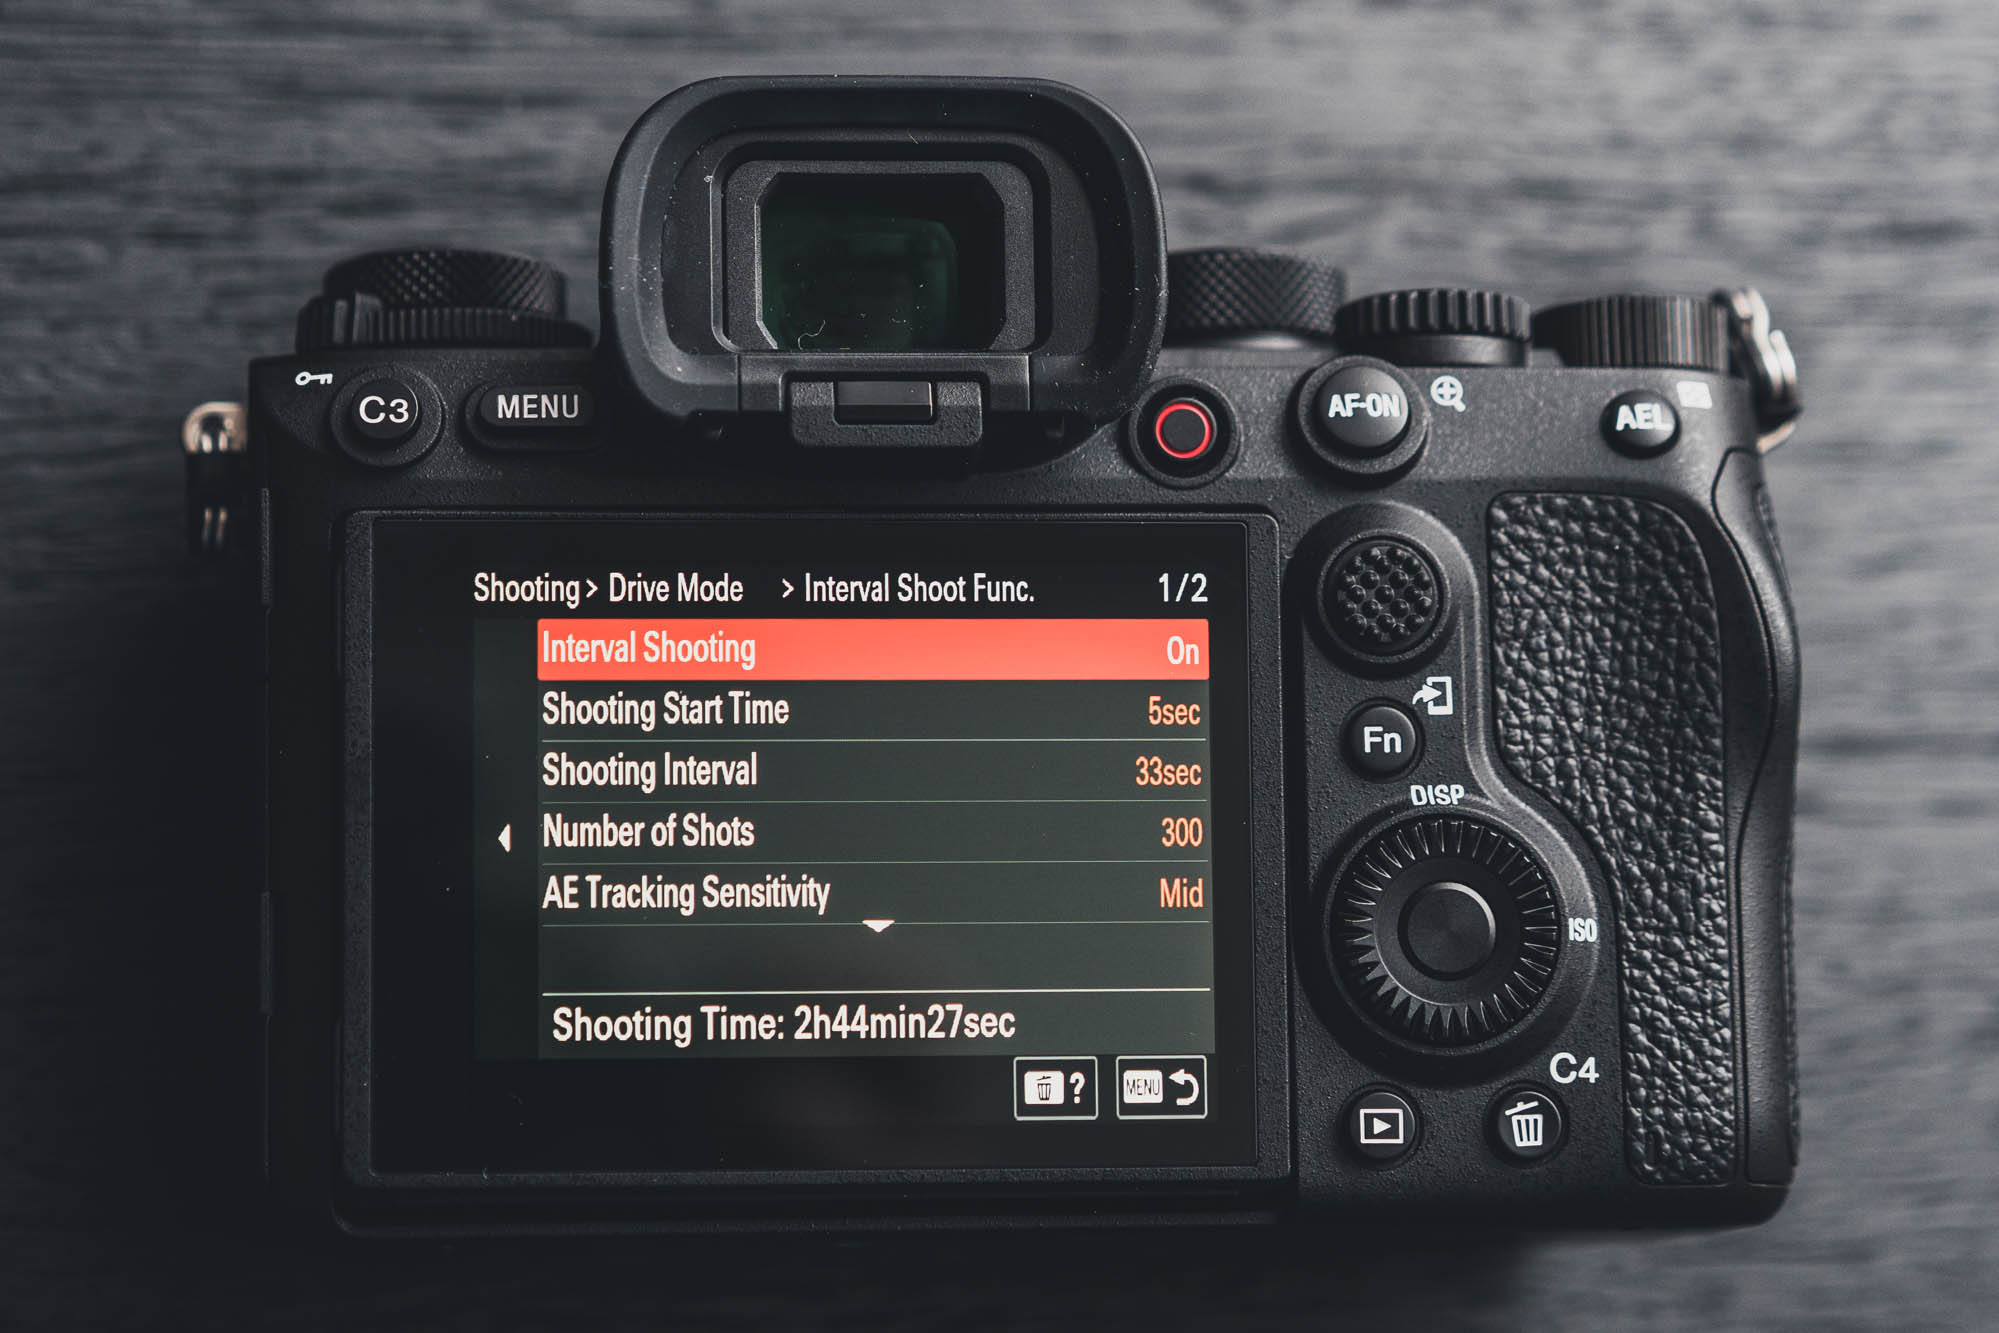
The last few features of the a1 body are things that we’d use a little more rarely: The a1 features an ethernet port for direct transfer of photos to a network server. It’s a feature that’s directly targeted to professional sports photographers or certain production settings. Ultimately, it’s a feature that is out of the realm of my experience and the scope of this review. There’s also a mic jack, headphone jack, PC port for flash sync, full-size HDMI, USB-C and a micro-USB/Multi-port. Similar to the a7III, the multiple-USB ports make it possible to simultaneously power the camera through one, while using the other for tethering, an intervalometer, or other wired controller, an excellent feature for long-term timelapse or video production projects.
Beyond those few things: the touchscreen, the viewfinder and the extra dial for controlling drive mode and AF mode, and a handful of extra ports, the a1 handles just like our a7III.
Speed
The first reason to buy the a1 is speed. When I say “speed”, I mean everything about the camera. The interface is better designed for touch and quicker to navigate, its continuous stills shooting speed is up to 30 frames per second, the autofocus is exceptionally fast on native Sony lenses and has active object tracking, and the new CFExpress Type A cards are an order of magnitude faster than previous generation SD cards. Overall, the operation of the a1 is speedy in every way, making it certainly the best performing camera Sony has ever made, and arguably one of the best wildlife, sports or fast action cameras available on the market today.
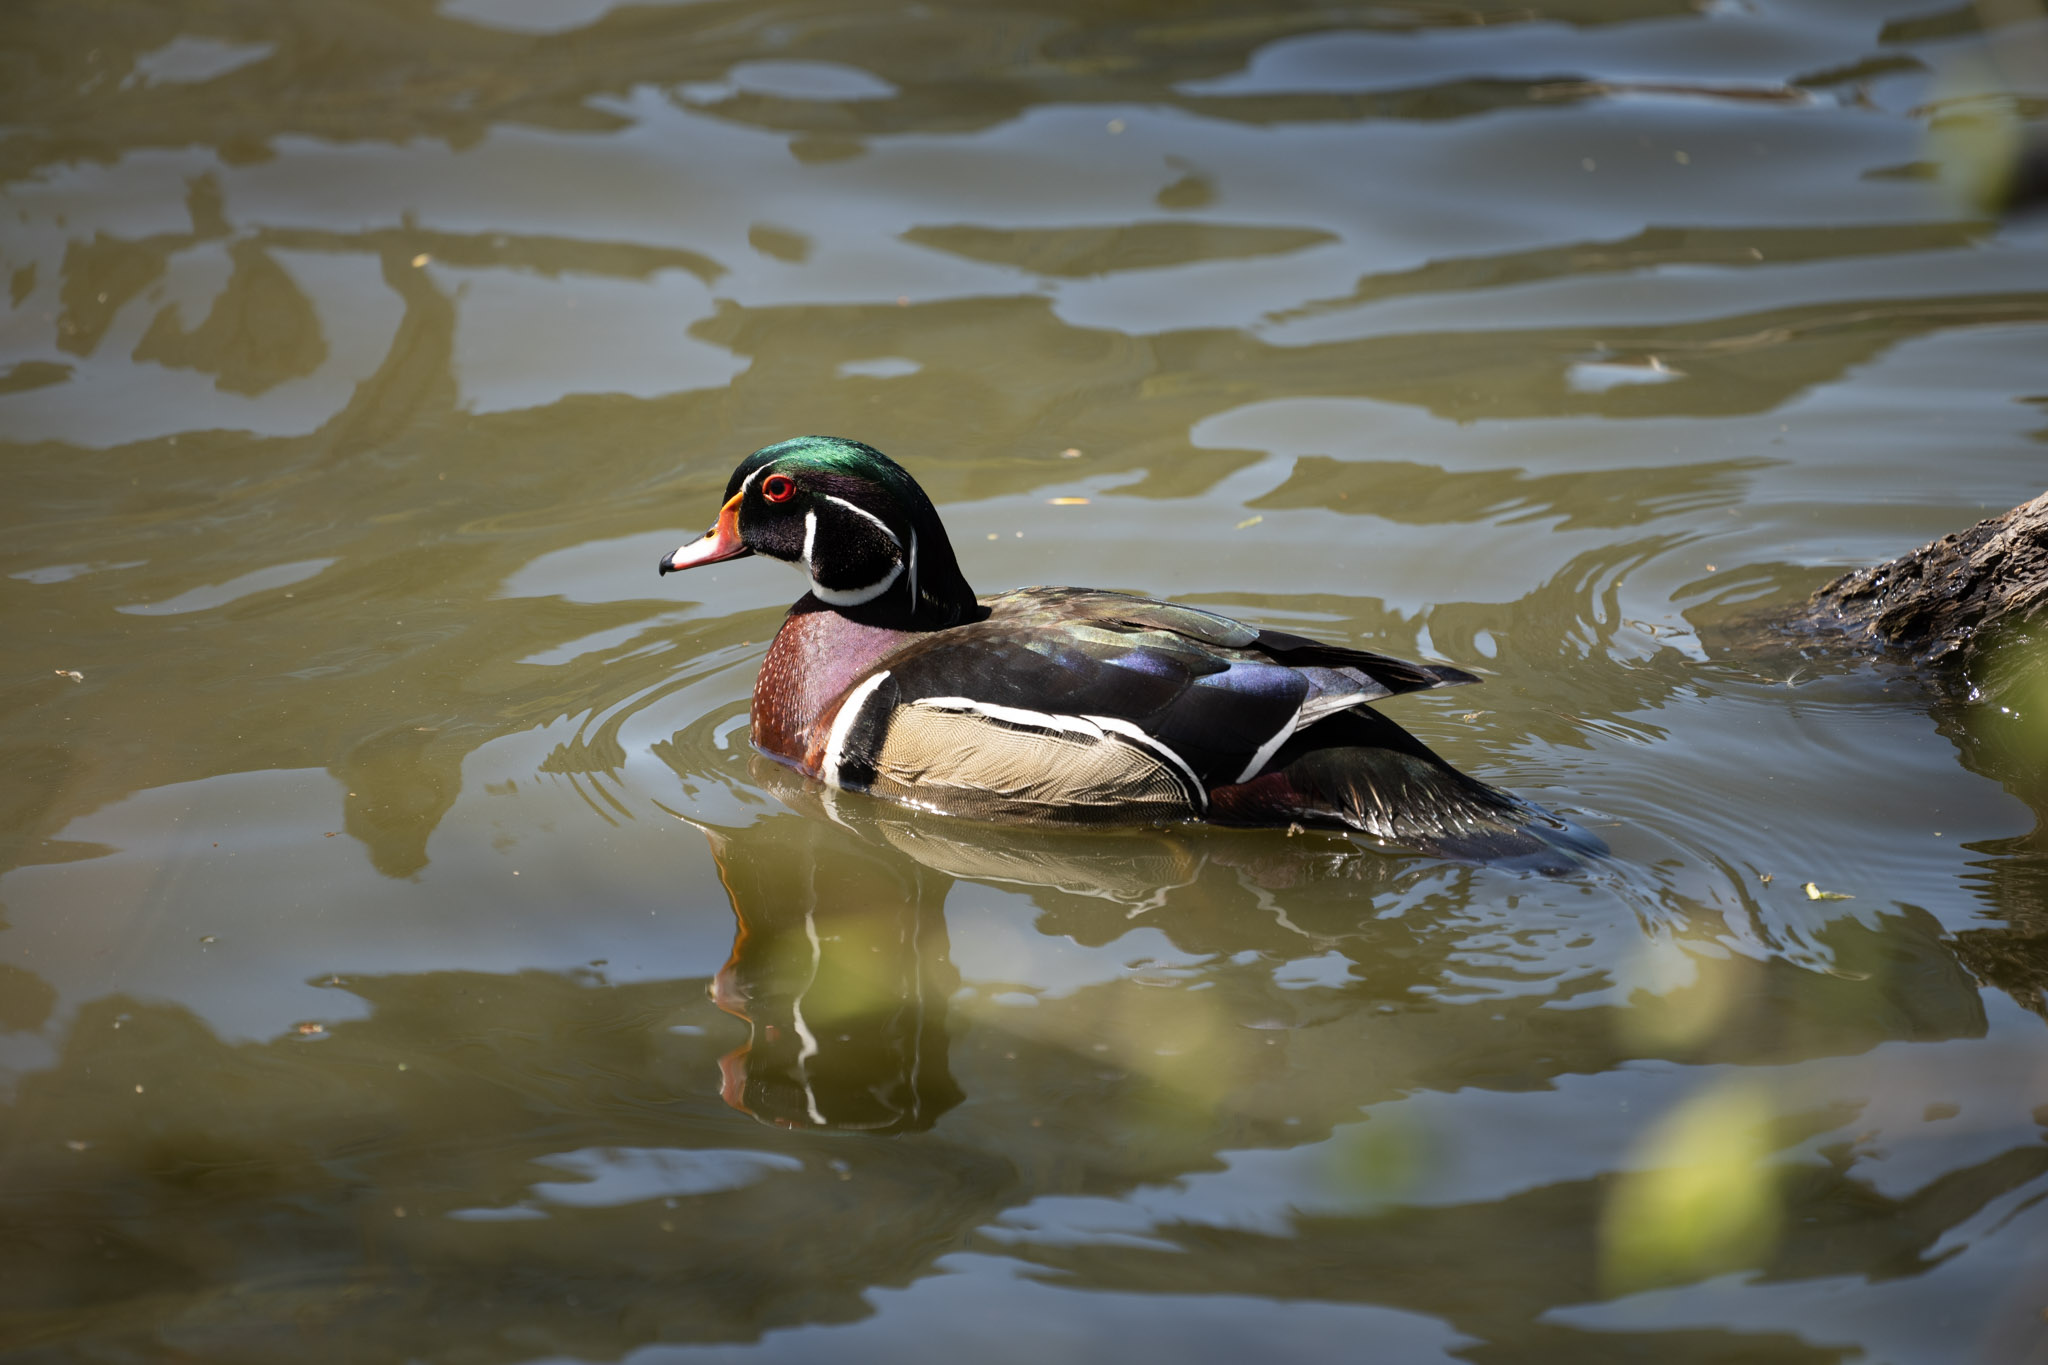
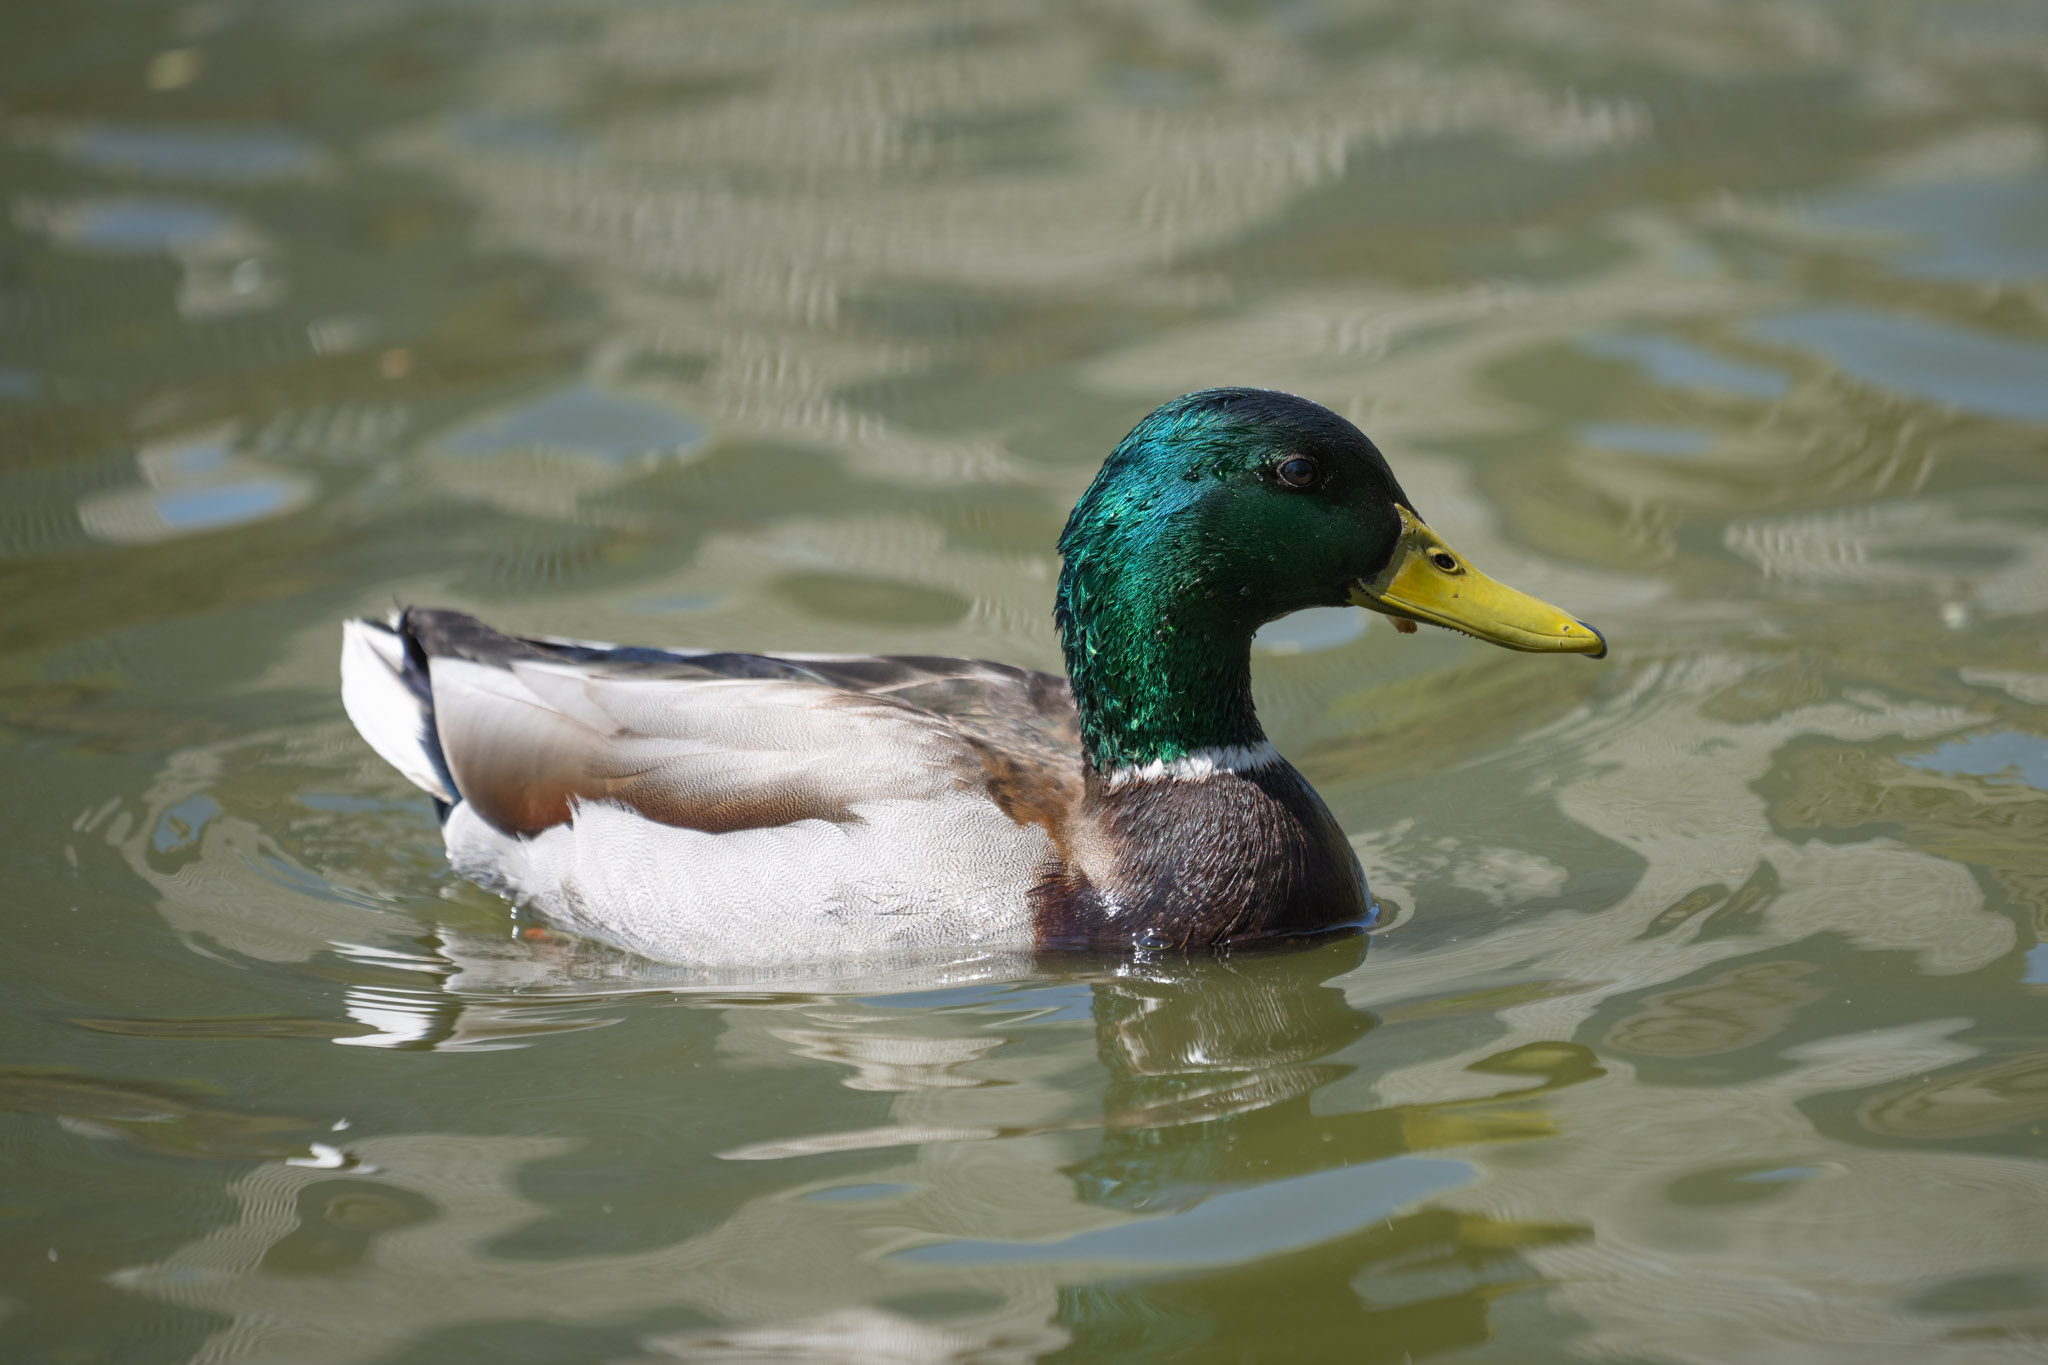
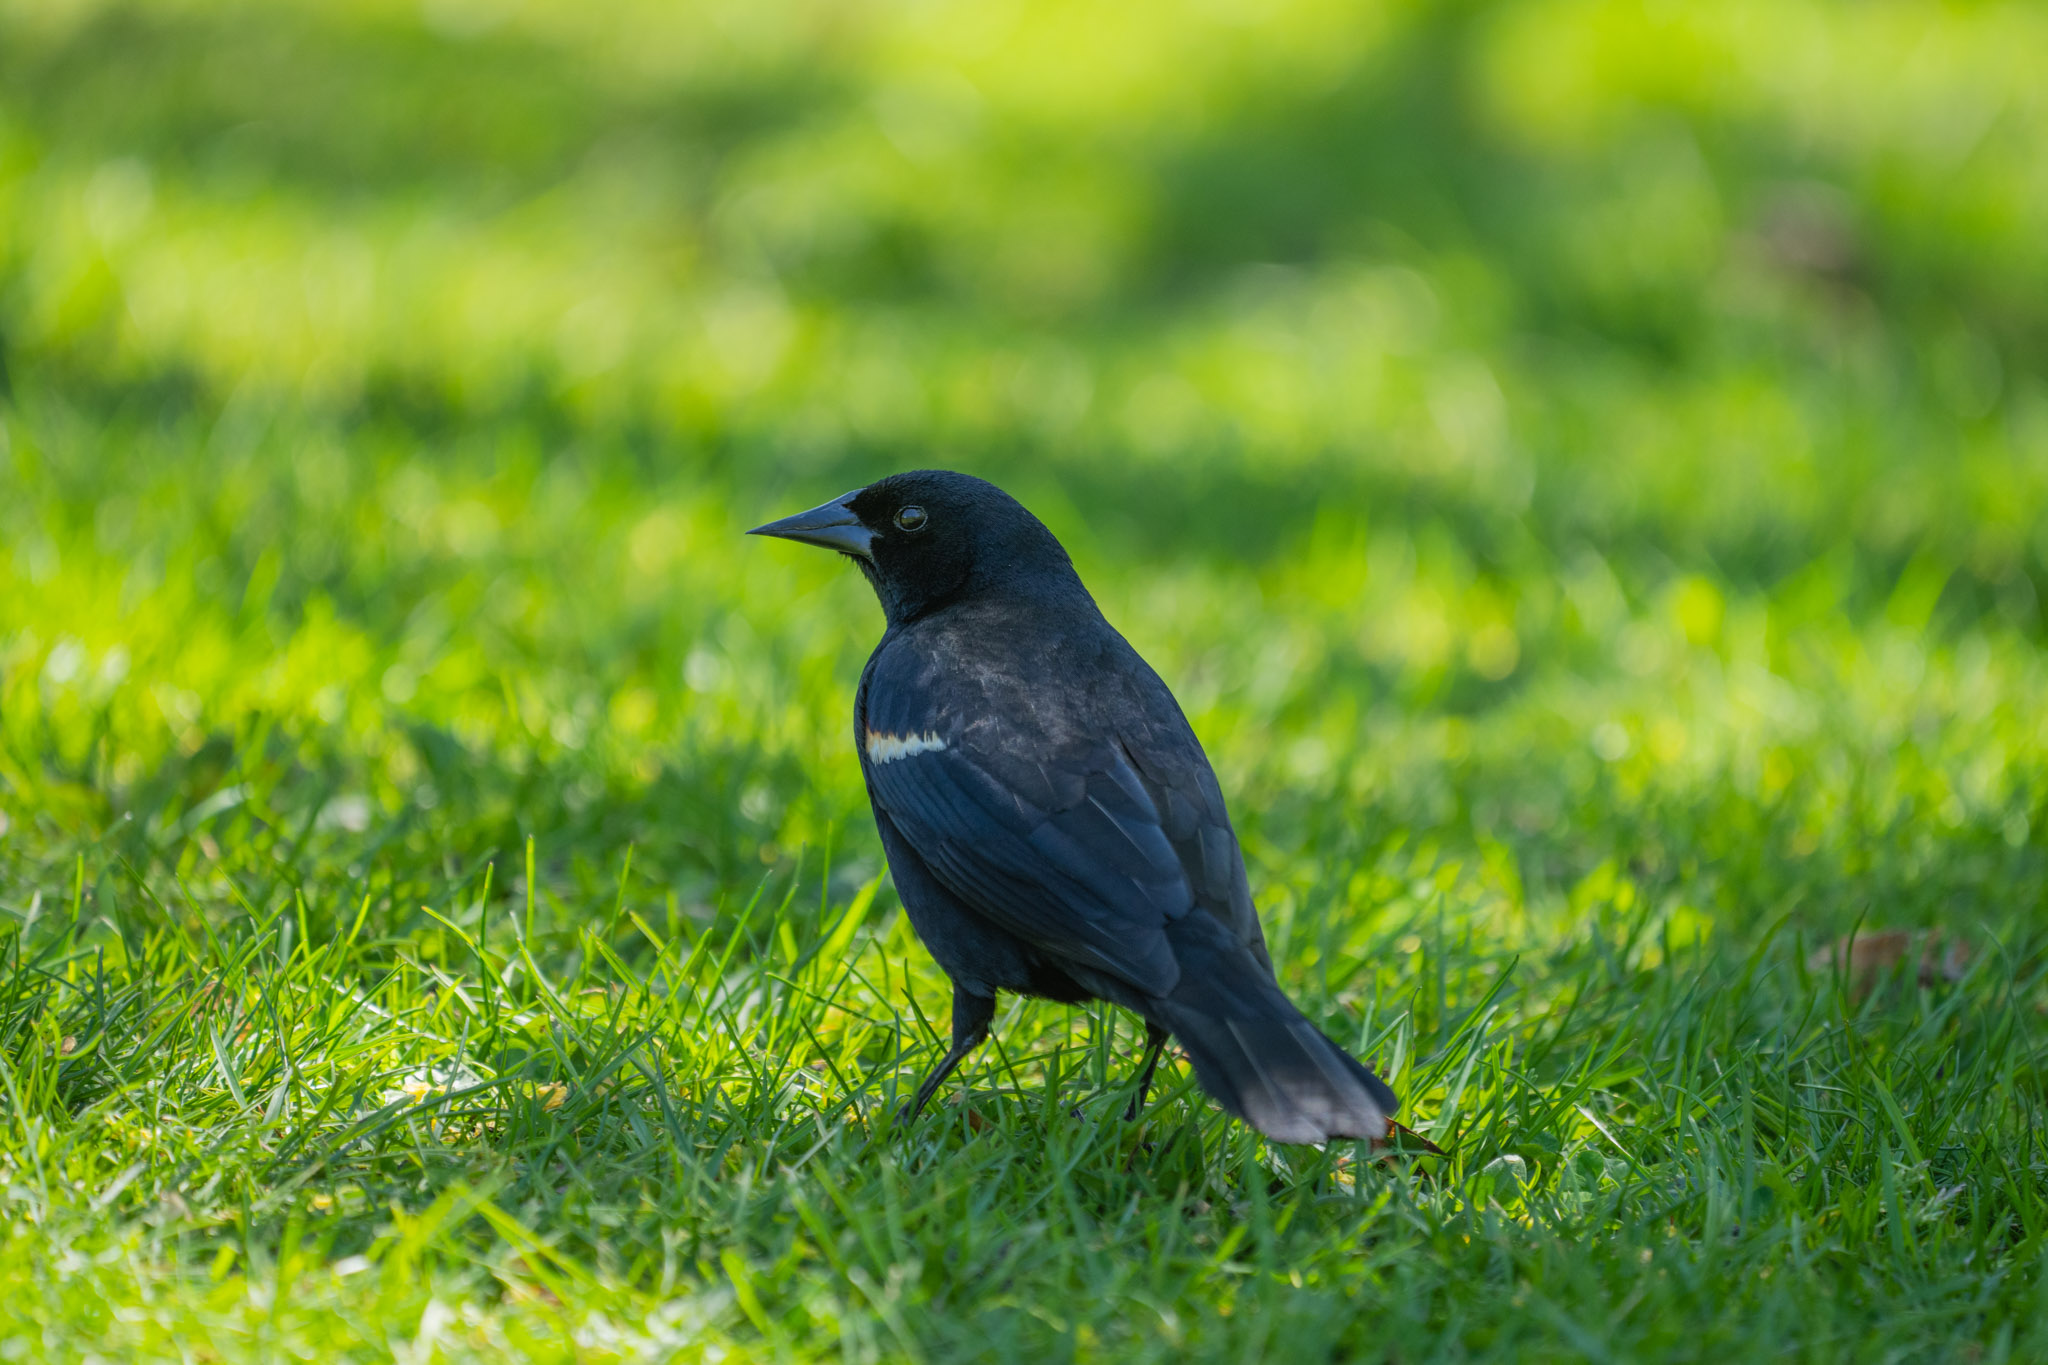
Just to test the AF and shooting speed of the a1, I took it out to a local pond to shoot some birds using the a1’s “Bird Eye AF” tracking and the results were nearly perfect, every single time. The a1 perfectly tracked any bird I put the viewfinder with extreme precision. It seriously felt like cheating. No other camera has inspired as much confidence in my personal ability to capture a tough wildlife shot as the a1. It was a little hard to film what it was like through the viewfinder without an external HDMI recording device, but the short clip below will show you what it’s like to track and shoot wildlife photos on the a1. Turn the sound on to hear the continuous 30 fps electronic shutter.
It’s important to point out that core to the experience of tracking faces, whether wildlife or human on the Sony a1, is the need to pre-select the “subject detection” mode in the camera menu with one of the three options: Human, Animal, or Bird in order for it to work best with each of those types of subjects. (I guess birds don’t qualify as animals?) The issue here is that it means that you first need to enter the menu (or a custom programmed button) to change the subject detection mode from one thing to another.
Even if not changing the subject detection mode, the a1 still locks on exceptionally well. Separate from the automatic Human Face/Eye and Animal/Bird AF modes are are the new “AF Tracking” mode and “Touch Tracking AF”, which enable a different type of tracking autofocus.

The AF Tracking is distinctly different from Human AF or Animal AF as it allows you to track any kind of object in the frame and continuously focus on that object in either video or stills mode. Tracking AF is either selectable when in AF-C by selecting the the “Tracking Expand Flex Spot” focus area or by enabling “Touch Tracking” via the menu under the Toolbox (Setup) Tab>Touch Operation>Touch Func. in Shooting. Touch tracking allows you to use the rear LCD touch screen to tap and select any object to track in either stills or video mode.
Since it is possible to program the AF-ON button behavior to use “Tracking On + AF On”, you can use it to instantly switch to AF-C and Tracking AF for tracking anything. This makes for instantaneous switching to AF-C even if you have AF-S selected by default.

The AF tracking is a huge upgrade to Sony’s previous cameras like the a7III. It has dramatically increased my confidence in the camera to maintain focus for video shots and stills alike. I’ve actually switched to keeping tracking AF enabled by default and I don’t really see myself going back to the traditional way of using AF-S focus points very often… tracking is just too good to not use all the time, even when the subject is not moving. Ultimately, the combination of fast tracking focus and an exceptionally high frame rate, the a1 has completely changed how I look at what “speed” means on a camera.
Resolution
The a1 has a high resolution, 50 megapixel sensor. That’s a tangible upgrade from my a7III and it’s the essential spec that makes 8K video recording possible on the a1. In terms of stills, when compared to our a7III, there’s definitely a noticeable increase in detail.

For still, I found that the extra megapixels from the a1 made it substantially easier to get extra reach out of a long lens through cropping. Even a dramatic crop would still leave an acceptable image, just because there were so many pixels to work with. This extra resolution is a huge boon for long-lens photography and further seats the a1 as a spectacular camera for photographers who love to shoot with extra long focal lengths, or even those who often find a need for cropping.
Pixel Shift Multi-Shooting
The a1 also features Sony’s Pixel-Shift Multi-Shooting feature to produce 200 megapixel photographs. I personally do not love Sony’s implementation of this method of super resolution, regardless of the camera model. It’s the same implementation as on the A7RIII and a7RIV: the camera can take up to 16 consecutive exposures, shifting the sensor by a pixel between shots. Then, in post, you need to used Sony’s Imaging Edge Desktop software to combine the photos together into a much higher resolution result.
When it works, it’s amazingly good. There’s a huge increase in resolution and massive reduction in noise. As you can see in my quick test out my apartment window, there’s a really good increase in detail in objects like the church steeple and the antenna towers. The original single frame was already very clean, but the Pixel-Shift result is absolutely noise free.
Looking even closer, we can see that the Pixel-Shift Multi-Shooting mode reveals fine details that were nearly invisible in the single frame and every sign of noise is gone. Compare the below crop to the frame as a whole and you’ll see that the resolution of this mode is quite spectacular.
The problem with this method of super resolution is that it requires absolute precision and ideally no movement of the camera or subject or there will be very visible artifacts that degrade the image quality and negate the feature. In my example frame, there was more dramatic movement from frame to frame in the clouds at the top of the image and that made for some weird looking grid-like artifacts along the lining of the cloud:
Anything that moves like this will present a problem. Swaying tree leaves, traffic, drifting clouds, people walking, even thermal turbulence in the air. Obviously this means Pixel-Shift multi-shooting is not really viable for astrophotography unless you used a very accurate star tracker. Ultimately, the Pixel-Shift Multi-Shooting on Sony cameras is primarily a studio tool and less viable for landscape photography and that’s a personal bummer for me.
Sony’s Imaging Edge pixel shift software is incapable of detecting this kind of motion for masking out these artifacts, dramatically reducing the practical use cases for pixel shift mode on the a1. There technically should be a way to run the Sony Pixel Shift files through the open-source RawTherapee in order to mask out motion artifacts, but I had a lot of trouble getting the Sony .ARQ pixel-shift files from opening properly in RawTherapee. (RawTherapee 5.8 crashes when attempting to open the a1 .ARQ files.)
Note: I have personally had a better experience with Pixel Shift Multi-Shooting on the several year old Pentax K-1 Mark II. It can combine its images in-camera if desired, and its pixel shift files can automatically mask out motion artifacts in post processing software like RawTherapee. But if pure resolution is all you want, consider large format panorama stitching as this method works on any camera.
Astrophotography: Shooting for the Moon
Of course, this wouldn’t be a Lonely Speck review without some astrophotography. What better way use the resolution capabilities of the Sony a1 than to shoot some astrophotography shots of the Moon. For this shot, I used out longest lens: the Sony FE 100-400mm f/4.5-5.6 GM OSS.


In order to make this image, I used the a1 mounted to a star tracker for capturing a series of images to stack together for noise reduction on the surface of the moon.

I feel that the extra resolution of the a1 helped to contribute directly to the success of this shot. I originally tried using the Pixel Shift mode in conjunction with a star tracker, but even with tracking, the atmospheric thermal turbulence from shot to shot was enough to prevent the pixel shift sequence from working properly. I instead combined the multiple exposures in Kandao RAW+ in order to reduce noise in the shadowed area of the moon. The final noise reduced stack of the moon was added to a separate stack for the stars for a high dynamic range look.
Low Light and ISO Performance
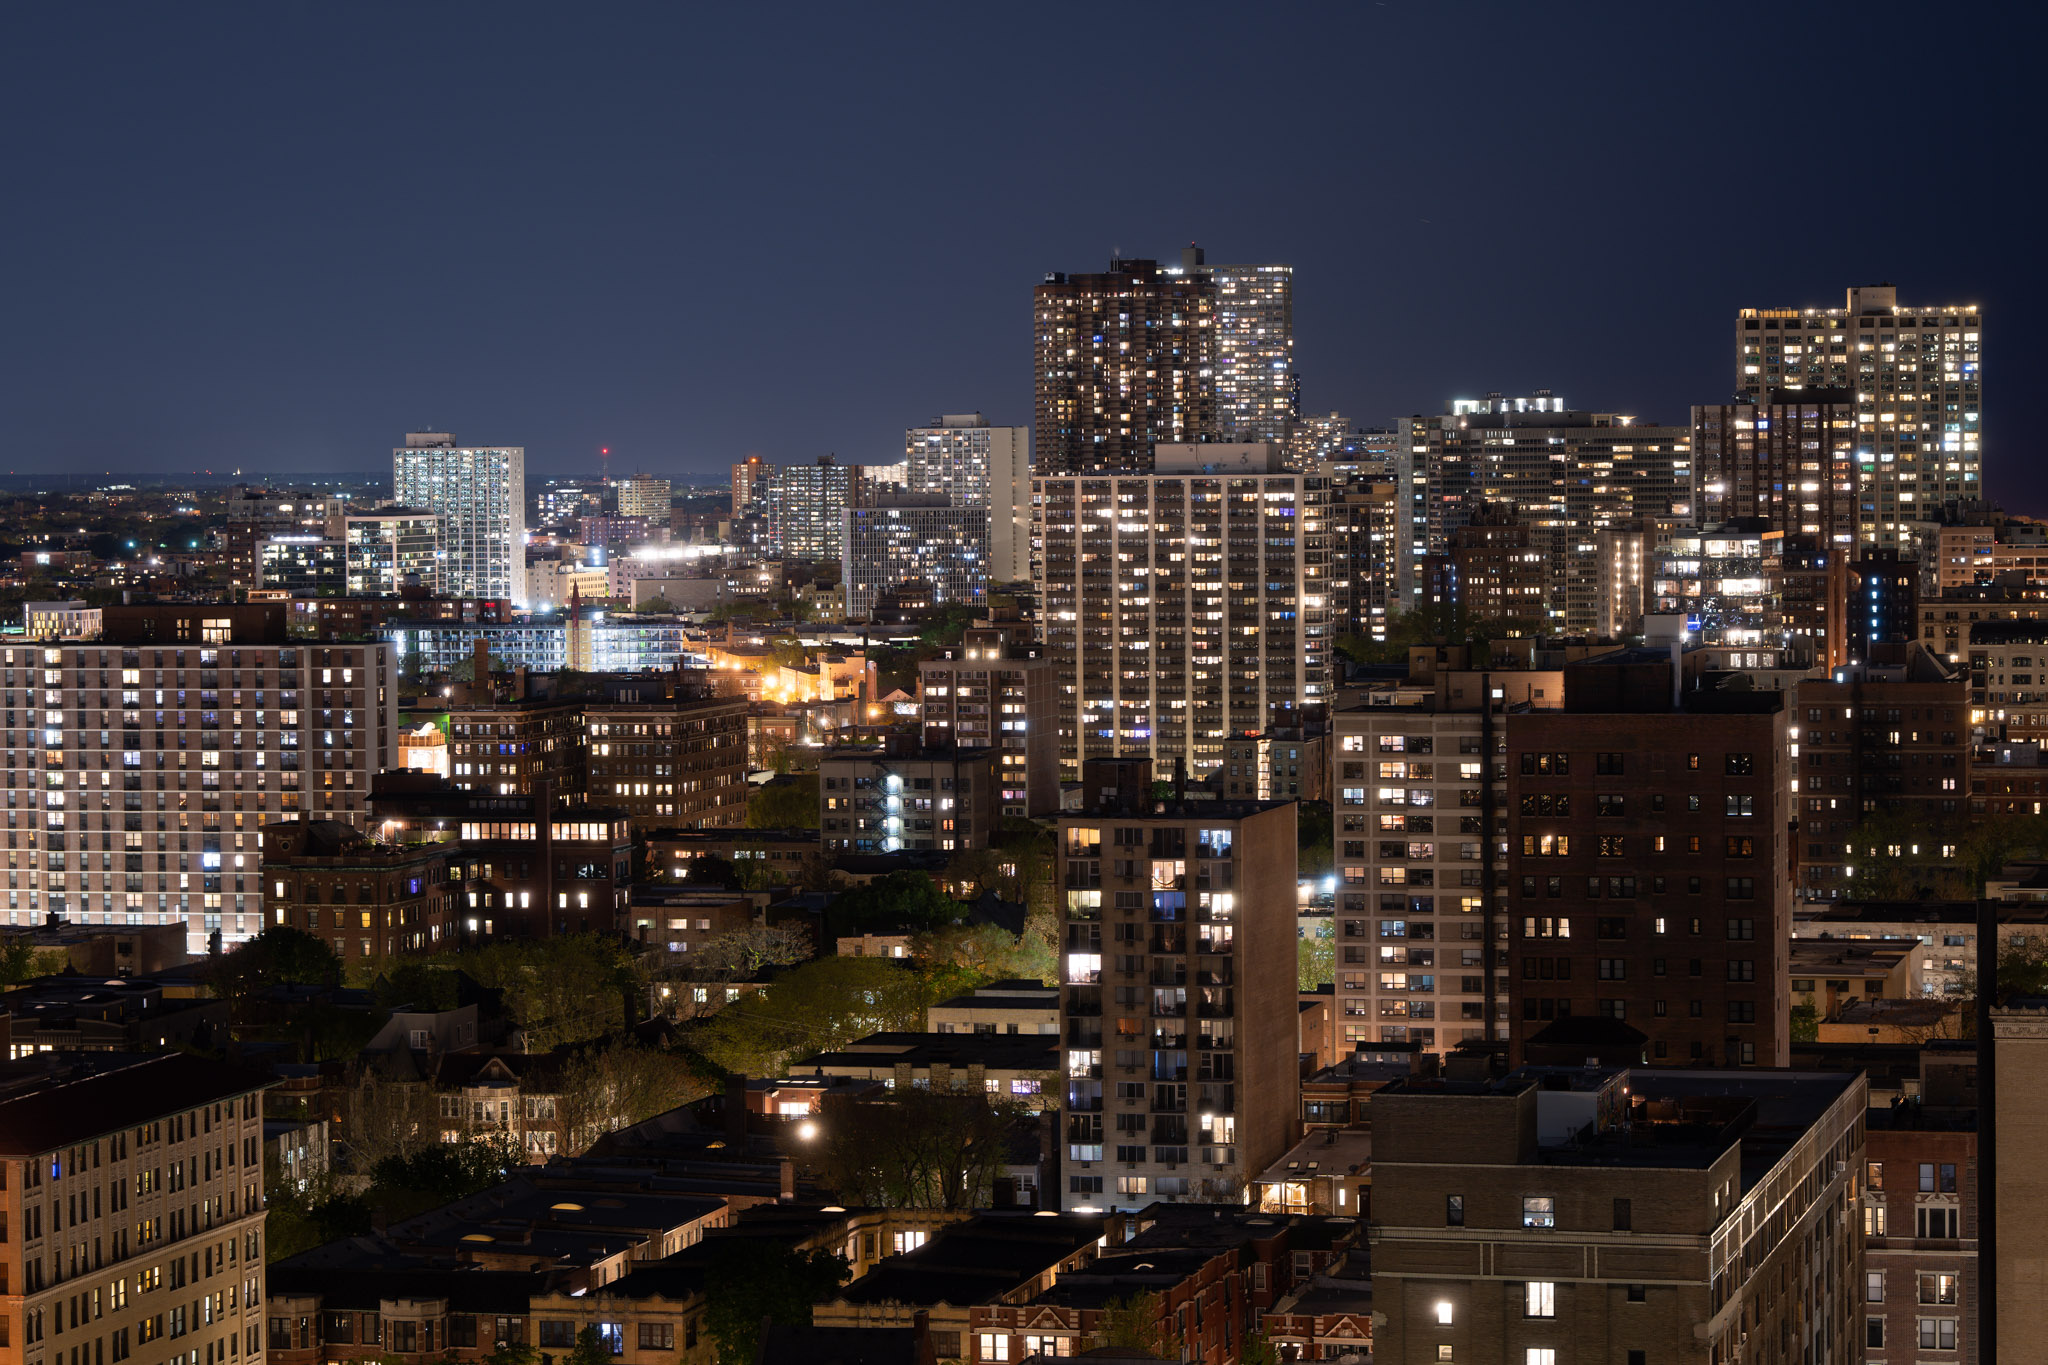
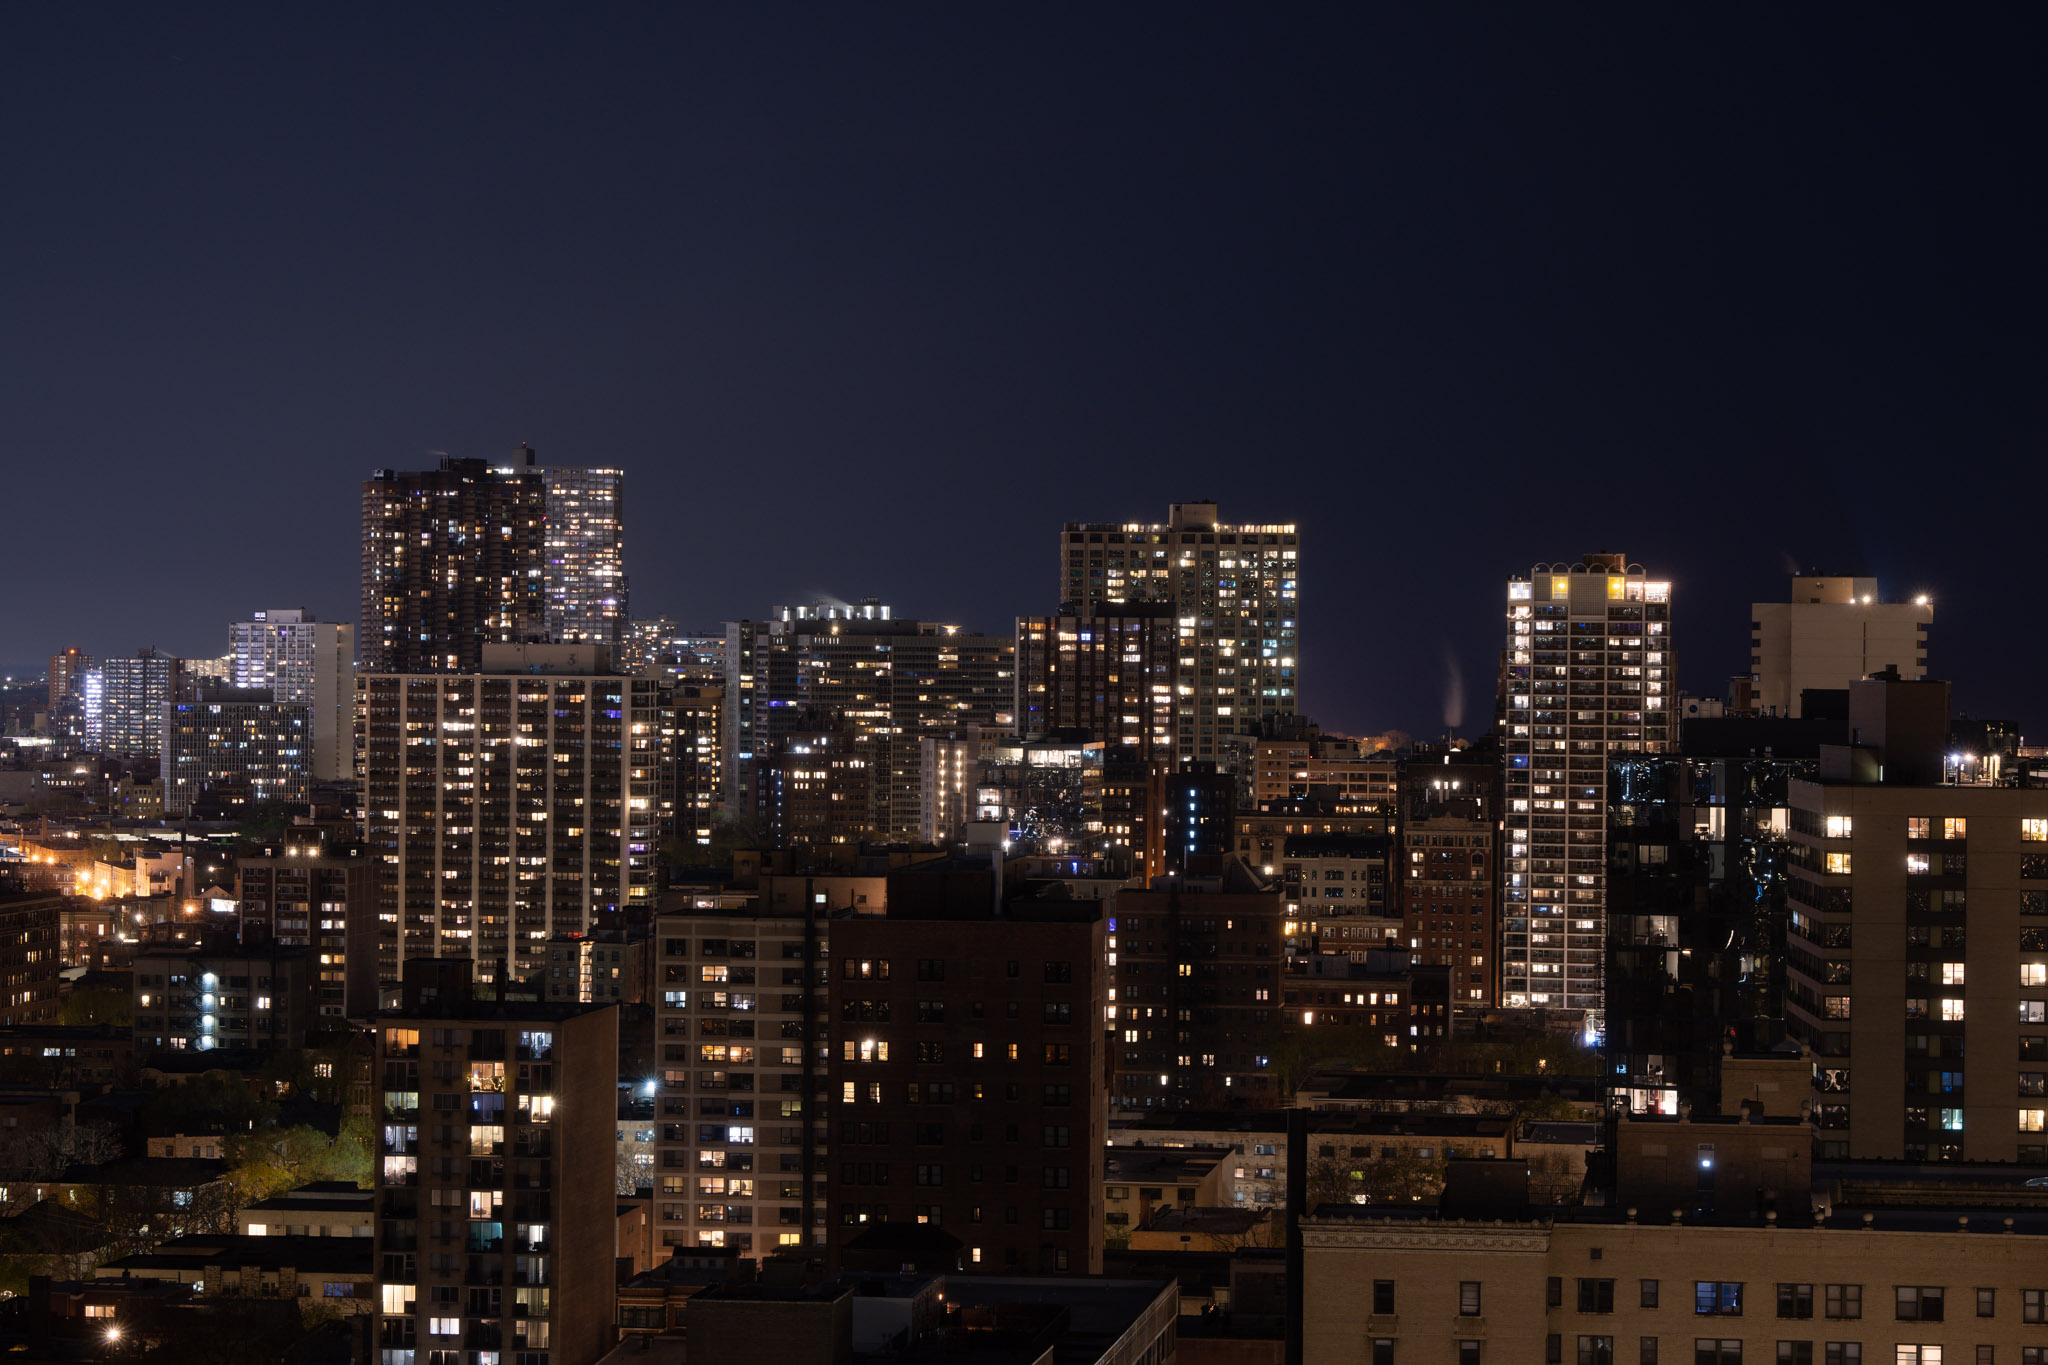
Just in making a few test shots of Chicago at night, the a1 feels like a solid performer at night. The live-view feed of the a1 in dark conditions is very nicely bright… even without Bright Monitoring enabled, it’s as good as the a7III when the a7III’s “Bright Monitoring” mode is enabled: it’s properly bright for simulating exposure brightness and it’s very low noise… much cleaner than what we get on the a7III by default. It’s as if Sony made some tweaks to how it boosts the live-view feed brightness in low-light… probably prioritizing the most helpful things like using a wide aperture, lower frame rate and longer shutter time before boosting the ISO in order to make the live view feed look as good as possible.

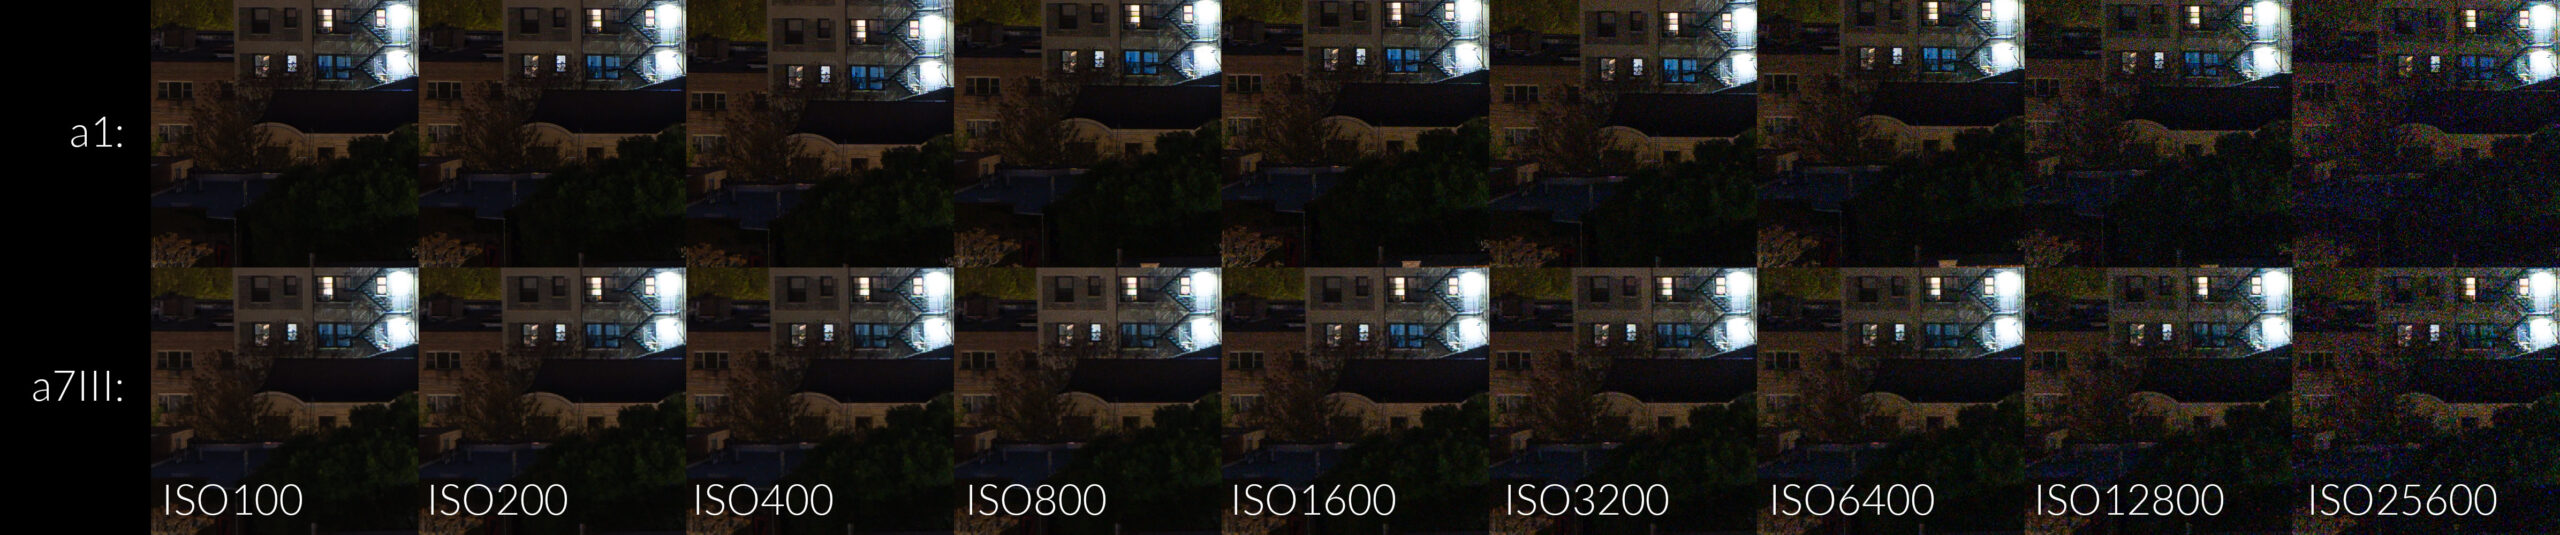
Higher resolution sensors like the a1’s have smaller physical pixels and that usually translates to a slight increase in pixel level noise. Smaller pixels collect less light and thus the resulting signal to noise ratio of each pixel should be lower, yielding a slightly noisier looking image. I wanted to see if this was the case with the a1 and test how the 50 megapixel sensor of the a1 held up to the excellent low-light capabilities of our a7III. With each camera mounted to an identical lens, I shot a series of exposures at each whole-stop ISO settings, varying shutter time accordingly for a neutral exposure.
Looking at the a1 images up close and compared to the a7III, they look nearly identical in terms of noise levels: an excellent result. Additionally, it’s clear that the a1 resolved significantly more detail than the a7III. It looks like double the megapixels doesn’t come with any compromises. Click the comparison below for a 100% resolution view of a cropped area of the test images.
Sony a1 ISO-invariance Test
In addition to a regular ISO test, I wanted to characterize how the a1’s ISO gain works by performing an ISO-invariance test. I kept the same set up for this test, but stopped the lens down to make noise more apparent.
This test differs from the regular ISO test because the shutter time and aperture are kept identical between shots and only ISO is varied. After shooting, the images are first equalized for brightness in Adobe Lightroom and then compared. This allows us to see how the sensor behaves at any given ISO, independent of the actual light entering the sensor.
Looking at the close up ISO-invariance results, the a1 again performs almost identical to the a7III. Both these cameras’ sensors appear to be a dual-gain design, with the transition to higher gain happening at ISOs higher than ISO 400. ISOs 100 through 400 use a lower gain level to maximize dynamic range in the bright highlights while higher ISOs boost the signal to improve shadow detail and reduce noise.
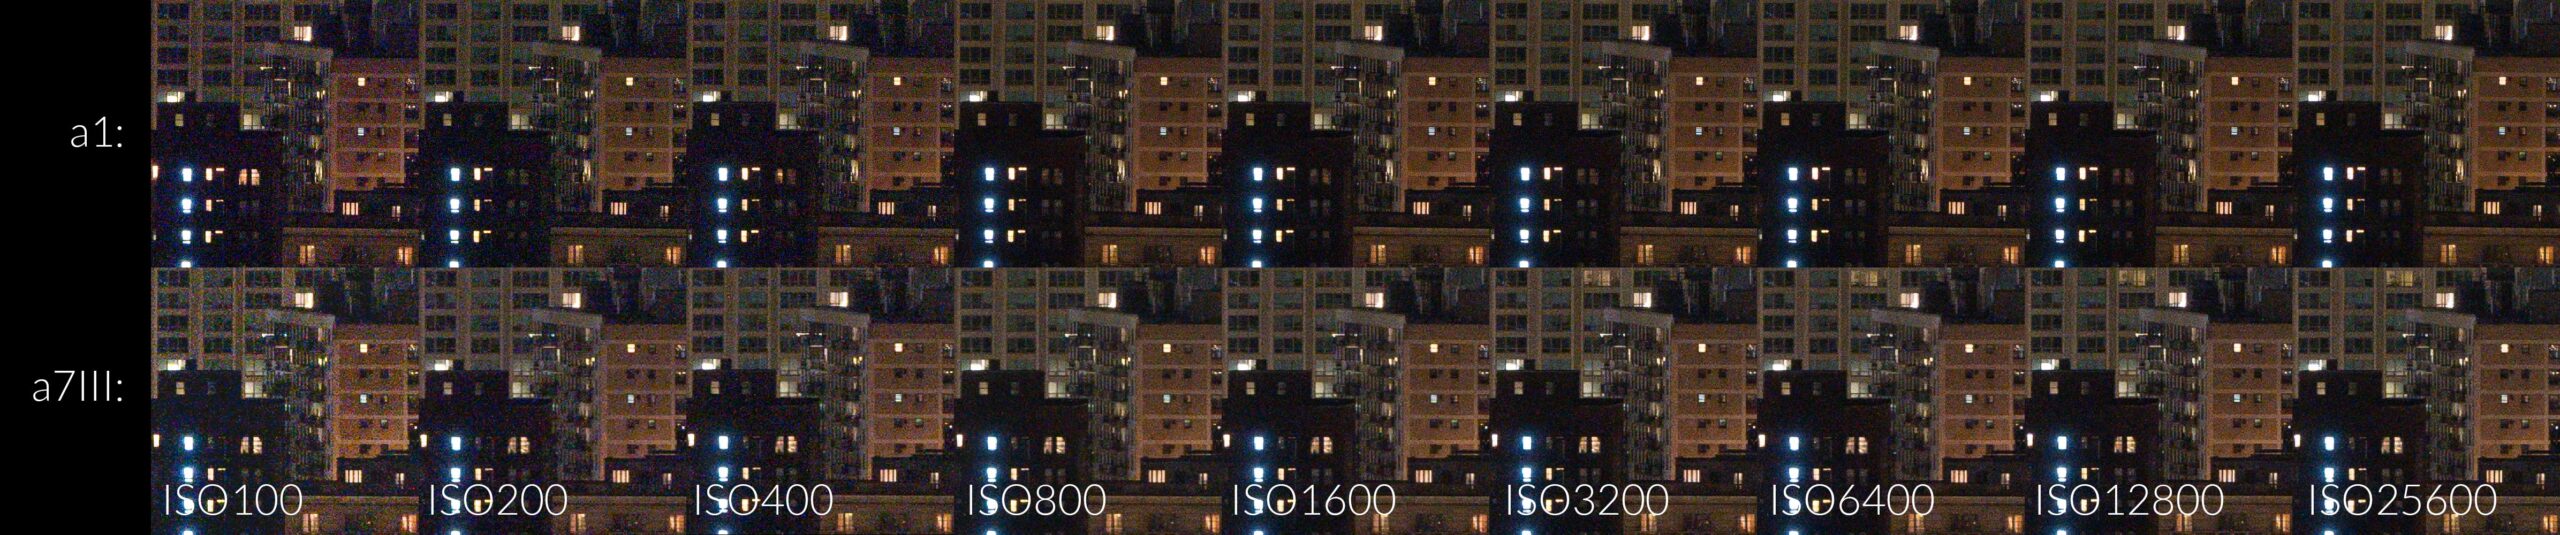
The takeaway here is that it’s advantageous to use ISOs higher than 400 on the Sony a1 when shooting stills in low-light conditions. That’s the point above which the camera enters a higher gain mode on the sensor to boost the image signal for reduced noise levels and better low-light performance.

In terms of low-light capability, I think Sony has hit a good balance of resolution and noise levels with the a1.
8K Video
8K video is actually very low on my personal list of needs for a number of reasons and so I won’t dive too much into the realm of video for this review. At the moment, 8K video is honestly a little bit out of my league. My laptop is incapable of playing it, let alone editing it. And while my desktop can handle playing and encoding 8K, it’s important to note that files sizes are 4 times as larger as a comparable length of 4K footage.
In order to transcode and edit the full resolution 8K movie files from the Sony a1, it also requires investment in a video editing suite that can handle 8K such as DaVinci Resolve Studio or Final Cut Pro, in addition to some proportionally decent hardware needed to handle such high resolution footage.
Sony’s own Catalyst Browse or Catalyst Prepare software for Sony cameras require a GPU with at least 8GB of memory, which limits the hardware that can handle such footage. My relatively new 6GB video card could not transcode in Catalyst Browse or Prepare and I even had some stability issued with Sony Catalyst Browse when just attempting to play 8K footage on my desktop.
That said, I found that on my mid-range desktop, VLC played back the HEVC a1’s 8K footage flawlessly and Handbrake worked quite reliably for transcoding the footage to a more friendly editing format. DaVinci Resolve Studio also had no issues playing back and editing the a1’s 200mbps 8K footage on a 4K timeline. For reference, check out our gear list for my desktop computer specification. At the moment, you can look at a few clips I shot in 8K on the a1 and downsampled to 4K for YouTube:
Personally, I feel like 8K is a niche need at the moment. It requires a lot of processing speed on the editing computer, it takes up significantly more drive space, and the advantage of the extra resolution is usually only apparent you have an 8K display, which, at least in 2021, are not exactly common. That said, 8K downsampled to 4K generally does look better than footage shot natively at 4K. 8K will eventually become a lot more common, whether we need it or not (Heck, I still watch all my TV and movies on a 1080p projector screen), and the a1 is probably the most accessible 8K-capable compact system camera at the moment that’s ready for serious use.
Personal Thoughts
To me, the a1 feels a lot more like an iterative spec sheet upgrade than a completely new camera when I compare it to my a7III. Sure, it’s faster (MUCH faster), it’s higher resolution, has a big viewfinder, and can shoot 8K.
With a relatively familiar body design, and buttons and dials in all the same places, the Sony a1 feels very much like Sony’s other Alpha cameras, but it’s as if it has a proverbial volume dial that goes up to 11.
For me, it was important to decide whether the a1’s top-of-the-line list of spec upgrades would be worth the price and if I would see a great enough increase in the value that my camera kit offers to me as a photographer. Like I said in the introduction, I think the a1 is the most capable camera one can buy. But do I need that capability?
After enough use, I personally realized that I didn’t. There was actually a point when using the camera I thought to myself, “why did I decide to review this camera? It’s SO MUCH camera.”
Much of what the a1 offers over other Sony camera bodies is well outside the realm of my personal and professional needs. Don’t take that as a knock on the camera. I think it’s kind of a strange complement in a sense: it’s so good that it’s almost too good for me to fully utilize. Maybe I need to stop photographing such slow moving subjects?

But really: I don’t shoot nearly enough wildlife or sports to fully take advantage of the 30 fps stills shooting. more than double the resolution is nice, but since I’m usually shooting landscapes, if I really need more resolution, I usually can use panorama stitching, which yields better results than a higher resolution sensor or pixel-shift mode.
And as far as 8K video goes… I’m personally happy without it at the time being in order to keep my video workflow as fast and friendly as possible. I’m just not personally ready for the extra hardware and software needed to support an all 8K workflow.
So who is it for?
After getting to understand the capabilities of the a1, I personally think that it fits best in the hands of a select few types of photographers:
First and foremost, if you want the best hardware specs available in a small mirrorless camera, and money is no object, the a1 is the most capable mirrorless camera on the market. It can do nearly every type of photography extremely well.If you’re a lover of photographing wildlife, or fast action, especially birds or actions sports, the a1 is an amazingly capable machine for the task. And finally, if professional videography is your thing and you need a compact 8K camera body, the a1 is actually comparatively cheap when compared to most full size 8K-capable cinema cameras.

Closing
Overall, the most tangible improvements that I personally loved about shooting with the Sony a1 were the more mundane things: the large high resolution viewfinder and the autofocus tracking system. Those features alone were the ones that I really felt improved the “feel” of the camera system as a whole and those are the elements of the Sony a1 that I really feel are worth praising. Looking through that big beautiful viewfinder and seeing the a1 perfectly track a subject just felt like a next generation experience.
It’s notable that Sony also has the a7SIII, which shares the same high resolution viewfinder and AF tracking system in a much less expensive package, but going that route strips all the superlatives (high resolution, extremely fast shooting speed, and 8K video) that make the a1 what it is: the ONE camera that can do it all.
If you want the whole package, I think the a1 nearly has it. Just make sure you’re ready for the hit to your wallet.
Sony a1 Pros:
- High resolution 50MP sensor
- Excellent low-light image quality and dual-gain sensor design
- Brilliantly bright, high resolution viewfinder
- Menu can be navigated via touchscreen
- Excellent tracking AF performance
- Up to 30 fps continuous shooting speeds
- Pixel Shift Multi-Shooting yields dramatic resolution and noise improvements under the right conditions
- Very clean live-view feed in dark conditions even without use of the available Bright Monitoring mode.
- 8K video recording
- Fully customizable buttons and menus with independent configuration for video and stills modes
Sony a1 Cons:
- Lower resolution monitor compared to the competition
- Monitor is not fully articulating
- Touchscreen still lacks certain functionality like aperture and shutter adjustment
- Drive mode/AF dial adds control complexity by splitting up controls for certain functions like bracketing
- Eye AF mode requires selection of the tracked subject, either Human, Animal or Bird for best performance
- Pixel-Shift Multi-Shooting creates artifacts around moving subjects
- Sony Catalyst Browse/Prepare software requires a beefy GPU to transcode 8K video
- Very expensive
Sony a1 Verdict: 4.5/5
Equipment Links
Thanks to the B&H team for temporarily loaning us the Sony a1 for this review. Without them, this post would not have been possible. This is all the equipment that we used for making the images in this review:
- Sony a1
- Sony FE 100-400mm f/4.5-5.6
- Zeiss Batis 18mm f/2.8
- Leofoto LS-284C Tripod
- Move Shoot Move Star Tracker
The affiliate links on this page allow lonelyspeck.com to earn a fee when you buy from B&H or Amazon.
Disclosure
We are a participant in the B&H Affiliate Program which also allows us to earn fees by linking to bhphotovideo.com. We are a participant in the Amazon Services LLC Associates Program, an affiliate advertising program designed to provide a means for us to earn fees by linking to Amazon.com and affiliated sites.
Learn Astrophotography
Astrophotography 101 is completely free for everyone. All of the lessons are available on the Lonely Speck Astrophotography 101 page for you to access at any time. Enter your email and whenever we post a new lesson you’ll receive it in your inbox. Updates will be sent out only periodically, usually less than once per week.
[email-subscribers namefield=”NO” desc=”” group=”Lonely Speck Newsletter”]
Help us help you!
Believe it or not, Lonely Speck is our full-time job. It’s been an amazing experience for us to see a community develop around learning astrophotography and we’re so happy to be a small part of it. We have learned that amazing things happen when you ask for help so remember that we are always here for you. If you have any questions about photography or just want to share a story, contact us! If you find the articles here helpful, consider helping us out with a donation.
Thanks so much for being a part of our astrophotography adventure.
-Ian and Diana
How does the Sony A1 handle with the “star eater” problem, did Sony fix it with the A1 or is “star eater” still an issue?