

Sony’s new a7III is arguably their most well-rounded camera so far. With a surprisingly high-end set of specifications for the price, it promises to be one of the best values in the full-frame mirrorless market. In this review, we test the a7III astrophotography performance at various dark sky locations around the world.
Introduction
The Sony a7III is Sony’s latest iteration of their “entry-level” full-frame mirrorless camera. We’ve been testing and using the a7III in real world astrophotography shooting for the past few months, in Spain, California, Switzerland and Utah.

As the more affordable camera in Sony’s Mark III full-frame mirrorless Alpha lineup, the a7III is slated to be Sony’s most popular full-frame camera in 2018 and beyond. It’s already likely the reason that Sony has claimed, for the first time, to be the #1 full-frame camera manufacturer in the US with nearly 40% of US full-frame camera sales in the first half of 2018. With months of use of this camera behind our belt, we have developed a pretty thorough understanding of the notable features and quirks that affect astrophotography shooting.
Notable Features
For astrophotography, the past generations of Sony Alpha cameras already had numerous attractive features and specifications that we found helpful for astrophotography. We still actively use the first generation a7S as a primary astrophotography camera, particularly for its amazingly bright live-view feed in dark conditions and its excellent noise performance.
In 2018, the Mark III generation of the Sony a7 series makes some incremental changes. There are some welcome improvements apparent in the a7III and some much less welcome omissions. Here’s what we like and what we hate on the new Sony a7III:
New Back Side Illuminated 24MP Sensor
The Sony a7III features an all-new 24 Megapixel sensor.
The Exmor R back-illuminated CMOS Sensor improves upon the previous generation 24 Megapixel sensor of the a7II by moving certain sensor electronics to the rear of the sensor stack, resulting in improved light gathering and noise performance.
In practice, we would agree that the low-light performance is roughly on-par with the Sony a7S. In other words, it’s excellent.
ISO 204800
The a7III ISO gain now reaches ISO 204800, a setting that will likely rarely be used, but one that tells of the noise performance and low-light capability of the camera. With so much amplification capability, it proves better for live-view framing of scenes in dark night conditions.

We definitely feel that the a7III is nearly as capable as the a7S in this regard. When using a rather fast lens (e.g. <f/2.8), it’s possible to see the horizon line and dimly lit foregrounds on the LCD in even the darkest clear night sky conditions.
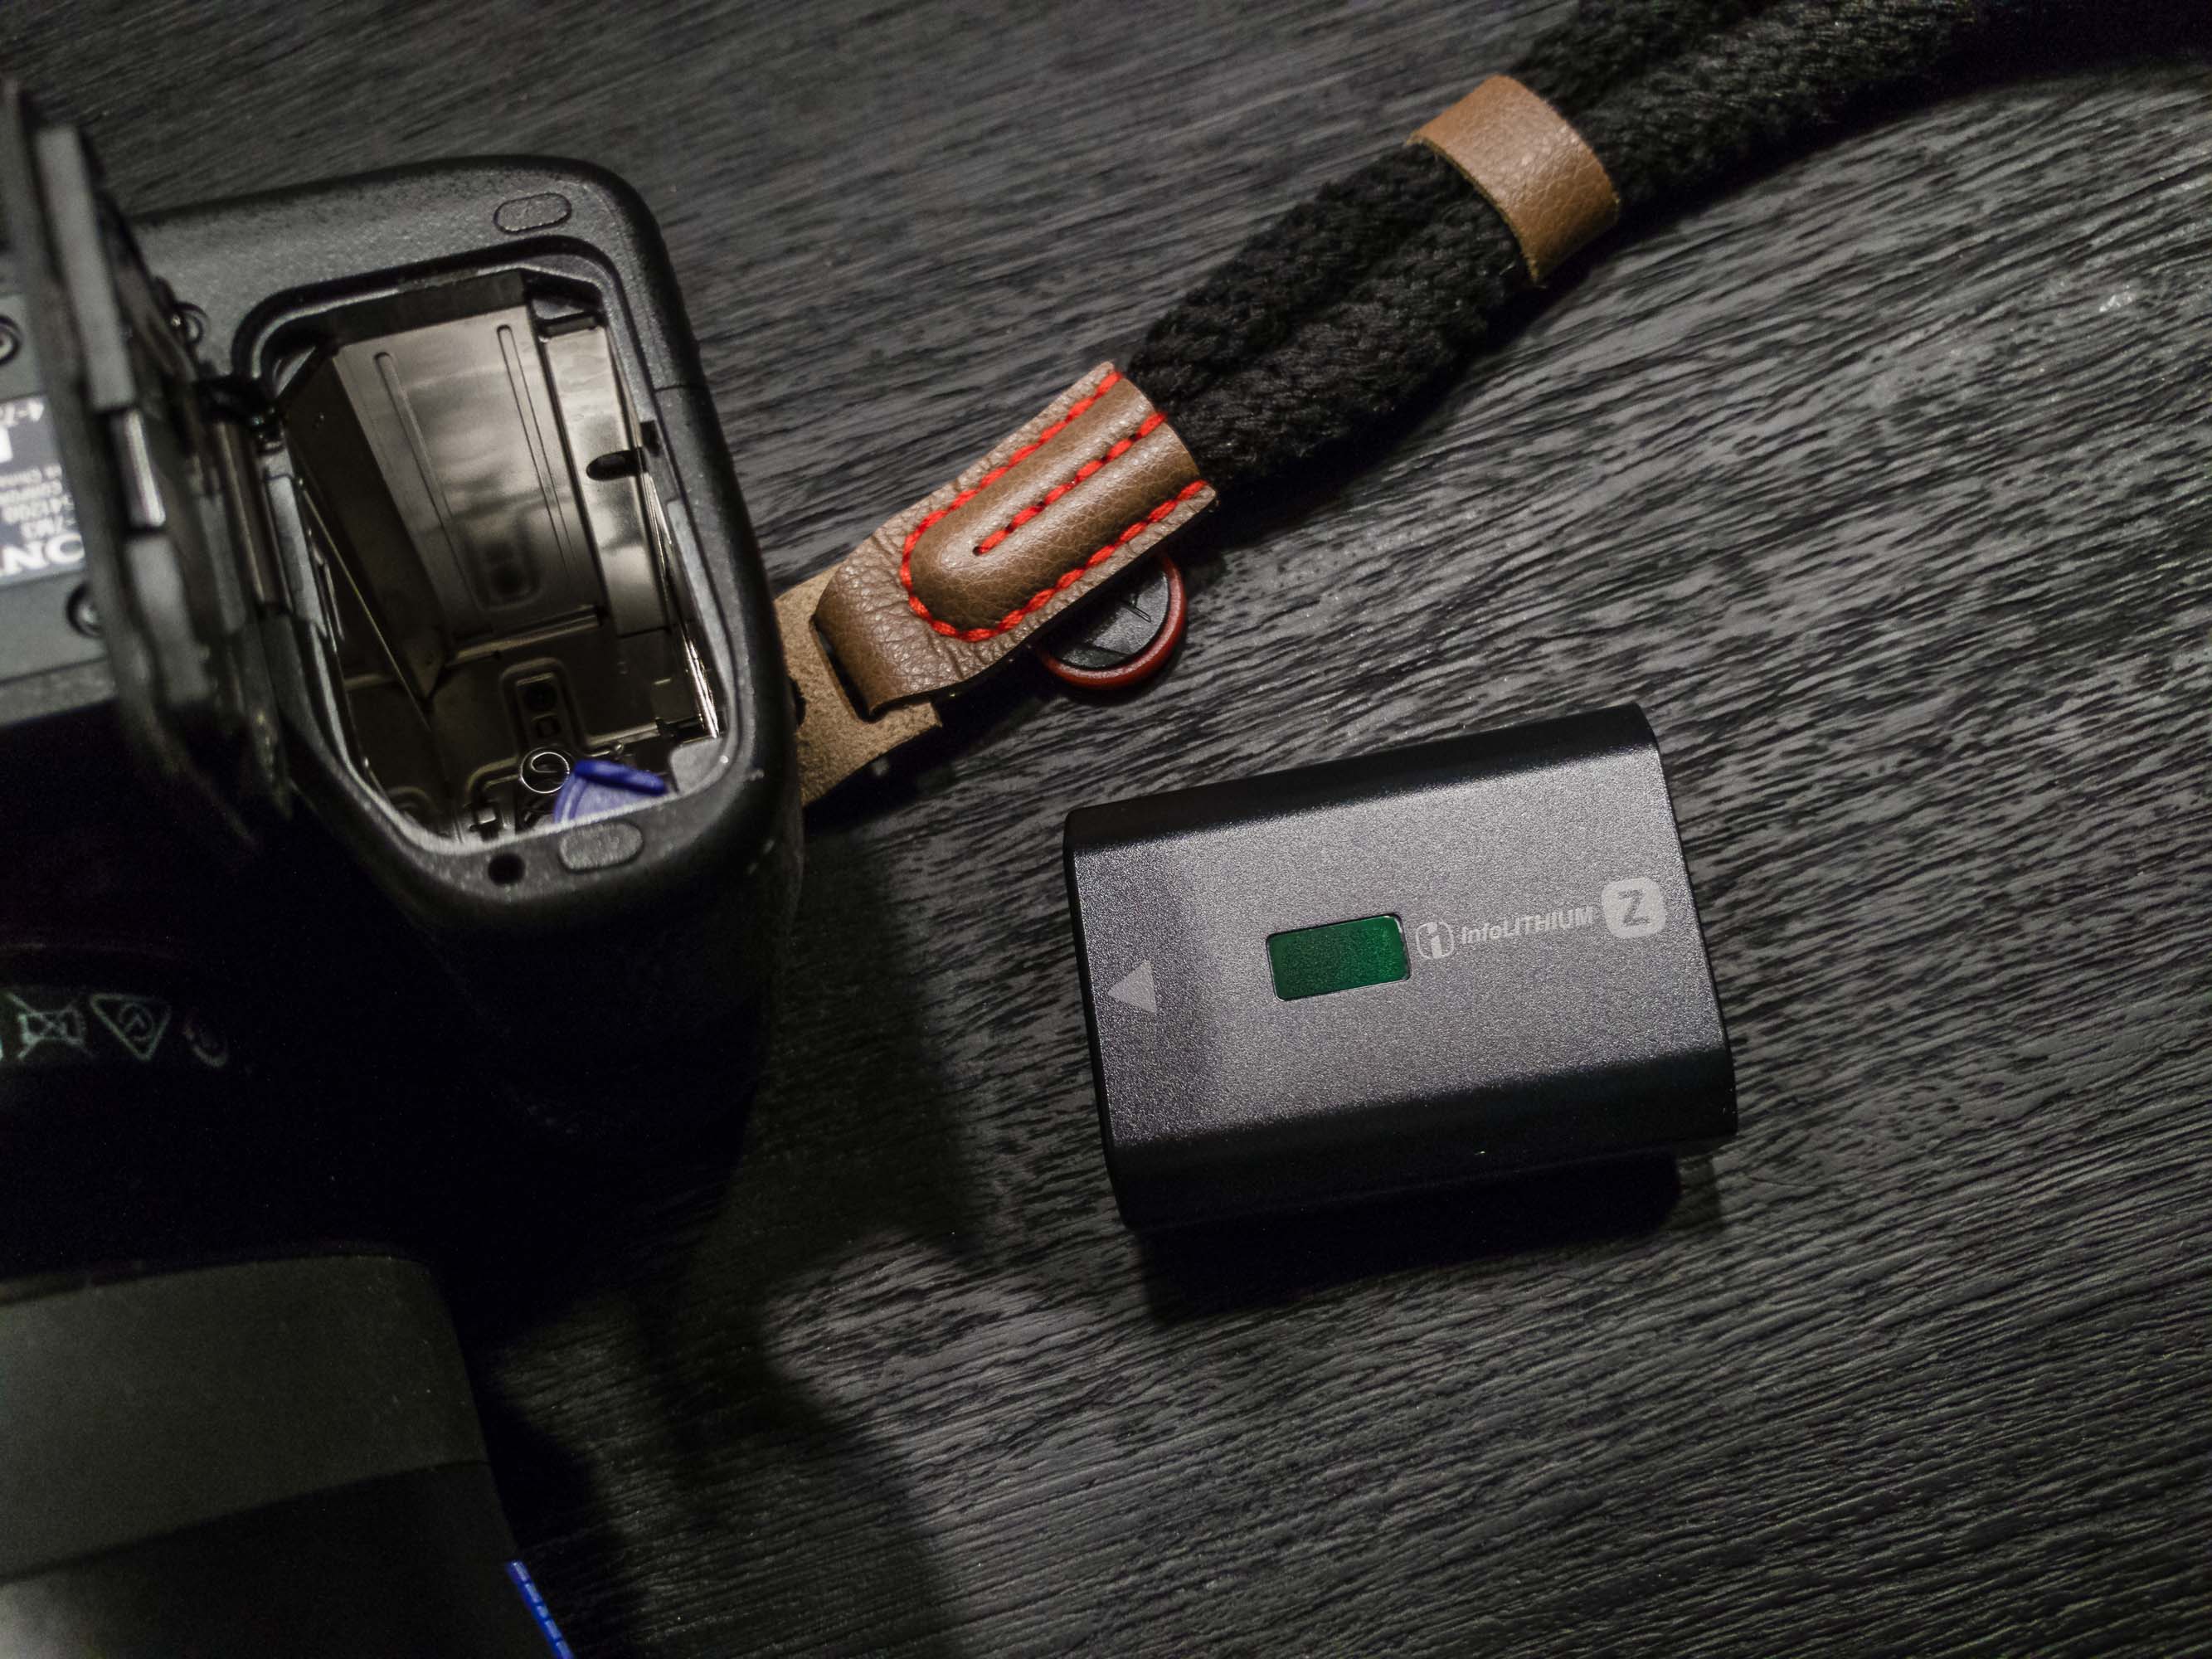
New NP-FZ100 Battery
The a7III is the second Sony Alpha camera to use the new NP-FZ100 battery. It’s now rated for 710 shots per charge, about double what the previous generation battery was capable of. In practice, it seems to actually provide better than that number, a welcome change for night photography and time-lapse photography.
With careful use of the LCD or when shooting images rapidly such as in wildlife or time-lapse shooting, it’s easily possible to shoot more than 1000 images on a single charge. With more typical light shooting, it’s possible to go for days of normal use without the need for charging. The battery is so improved that, coupled with the camera’s USB charging capability, we’ve never had the need to swap in a second battery.
USB Powered Operation
New to the Mark III generation of Alpha cameras is the ability to power and charge the camera via an external USB power source while it’s operating. Previously only a feature that could charge the camera while it was off, this change makes it possible to keep the camera perpetually powered on with an external USB battery while shooting long videos or a time-lapses. We normally tote around an Anker 10000 mAh PowerCore on our travels and the ability to charge and power the a7III from the Anker battery has us re-assured that we won’t ever run out of power. Since it’s possible to hot-swap the power source as the camera is running, it’s theoretically possible to power the a7III perpetually via external battery packs.
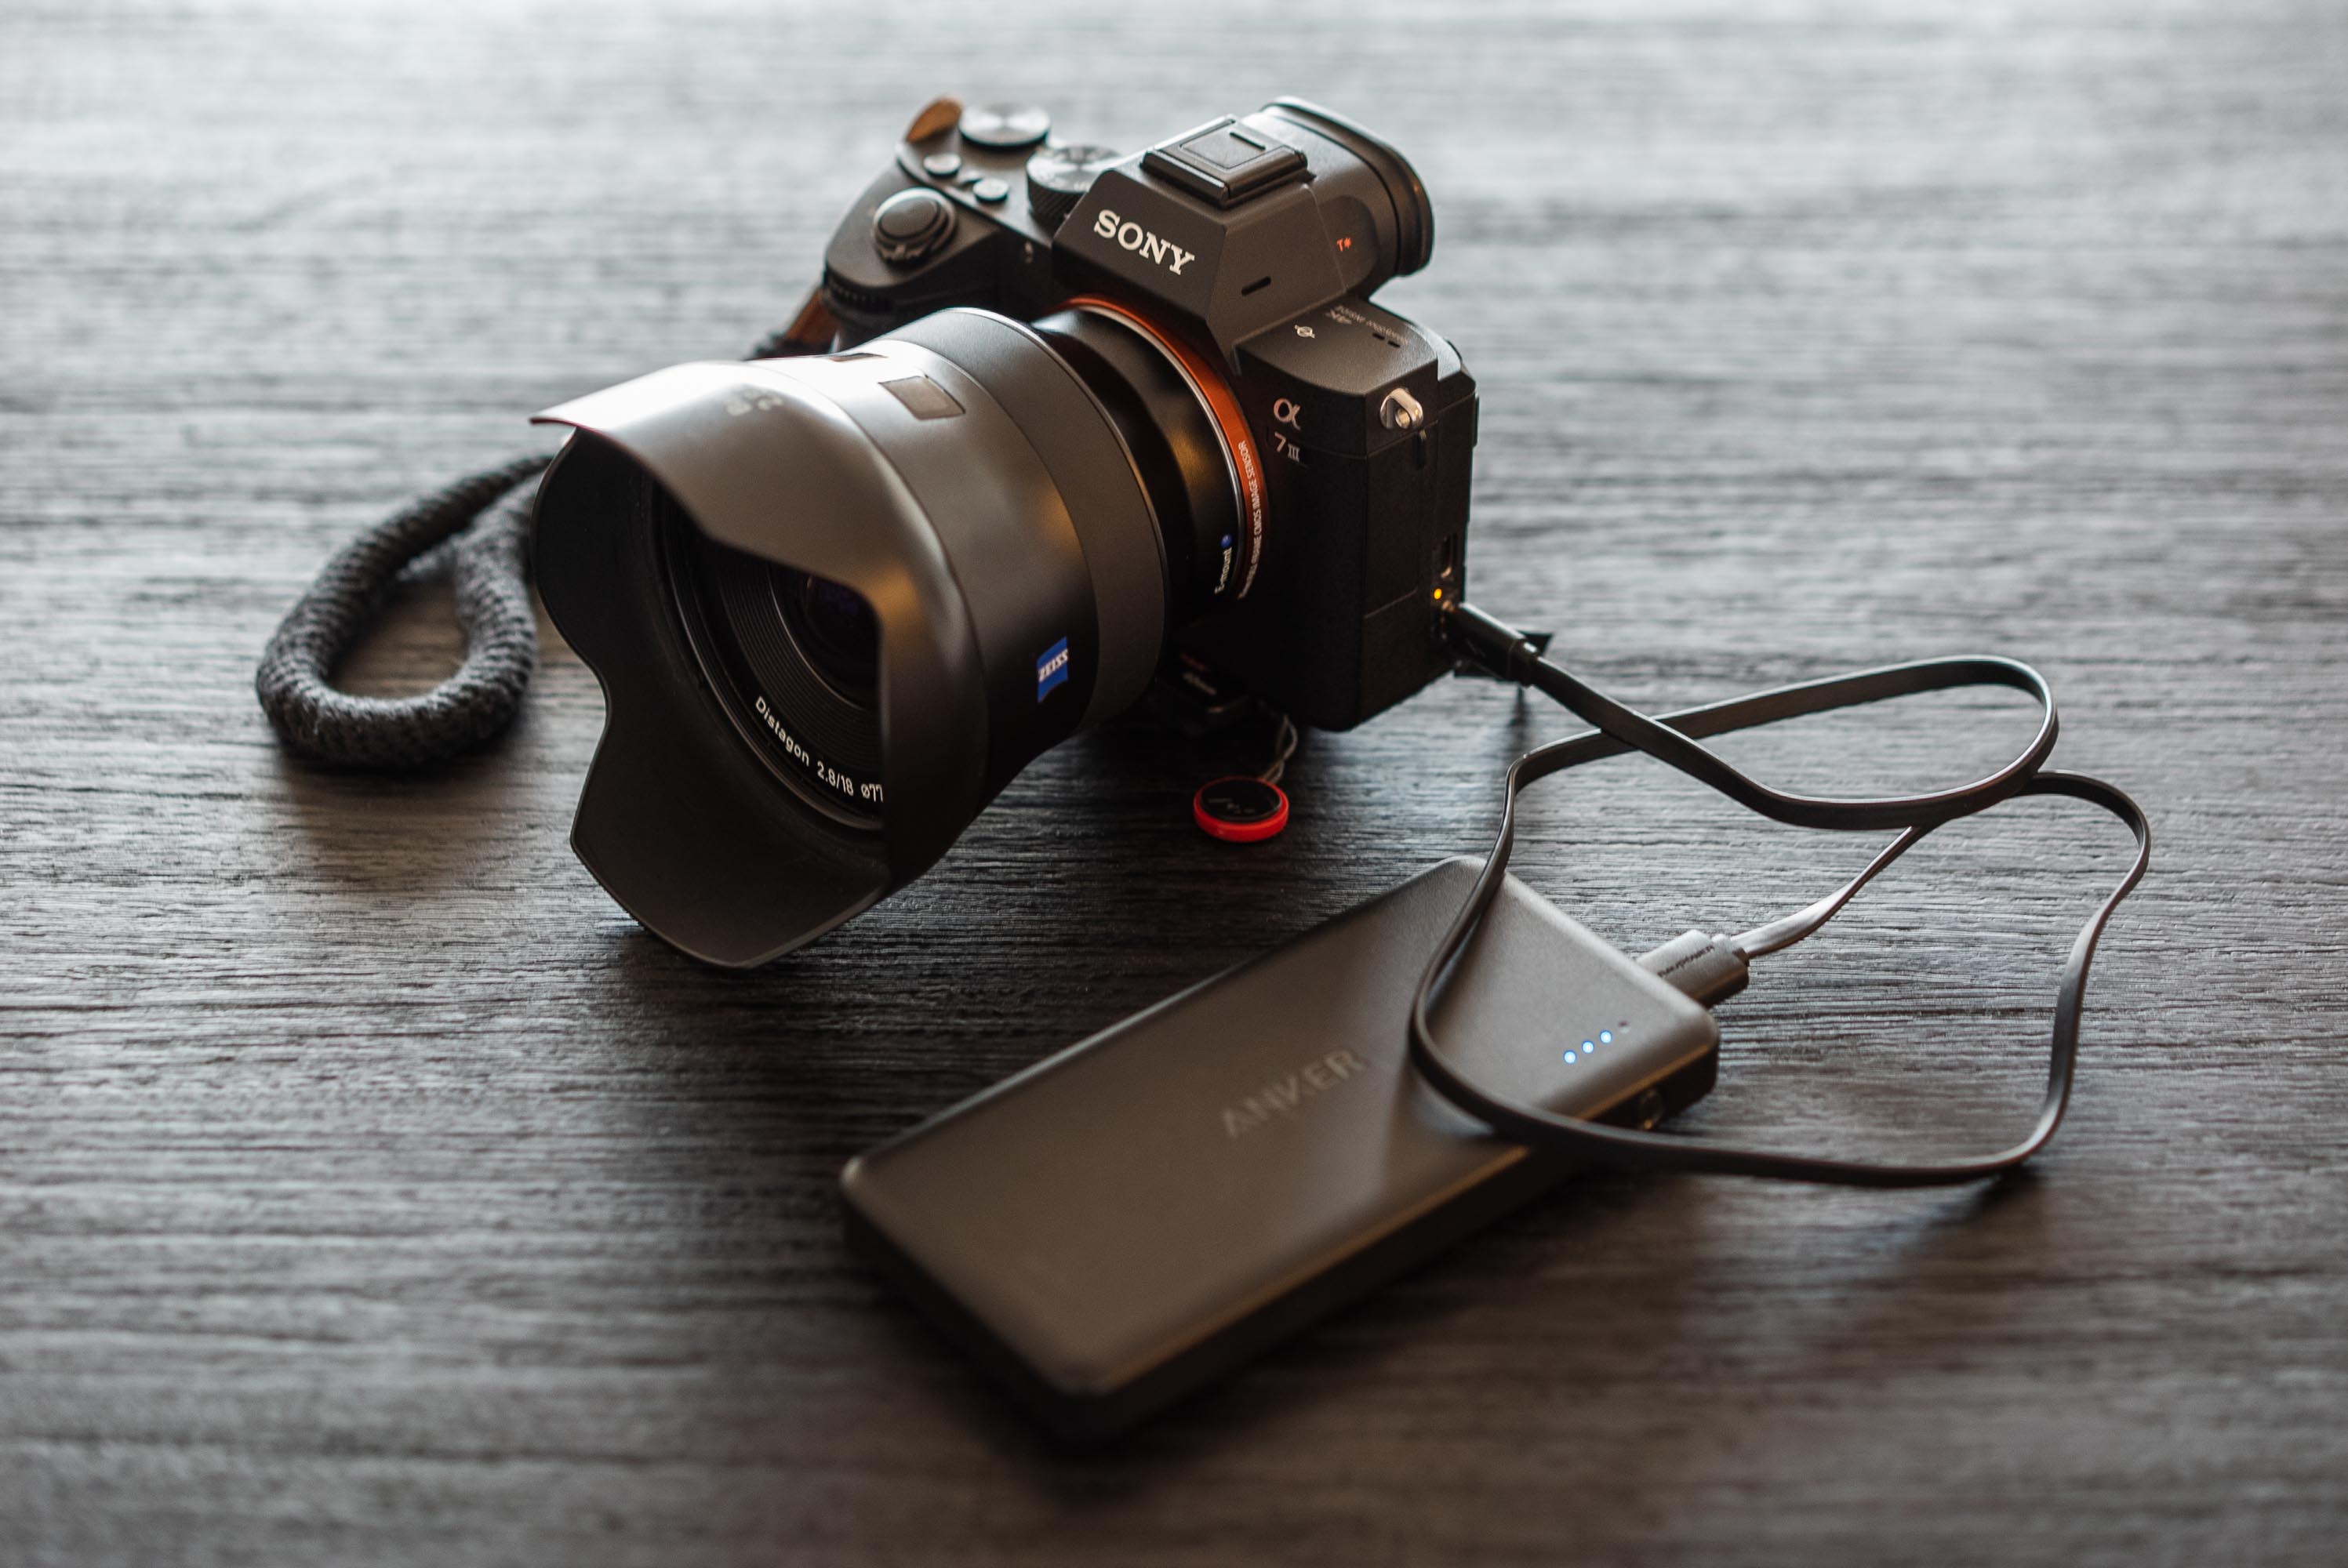
This kind of USB powered operation is very exciting for extremely long time-lapse shooting and other demanding applications such as recording long video sessions such as interviews or performances. Previous generation Sony Alpha cameras could not run on external power without a separate, cumbersome DC coupler and/or AC adapter, a solution that’s not as elegant for in-the-field work.
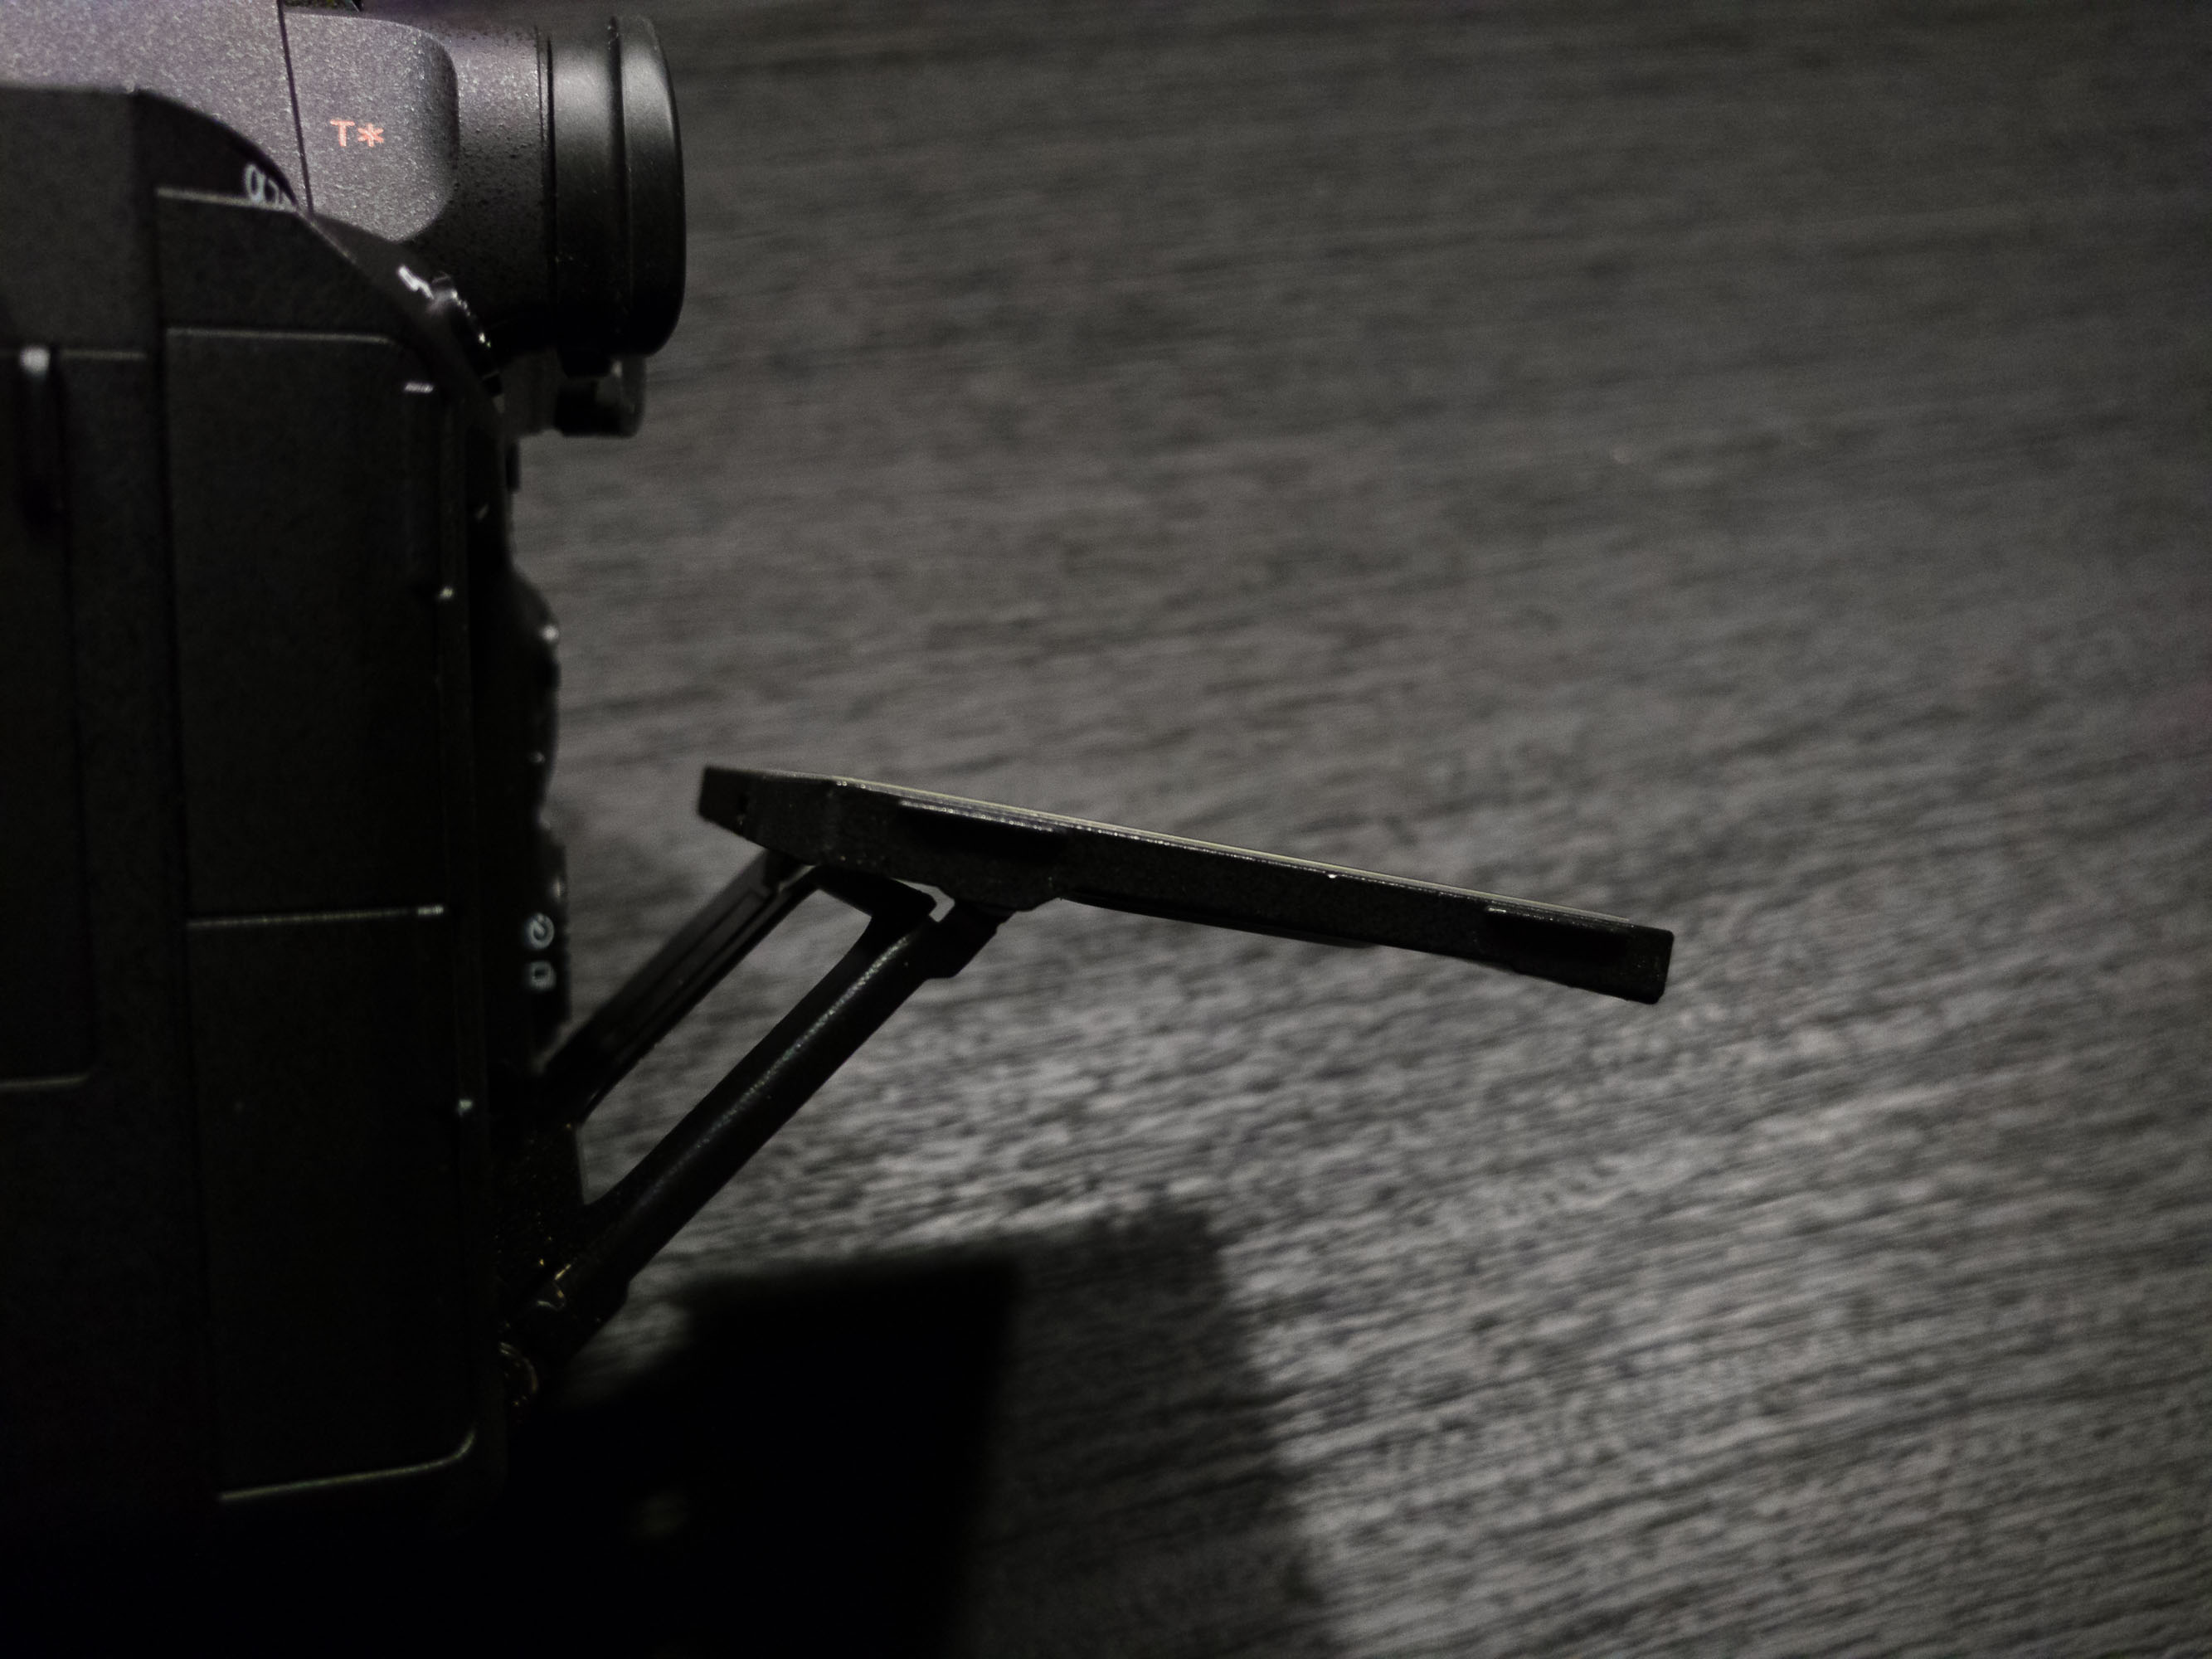
Touch Tilt-Screen
Consistent with the previous generation Sony a7 cameras, the new a7III features a simple tilt screen that allows for low slung or overhead shooting in the landscape orientation. We’re bummed that Sony did not add the ability to tilt for vertical portrait shooting (a la the Fujifilm X-T2), but we’re glad it at least tilts in one orientation. And it’s a touchscreen. Sort of.
New is the ability to use touchscreen functionality for basic functions like AF point selection. In practice, there are already two other methods of AF point selection that are available (joystick and thumbwheel via AF Settings) so the addition of touch screen functionality just to choose an AF point is not particularly revolutionary. It should be noted that the touch screen cannot be used to navigate the menu or to change any on-screen settings.
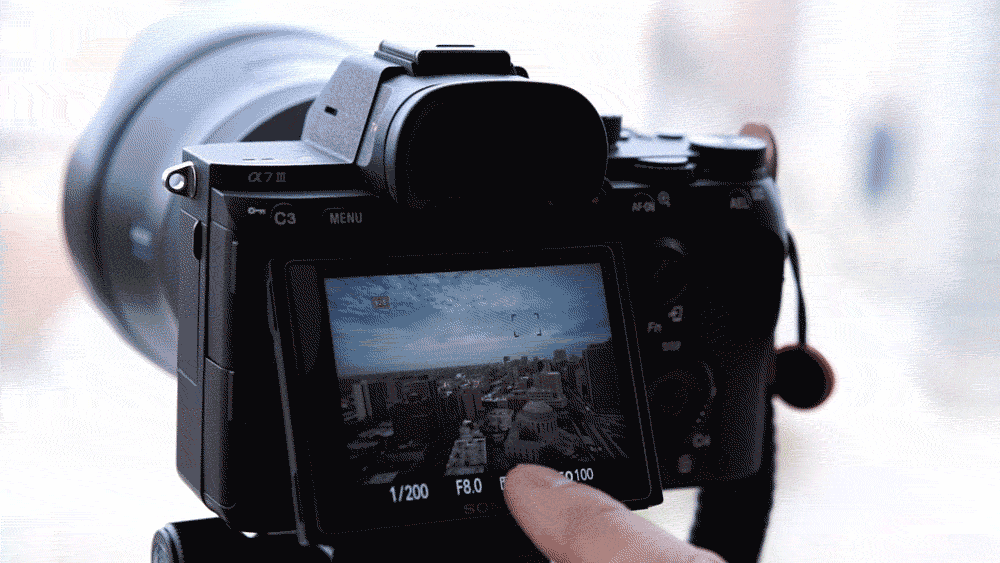
We do like that the screen can be double tapped in manual focus mode to instantly zoom into that portion of the frame to check focus. When zoomed in manual focus, it’s also possible to now use the AF-ON button to instantly autofocus while using the focus magnifier.
Internal 4K UHD Video Recording
While not specifically a feature for shooting astrophotography, the a7III records 4K Ultra High Definition video internally. We love creating YouTube videos so 4K comes in pretty high on our list of personal desires in a camera. HD is quickly being replaced with UHD so we honestly expect nothing less than at least 3840 pixels wide at 24 frames per second for video recording in any modern camera in this day and age.
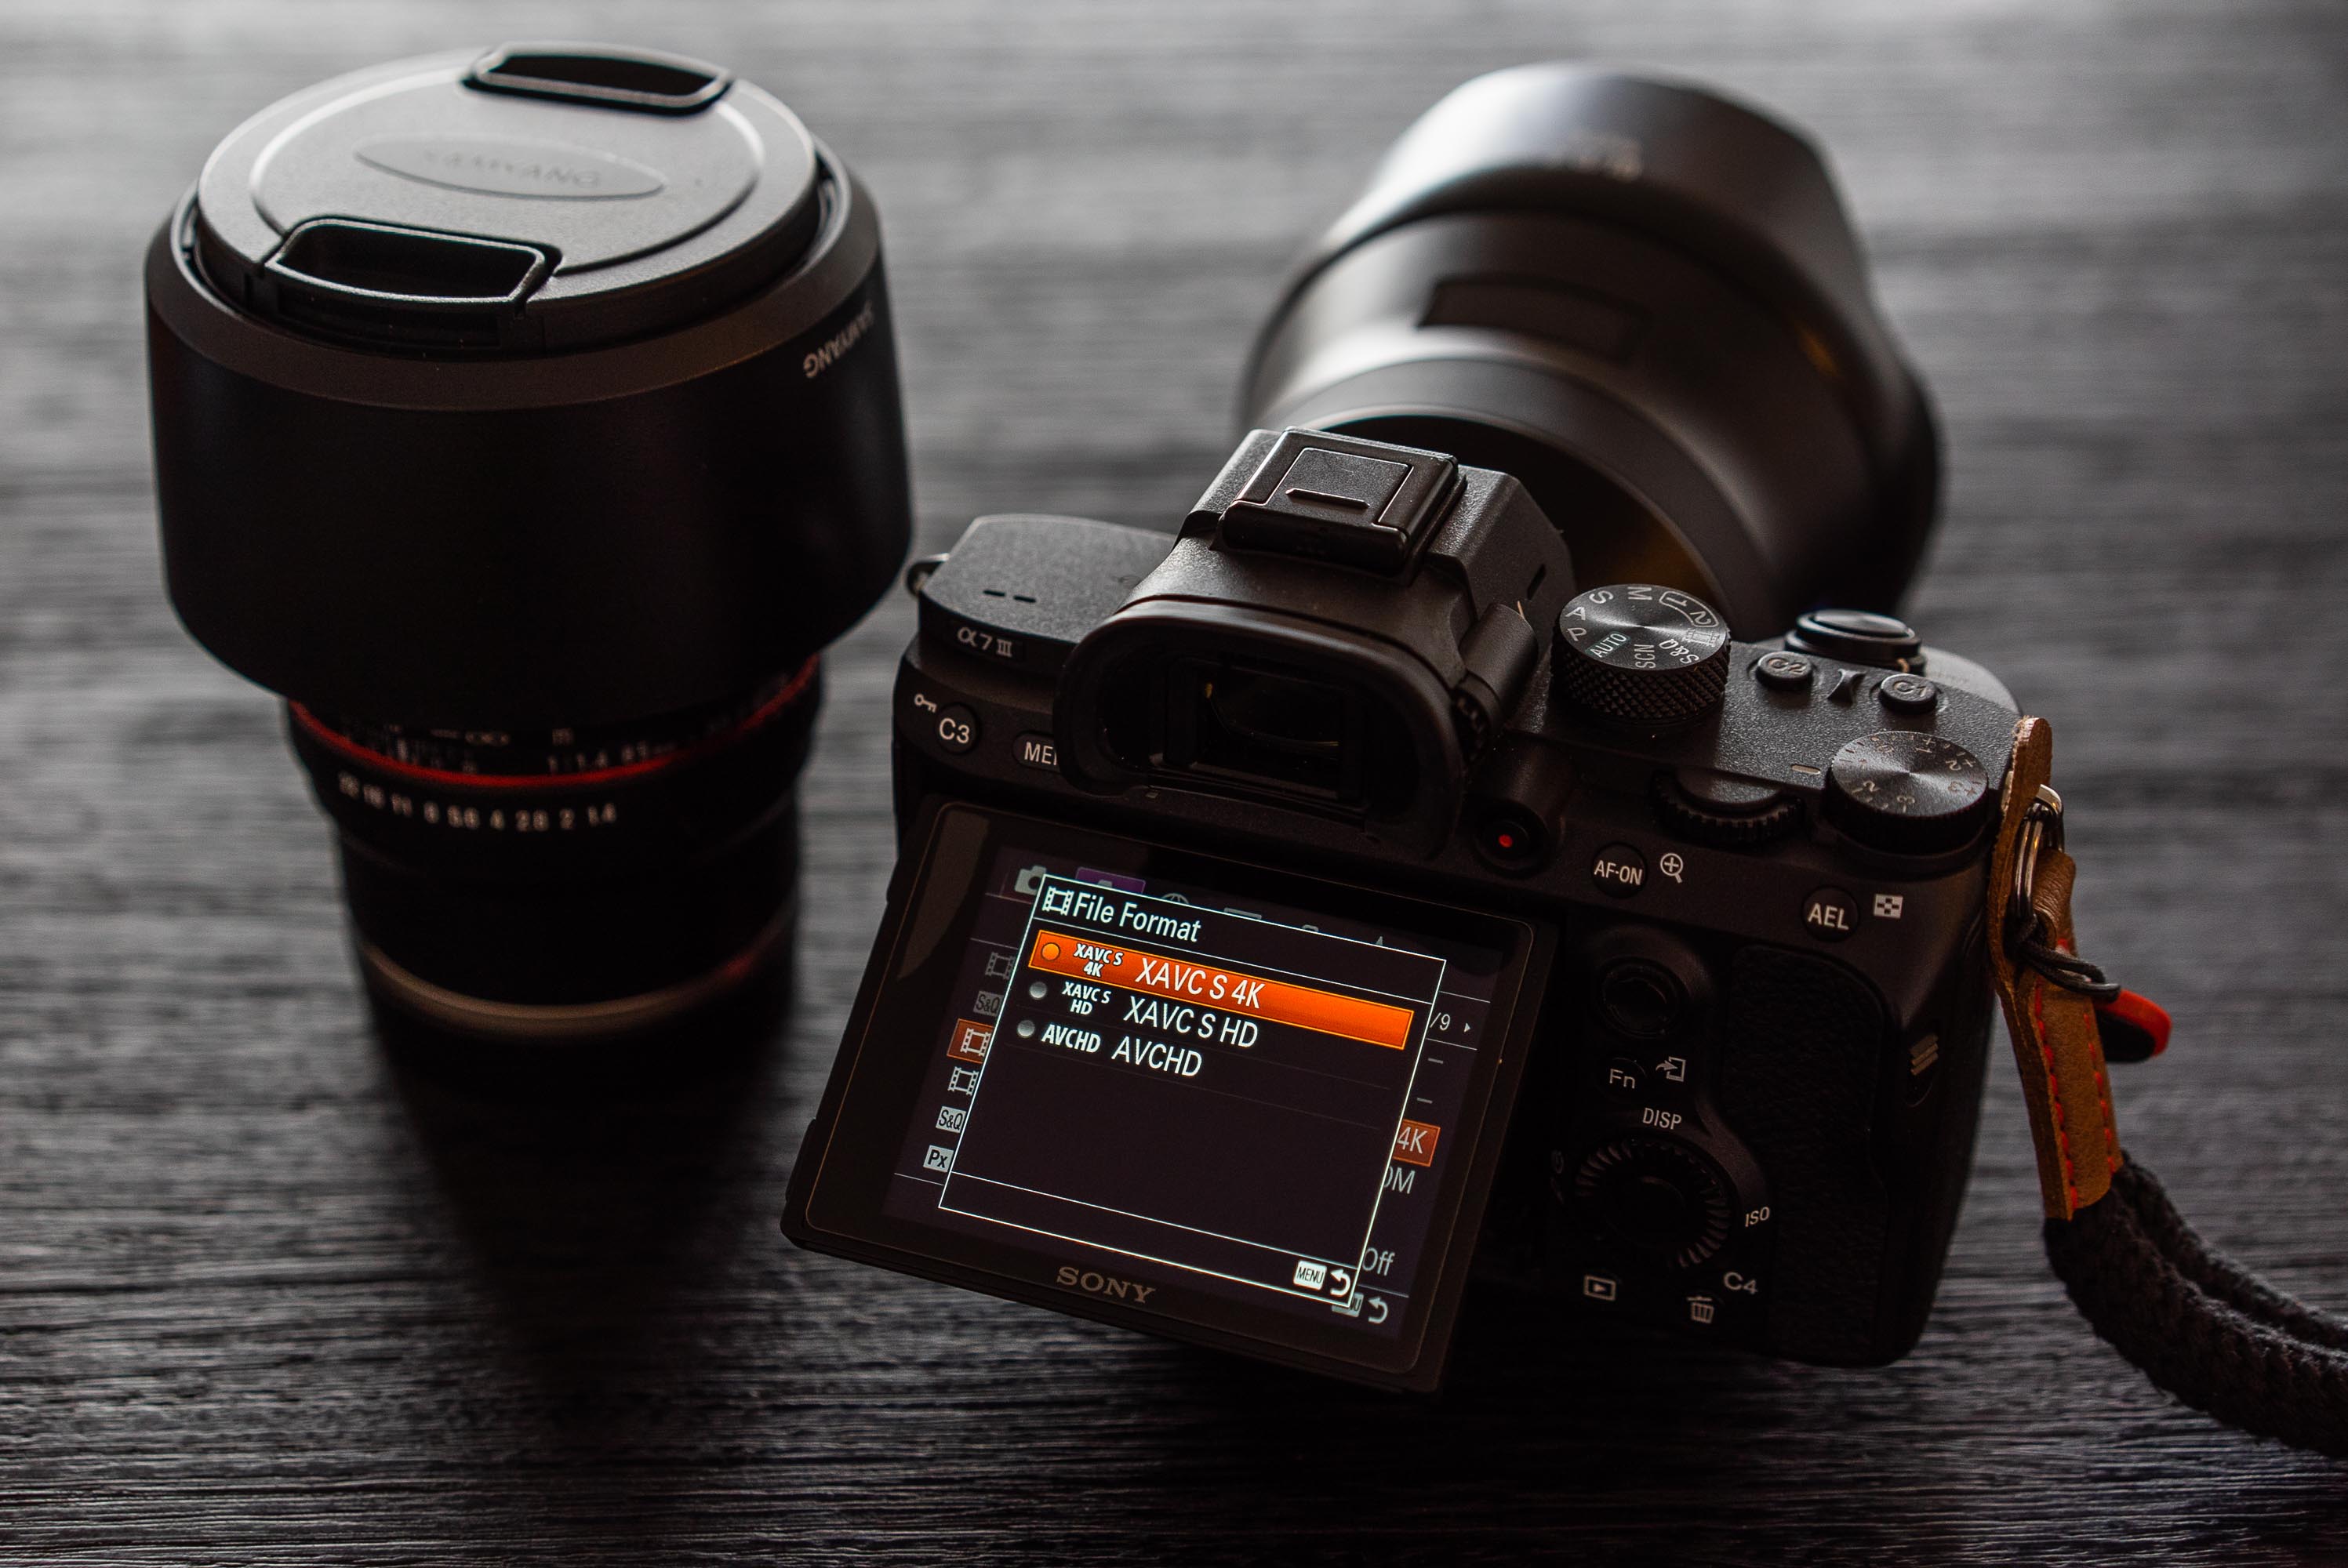
The video image quality out of the a7III is downright excellent. Since the camera samples with full 6K width of the sensor before downsampling for UHD output, the resulting image quality is excellent, on par or better than what we previously expected of the a7S with an external HDMI recorder.
No Internal Time-Lapse App
Update – April, 2019: Sony has released a new firmware version 3.0 that enables intervalometer functions on the a7III. We’re very happy that Sony implemented this feature. It should have been there to begin with. You can download the firmware from Sony’s support page. The original text of our review is below.
We are super bummed to hear that Sony axed the internal PlayMemories App functionality on the a7III. That means that the extremely useful Time-Lapse, Light Trails, Smooth Reflection and Digital Filter apps are no longer downloadable to the Mark III Alpha full-frame cameras. We loved these apps on our old a7S.

Sony might be as forward thinking a camera company as any, but this feels like a step backwards. This omission means it’s impossible to make a night time-lapse sequence without first purchasing a compatible external intervalometer. Why Sony? Why?!
It should be noted that Sony did add the S&Q mode to the mode dial which allows for “Slow and Quick” video recording. This mode allows the a7III to record video at various frame rates as fast as 120 frames per second and as slow as 1 frame per second and then the camera will automatically output that recording as a video at 30p or 24p. At the 1 frame per second shooting setting, it’s a convenient way to make a simple time-lapse video but it’s purely a video mode that cannot generate RAW still image files and it also does not allow for intervals or exposures longer than 1 second.
Dual Card Slots
The Sony a7III features dual SD card slots, which allows for extended shooting, separating RAW and jpeg images, separating video from stills, or creating a real-time second card backup as you shoot.
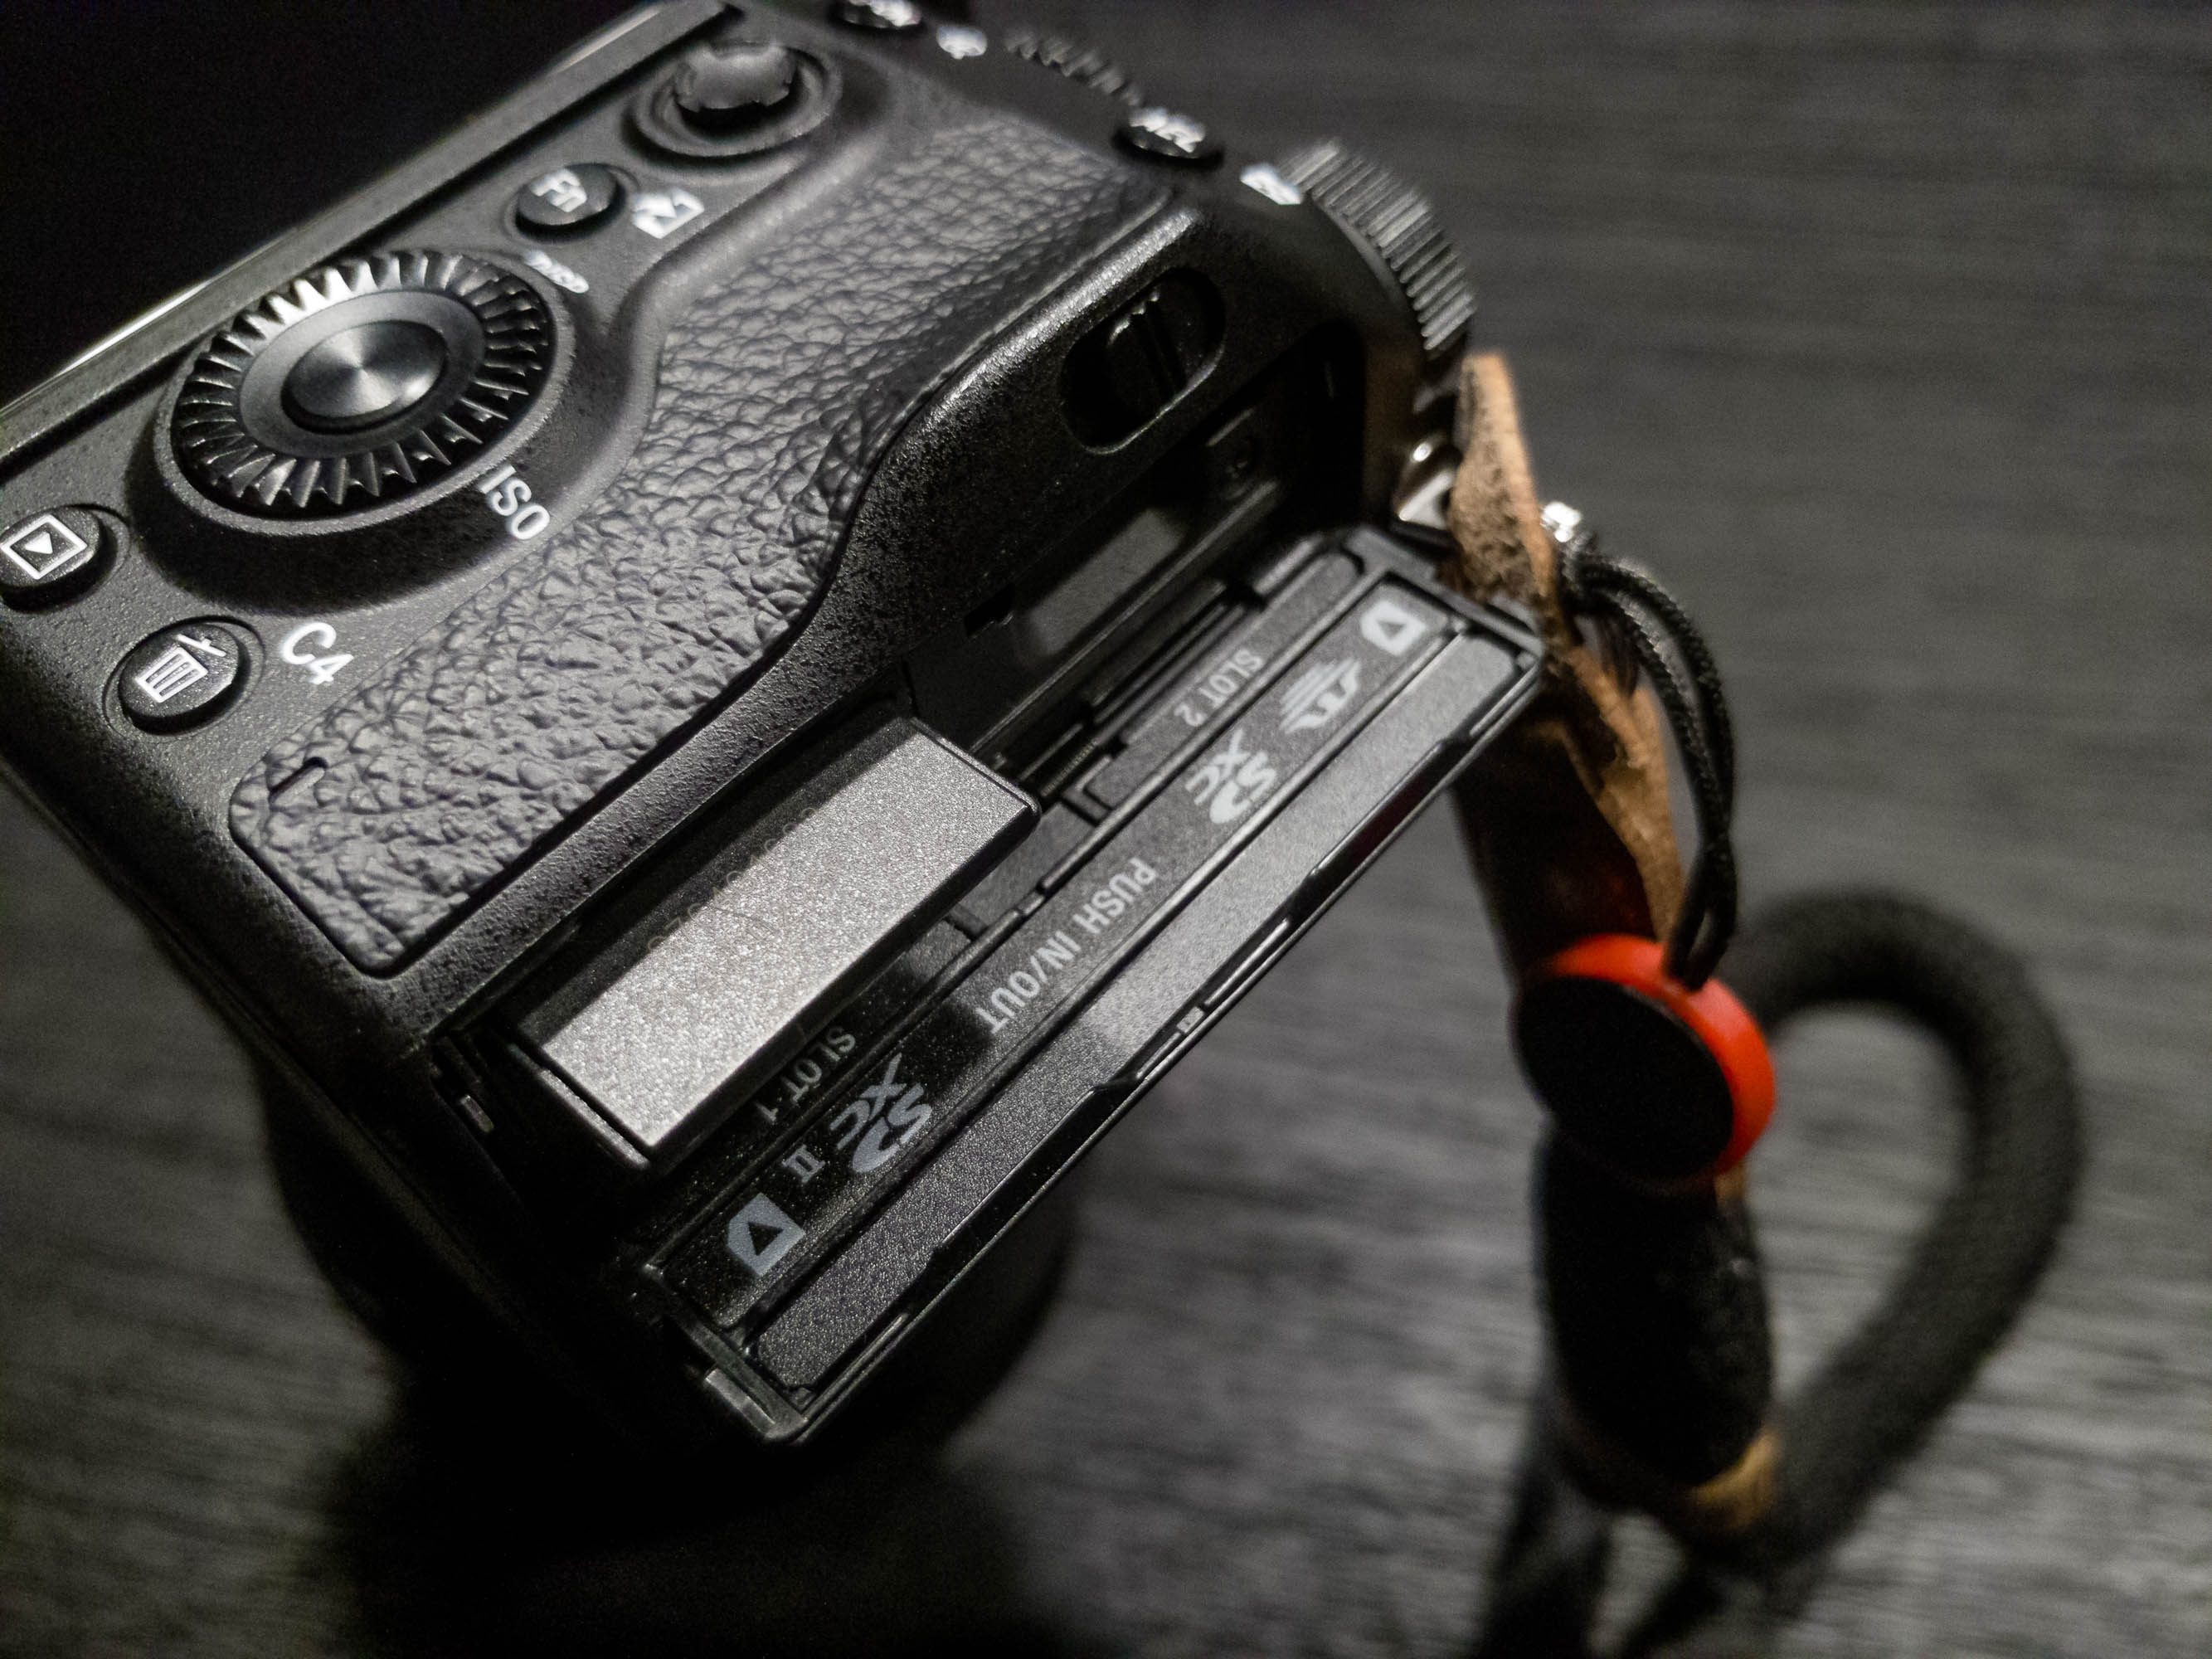
Personally, we use the dual card slots as a way of extending our shooting when making large amounts of images, such as astro time-lapse or the occasional wildlife shoot.
Button Layout and Focus Point Joystick
The most notable physical handling improvement, in our opinion, is the addition of the rear joystick for both menu navigation and AF point selection. It’s now much faster to select an AF point or MF focus magnification area.
Also changed are the position of the video record button to underneath the viewfinder cup, separation of the AF-ON and AEL buttons and a larger, more substantial rear control wheel that’s less easy to accidentally turn and feels better in overall operation.
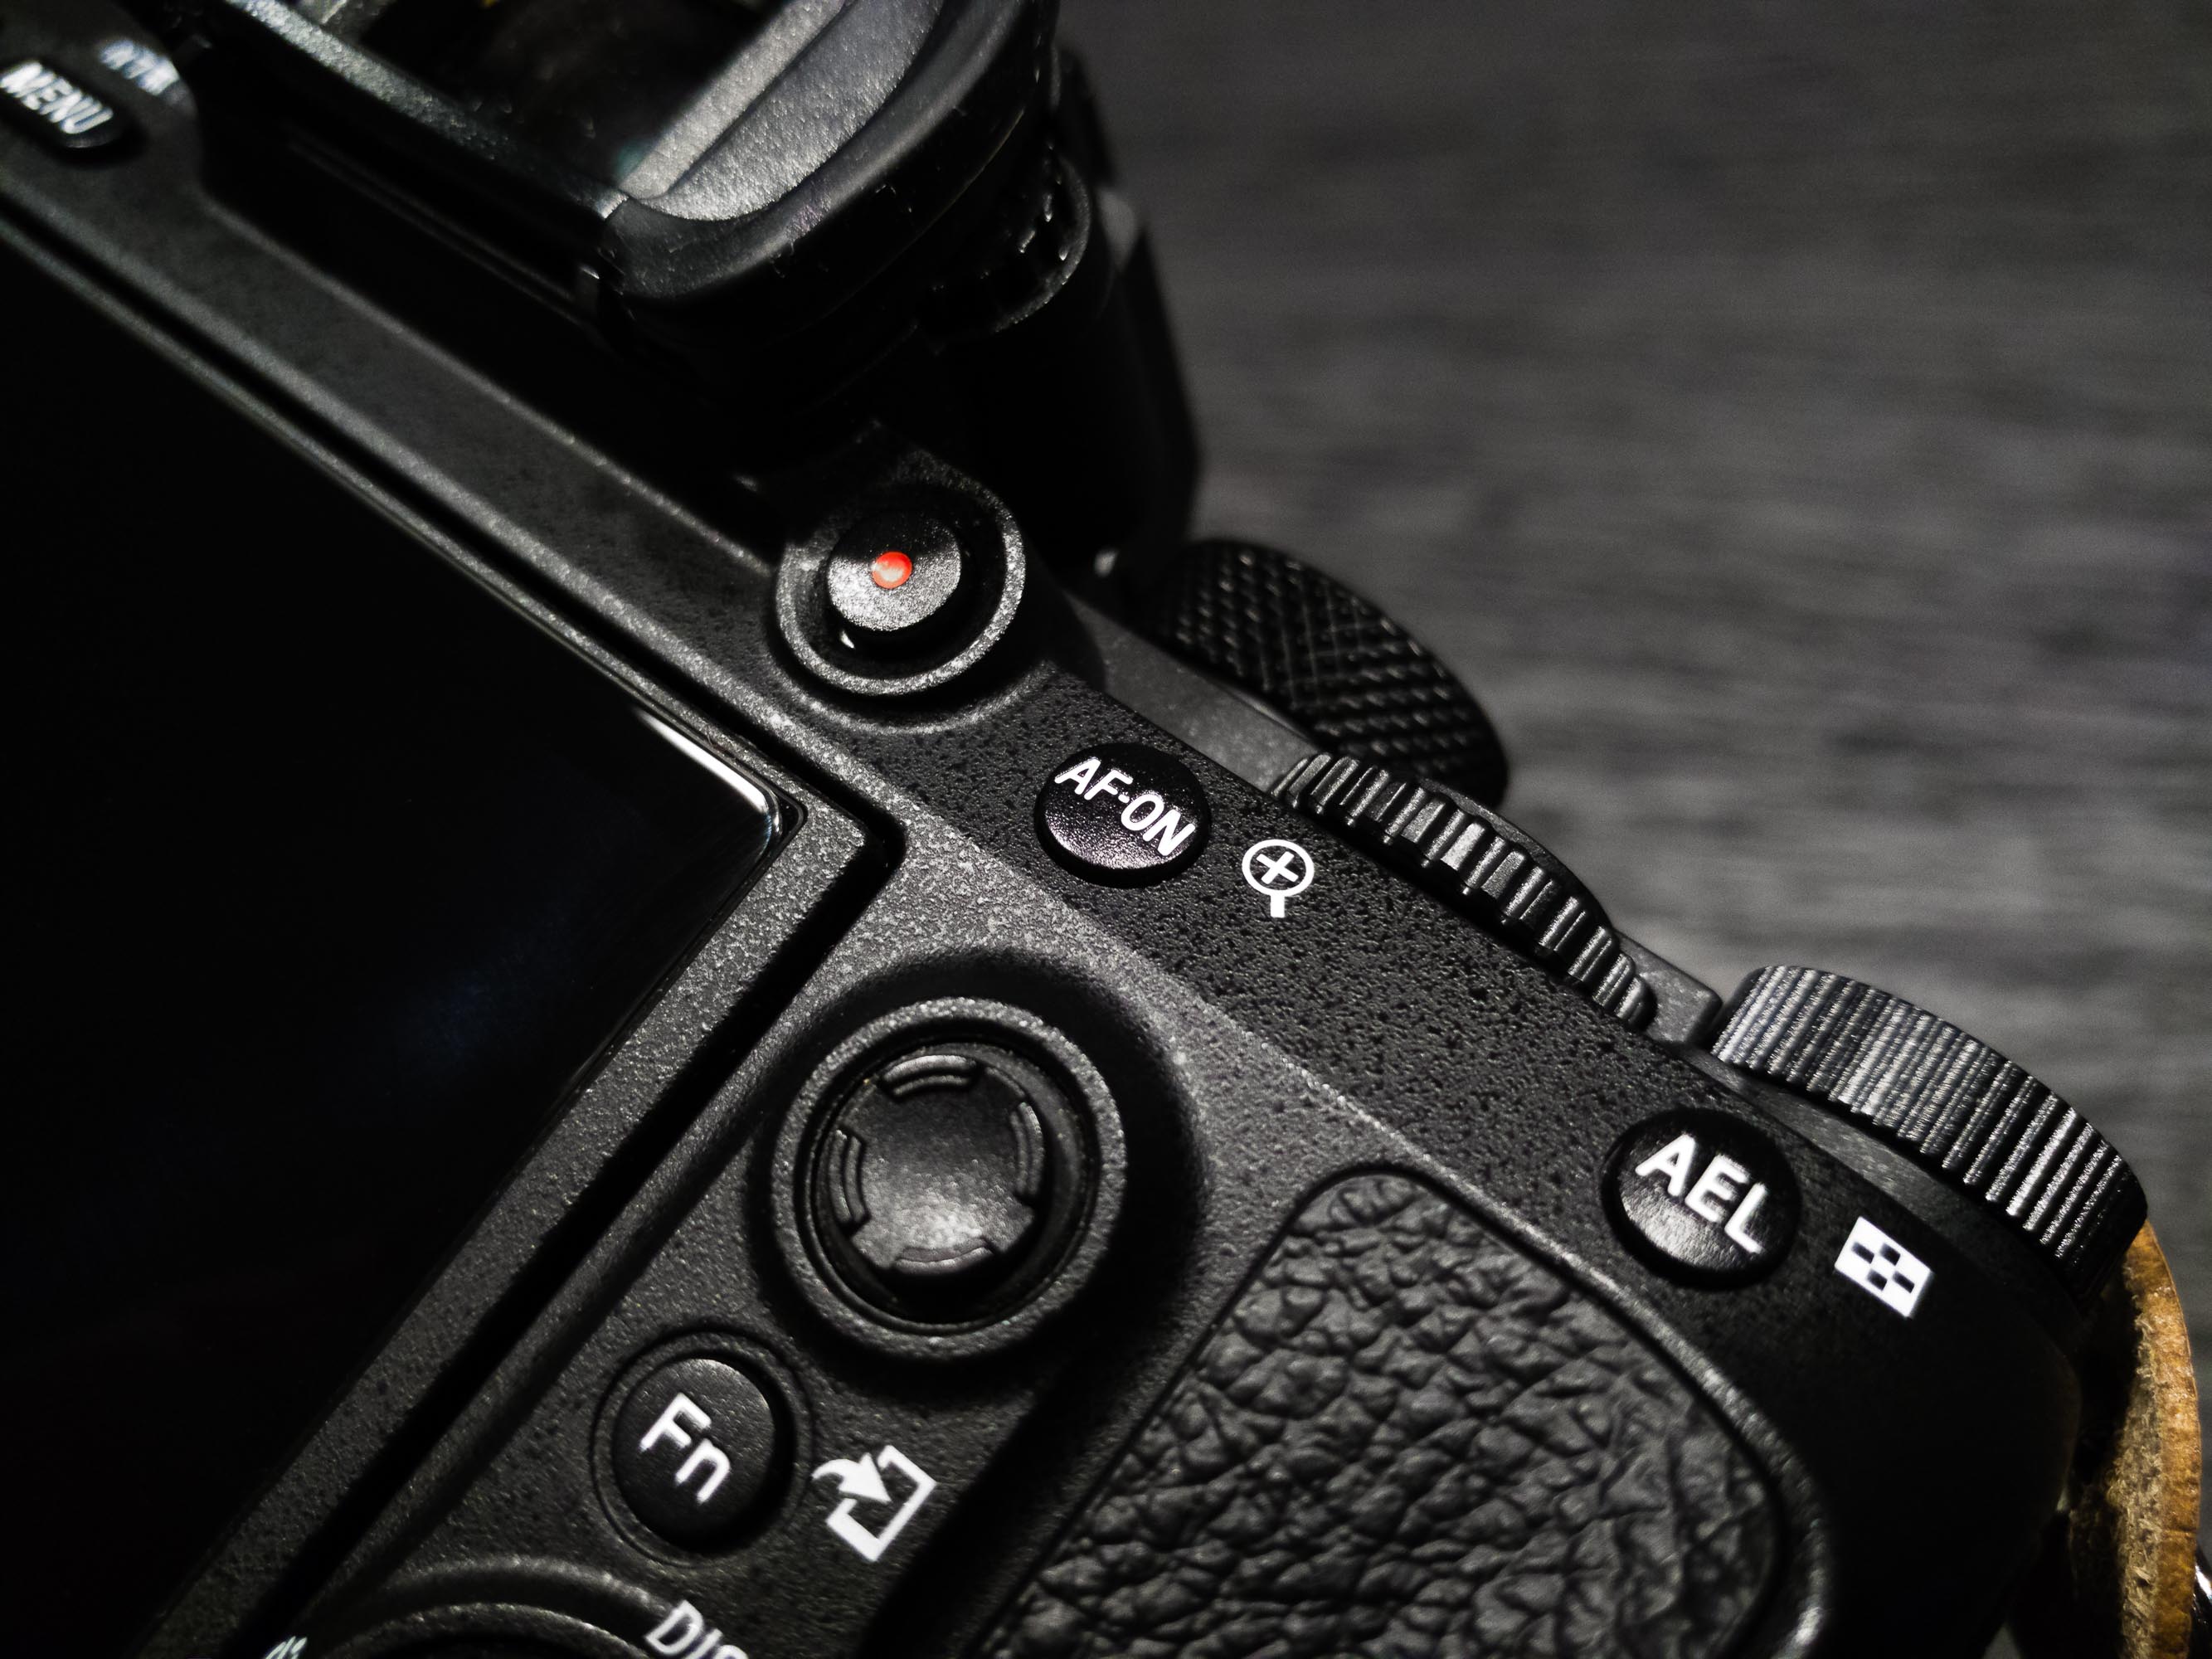
With the new position of the video record button, we did find ourselves occasionally pressing it when attempting to press the AF-ON button, a problem that would crop up occasionally if we were trying to magnify the live-view feed when using manual focus in dark conditions.
The lack of any kind of button illumination at night does make operation of the camera a tad more difficult without turning on a headlamp, at least until the position and feel of any given button is memorized over time.
Overall operation seems pretty smooth but there is some slight lag in the interface when changing settings with the dials.
Button Customization
Nearly every single button or dial on the a7III is customizable. Sony has drastically improved customization and lengthened the list of functions that can be assigned to any given button or dial. Immediately customizable are 4 dedicated custom function buttons (C1, C2, C3, C4) and a configurable Function Menu button (Fn) that gives quick access to a menu of multiple settings of your choice.
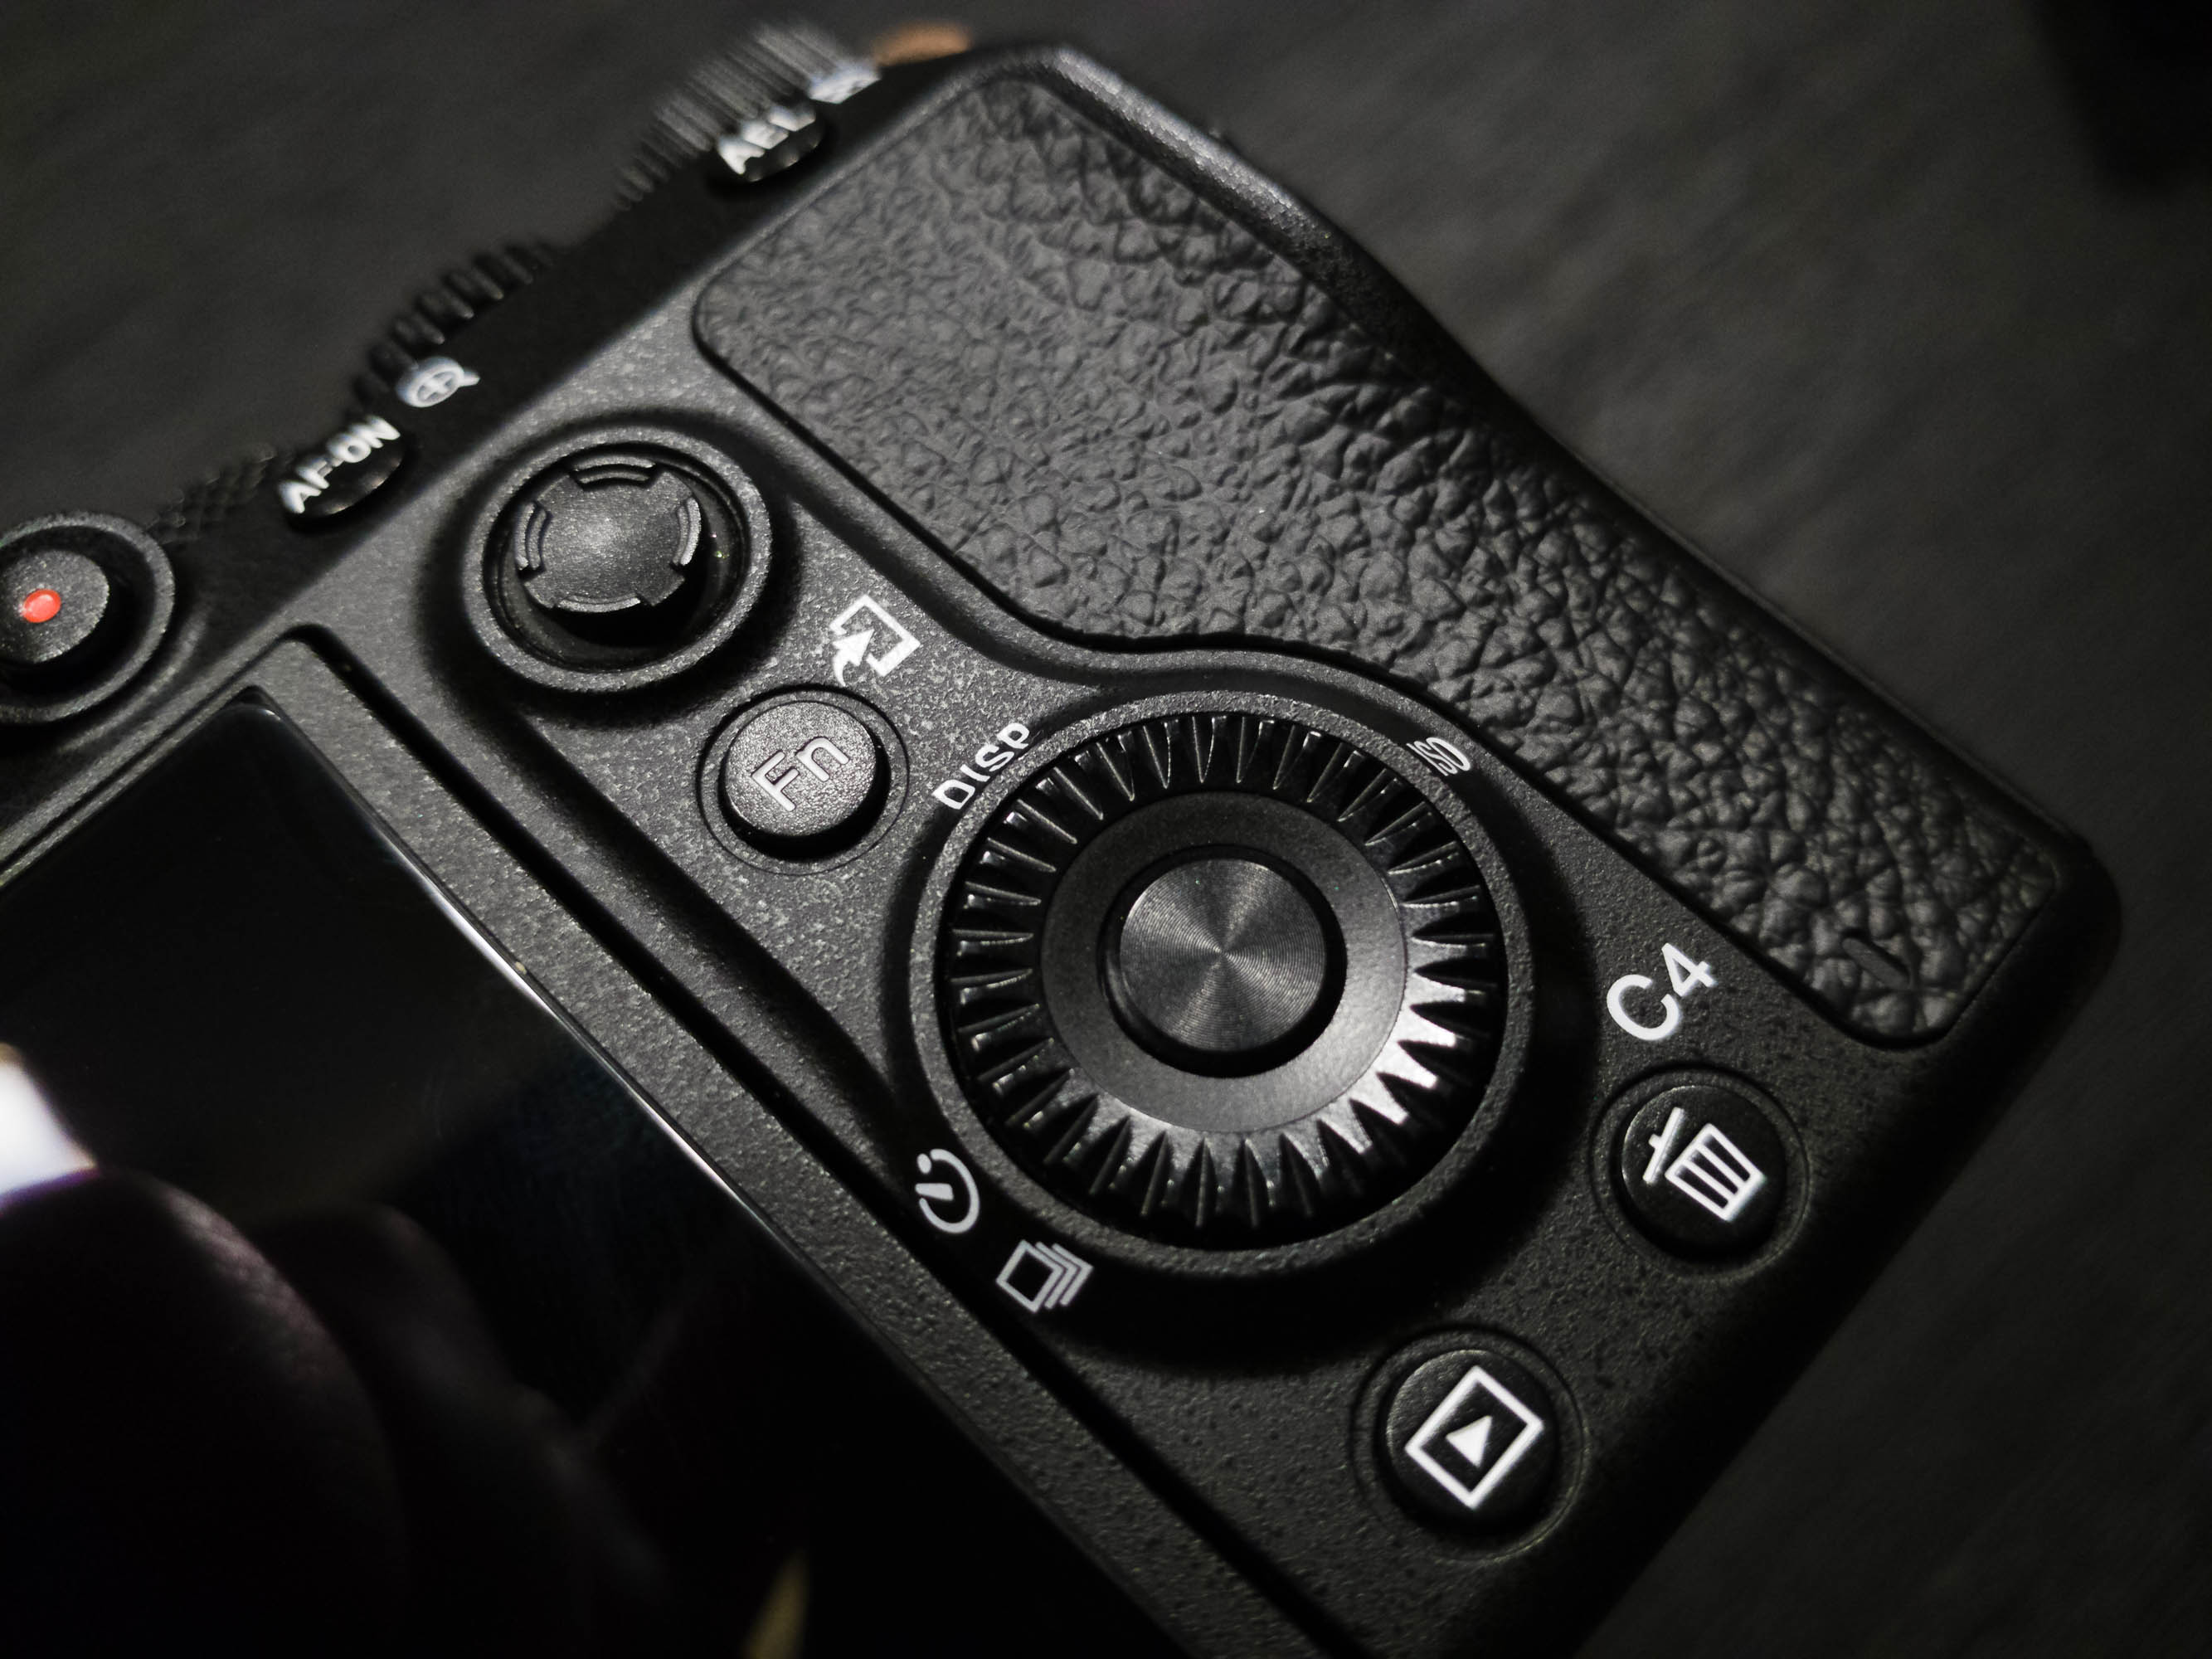
Beyond that, almost every other button, include the ones already labeled for white balance, drive mode, display mode or even the center push of the joystick, can be set to a custom function of the photographers choice. It’s a far cry from the very minimal amount of customization of most DSLRs and a welcome difference at that.
Custom button functionality is a huge advantage for astrophotography because it improves the speed of accessing the most used functions of the camera. Being able to save a function to a tactile button is a huge help when working in the dark.
We use a few custom buttons in stills shooting that are helpful for astrophotography:
- C1: Finder/Monitor Select
- For turning off/on the monitor while shooting in the dark.
- C2: Focus Magnifier
- For checking focus while manual focusing.
- AF-ON: AF/MF Focus Control Hold
- Autofocuses while in manual focus mode.
- AEL: Recall Custom Hold 1
- Enables custom shooting settings upon pressing.
- C3: SteadyShot On/Off
- For disabling when shooting long exposures.
- C4: LCD Monitor Brightness
- For reducing monitor brightness when out at night.
- Control Dial Down: Focus Peaking Display On/Off
- For enabling/disabling focus peaking.
- Multi-Select (Joystick) Center Button: Bright monitoring
- Lowers the refresh rate of the live-view for brighter night framing.
Custom Shooting Modes
Sony also improved the number of functions and settings that can be stored in the custom memory shooting modes, “1” and “2” on the mode dial, making it possible to create your own custom modes for your favorite exposure mode and exposure settings.

No two Sony a7III cameras will likely be configured the same way from one photographer to another and that’s the beauty of the a7III’s custom buttons: If you take the time to customize the controls, you can make it operate in exactly the way that you want for any given shooting scenario, a feature that that very few other camera manufacturers have offered to the extent that Sony has on the a7III.
Bright Low-Light Live View Feed (Bright Monitoring)
The LCD screen appears to be very similar to the a7II, daytime brightness is adequate but not exceptional for shooting in brightly sunlit conditions. We were very pleased by the brightness and gain capability of the live-view feed at night. It’s nearly as bright as the Sony a7S, making composition in dark conditions comparatively easy, especially with a decently fast (<f/2.8) lens.
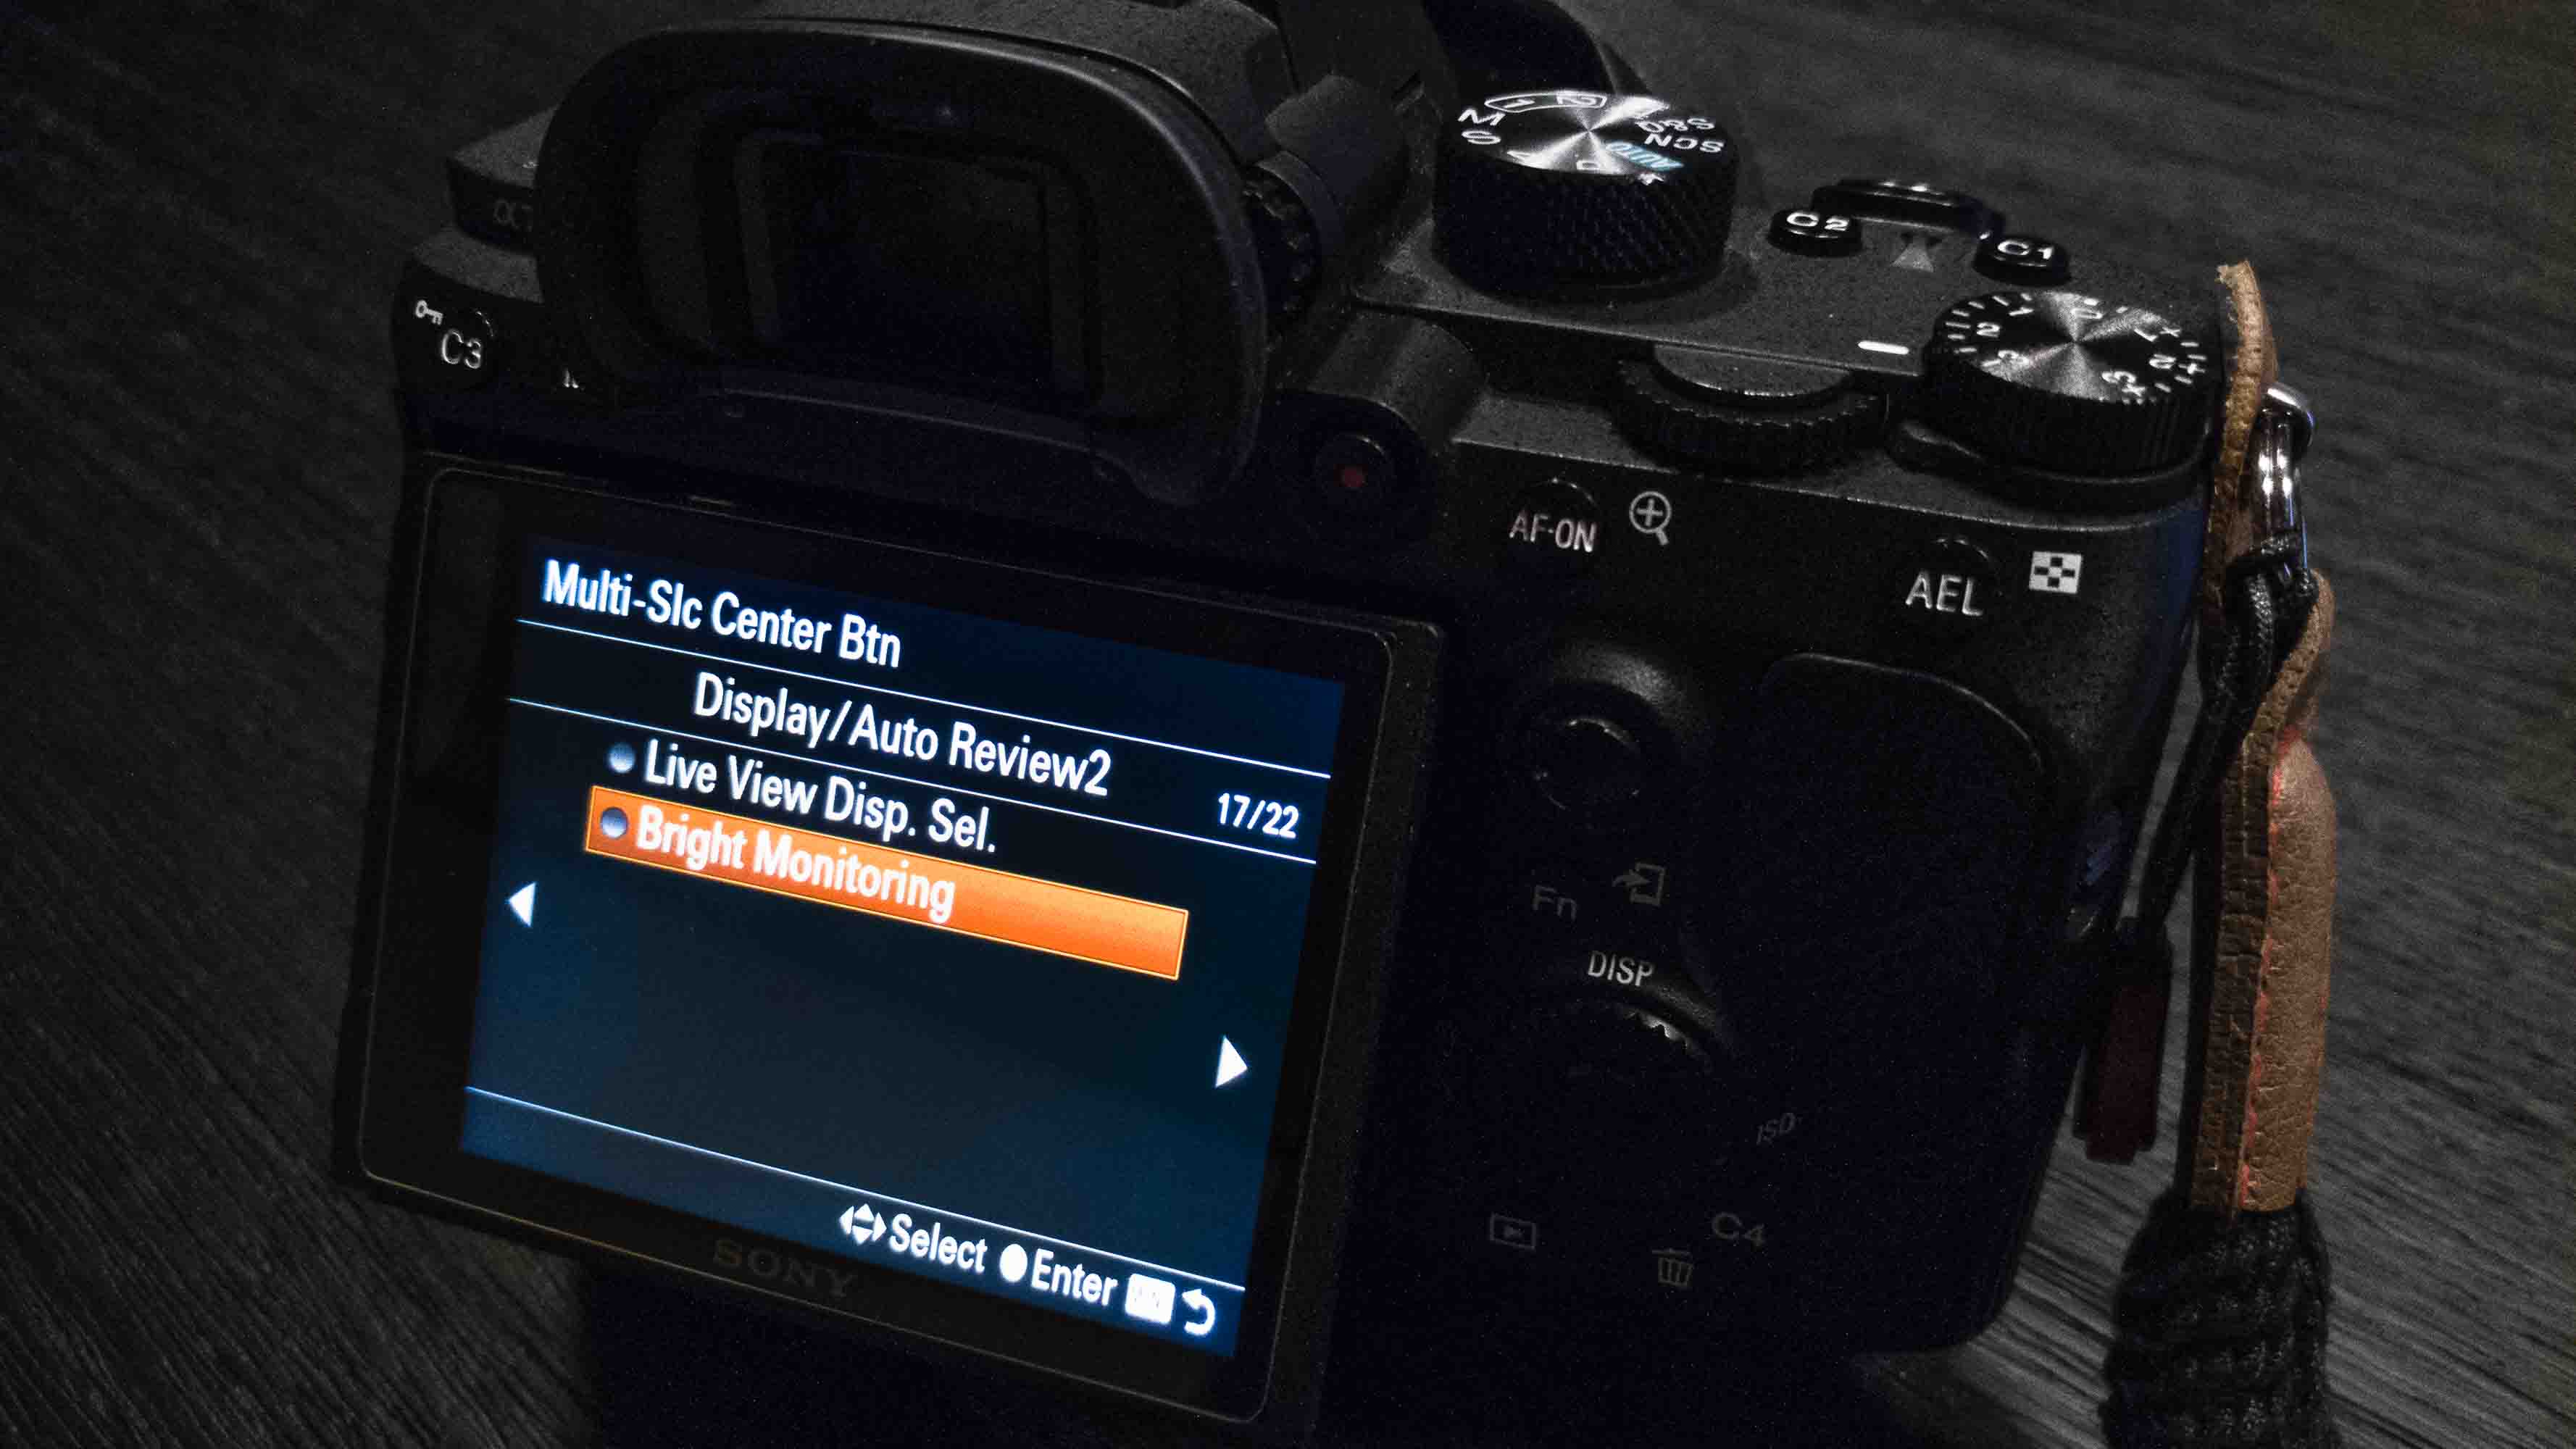
Also new is the “Bright Monitoring” function that can be set to a custom button. (It’s also available on the a7RII and a7RIII.) Bright monitoring disables any creative styles and slows the frame-rate of the live-view feed for an even brighter view when framing in the extreme dark.

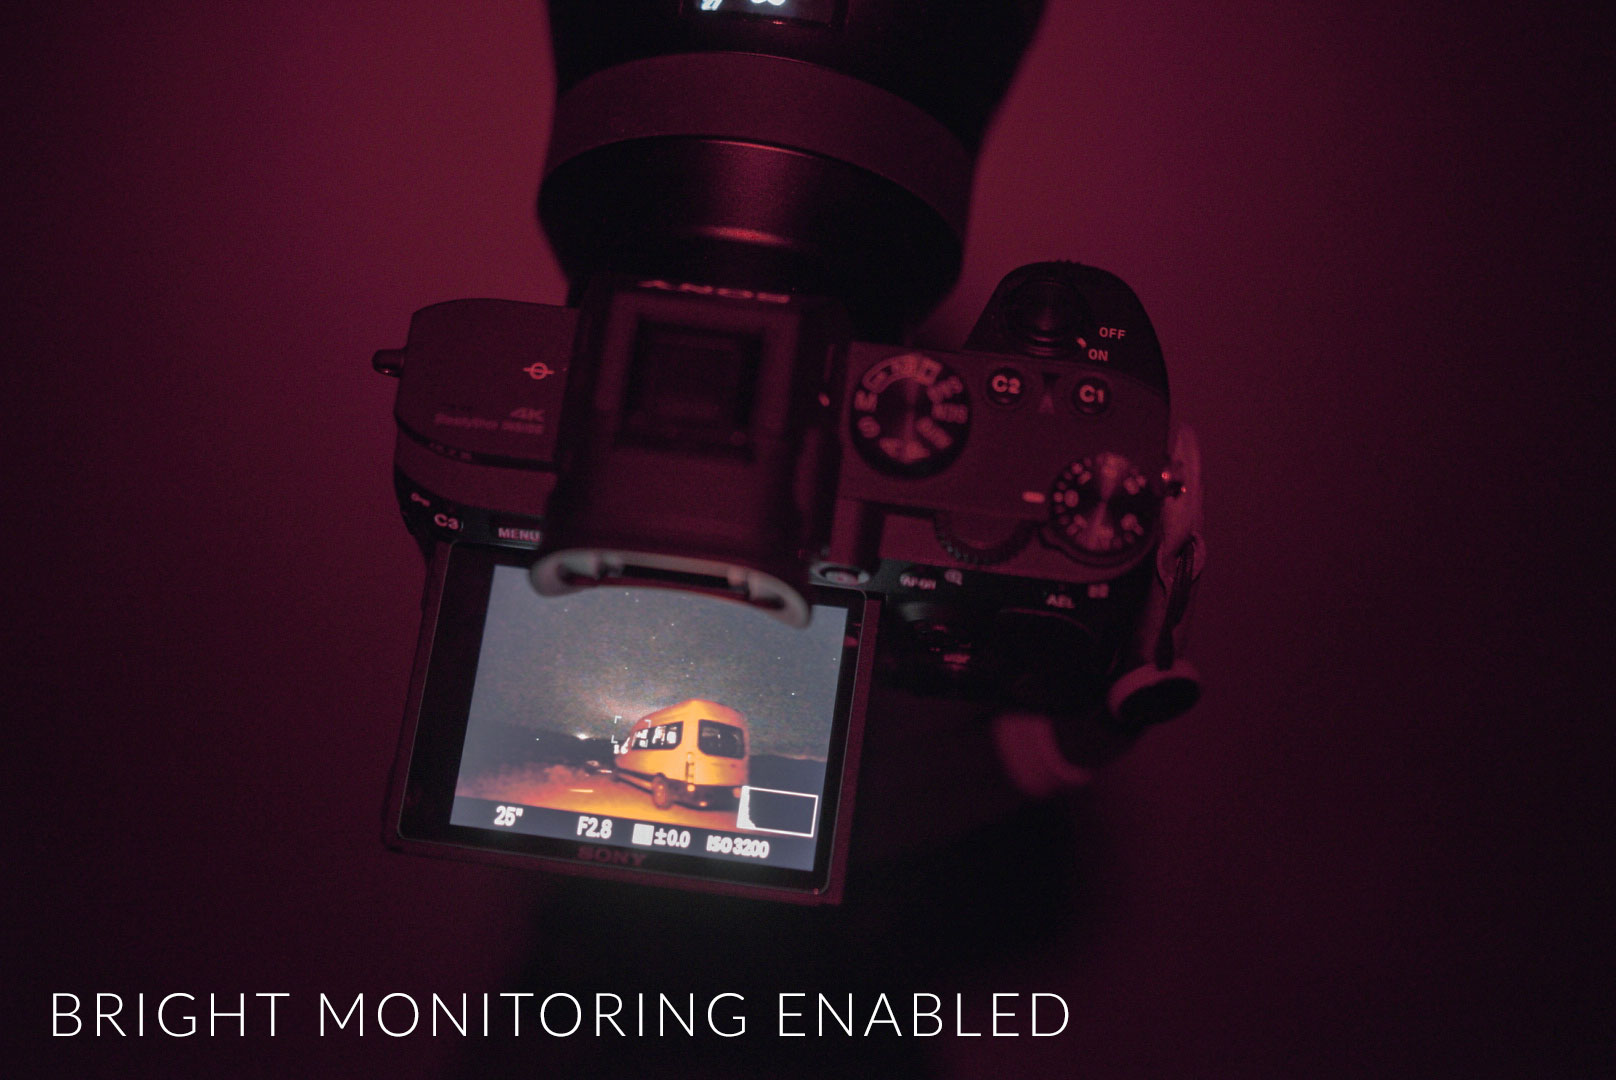
Even with a modest aperture lens, Bright Monitoring is nearly like night vision. While in this mode, the LCD monitor frame rate can be very slow in dark conditions and moving the camera around can feel like the camera’s drunk, but it’s exceptionally helpful to be able to see in the dark for composition and framing at night. It does not, however, work in conjunction with the Focus Magnifier function.

Organized Menus
The latest iteration of the menu interface is much improved on the a7III. The settings menu is still exceptionally long and deep, but functions have been categorized into useful groups and as a result, they are much more easily found.
The menu is, however, different enough from previous Sony cameras that it has taken us some time to memorize the positions of certain menu functions and its still takes us some time to browse before finding certain settings. Luckily, it’s possible to put our most used settings in the “My Menu Setting” tab, the Function (Fn) menu, or assign it to a button of our choice.
Shooting Experience Final Thoughts
Handling of and shooting on the Sony a7III is an improvement in many ways from the previous generation Sonys, as we would hope and expect. Every aspect of the camera feels newer and more refined than previous generations, in-spite of some glaring omissions like the lack of an internal interval-timer or time-lapse mode.
The extreme level of customization available to photographers is one of the most attractive features of the a7III, but one that we expect relatively few photographers to fully utilize. Taking the time to fully understand and customize the buttons, dials and menus of the a7III can add tremendous power and capability to a photographers toolset. Control customization is one of the most valuable capabilities of the a7III. We’ve never used a camera with so much capability for customization and that’s a good thing.
Image Quality
ISO-Invariance
We like to test every camera we review with an ISO-invariance test. This test allows us to more fully understand a camera’s ISO performance and to gauge the best ISO settings for the camera in ultra-low light shooting conditions.
We test the camera’s ISO behavior by shooting a series of underexposed images using the same exposure settings (shutter and aperture), but ISO is varied between each image at 1 stop increments from base ISO (100) up to high ISO (204800). Then, in post processing, the images are equalized in brightness and compared. Read more about how to perform an ISO invariance test here.

For the a7III, I chose a night cityscape scene in Chicago. In order to accentuate noise, I intentionally underexposed all of the images by stopping down to f/8 and using a shutter time of only 1/4th of a second to simulate extremely low-light shooting. I shot one photo at each whole stop ISO setting. Then, in post processing, all of the images were adjusted to equal brightnesses and compared.

A close look reveals important differences between certain ISO settings. In this low-light scenario, the lowest ISOs show more shadow noise, with some horizontal banding present at ISO 100. There’s a slight improvement between ISO 100 and 200 and another small improvement between ISO 200 and 400.
At ISO 800 and higher, shadow noise is greatly reduced and noise levels remain nearly identical at every higher ISO. From ISO 800, all the way to ISO 51200, the Sony a7III appears to be ISO-invariant. Finally, at ISO 102400 and 204800, we can notice the detrimental effects on dynamic range: extremely bright highlights are blown out and detail is reduce around the brightest city lights.
Why does this matter for astrophotography? Based on the ISO-invariance test, we’ve learned that it’s beneficial to use ISO settings higher than ISO 400 when shooting in light-limited conditions (such as landscape astrophotography). At ISOs higher than 400, the camera uses a higher gain that boosts the shadow detail above the noise floor of the image. The advantage is cleaner shadows, perhaps at the expense of some dynamic range in the extreme brights.
We can see the characterization of this high ISO advantage in real-world landscape astrophotography shooting:

Looking at the above ISO 400 photo, compared to the below, ISO 1600 photo, it’s apparent that the ISO 400 photo has tangibly noisier shadow areas than the higher ISO 1600 photo. Click on each photo for a higher resolution view.
The ISO 1600 is much cleaner looking overall with the biggest difference noticeable in the dark blacks of the mountains in the background.
Noise Performance
We already said it, and our example photos seem to show it: low-light noise performance on the a7III is excellent. It is nearly as good in performance to our beloved Sony a7S, but with the resolution advantage of twice as many pixels.
Even in fully dark-sky conditions with nearly no-light pollution, the a7III RAW files show an excellent amount of shadow details, even when severely underexposed and then pulled up in post-processing. We’re extremely happy with how much shadow detail is captured by the Sony a7III.
Star Eater Test
Does the a7III eat stars?
Previous generations of Sony Alpha full-frame cameras have the so-called star-eater issue. Under certain long exposure settings, the camera kicks in a noise reduction algorithm that mistakes dimmer stars for noise and “eats” them or at least reduces their brightness. Our a7S body has the issue when shooting in Bulb mode only, but other cameras like the a7SII and a7RII have the issue in regular camera-timed exposures of 4s and longer. I’ve tested the a7III extensively to see if it also has the issue and these are my findings:
The a7III exhibits a similar, but different characteristic noise filtering as previous generations. The filtering reduces noise and diminishes the brightness of small dim stars in an image for exposures of 4 seconds or longer. An easy way to see the effects of star-eater on the a7III is to simply compare a 3.2s exposure (left) with a 4s exposure (right):
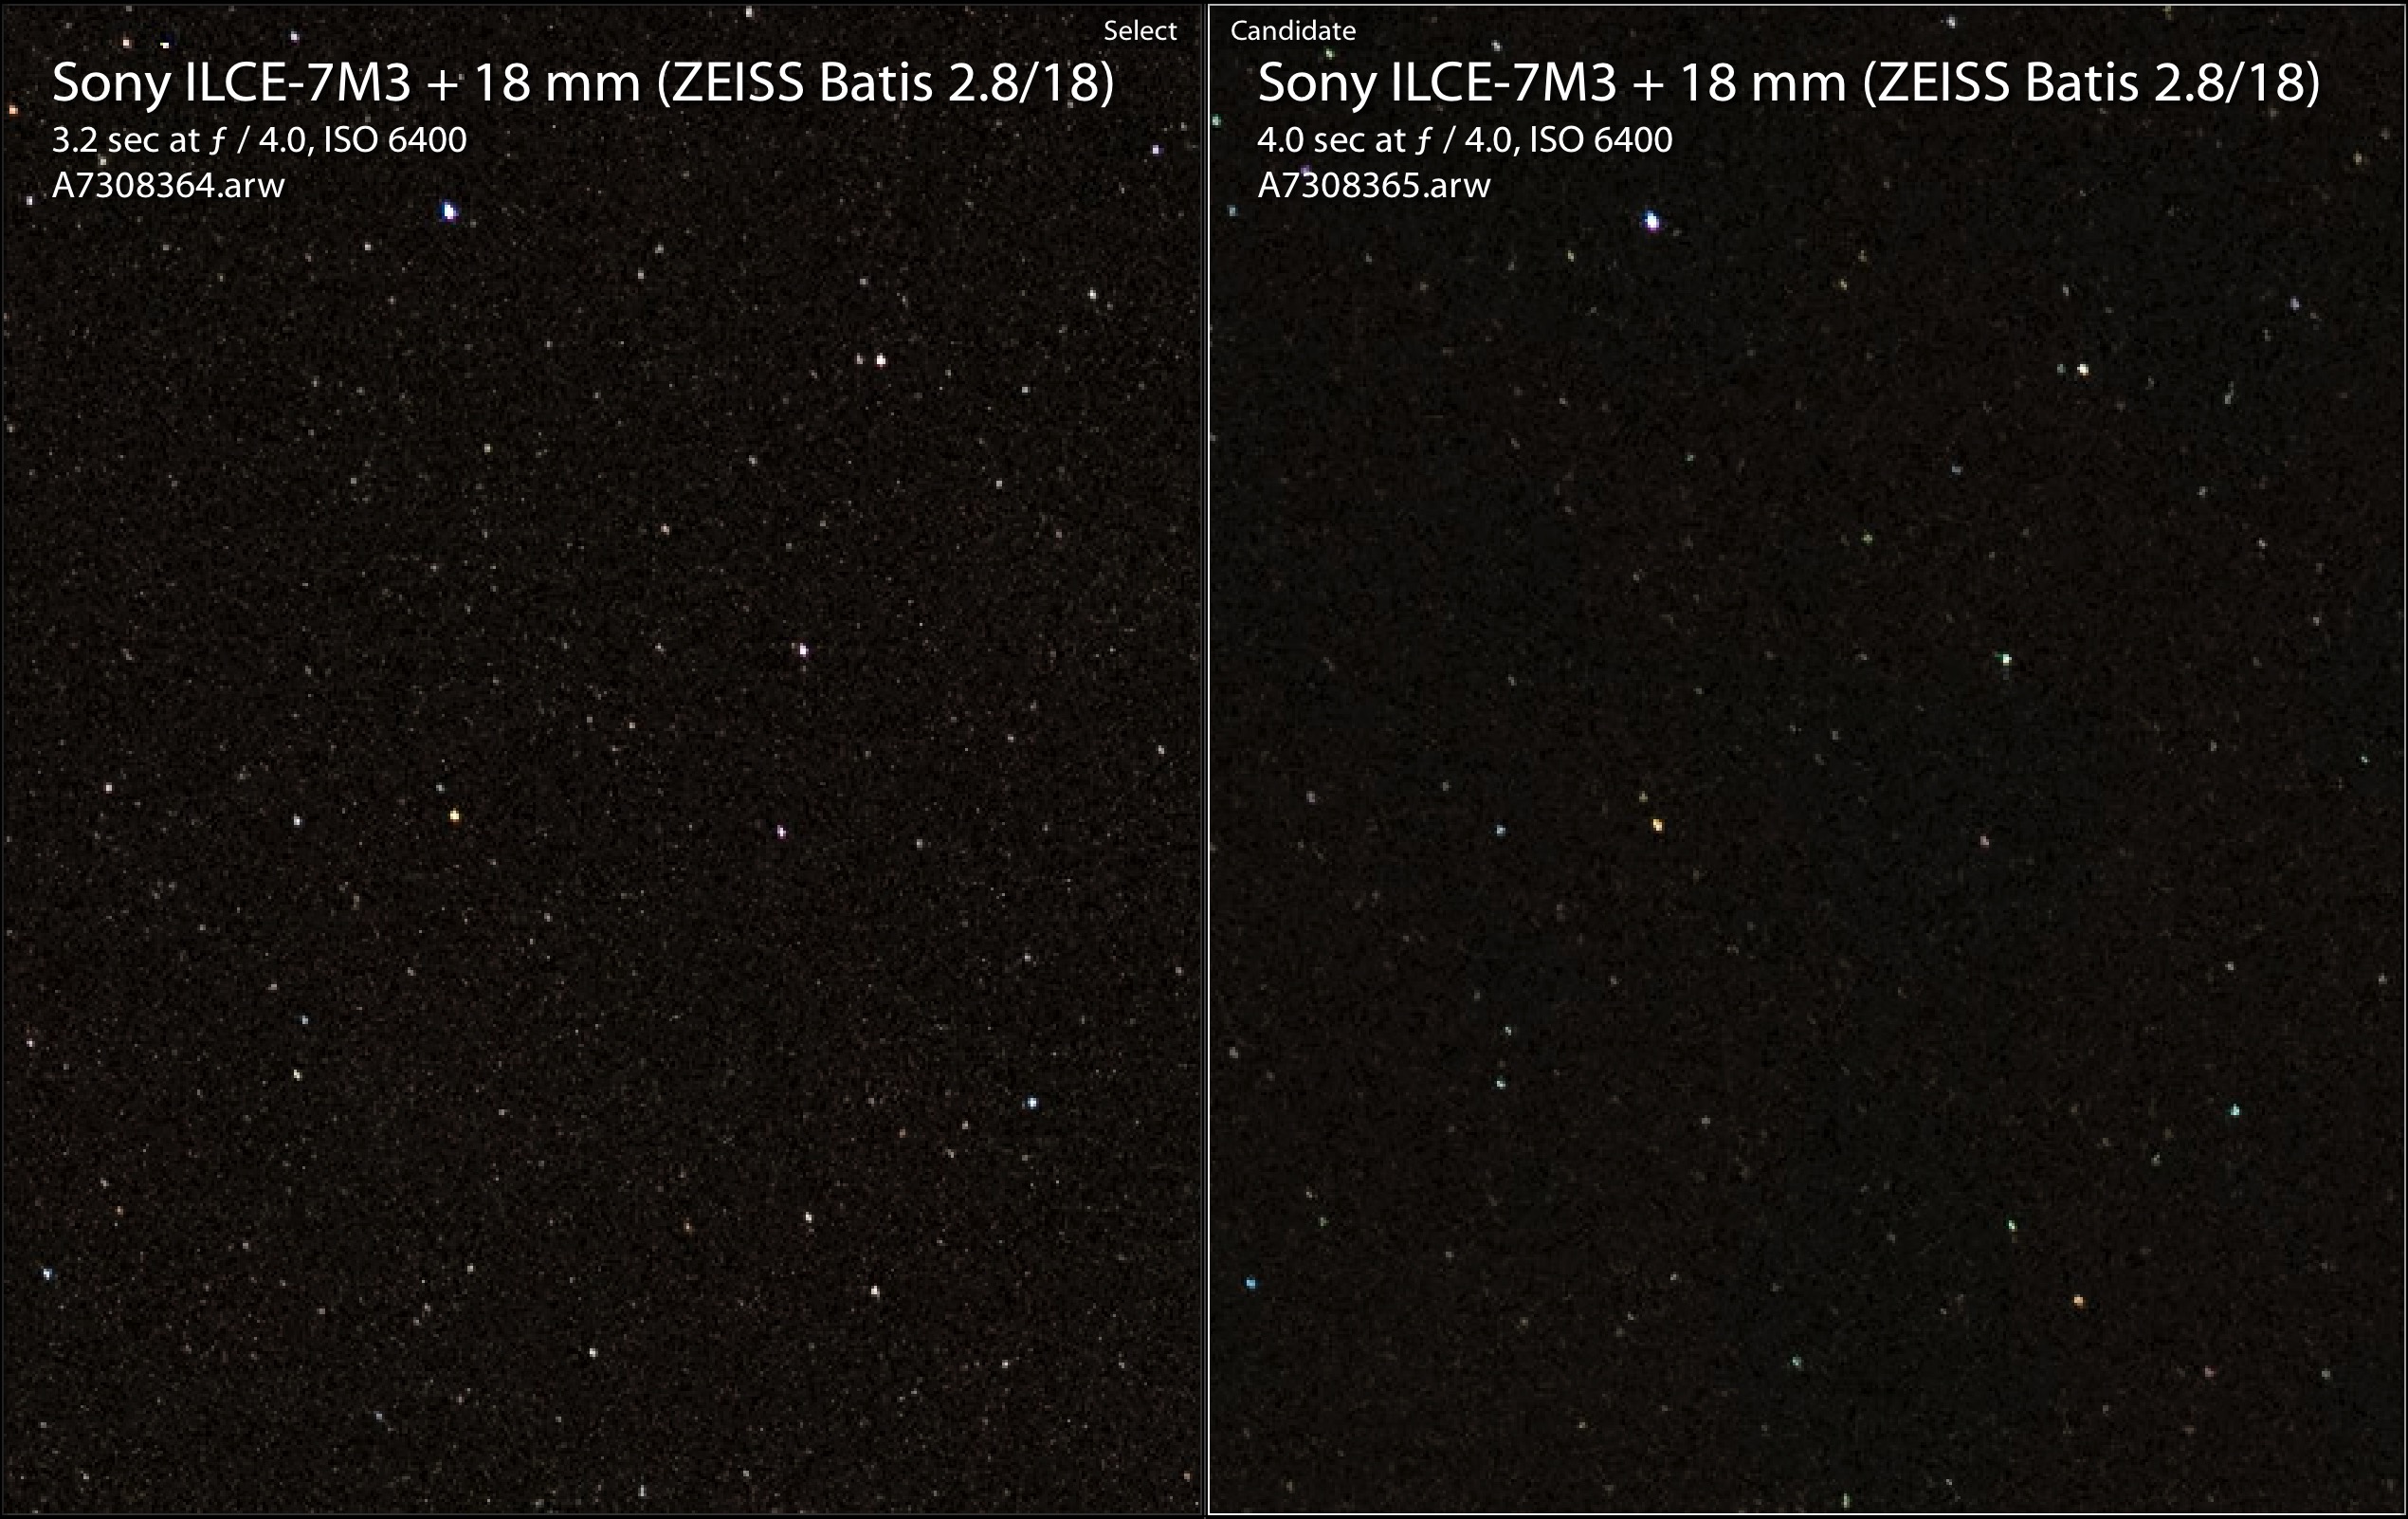
There’s definitely a difference in the 4 s exposure when compared to the 3.2 second exposure. At 4 seconds, noise is reduced dramatically and dim stars are further diminished in brightness, a clear indicator that Sony is filtering out the higher frequency noise and taking some stars with it. So star-eater is still present, but how does the problem compare with previous generations and how detrimental is it to actual shooting?
A 3.2 to 4 second exposure is a little short for most landscape astrophotos. Let’s take a look at a slightly more realistic 8 second exposure, compared with a previous generation camera that exhibits the star-eater issue (the a7S in Bulb-timed shooting mode). At 8 seconds long, on an 18mm lens, the stars should hopefully “burn-in” more and be less susceptible to the star-eater issue.
The comparison below shows an 8s star-eater exposure from the original generation a7S on the left (8s, Bulb-timed) versus a standard camera-timed 8s exposure from the a7III on the right. The a7S image was scaled to match for comparison purposes.
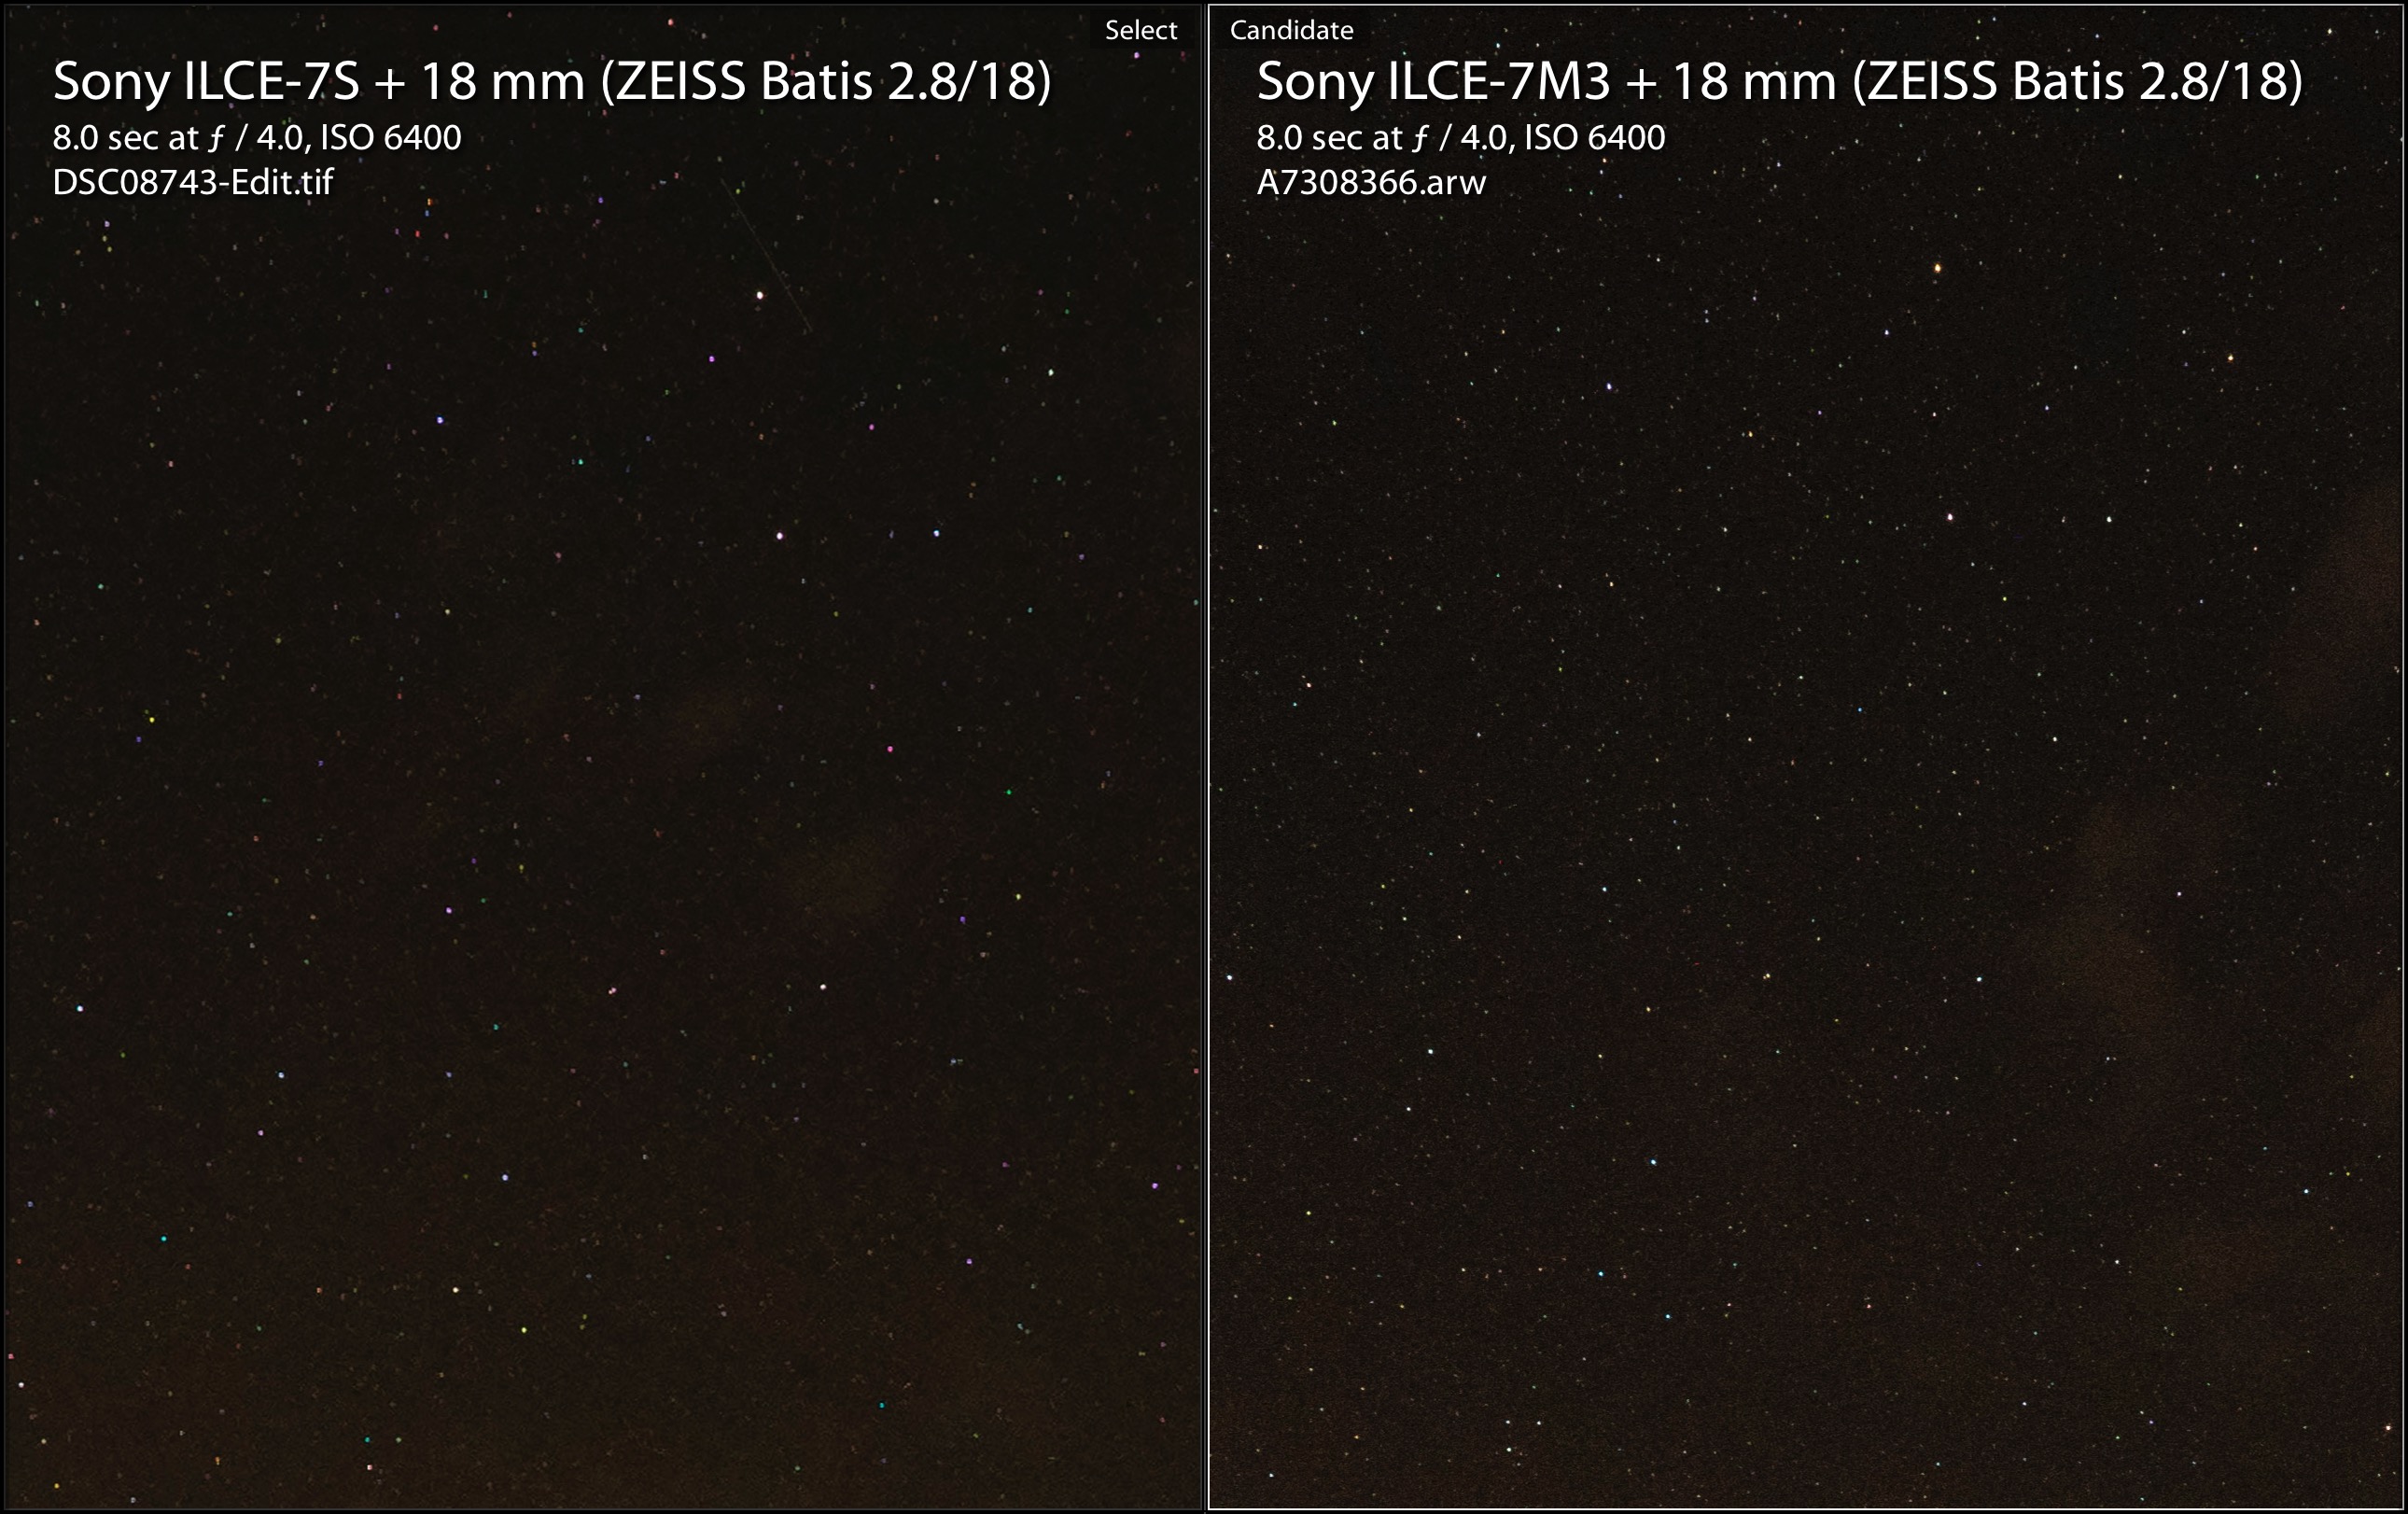
As you can see, the 8s a7III (right) shot looks a lot better than the star-eaten a7S Bulb shot (left). The a7S Bulb shot (left) shows some weird color shifted or blocky looking stars that appear a little bit defocused as a results of the old a7S’s spatial filtering (star-eater) in Bulb mode. The a7III shot shows more dim stars and stars appear markedly sharper than in the old a7S Bulb shot. Stars look “normal” in the a7III shot. This result is great news for astrophotographers looking to get the a7III.
If we compare details from that same 8s image from the a7III with an 8s non-star-eater (camera-timed) image from the a7S, differences become significantly less noticeable. The a7S image was scaled to match for comparison purposes.
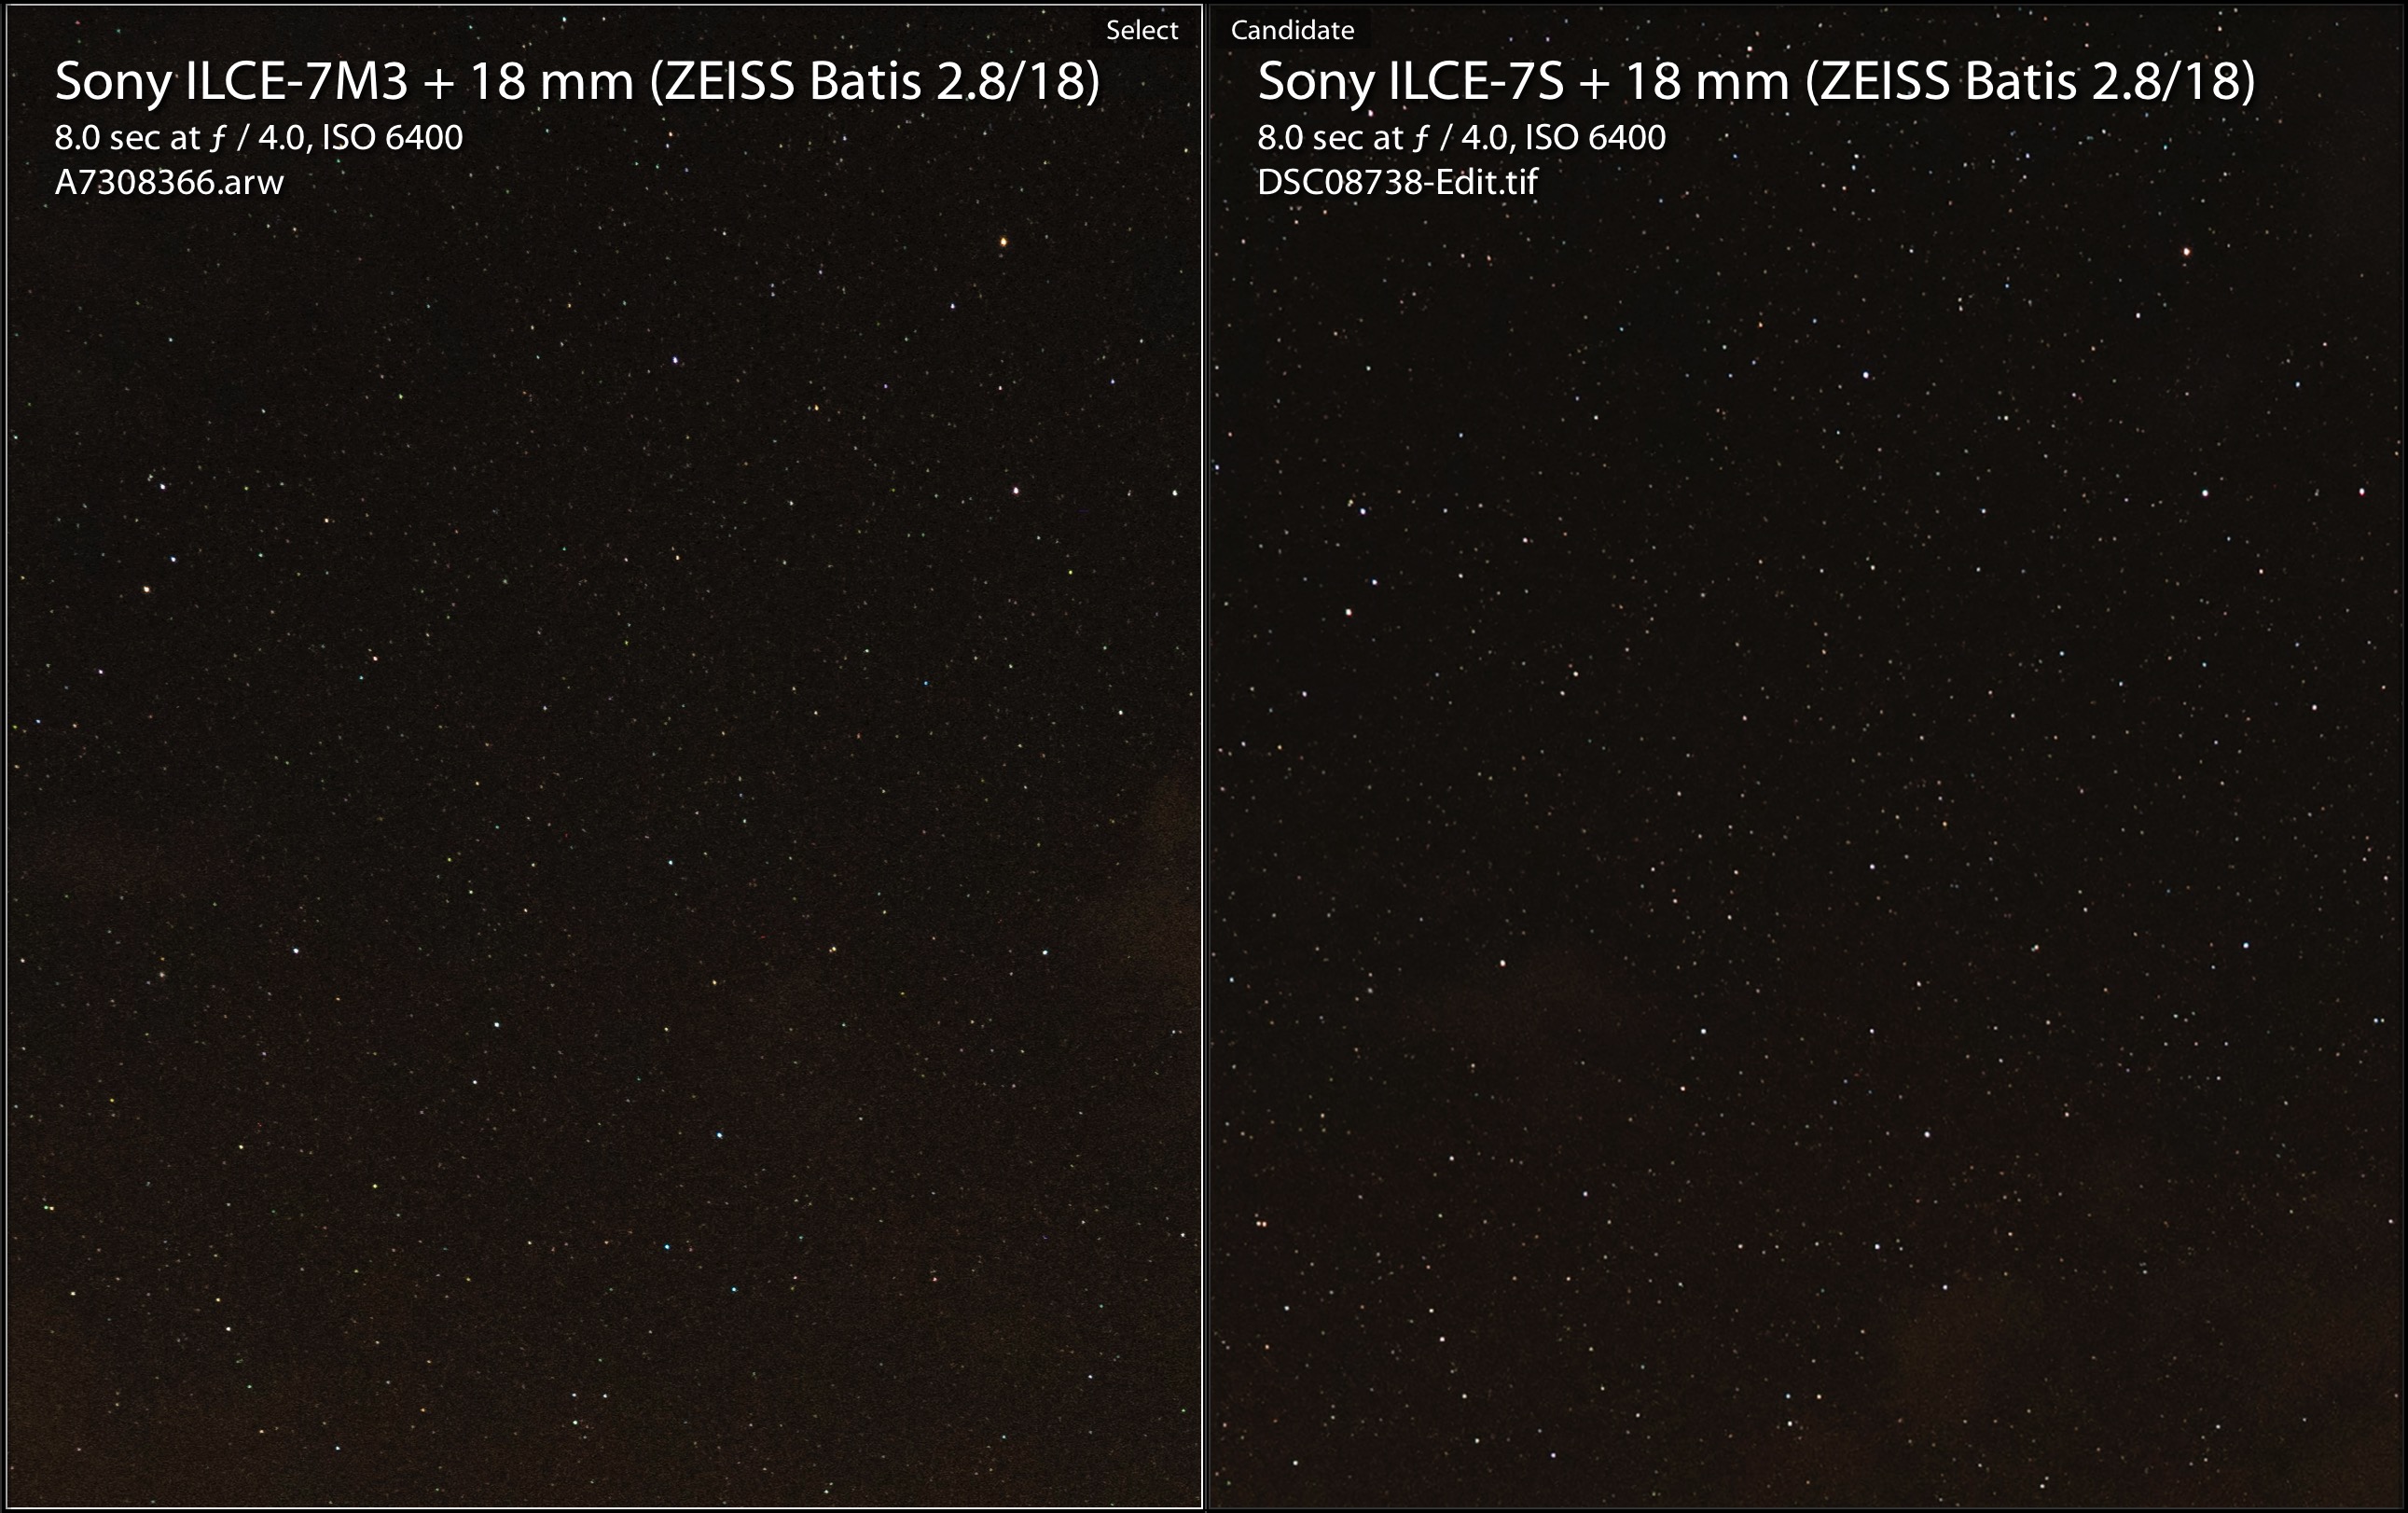
Here, both the a7III (left) and a7S (right) seem to be on par with each other in this direct 8S exposure comparison. The frequency and sharpness of stars look pretty much the same between both images. Upon very close inspection, I’d probably give the original a7S a very slight advantage in terms of noise but both cameras seem to do a good job at resolving fine stars.
So, there’s still some noise filtering in the Sony a7III, but in practice, it’s much improved from previous generations. Sony has obviously tweaked their noise algorithm a bit and the result is much more acceptable for typical night photography exposures. The a7III’s higher resolution sensor, when compared to the a7S probably also helps here. While star-eater is improved, it doesn’t hide the fact that the Sony is still doing some funky stuff to the a7III long exposure RAWs.
We wish that Sony did not apply a noise reduction algorithm as such to the a7III’s RAW files. RAW should be raw, unfiltered and un-baked. Ultimately, however, we really love most of the astrophotos that we’ve made from the a7III and we think that they speak for themselves.
Sample Images
For this review, we loaned a Sony a7III from B&H while we attended the PhotoPills Camp 2018 and we liked the camera so much after a week of shooting that we decided to buy it.
PhotoPills is known as the best photography planning app for Android and iOS. The PhotoPills development team hosts yearly photography camps in Menorca, Spain where 50 participants have a chance to shoot photos with a handful of some of our favorite professional photographers… and us!
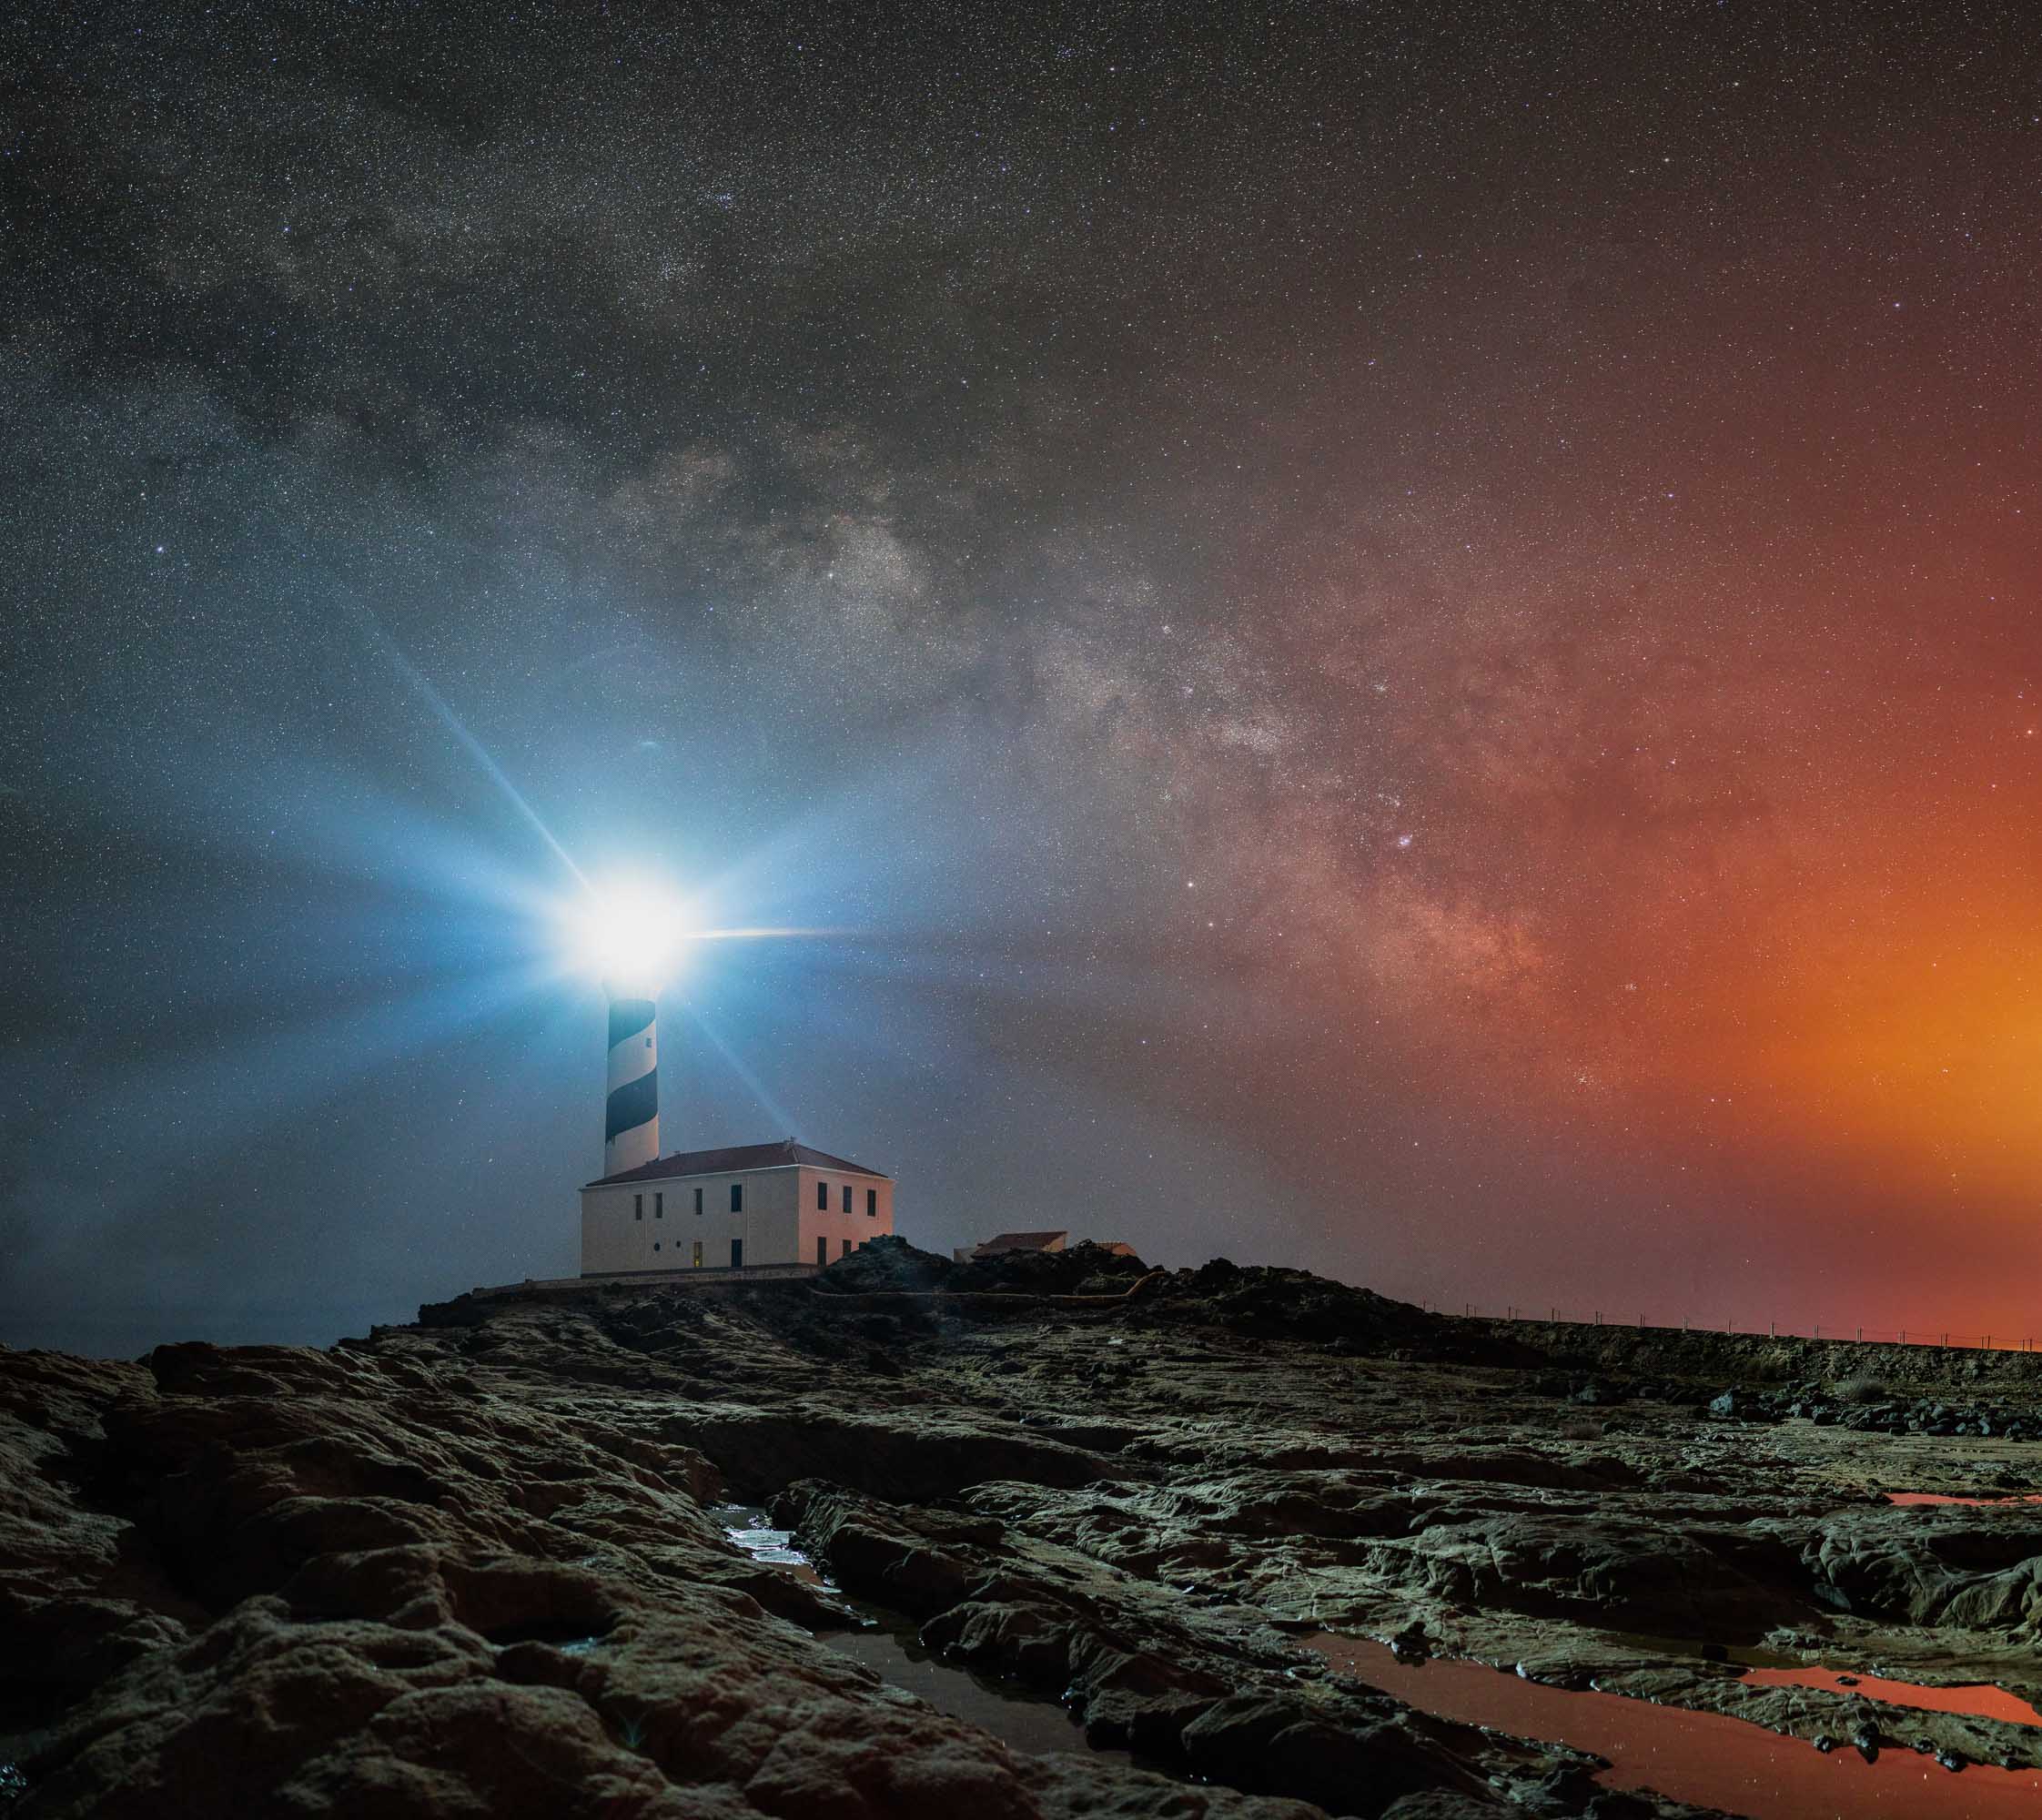
My wife, Diana, and I joined as Masters for their 2018 Camp. We hosted workshop outings, presented about astrophotography, performed group critiques and had a ton of fun. While we were there, we put the Sony a7III through some of its first tests and trials.
In Menorca, we shot primarily with the Sony a7III and the Sony Zeiss 55mm f/1.8, choosing to shoot high resolution multi-row panoramas, rather than the typical wide angle landscape shot with a shorter lens.
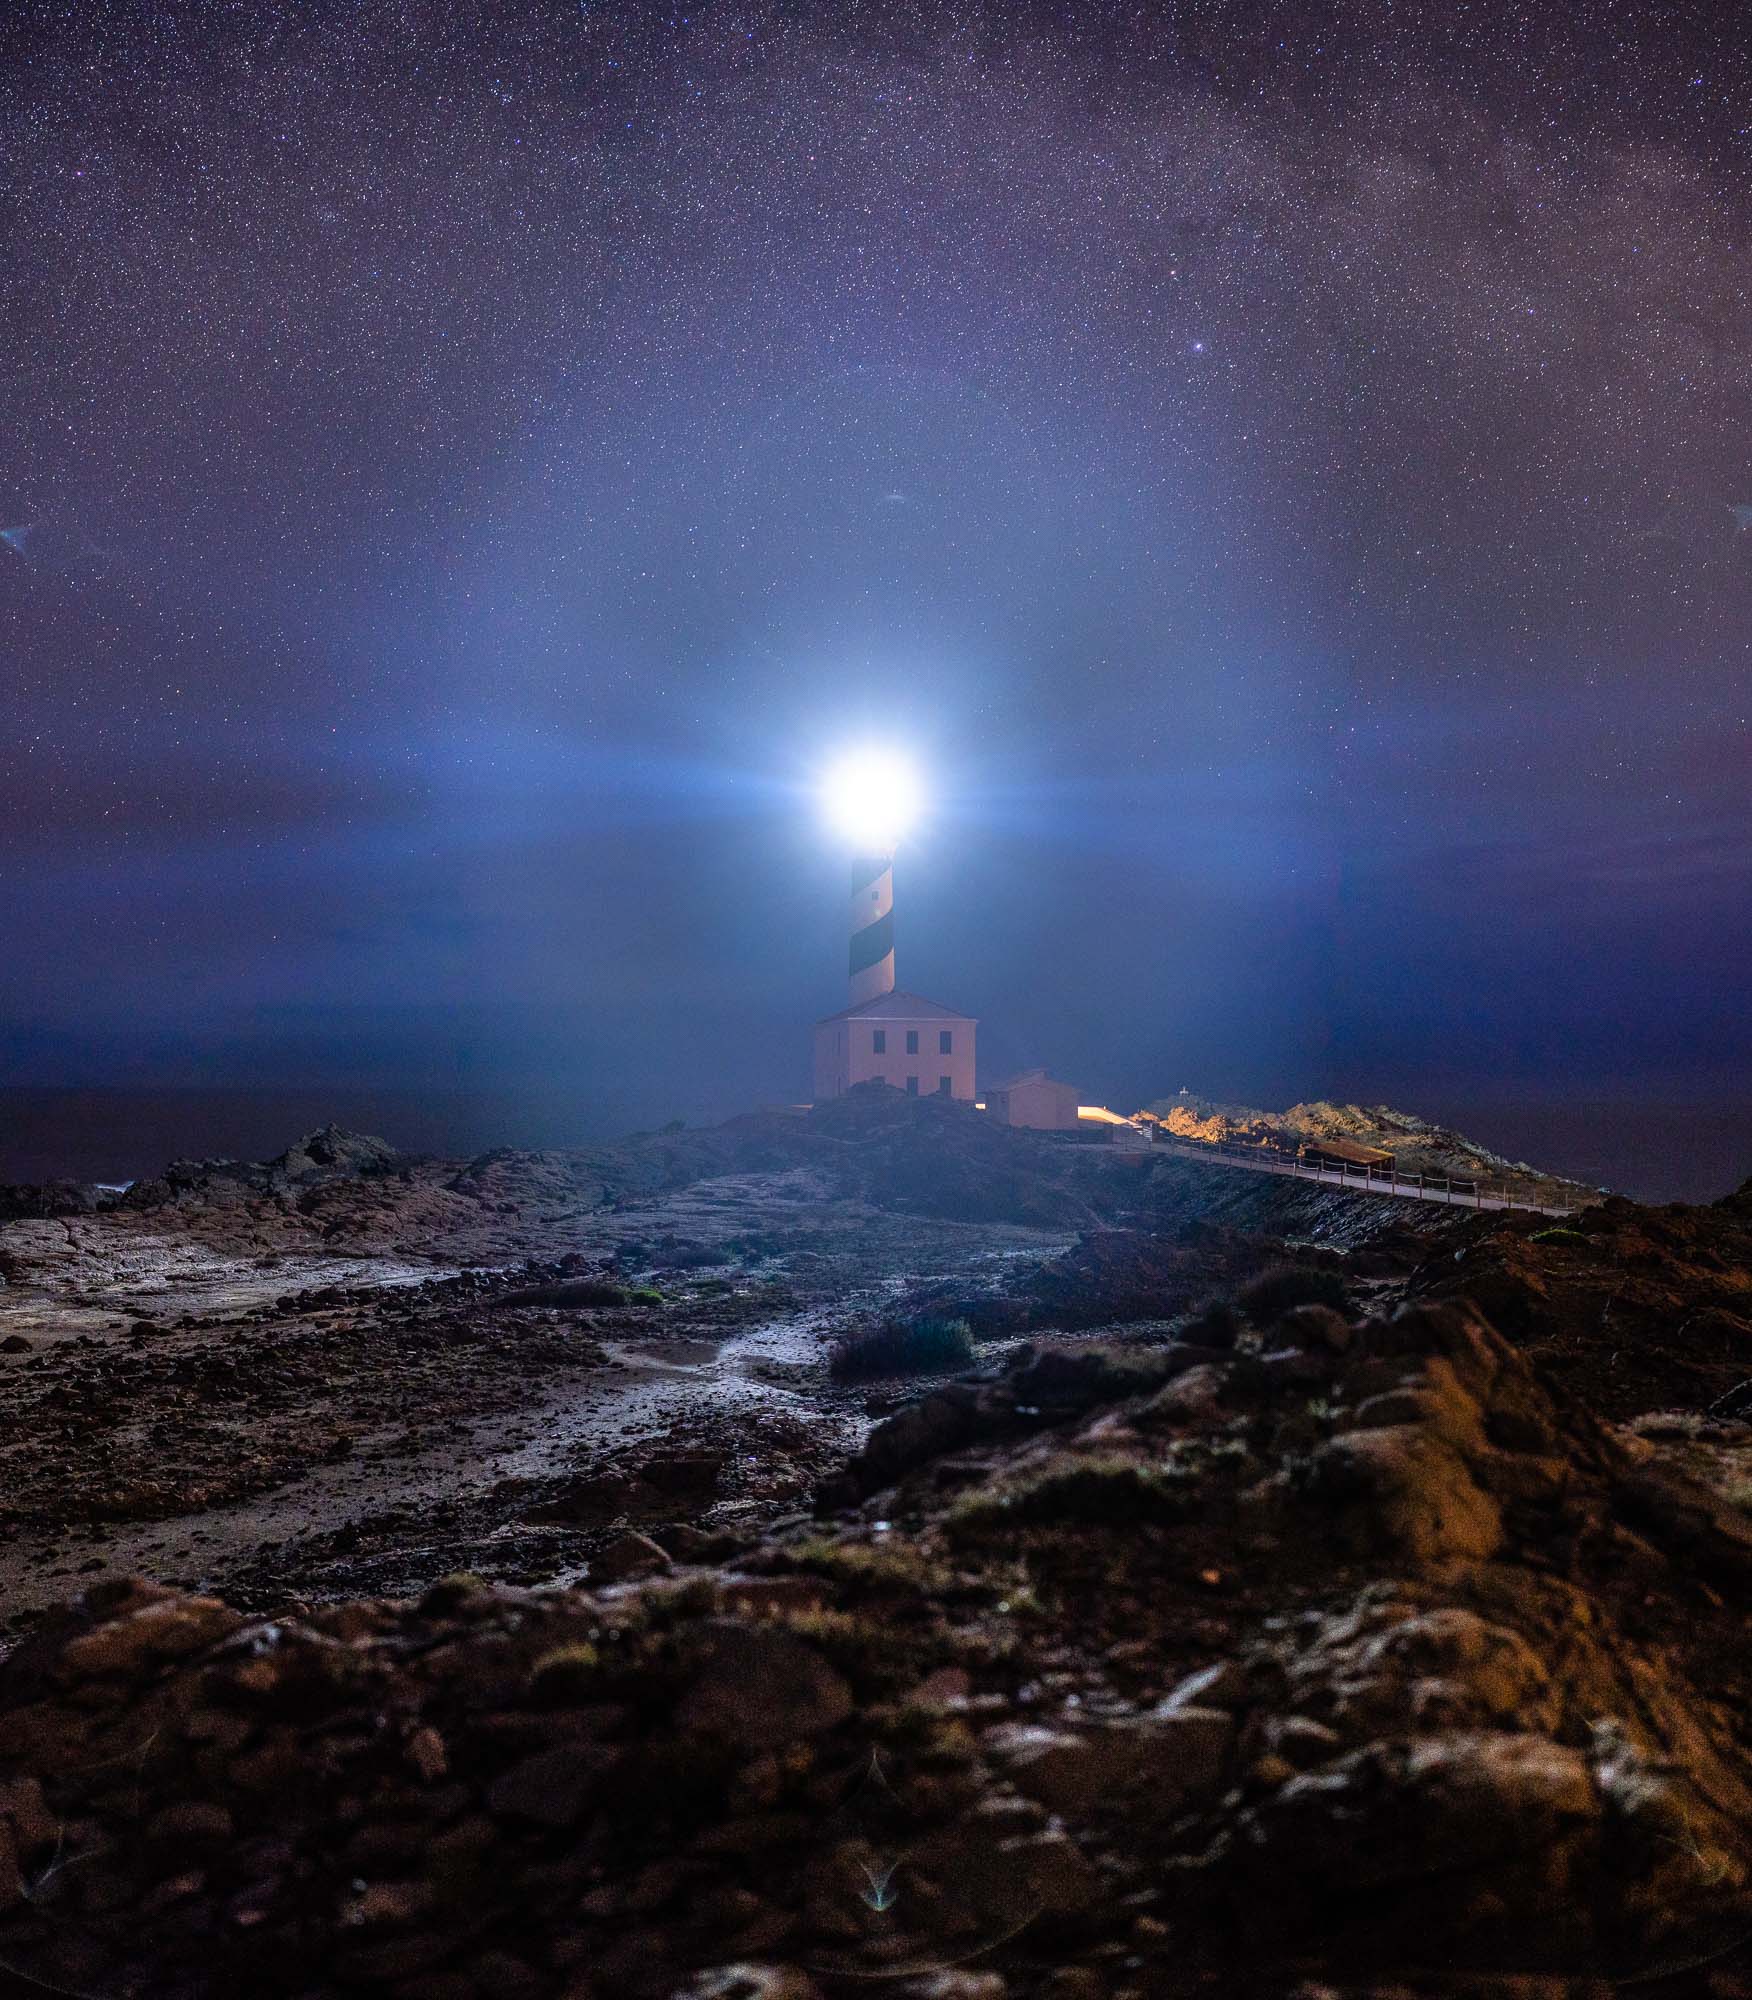
The thing that first struck me when using the a7III in these conditions was that the LCD live-view feed was adequately bright and framing in the dark was easy with a fast f/1.8 lens.
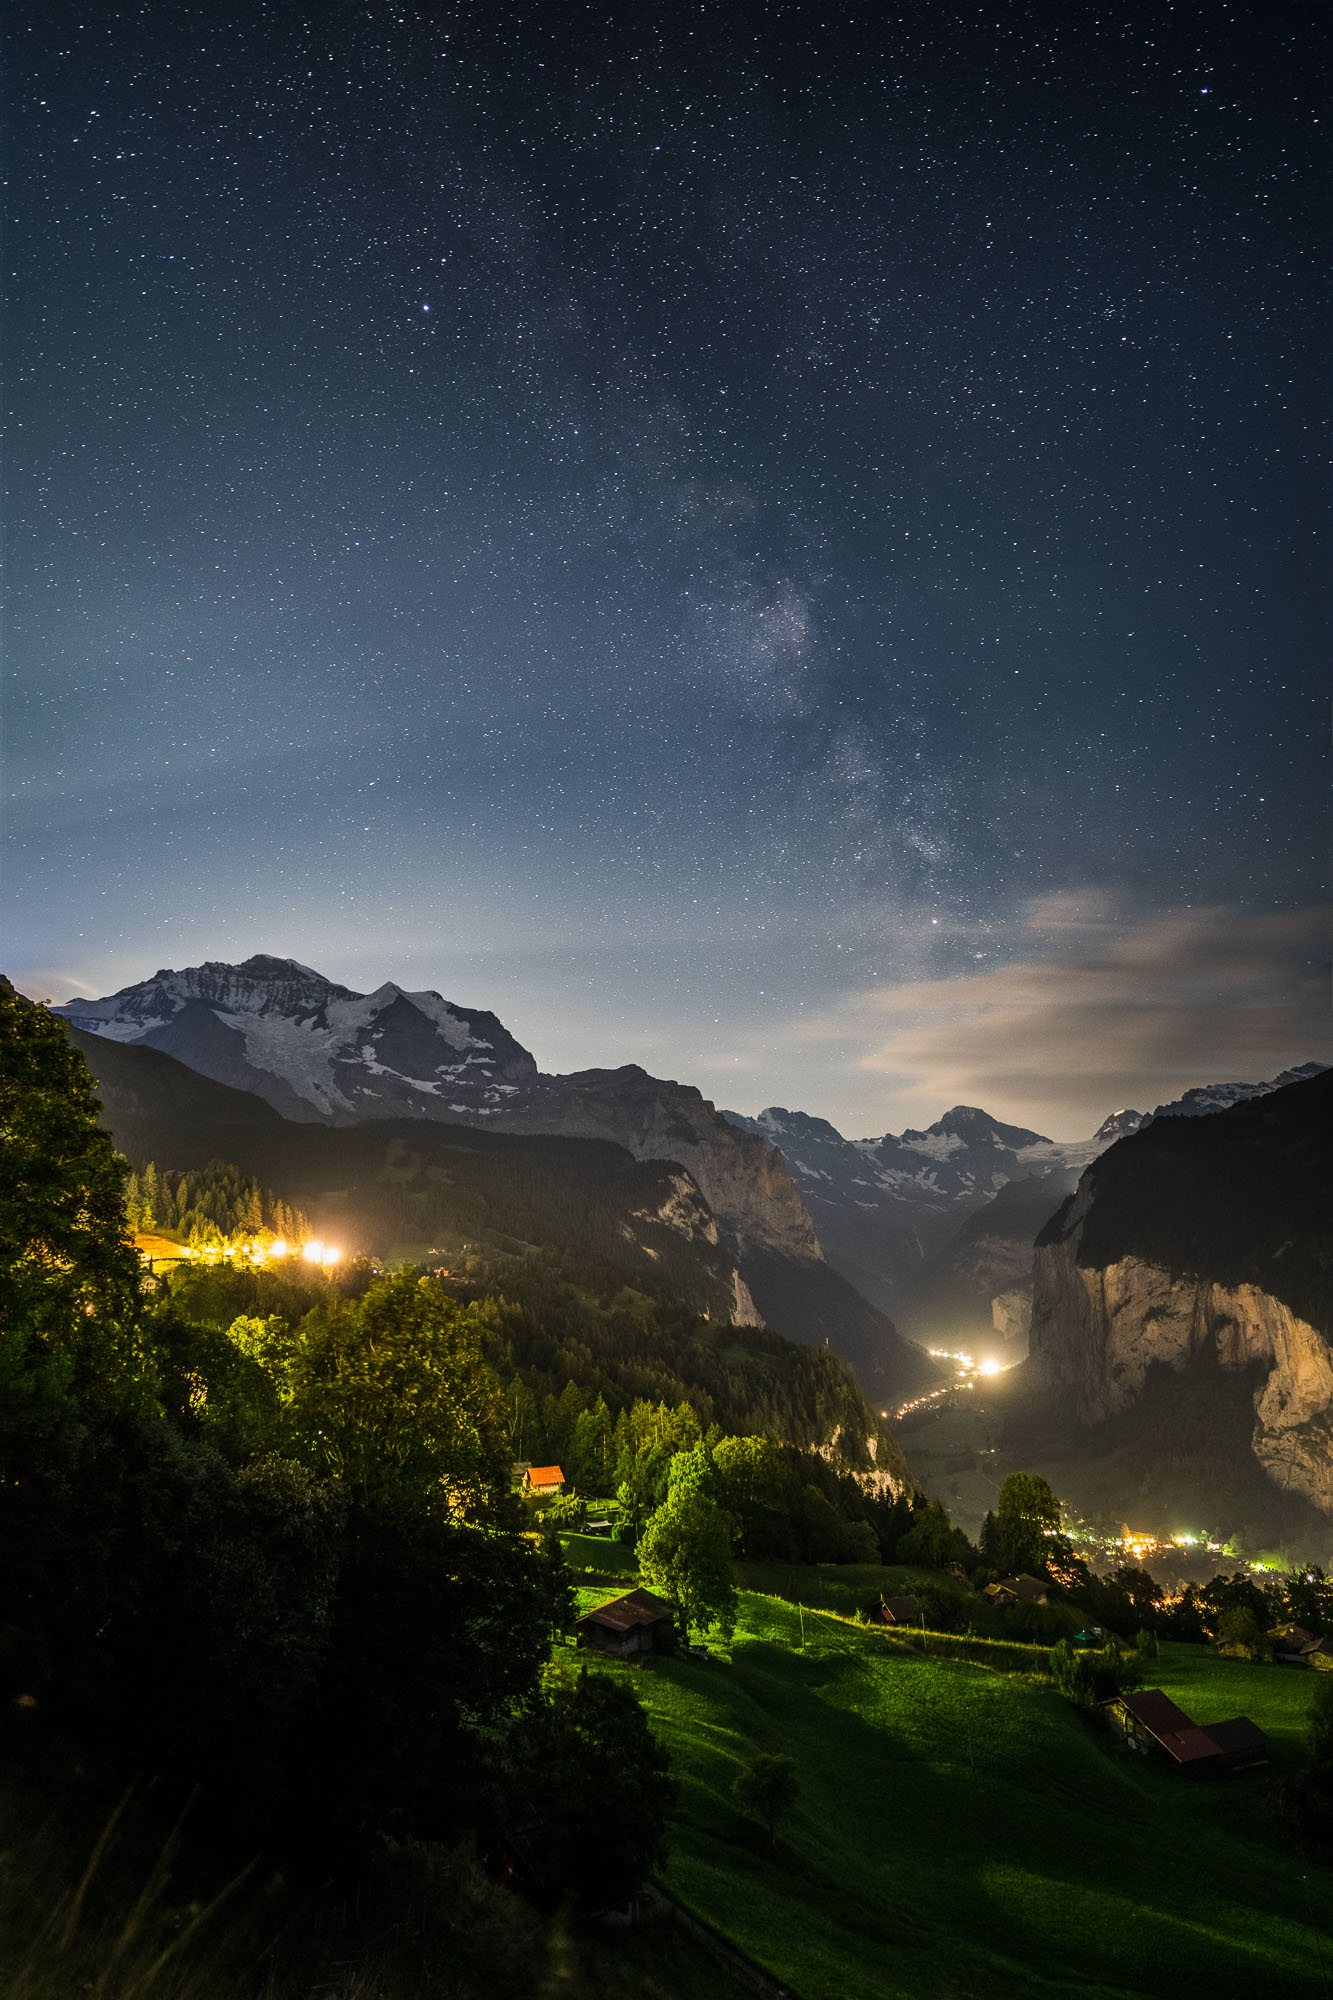
Later in the year, we ventured to Wengen, Switzerland, a small mountain resort village only accessible by cog railway.
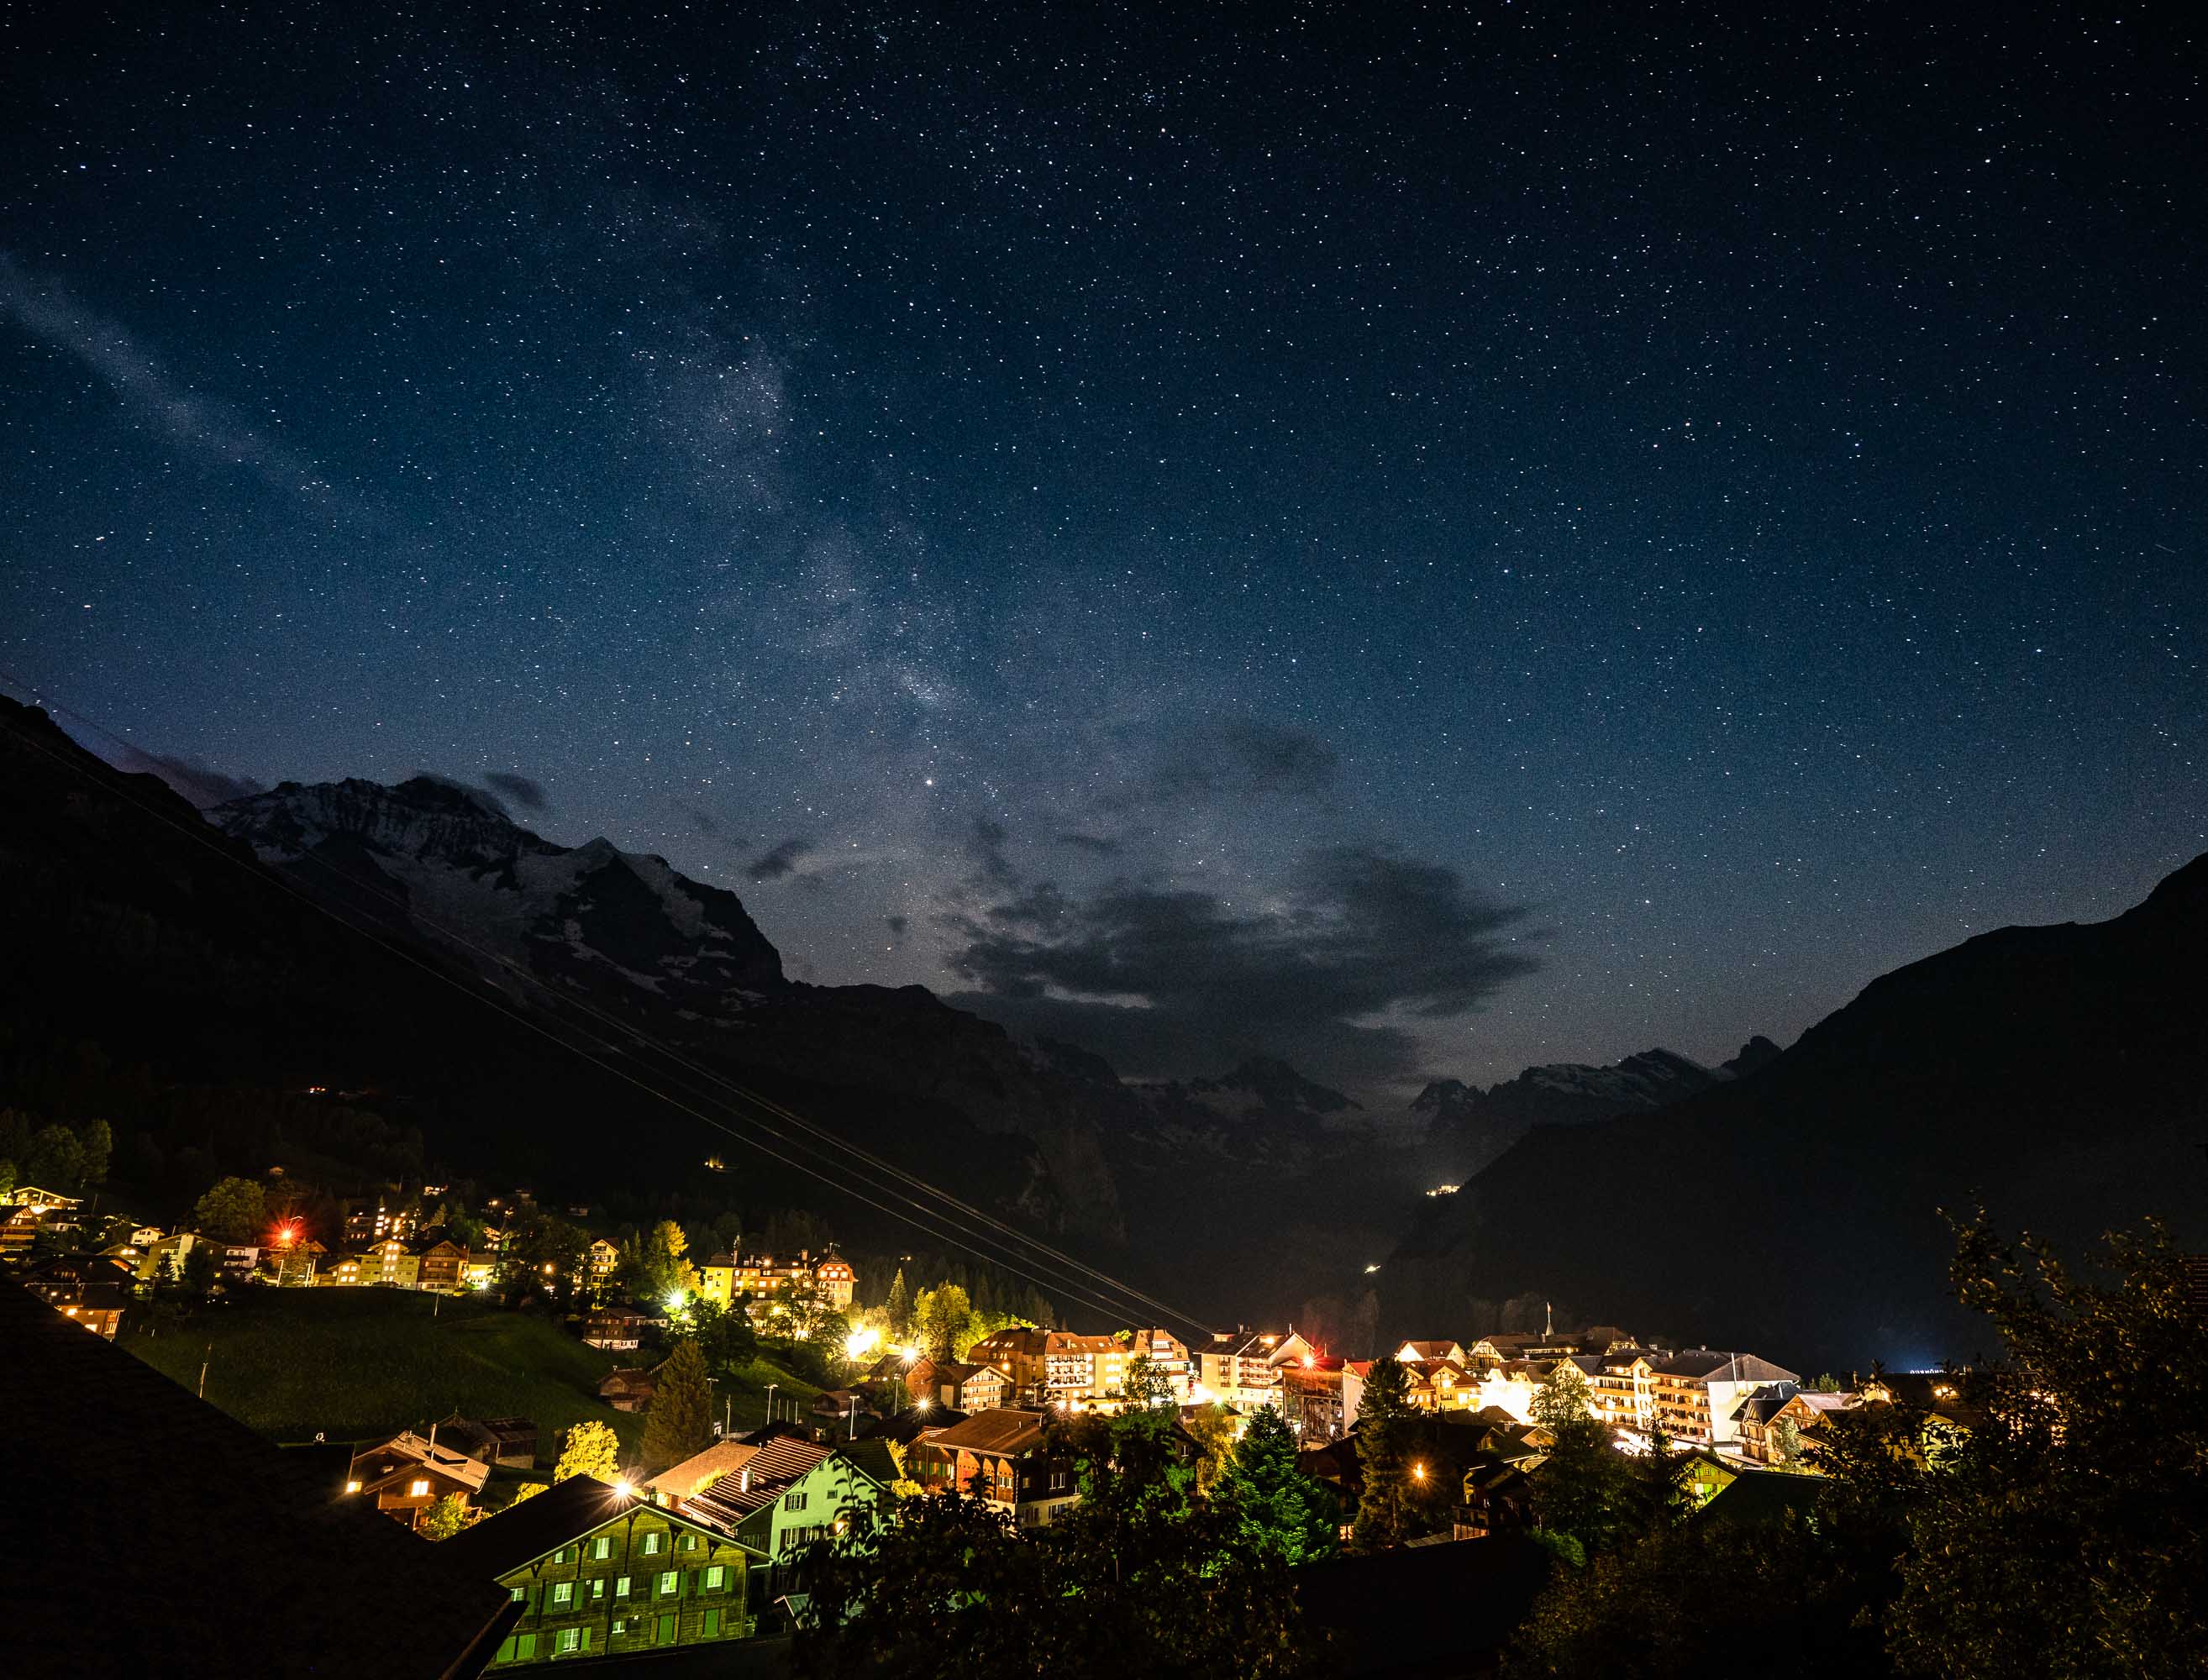
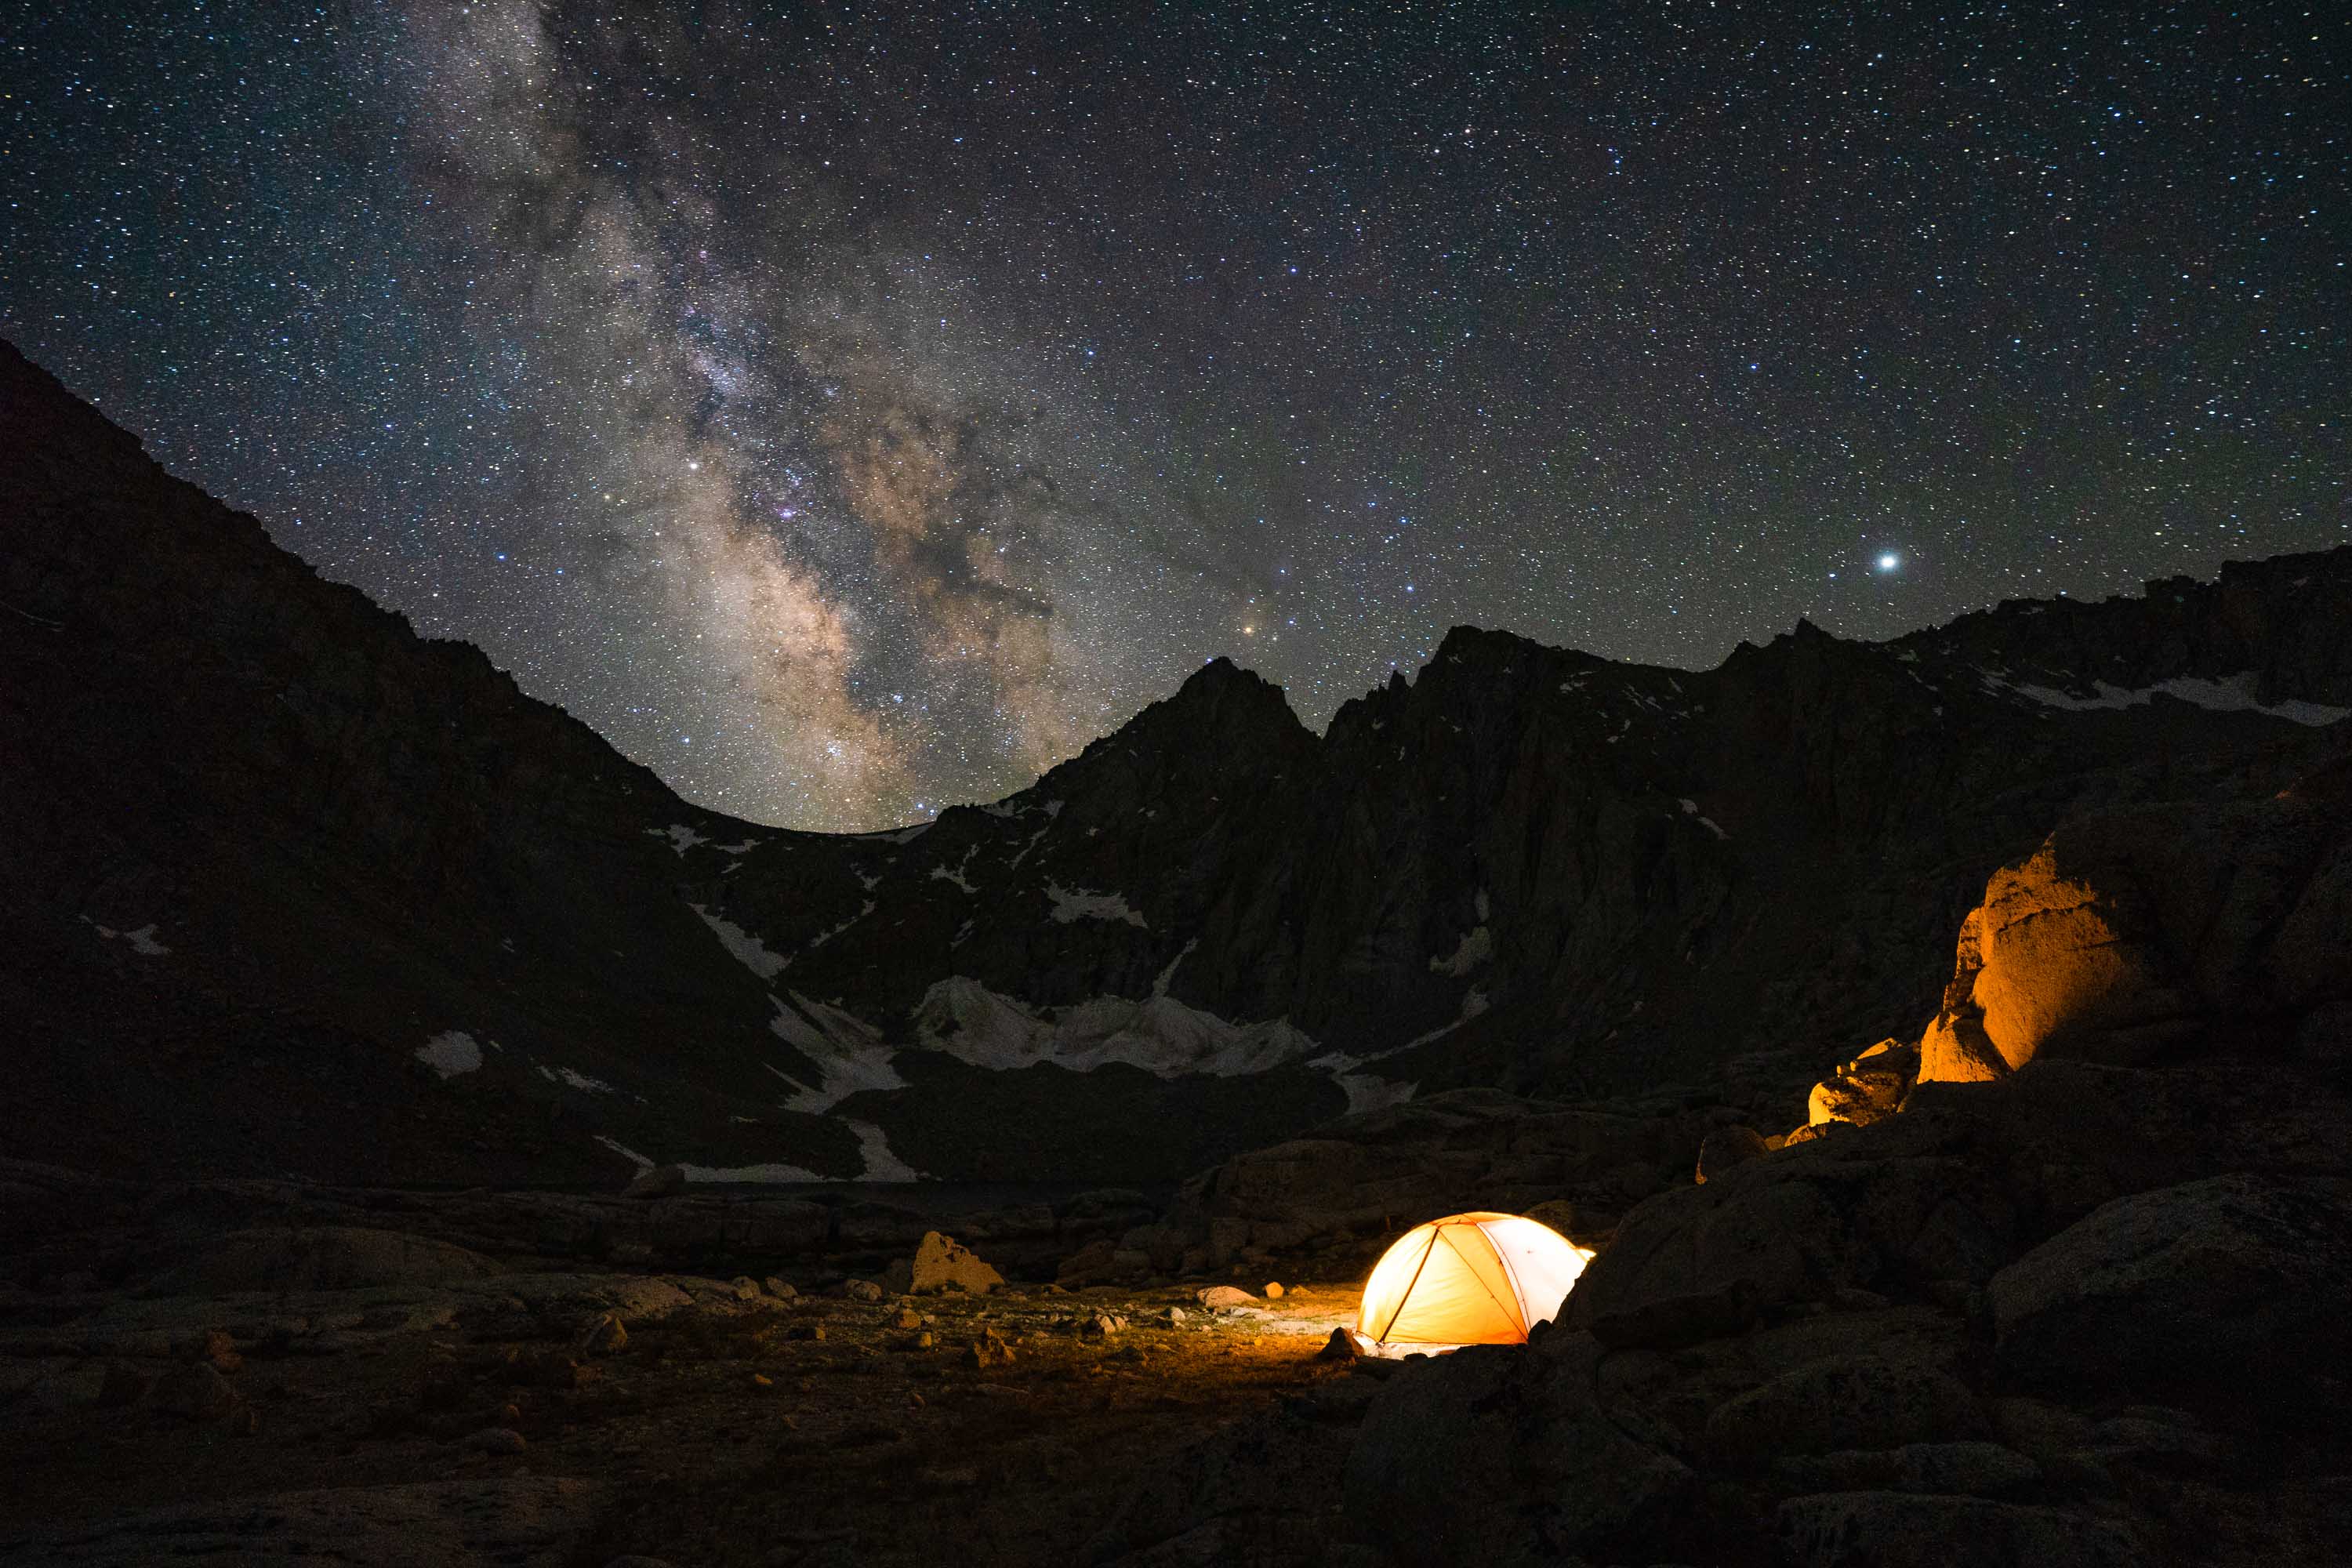
Our favorite astro shot from the trip was made by Diana with our favorite wide angle lens, the Zeiss Batis 18mm f/2.8. She captured a beautiful view of the Milky Way over Lauterbrunnen Valley in the Bernese Alps, just as the moon was rising behind Jungfraujoch, one of the highest peaks in the Alps, creating crepuscular rays in the blue night sky.
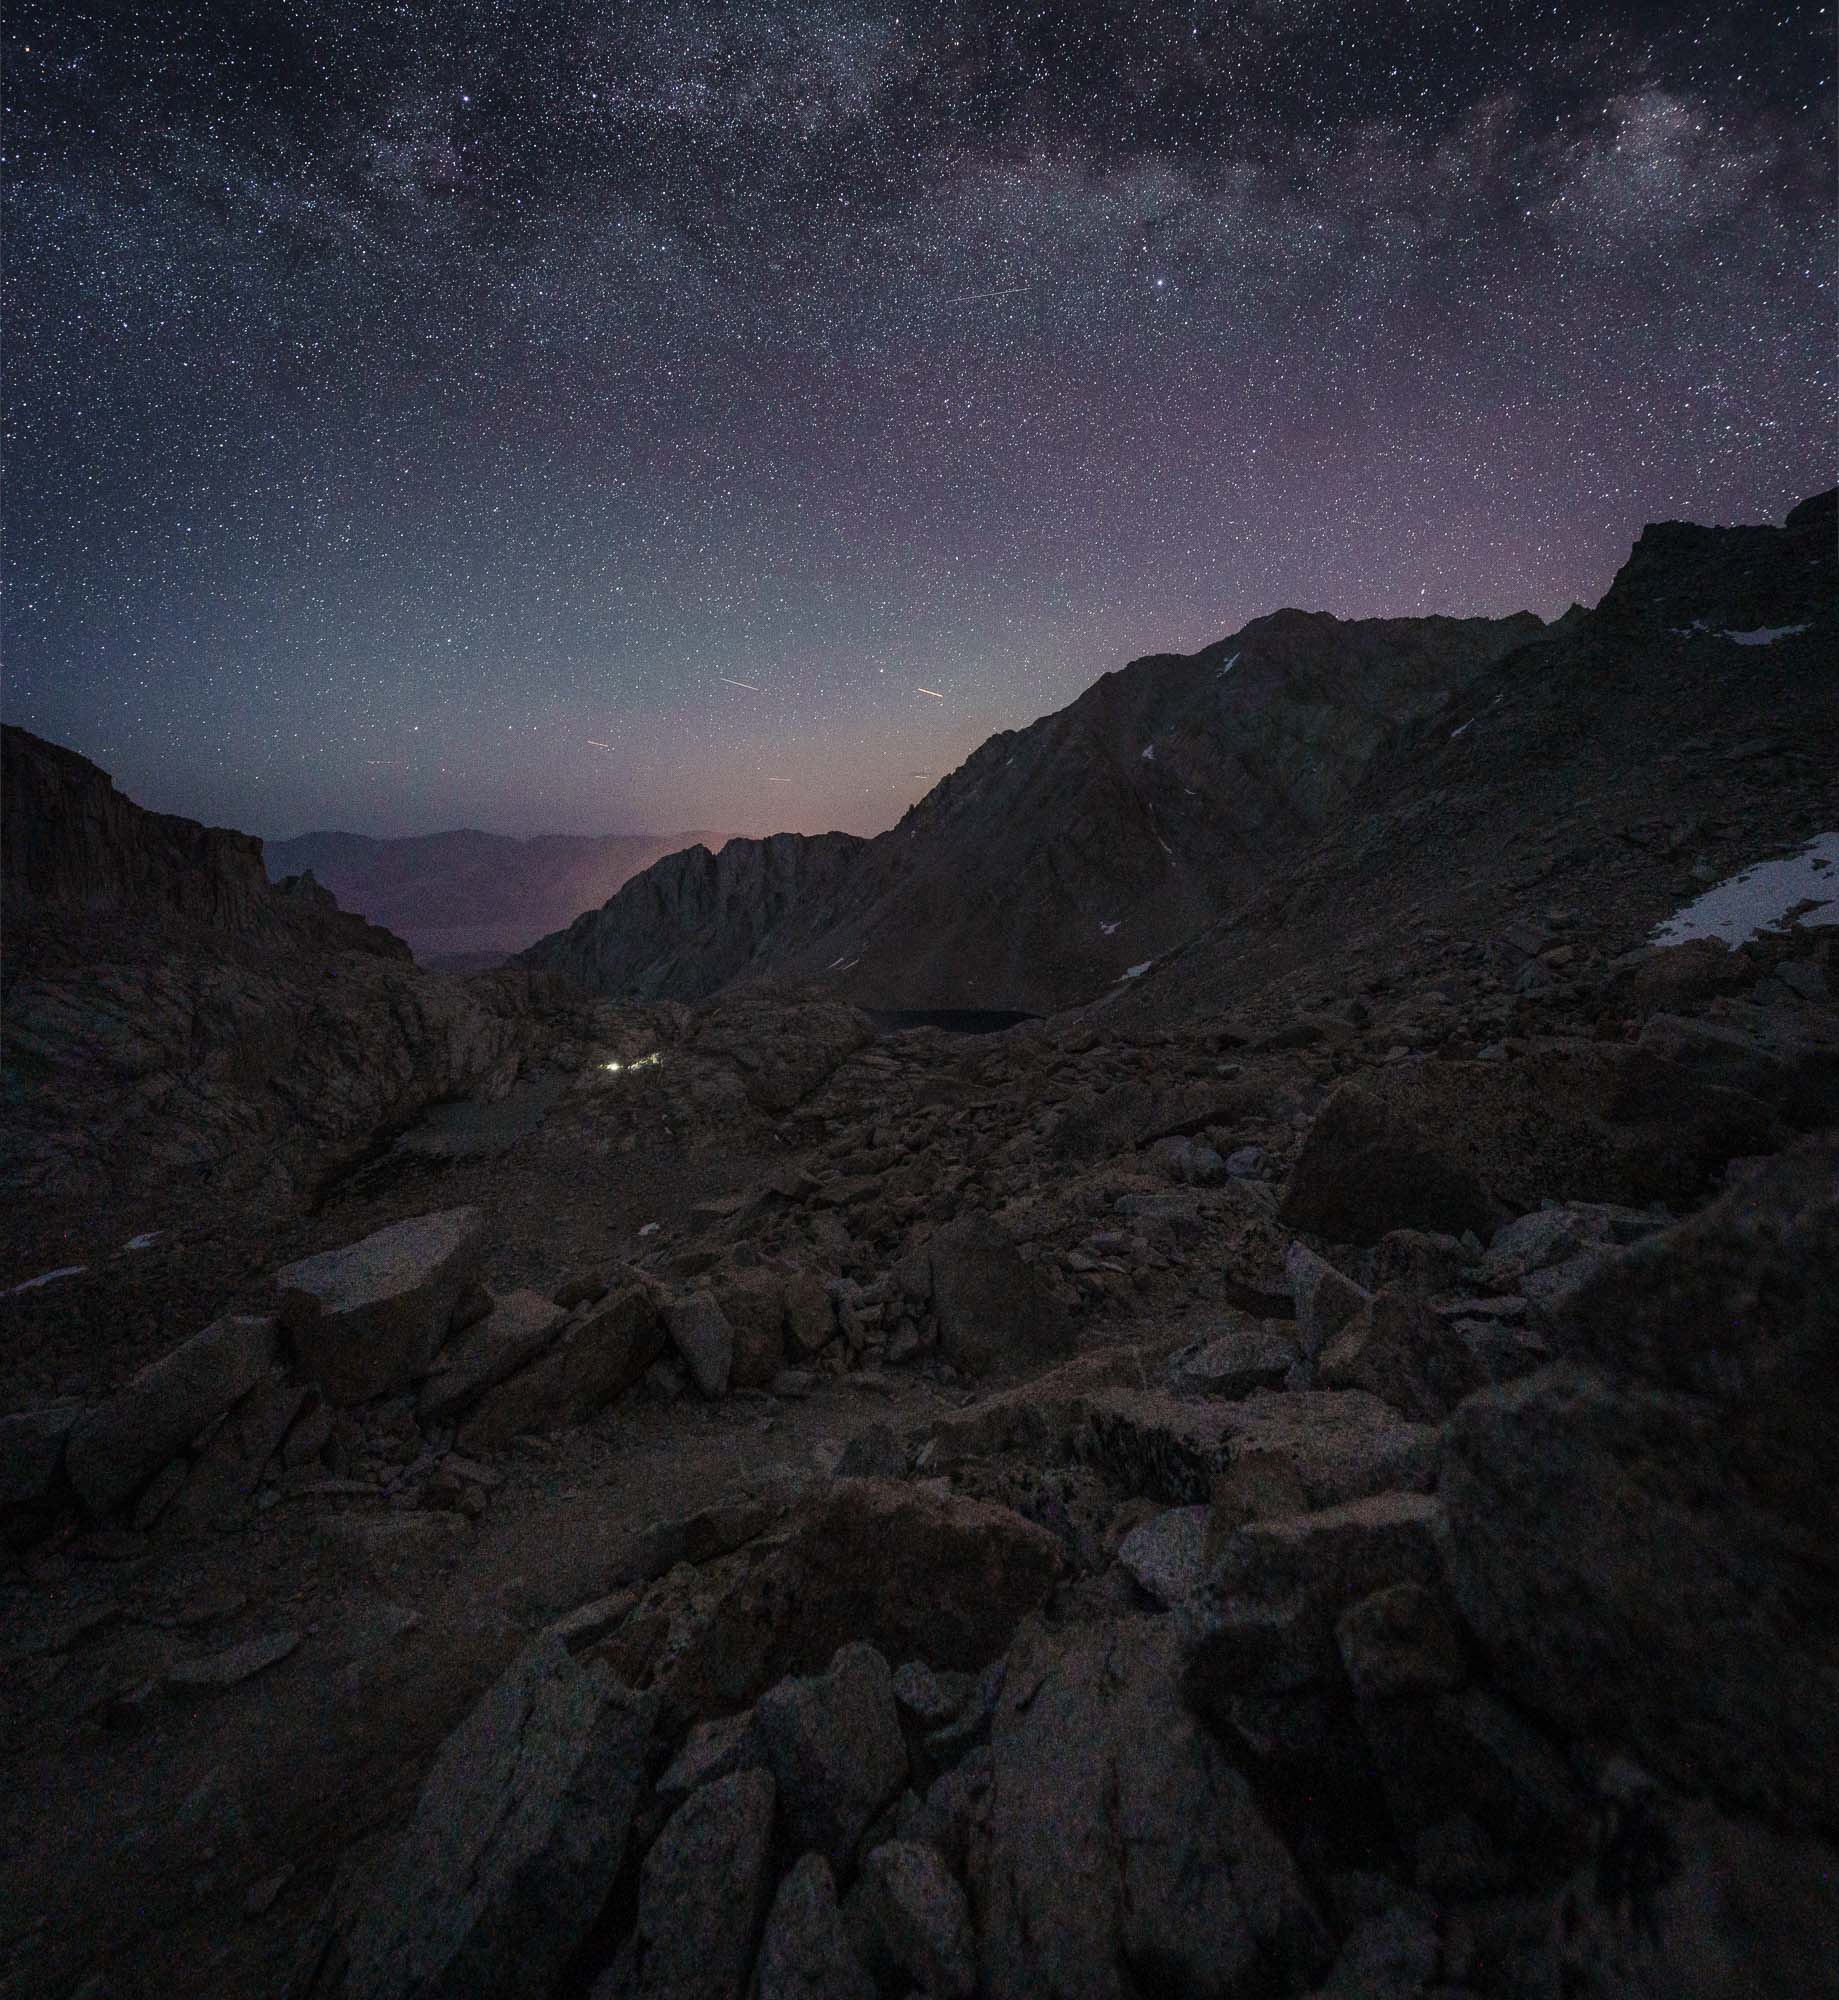
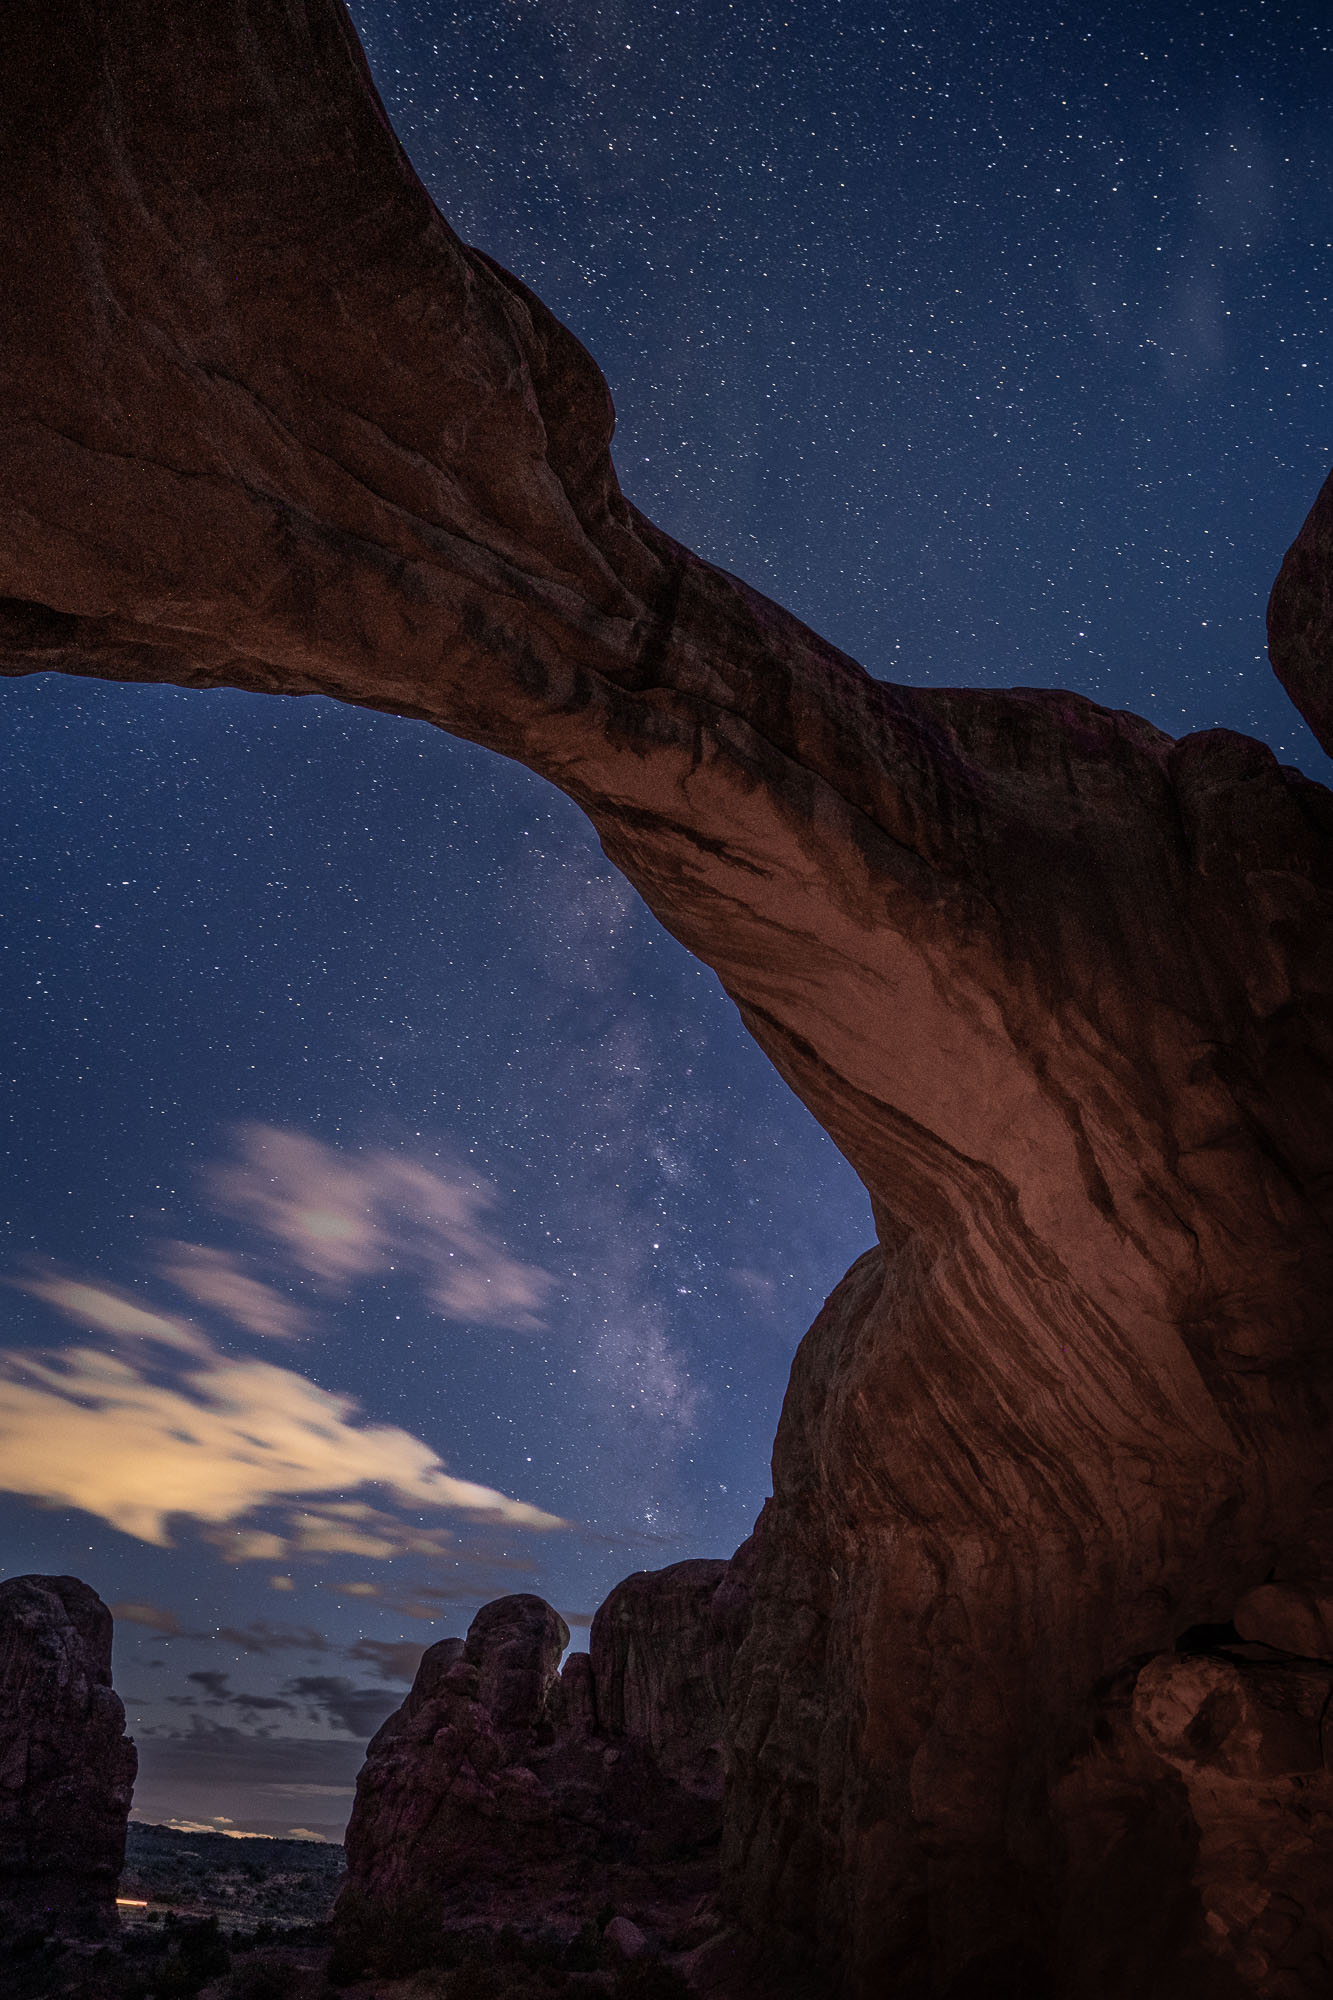
Returning from Europe, Diana and I attended Out of Chicago’s Out of Moab Conference in Moab, Utah where we spent a week of shooting and workshopping in the beautiful areas of Arches National Park. At this point in our travels, the Sony a7III became Diana’s primary shooter and the remaining images are all shot by her.
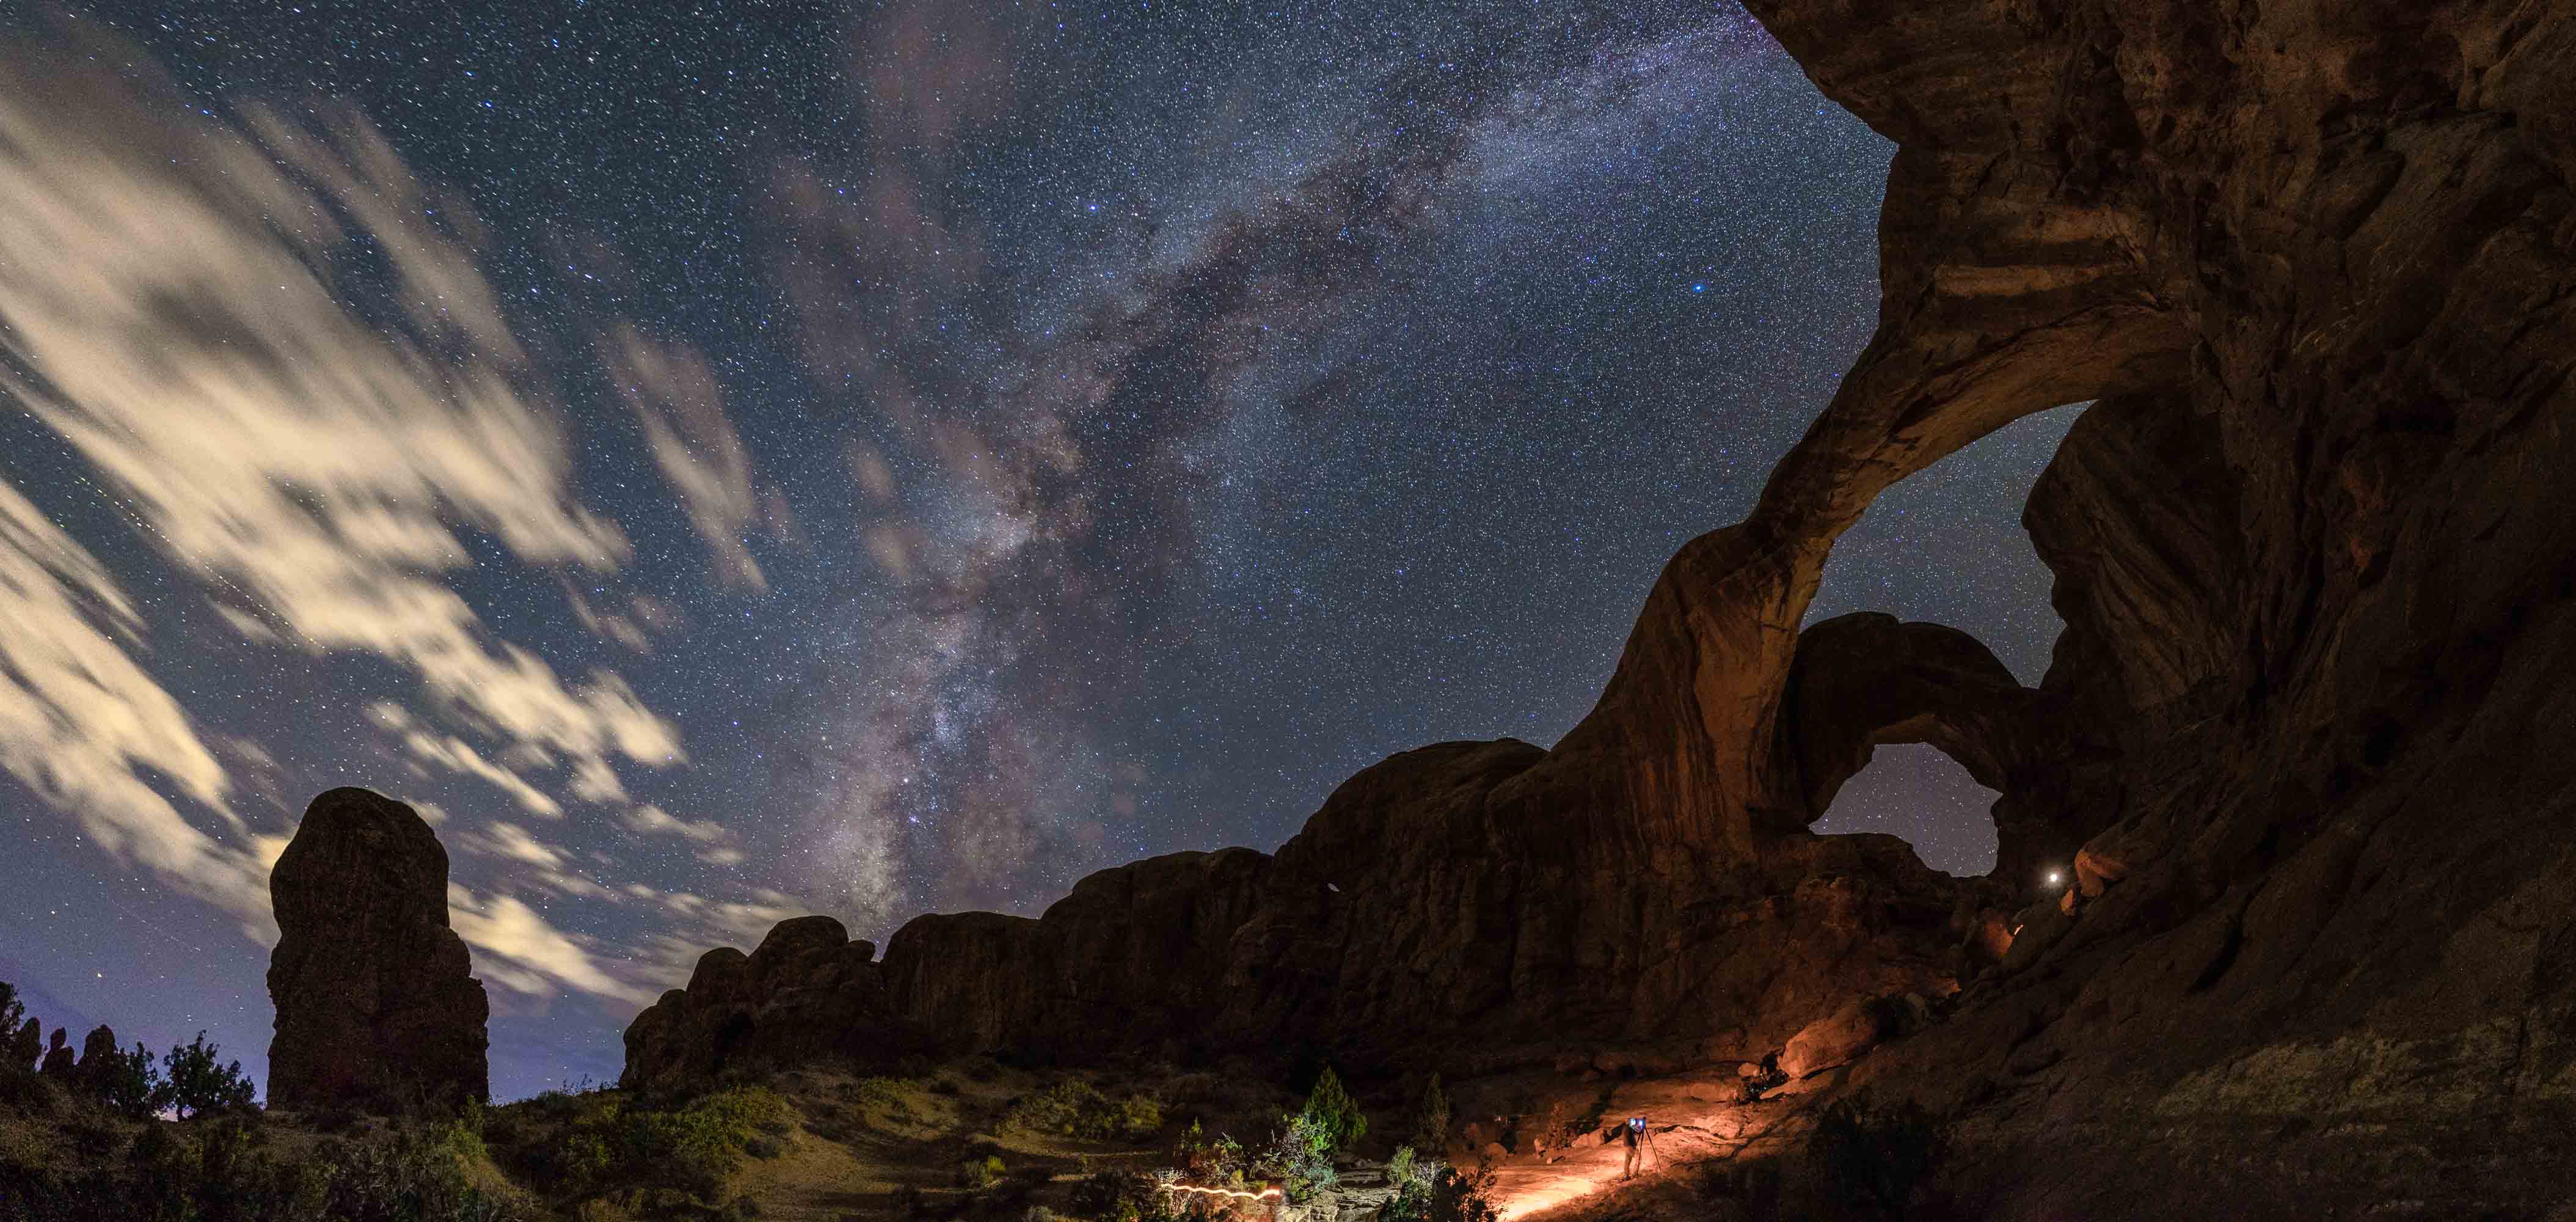
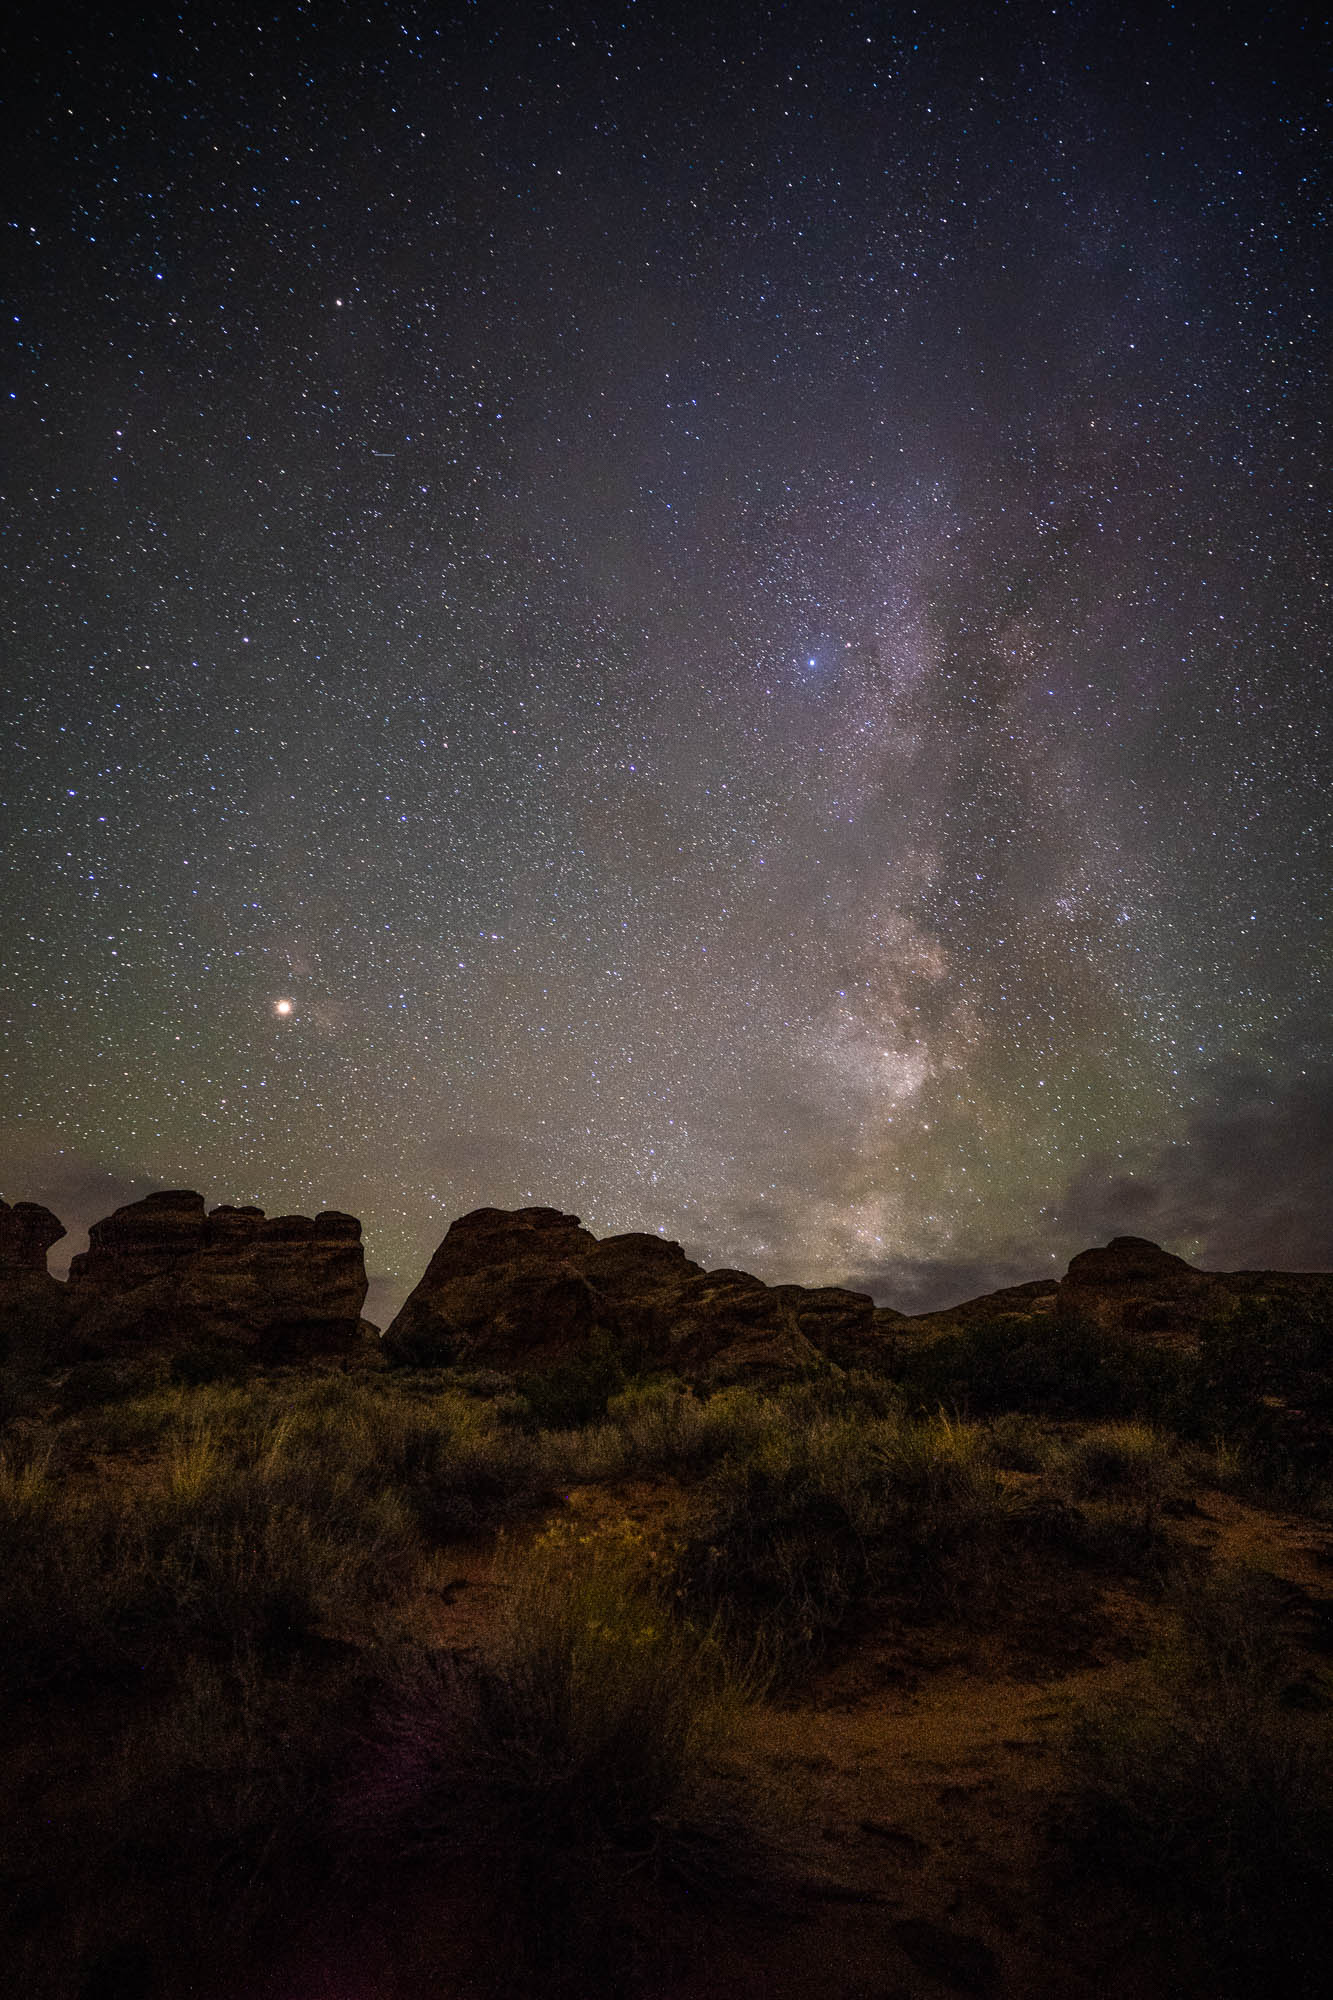
Our first outing of the conference brought us to Double Arch where we caught the Milky Way galactic center setting in the early portions of the night. I primarily focused on helping the workshop participants while Diana captured the Milky Way with the a7III and the Zeiss Batis 18mm f/2.8, shooting both panoramas and single frames of the arches.
As the night progressed, the Milky Way galactic center started to set low on the horizon and the galactic plane sat vertically in the sky.
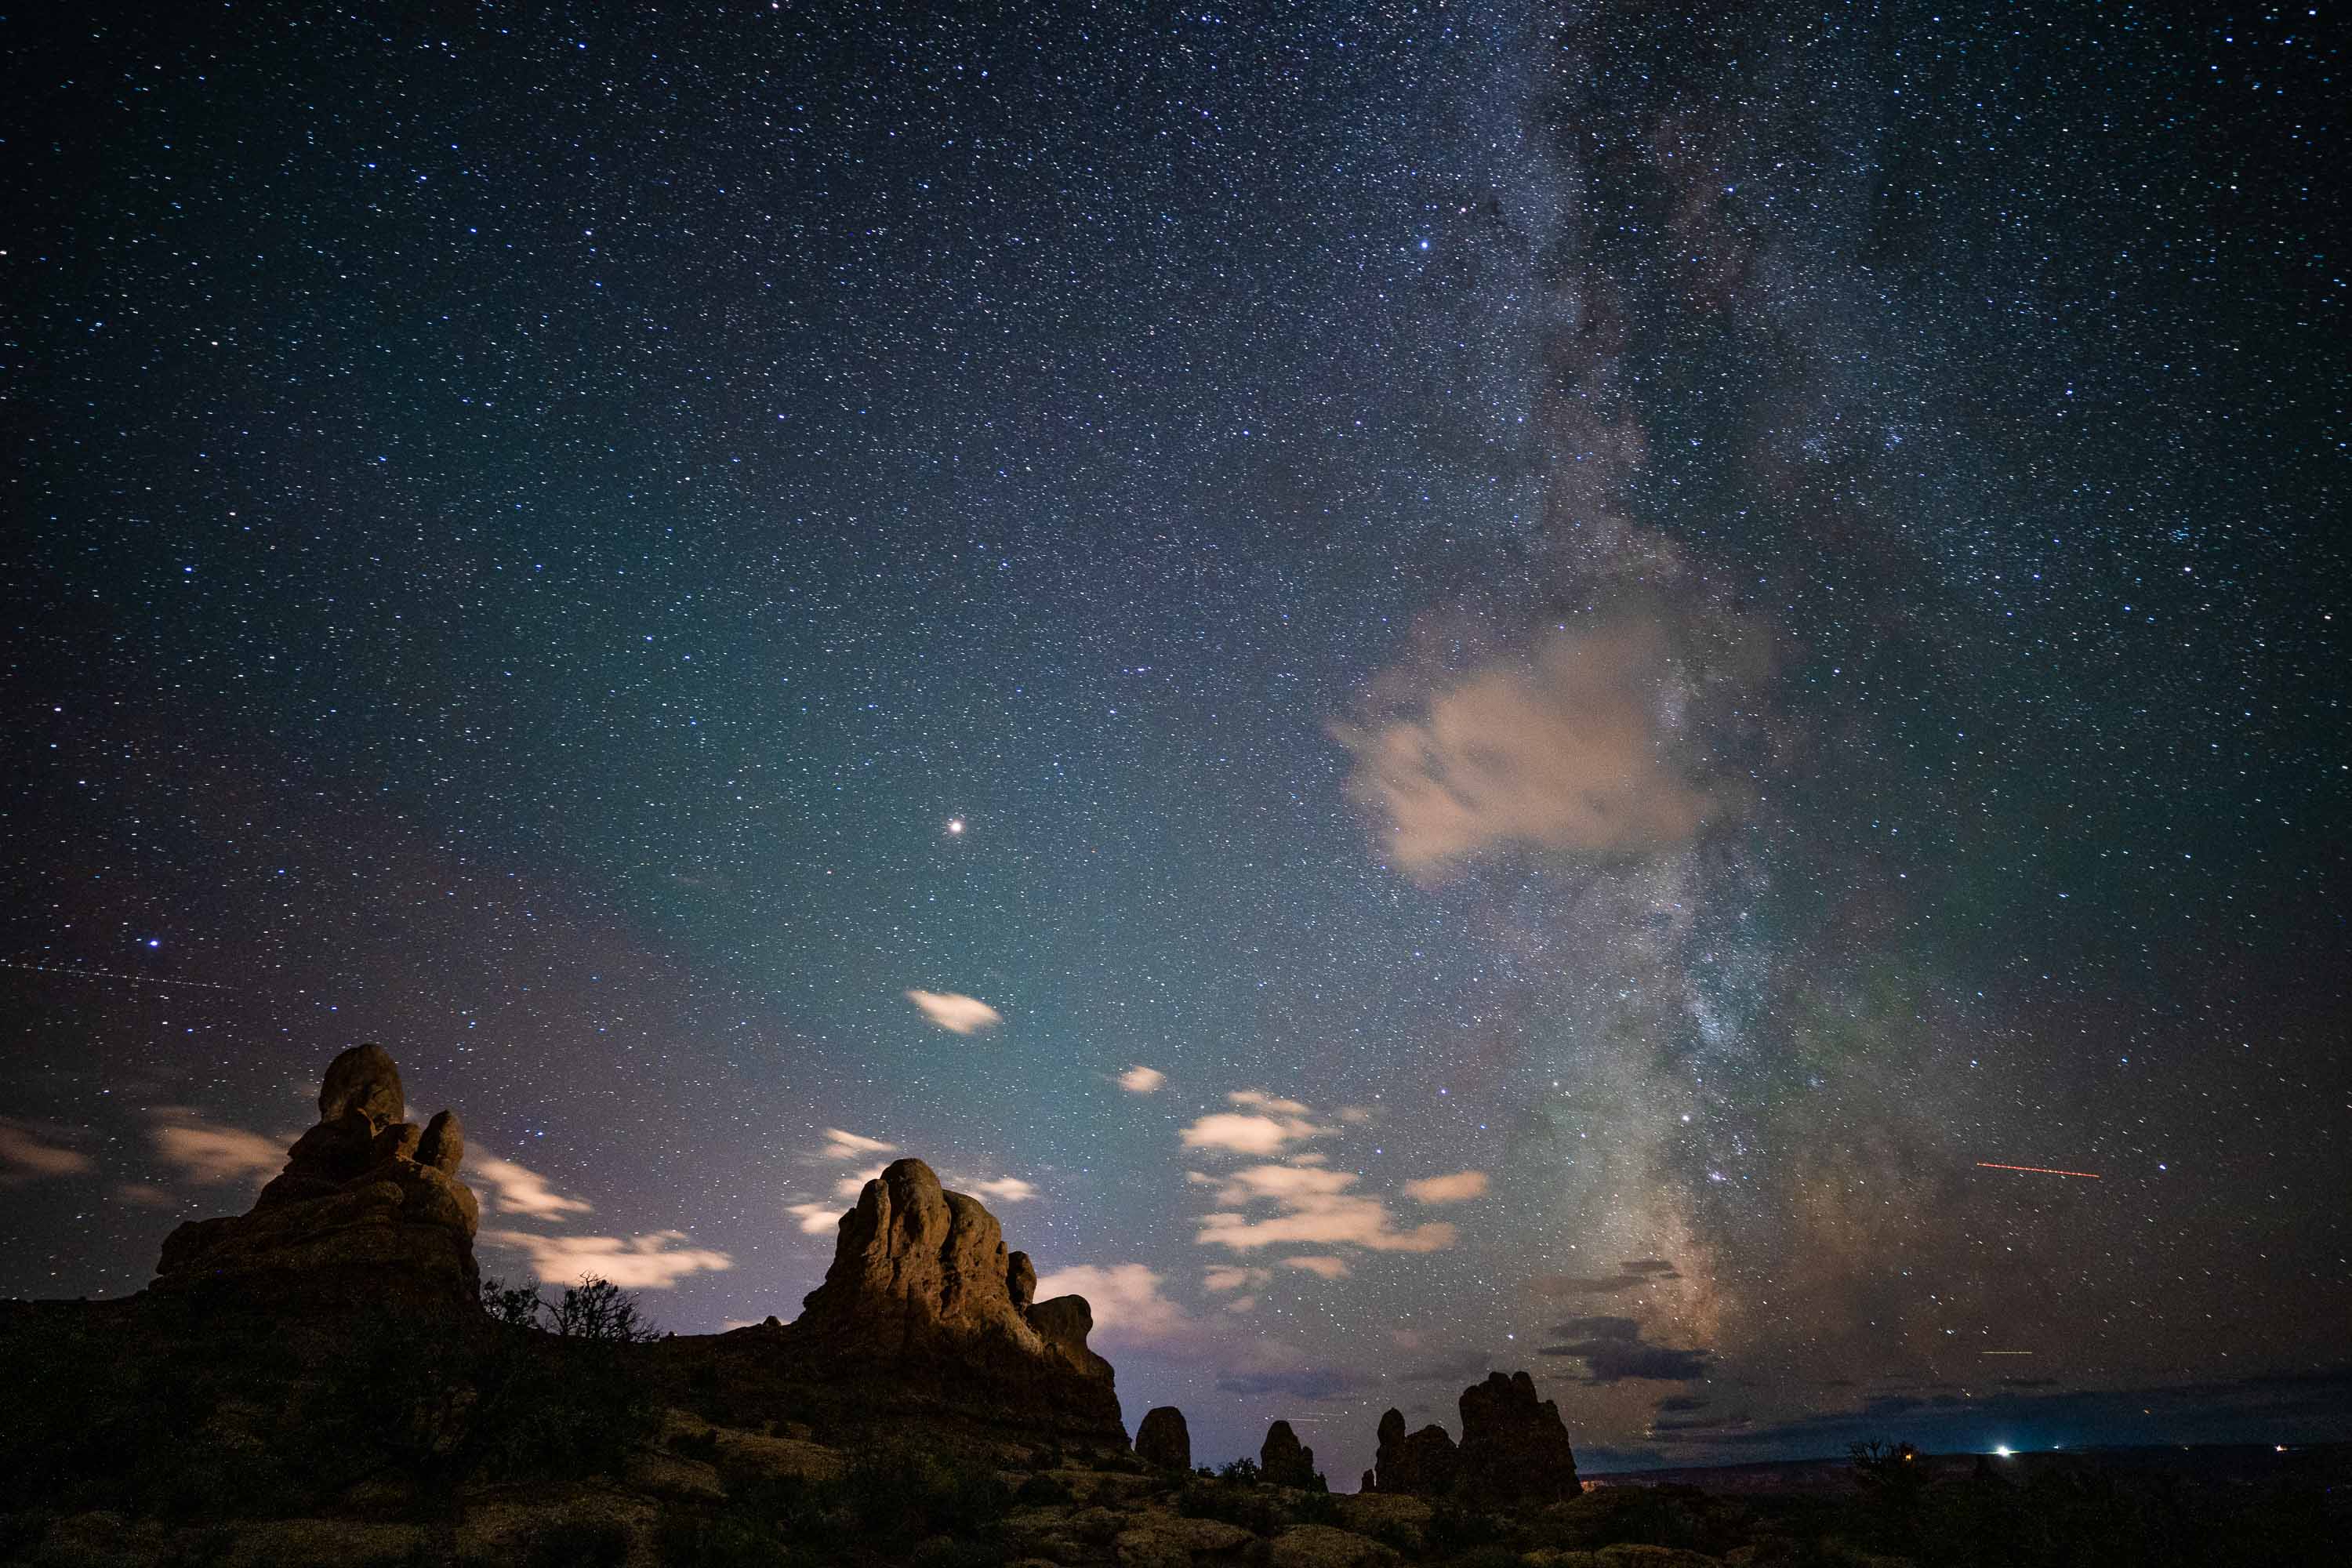
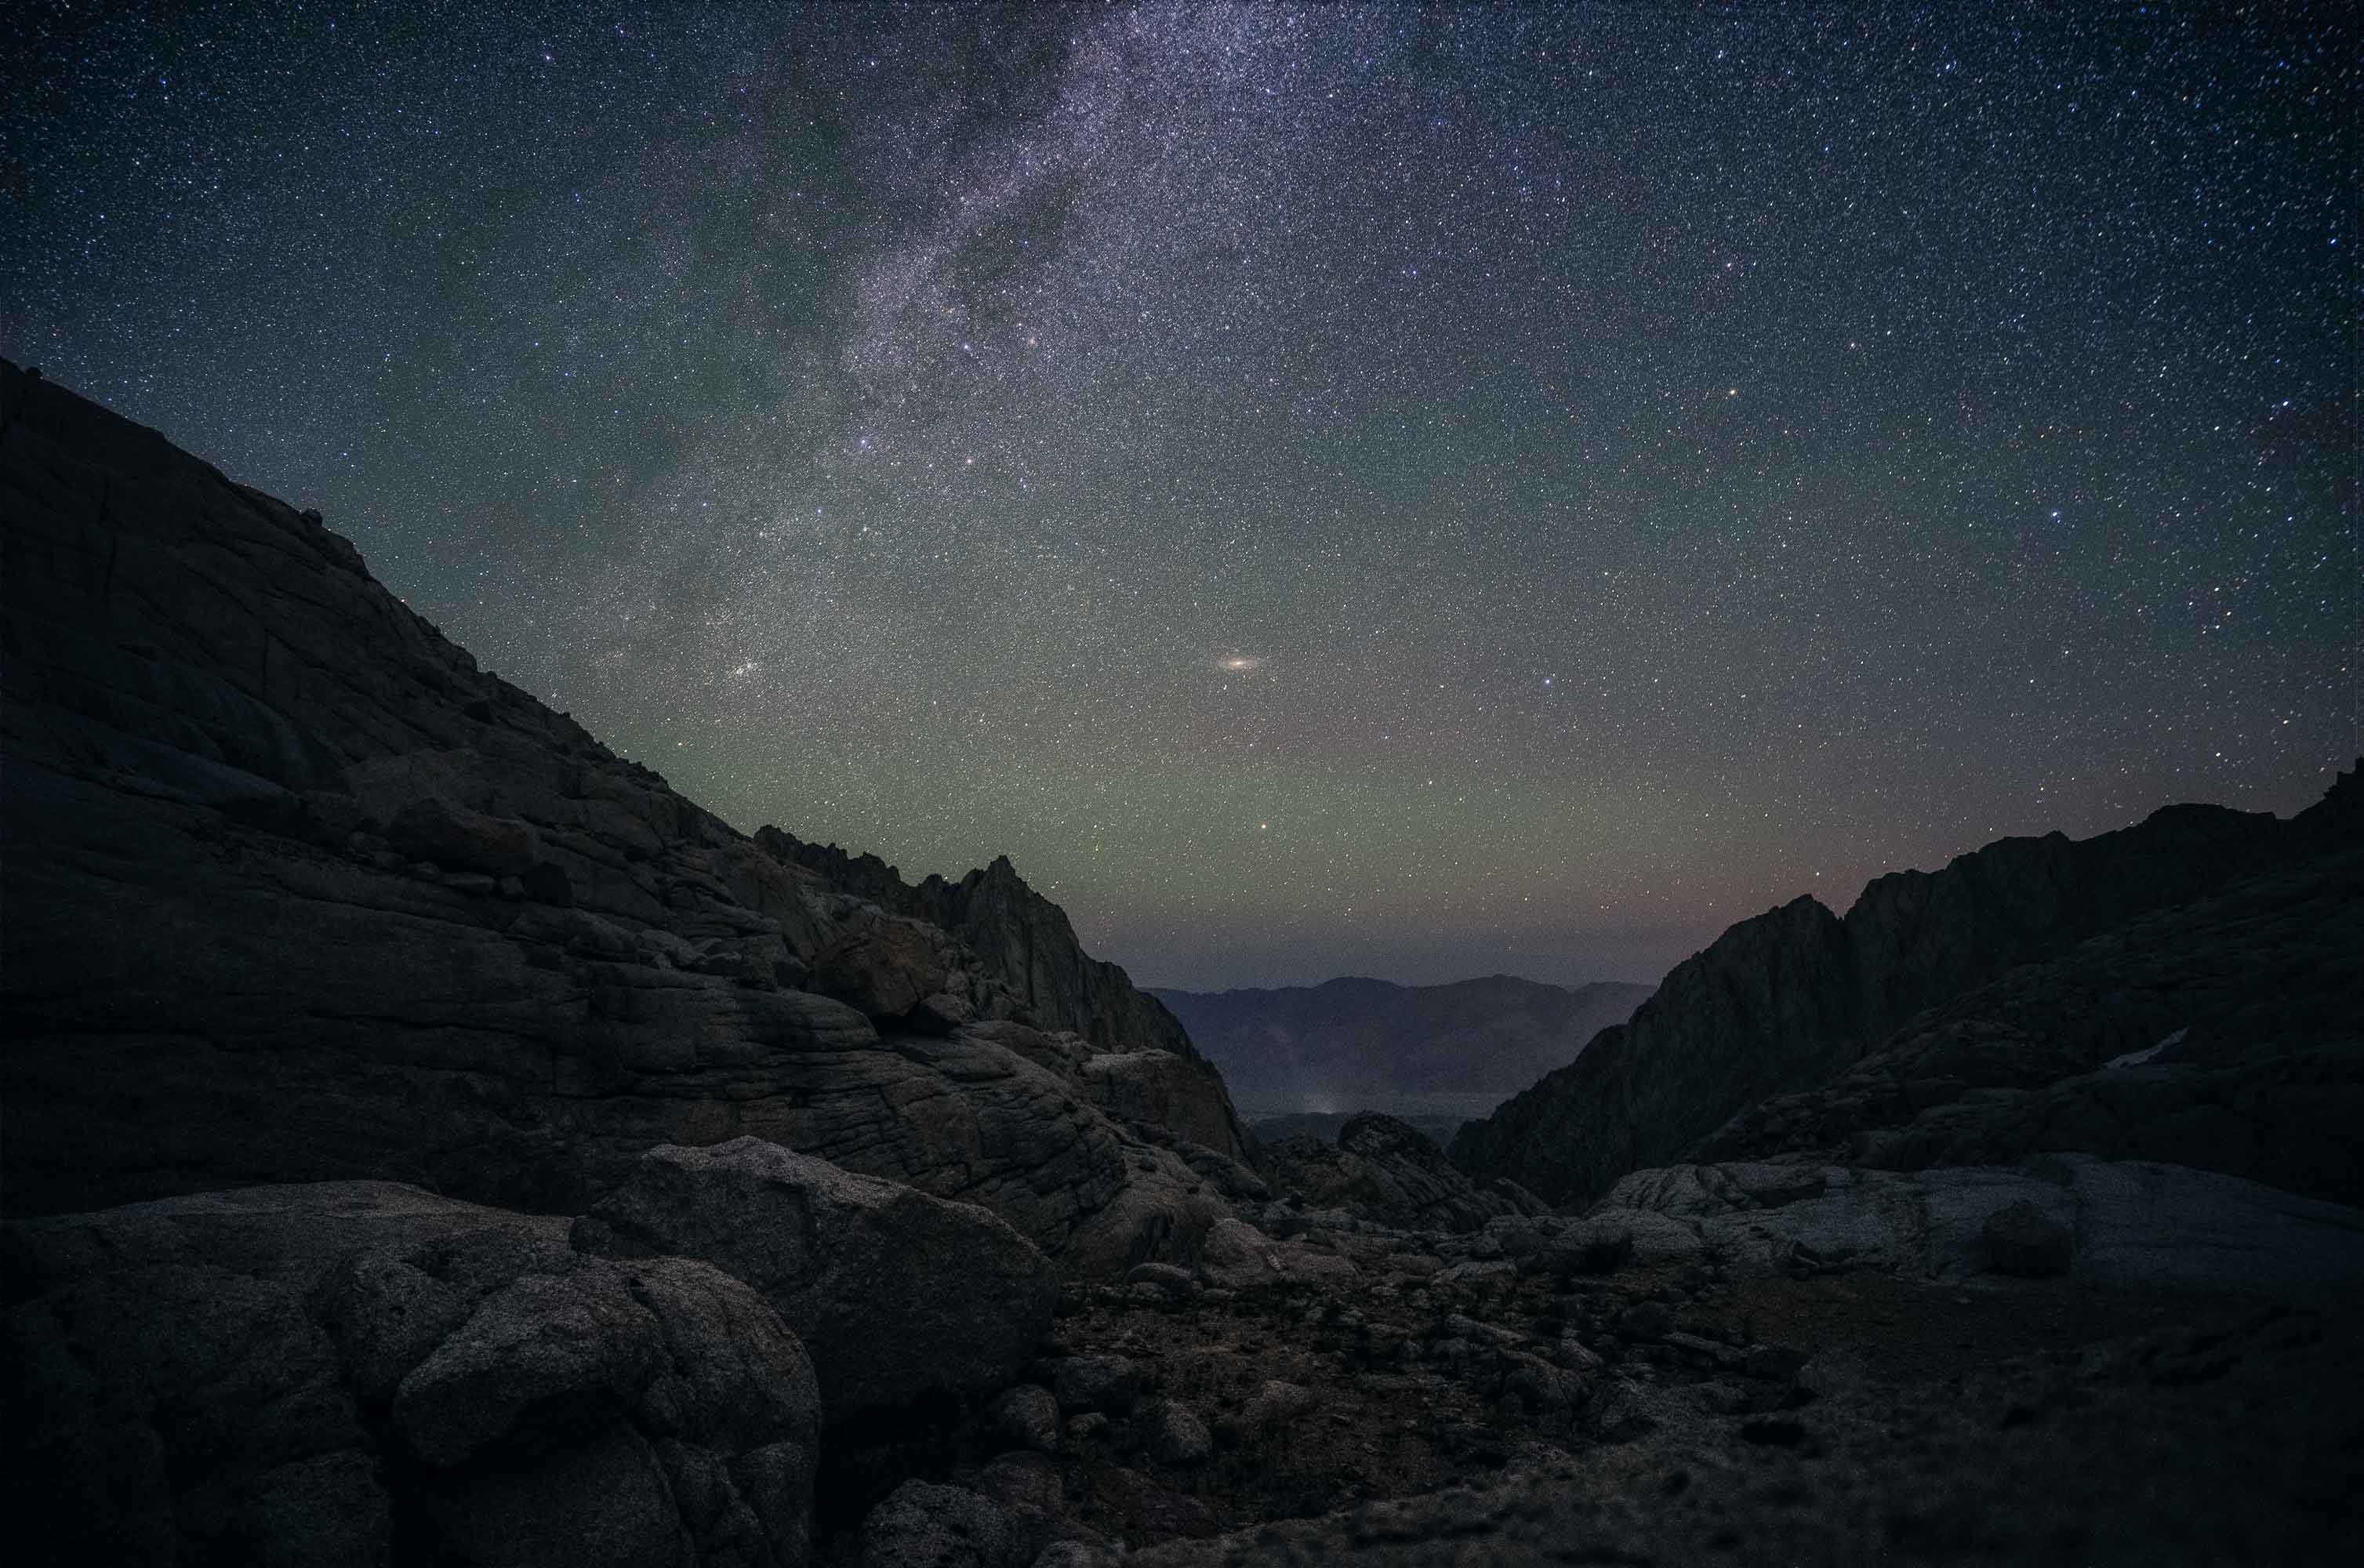
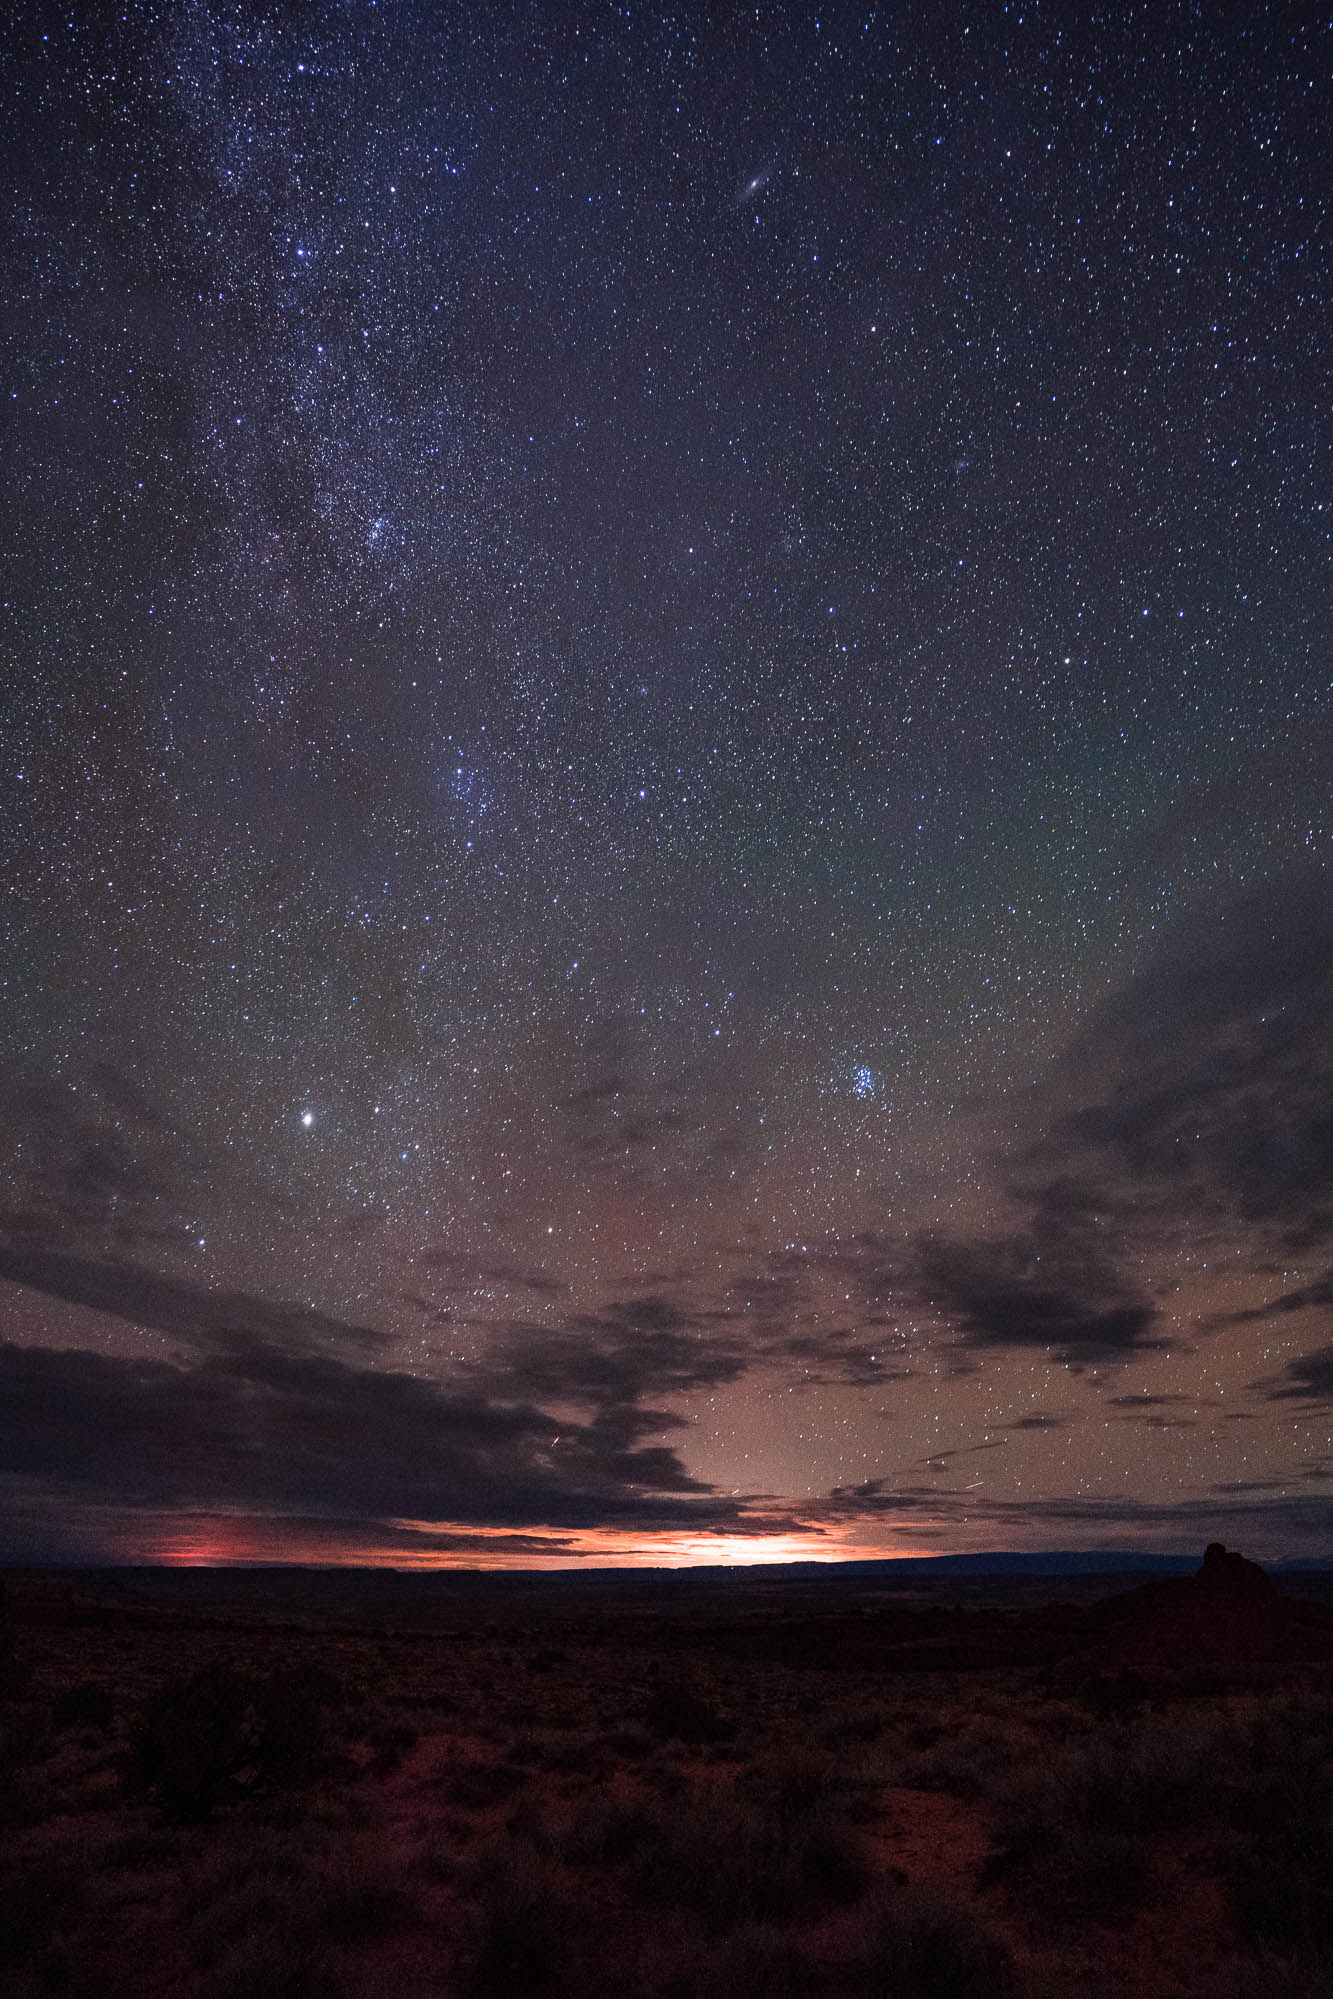
Once the galactic center was full set, Diana turned north to shoot the dimmer section of the Milky Way near the constellation Cassiopeia.

Here, the Andromeda galaxy is the small bright spot in the center of the frame. It sits behind the Northern Milky Way and a sky colored with green airglow.
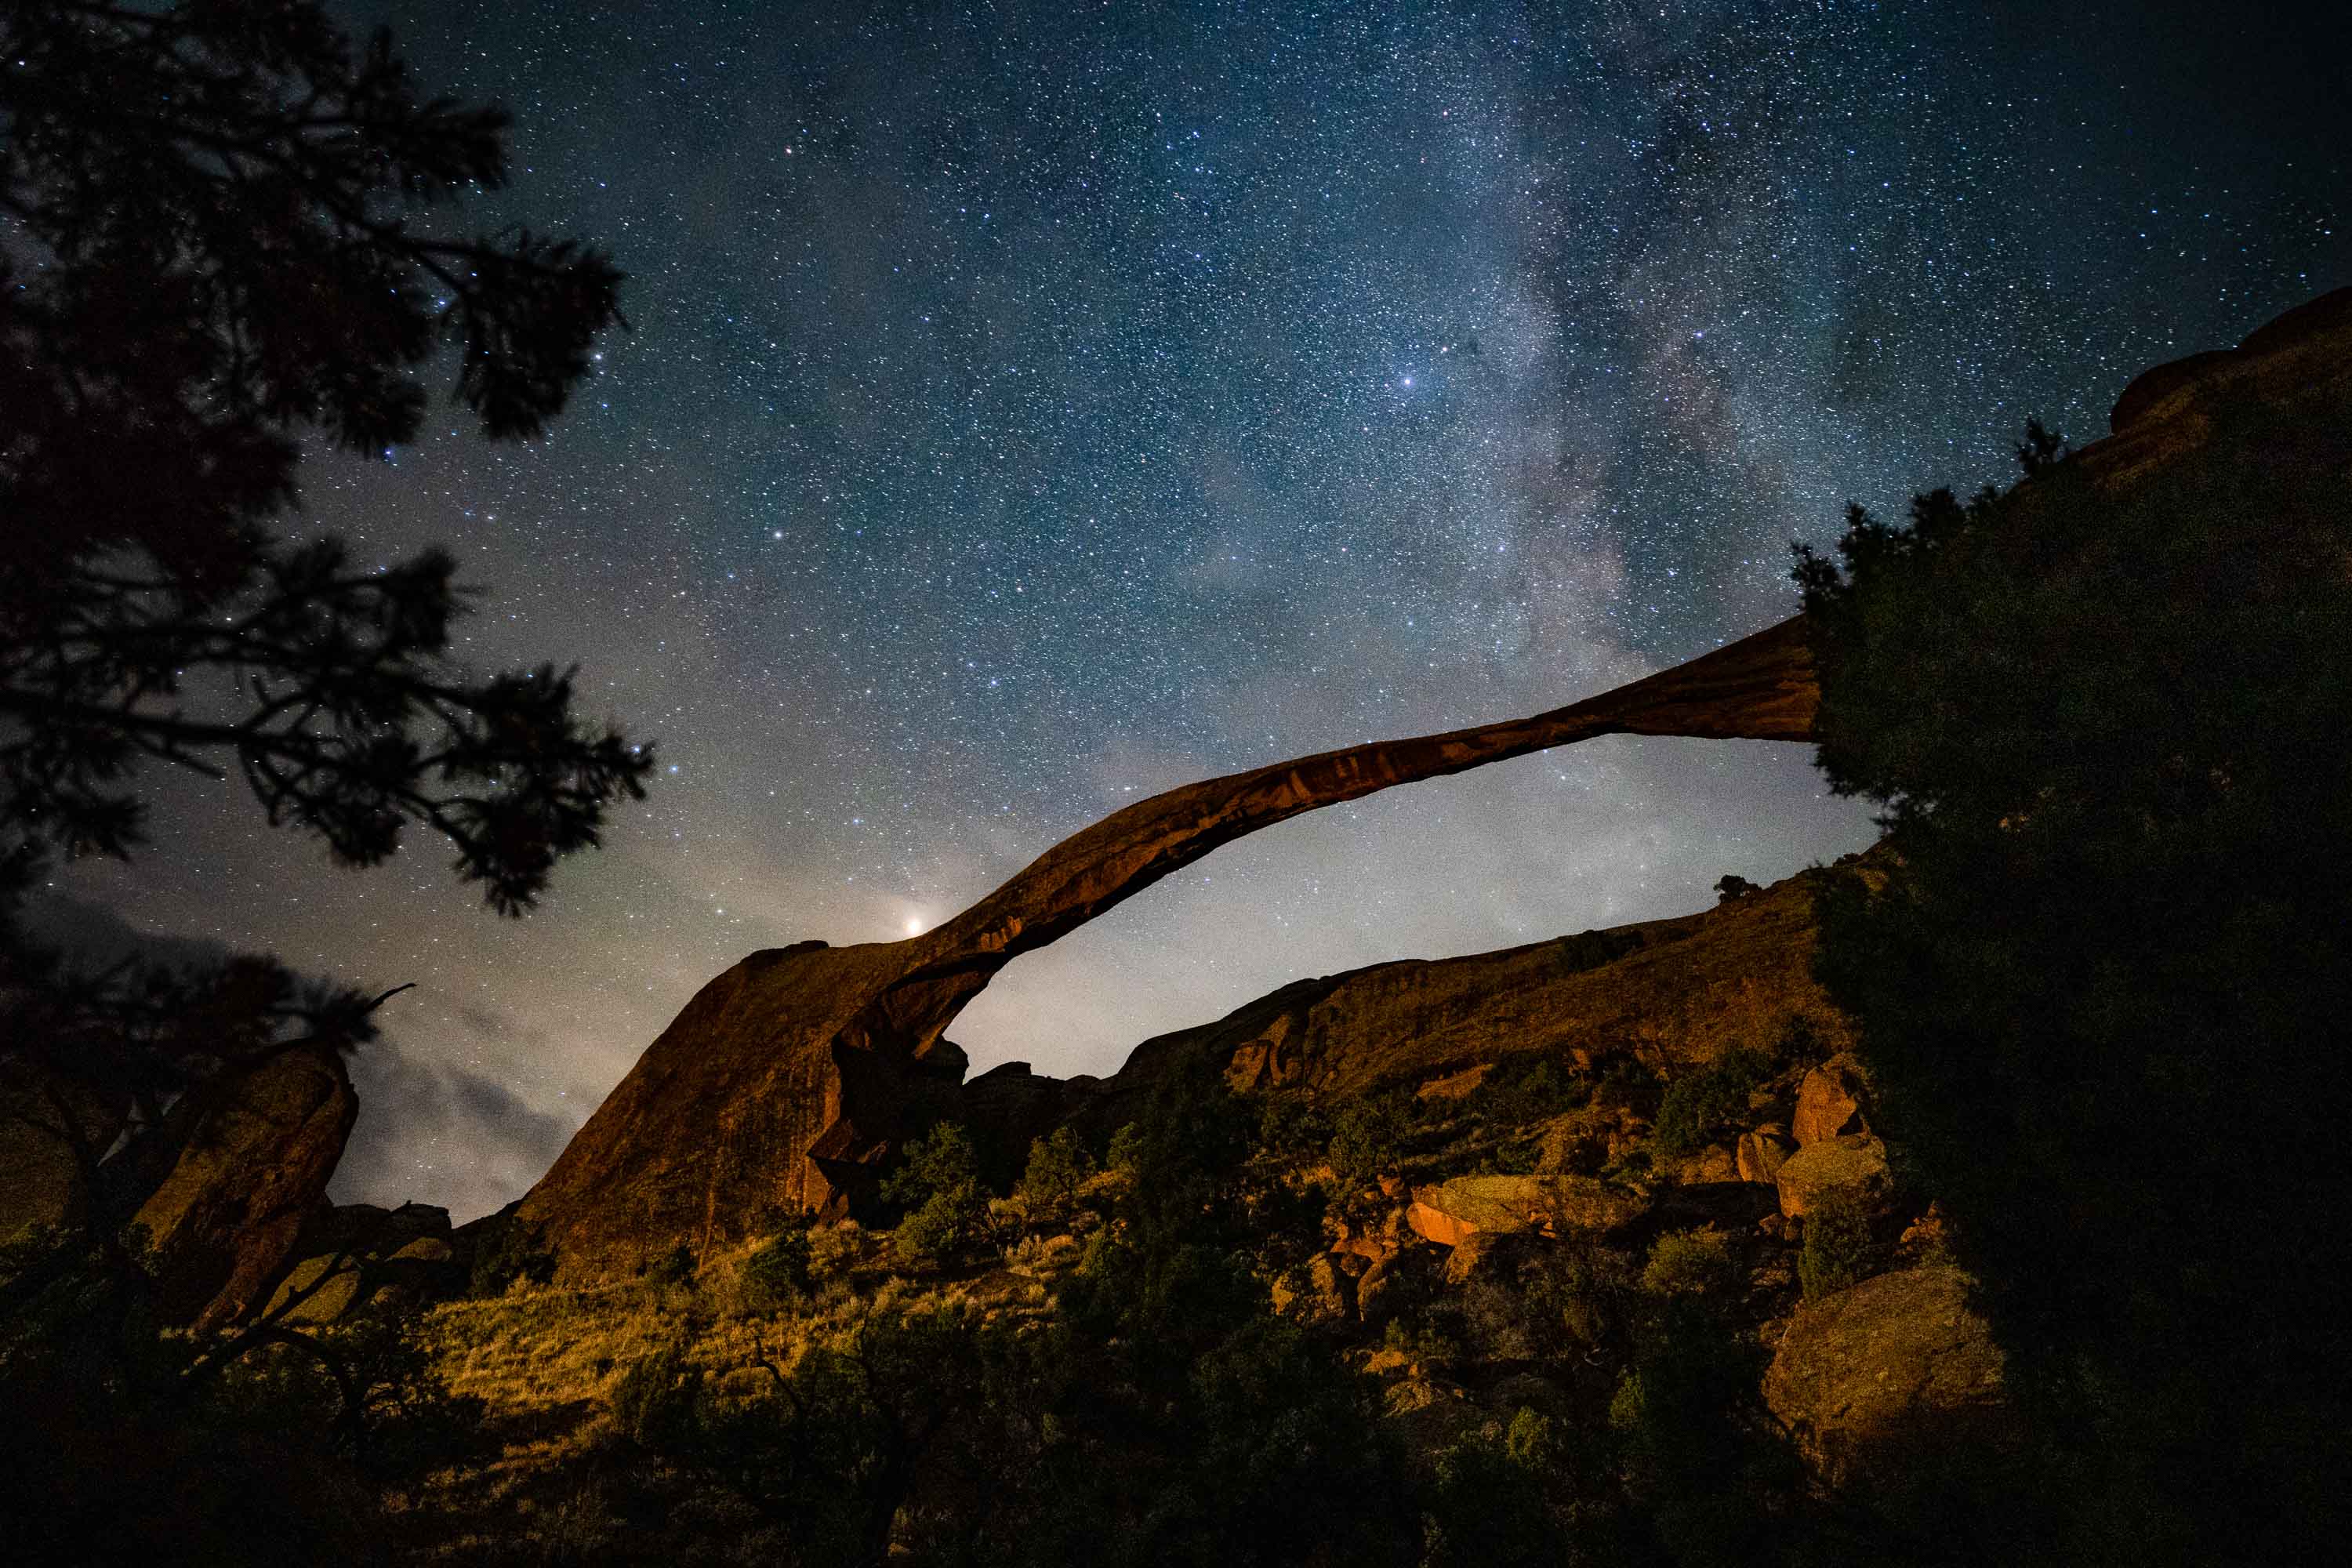
Later days in the conference had a lot of rain and clouds, but we found some breaks in the sky at Landscape Arch. We waited patiently for a few hours in the rain and the dark only to have a break in the clouds for a few minutes for Diana to capture the dark dust lanes of the Milky Way galactic plane setting behind the arch.
After we finished up at Landscape Arch, we hiked back with our workshop group and stopped along the Arches National Park Devil’s Garden Trail for some last shots of the Mars and the Milky Way before the brightest parts of the galaxy fully set.
And for our final shots of our time in Arches, we turned north and shot the dimmer, Northern Milky Way, with the bright star Capella and the Pleiades cluster visible in the frame.
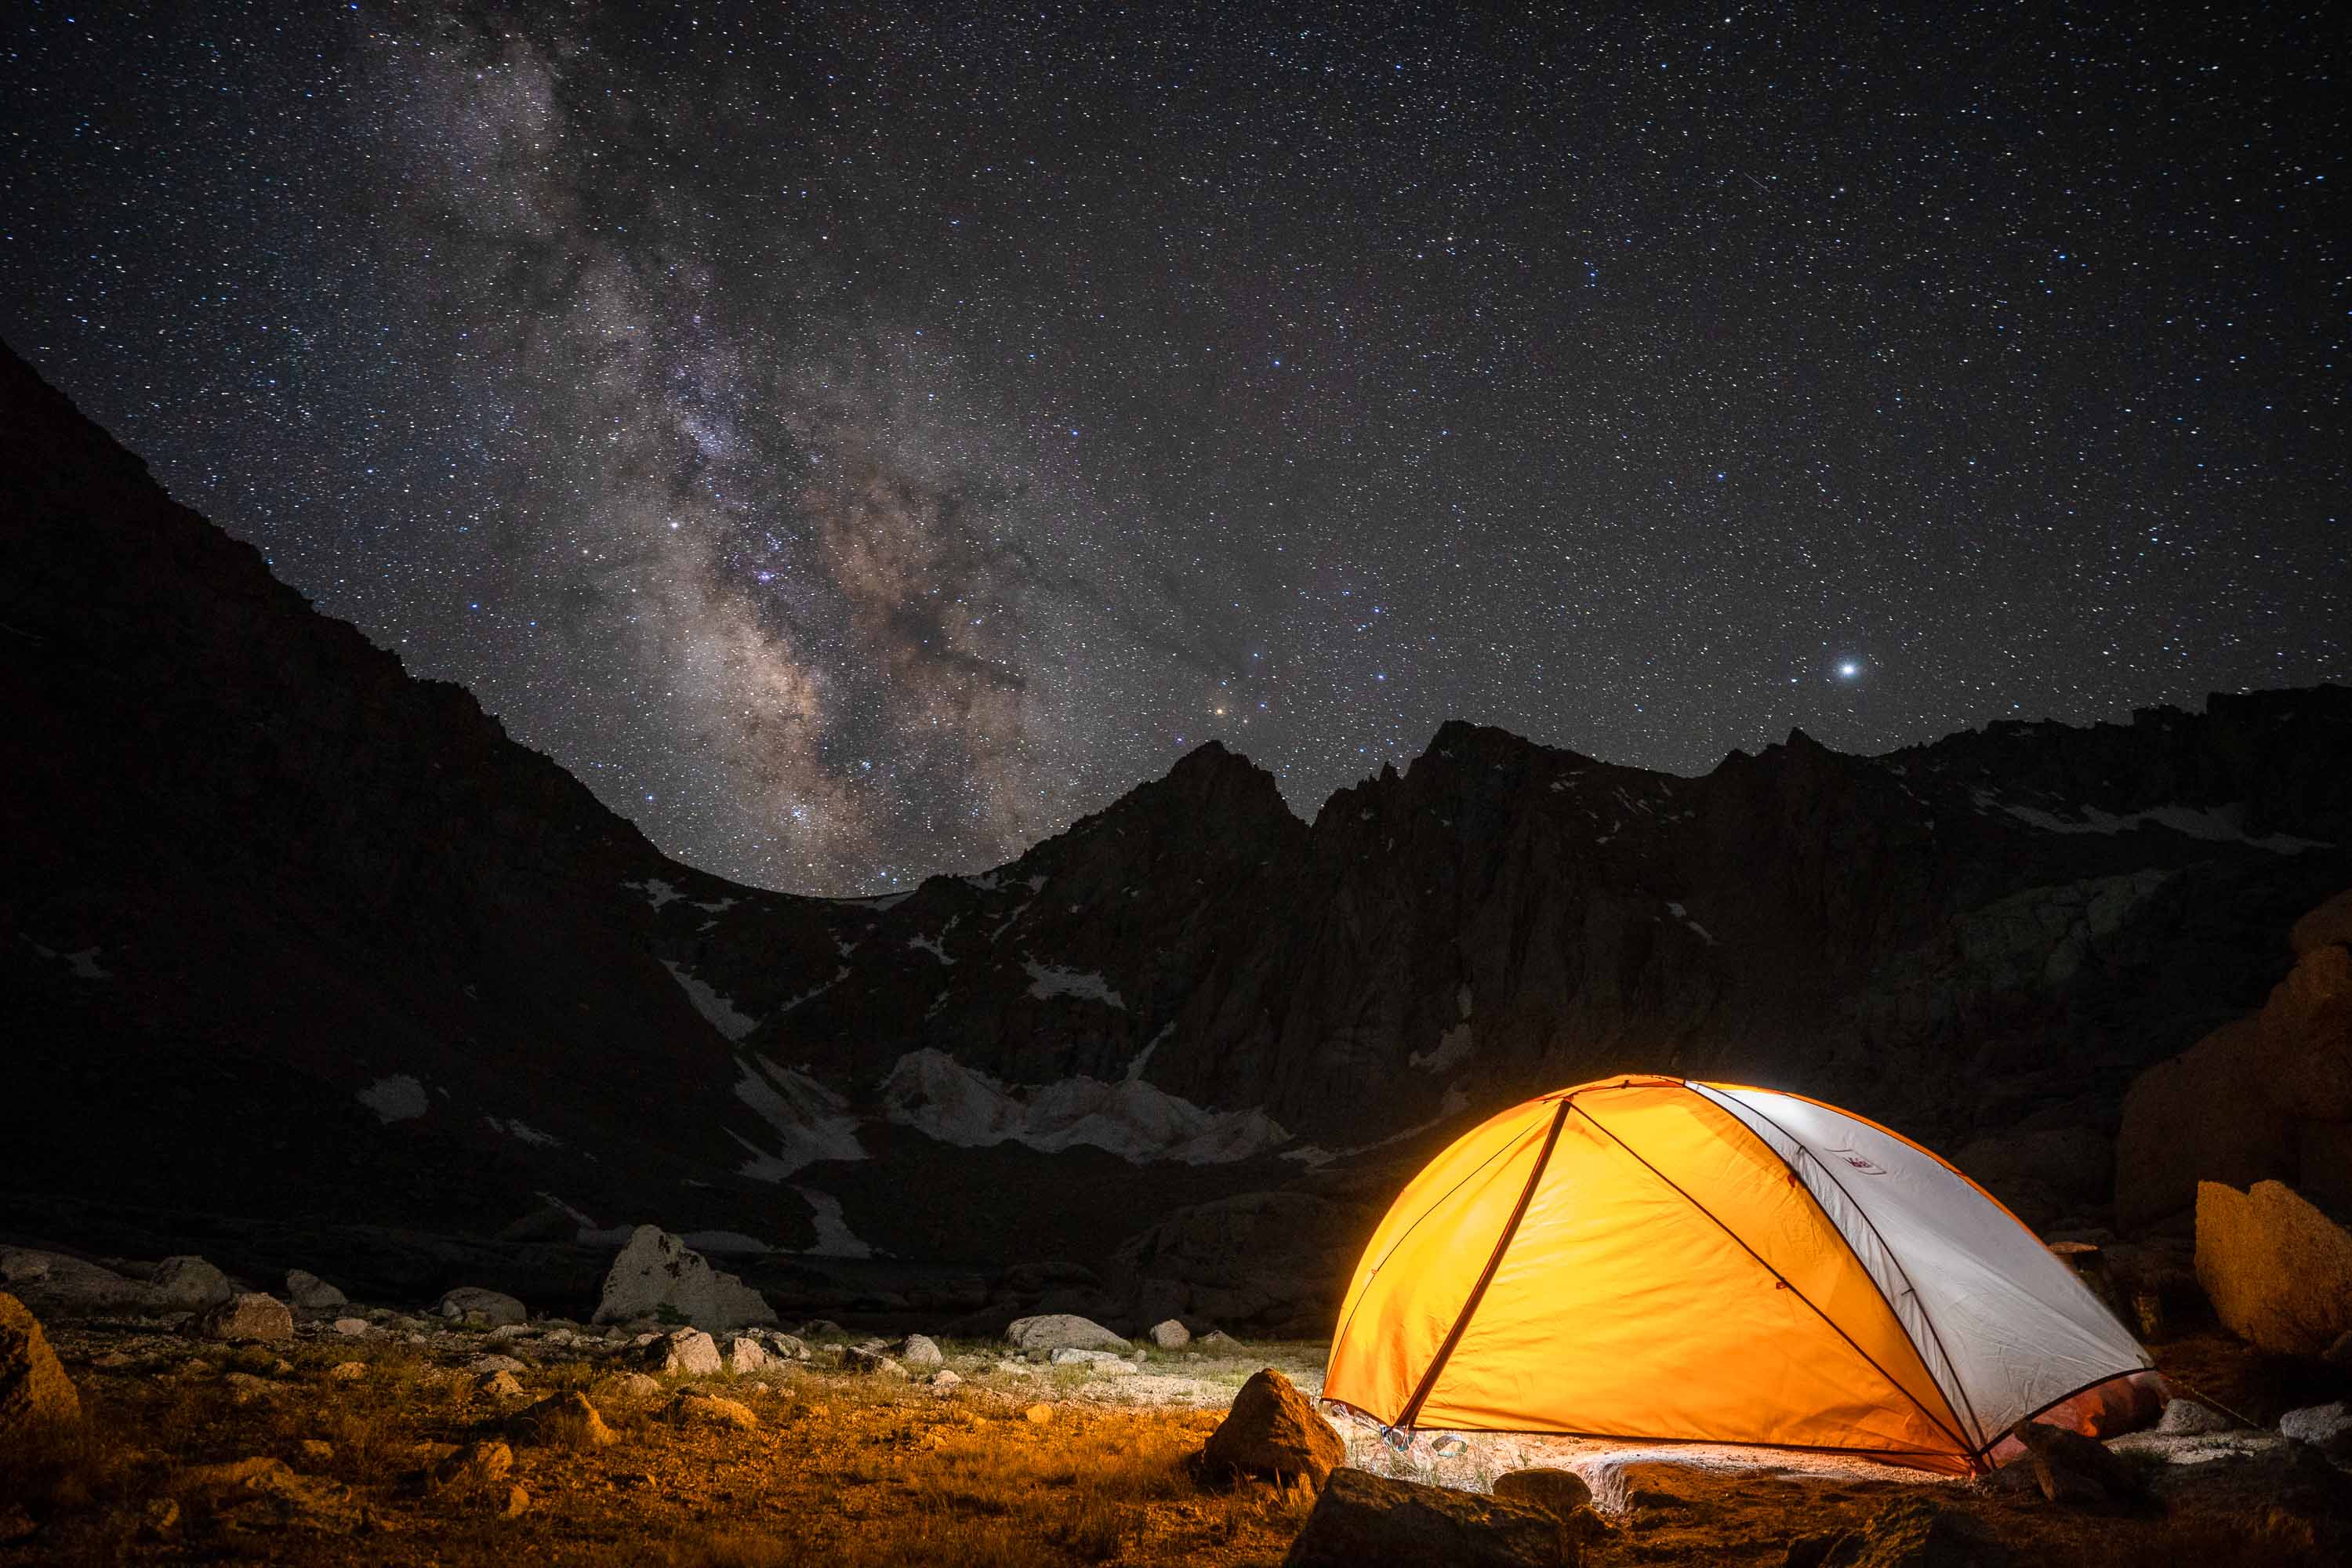
On the drive back to California from the Out of Moab Conference, we stopped at the landmark exit along interstate highway I-15 called Zzyzx Road. It’s situated roughly half-way between Las Vegas and Los Angeles and offers some fairly dark skies. We had stopped initially to shoot some photos of the setting crescent moon, but stuck around for a few more minutes to allow Diana to capture the Milky Way with the a7III.

Final Thoughts on Features and Price
We’ve loved the time we have spent shooting with the a7III and we had to weigh the camera against some alternatives like the Pentax K-1 Mark II before we decided to buy the a7III.
The Sony a7III does not feature some of the things we got super excited about in our camera review of the Pentax K-1 Mark II. Both camera bodies were released at the same base price for the body, but the Pentax featured some capabilities that were uniquely geared towards astrophotographers such as an illuminated camera body and the Astrotracer function that combined the capability of a GPS and image stabilization system to track the stars of the night sky.
Those types of features are notably absent from the a7III. That said, the a7III counters with a newer (albeit lower resolution) sensor with improved noise performance, internal 4K recording, a markedly better autofocus system, a small and light mirrorless body, extreme levels of control customization, USB charging and a much more complete and modern lens ecosystem. It was the long list of small details like these that had us wanting to keep the a7III.
Looking at our decision today, the closest recent competitor in the camera market is probably now the newly released Nikon Z6 in terms of base price and raw specifications. The Nikon Z series is, however, very new to the market and has only a very limited selection of native mirrorless lenses available (only 3 as of November 2018). Sony, by comparison has over 150 native OEM and third party lenses available for full-frame E-mount cameras. We’re excited to see Nikon, Canon and Panasonic entering the full-frame mirrorless market, but for now, Sony has the most well-developed and refined system.

For the price, the Sony a7III is one of the best values on the market. It’s a well-rounded camera that holds almost nothing back in terms of raw power and capability for an ever-changing digital photography market.
Conclusion and Verdict
The Sony a7III proves itself as a great astrophotography camera and general all-rounder. It has great low-light performance, some of the best that we’ve seen. For astrophotography and other low-light scenarios, we found that the a7III sensor performs best at ISOs higher than 400. RAW noise filtering does exist but are greatly improved over previous generation cameras and should not eat stars or be problematic in real-world shooting. Low-light live-view performance is nice and bright in dark shooting conditions, especially when using reasonably large aperture (<f/2.8) lenses or using the camera’s “Bright Monitoring” function.
A large number of custom buttons and functions make the a7III superbly customizable for any shooting style and most of the physical changes, like the addition of a joystick, touchscreen AF/MF point selection, and USB power capability, are all welcome improvements.
We are disappointed that the Mark III generation Sony Alpha cameras, including the a7III, no longer support the Sony Playmemories apps which previously provided custom shooting modes like Time-Lapse, Smooth Reflection, and Light Trails, all modes that were powerful creative tools on previous generation Sony cameras.
Overall, the Sony a7III feels like Sony’s most well-rounded camera. It’s not the highest resolution or fastest camera in their lineup, but it might just be one of the best low-light cameras on the market. It offers a tremendous amount of power for the price and that’s the primary reason that we loved it enough to buy it.
Sony a7III Pros:
- Excellent low-light image quality
- Bright live-view in dark conditions, “Bright Monitoring” functionality.
- Nearly every button customizable
- Excellent dynamic range
- Internal 4K video
- Touchscreen/joystick AF/MF point selection
- Touchscreen MF magnifier focus check
- USB powered operation and charging
- Much improved battery life with new NP-FZ100 battery
- Excellent, modern lens ecosystem
Sony a7III Cons:
- No Playmemories Apps
- No time-lapse / interval function
- Baked-in noise reduction still present in 4s+ exposures
- No LCD tilt in portrait orientation
- No button illumination
- Slight lag while changing settings.
- Very limited use touchscreen (AF/MF point selection/magnification only)
Sony a7III Verdict: 4.6/5
Highly Recommended
Equipment Links
Thanks to the B&H team for temporarily loaning us the Sony a7III for this review. Without them, this post would not have been possible. This is all the equipment that used for a7III Astrophotography Review:
- Sony a7III
- Zeiss Batis 18mm f/2.8
- Sony Zeiss 55mm f/1.8
- Oben CT-3581 Carbon Fiber Travel Tripod with BE-126T Ball Head
- LG V20 (Equipment Shots)
The affiliate links on this page allow lonelyspeck.com to earn a fee when you buy from B&H or Amazon.
Disclosure
We are a participant in the B&H Affiliate Program which also allows us to earn fees by linking to bhphotovideo.com. We are a participant in the Amazon Services LLC Associates Program, an affiliate advertising program designed to provide a means for us to earn fees by linking to Amazon.com and affiliated sites.
Learn Astrophotography
Astrophotography 101 is completely free for everyone. All of the lessons are available on the Lonely Speck Astrophotography 101 page for you to access at any time. Enter your email and whenever we post a new lesson you’ll receive it in your inbox. Updates will be sent out only periodically, usually less than once per week.
[email-subscribers namefield=”NO” desc=”” group=”Lonely Speck Newsletter”]
Help us help you!
Believe it or not, Lonely Speck is my full-time job. It’s been an amazing experience for us to see a community develop around learning astrophotography and we’re so happy to be a small part of it. I have learned that amazing things happen when you ask for help so remember that we are always here for you. If you have any questions about photography or just want to share a story, contact us! If you find the articles here helpful, consider helping us out with a donation.
[button font_size=”16″ color=”#136e9f” text_color=”#ffffff” url=”https://www.paypal.com/cgi-bin/webscr?cmd=_donations&business=lonelyspeckblog%40gmail.com&item_name=These+tips+help+keep+lonelyspeck.com+running.¤cy_code=USD&source=url” target=”_blank”]Donate[/button]
Thanks so much for being a part of our astrophotography adventure.
-Ian
Well you are always my goto channel for Astro. I’m just deciding between the a73 & a7C as my Astro – do everything else camera. I don’t shoot or video selfies. Which one would you both recommend?
Since posting this i have decided to wait & get a used A7IV
Hi Ian,
This review has been really helpful.
Have you experienced any “hot” pixel issues while shooting long exposure/high ISO shots?
Hot pixels are relatively ubiquitous on any camera in long exposure conditions. The Sony a7III and other alpha cameras can re-map hot pixels manually by setting the camera date forward and back 1 month.
If you had to choose between the A7S and A7III, which would it be solely for a dedicated astro camera.