

In this review, we take a look at the ultra wide-angle Zeiss Batis 18mm f/2.8 for full-frame E-mount Sony cameras. This premium ultra wide-angle lens is one of the widest f/2.8 prime lenses available natively for the a7 series of cameras.
We love fast wide-angle primes for astrophotography, so the Batis 18mm quickly jumped to the top of our list of most desirable lenses to test. We push the low-light limits of the Batis 18mm to capture nightscapes around the world in California, New Zealand and Australia.
Introduction
The Zeiss Batis 18mm f/2.8 fills out the shorter end of the current offerings from Zeiss and Sony for the a7 series. At the time of writing this review, there were only two other ultra wide-angle autofocus lenses available natively for full-frame E-mount cameras: Sony Zeiss 16-35mm f/4 OSS and the Rokinon/Samyang AF 14mm f/2.8. The 16-35mm f/4 is a well regarded lens but leaves something to be desired with its slower f/4 aperture. The Rokinon AF 14mm f/2.8 was just announced recently and wasn’t shipping when we started this review. We’ll likely get a copy of the Rokinon AF 14mm f/2.8 as soon as possible to compare directly to this Batis 18mm in a separate review.
Among these three ultra wide-angle lens offerings, the Batis 18mm f/2.8 stands out as the most expensive of the bunch: almost twice the price of the more budget-friendly Rokinon AF 14mm. With such a high price point, I entered this review with really high expectations and a lot of skepticism. Let’s see how it does.
Specs
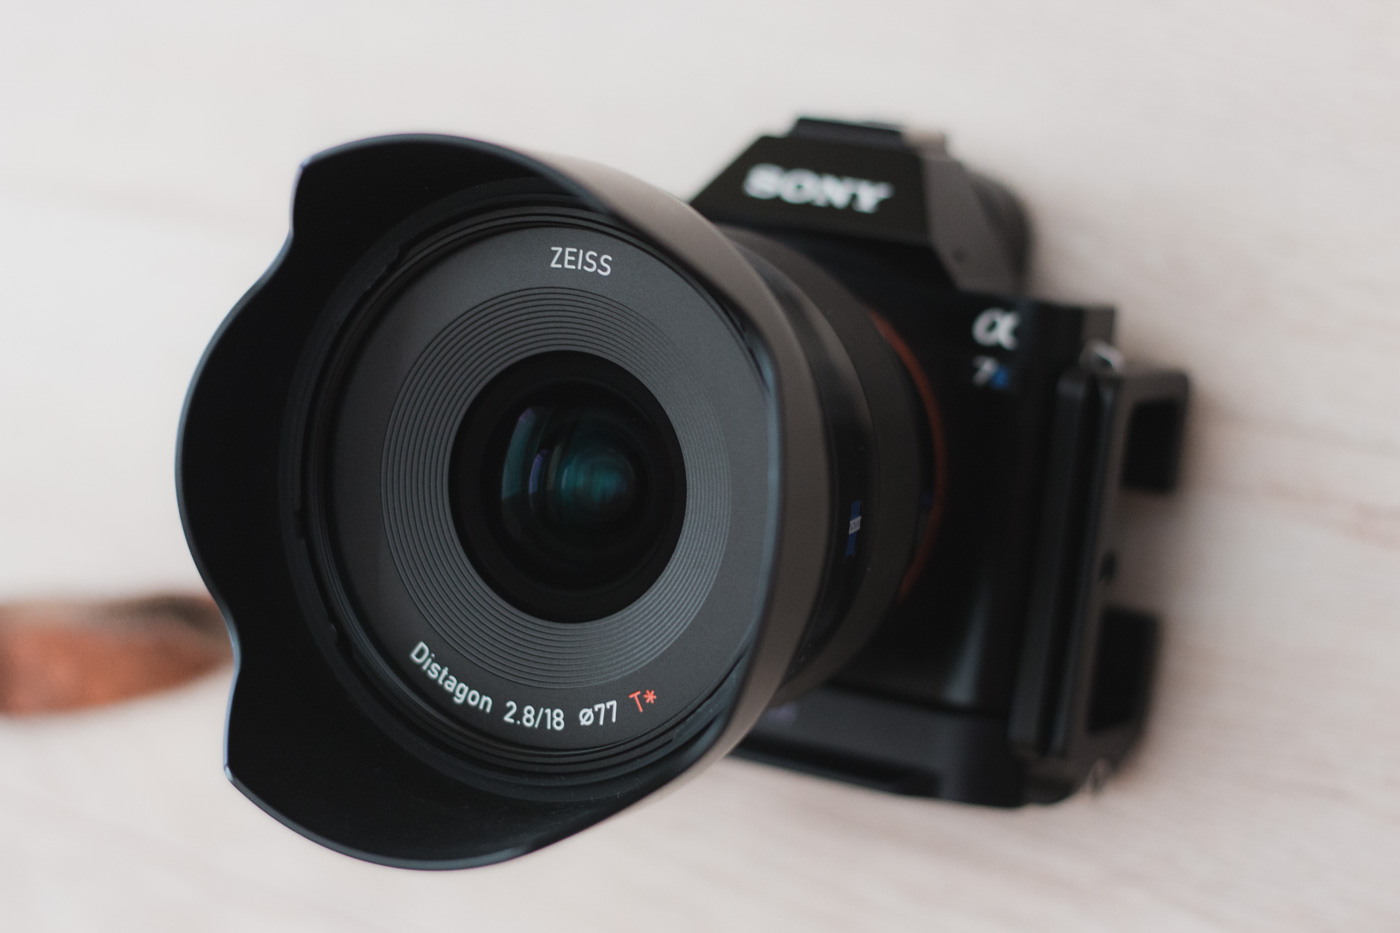
The Zeiss 18mm f/2.8 is the third lens in Zeiss’s premium autofocus Batis line of lenses, sharing a distinct design philosophy with its Batis 25mm f/2 and Batis 85mm f/1.8 lenses. The 18mm is the shortest of the three and has a super wide-angle field of view of 99 degrees from corner to corner. It uses a Distagon optical design, the same family of optical design as some of Zeiss’s sharpest and most well regarded wide-angle lenses like the manual focus Zeiss 15mm f/2.8 Milvus Distagon for Canon and Nikon mounts. Internally, it features 11 lens elements in 10 groups, a round 9-bladed aperture design, and internal autofocusing with a minimum focus distance of 9.9″ (25 cm). The focus mechanism uses a linear actuator for focusing, similar to most lenses in Sony’s lineup. Like all modern Zeiss lenses, the Batis 18mm has its standard T* anti-reflective multilayer coating on its lens elements.

Externally, the Batis 18mm sports a large 77mm front filter thread, moisture and dust resistance, and an included petal-style lens hood. It weighs 11.6 oz (330 grams).
First Impressions
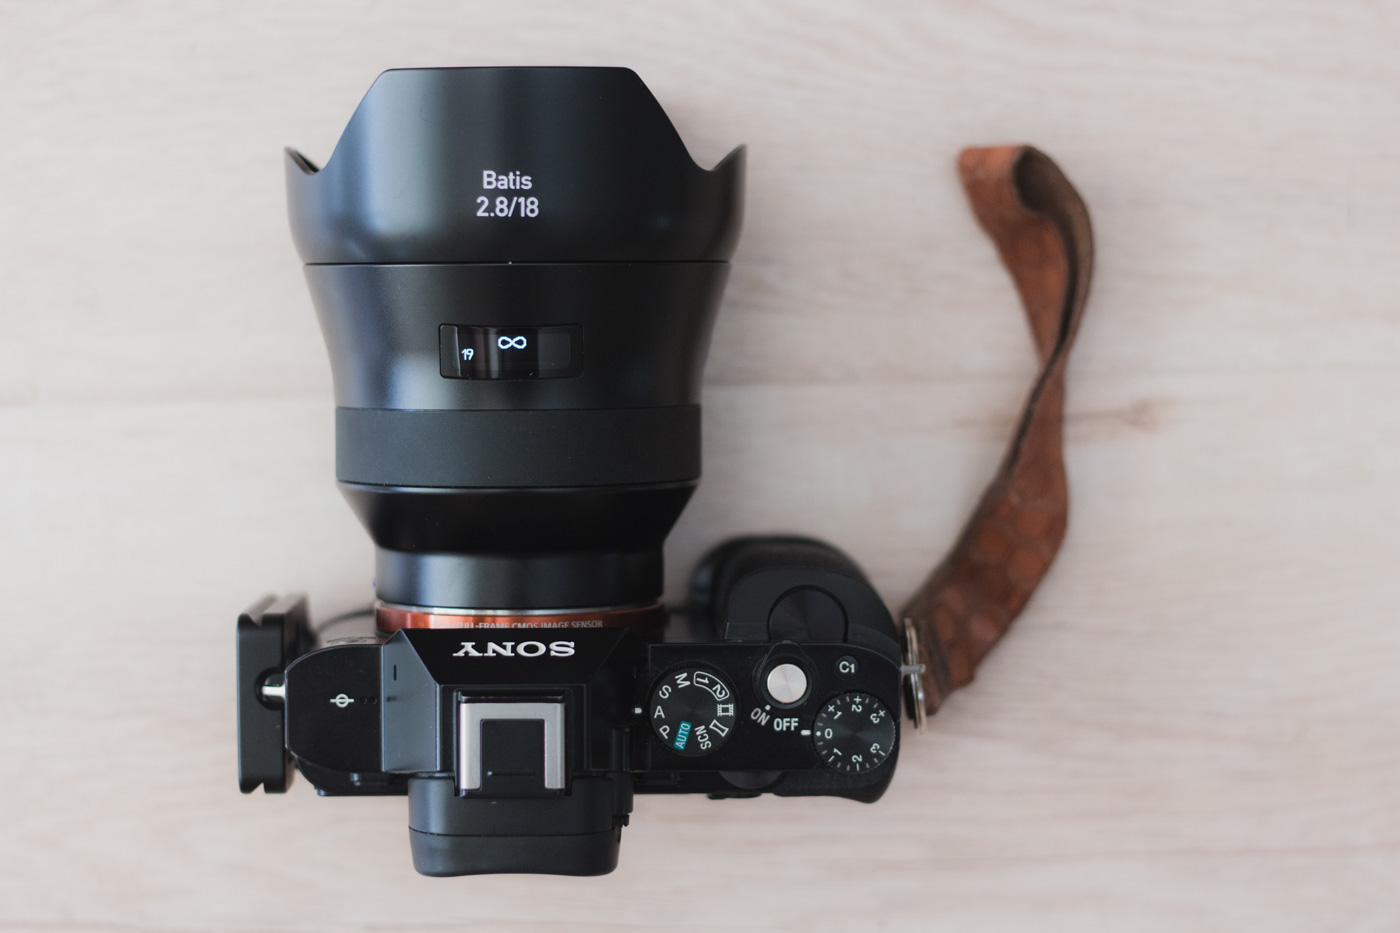
The first thing I thought when seeing the Zeiss Batis 18mm f/2.8 in its box was that it looked really big. But as soon as I grabbed it to install on my Sony a7S, my worries were somewhat alleviated: it’s really lightweight — unusually so for its size. Compared to my old (heavy) manual focus Rokinon 14mm f/2.8 (review), the Batis 18mm f/2.8 felt like it was going to be a joy to carry around. Its large diameter is actually a little perplexing at first, given its weight. Looking at the optical element diagram, the elements appear significantly smaller in diameter than the lens body, so I can only assume that the body of the lens tapers out to accommodate a filter thread diameter large enough to prevent vignetting on such a wide field of view. Or, perhaps, to house the electronics and mechanisms for the focusing and diaphragm system.

The body of the lens is made of plastic but it feels premium in construction. The lens mount is stiff when installing and is nicely pre-loaded with absolutely no play. One of the most notable and stand-out features of the lens is the OLED (organic light-emitting diode) focusing scale that illuminates as soon as the camera is powered. It shows the distance at which the lens is critically focused and also indicates the depth of field on either side. The scale can be enabled all the time, for manual focus only, or disabled by rotating the ring a couple times past infinity. It can also be switched from meters to feet by rotating the ring a couple times past minimum focal distance.
The rubberized manual focusing ring is especially smooth to turn, easy to find by feel (e.g. in the dark) and allows for very fine and precise adjustment. Similar to most of the focus-by-wire lenses for the Sony mirrorless system, the manual focusing is non-linear. Turning the ring faster will rack focus coarser and more quickly while turning it slower will rack the focus slower and more precisely. It’s a little strange to get used to and may not be ideal for pulling focus in video, but it does allow for very precise control of the focus point with still photography.
Autofocusing is very fast and almost perfectly silent — a standard I have become used to with all the autofocus lenses for the a7 cameras. Autofocus is by no means a necessity for astrophotography, but we all love to use our gear for other purposes, and I love being able to use AF mode during most of my daytime shooting while we travel.
The petal style lens hood snaps into place with a firm click and shares the same finish as the lens body. I left the lens hood on the Batis 18mm most of the time, reversing it only for storage while in transit or removing it while using a filter holder (my Formatt-Hitech 85mm Modular Holder), typically while using the SharpStar2 for precision focusing for astrophotography.
Probably one of the more expensive lenses I’ve ever used, the Batis looks and feels the part. It really does feel like a high quality piece of gear in line with its elevated price point.
Image Quality and Aberrations
Initial reviews of the Zeiss Batis 18mm f/2.8 seem to indicate excellent performance in terms of sharpness and overall image quality.
When shooting astrophotography, we like to judge a lens less specifically for its overall sharpness and more for its corner aberration and coma performance. Certain types of optical defects or lens aberrations like coma and astigmatism can make for distracting-looking stars in the corners of an astrophoto. Coma can be a common problem on fast wide-angle lenses.
We put the Batis 18mm f/2.8 through our lens aberration test chart to try to initially characterize its aberration performance in a controlled environment and see what we could expect in the field. The test is performed by shooting an LCD with a test pattern of dots.
In general, the 4 dots in each crop of the chart should look like pinpoints. Any deviation from a pinpoint is an indication of aberration. In my test, aberration sizes are measured, in pixels, relative to the full-frame height and expressed as a percentage of the frame height. This makes measurement of the aberration in this test unaffected by camera resolution and allows comparison of performance across systems and sensor sizes. In general >1.5% is poor, 1.0% is average, 0.5% is very good and <0.3% is excellent. The test is measured in two places: in the center of the frame and the corner of the frame. You can read more about my aberration test and try testing your own lenses with our downloadable chart in my practical guide to lens aberrations.
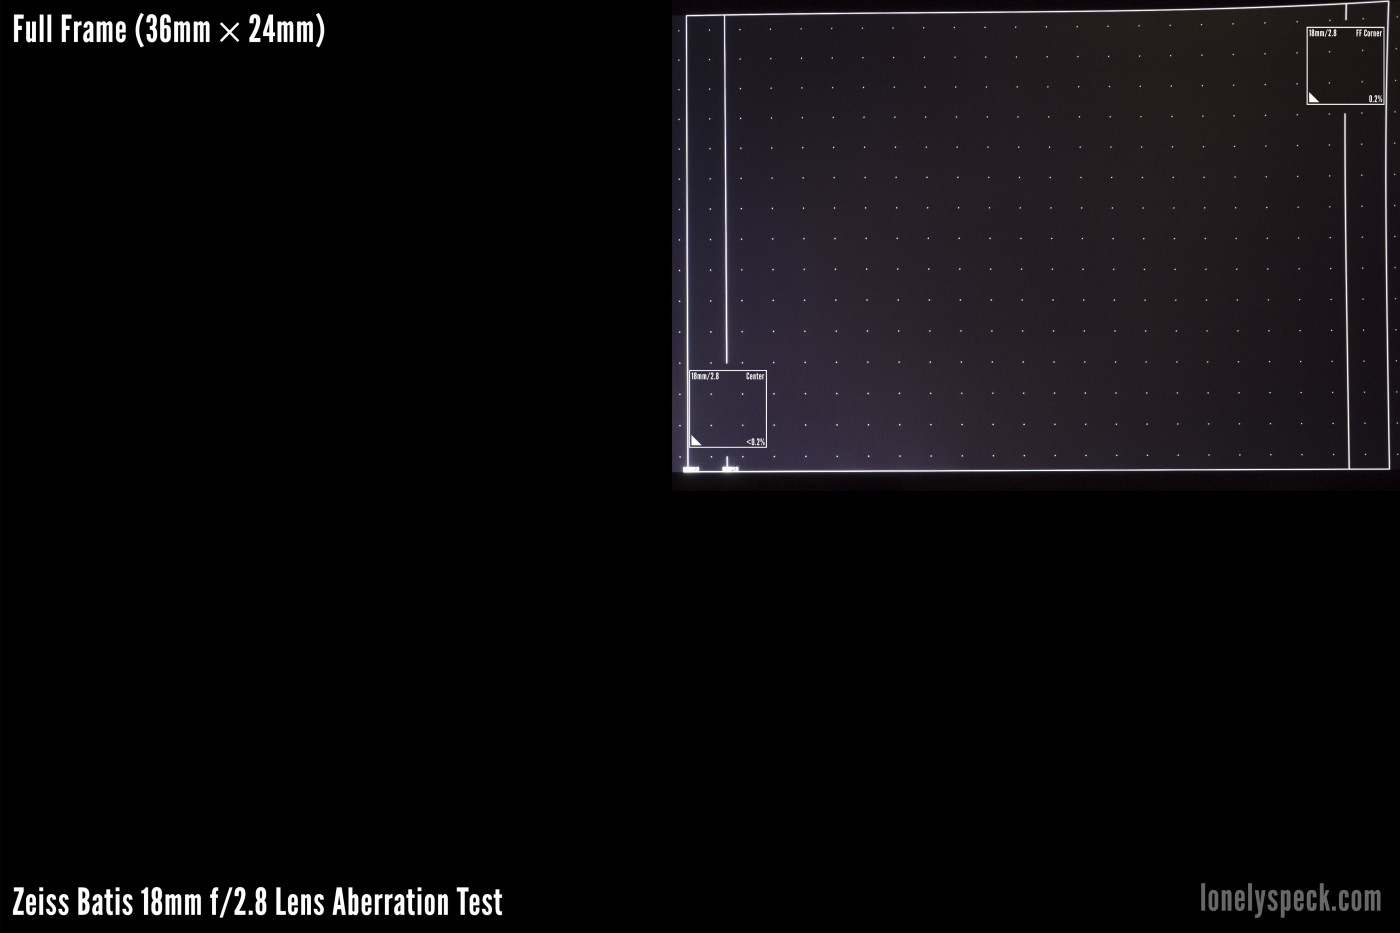
If you look carefully at the full-frame test chart above, you can see some pretty noticeable mustache distortion of the test chart edges. It shows barrel distortion in the center and pincushion distortion in the corners. Not a great trait for architectural shots but it’s also easily correctable with the lens profile built into Adobe Lightroom. Looking at our 100% crops, here’s how the Batis 18mm f/2.8 does in terms of aberration for pin-point light sources wide-open at f/2.8:
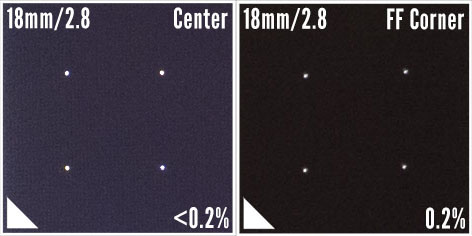
At f/2.8, the the Zeiss 18mm f/2.8 looks nearly perfect with nearly no noticeable aberration or coma issues. On the 12MP Sony a7S, the pinpoints in the center of the frame read only 5 pixels in diameter, scoring less than 0.2% of the frame height, a perfect score by our standard. In the extreme corner, there is slight indication of a stretching in the tangential plane. There the pinpoint barely shows some diffuse looking “wings” in the sagittal direction if you look really closely. Barely. The total deformation is small and makes the size of the pinpoint 6 pixels if measured out to the edge of the diffuse “wings” for a score of 0.21% (still nearly perfect on our scale). No matter how you look at it, any aberrations are very small. Stopped down to f/4, the results are pretty much identical:
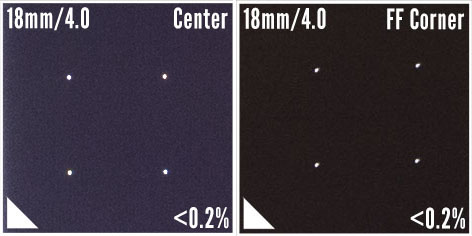
When stopped to f/4 the barely visible, diffuse “wings” in the sagittal plane are gone. Basic performance seems the same between f/2.8 and f/4, perhaps with a slight increase in resolution and reduction of vignetting.
Overall, the performance of the Batis 18mm is impressive, and I would expect no less from a lens this expensive. Zeiss touts the Batis 18mm as “the super wide-angle lens for a new era.” If we judged it solely on this test, I’m starting to agree.
Okay, enough test charts. Let’s see how it does in real life.
Using the Zeiss Batis 18mm f/2.8 for Astrophotography
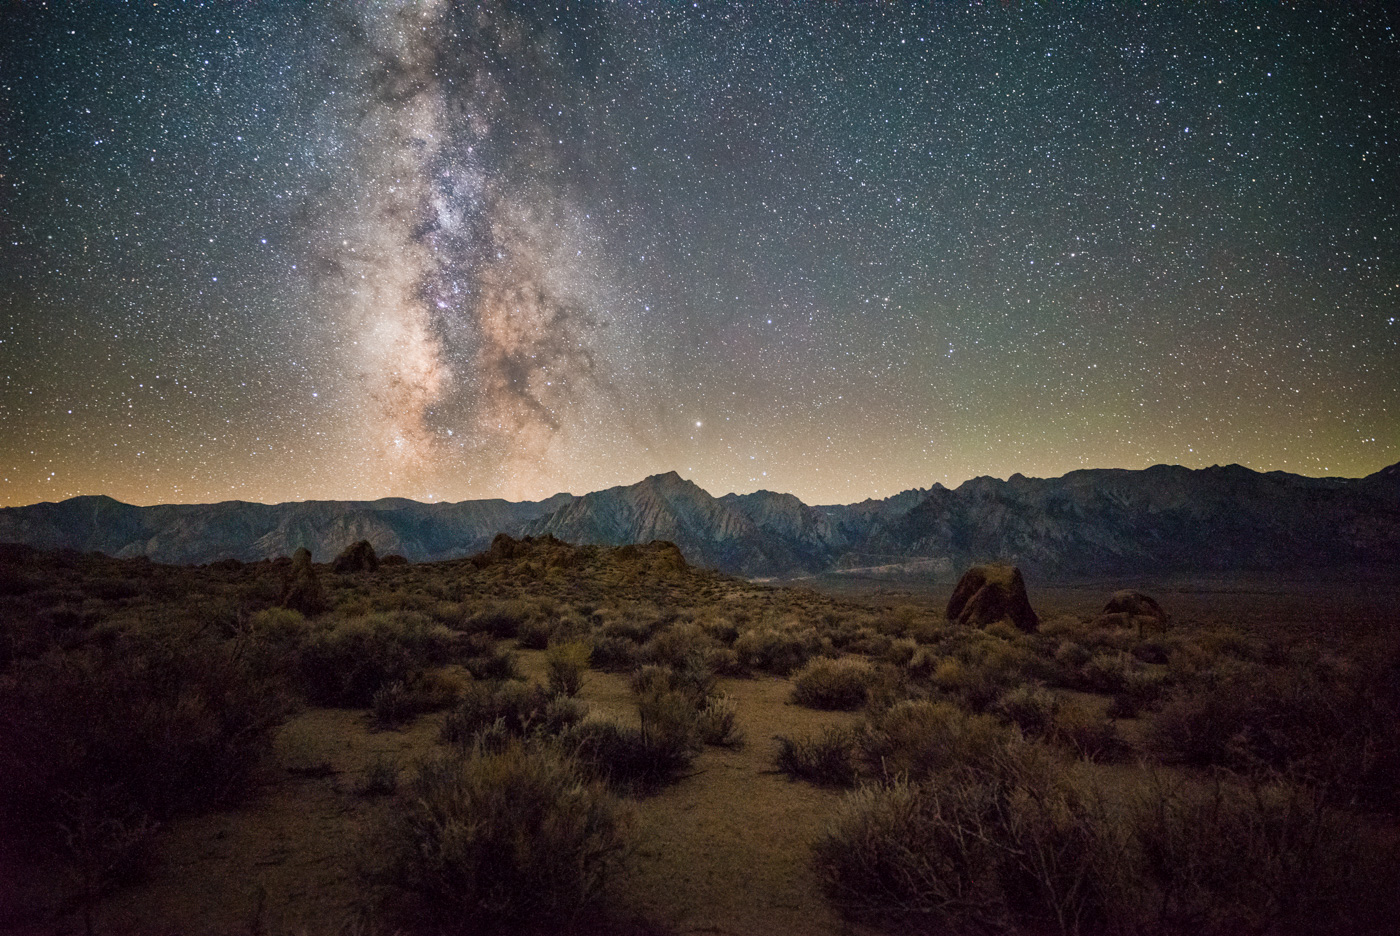
We used the Batis 18mm extensively while traveling in California, New Zealand and Australia. Our first stop was Alabama Hills, California where we met with Lance Keimig of National Parks at Night for a two-night filming session where I make a cameo appearance on his Night Photography class on CreativeLive.
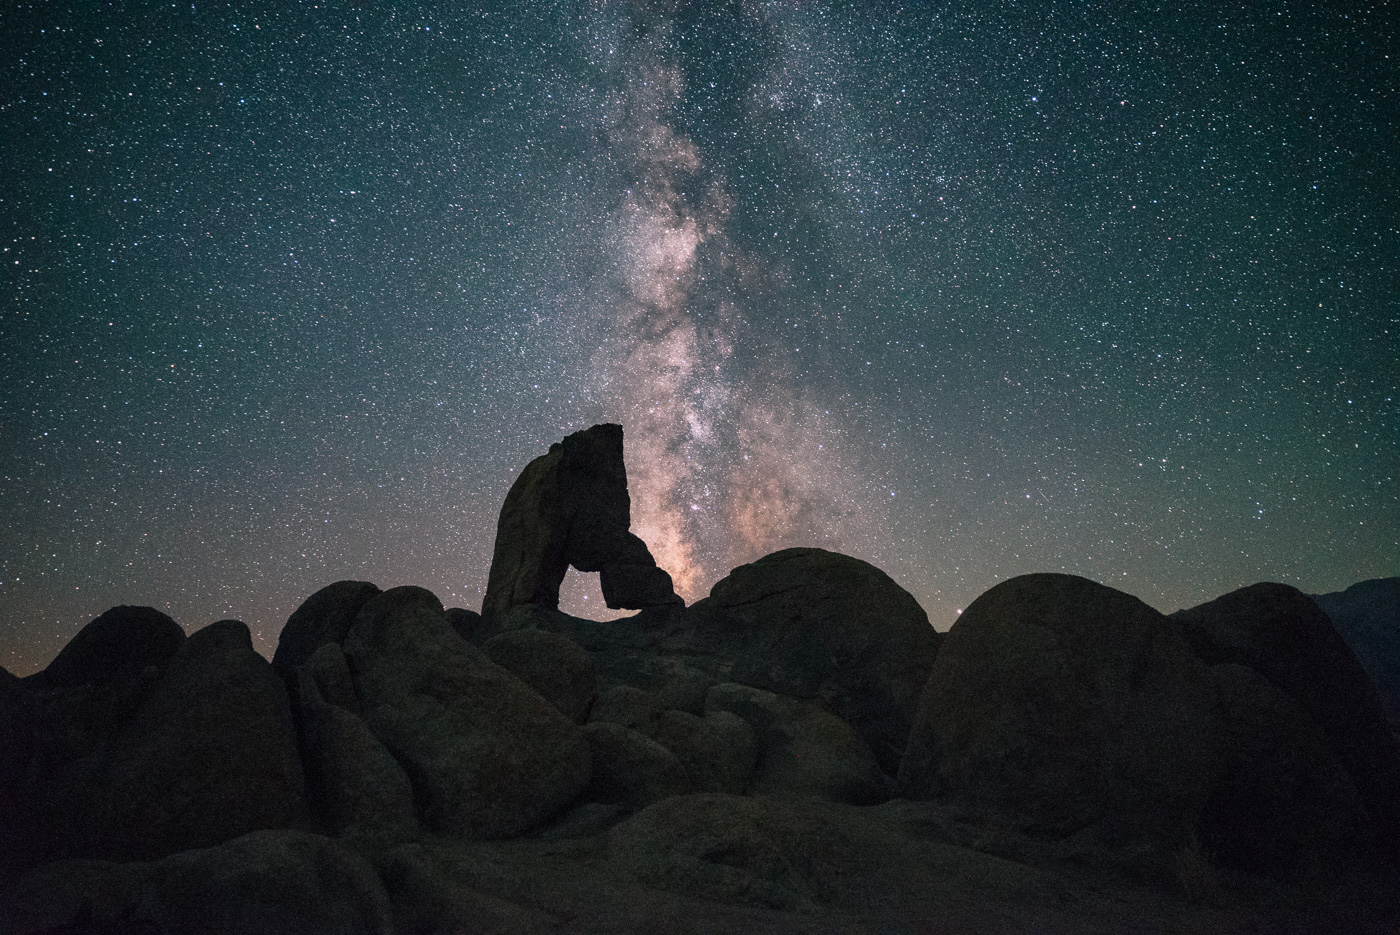
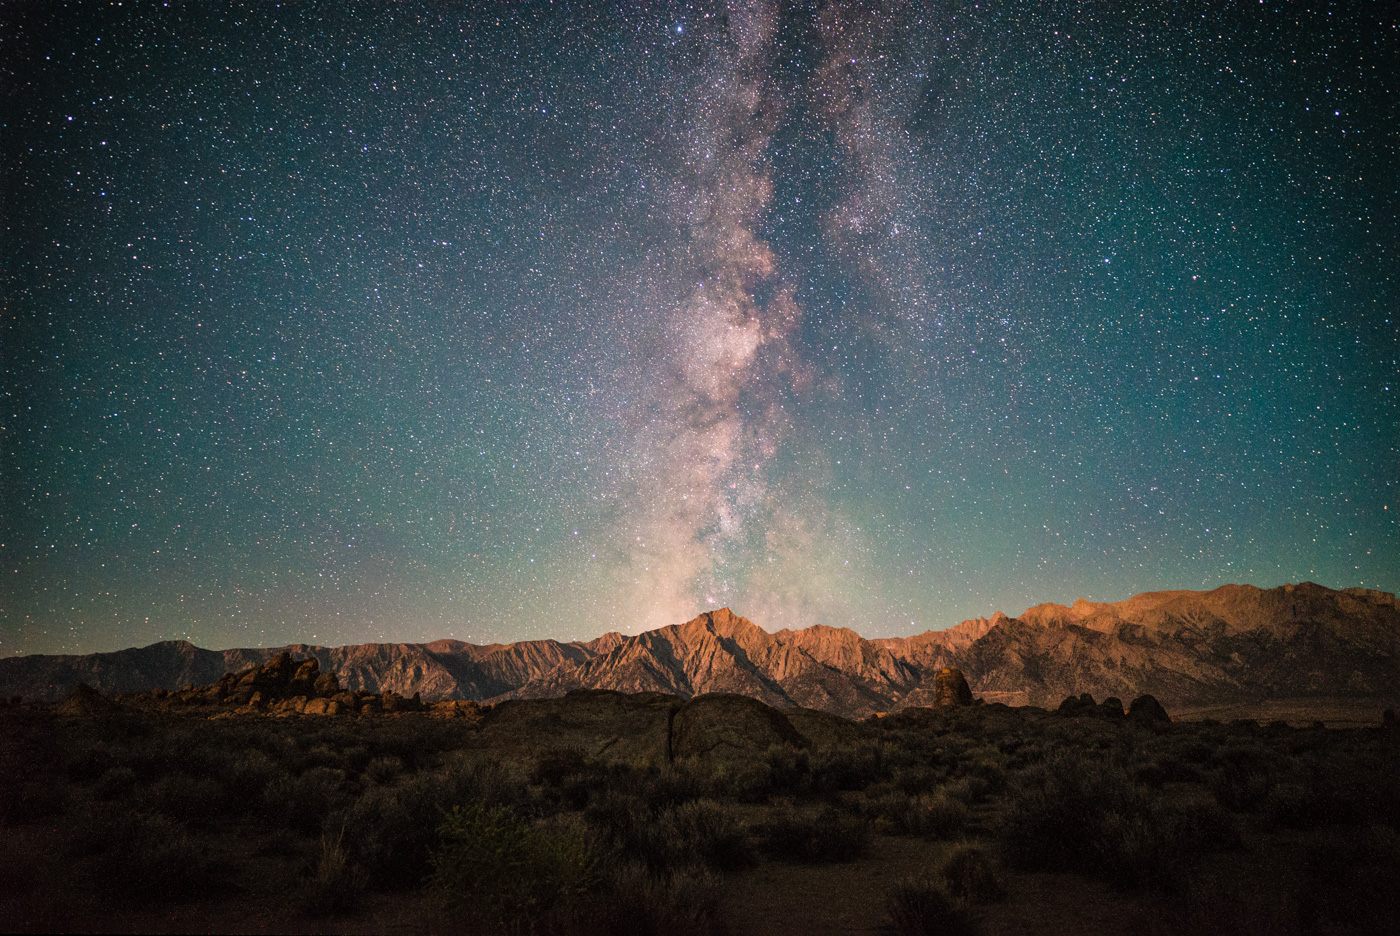
The night started extra dark with perfectly clear skies. We shot primarily at the so-called “Lady Boot Arch” a couple thousand feet from the main dirt road running through the Alabama Hills area. Alabama Hills is a rocky high desert area with dark skies, open camping and a view of the beautiful Eastern Sierra Nevada mountain range including the iconic Lone Pine Peak and the tallest mountain in California, Mt. Whitney. Straight away in our early shots, the Batis performed great. Shots show some pronounced vignetting (darker corners) which is expected from most fast lenses. Other than the vignette, most of the shots from the lens seemed flawless.
One of my primary concerns with the Batis 18mm f/2.8 was the brightness of the OLED focusing scale on the lens. In dark conditions, it’s relatively bright and I did have some concerns that it would spill too much light into the scene. I initially kept a little gaffer tape handy to cover the scale, but it eventually didn’t seem to be a problem in practice. It’s no brighter than the LCD of the camera. If you’re really concerned about the brightness of the OLED display, it can be disabled by rotating the focus ring a couple turns past infinity. I never found it necessary to turn off, but it’s nice to have the option.
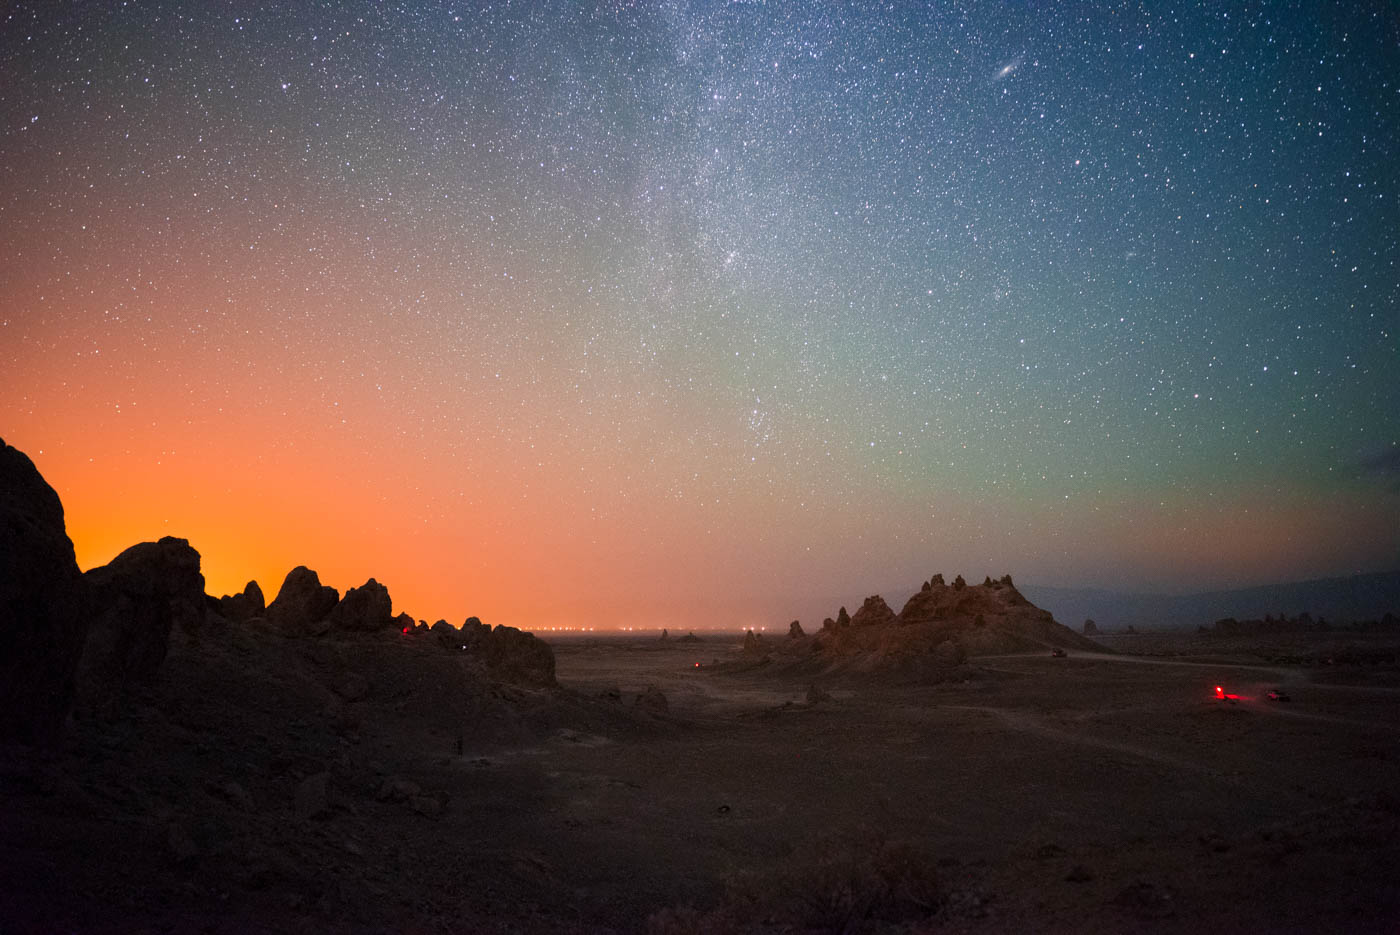
The waning crescent moon eventually rose well after midnight, turning the sky blue and illuminated Lone Pine Peak as the Milky Way Galactic Center appeared to set behind it, making for my favorite shot of the night.
The Batis 18mm ended up being pretty friendly for automatic exposure stacking in Adobe Photoshop. Although the lens seems to exhibit some mustache distortion as indicated in our aberration test above, Adobe Photoshop had almost no issues aligning the stars automatically in my stacked exposure above, a welcome bonus as most lenses shorter than 21mm tend to be a little more problematic. I also had very good success with stacking up to 20 frames with Starry Landscape Stacker with nearly zero alignment issues. Not sure if there’s something specific about the Batis 18mm that helps it play nice with stacking, but it really did seem to behave more desirably for this type of post-processing.
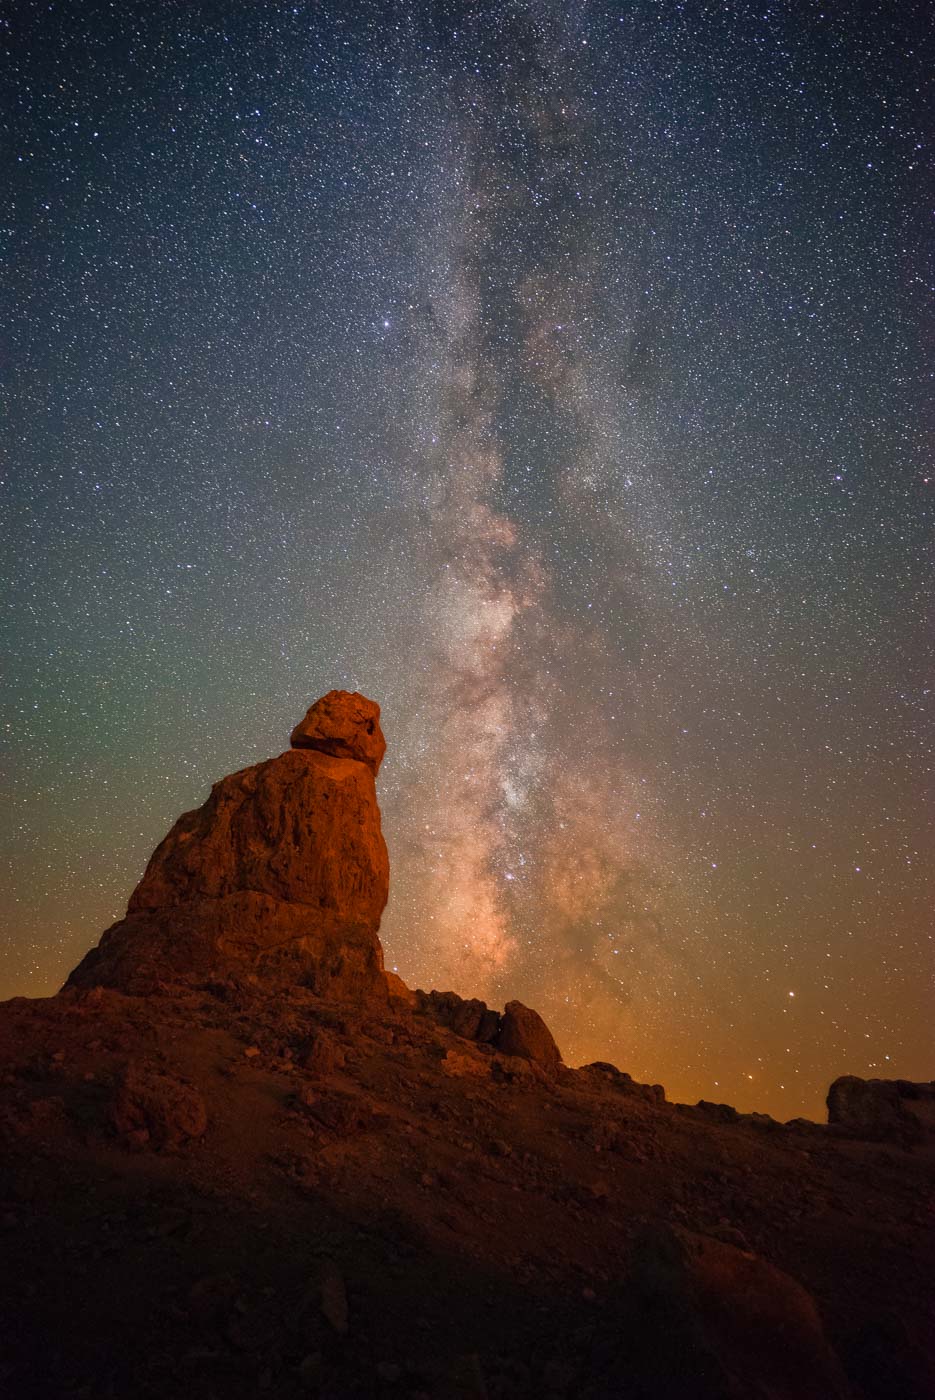
After our time in Alabama Hills, we traveled south to Trona Pinnacles for the First Annual Lonely Speck Meetup. I didn’t spend a whole lot of time shooting photos, but I managed a few snaps later in the night.
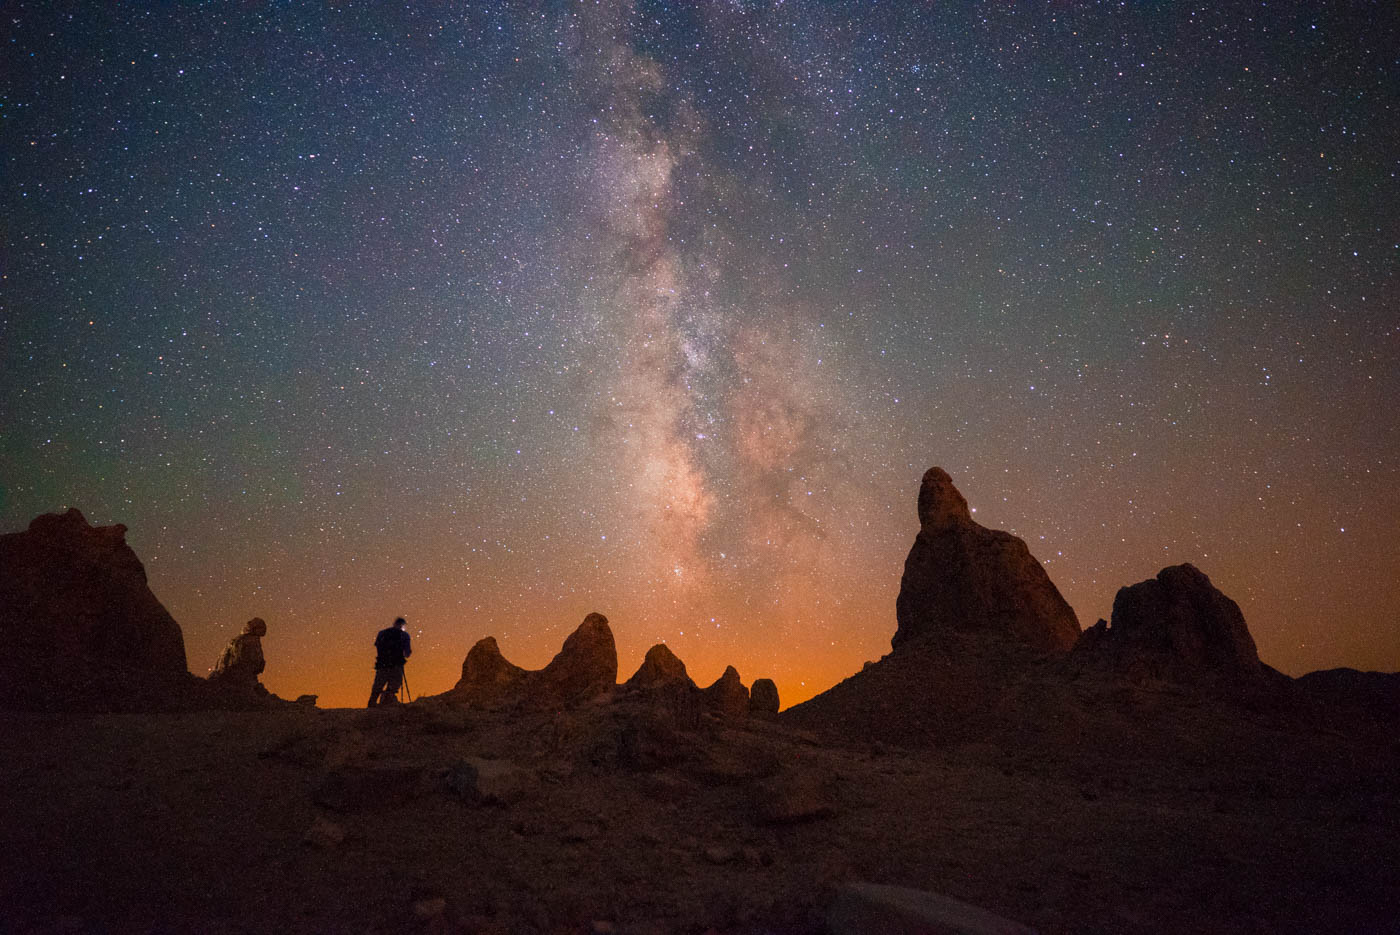
I also used our SharpStar2 on the Batis 18mm to verify focus. An 18mm f/2.8 is just approaching the minimum speed and focal lengths I recommend for use with the SharpStar2, so it required a relatively bright star to be able to verify focus but worked well in most cases, especially when able to use an especially bright star or planet like Mars. The thing that pleased me most about focusing the Batis 18mm was that the focus scale for the sharpest critical focus, as verified by the SharpStar2, was always at the position right where the OLED display shifted to the infinity (∞) symbol on the central distance marker. This means that the Batis 18mm is very well calibrated for infinity focus, something that I don’t usually trust on any lens.
I preferred a shutter time of about 15-20 seconds on the 12MP Sony a7S for most Milky Way shots. I found I could bump it up to 25 seconds when shooting near the celestial poles. Those times kept star trails at a minimum while still gathering adequate amounts of light for relatively low-noise images. On higher resolution cameras, like the Sony a7RII, I might prefer to constrain the shutter times to a maximum of about 10-15 seconds in order to keep the stars from trailing when viewing the image closely.
After California, we set off for New Zealand in search of darker skies in the Southern Hemisphere. We rented a campervan for nearly three weeks and drove more than 5000km from north to south across both islands of the country. Our first opportunity among many days of rain and clouds was a random chance stop in the middle of the countryside of the North Island at a little place called Stormy Point Lookout.
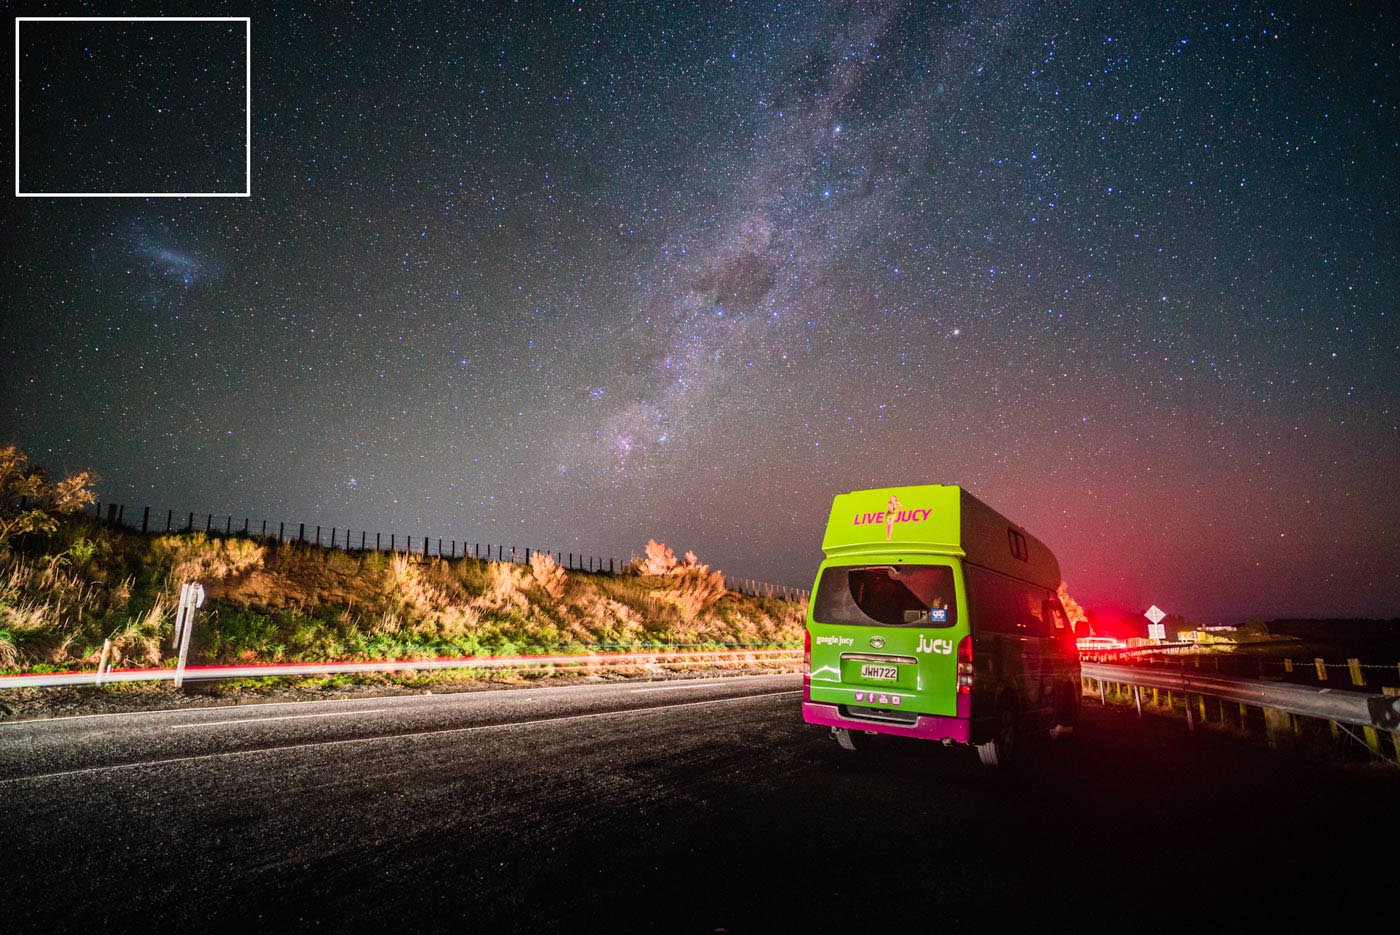
If we look at the stars in the extreme corner of this image shot at f/2.8, we can see that the lens behaves very similarly to our aberration test. There is a slight indication of sagittal astigmatism if you look very closely, but overall aberration size is so small that it’s mostly invisible. The Batis 18mm f/2.8 is a perfect example of an excellent night photography lens.
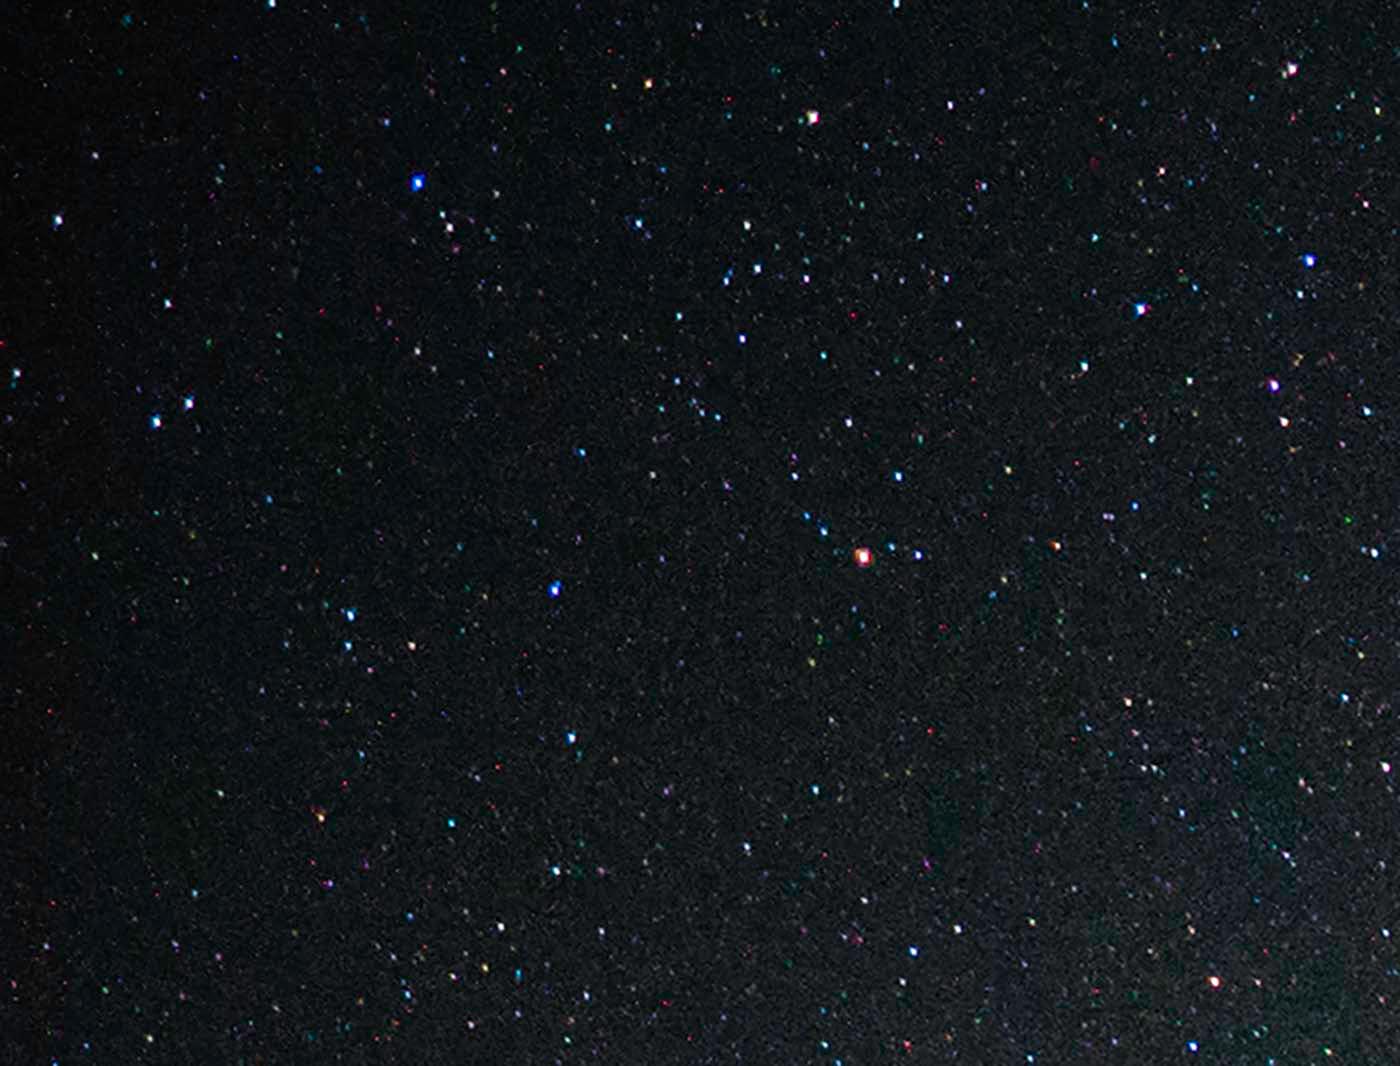
Stars stay as nearly perfect pinpoints throughout the entire frame of the image which gives night sky photos a very high resolution and fine detail characteristic. When I look at a photo from this lens that was shot at f/2.8, it looks like it has the high levels of sharpness I would expect at f/4 or f/5.6 from a typical fast wide angle lens.

Most of the photos in this review were processed with Film Speck Pro, my premium presets for Adobe Lightroom, a couple of which were developed specifically from the photos made for this review while on the road in New Zealand.
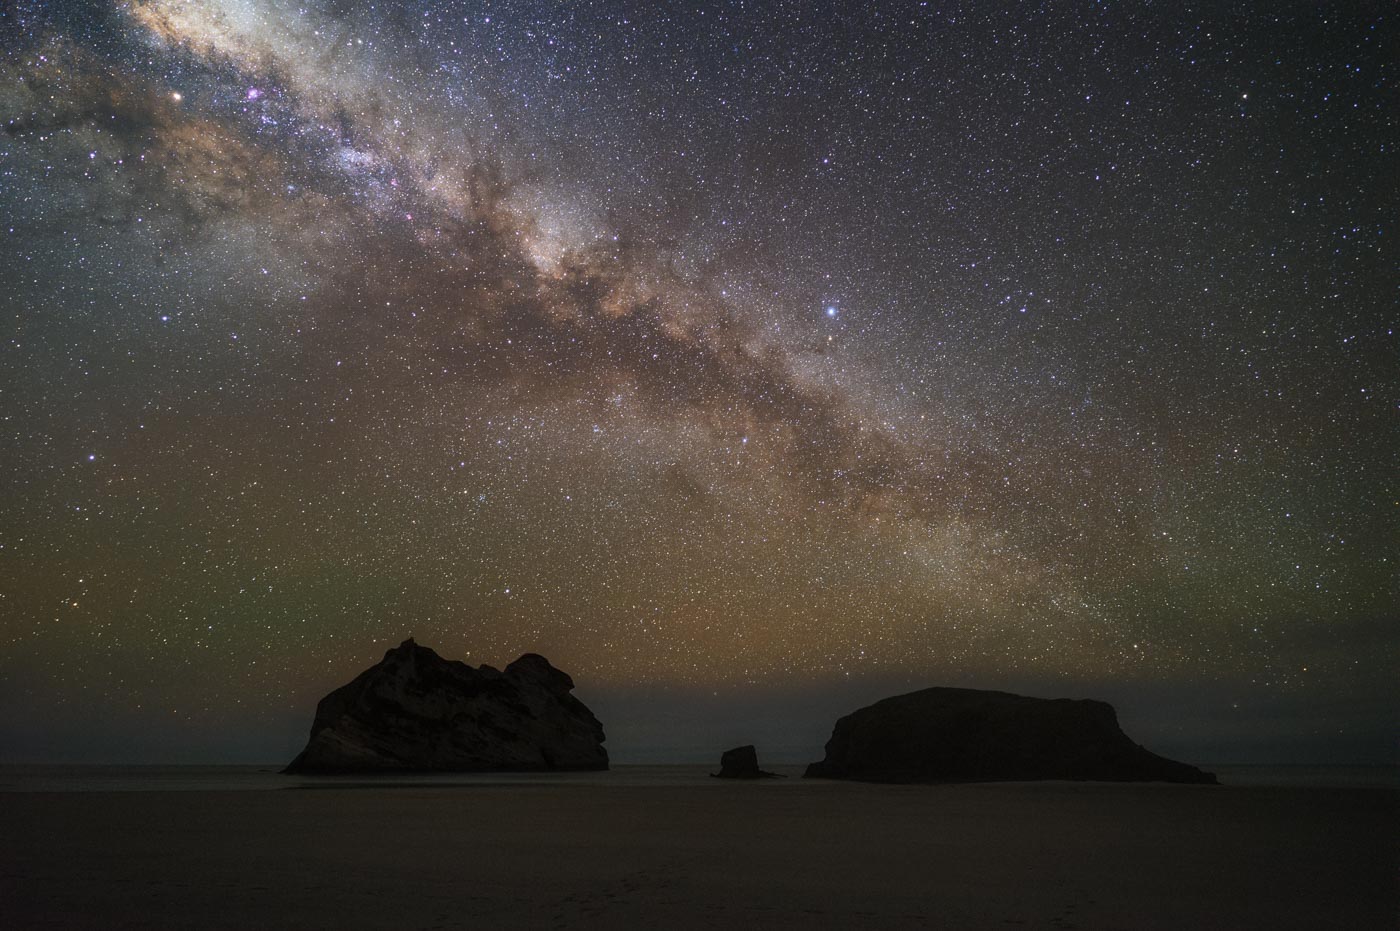
While our opportunities to shoot photos on the North Island were few and far between due to the weather, we had a couple more clear nights once we got to the South Island. Our first stop for astrophotography was Wharariki (pronounced something like Ferrari-key) Beach on the northernmost point of the South Island.
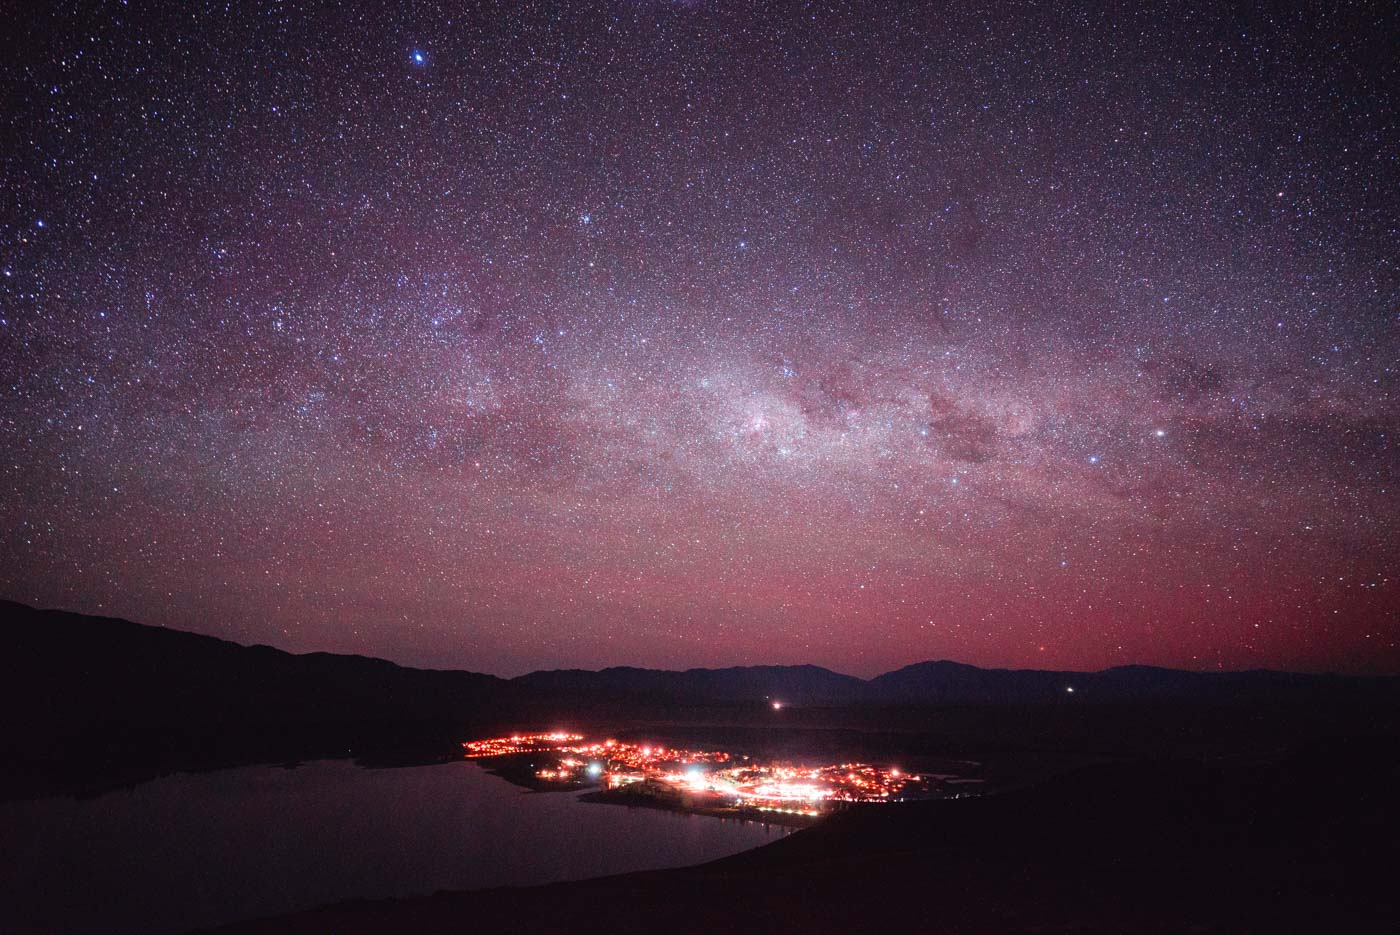
Our final opportunity while in New Zealand was in the world’s largest dark sky reserve at Lake Tekapo. We started the night on the eastern shore where I managed to capture the glow of the Zodiacal Light, Venus, and the Galactic Center reflecting above the still waters of Lake Tekapo.

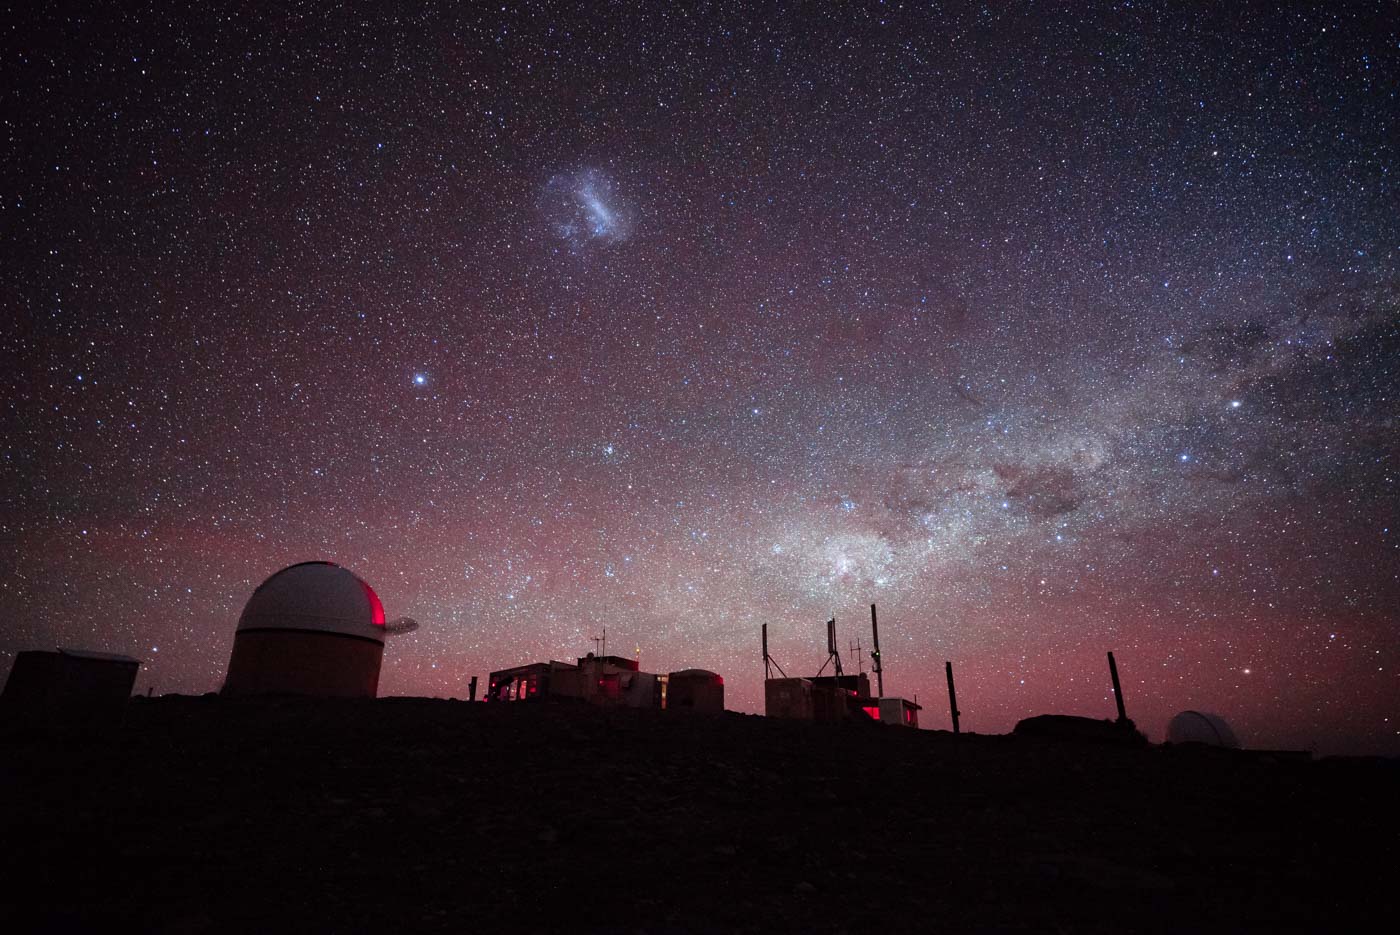
The small and large Magellanic Clouds, a unique feature of the Southern Hemisphere sky, were also brightly visible to the south. I documented a part of my experience shooting with the Batis 18mm in New Zealand in our recently published video: Astrophotography On Location: New Zealand.
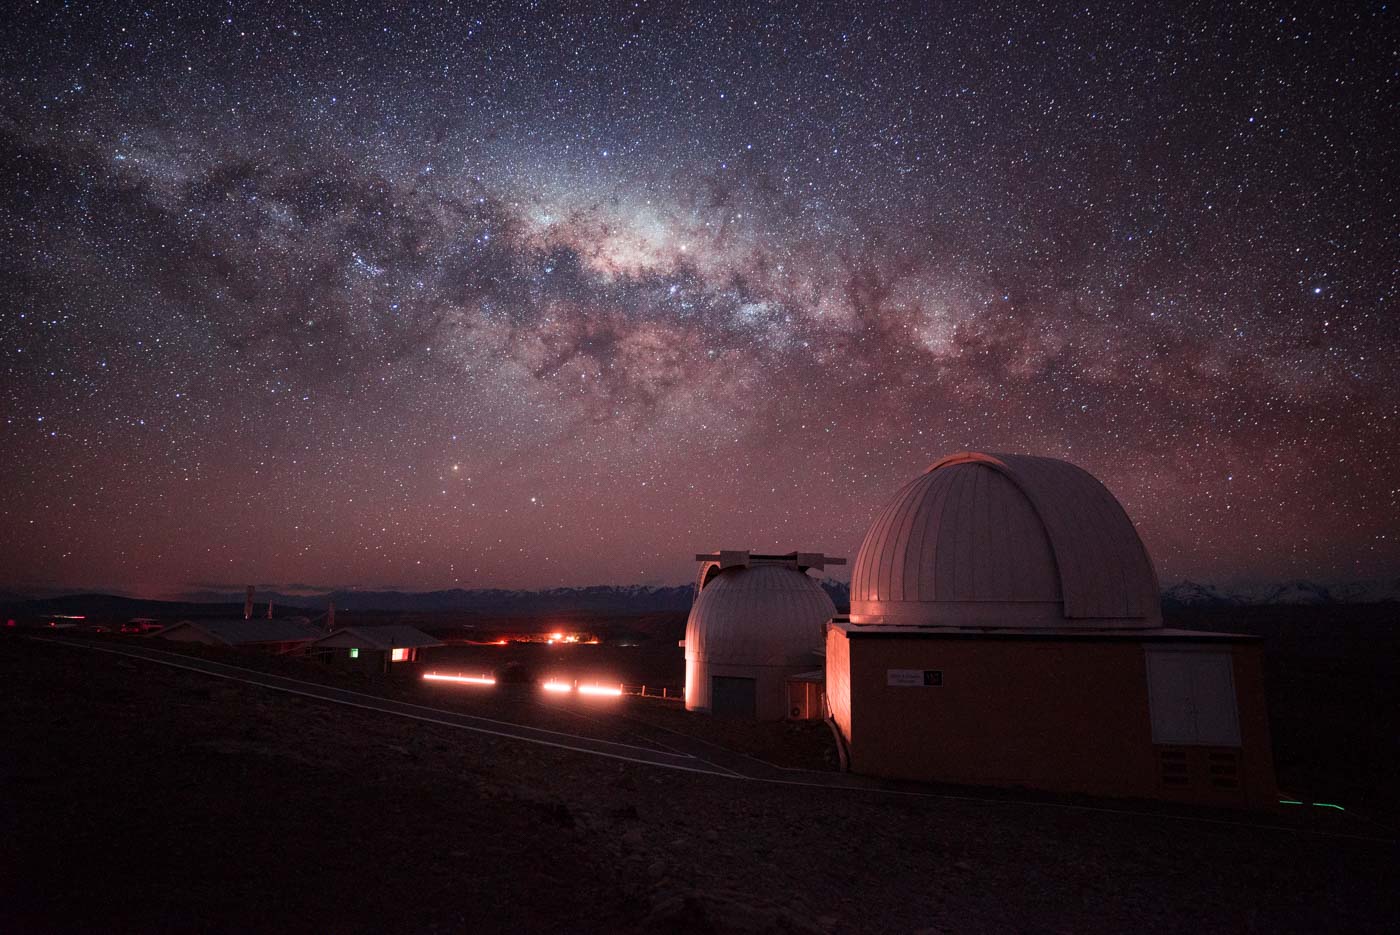
After a couple hours of shooting along the lake shore, we joined up with a fellow astrophotographer, Chris Murphy (Instagram). He was our guide for an Earth & Sky tour of the local Mt. John Observatory, high above the town of Tekapo.
Chris gave us a visual tour of the Southern Hemisphere sky that taught us about some of the staple constellations and dark sky objects and how to find them at any time of year. We also had the opportunity to shoot a few astrophotos and to look through a few of their large telescopes.
The night sky at Tekapo was certainly one of the best we’ve experienced in recent years, and I was happy to have the Batis 18mm with me to capture it. The ease of focusing the lens at night, the super wide field of view, and the consistent tack-sharp results made me forget about the lens almost entirely and concentrate more exclusively on composition.
We continued our trip through Oceania with a week-long stay in Melbourne, Australia. Mostly a stop where Diana and I could work on our blogs with reliable Internet. Since we were working most of the time, we only made one night sky stop with our photographer friends Aaron Zajonc (instagram) and Matt Hull (instagram). They took us to a couple spots on our last night in Australia near Cape Schanck, just south of Melbourne.
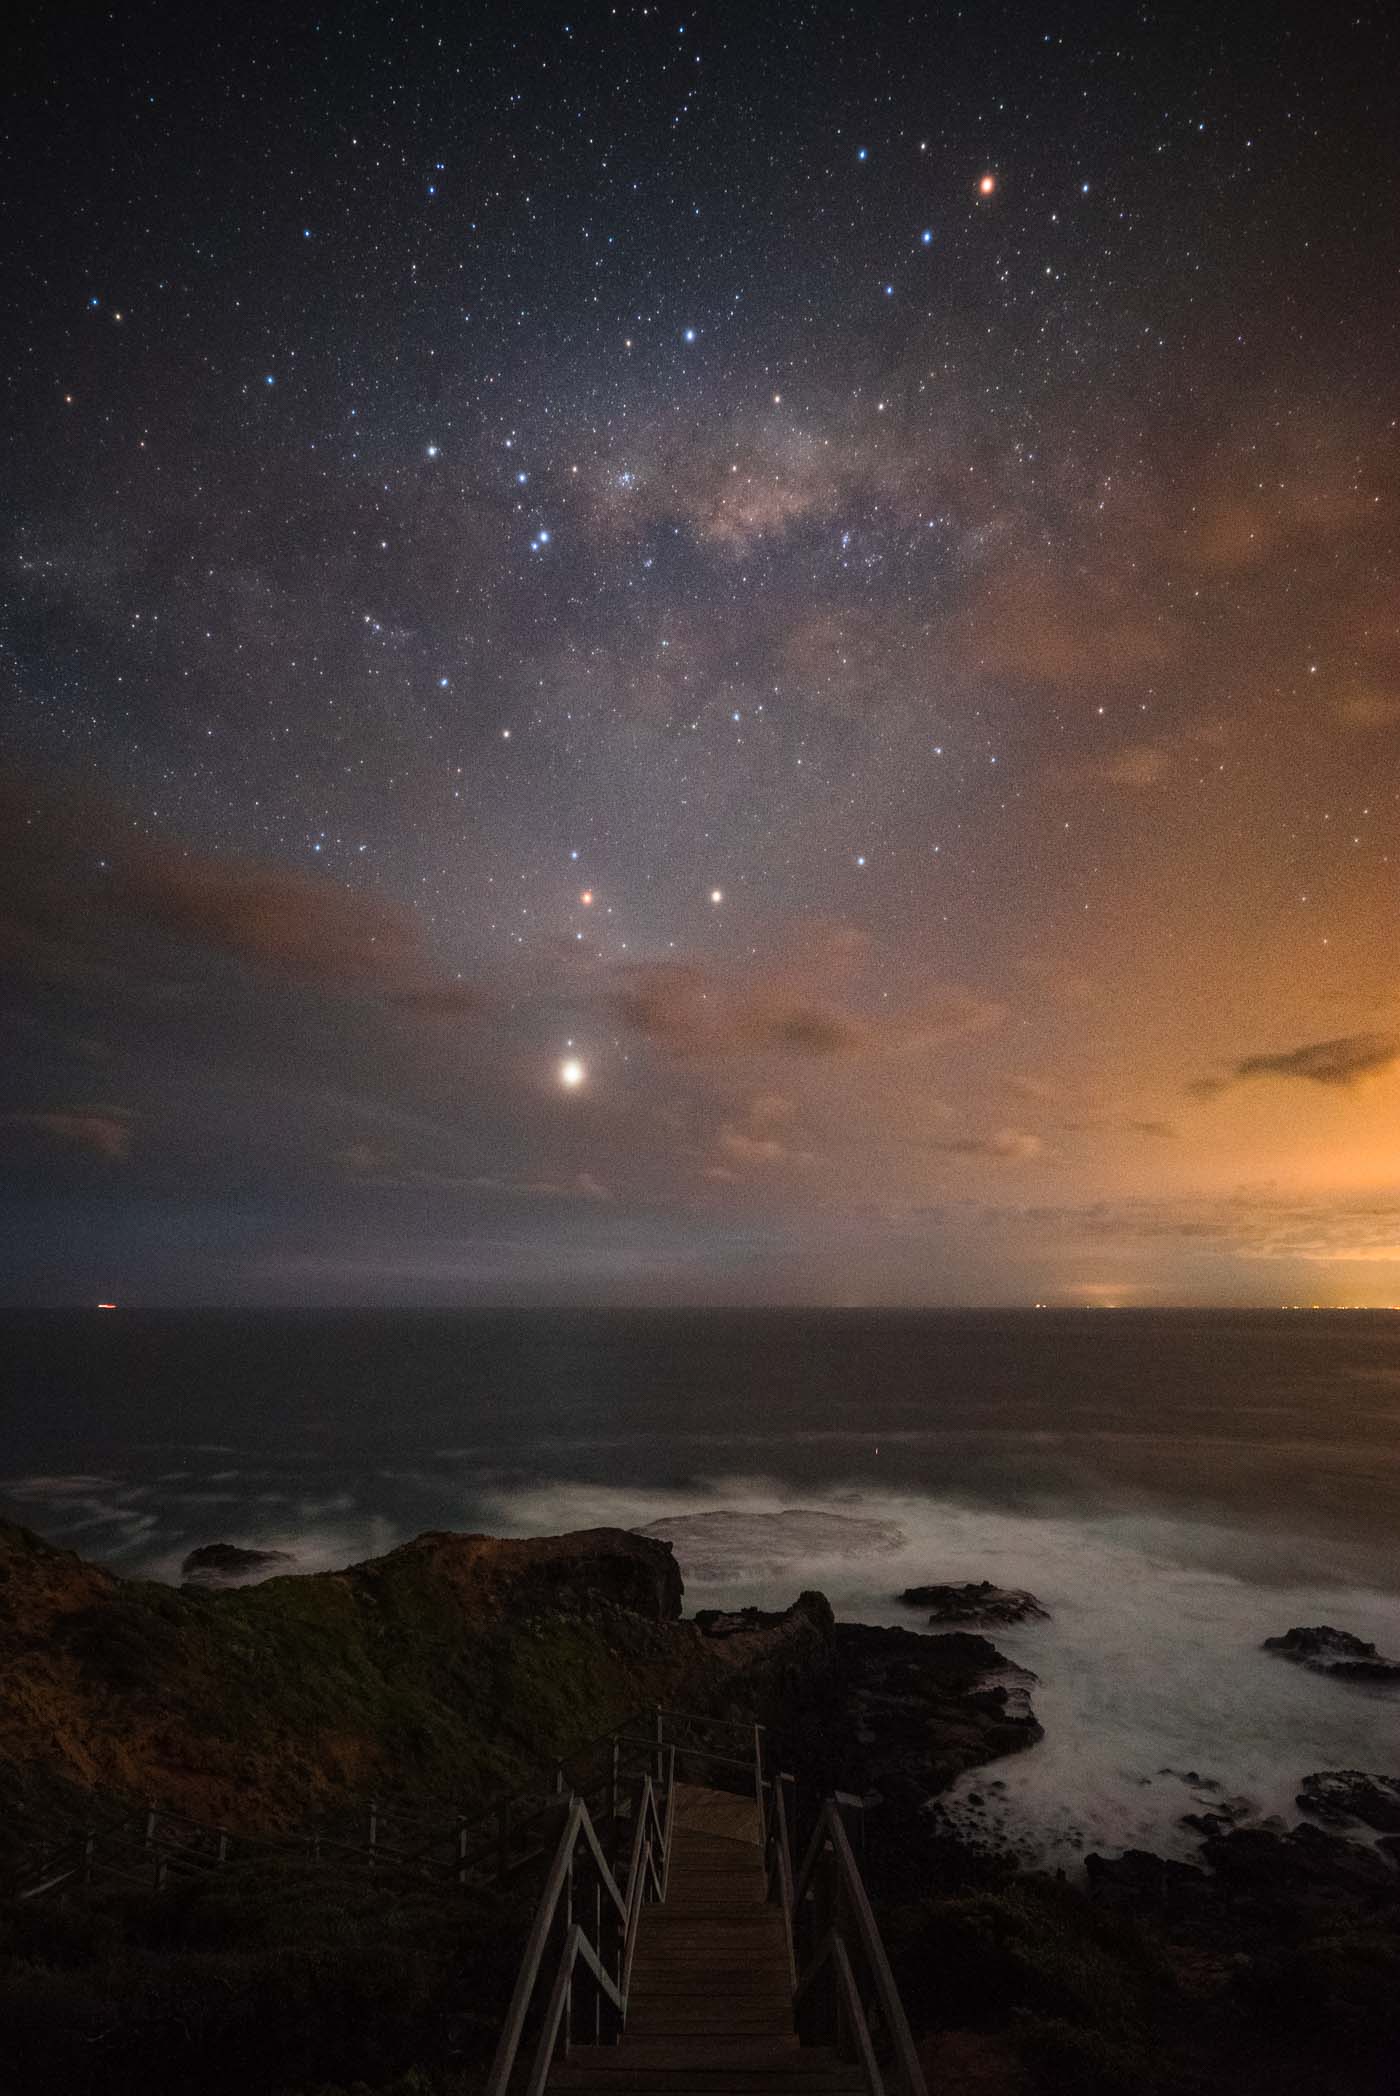
The conditions early in the night were difficult. A fair amount of moisture and haze in the air, along with many moving clouds and the light pollution from Melbourne, made for a distinct challenge for both shooting and post-processing.
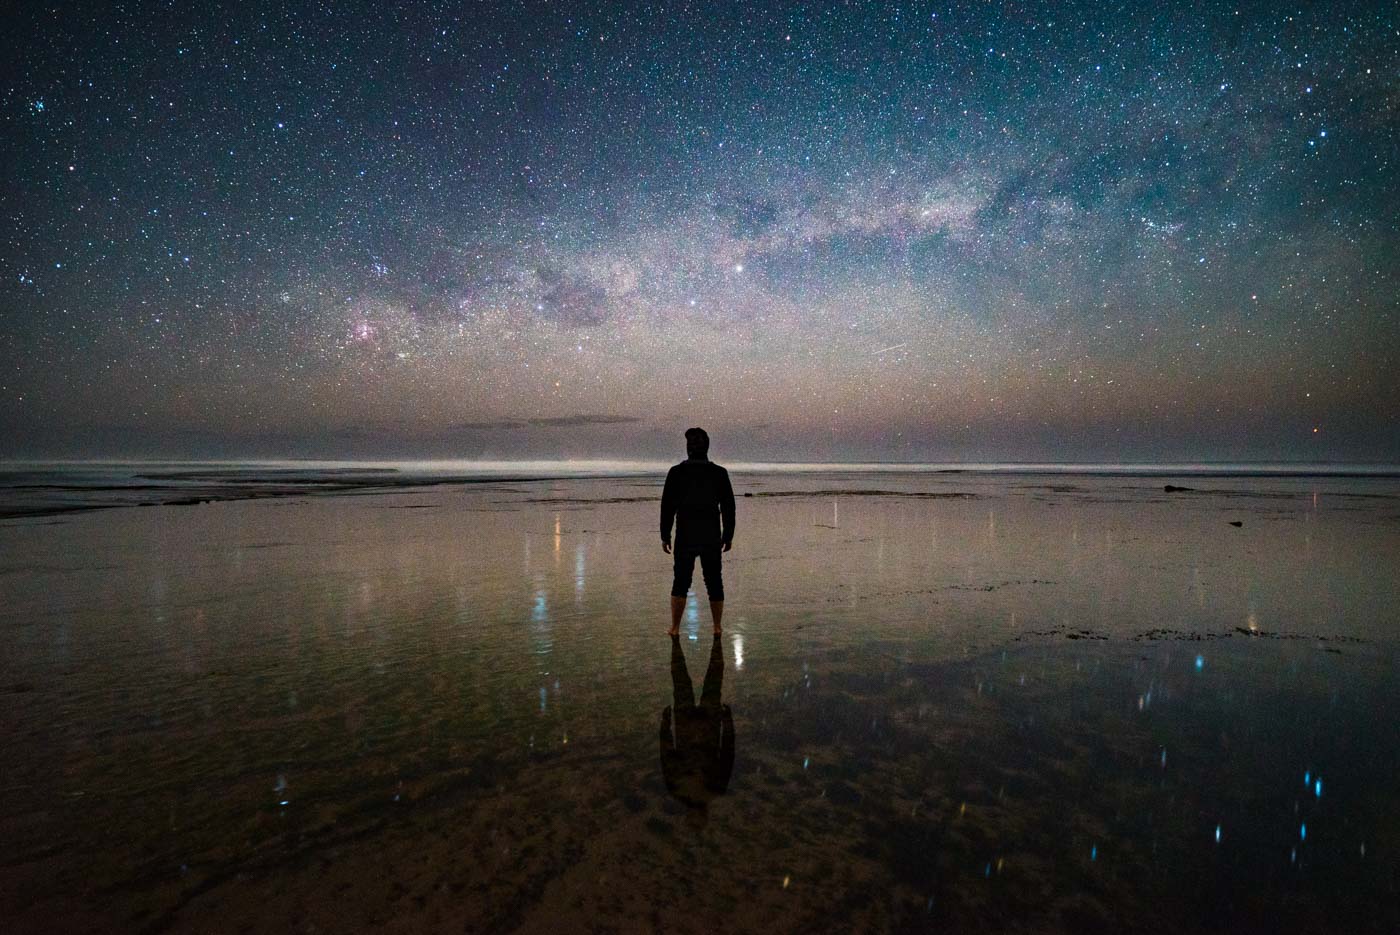
My favorite shot with the Batis 18mm from that night was actually shot by my fianceé, Diana. On our second location stop of the night, we walked along one of the beaches in the area where the tides were slowly rising, creating a brilliant reflection of the stars. Since there are few things as ridiculous as venturing out on the beach in the pitch black, I took the opportunity to wade out into the tide pools so that Diana could capture my silhouette against the reflection of the Southern Hemisphere sky.
Conclusions and Verdict
We received the Batis 18mm f/2.8 as a loaner for evaluation from B&H and I was initially skeptical that I would want to keep such an expensive lens. At its luxury price, our expectation of performance was set extremely high. Luckily, the lens performed nearly flawlessly. It was so good that I decided that I wanted it as part of my primary astrophotography kit, so I bought it. It’s now my favorite super wide angle lens for astrophotography.
Vignetting is pronounced but not overly distracting, in line with our expectations of any fast prime and easily correctable in post-processing if desired. While not a problem for most landscapes, mustache distortion is apparent. It, too, is easily correctable in post-processing with the Adobe Lightroom lens profile, but it’s something that architectural photographers should keep in mind. Aberration and coma performance is nearly perfect straight from f/2.8, and I left it there for every astrophoto in this review, seeing no need to ever stop down.
A very useful and accurate electronic focus scale with an OLED display tops off the premium experience that this lens offers. More than just a fancy feature, the electronic focus scale actually made for a very fast and accurate manual focusing experience. Autofocus is excellent, too.
The Zeiss Batis 18mm f/2.8 is simply the best wide angle lens I’ve ever used and a perfect choice for landscape astrophotography. Highly Recommended.
Zeiss 18mm f/2.8 Pros:
- Sharp corner to corner at f/2.8
- Minimal aberration and coma
- Very fine and accurate manual focusing capability with the OLED focusing scale
- Fast silent autofocus
Zeiss 18mm f/2.8 Cons:
- Pronounced vignetting at f/2.8
- Visible mustache distortion
- Expensive
Highly Recommended! (4.8/5)
Links:
Disclosure
We are a participant in the Amazon Services LLC Associates Program, an affiliate advertising program designed to provide a means for us to earn fees by linking to Amazon.com and affiliated sites. We are also a participant in the B&H Affiliate Program which also allows us to earn fees by linking to bhphotovideo.com.
Learn Astrophotography
Astrophotography 101 is completely free for everyone. All of the lessons are available on the Lonely Speck Astrophotography 101 page for you to access at any time. Enter your email and whenever we post a new lesson you’ll receive it in your inbox. We won’t spam you and your email will stay secure. Furthermore, updates will be sent out only periodically, usually less than once per week.
[email-subscribers namefield=”NO” desc=”” group=”Lonely Speck Newsletter”]
Help us help you!
Believe it or not, Lonely Speck is my full-time job. It’s been an amazing experience for us to see a community develop around learning astrophotography and we’re so happy to be a small part of it. I have learned that amazing things happen when you ask for help so remember that we are always here for you. If you have any questions about photography or just want to share a story, contact us! If you find the articles here helpful, consider helping us out with a donation.
[button font_size=”16″ color=”#136e9f” text_color=”#ffffff” url=”https://www.paypal.com/cgi-bin/webscr?cmd=_donations&business=lonelyspeckblog%40gmail.com&item_name=These+tips+help+keep+lonelyspeck.com+running.¤cy_code=USD&source=url” target=”_blank”]Donate[/button]
Thanks so much for being a part of our astrophotography adventure.
-Ian
Hey Ian,
Thanks for the great review. I have the Batis but always go back to my tried and true 14-24 Nikkor as I know it inside and out in the pitch black. I guess I need to trust OLED on the Batis. How can I get the SharpStar2 adapted to the Batis? (I have held off getting one due to the Nikkor mount issues).
Tim
Ah yes, but the 14-24mm f/2.8 is legendary. I think the Batis is perhaps a good light weight alternative given the size of the 14-24.
I use the SharpStar2 on an 85mm holder. That will just barely fit on the Batis with the right 77mm adapter ring. Good news on the 14-24mm… I think we have a SharpStar solution that we hope to release soon for it.
Ian, great review with beautiful pics! Hope you’ll do a review on the Laowa 12mm f2.8.
yes, I’m very interested to see some of their new lenses!
I absolutely loved those photos! incredible. when I saw the aberration test I actually said Holy s*** out loud. what a beautiful lens.
Those shots right above the video are totally nuts. The MW looks absolutely incredible. Well done, Ian.
Hey ! Very nice review, and superb shots ! It’s not curing my GAS at all 😉 Btw, could you give me some advice : I’m currently hesitating between this + A7II, or A6500 + Touit 12f2.8. Do you think there’ll be a huge difference between both ? I don’t plan to do a lot of astro, but I’d like to have the ability if I were to go on camping in the mountains. Otherwise, I will mainly use it in daylight, I think.
Thanks in advance, and keep up the excellent work !
The a7II + Batis 18mm is going to give you a one stop advantage versus the Touit 12/2.8 and a6500 at night just because of the larger sensor/lens. That said, the a6500 kit would certainly be preferable in terms of size.
How does it compare to the Rokinon 14mm MF lens in terms of sharpness and coma?
I have no direct sharpness comparisons between the two. I would expect the Batis to have the edge on the Rokinon at f/2.8 and for them to converge in sharpness when stopped down to f/4-5.6. The Rokinon 14mm f/2.8 tends to do more stretching of the stars in the corners in the tangential direction. The Batis does this mildly but it’s very minimal. That said, the two have very different fields-of-view and that likely contributes to their differences. The manual focus Rokinon 14mm f/2.8 is still one of the best ultra-wide angle lenses available, even today. If on a tight budget, the 14mm f/2.8 is still an obvious choice.